
Mixing drums is one of the most challenging aspects of music production. With so many variables, you can’t just fly at it willy-nilly and hope to get good results. No, you have to know what you’re doing, and here we’re going to show you how to take a set of raw acoustic drum kit multitracks and mould them into a powerful, cohesive mix.
Before you even touch those level faders, the one thing you absolutely must have is a decent set of multitracks, either recorded or from a quality ROMpler. No amount of mixing ability can make a rubbish recording sound good - unless you replace every single sound within it, which, although eminently possible, could have a detrimental effect on the overall feel of the groove.
So, if you’re recording your drums, be sure that you know what you’re doing in terms of mic selection and placement, room acoustics and drum kit setup and tuning.
If you’re using a ROMpler, it needs to be one that features separate virtual mic channels (preferably including separate top/bottom snare and in/out kick mics) and, ideally, control of mic bleed between channels. So we’re talking the likes of FXpansion BFD, Toontrack EZdrummer/Superior Drummer, NI Battery or XLN Audio Addictive Drums. If you can afford them, BFD 3 and Superior Drummer 3 lead the pack in this area, offering everything you need to make superb drum tracks.
In our example, high-quality mics and preamps were used, and nine tracks were recorded: close-miked kick, top and bottom snare, hi-hats, rack tom and floor tom, plus left and right room mics, and a stereo overhead mic.
We have two primary goals: achieving good separation between the elements of the kit, and imbuing our part with power, presence, character and ‘that pro sound’. We’ll do it mostly using EQ, gates and compressors - your three most valuable drum mixing tools.
Incidentally, we’re only dealing with backbeat-orientated styles here; jazz and gentler acoustic material require a looser, broad-dynamic approach.
Drum miking 101
To mix drums, you need to understand miking techniques. There are two fundamental types: close and ambient.
Close mics are positioned to capture the direct, ‘isolated’ sound from one drum or cymbal in the kit. The other drums will inevitably be picked up in the background - this is called bleed or spill. While it usually needs to be reduced with EQ and gating, you don’t necessarily want to eradicate it entirely, because a bit of bleed makes the kit sound more natural and cohesive.
Toms and cymbals are almost always single-miked. One mic inside the kick drum is sufficient, but some engineers also use an outside kick mic and maybe a special ‘sub’ mic to capture the low end. These can be blended to taste in the mix, provided they’re in phase (which we’ll come on to shortly).
The snare drum most often uses two mics: one on the top head and another underneath, pointed at the bottom head. The latter captures the sound of the snare wires rattling, while the former captures the ‘thwack’ of stick striking skin. When mixing, you can process the top and bottom mics to achieve the desired balance of oomph and sizzle.
Ambient mics capture the sound of the whole kit from a particular perspective. Overhead mics are the most commonly used – typically a stereo pair placed above the kit. You may also encounter room mics, which are placed further from the kit to capture more of the recording space’s natural reverb.
Turning all these mics up at once will lead to undesirable interactions between the channels. This can be reduced using gates (to silence the signal between each hit) and EQ (to remove frequencies that belong to other drums/mics) on individual channels.
The fundamental (lowest) tones are particularly important in conveying power and punch, so high-pass filters and EQ can be handy to ensure that the fundamental tones of the kick and snare are supplied mostly by their internal and top mics respectively. For much more on miking drums, check out our Recording Drums feature.
Mixing live drums
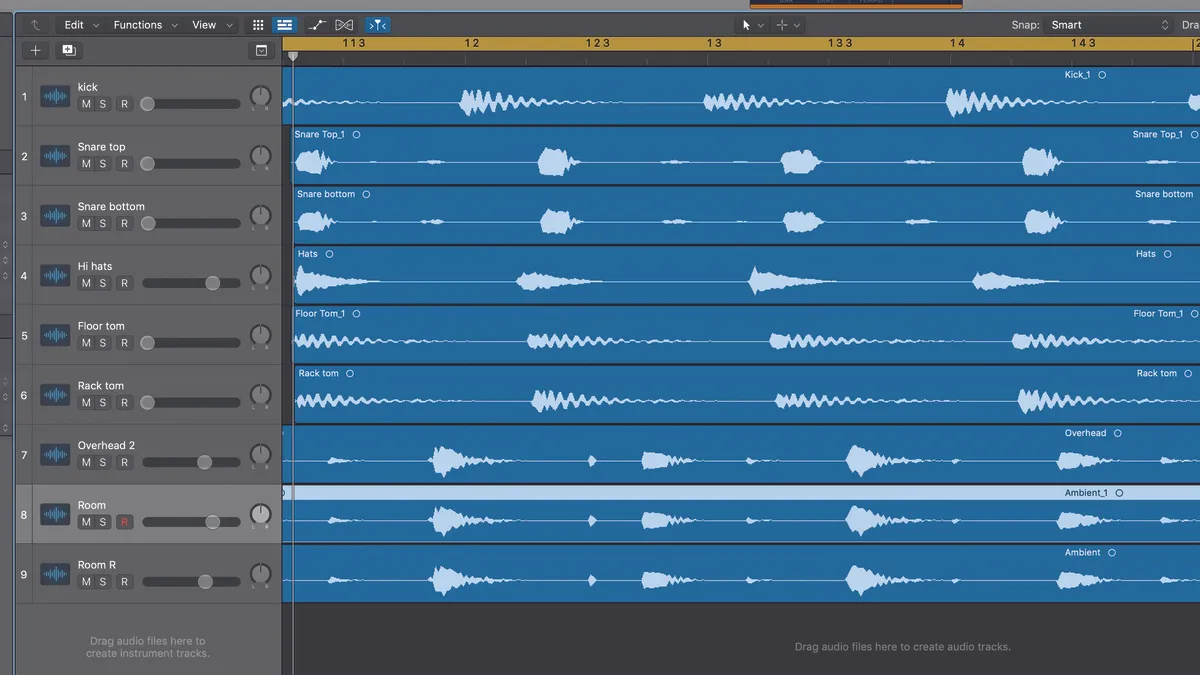
Step 1: Although we’re working with a set of live recordings, everything we’re about to do applies equally to a virtual drum kit plug-in. Such plug-ins will ideally give you total control over mic bleed – a definite plus. So, here are our nine tracks/channels: Kick, Snare (Top and Bottom), Hi-hats, Floor Tom, Rack Tom, Overheads and L/R Room.

Step 2: There’s a bit of spill from the snare and toms in the Kick channel, so we insert a gate plug-in to clean it up. We set the Threshold to -16dB in order to let only the kick through, the Attack and Hold times to 0ms, the Lookahead to 6.8ms, and the Release to 310ms – long enough to let the full decay of the drum ring out. We do this with the Kick channel soloed, as no context is required for purely corrective work.

Step 3: Let’s up the kick’s power and definition. We EQ first, activating a low-cut filter at 30Hz to remove headroom-eating ultra-lows, boosting by a hefty 6.5dB at 70Hz for welly, boosting 5.5dB at 5.4kHz for ‘click’, and cutting 9dB at 152Hz and 445Hz to reduce boxiness and make space. Our compressor is set to catch every hit at a 9:1 Ratio, with a long enough Attack to let the transient through.

Step 4: There’s a lot of sympathetic resonance coming from the Rack Tom channel, and we need to gate out the bleed into the Floor Tom mic, too. We load gates onto each channel, both set to -9dB Threshold, with Release times of 351ms for Rack and 414ms for Floor. There’s still a bit of bleed at the end of the Floor Tom hit, but there’s no way to avoid that if we’re wanting to keep the sustain.

Step 5: We tackle our Snare Top and Bottom channels together. Again, there’s plenty of spill into both mics from the other channels, so we set up a pair of gates to do away with as much of it as possible without killing any ghost notes. This is only mildly effective, but it makes enough of a difference to the track to warrant doing, drying out the Bottom Snare track in particular.
Power Tip: Phasing issues
If your top and bottom snare drum channels sound strangely hollow and, well… weird together, chances are that they’re out of phase due to the polarity of one of the mics being inverted. Fixing this is a simple matter of loading the requisite utility plugin in your DAW and hitting the Phase Reverse or Invert switch. Some DAWs even have this button built into the mixer. The snare in our track is fine, though, so we don’t need to do this.

Step 6: Now for some EQ. We high-pass the Top and Bottom channels with the steepest filter slope (48dB/oct) at 70Hz (for Top) and 180Hz (Bottom). Boosts at 200Hz (2.5dB), 1.4kHz (4.5dB) and 8.3kHz (3.5dB) give the Top channel body and snap, while deep, tight cuts at 670 and 970Hz do away with any odd overtones. A compressor with a hefty 19:1 Ratio on the Top adds oomph. EQ the Bottom as shown.

Step 7: The gating and other processing has dried the snare out, so we load a small plate reverb onto an auxiliary channel and send a low amount of both Snare channels to it. The Kick channel spill gets caught up in this in a good way, putting a bit of tail back on our otherwise rather dry kick drum. With the send levels low, the effect is subtle – you don’t really notice this 0.7-second reverb until it’s bypassed.

Step 8: The hi-hats are the easiest part of the kit to deal with. In this case, all we have to do is apply a high-pass EQ to attenuate everything below 290Hz – spill from the kick and snare – and then add a gate to get rid of most of said spill completely. We also throw in a 6.5dB EQ boost at 14kHz to up the brightness and ‘air’, bring the level down a bit, pan the hats left slightly, and dial in a low send to the snare reverb.

Step 9: Our two Tom Tom channels have already been gated to silence for the vast majority of the track, doing away with unwanted resonance and spill. They need real impact when they arrive, though, so we give them EQ boosts in the low mids and highs, for stick impact and body, and moderately hard compression for greater presence in the mix. We pan them left and right, and send them lightly to the reverb.

Step 10: With our direct mics done, all that remains are the overheads and room channels. The overheads are crucial to a good drum mix – they enhance pretty much every element of the kit, particularly the snare and cymbals. Here the overheads are of most importance in the second half, when the drummer takes to the cymbals. We apply 5.5dB of high-shelving boost from 4.4kHz, and turn the level down a bit.
Power Tip: To pan or not to pan?
Generally, you want your kit to sit centrally, especially the kick and snare. Unless you’re going for an odd effect or a very retro sound, leave those two dead centre. Hi-hats can sound good panned slightly left or right, however, and toms can also be panned to descend/ascend across the soundstage – just don’t go too wide. Overheads will usually be in stereo already (or on two mono channels), but you might want to widen or narrow them further, depending on your track.

Step 11: The overheads have added a good amount of width and sheen, but we’re lucky enough to have left and right room channels, too, for natural reverb. We pan these left and right, filtering off everything below 150Hz to keep the bottom end tight. Getting the level balance correct is crucial with room channels – dial in too much and your kit will sound unfocused.

Step 12: Finally, we bring it all together with a group EQ (moderate, tight cuts at 140Hz and 1.2kHz, and a small boost at 2.2kHz) and a tube levelling amplifier plugin. We don’t go overboard with the Gain Reduction, since we’re not looking to dramatically crush our drums, and set a roughly 50/50 mix between wet and dry.
Power Tip: In a full mix
We’re mixing our drums entirely for their own sake in this tutorial, but the next step would be to get them sitting perfectly within the context of a full band. This would probably involve tweaking the overheads and any reverb we might have set up, nudging the kick drum EQ to fit it around the bass, and generally finessing the drums while being sure to maintain their cohesion and authority. Throughout the drums mixing process, bring the other instruments up from time to time, as well as giving the kit plenty of solo attention.
