Quick Tips: How to maximise your track and mix levels without distortion
Find out how to use Ableton Live's Limiter to make your mixes sound bigger, better, and more professional

Want all the hottest music and gear news, reviews, deals, features and more, direct to your inbox? Sign up here.
You are now subscribed
Your newsletter sign-up was successful
Some of the most important and most-used tools in Ableton Live are the least glamorous – yes, we’re looking at you, EQ Eight and Limiter!
They definitely don’t produce any jazzy sound effects, but devices like these are the ones that’ll make your mixes and live performances sound bigger, better, and more professional. However, the Limiter in particular can be quite mysterious. Short version; a Limiter will cap your maximum volume level, without distorting or changing the tonality of your sound. That’s it!
Ableton’s Limiter can be used on individual tracks, grouped tracks, and master tracks; it doesn’t do any harm – it’s better to have them there just in case. In live performances we put them on every track in the project.
Limiter is also an important mastering tool, and sometimes that’ll be all you need. It will really help average out levels as you move between songs that have been collected together for a live set, EP, or album, and it’s especially useful if you’re organising tracks from different sources for a compilation or DJ set.
Every version of Ableton Live, from Intro to Suite, includes Limiter, so you have no excuse for not using it!

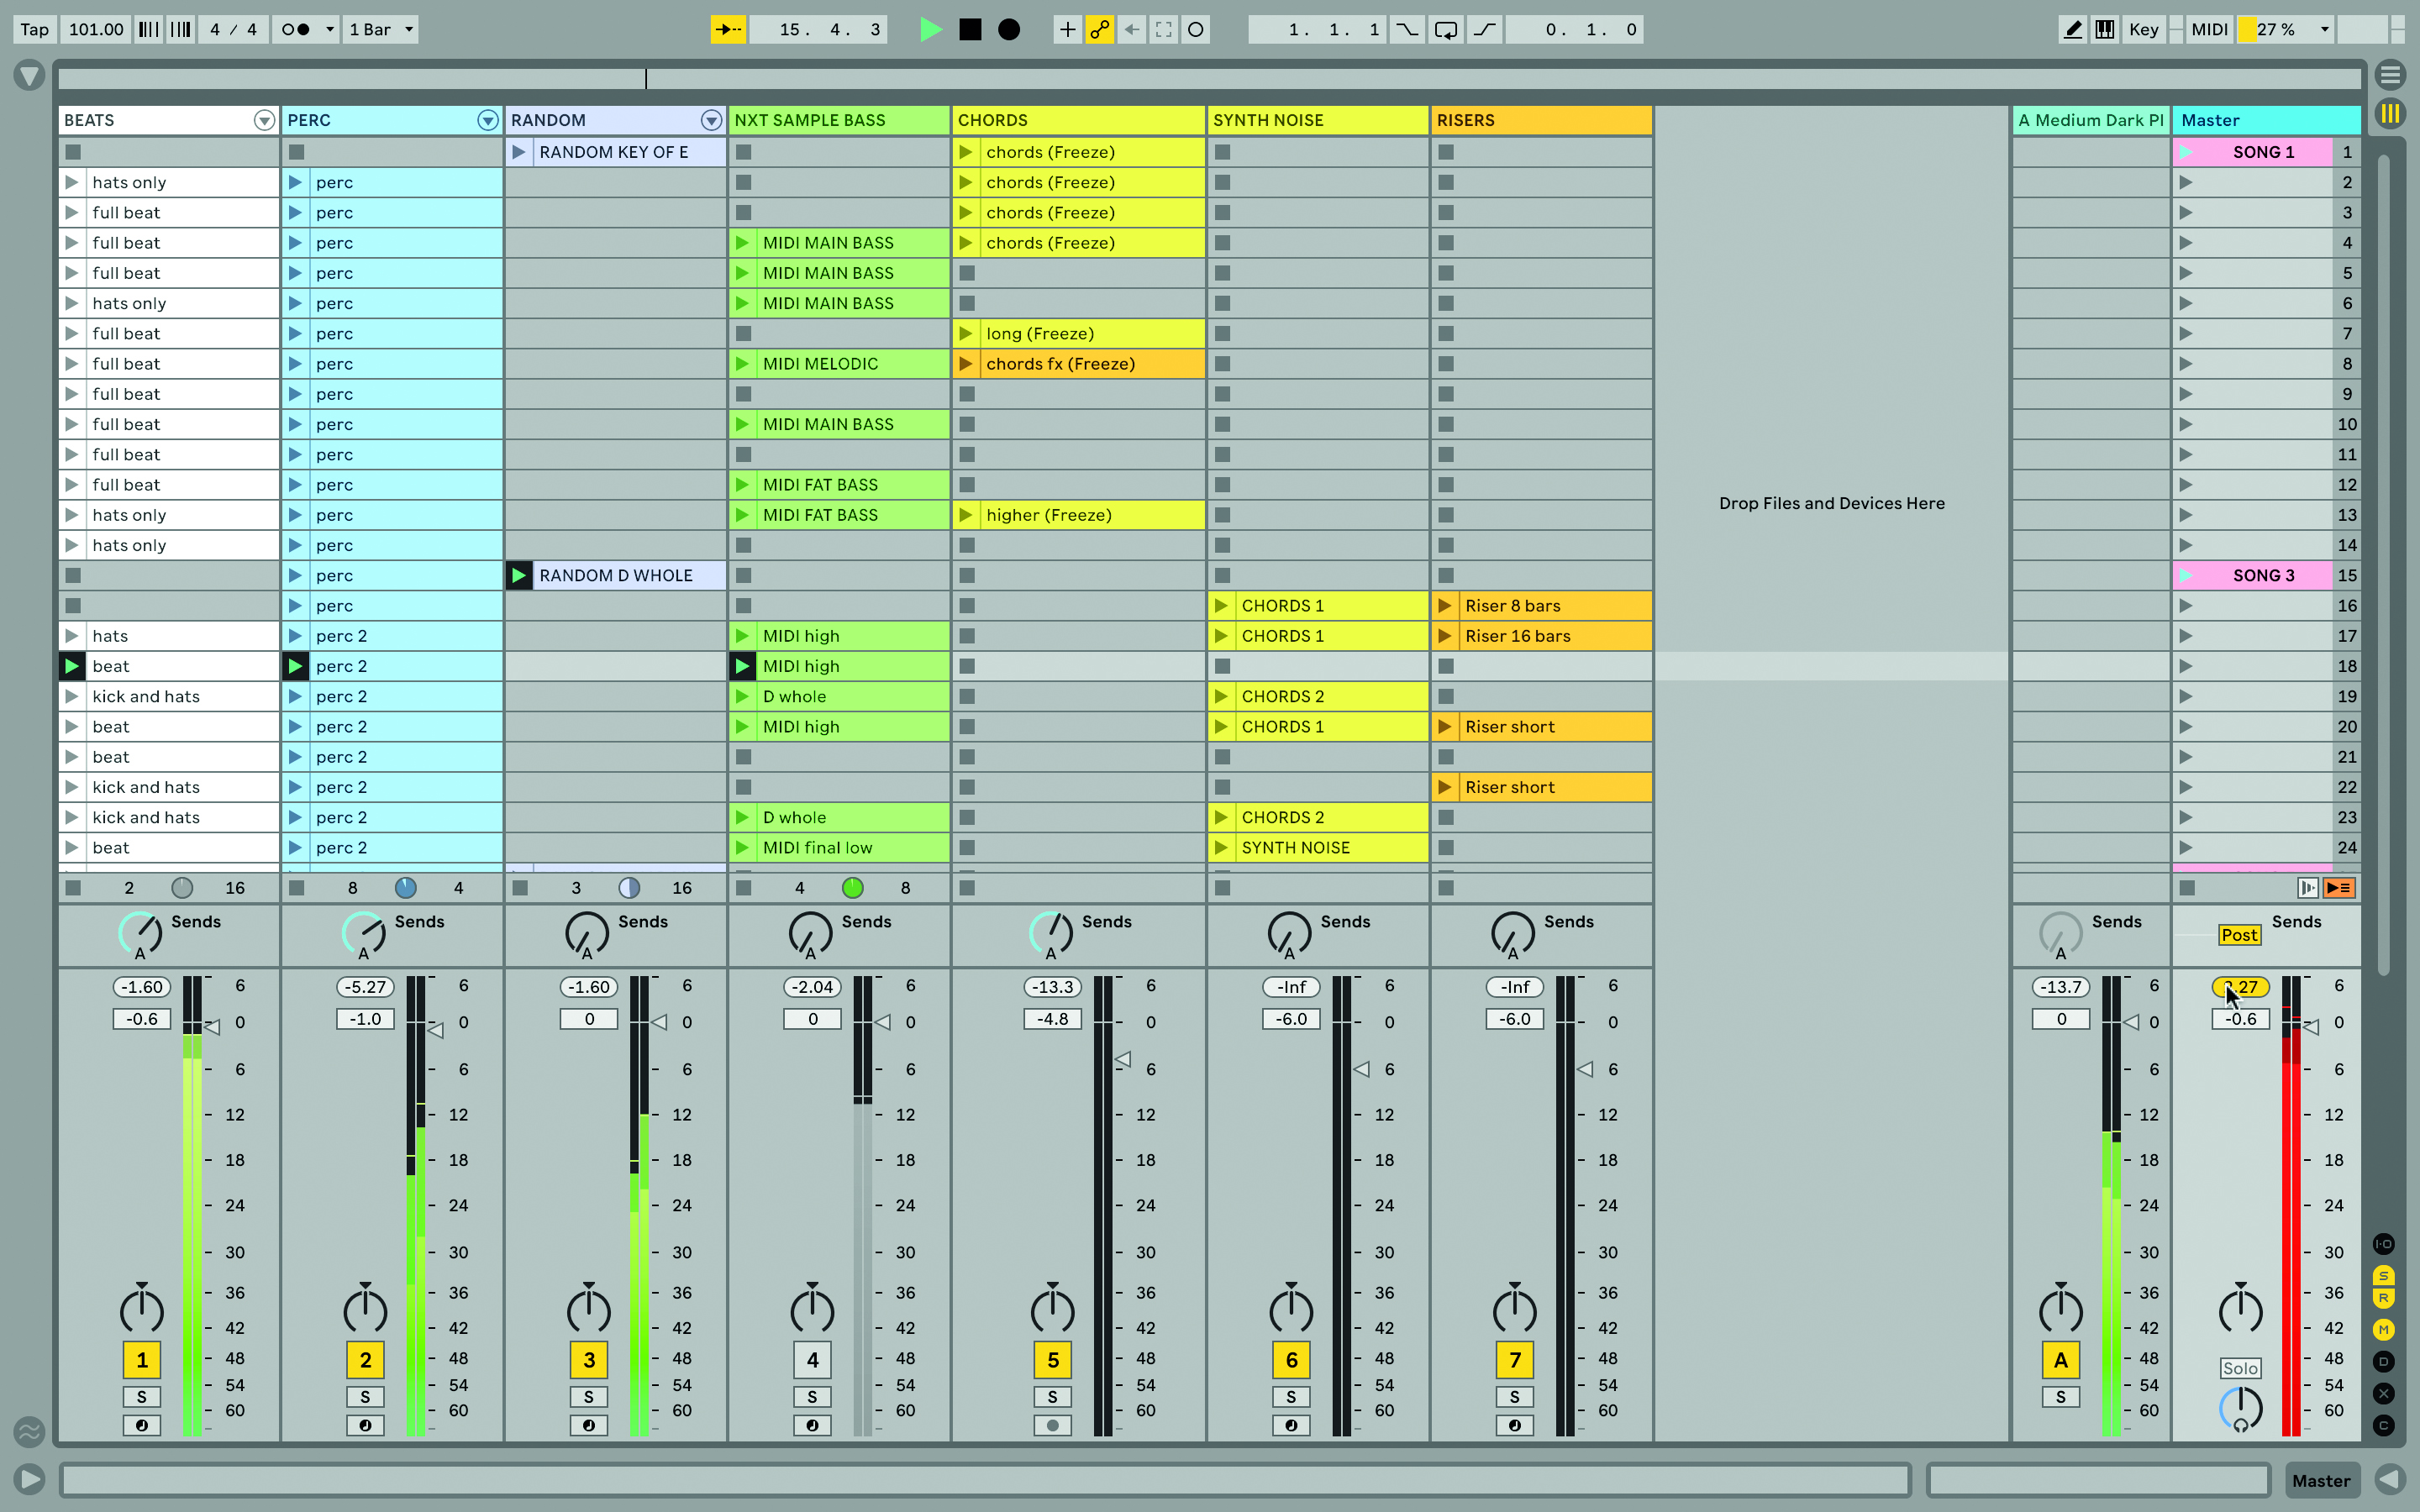
Step 1: Without a Limiter, this master track’s overloading. Note the red meter and the peak indicator at the top. This can create distortion, but not the kind of distortion we like – use a plugin for that! This can also happen on individual tracks; keep an eye out when recording or mixing.

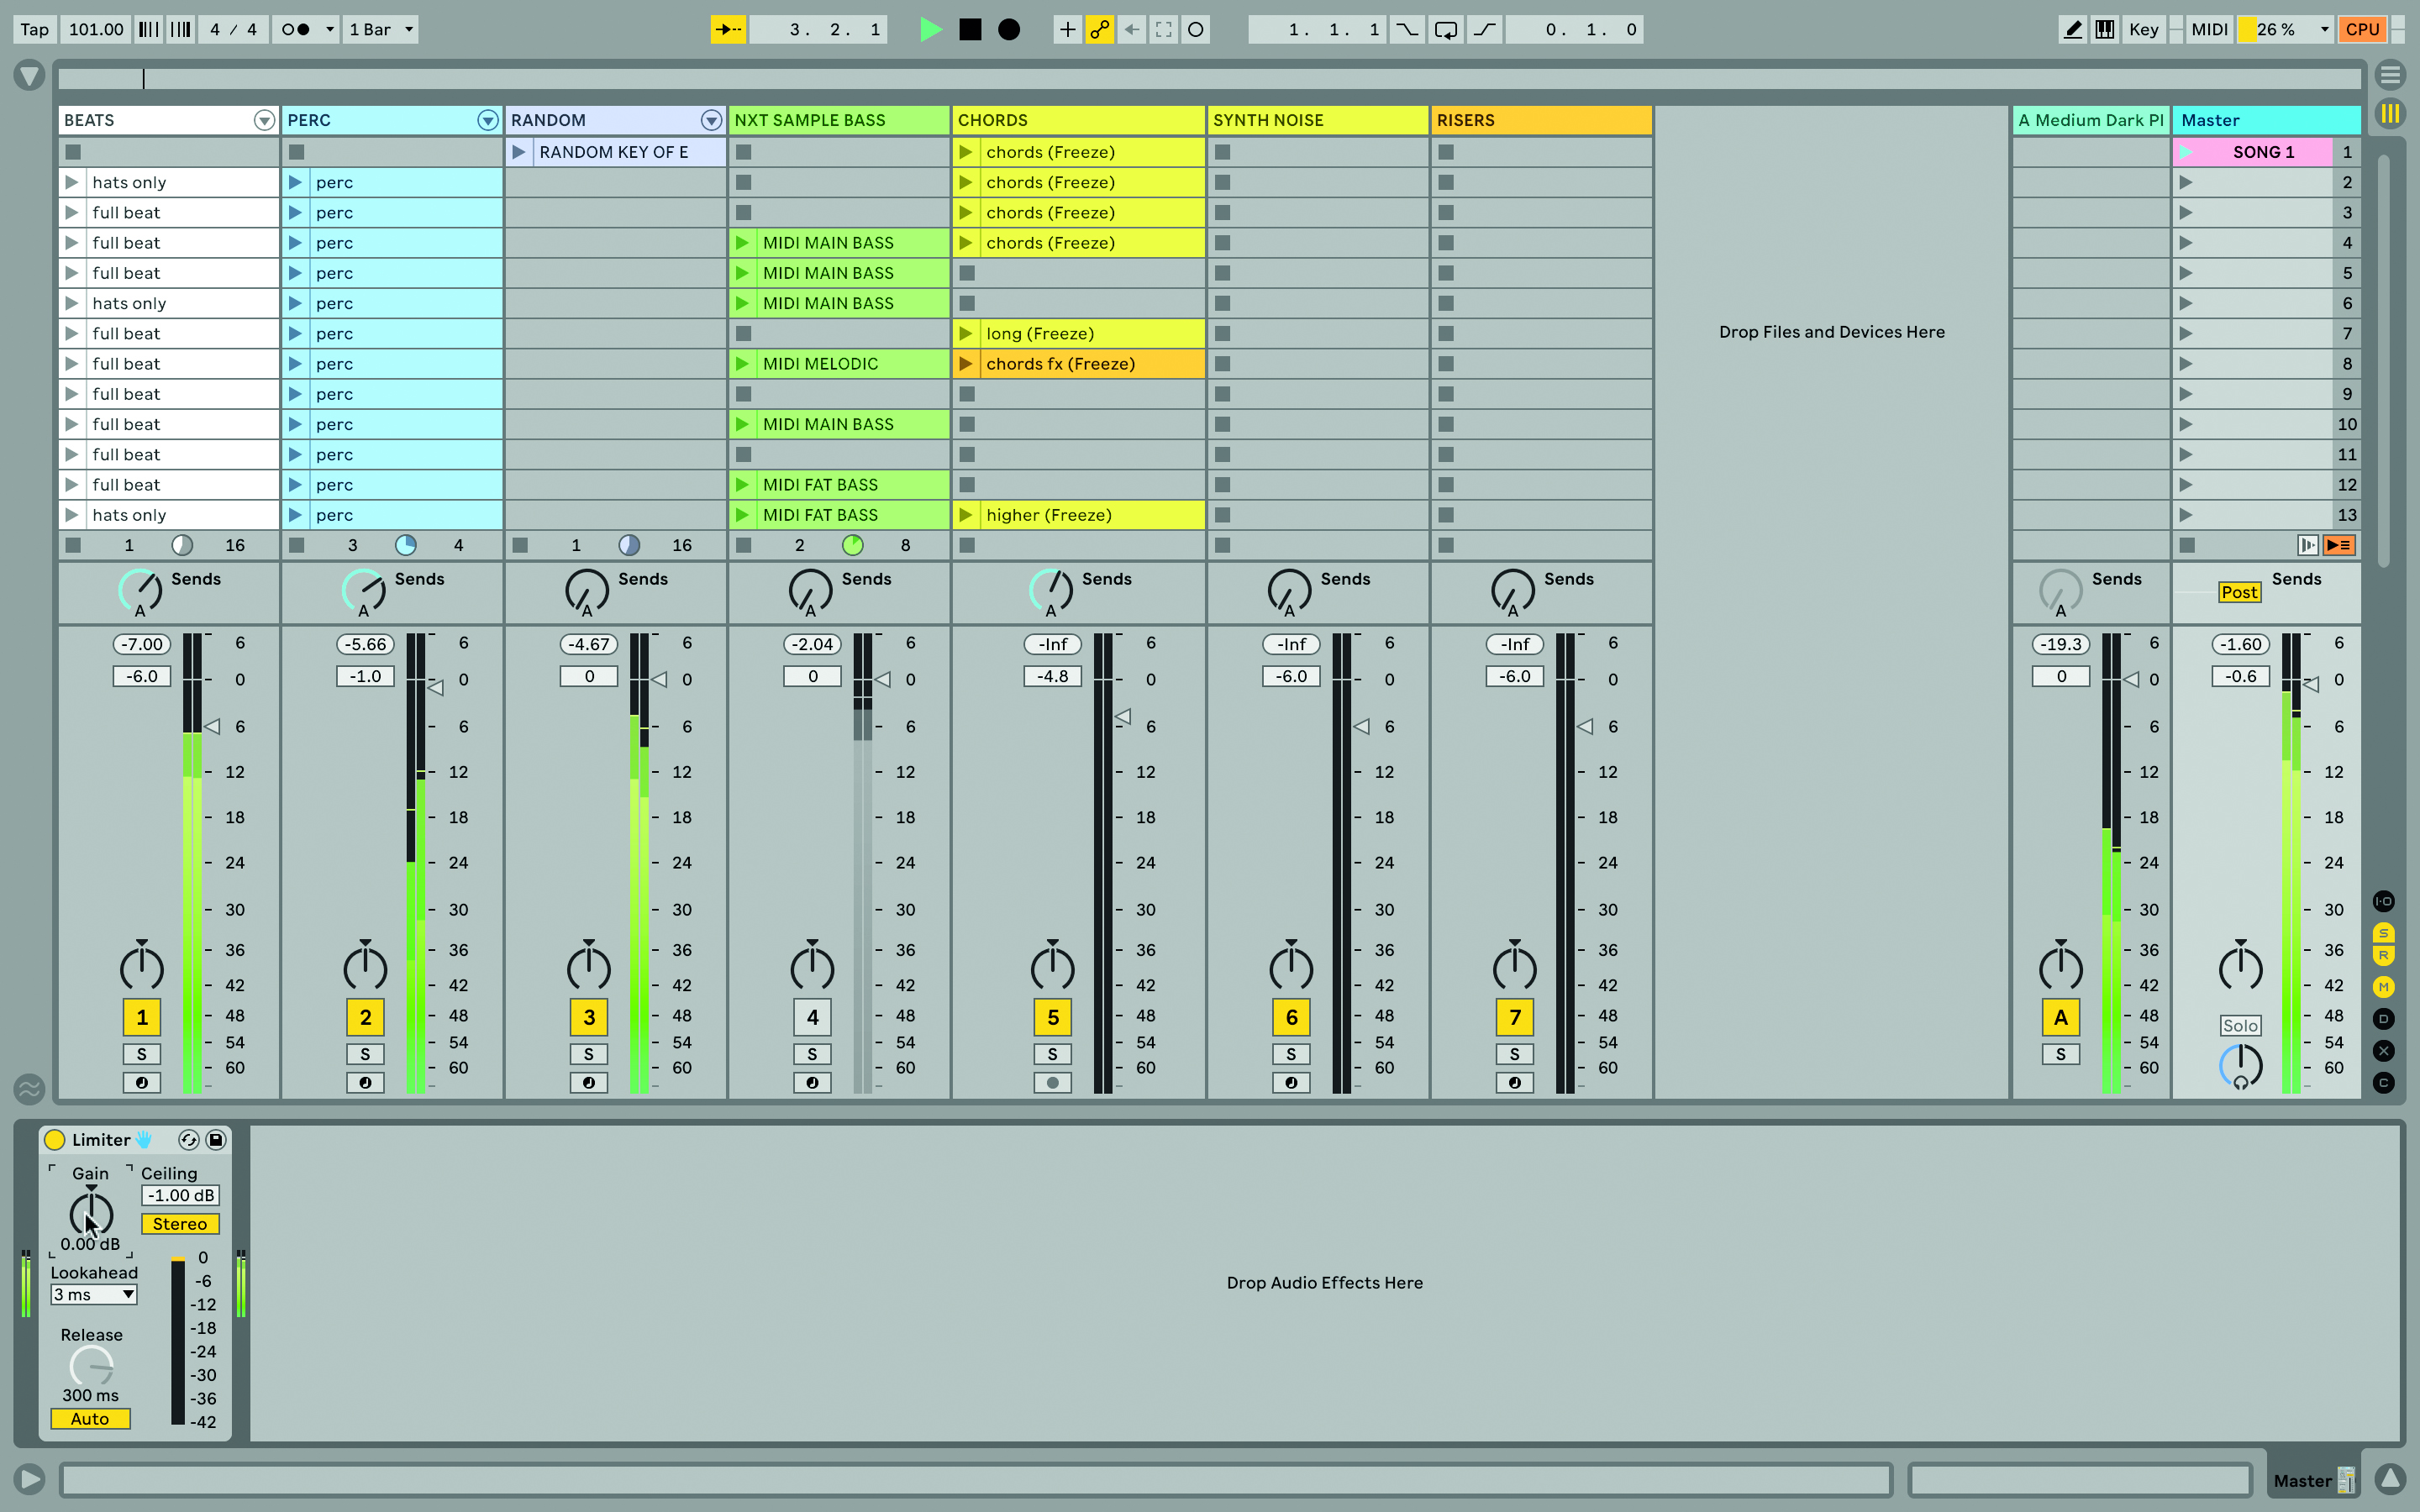
Step 2: If we add Live’s Limiter audio effect device to the master track while the song is playing, we can see some activity in the gain reduction meter. We’ll set an ideal maximum level, usually around -1dB, and keep checking the meter. Use the gain control to tame the input levels.
Want all the hottest music and gear news, reviews, deals, features and more, direct to your inbox? Sign up here.

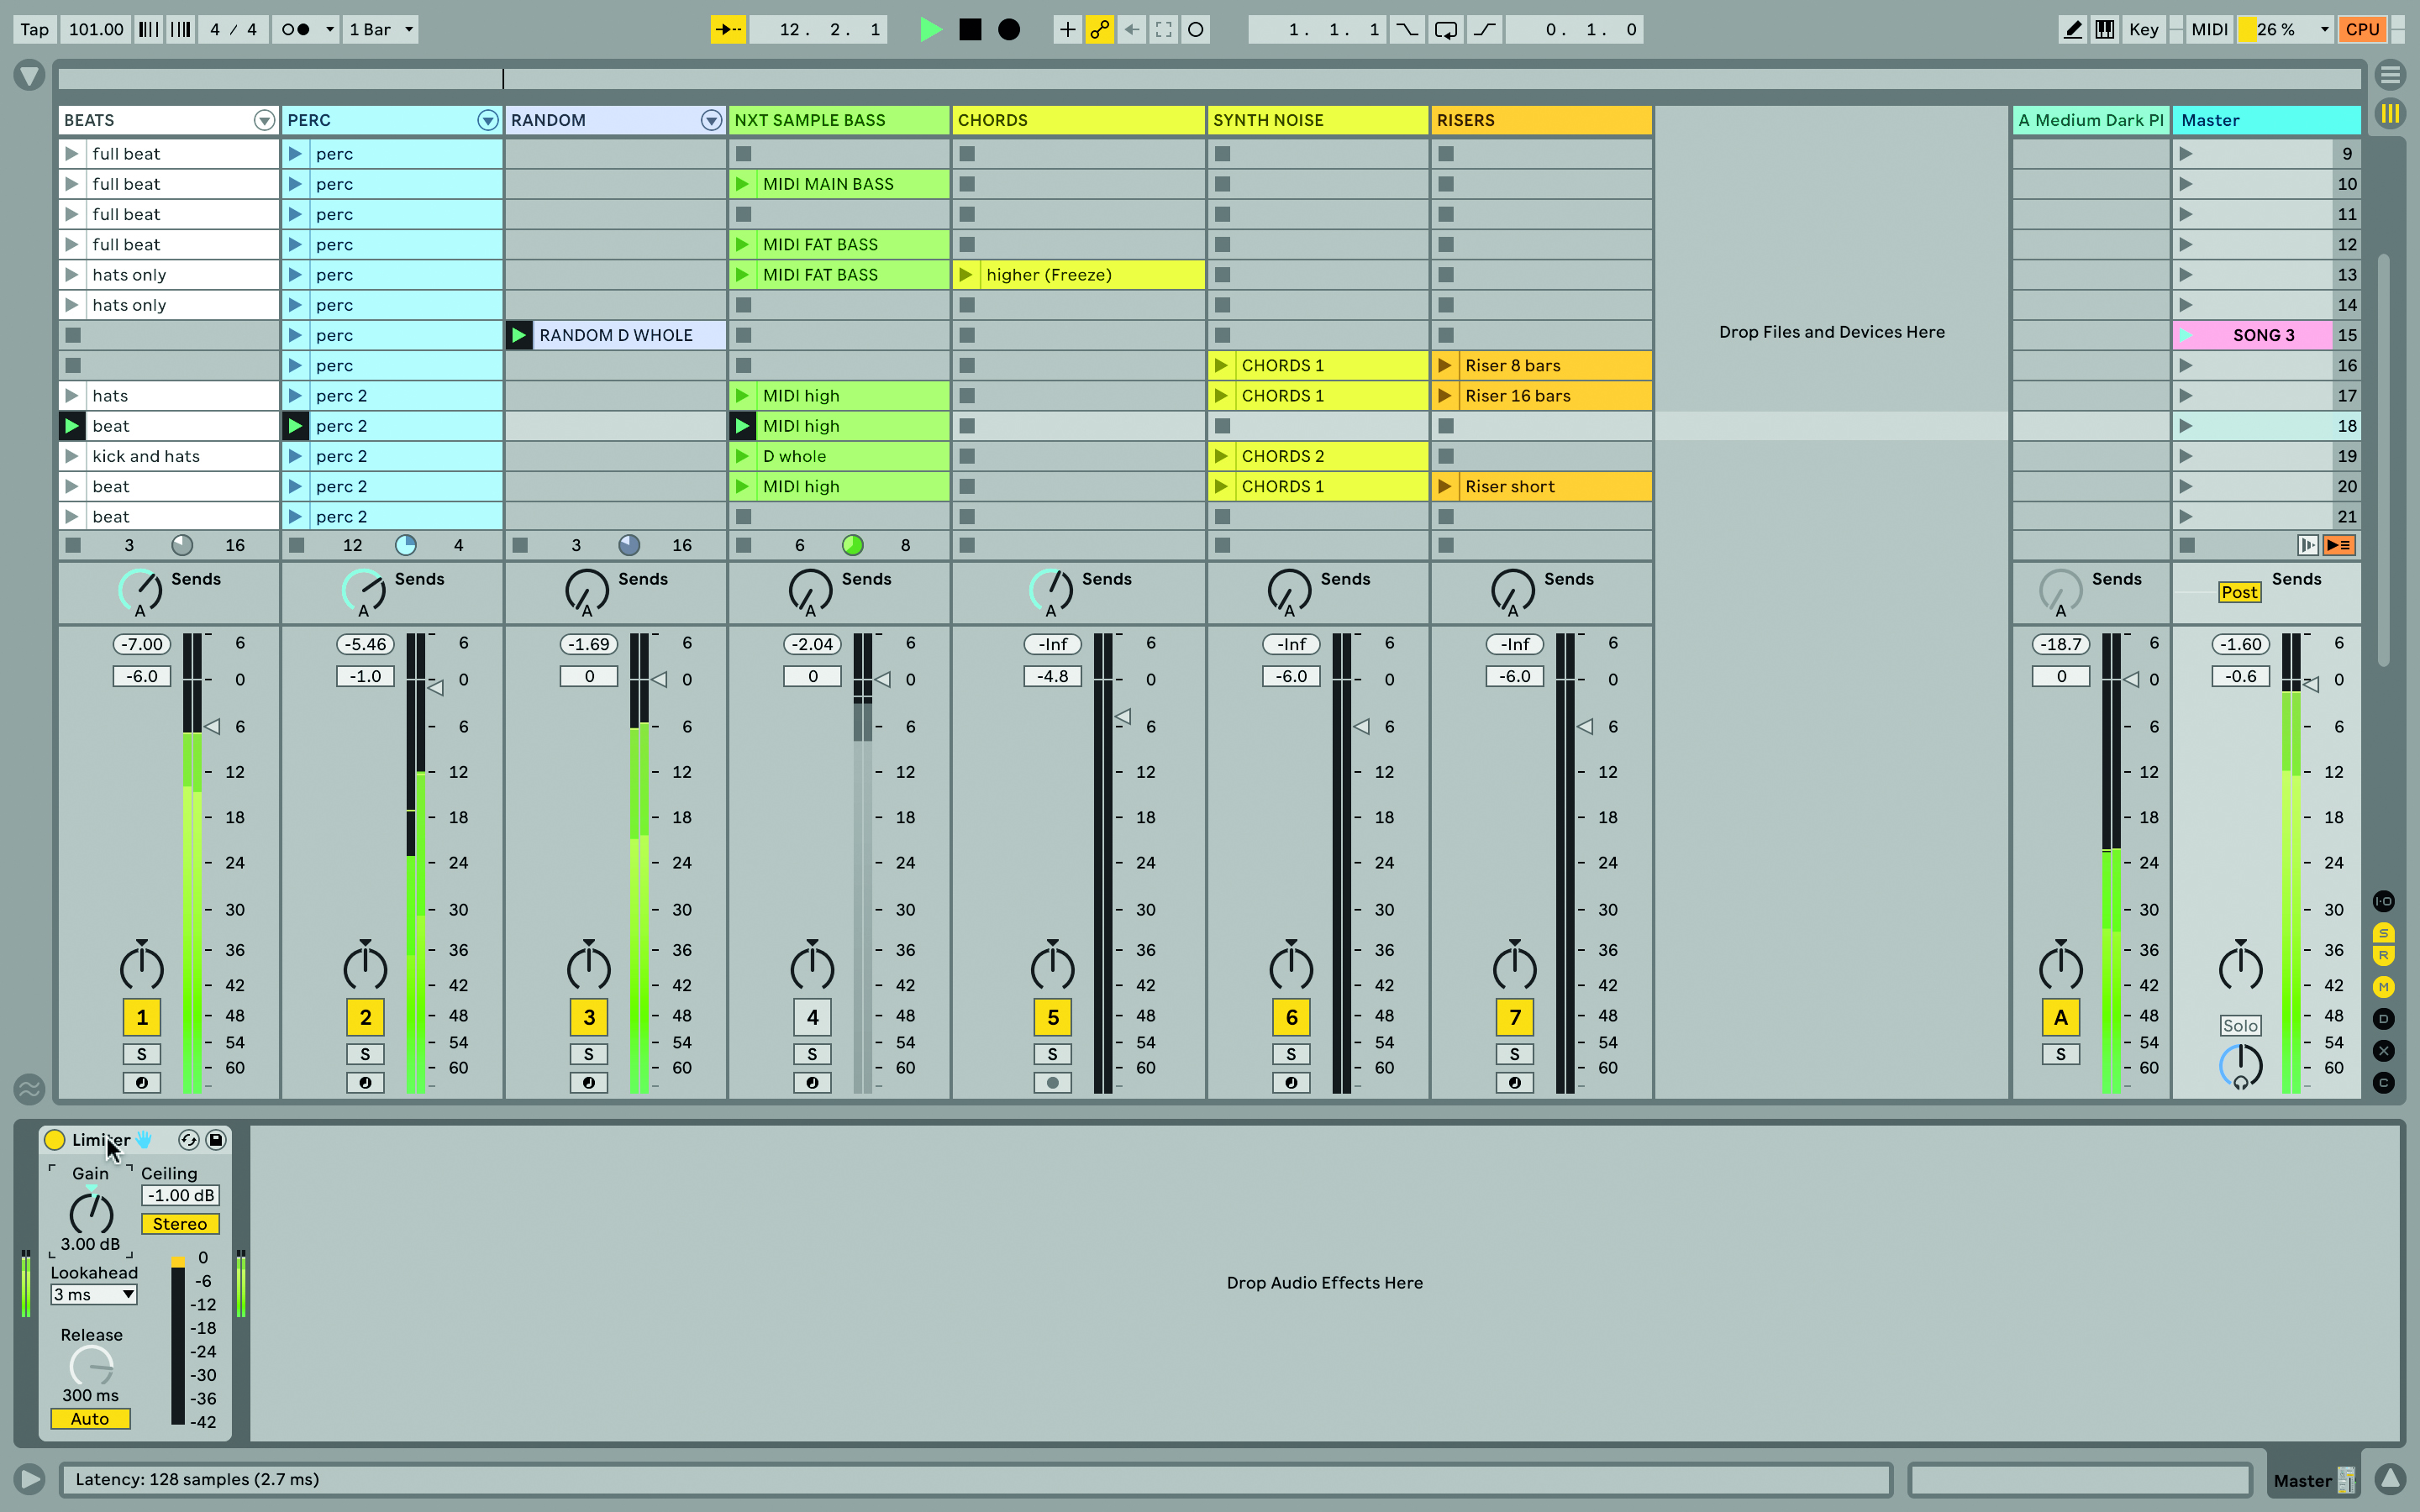
Step 3: When there’s just a little activity remaining in that meter, we should be good to go. A bit of gain reduction means we’ve effectively contained the extremes of your levels, while making sure the overall mix remains as loud as possible, and more likely to hold up against other mixes.

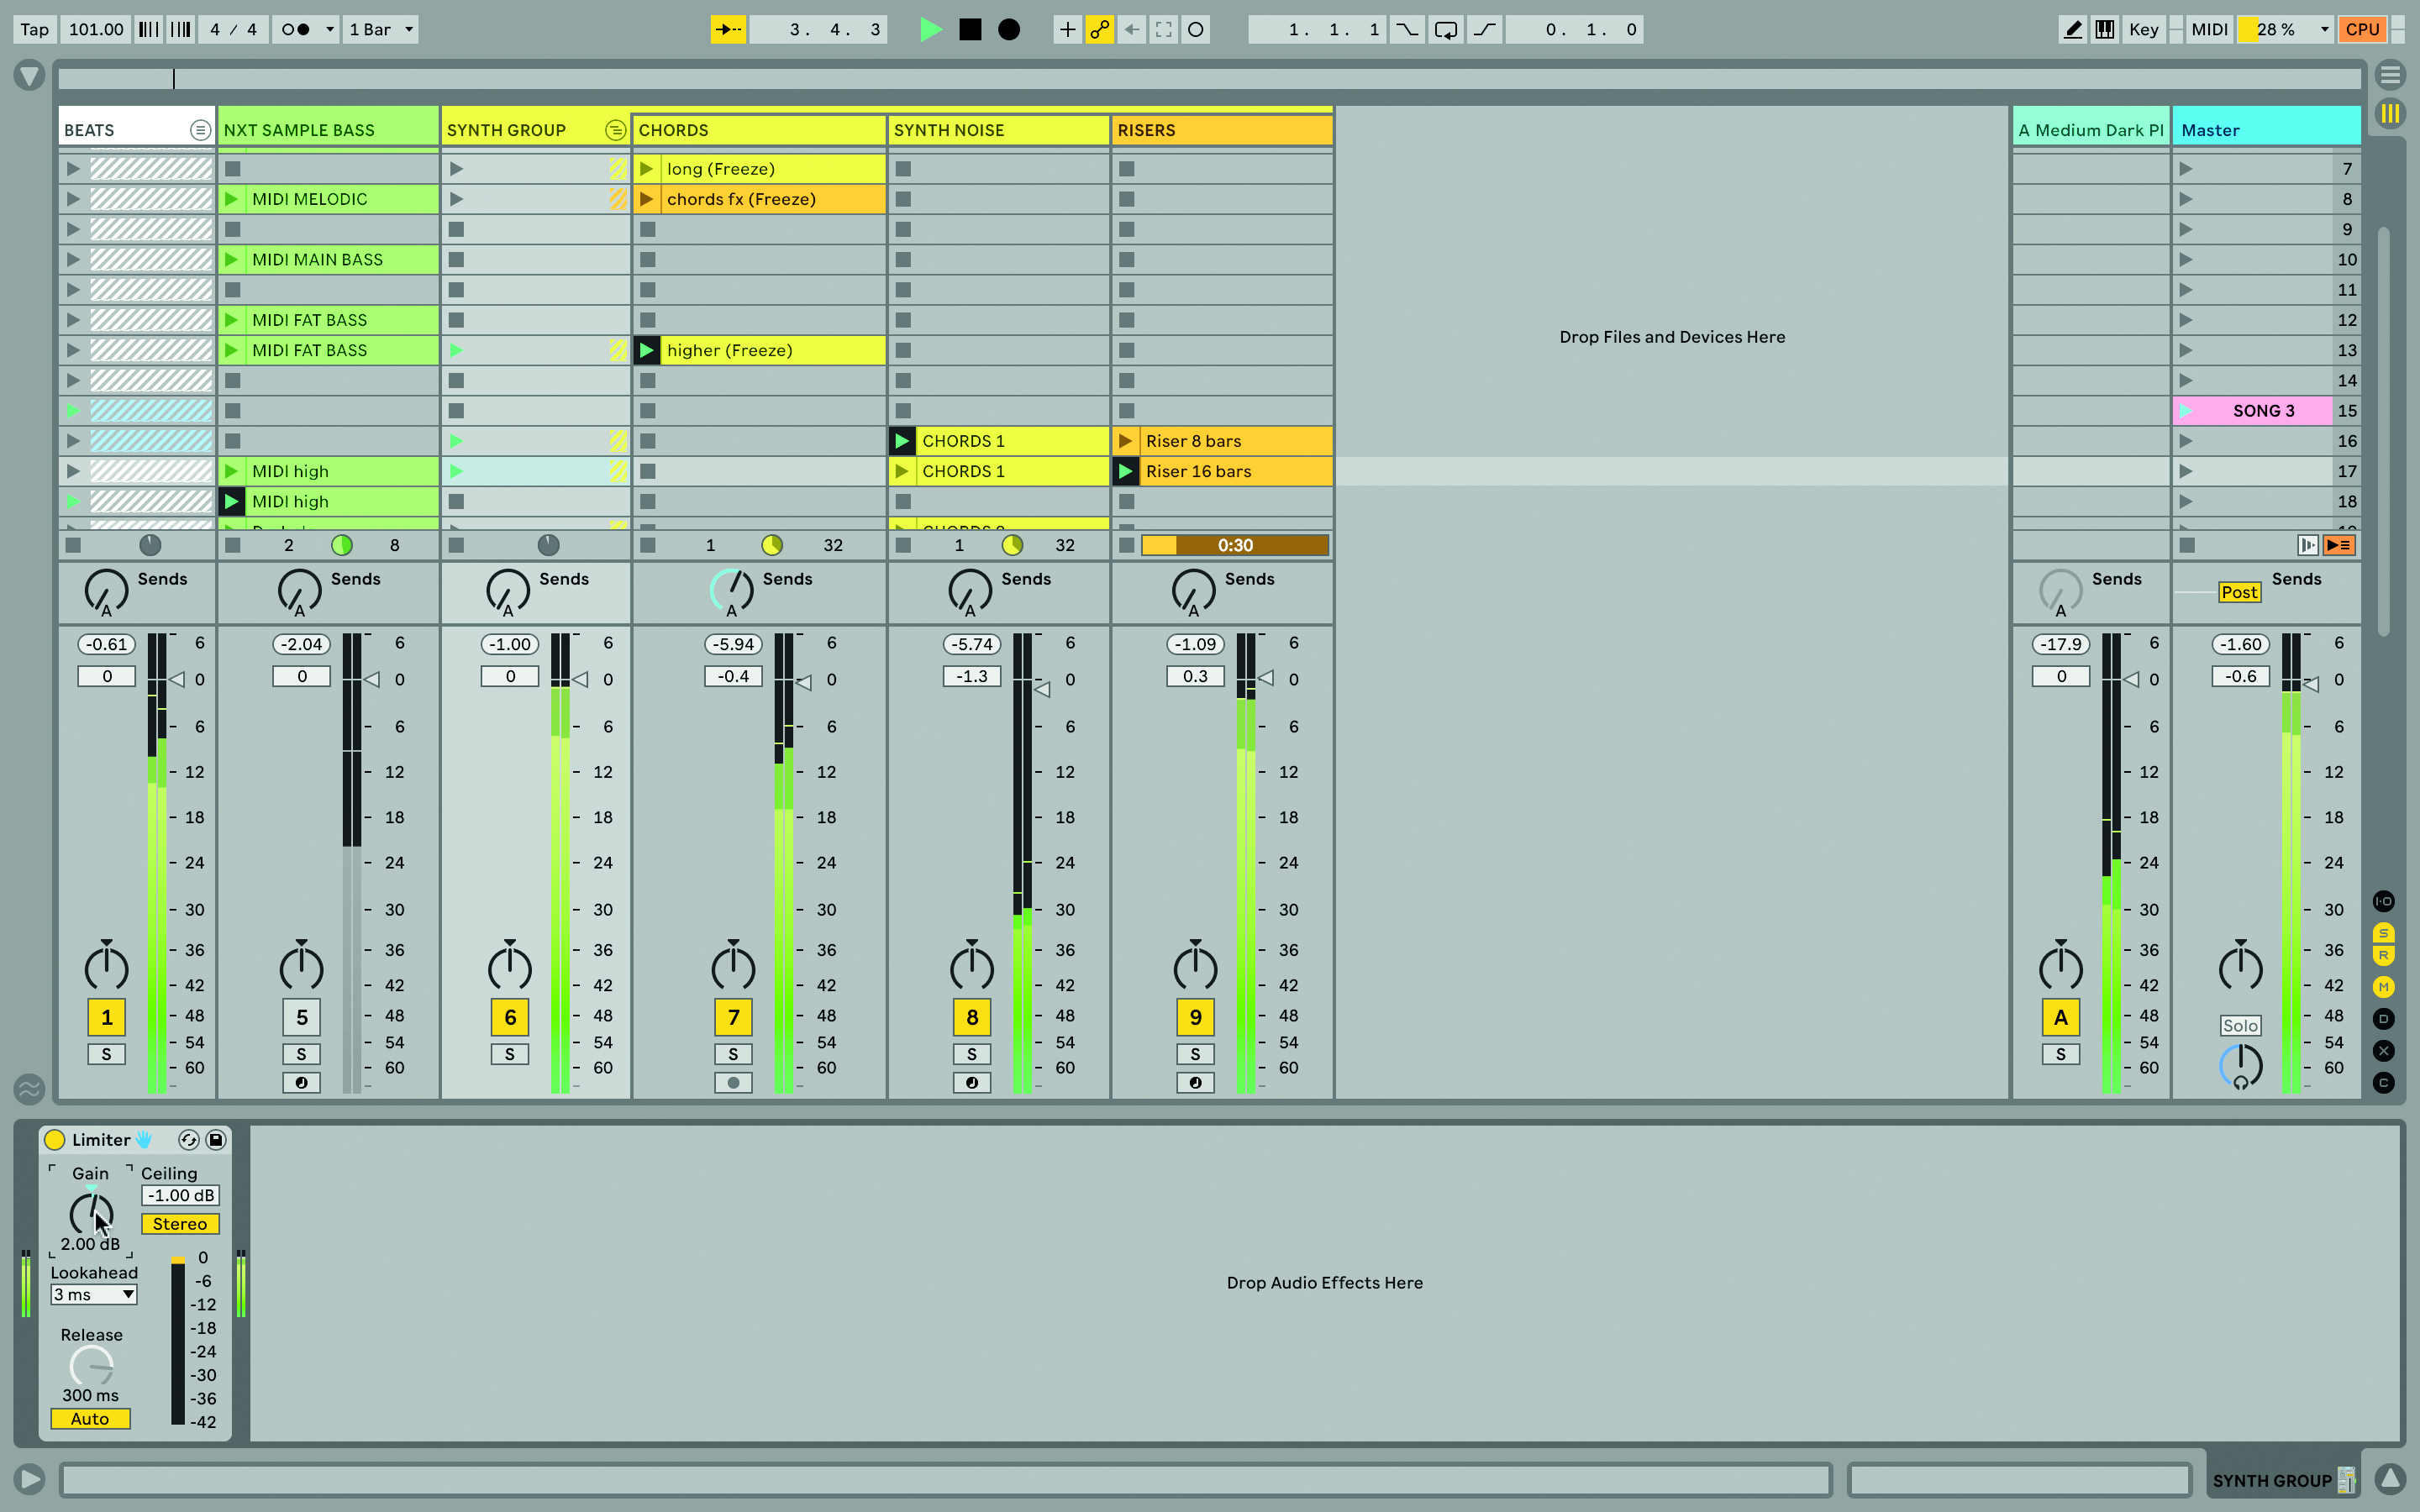
Step 4: Limiters on group tracks come into their own on projects where you have more than one group – you can process each one separately, before they reach the master track. This is another important part of what a limiter can do – it’s like a mini mastering step (same goes for compression).

Martin Delaney was one of the UK’s first Ableton Certified Trainers. He’s taught Ableton Live (and Logic Pro) to every type of student, ranging from school kids to psychiatric patients to DJs and composers. In 2004 he designed the Kenton Killamix Mini MIDI controller, which has been used by Underworld, Carl Craig, and others. He’s written four books and many magazine reviews, tutorials, and interviews, on the subject of music technology. Martin has his own ambient music project, and plays bass for The Witch Of Brussels.