How to modulate gates on synth pads like Kraftwerk
Gating a pad has long been considered a classic effect. Adding real-time control takes pad-gating to the next level!
The ever popular and ubiquitous synth pad is the perfect example of a synth patch that has developed exponentially over its many years of production deployment.
Emanating from synthetic string machines, which were one of the few polyphonic devices in use during the early ’70s, it didn’t take long for producers to find ever more ingenious ways of creating pad-like textures.
While the sound of string machines was relatively plain, bolstering their basic tones with modulation effects, such as chorus, substantially thickened the texture. This was often coupled with the use of some form of gating effect; the basic square gate, which effectively switched the sound on and off in tempo, became a popular device, used by everyone from Roxy Music to The Who.
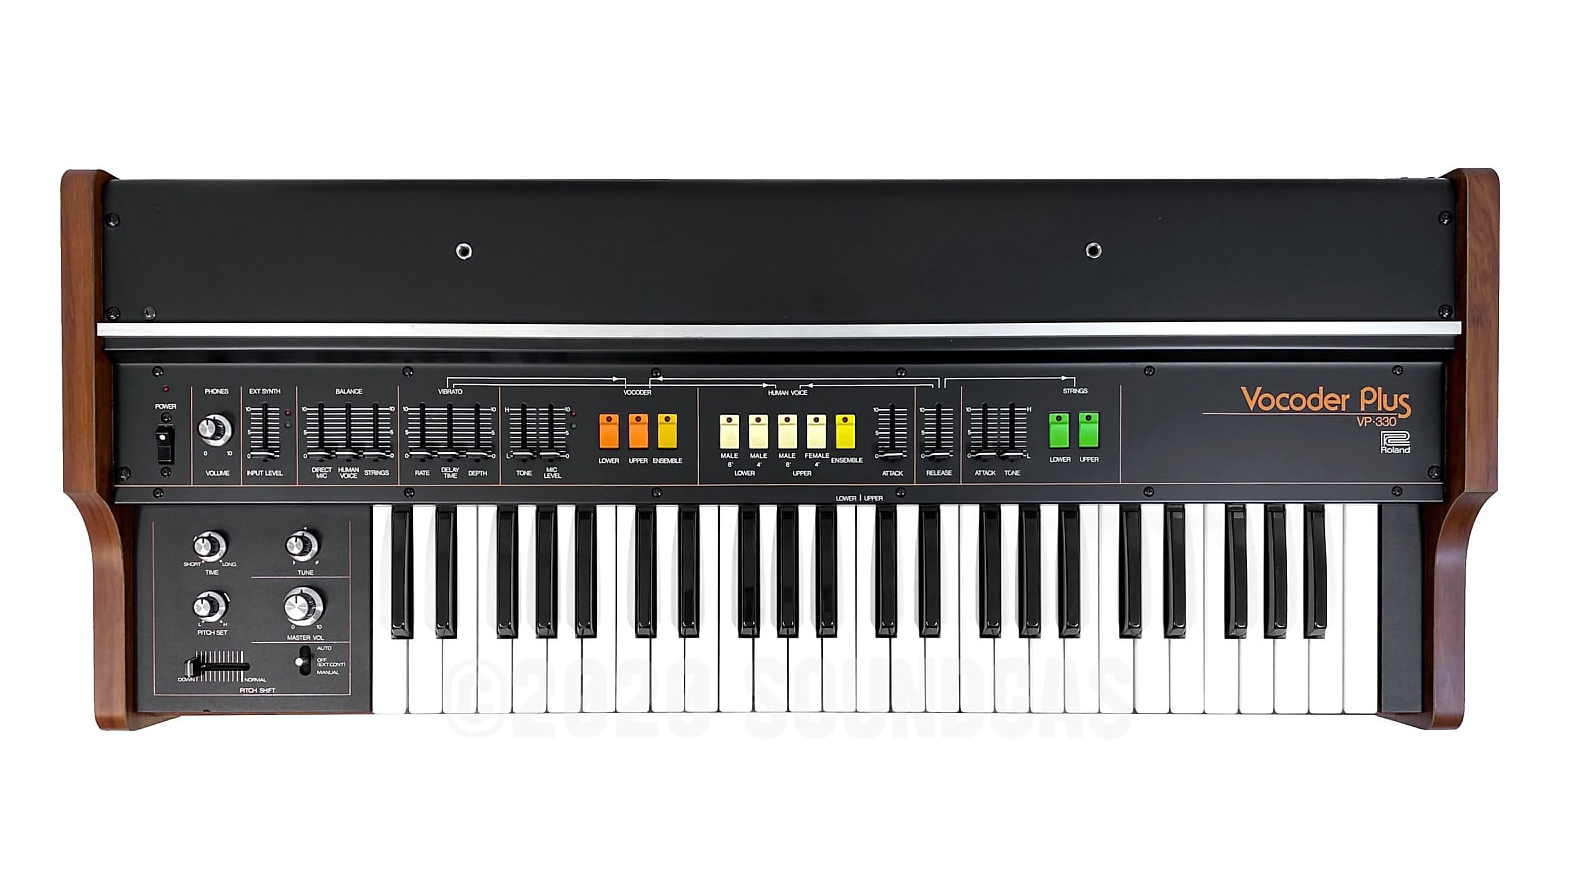
5 songs that use Roland's classic VP-330 vocoder and string machine
As polysynths became more prevalent, the string machine was largely replaced, in favour of patches of more generous scale that could be performed by two oscillators. Despite the initial signal being more substantial in stature, it still invited the use of gating, now with the ability to create, perform or program crescendo and diminuendo effects. This development is available, in no small part, thanks to the complexity of software synths.
The ZebraCM synth plugin, (part of the Computer Music Plugin Suite, a suite of free plugins available with every issue of Computer Music Magazine), allows the programming of perfect gating effects, which can be controlled using the modulation lever or wheel, in both live or programming scenarios. So, let’s get gating…
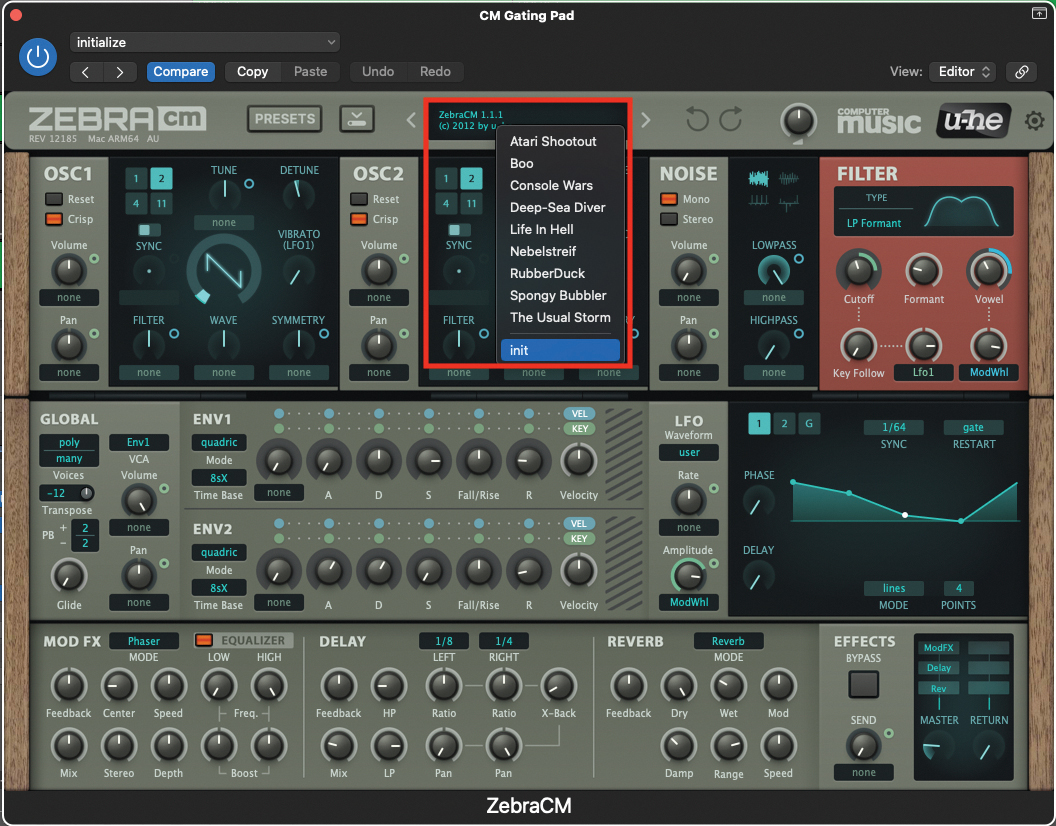
Let’s begin by initialising a patch on the ZebraCM. Open up your DAW and load up the plugin. Once the plugin window is open, move to the central display at the top of the window, click to reveal the drop-down menu, and select ‘init’ from the bottom. This will initialise the patch.
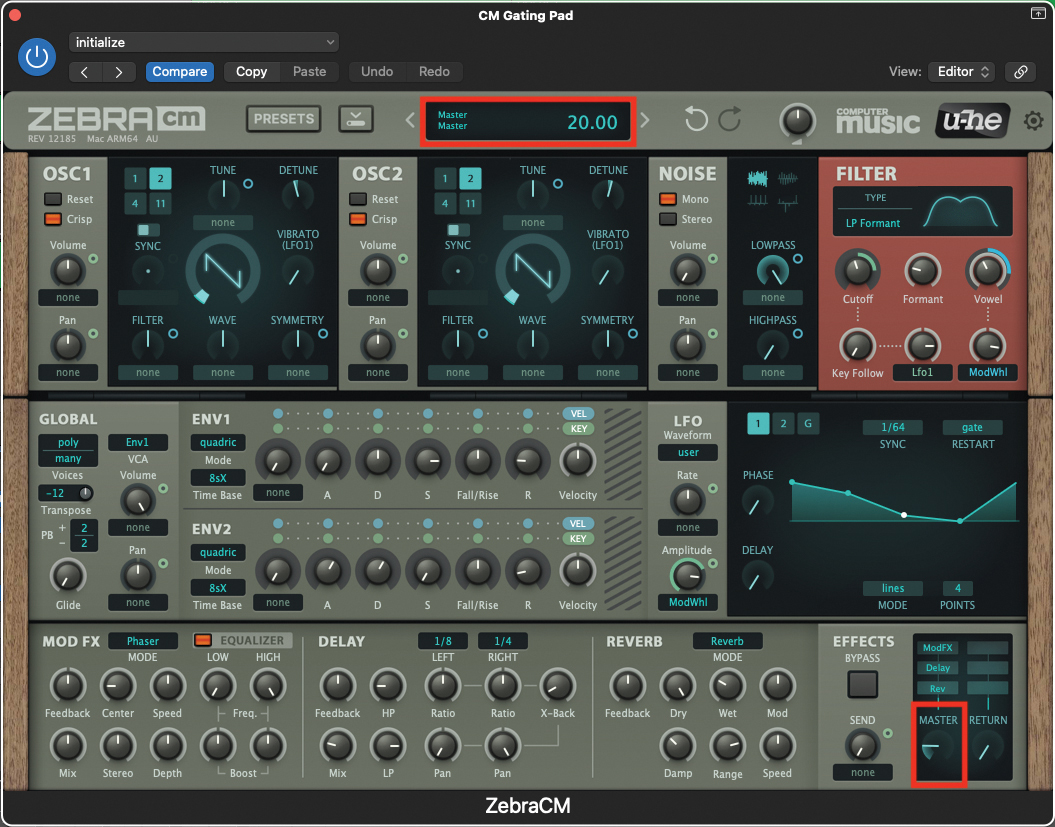
This patch is going to be relatively loud, so it’s going to be a great idea to reduce your master volume to a level of 20. Just as a reminder, every time you tweak a pot or setting on the plugin, you will see an accurate value/numeric in the upper display.
Want all the hottest music and gear news, reviews, deals, features and more, direct to your inbox? Sign up here.
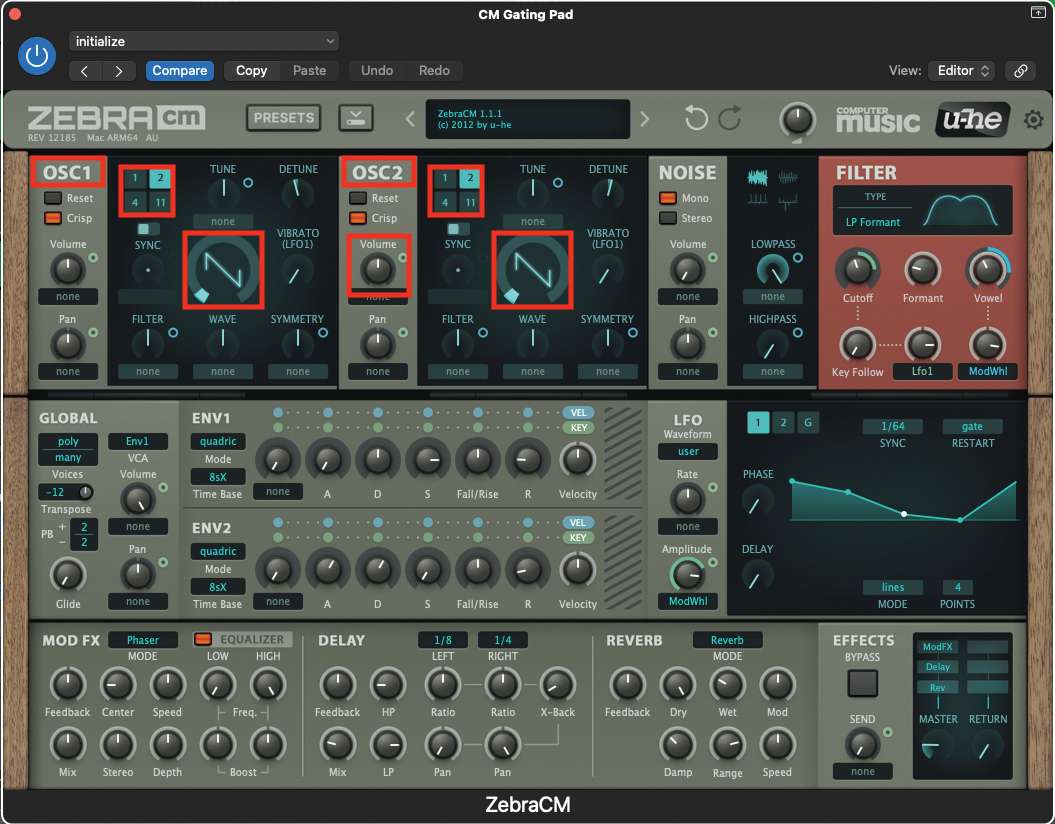
Uniquely, for this patch, we are going to set the majority of Osc1 and Osc2 to the same settings. Leave the waveforms set to the default Sawtooth, set the volume of Osc2 to 100, to match Osc1. Then select the number 2 in the Osc aliasing section. This will create a much thicker texture for our patch.
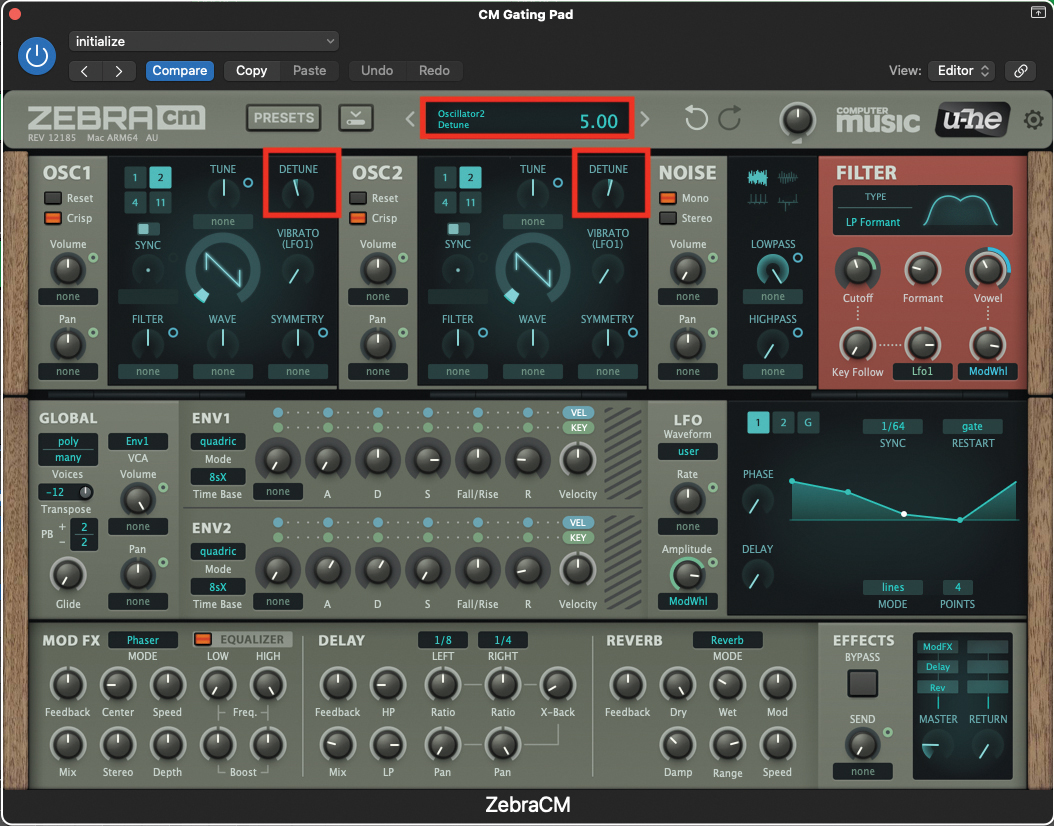
To thicken the oscillator texture further, set the Detune pot, in the Osc1 section, to a value of -5. Conversely, set the Detune pot in the Osc2 section, to a value of 5. The previously tuned oscillators may have phased slightly, and this detuning will substantially eradicate any hint of phasing.
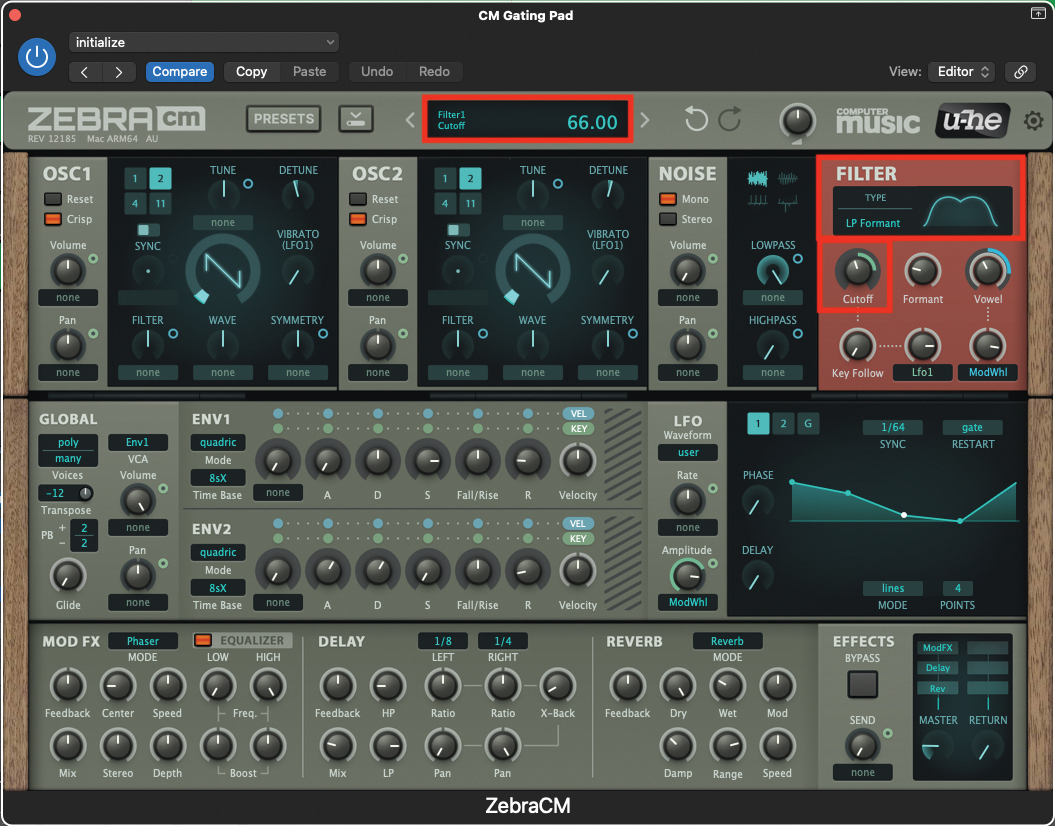
To provide even greater interest than the norm, we are going to use the LP Formant filter in this patch, providing some vowel like humanistic qualities. Select LP Formant from the drop-down menu, and set the Cutoff pot to a value of 66.
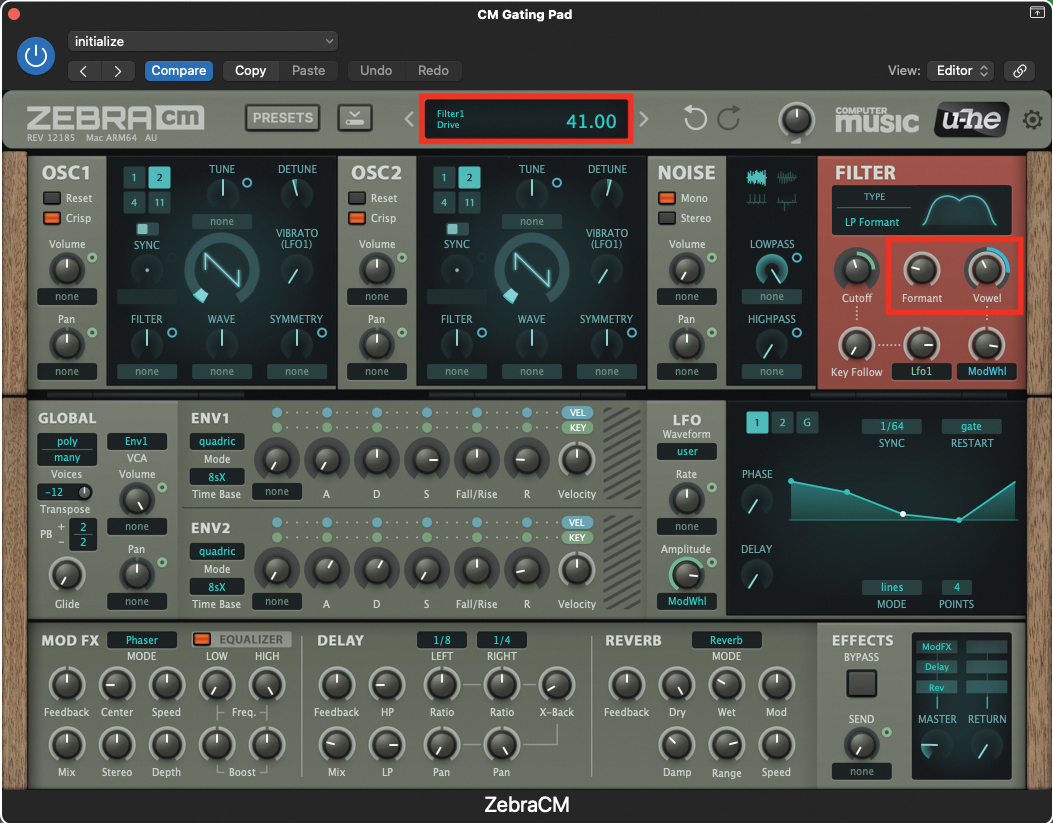
We also need to make a couple of further filter section adjustments; firstly, set the Formant pot to a value of 25, then set the Vowel pot to a value of 41. These values relate to the static positions for this patch, with modulation following on behind, as an additional value.
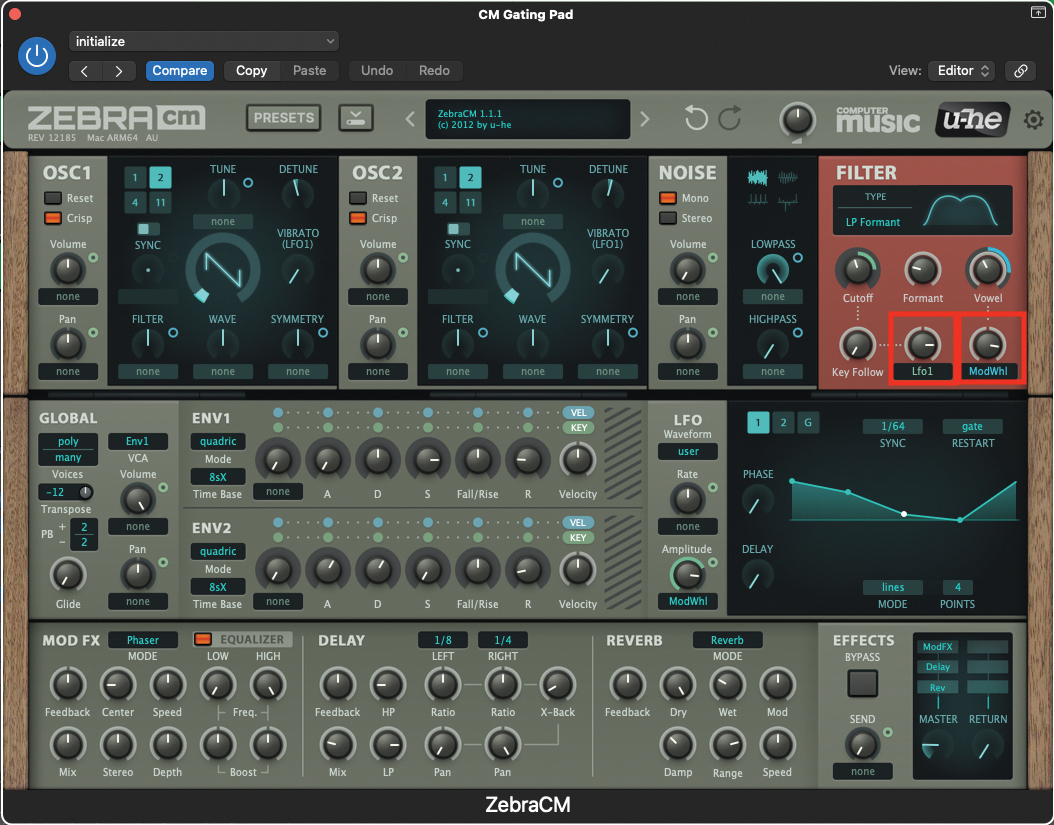
Now it’s time to apply the gating effect to the filter. Using the central user-assigned pot within the filter section, select the LFO1 routing, from the drop-down menu below the pot, before setting the value of the pot to 90. Next, apply the mod wheel routing, below the right-hand user-assigned pot, before applying a value of 99 to the pot itself.
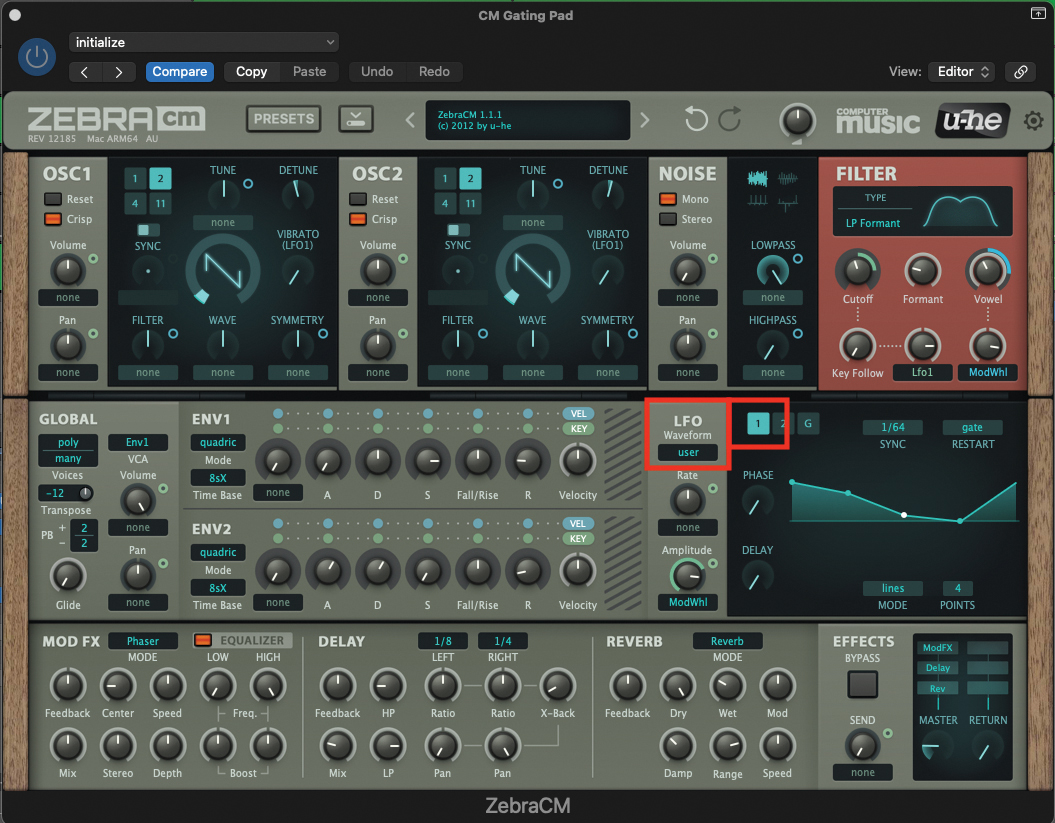
The Gating effect will be generated by LFO1. Moving to the LFO section, ensure that you have LFO1 selected, in turquoise. Then select User from the LFO Waveform dropdown. You could use one of the pre-determined LFO waves, but by creating our own User wave shape, we garner greater control.
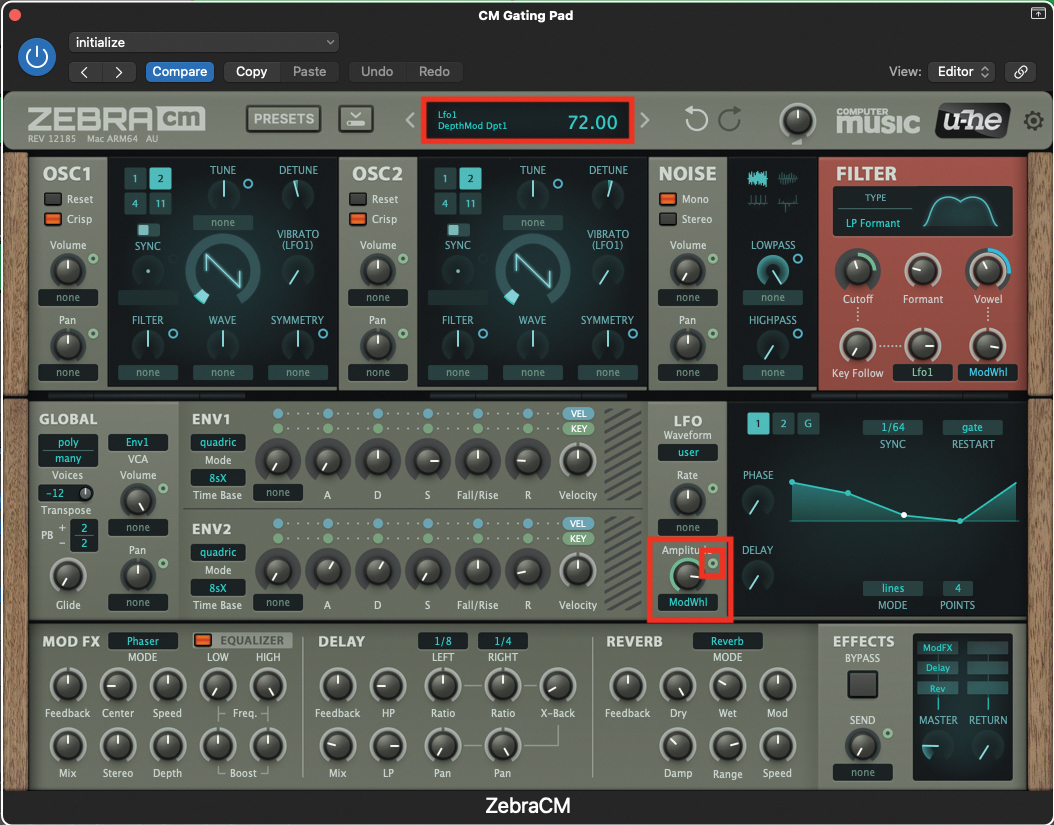
Staying within the LFO section, select mod wheel from the dropdown menu located below the Amplitude pot. Then set the pot amount to a value of 81. To indicate the amount of modulation required, click and hold on the small turquoise dot, to the right of the main Amplitude pot, and drag to a value of 72.
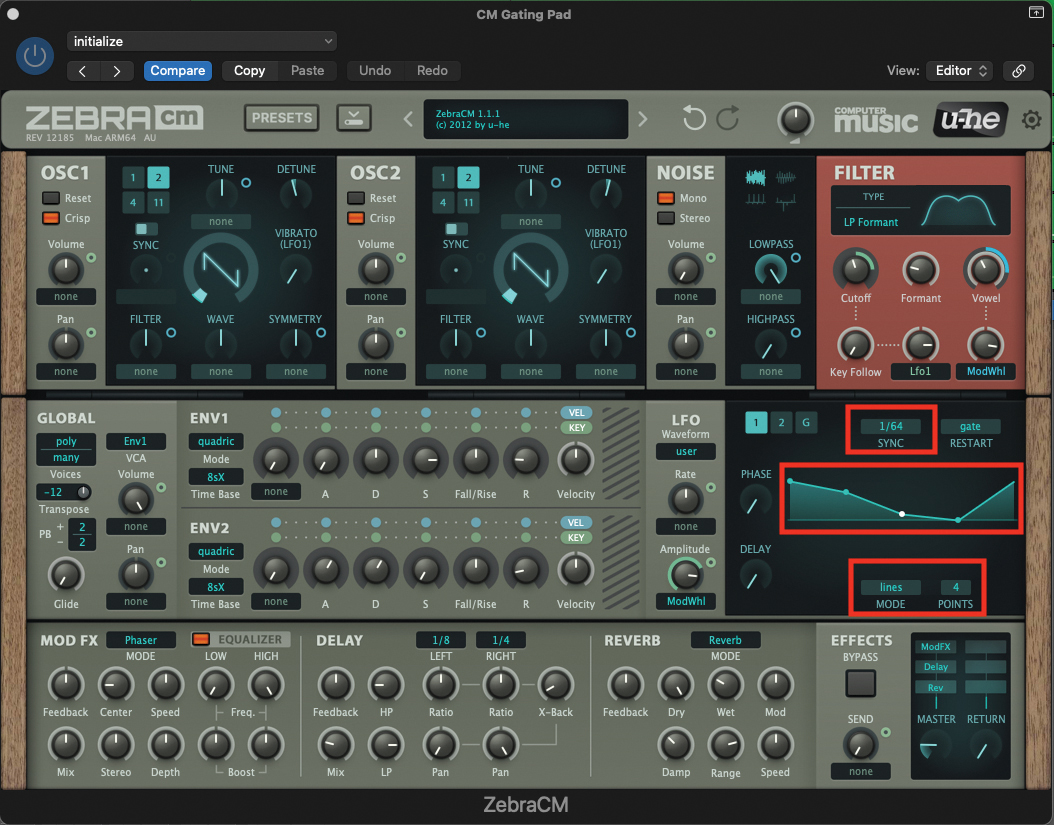
Now we can generate our User LFO wave; set the Sync rate to 1/64 note. Then set the Mode to Lines, changing the number of points from 16, to just four points. By clicking on each of the four points in turn, set Point 1 to a value of 97.5, Point 2 to a value of 70, Point 3 to 15, and finally Point 4 to 0.
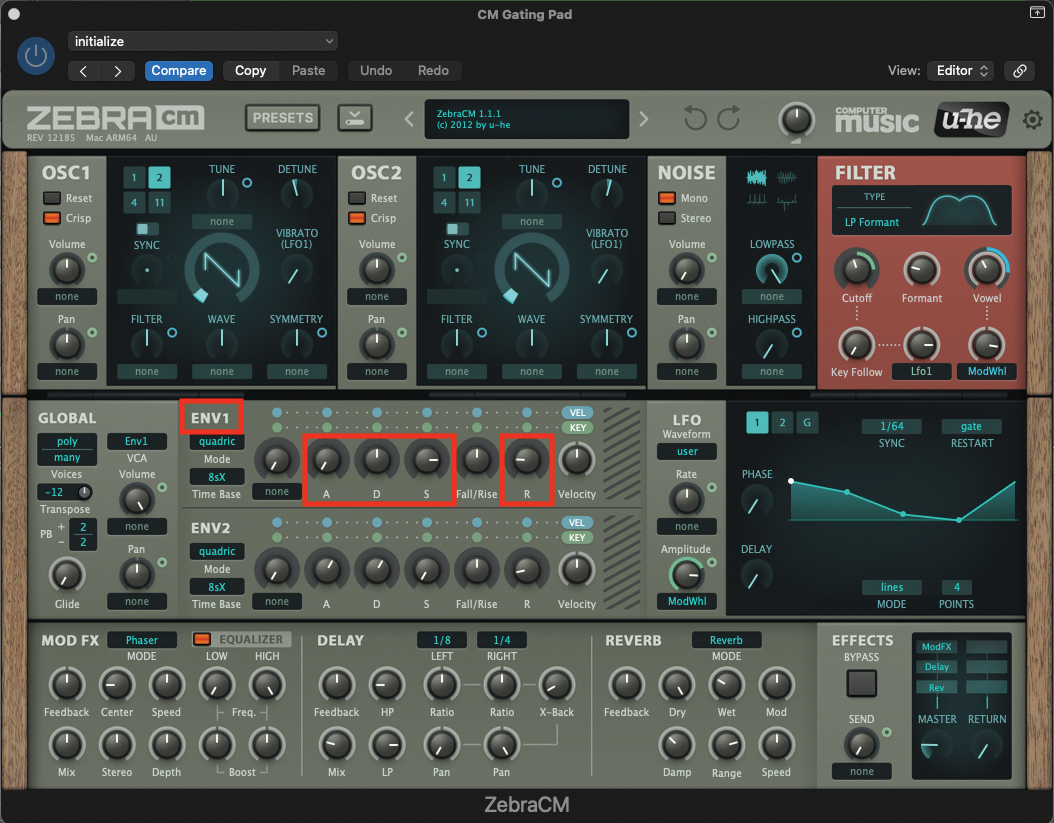
We need to make some subtle alterations to the Envelope section. Env1 is being employed to shape the volume contour of our patch, so set the Attack pot to a value of 0, Decay to 50, Sustain to 80 and Release to 21. Env2 is redundant in this patch, as it’s not being used for its normal operation of filter modulation.
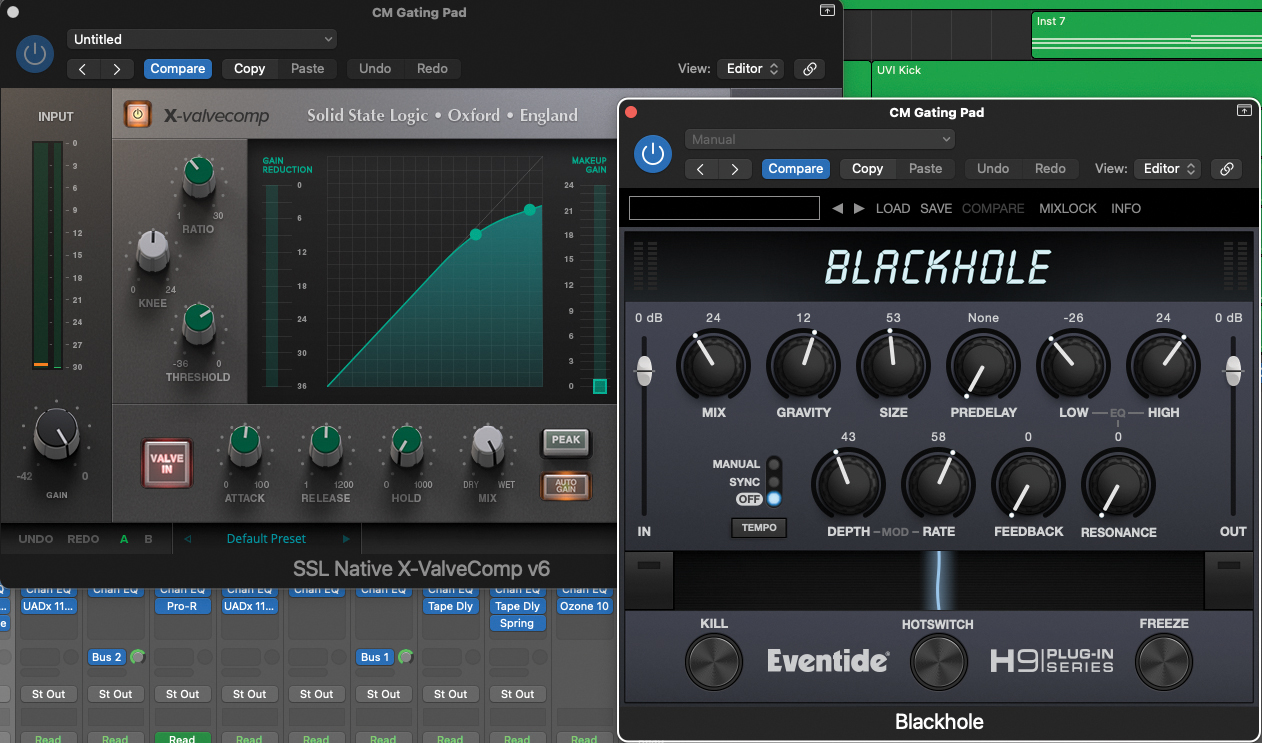
This concludes our synth patch, and you’ll find that holding a chord while riding the mod wheel, will increase the intensity of the gating. However, you should also consider adding some backend effects. Some basic compression, coupled with either a subtle delay or reverb, will fill in the voids where the gating silences the signal.
Pro tip
In the early days of pad gating, it was considered a classy enough effect by merely popping a gate on a Solina string machine, in order to maintain interest for the duration. Nothing wrong with that! However, tastes and styles change, and in this current world of DAW-shaped ease, it’s never been a more simplistic pursuit to add realtime control to an effect you have on-screen.
In the case of our patch, we have engineered it in such a way that moving the mod wheel forward increases the amplitude of the wave being generated by LFO1. This in turn sends a modulation signal to the Vowel component of the Formant filter, while the gate, generated by LFO1, is modulating the filter cutoff.
So, we are simultaneously controlling two components within the filter section, which generates a wonderful sense of movement. This invites modulation to be applied while playing live, or programmed within the DAW, and is an excellent device for creating rises and falls in your music. The mod wheel uses MIDI CC 1, so look for this within your DAW automation, or record it onto your track.
Recommended listening
1. Kraftwerk - Aéro Dynamik
Taken from their last original album (some 20 years ago), Aéro Dynamik employs contemporary gating, coupled with realtime control of filter cutoff, and more!
2. Röyksopp - Shores of Easy
This long but effective track, employs similar tendencies to our gating effect, with plenty of realtime manipulation to inspire interest.