How to use EQ when you're mastering: discover the tricks the pros use
Get the fundamentals of mastering EQ down with our easy-to-follow tutorial
Probably the most important part of the mastering process, the effective application of EQ to a finished stereo mix is something of an art form. That doesn't mean it can't be learnt, however, which is where this tutorial comes in.
Over the nine steps of our walkthrough below, we'll guide you through a range of tried and tested techniques for correctively shaping the spectral balance of your master with EQ. We're using FabFilter’s Pro-Q 2 for demonstration purposes, but any decent EQ plugin with do - even the one built into your DAW.
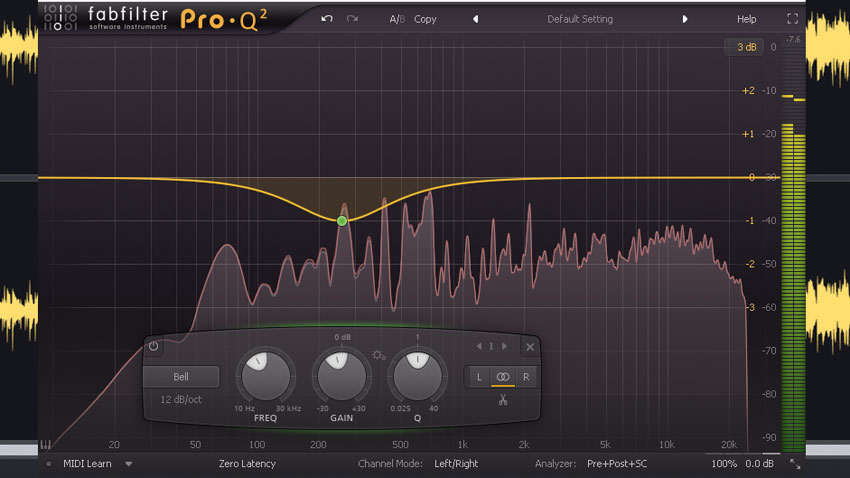
Step 1: A build-up of energy in the lower mids is one of the most common mix issues. If your mix is sounding muddy or boxy, sweep a gentle cut around this region. Sometimes just 1dB of attenuation or less can open up the mix, clear the congestion, and make the lows seem better defined and the highs cleaner.
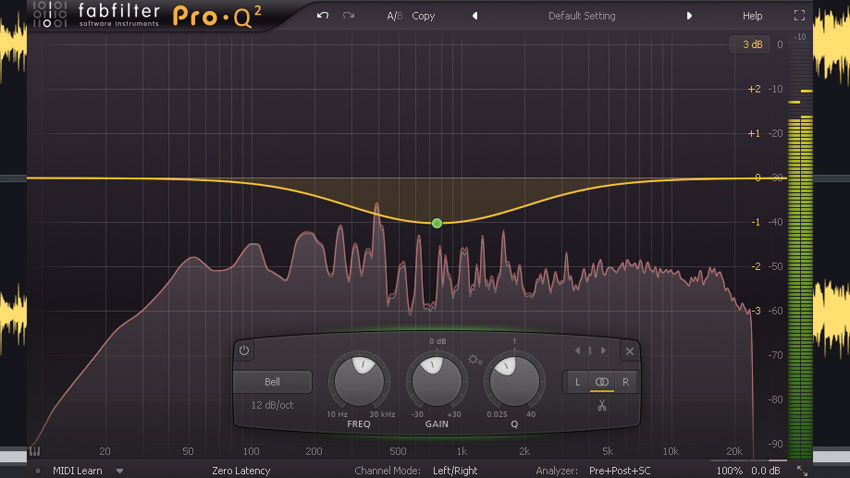
Step 2: If you’re hearing a ‘nasal’ or ‘honky’ character, try a gentle cut around 800Hz-1kHz. Again, keep it pretty subtle: 2dB is a lot in a mastering context. A cut in this region is equivalent to gentle low- and high-shelving boosts once the overall level difference is compensated, creating a gentle, flattering, smile-shaped curve.
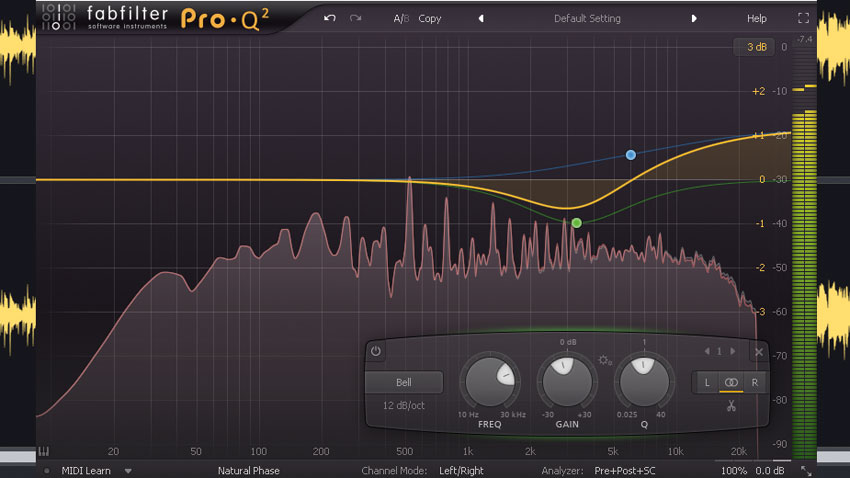
Step 3: Cutting the upper midrange is a great way to reduce harshness and stop the mix from sounding painful at high volumes. If you find that taming the harshness results in a dull and lifeless sound, you could equally try boosting the higher, airier frequencies with a high shelf to compensate.
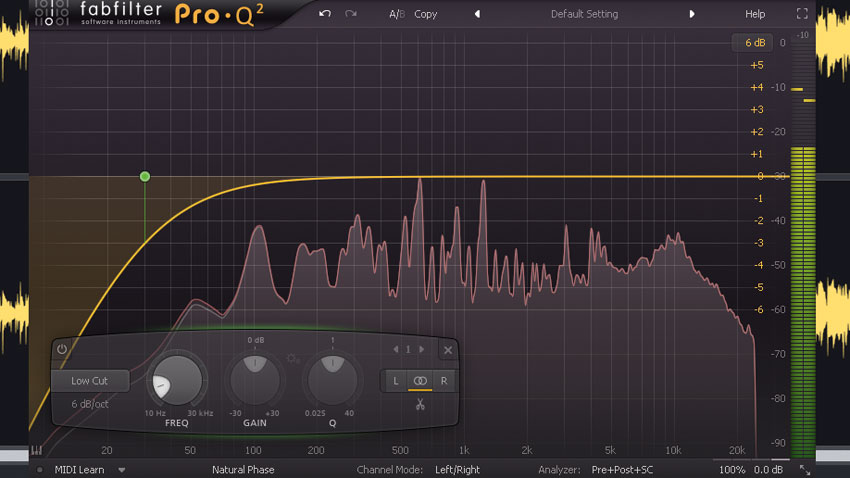
Step 4: If your mix has a lot of energy at 20Hz or below, you might need a high-pass filter. Few monitors go that low, so this is often best judged with a spectrum analyser. Steeper 18 or 24dB/octave slopes can be useful to avoid affecting the audible range, but gentler slopes ease back on the sub bass more naturally.
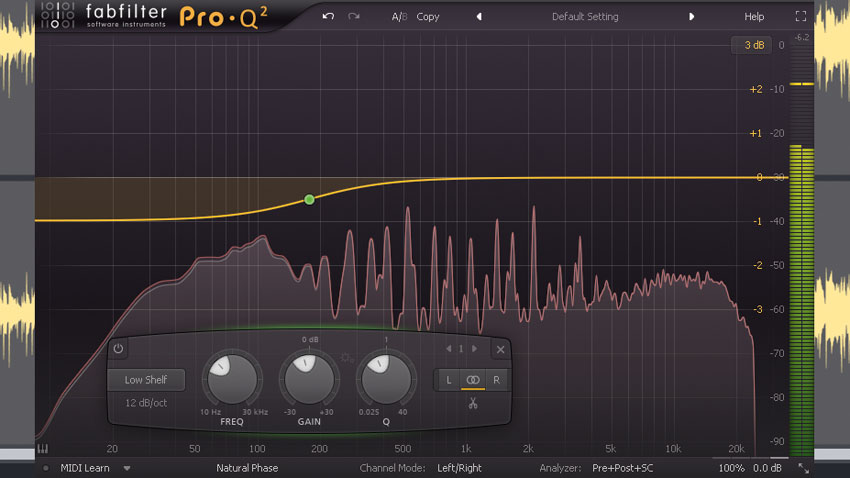
Step 5: Sometimes, you’ll need to tame higher bass frequencies as well as sub bass, in which case a high-pass filter may prove to be too extreme. There’s a ‘yin and yang’ type of effect with EQ: cutting excess low end with a gentle shelf can create the perception of having clearer and brighter mid and high frequencies.
Want all the hottest music and gear news, reviews, deals, features and more, direct to your inbox? Sign up here.
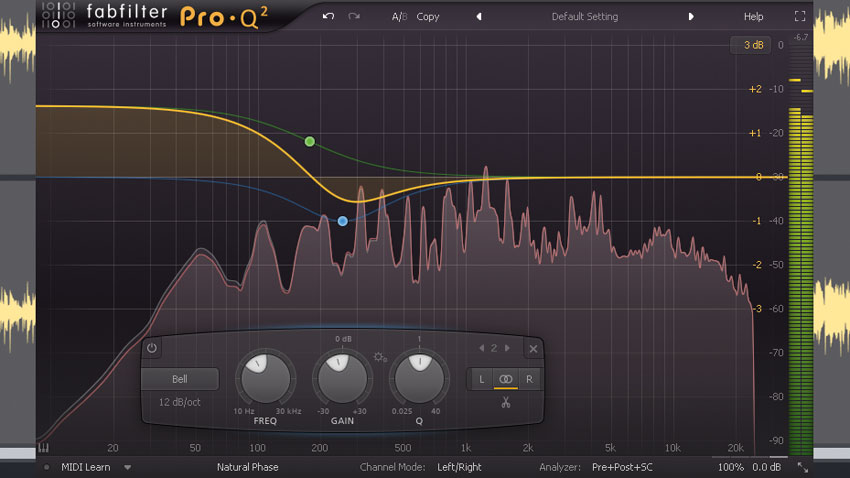
Step 6: Your mix may need extra weight and depth, in which case a low-shelving boost can be just the ticket. Sometimes this will sound better when tempered with a low-mid cut a little higher up - a pre-rise dip (or pre-dip rise) is often pleasing to the ear, and roughly mirrors the curve we created for the high frequencies in step 3.
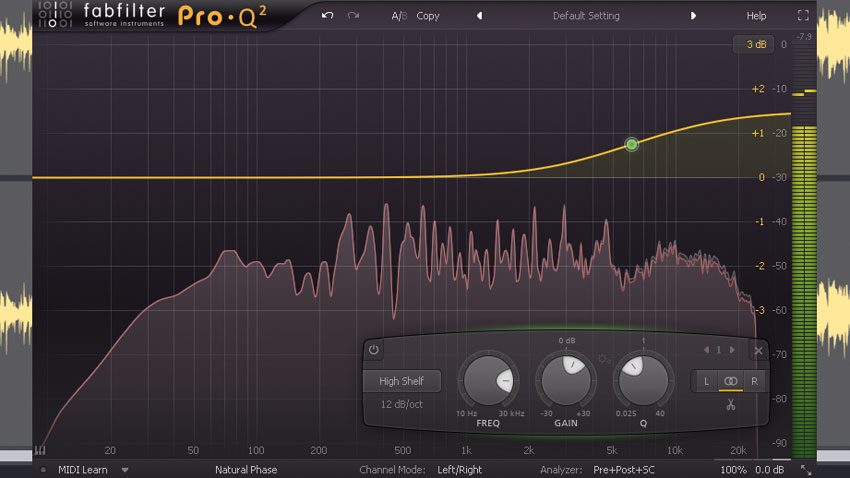
Step 7: A high-shelf boost is the first thing that you can try if your mix needs more brightness and air. Very gentle slopes often work well on full mixes, but if this introduces too much harshness, you could think about trying a steeper slope in order to avoid boosting the upper mid range, or add a cut a little lower down (a pre-rise dip).
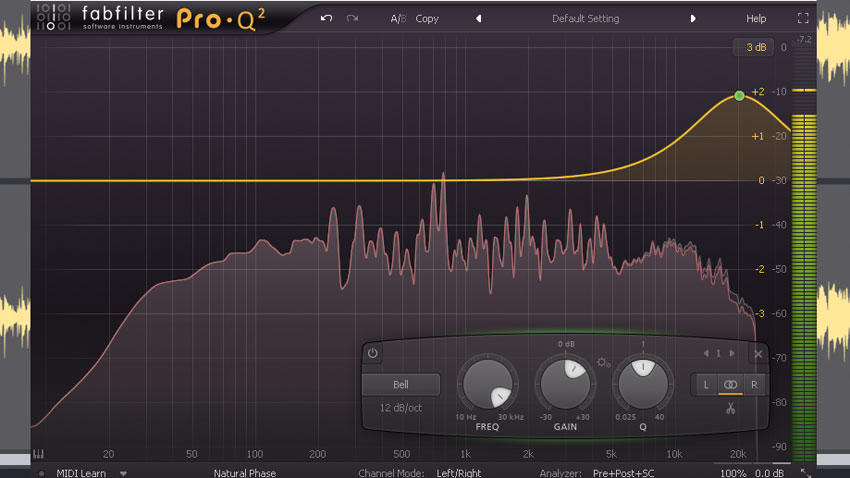
Step 8: Set a bell-shaped band to 20kHz and dial in some boost, then tune the Q or bandwidth to determine how far the boost extends into the upper mids. This can create a very natural sounding ‘Baxandall’ air boost. You can also cut if you wish, which can tame the highest frequencies and create a warmer, more ‘vintage’-sounding presentation.
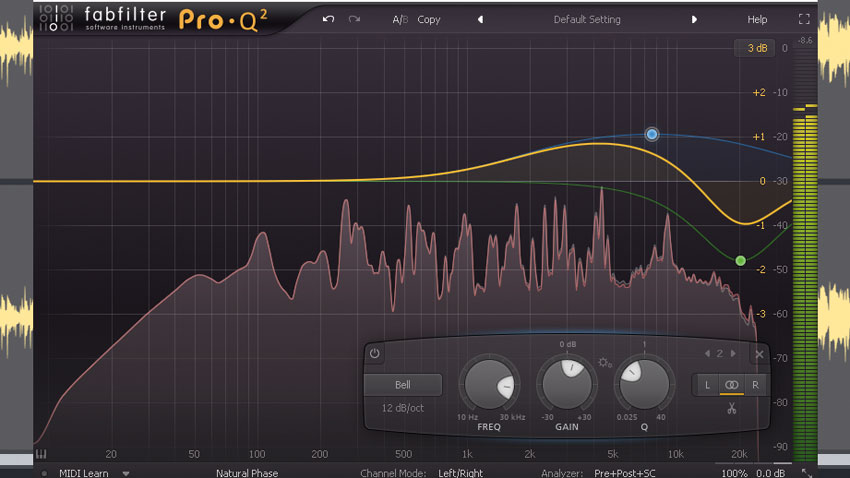
Step 9: Sometimes, the brightness you want isn’t in the highest octave of the mix, but a little lower down instead. A gentle boost at around 6kHz might help create clarity and presence without exaggerating sibilance or making cymbals sound too splashy. Combine this with a gentle Baxandall cut in the highest octave for vintage warmth that still has presence.
Computer Music magazine is the world’s best selling publication dedicated solely to making great music with your Mac or PC computer. Each issue it brings its lucky readers the best in cutting-edge tutorials, need-to-know, expert software reviews and even all the tools you actually need to make great music today, courtesy of our legendary CM Plugin Suite.
