How to strip back FX treatments to gain more space in a mix
It’s not only instrument parts which benefit from thinning out; often, effects treatments sound better when space is created within them…
Want all the hottest music and gear news, reviews, deals, features and more, direct to your inbox? Sign up here.
You are now subscribed
Your newsletter sign-up was successful
MIXING WEEK: It may surprise you to learn that the biggest-sounding mixes are usually those on which the producer or engineer has spent a lot of time thinning out individual sounds and group busses through the use of EQ, panning and other reductive processes.
The fundamental creative principle of less being, in fact, more, is wholly applicable to music production, and In this tutorial, we'll show you how to turn it into practical technique.
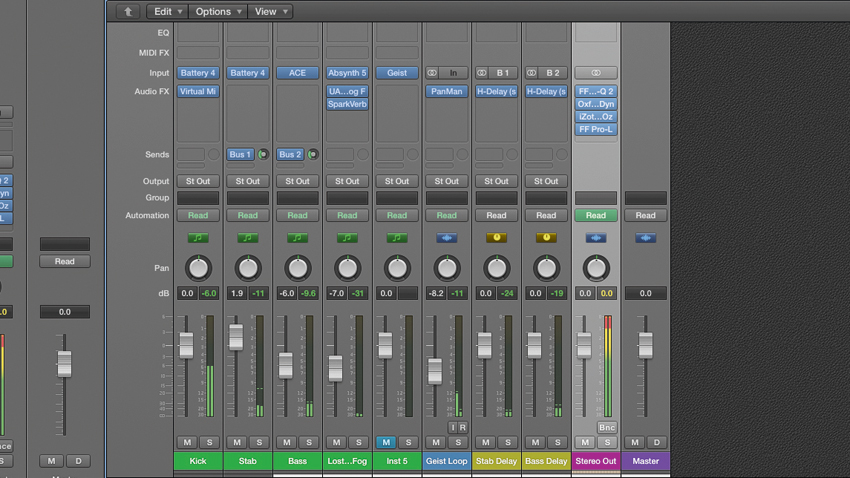
Step 1: We start with a relatively minimal track. Effects-wise, there are separate auxiliary delays on the bass and percussion stab, a lengthy reverb on the ‘Lost In The Fog’ pad and a wandering auto-pan treatment on the bounced Geist loop.
Article continues below 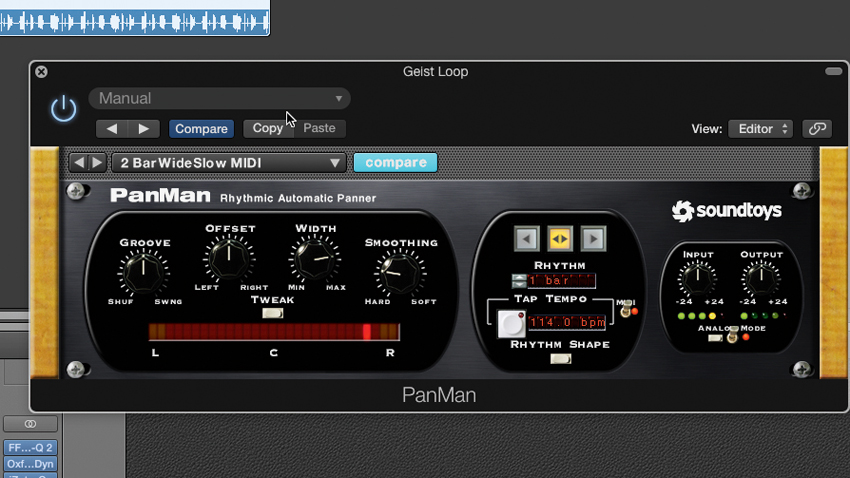
Step 2: We start with the Geist loop. The Auto-pan movement is wandering freely at the moment, not giving the part any shape. We sync the tempo to one bar and use hard panning so the signal jumps from left to right, missing out the middle and giving more space to the central area.
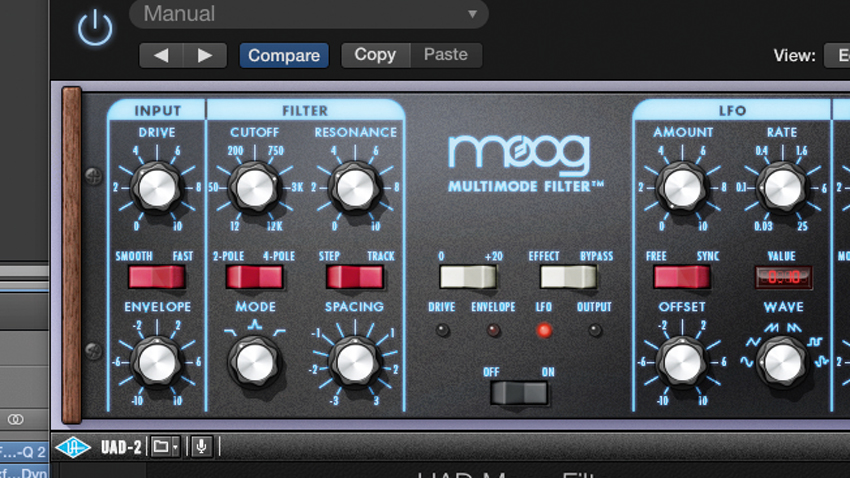
Step 3: The pad is providing a useful layer but it’s far too bright and dominant. We open the UAD Moog Filter treatment on its first effects insert and drop the frequency cutoff of the low-pass filter to around 2kHz. This makes it more distant and the mix gains more space.
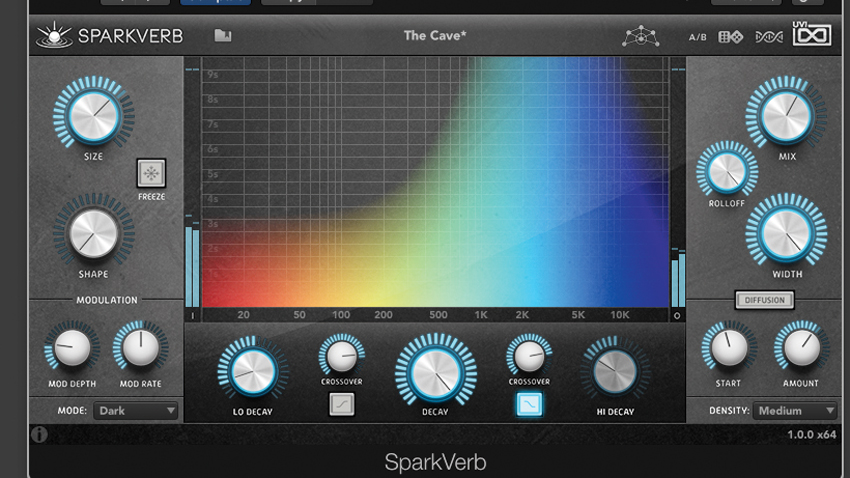
Step 4: Conversely, we want more air in the pad’s reverb, so that it ‘floats above’ the mix. So, we open UVI’s Sparkverb, decrease Lo Decay and move the Crossover frequency between Low and Hi up to 400Hz. We then boost the Wet balance. Now the reverb is thinner but shinier.
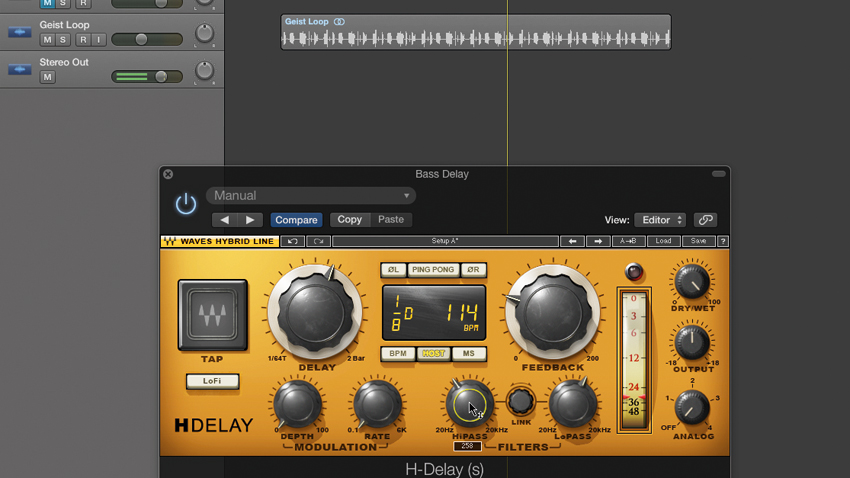
Step 5: The delay on the bass is effective, but it’s taking up too much space. We employ the low and high-pass filters with settings of 258Hz (HPF) and 1.13kHz (LPF). This narrows the frequency response of the bass delay, preventing the mix becoming bloated.
Want all the hottest music and gear news, reviews, deals, features and more, direct to your inbox? Sign up here.
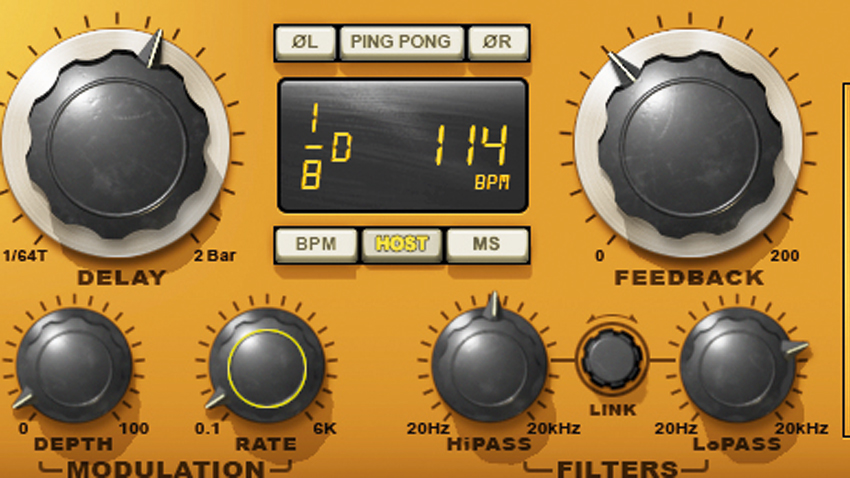
Step 6: Lastly, we look at the delay on the percussive stab. We use the same ‘narrowing technique’ but go further, with a high-pass filter at 700Hz and a low-pass filter at 3.5kHz. We introduce some pitch-wobbling modulation via the Mod Depth and Rate dials. We can now increase Feedback.
MusicRadar's Mixing week is brought to you in association with Softube. Check out the Mixing week hub page for more mixing tutorials and tips.
Future Music is the number one magazine for today's producers. Packed with technique and technology we'll help you make great new music. All-access artist interviews, in-depth gear reviews, essential production tutorials and much more. Every marvellous monthly edition features reliable reviews of the latest and greatest hardware and software technology and techniques, unparalleled advice, in-depth interviews, sensational free samples and so much more to improve the experience and outcome of your music-making.
