How to make macro assignments that matter
A common feature on many soft synths of the last few years, these versatile controls can really open up your patches to live performance
Your keyboard’s mod wheel is one universal modulation source that can be assigned to affect multiple parameters at once, but many synths also provide macro control knobs. You can assign multiple parameter moves and custom ranges to one macro knob, enabling you to tweak many different global changes with a single mouse twist. You could, say, hook up a macro to fully open the filter cutoff, while simultaneously increasing amplitude envelope decay, sustain and release, and reverb and delay mix amounts. We’ll explore this approach using Xfer Records Serum in the walkthrough below.
Macros also make the process of automation more efficient. Hook up a single macro to alter several parameters at once, then draw in the motion of that one knob on your DAW’s timeline.
Many sound designers preassign parameter changes to macros, which can be interpreted as suggestions for how to edit the patch. A well-designed preset could offer many variations for you to instantly shape. If you’re designing your own sounds, set up labelled collections of go-to controls for other preset surfers, to remind them of the most important sound-altering features.
Macros can also be assigned to your MIDI keyboard’s rotary controls. This helps bridge the gap between software power and hands-on control - get away from fiddly mouse tweaks and perform your patch away from the computer screen.
To discover more synth programming techniques, pick up the September 2018 edition of Computer Music.
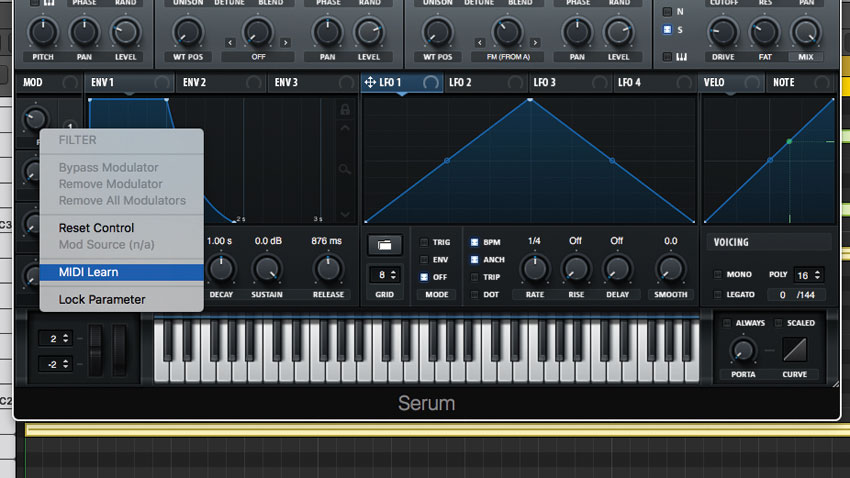
Step 1: Load Xfer Serum and the Pads » PD D_Pad 2 preset from the synth’s factory library. To trigger the preset, we’ve recorded a sustained MIDI chord in A#min. Macro 1 (labelled Filter) is already mapped to filter Cutoff. To make things more expressive and ‘playable’, we right-click and map this macro to one of our MIDI controller’s knobs via MIDI Learn.
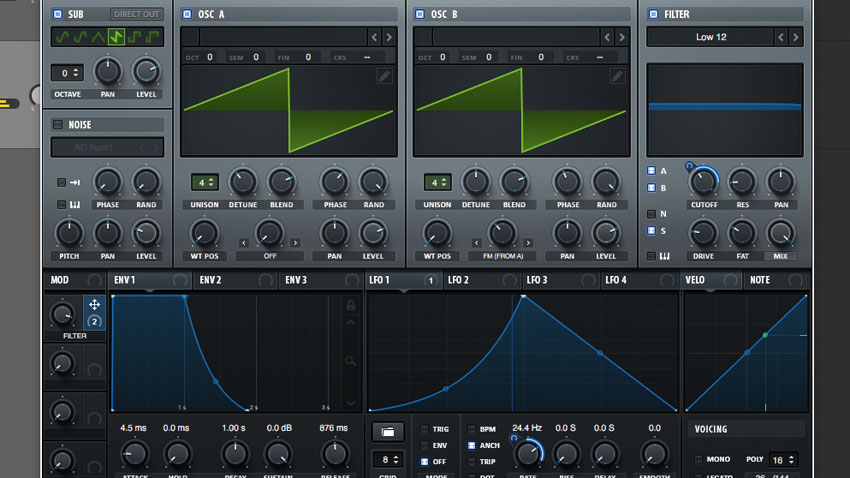
Step 2: Let’s also use this macro to wind up filter ‘wobble’ speed. Drag LFO 1’s mod ‘crosshair’ to the filter Cutoff frequency knob - LFO 1 now modulates the filter frequency. Drag the Cutoff’s mod ring down to reduce the mod amount to 38. Next, detoggle LFO 1’s BPM switch, then drag Macro 1’s mod ring over to LFO 1’s Rate knob to assign it.
Want all the hottest music and gear news, reviews, deals, features and more, direct to your inbox? Sign up here.
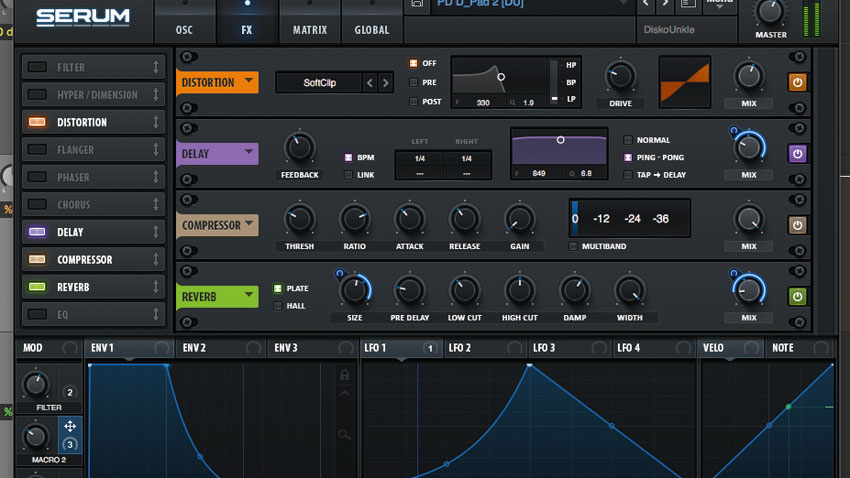
Step 3: Over on the FX page, the Reverb module is already engaged - pull Mix down to around 15%, then tell Macro 2 to control reverb Mix and Size. After that, turn on the Delay, change Time to 1/16 for both Left and Right channels, then direct Macro 2 to the delay’s Mix. A quick twist of Macro 2 now transforms the sound into a wash of ambience.
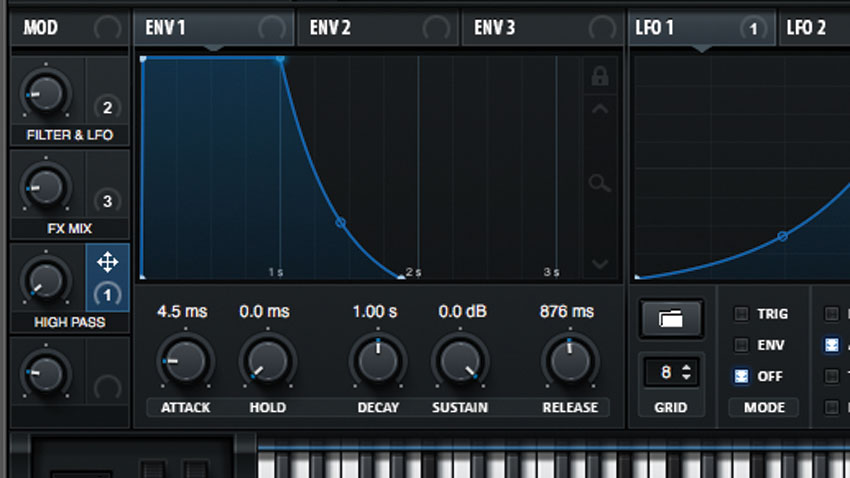
Step 4: Next, flip on the Filter FX effect, set it to a 24dB/oct high-pass filter (High 24 mode), and direct Macro 3 to control its Cutoff. Once Macro 2 (renamed FX Mix) is increased, we can sweep the ambient ‘wash’ out to thin air using Macro 3 (labelled High Pass) - ideal for trippy transitions!
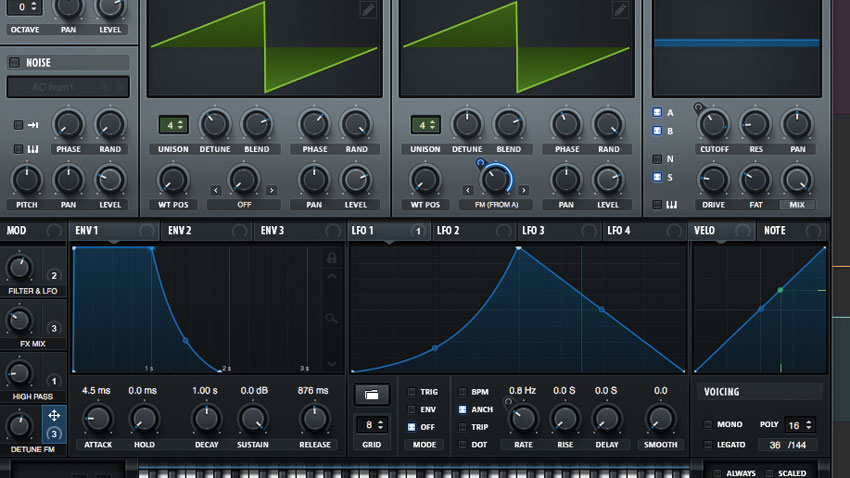
Step 5: Back on the main Osc page, let’s make things more twisted by using Macro 4 to detune both oscillators via their Fine controls. Elsewhere in this patch, the frequency of Osc B is being modulated by Osc A, so assign Macro 4 to Osc B’s Warp knob to sweep this open. Rename Macro 4 to Detune FM.
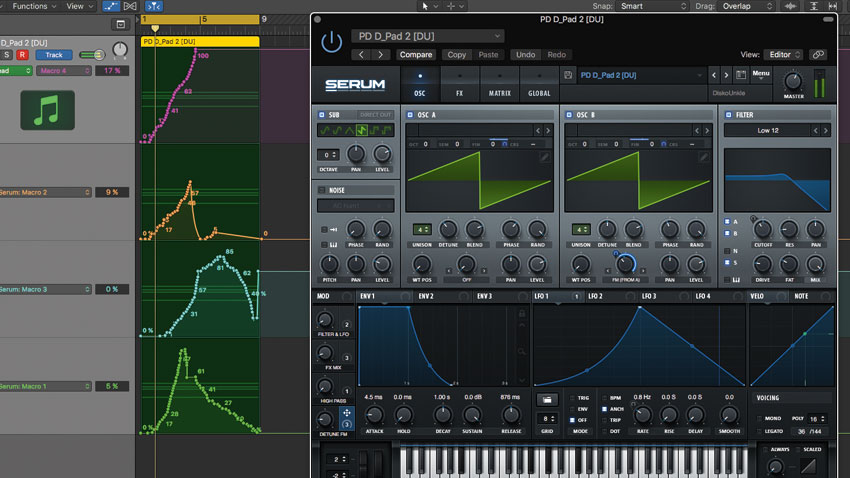
Step 6: With our quartet of macros set up, we also assign 2, 3 and 4 to MIDI rotaries. Name them so that you can tell what they do when you revisit the patch later - remember to save your preset! You can then proceed to automate all four macros, transforming the sound from a warm pad to a gritty FM-style tone.
Computer Music magazine is the world’s best selling publication dedicated solely to making great music with your Mac or PC computer. Each issue it brings its lucky readers the best in cutting-edge tutorials, need-to-know, expert software reviews and even all the tools you actually need to make great music today, courtesy of our legendary CM Plugin Suite.
