How to make beats with the Roland Cloud TR-909 drum machine plugin
The big R's impressive software emulation explained
As you’d expect, Roland knows a thing or two about how the TR-909 drum machine should sound, and has rolled that knowledge into its own plugin version, available through the Roland Cloud subscription service. Let’s fire it up and have a play.
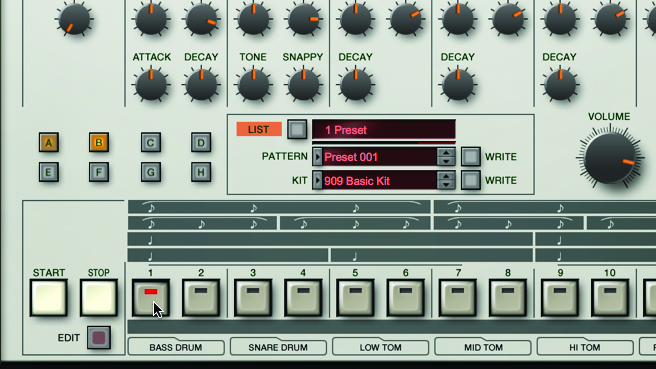
Step 1: There’s a familiar row of 16 keys along the bottom, just like on the real deal. Depending on how they’re used, these keys are associated with pattern steps or various drum voices. Go ahead and give each of them a click or tap. Note that Bass, Snare, and each of the Toms have two keys – the leftmost for accented volume.
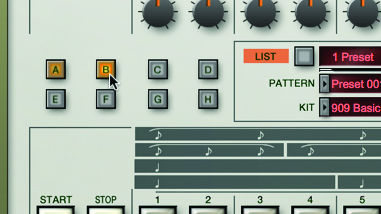
Step 2: Those sounds are achingly familiar, if a bit vanilla. For now, note that clicking the Start key or engaging your DAW’s transport will set the currently selected pattern into motion. Note the flashing A button on the left side of the GUI: this is the current pattern variation being played. This pattern has two variations. Press the B button to hear the other.
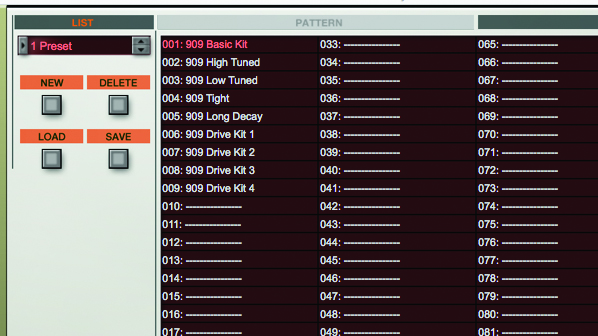
Step 3: If you look to the section just above the Main keys, you’ll see a browser section, where you can select presets banks, patterns and kits. Currently, the 909 Basic Kit is selected. This is fine. We want to build our own pattern from the ground up, so we’ll need to either create or select an empty pattern. Go ahead and click the List button.
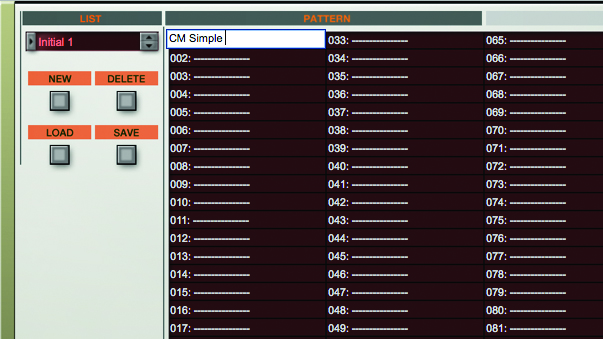
Step 4: Here, we see the current preset’s various Kits. If we click the Pattern tab up top, we’ll see that there are 50 patterns associated with this preset. If we click the New button in the upper left, this list clears as a new preset starts. We select the first pattern slot to load it into our 909. We can then rename the new slot.
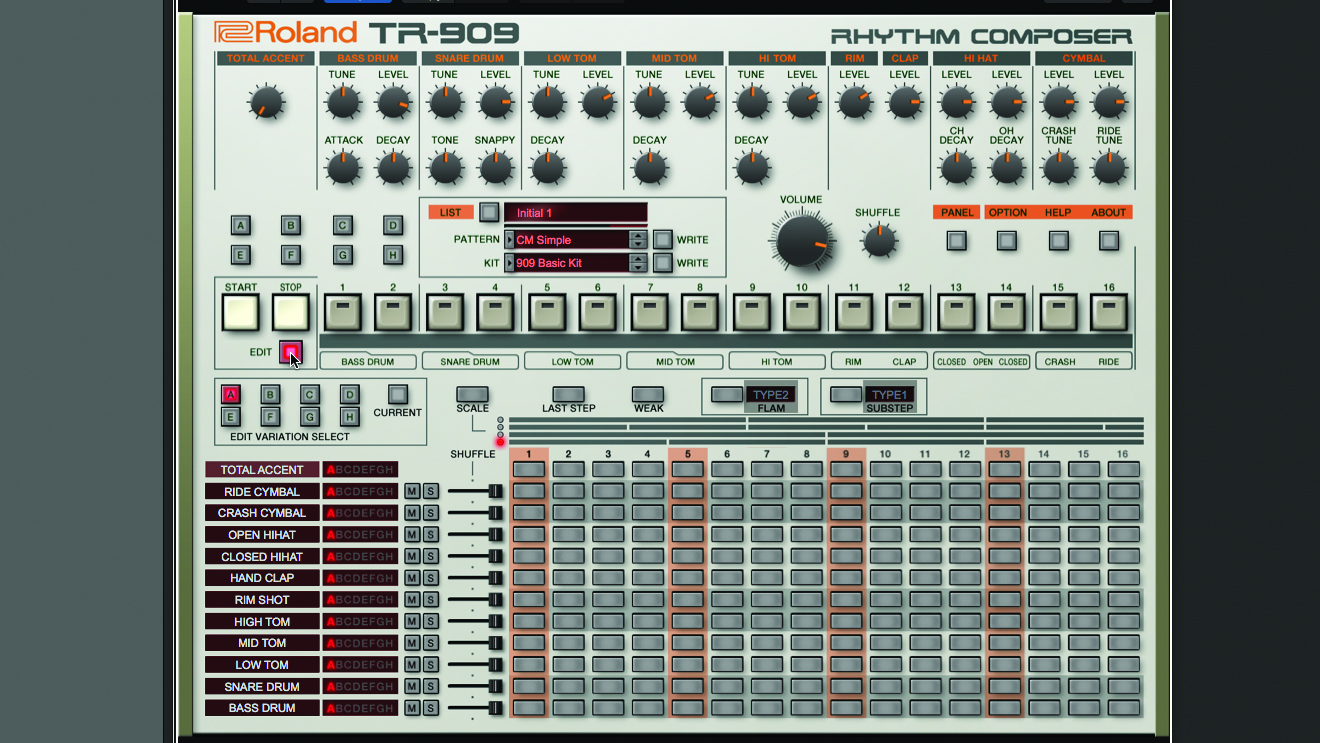
Step 5: Closing out the List window, we now have a blank pattern with which to play. We can trigger the various drums used in our kit using the onscreen keys or an attached MIDI controller. However, we’ll create our pattern using the Editor – click the Edit button. The various drum sounds are shown in a vertical column on the left.
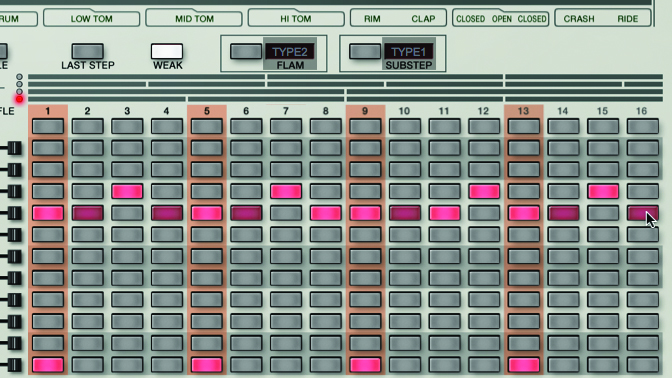
Step 6: The steps are, of course, represented by horizontal rows, one for each sound. Let’s click every fourth button in the Bass Drum row for a bland four-to-the-floor beat. Let’s add some hi-hats. To add dynamics, click the Weak button, then click on the steps you’d like to be played at a lower level.
Want all the hottest music and gear news, reviews, deals, features and more, direct to your inbox? Sign up here.
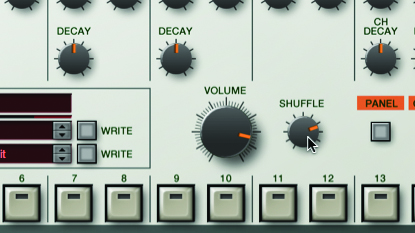
Step 7: We add a few more drum hits to our groove, including a rather active snare pattern. To really make it groove more, though, we’re going to need to add a bit of that ol’ 80s drum machine swing. We’re going to take the easy way out, simply cranking the Shuffle knob up to a rather pendulous +58.
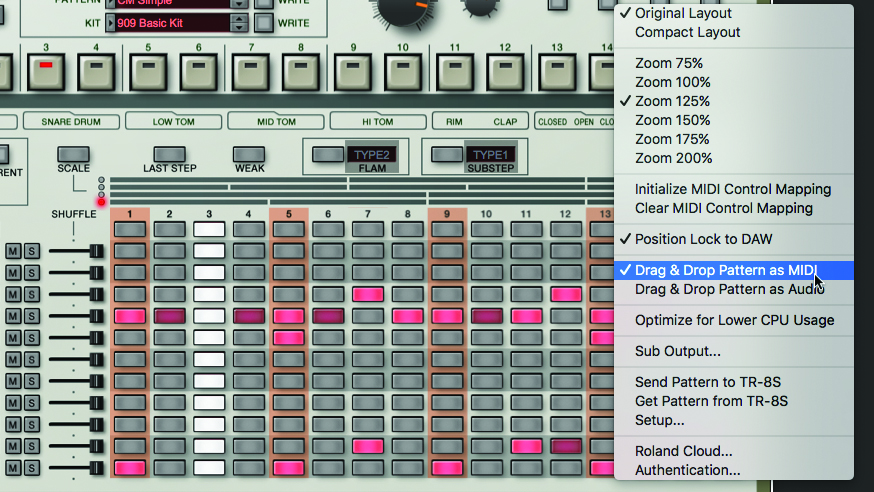
Step 8: We can’t resist using the sound section controls to tweak our drum sounds a little. That Snappy knob is hard to resist. Note that you can save a kit with any changes you make. Once you have a groove you like, you can write that to your preset, too. Click Option to allow both MIDI and audio clips of your patterns to be dragged right from the plugin.
Computer Music magazine is the world’s best selling publication dedicated solely to making great music with your Mac or PC computer. Each issue it brings its lucky readers the best in cutting-edge tutorials, need-to-know, expert software reviews and even all the tools you actually need to make great music today, courtesy of our legendary CM Plugin Suite.
