How to create seamless loops in Logic Pro X
Learn how to get a perfect loop in Apple's DAW, every time
For composers and sound designers working in music for games, being able to create seamless loops is a skill that’s used often. Loops are also great for electronic musicians wanting to perform their music live or for creating a collection of musical or sound effect assets to use in projects at a later date. You may also need to create loops for sample packs and libraries, two significant income stream areas for many musicians.
If you’ve ever tried to create a loop by exporting a range of audio from Logic, you have likely noticed that, while everything sounded fine within Logic Pro, the experience was different once the audio was played back in another application.
The reason for this is that Logic Pro (and any other DAW for that matter) is secretly fading the end of the loop into the beginning to create the illusion of a seamless loop. So, in order to create a loop that won’t have any pops or skips, a file needs to have the tail ‘baked’ into the beginning, so that the beginning matches the end, creating a smooth transition.
In this article, we’ll be giving you a step by step guide to creating seamless loops from an unedited performance. We will cover everything from cleaning up and quantising your audio in Logic Pro to exporting your files. By the end of the guide, you’ll be a total master in the art of the looping. Let’s dive in!
Seamless looping in Logic Pro
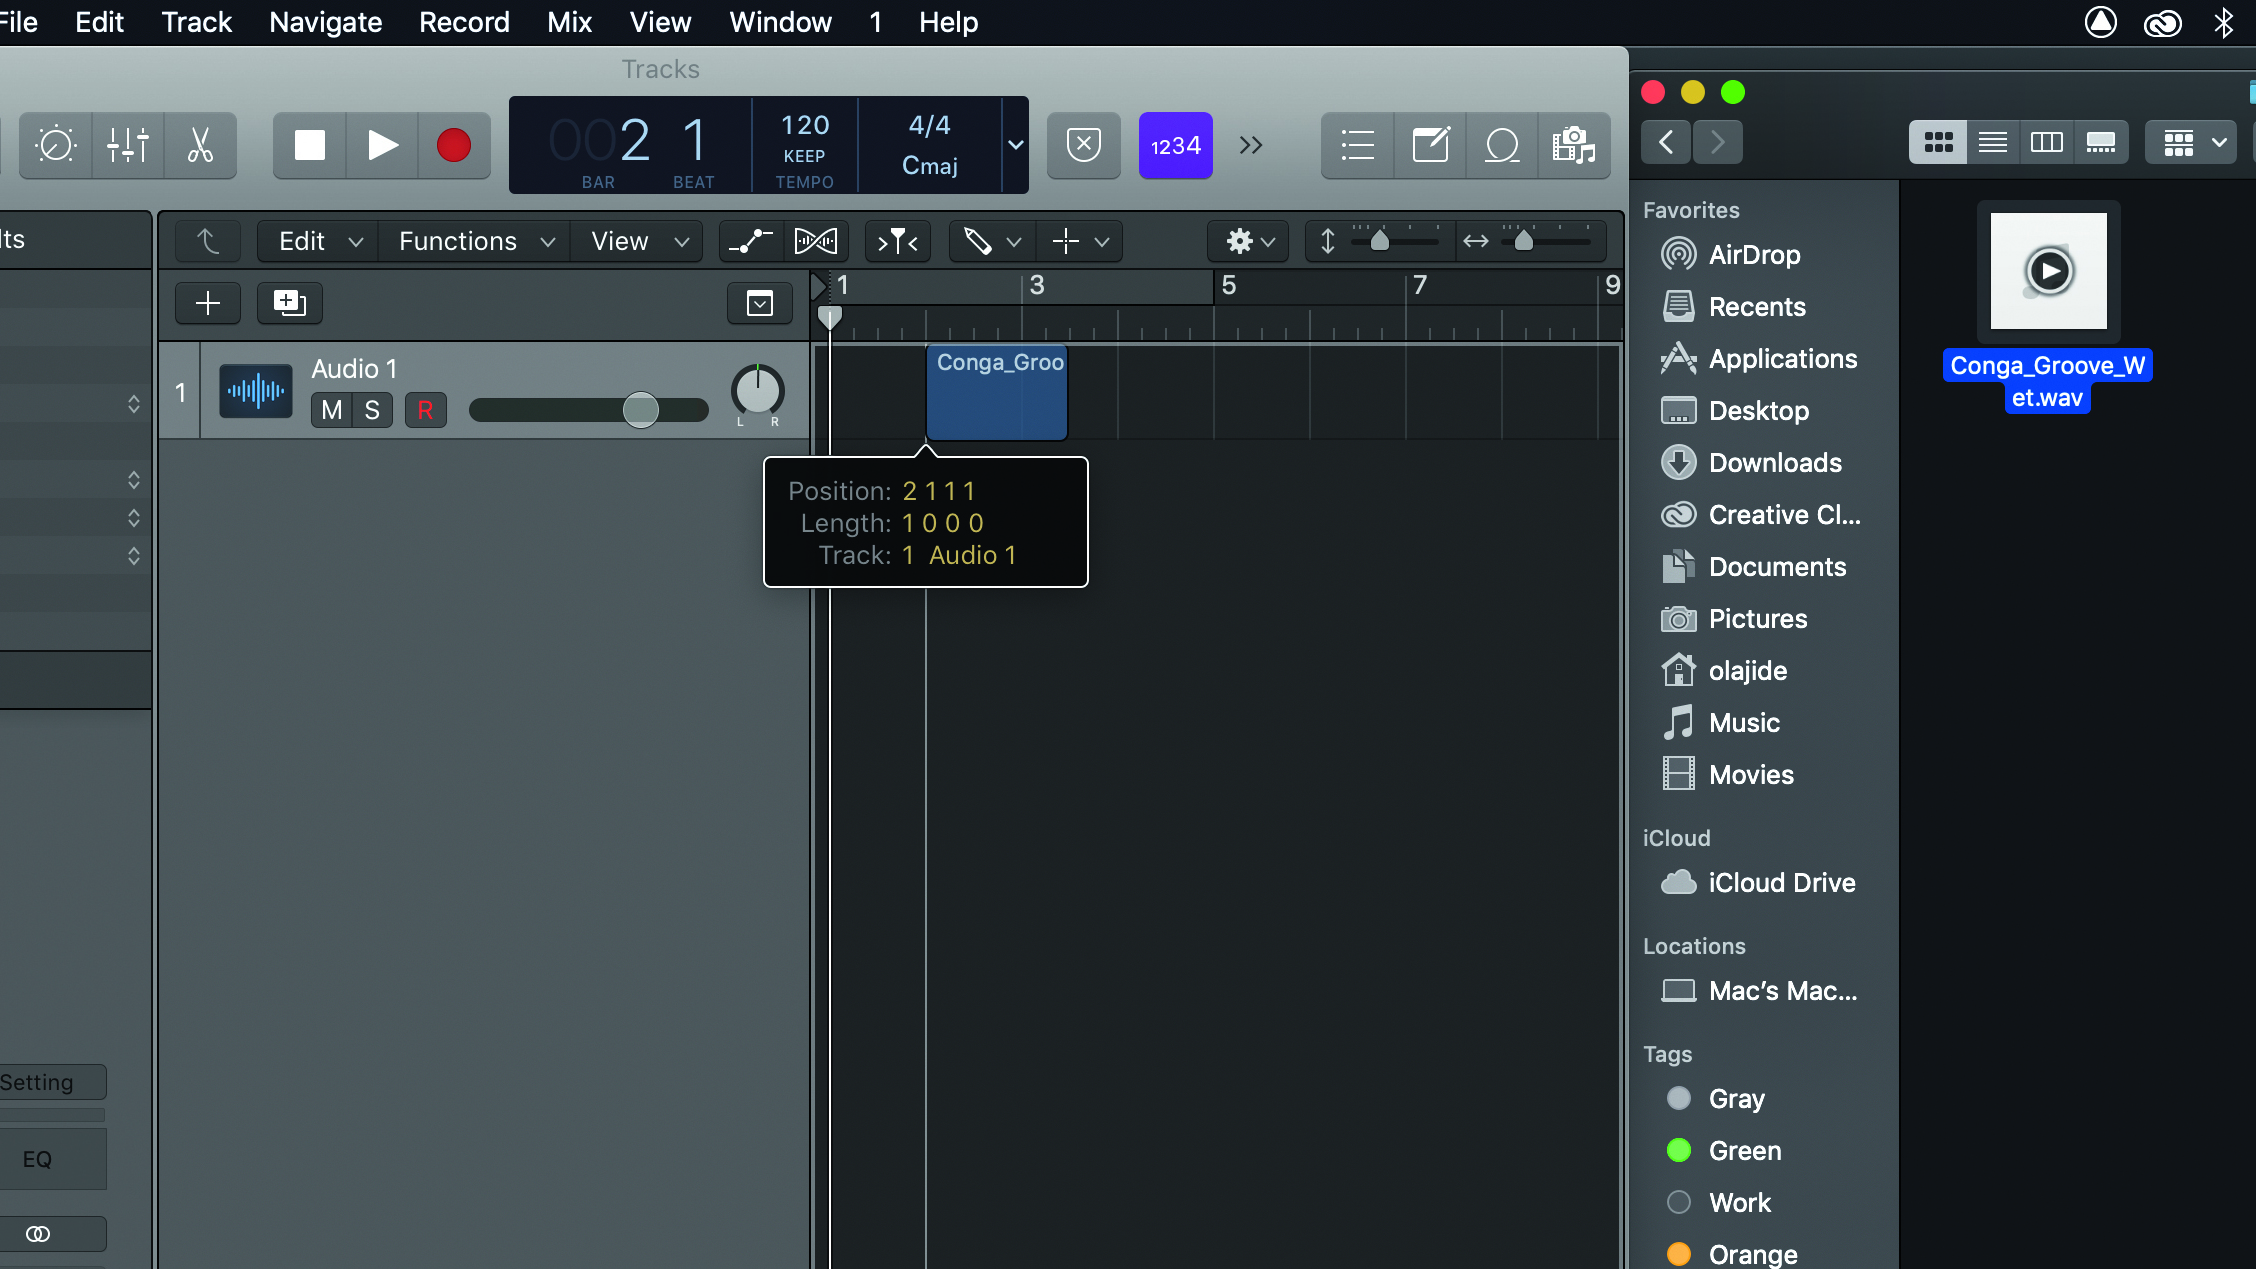
Step 1: Start by importing your material into Logic. There are a few ways of doing this – each method having its own benefits – so we will cover them all. The first method is straightforward enough: simply navigate to the folder containing your audio material, then drag and drop the audio file or files onto an audio track in Logic Pro.
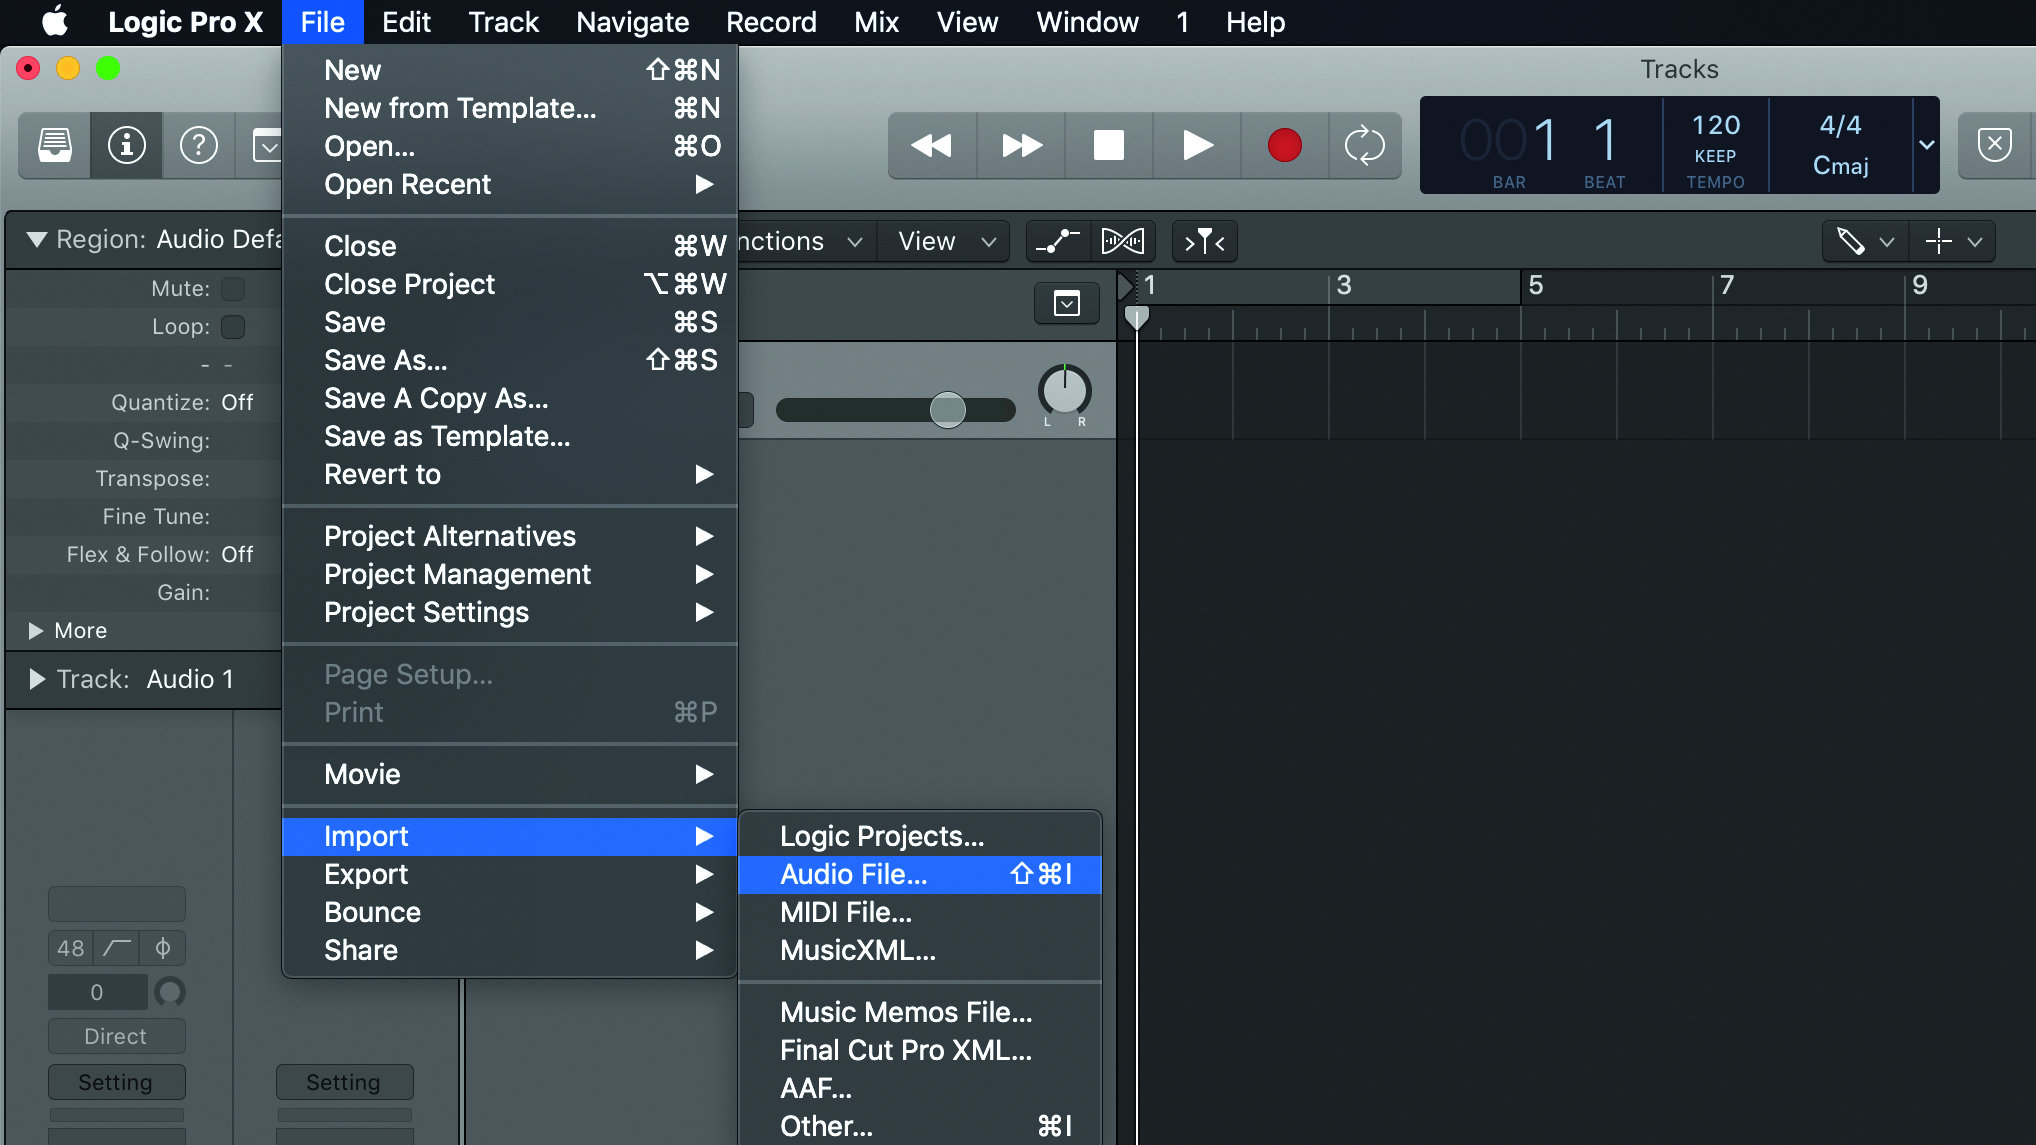
Step 2: The second method is via the File menu. Navigate to this menu and choose File>Import Audio File (or alternatively use the Command+Shift+I key command). Find your material and press Open. This method can seem slower at first but when you realise that it’s the only method with a dedicated key command, the benefits are obvious.
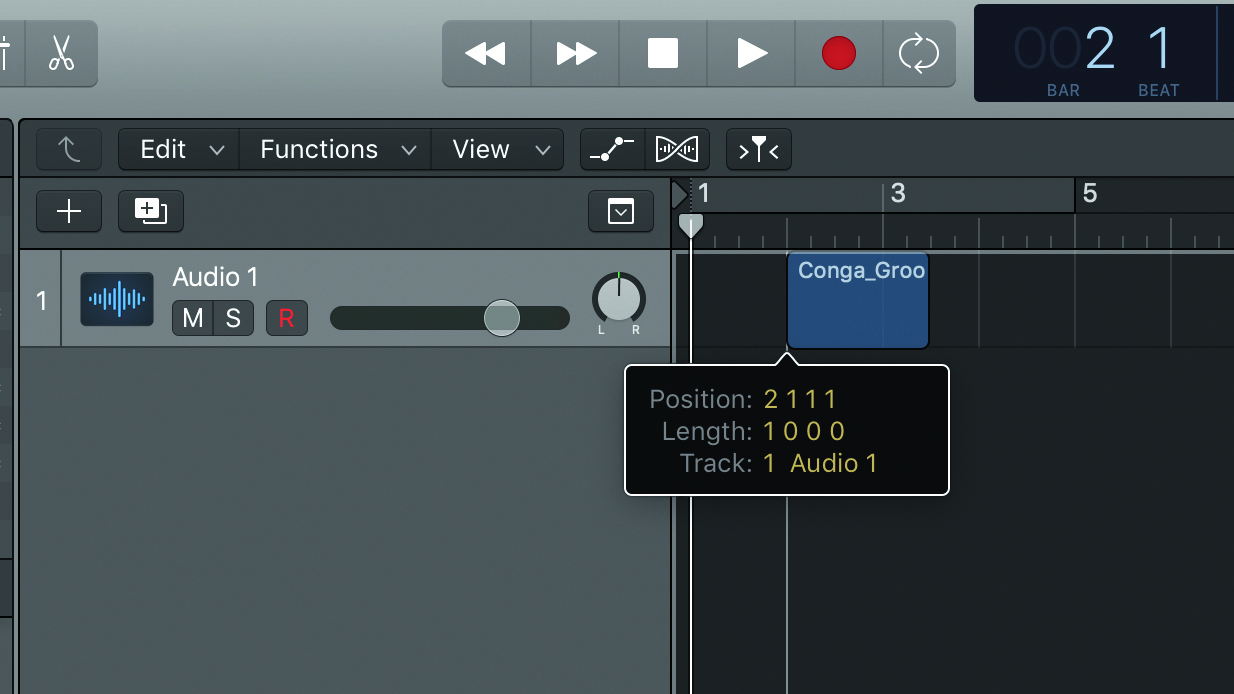
Step 3: Possibly the least known method of importing audio is using the Pencil tool. With the Pencil tool selected, Control+Click or Right Click on an empty audio track and choose Add Audio File. Then follow the steps previously mentioned in other methods to import. This is a great method to use if you want to import audio at a specific location.
Want all the hottest music and gear news, reviews, deals, features and more, direct to your inbox? Sign up here.
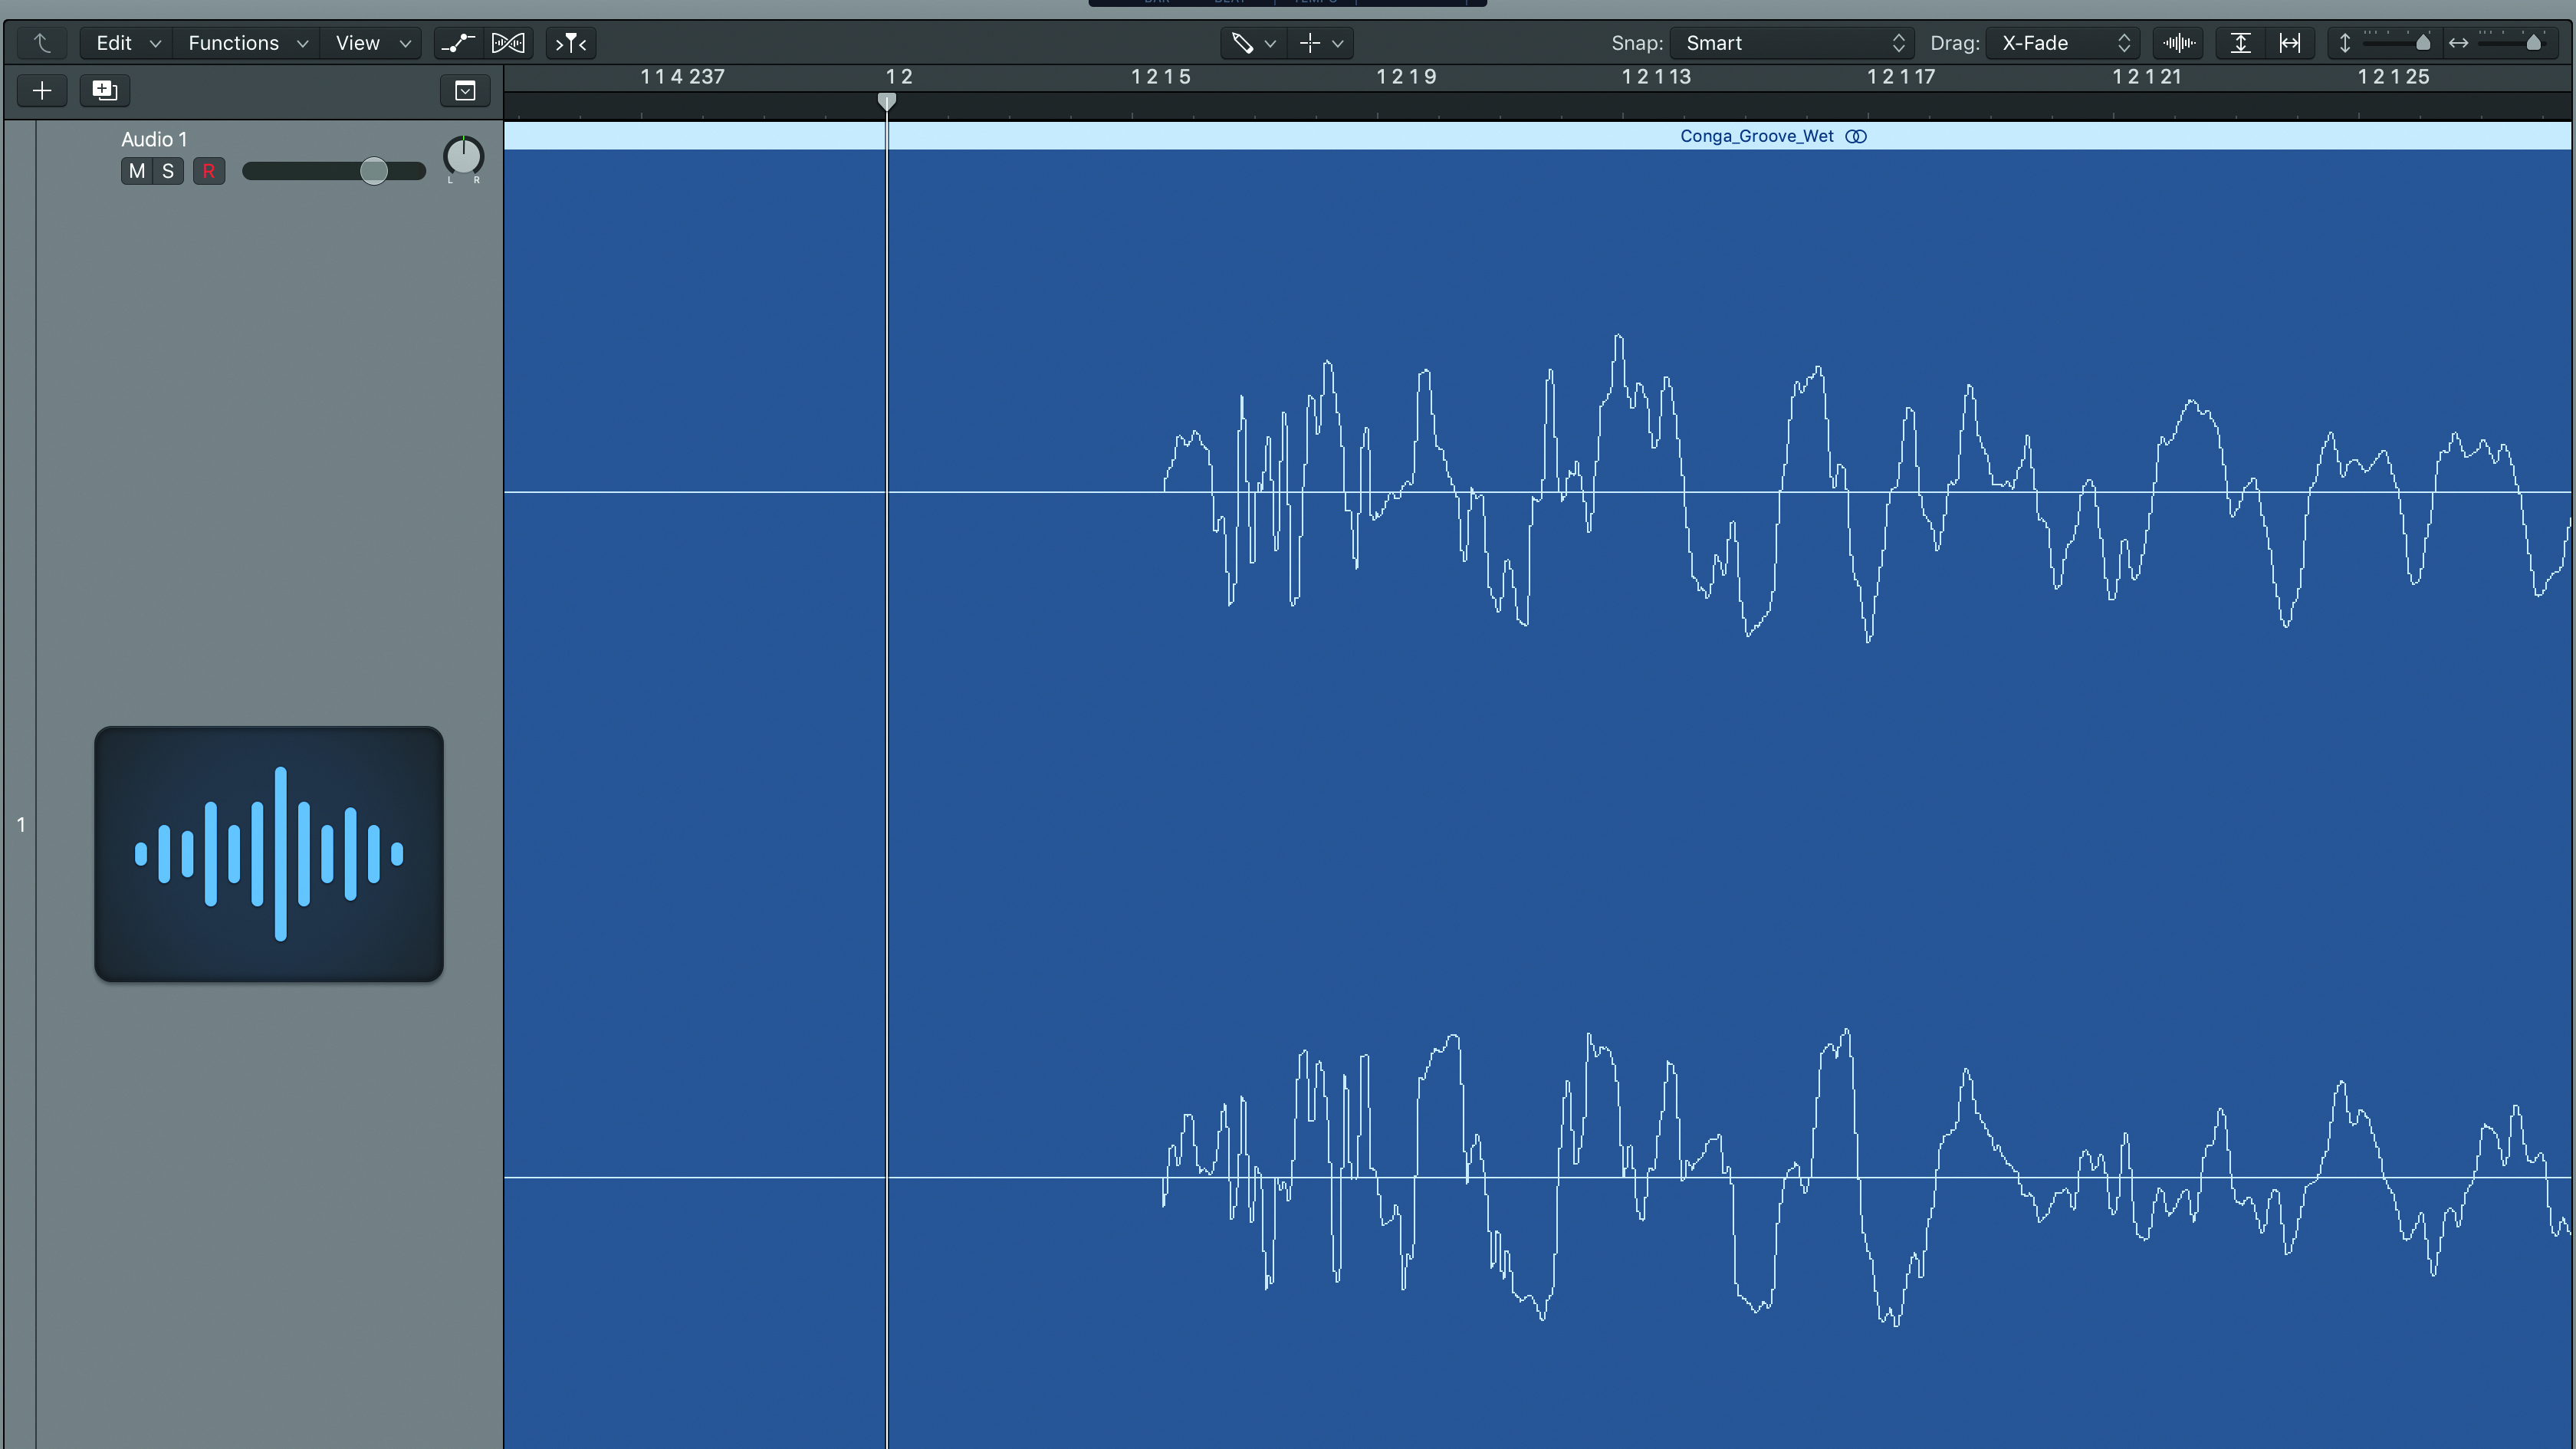
Step 4: If the material you’re working with is rhythmic in nature or has any obvious transients, it’s important to check the timing of the performance to ensure the audio sounds natural when looping. In our example, we can see that the second beat is a little bit late so that will need cleaning up, which we will do in the next step.

Step 5: Carefully fix any transients that are noticeably off the beat by re-aligning them using the Flex tool. Turn on Flex mode by either clicking on the Flex icon or with the Show/Hide Flex key command; Command + F. Next you will turn Flex on for the selected track or audio by clicking the Flex icon on the track itself.
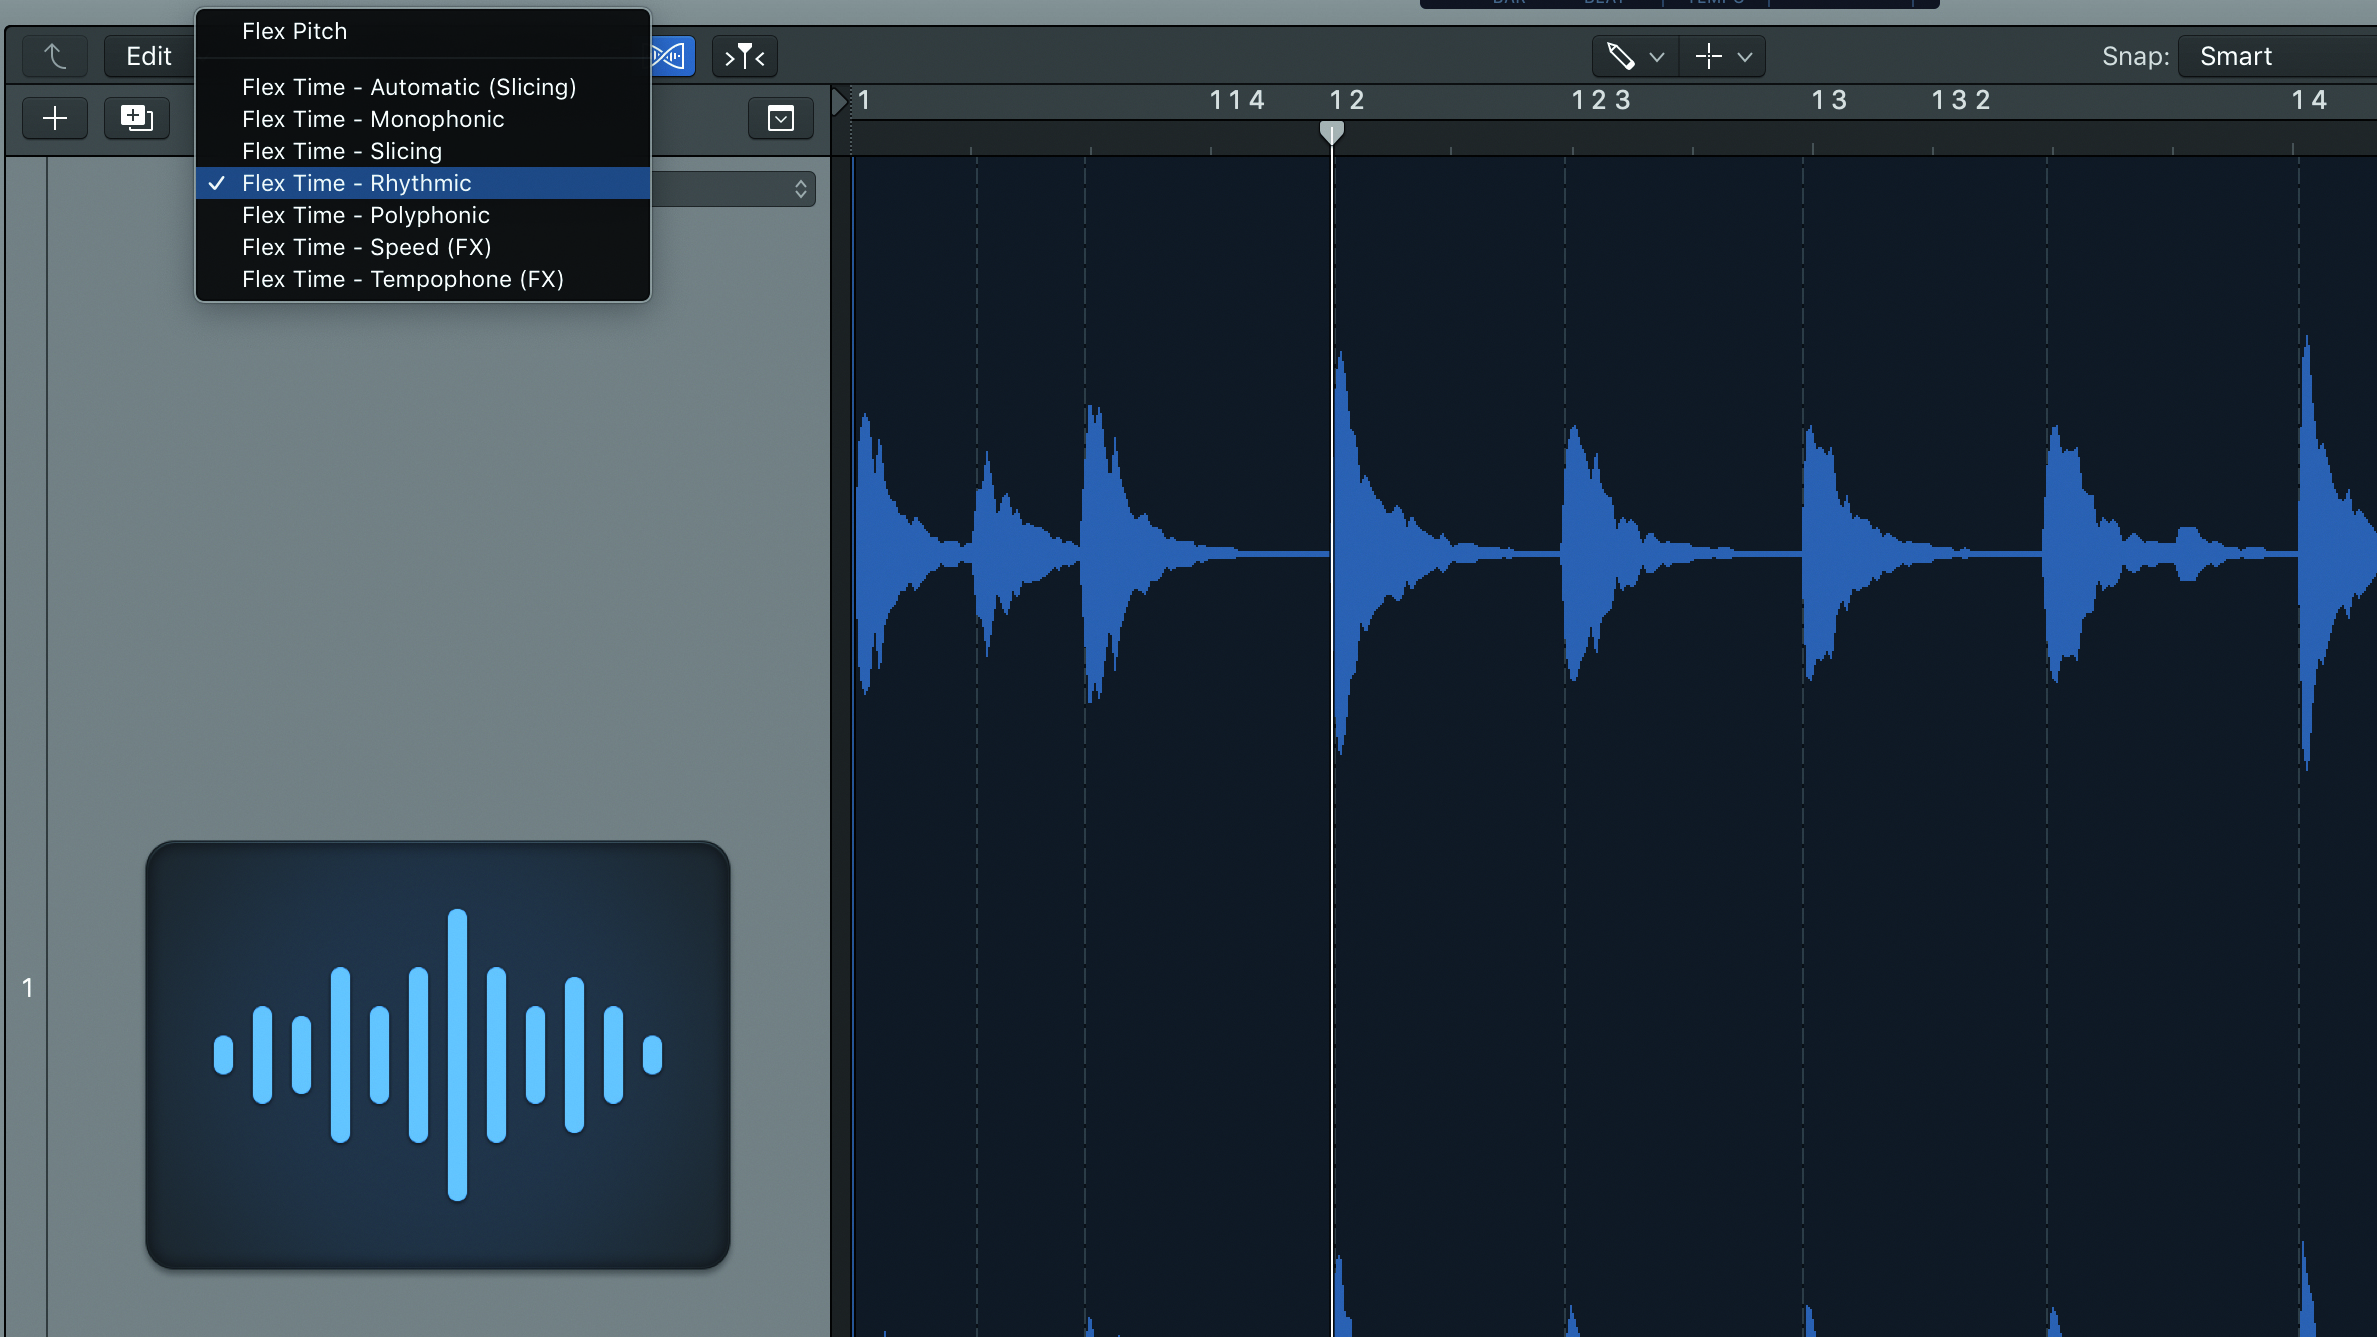
Step 6: Choose a Flex Time algorithm from the track’s menu. Each algorithm is optimised for a specific type of material so it is worth experimenting and listening to the results as you edit if you are unsure or inexperienced. For my purposes, we will be using Rhythmic mode which works best with unpitched, rhythmic material like drums or percussion.
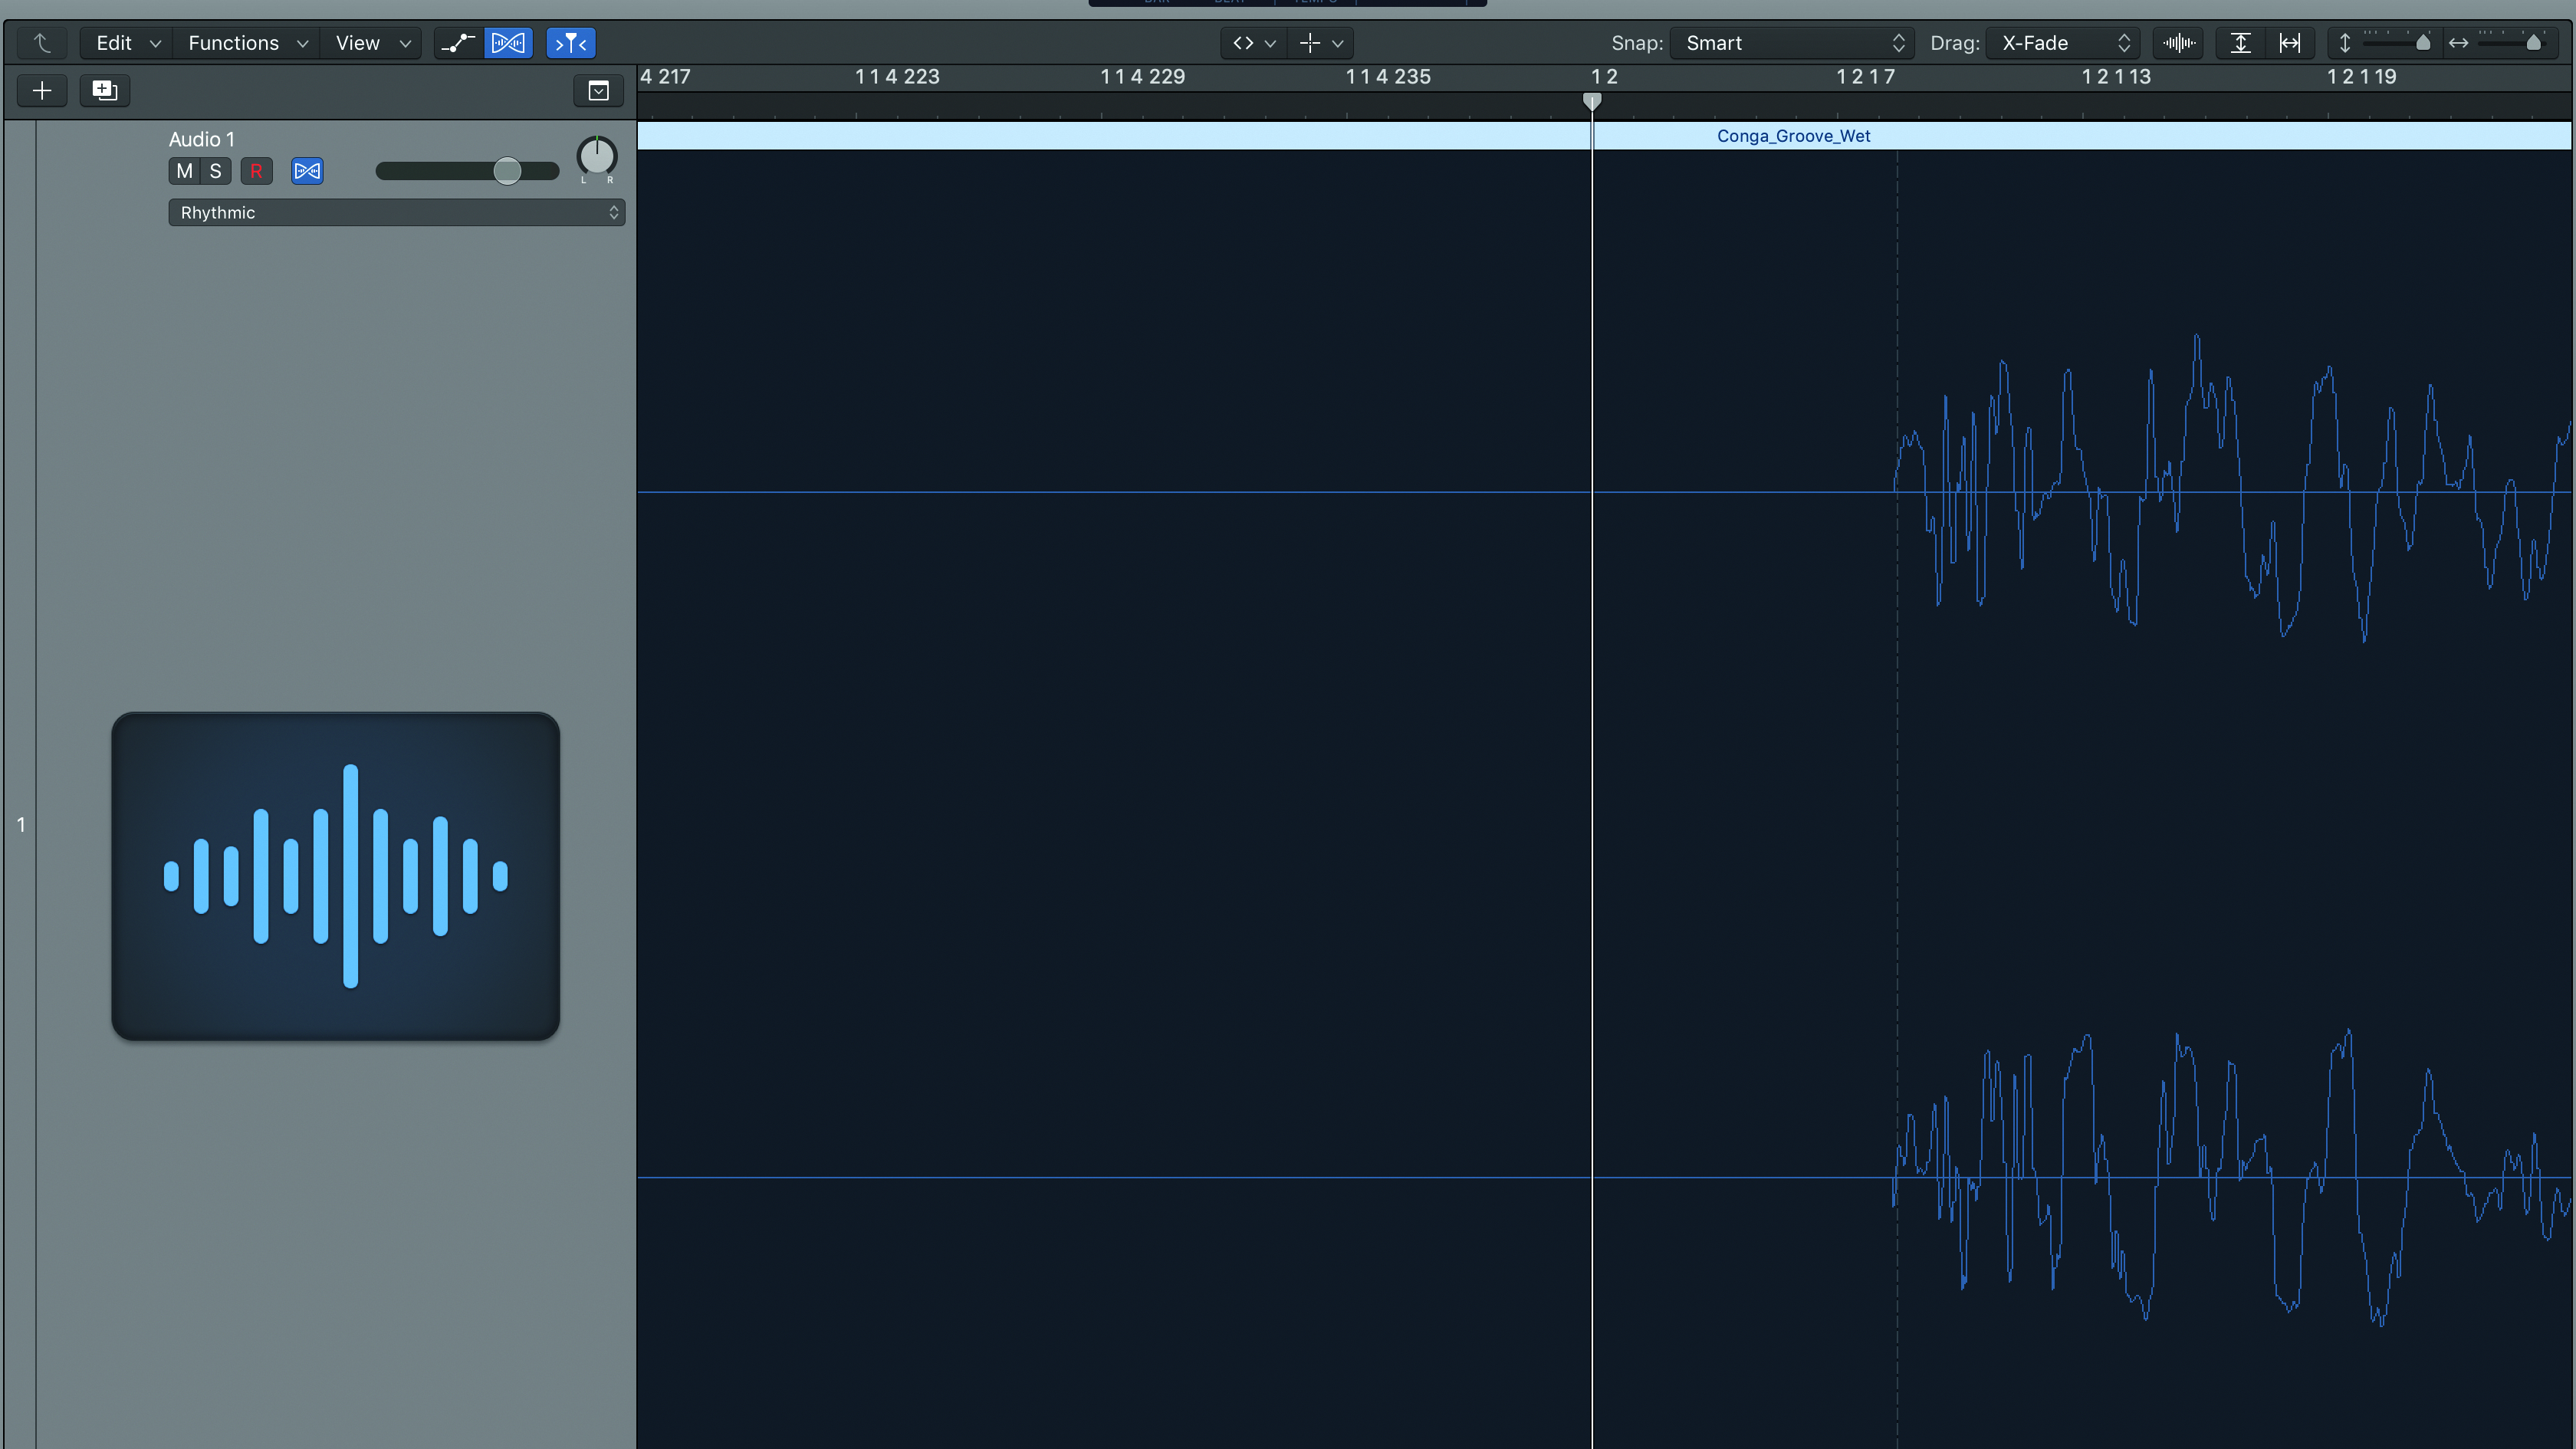
Step 7: Using the Flex tool, align the most important transients so that they’re positioned on the beat. Pay special attention to the very first beat of the loop, making sure that there’s no silence at the very beginning. You may end up wanting to use the maximum zoom, as it can be pretty useful in helping detect gaps and aligning transients.
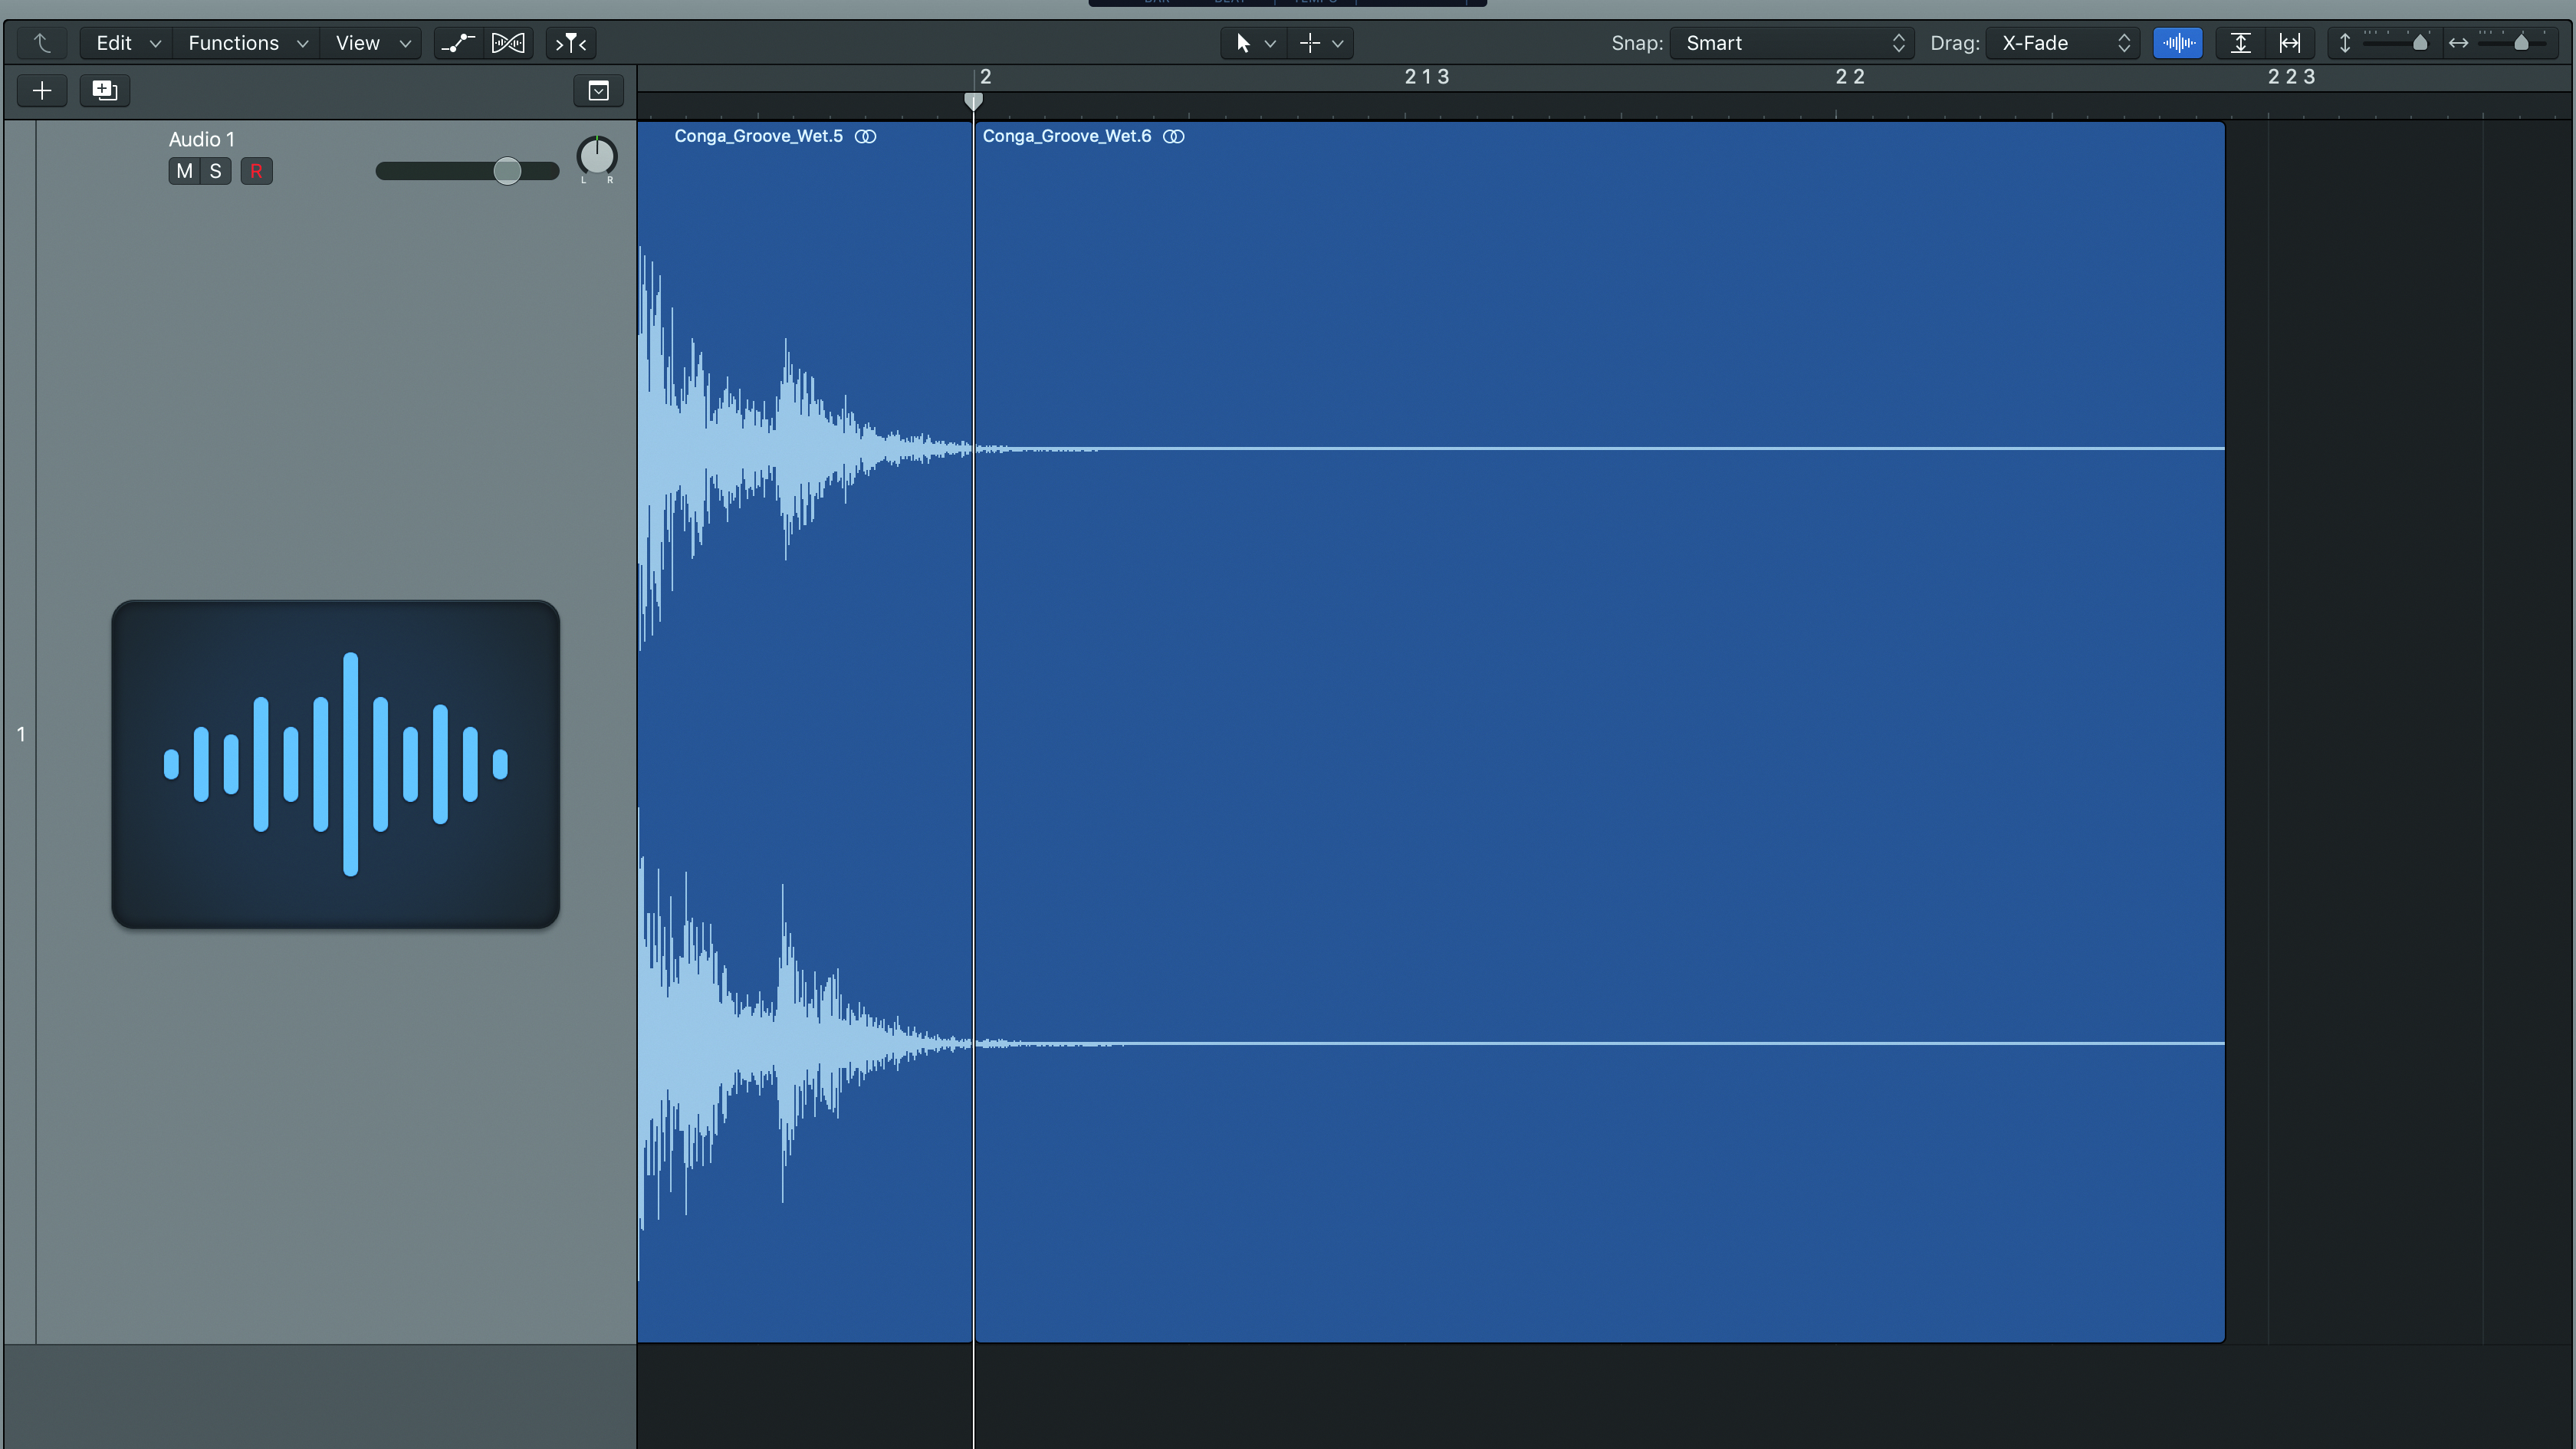
Step 8: In order for the audio to leap seamlessly outside of the DAW, the tail of the audio file needs to be grafted onto the beginning to create a seamless transition. Since our loop is one bar long, we will snip the audio right at bar two by placing the cursor at bar two and using the Split Regions/Events at Playhead Position command (Command +T).
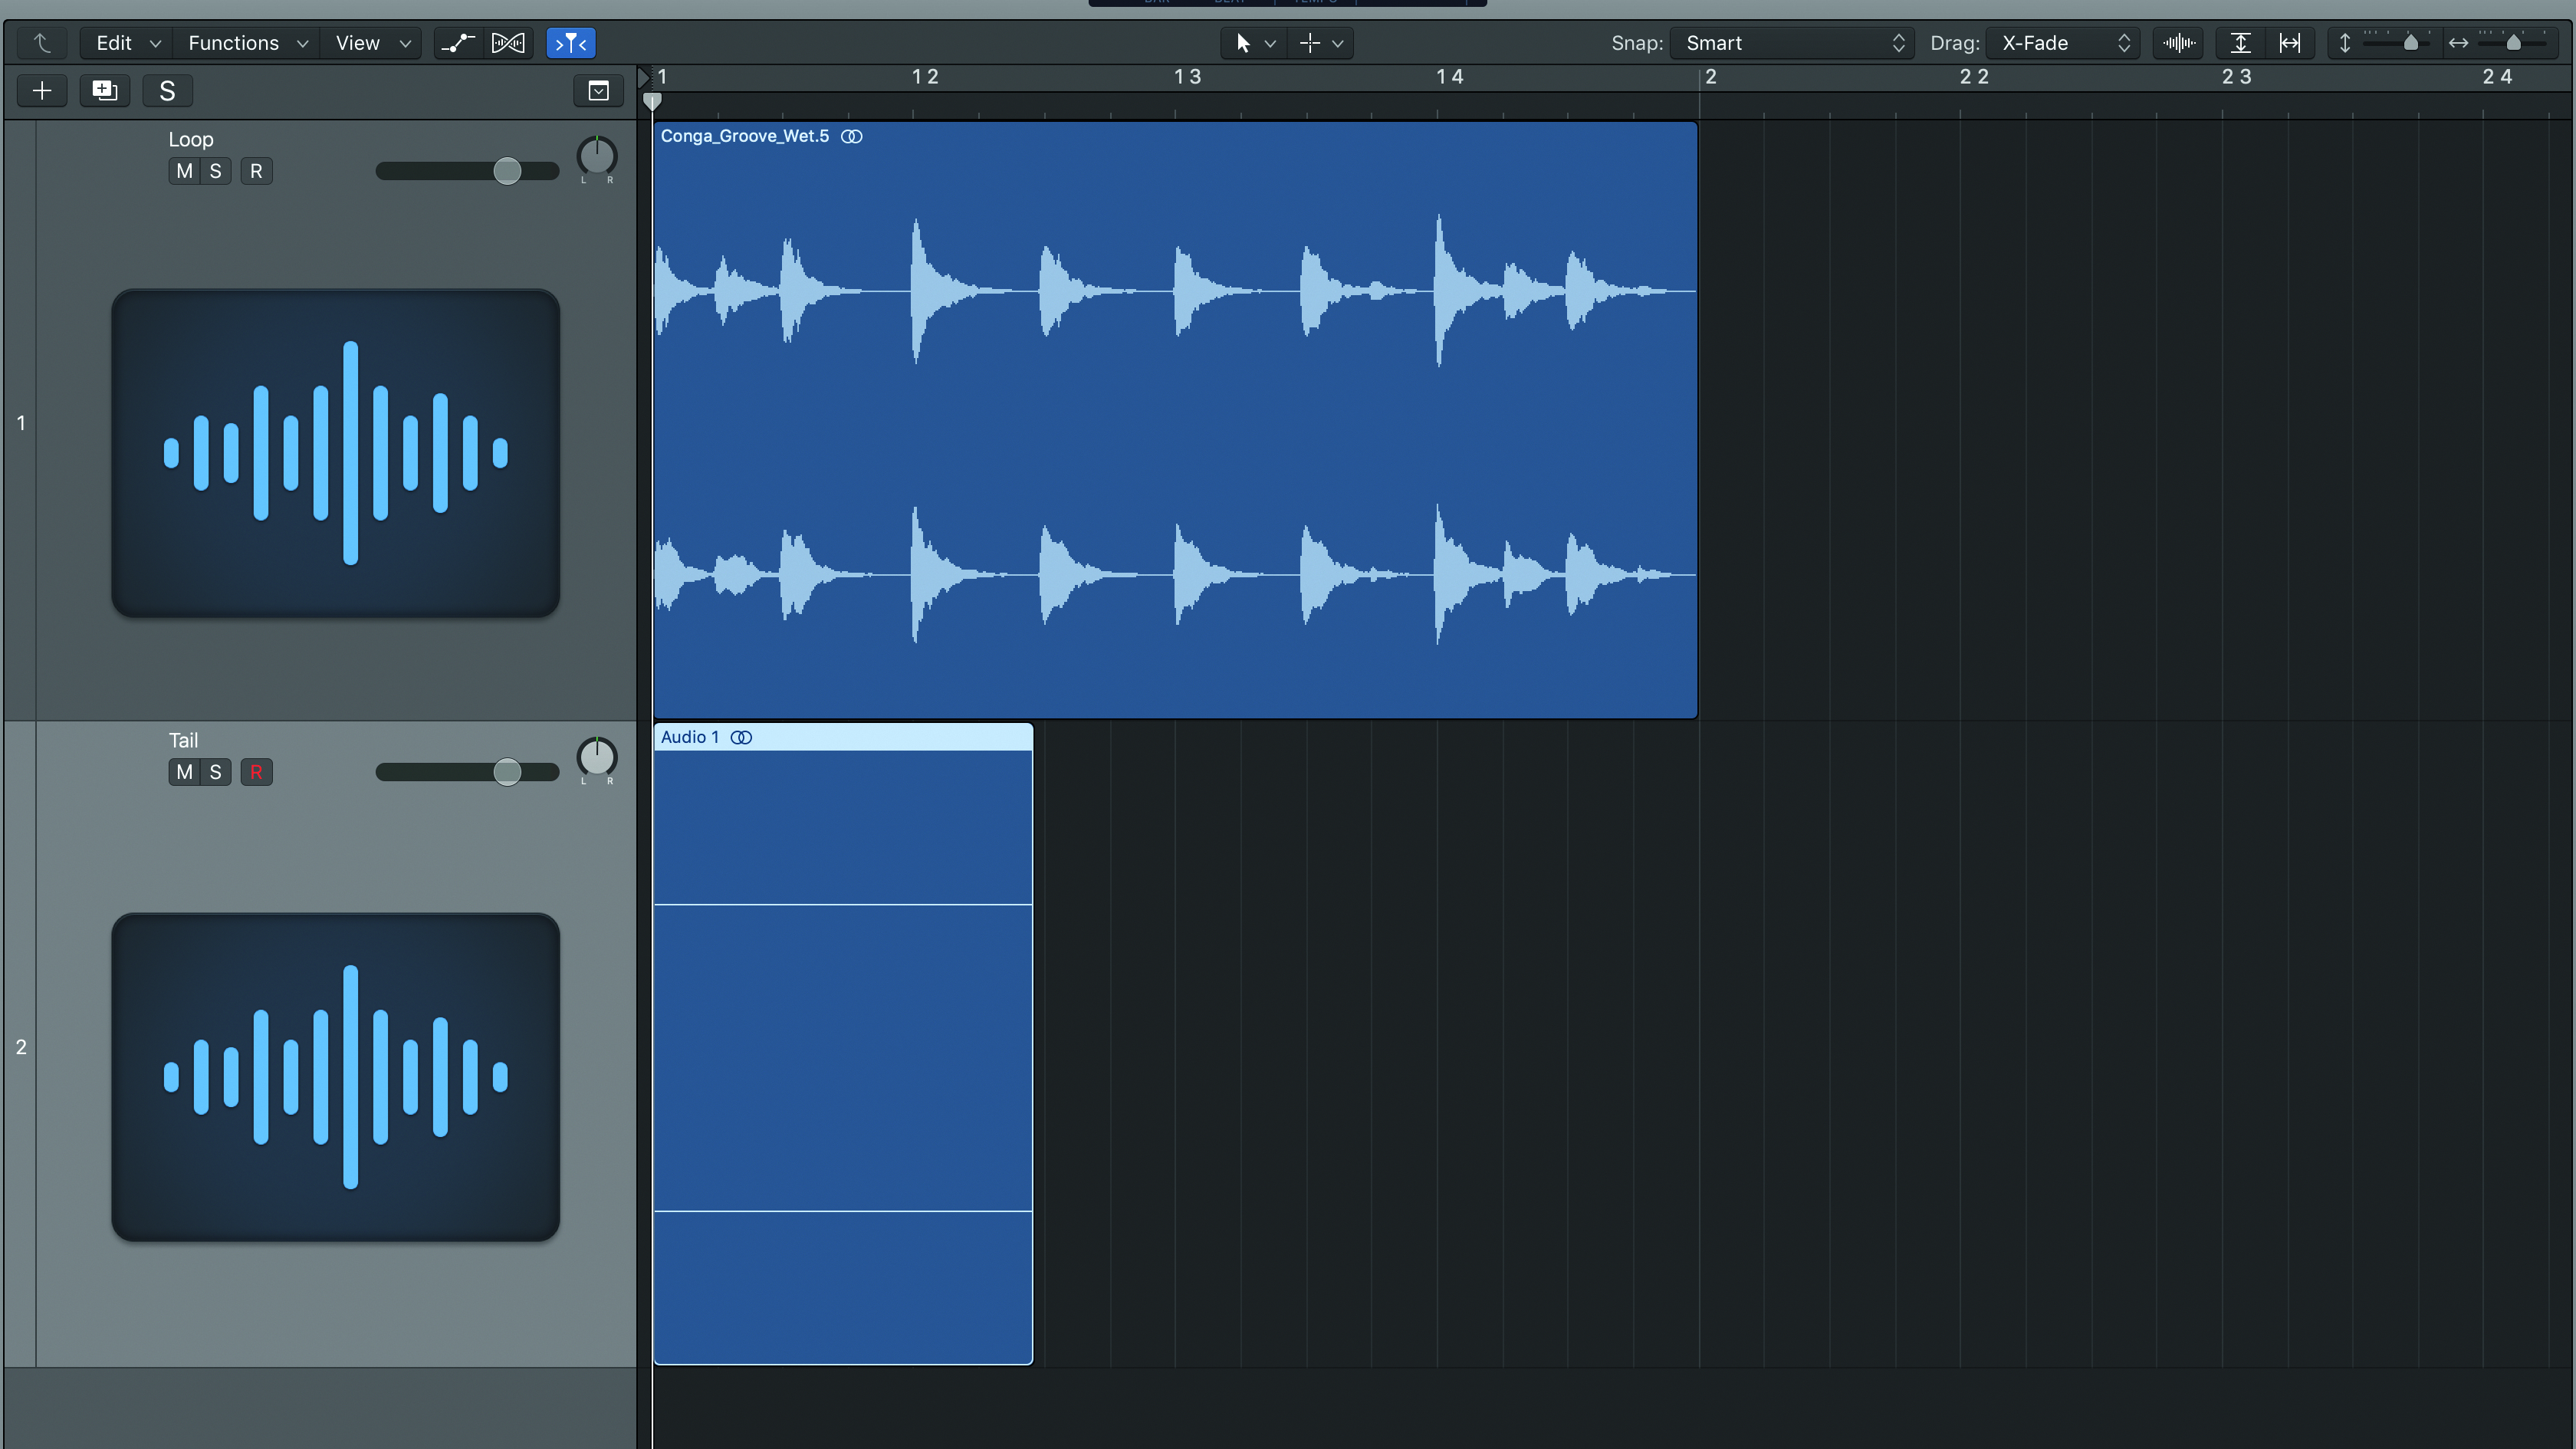
Step 9: Create a new audio track (Option+Command+n) or from the Track menu by selecting Track>New Audio Track. Name the original track ‘loop’ and the new track ‘tail’. Cut and paste or simply drag and drop the tail that was just split from the loop to beat one, bar one of the new ‘tail’ audio track.
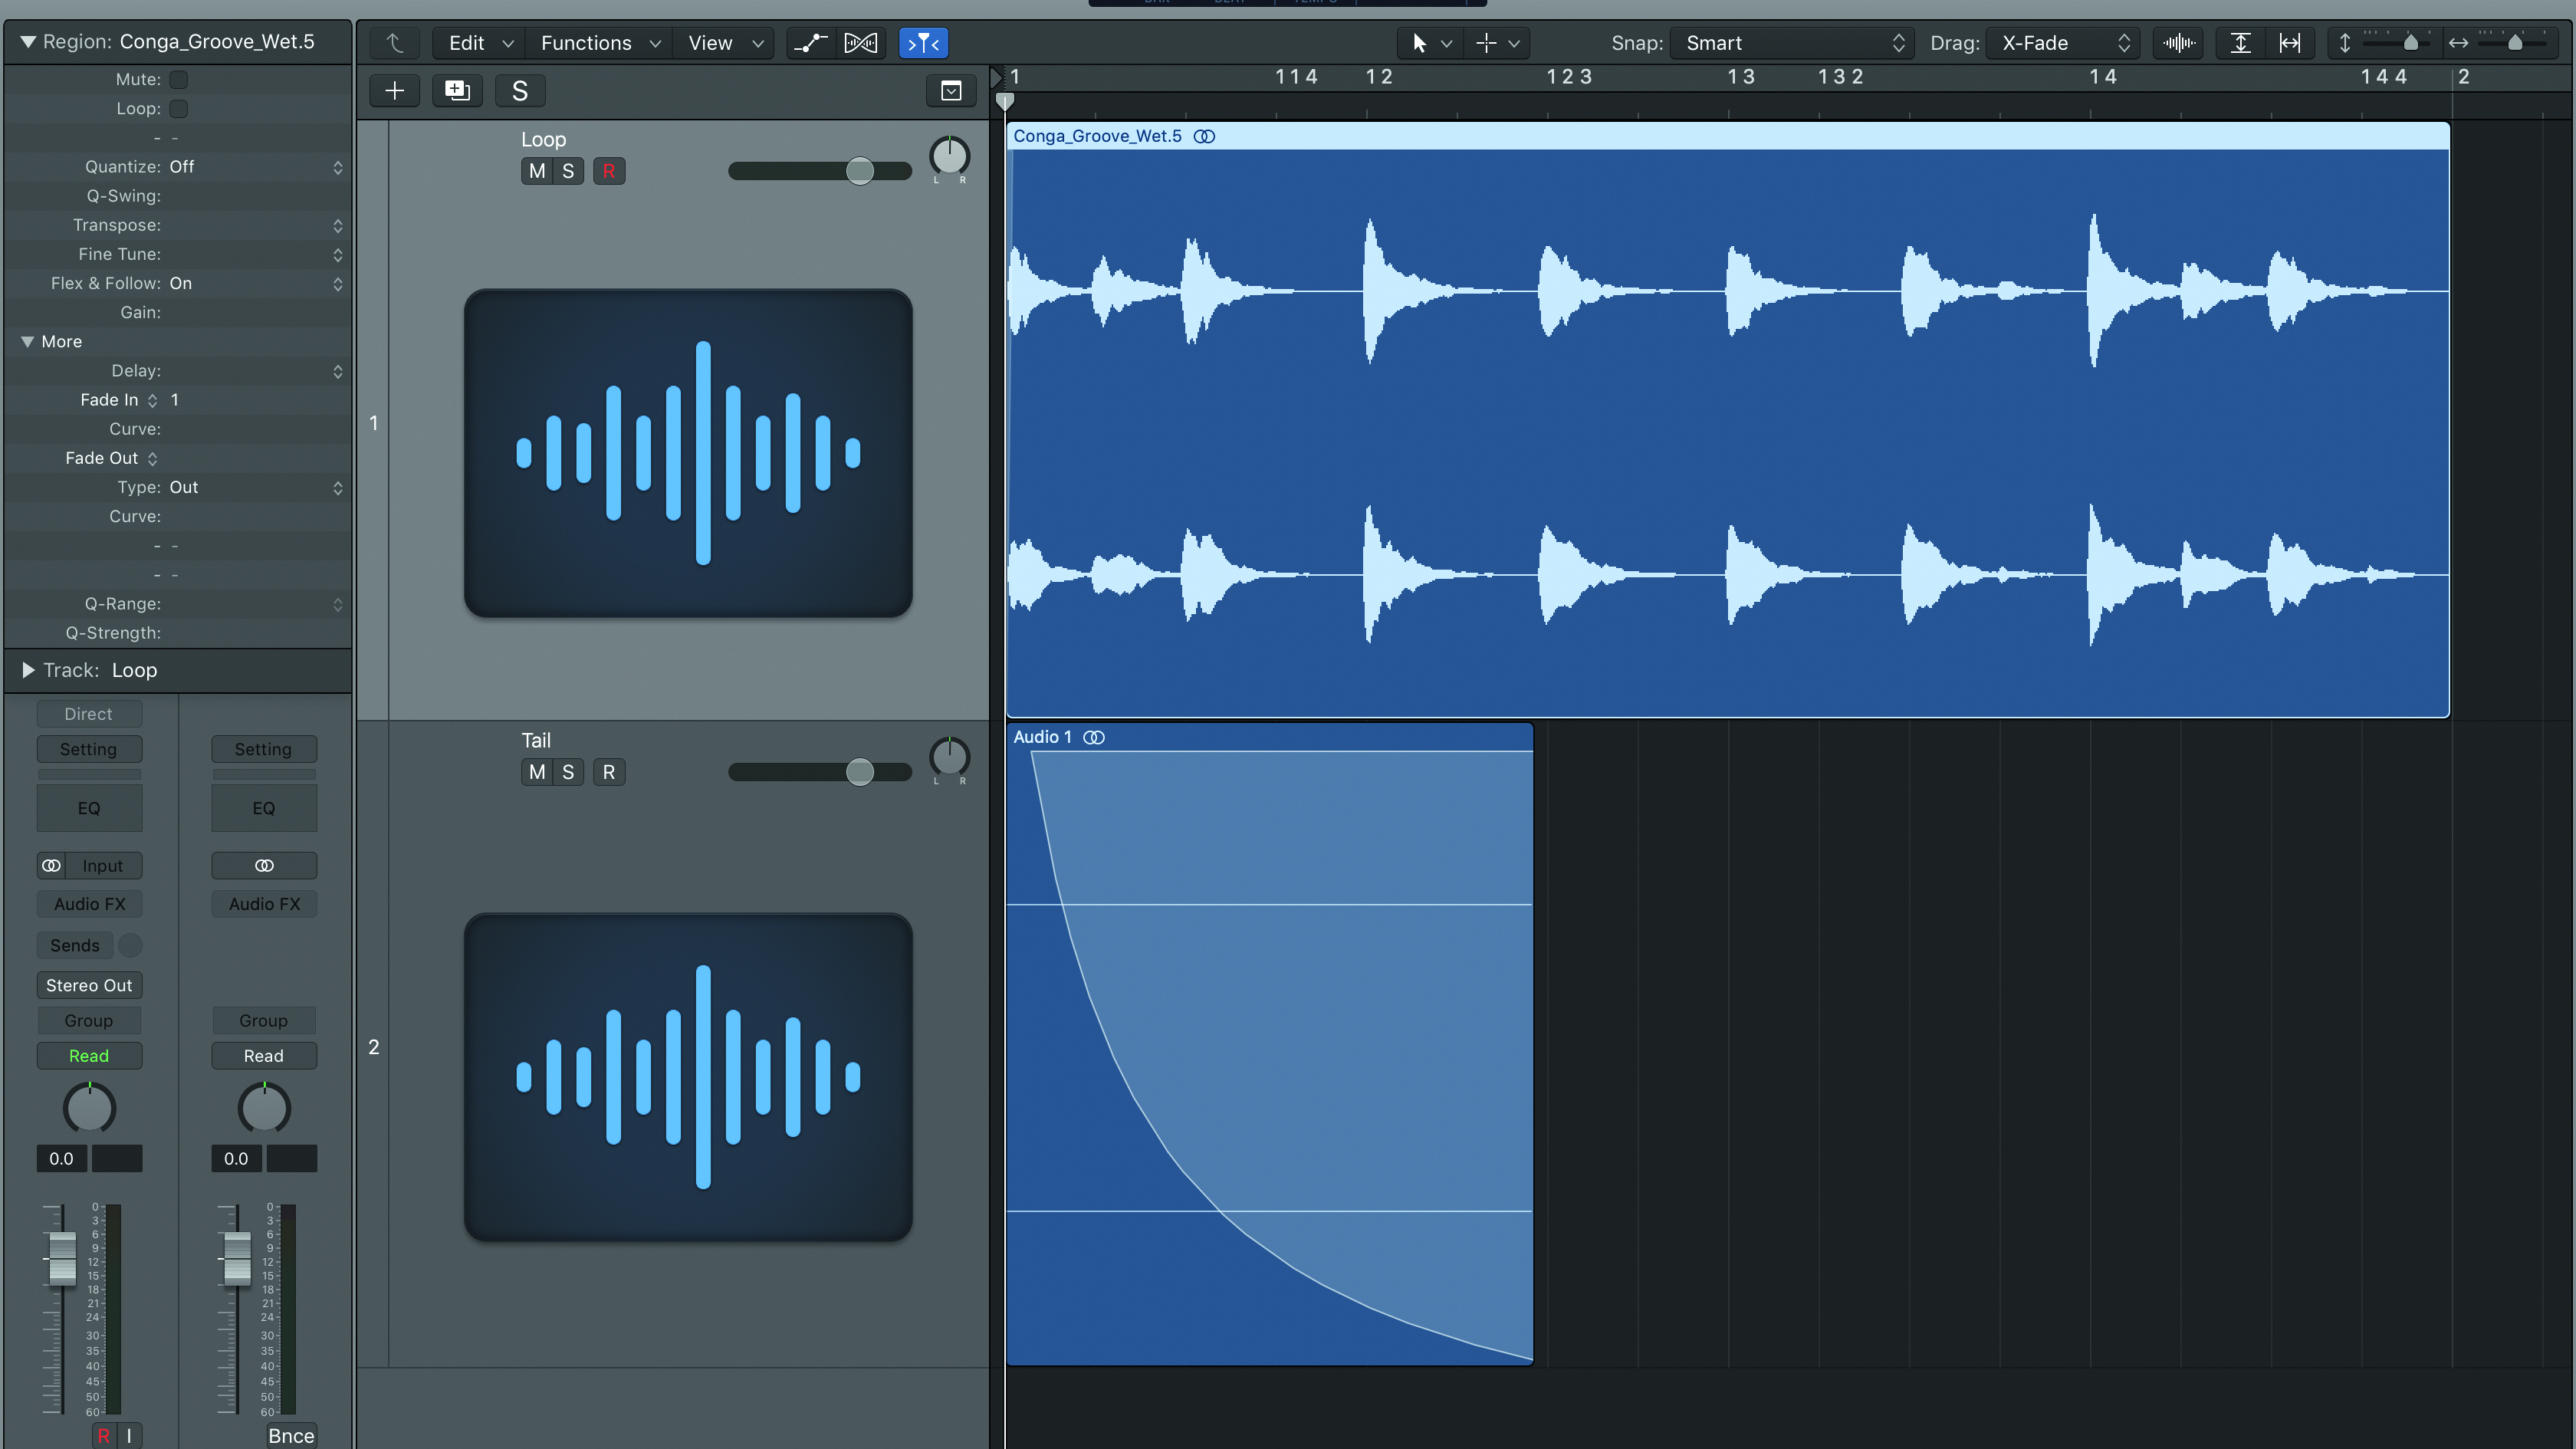
Step 10: Add a long fade out to the tail using the Fade tool or the Inspector. The fade will allow the tail of the audio file to mix into the loop without being noticeable. A very short fade in (fade in value of 1) at the beginning audio loop will ensure that there’s no audible clicking or popping sound when the loop begins.
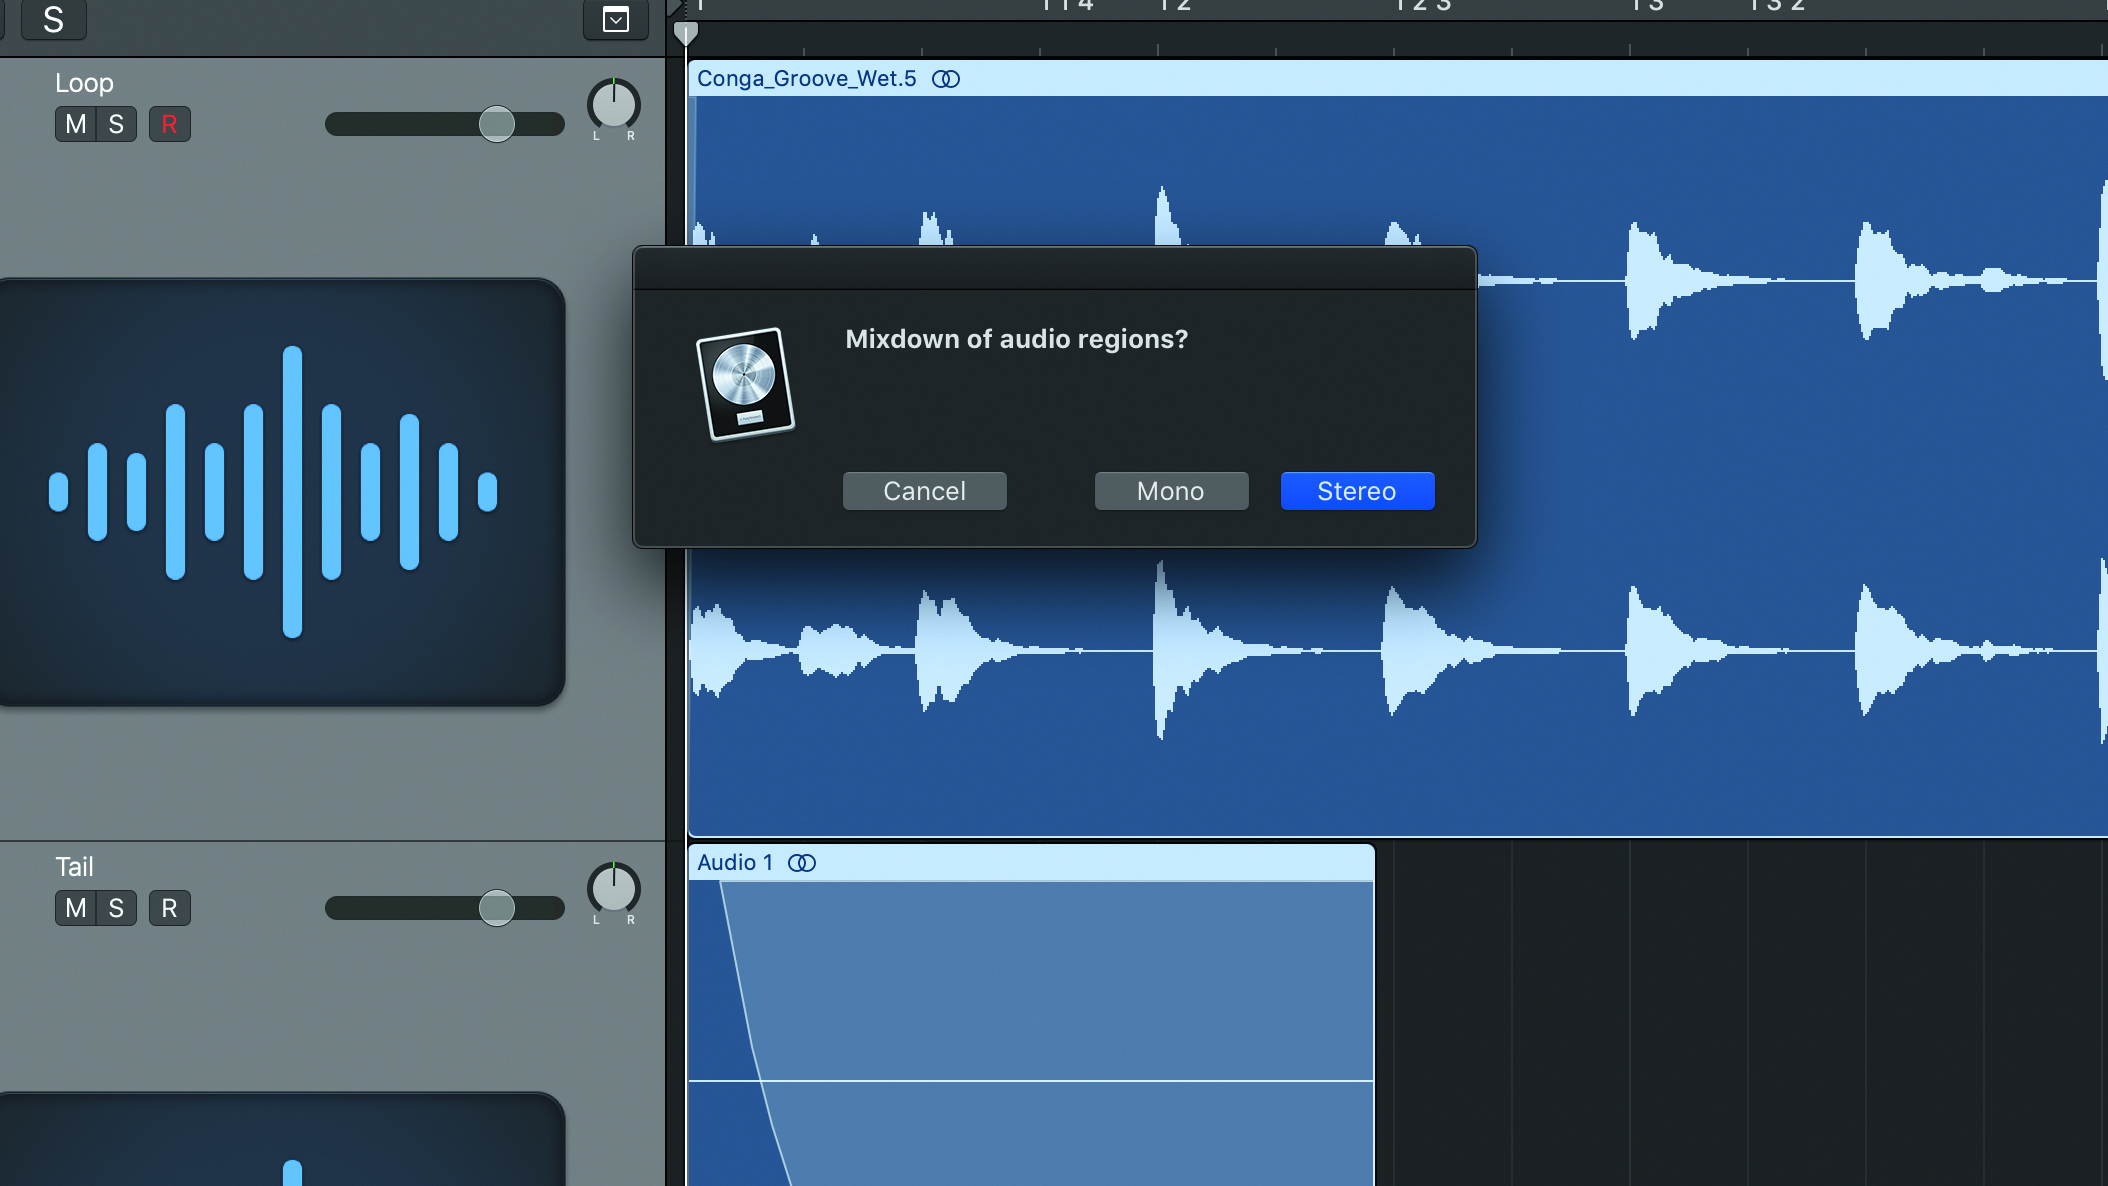
Step 11: Finally, to graft the tail and loop together, we can use one of two methods. The quick and dirty method is to select both audio regions and click on either of them with the Glue tool. This will create an audio mixdown, combining both regions into a single audio file. Choose mono or stereo based on the file type you want to use.
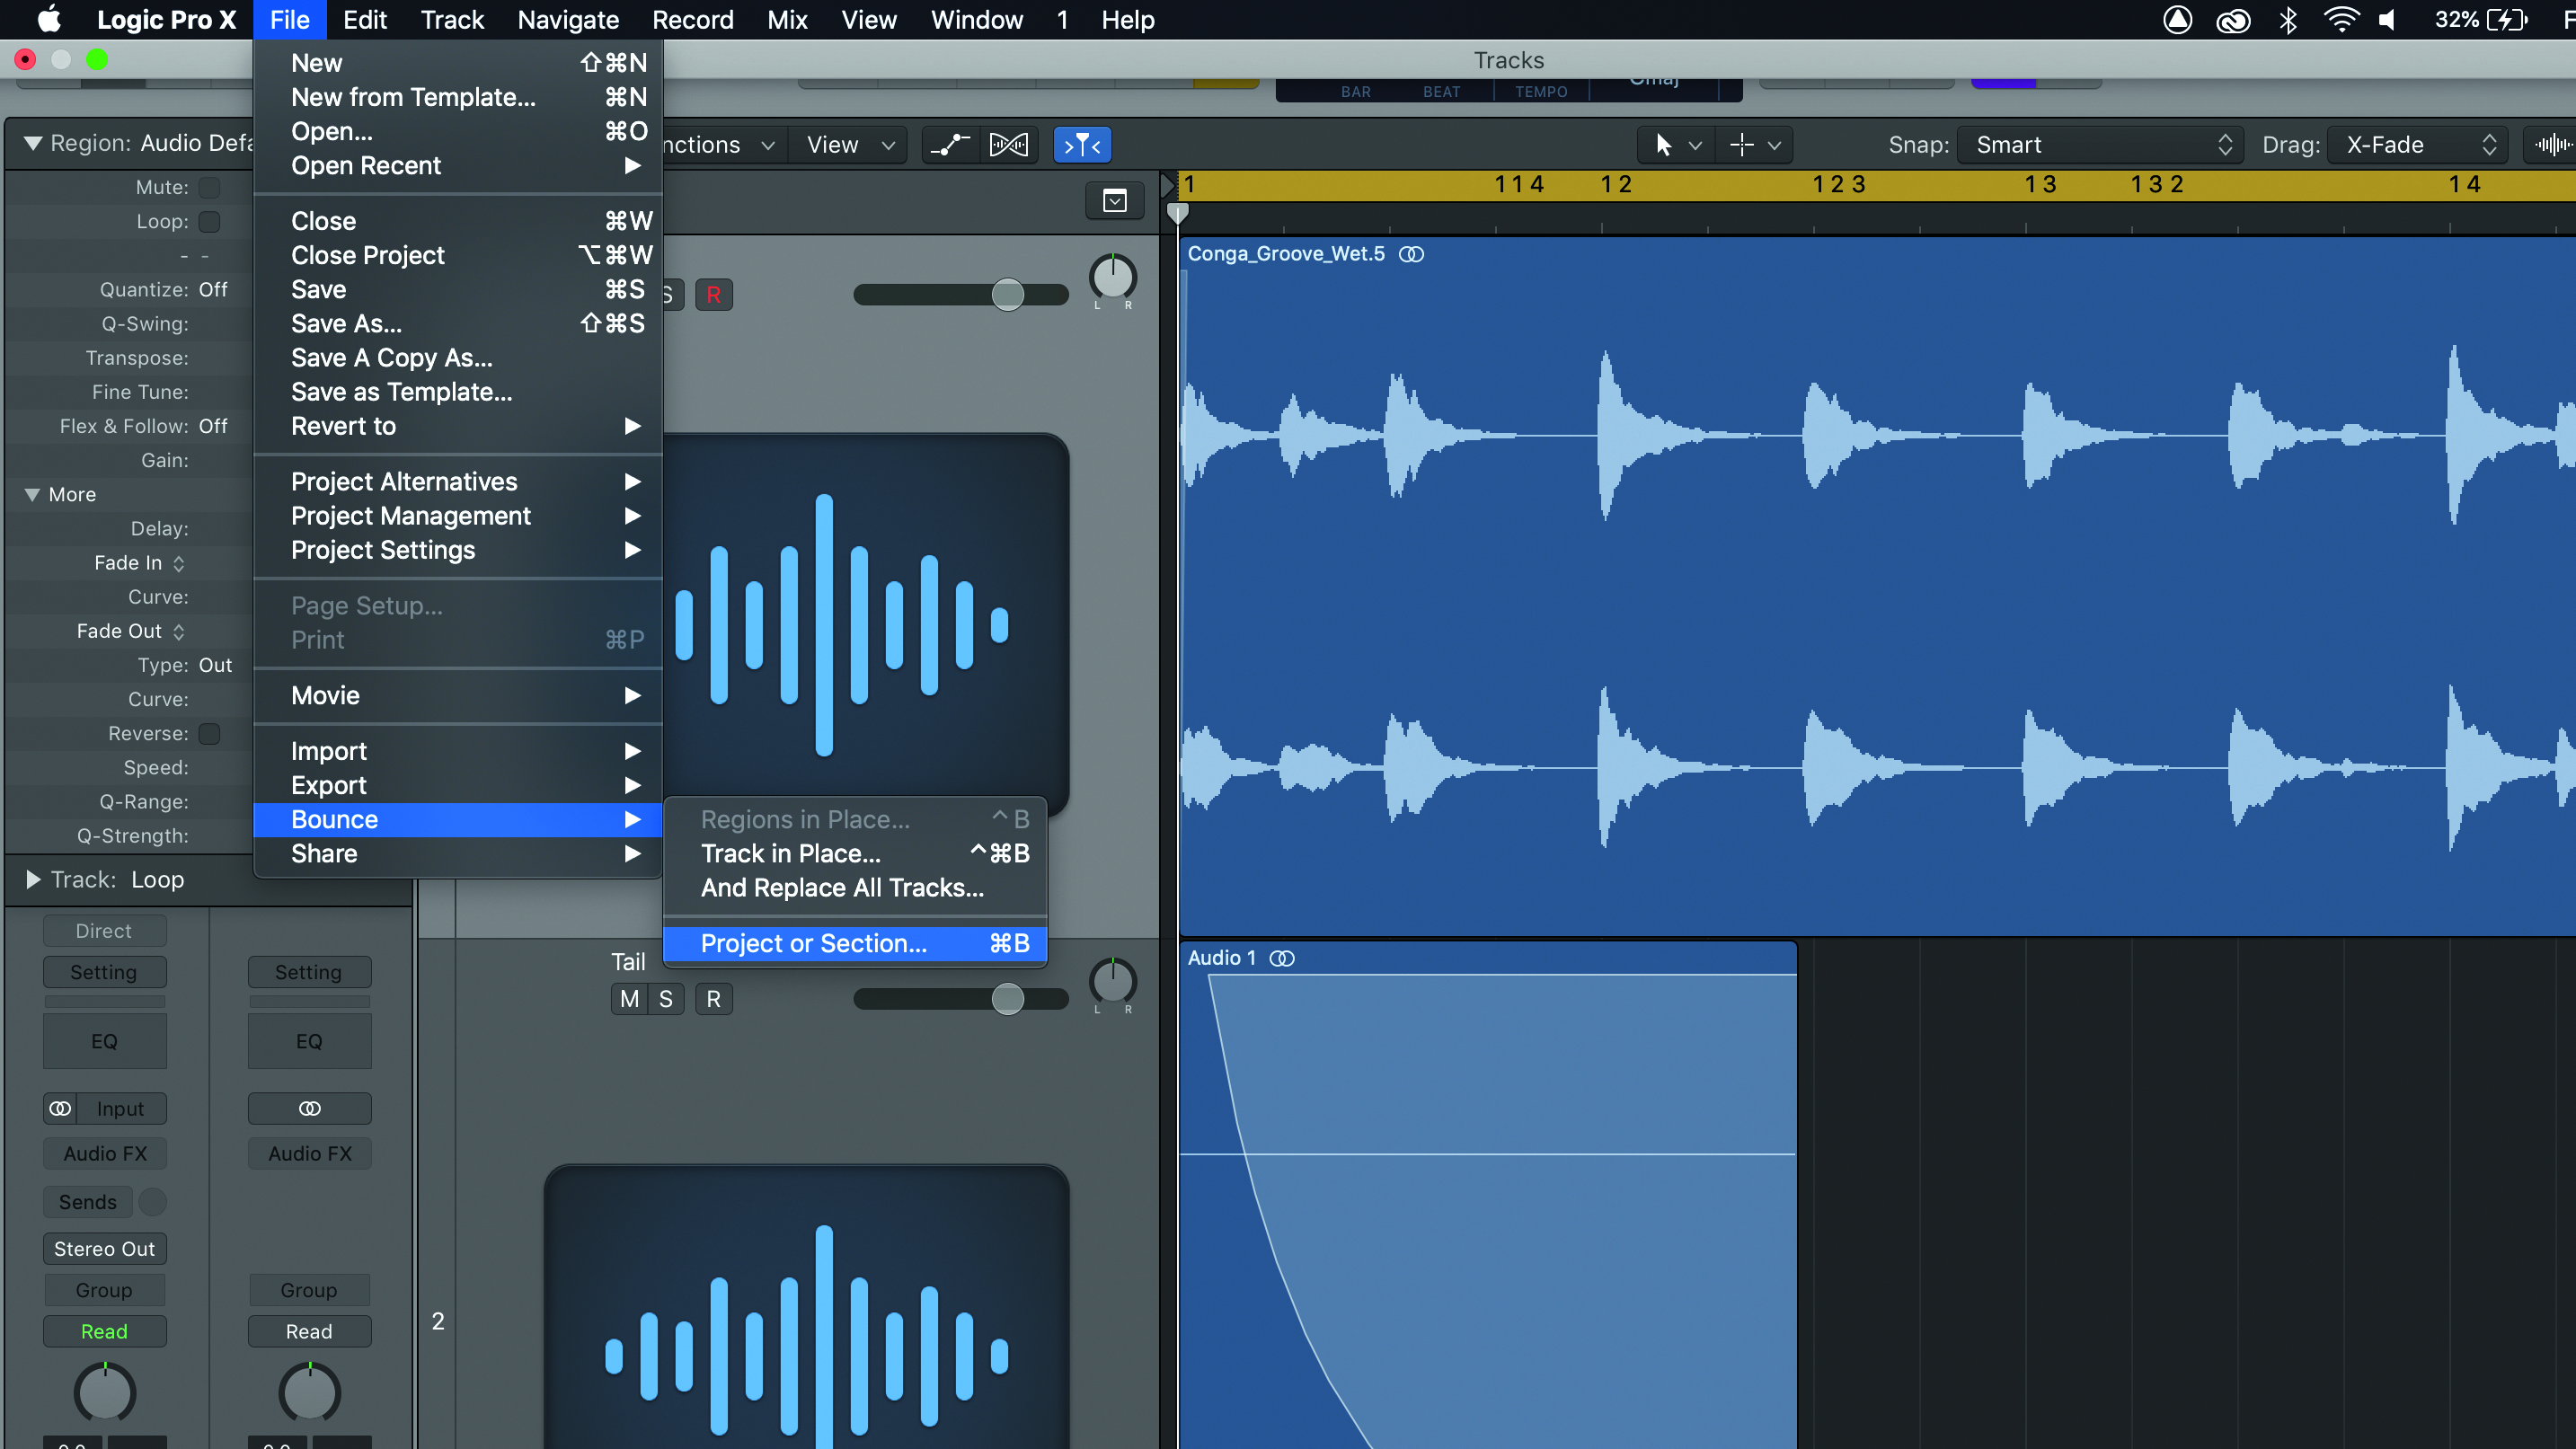
Step 12: The second method is more manual but has the benefit of preserving the original material, which is useful in case you have to go back and tweak things. Select the locators around the loop by selecting the loop and pressing Command +U. From the File menu choose Bounce>Project or Section (Command+B) and export to the desired format.
Pro tips
1. Clean start
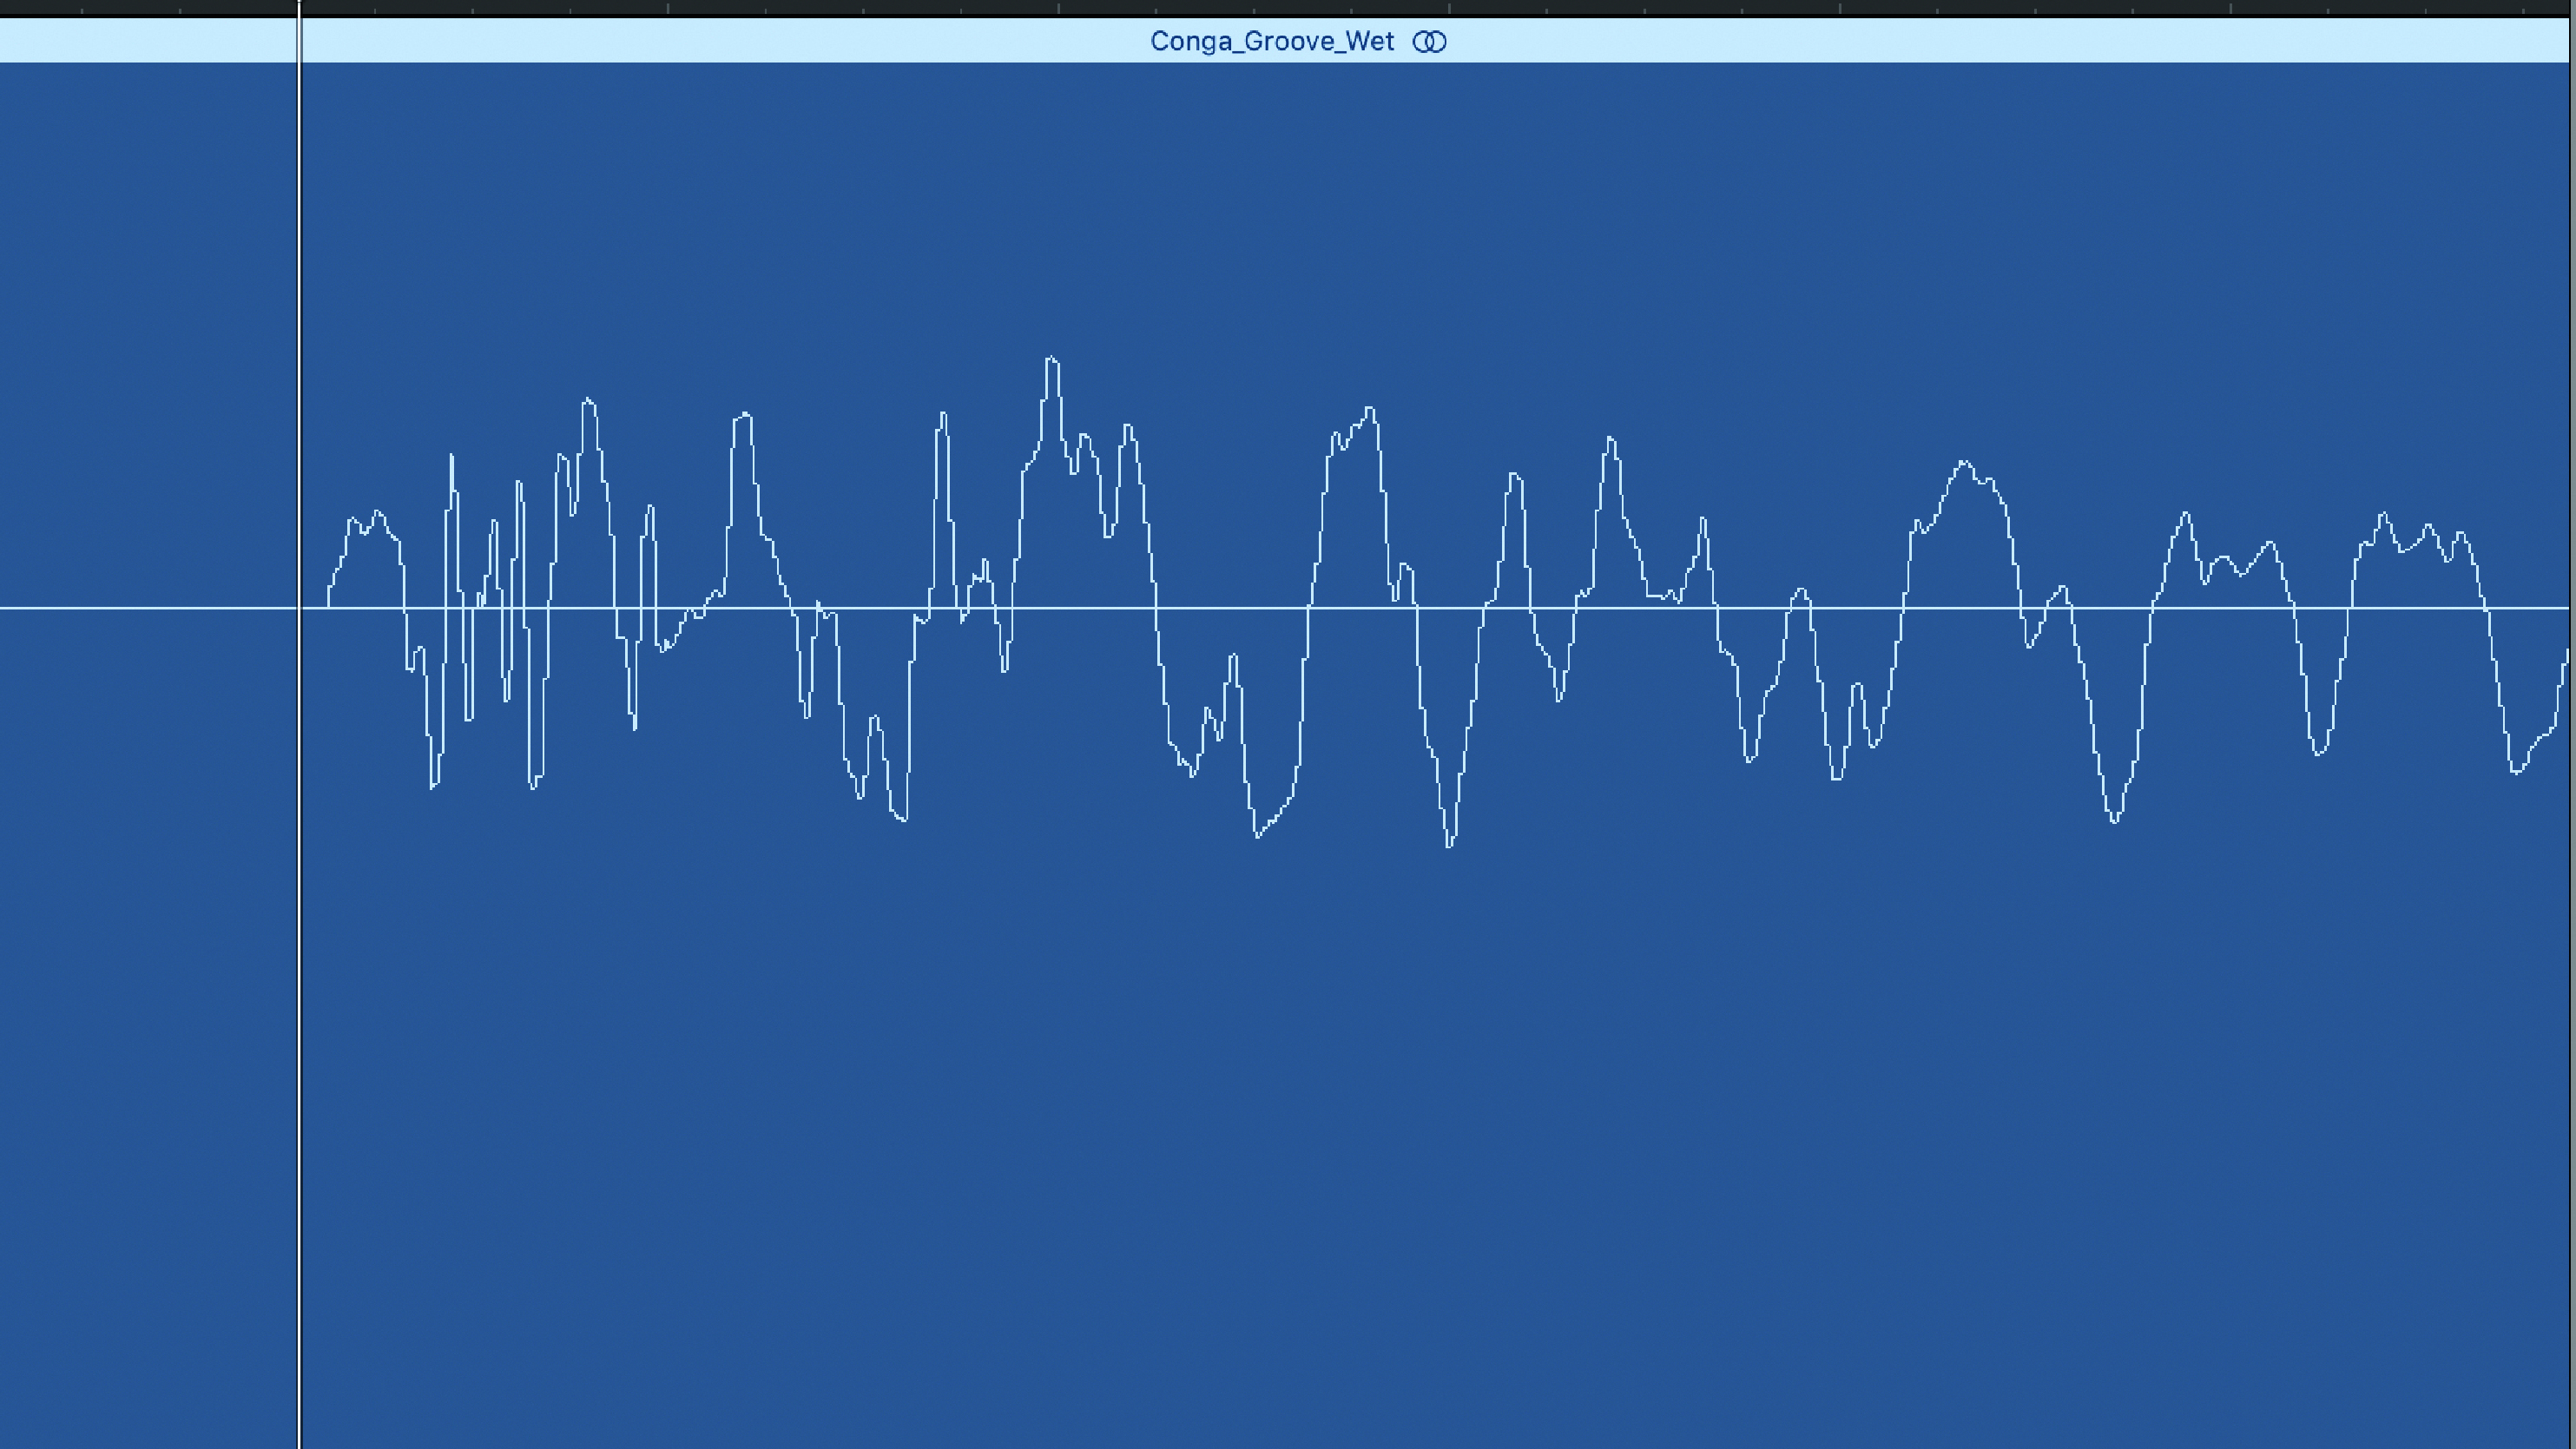
It’s extremely important that prior to quantising or looping, you double check that your audio is aligned exactly to the first beat of the first bar. Unless you are zoomed in to the sample level, it is virtually impossible to detect whether or not your audio is precisely aligned, therefore zoom in as much as necessary to check. You’ll often find that audio you thought was exactly on the beat in fact has several milliseconds of silence before the first clearly detectable audio event.
2. Artificial tails
As you learned in the guide, grafting the natural tail of a performance onto the beginning is vital to creating a seamless loop.
However, every once in a while you may be faced with a situation where you need to create a loop but do not have access to the original recording. In that case, duplicate your audio track and add a medium plate reverb. Render the duplicated file and use this new artificial tail as you would normally.
3. Test!
Once you have created your loops you will need to test them. The quick and easy way is to simply re-import your exported audio back into Logic Pro and repeat it, bypassing the internal hidden crossfade trick that Logic does when repeating a looped section. Listen carefully to the transitions between repetitions; if the transitions are free of pops, clicks or skips, then you can celebrate your success! Otherwise, you may need to go back and try again.
Computer Music magazine is the world’s best selling publication dedicated solely to making great music with your Mac or PC computer. Each issue it brings its lucky readers the best in cutting-edge tutorials, need-to-know, expert software reviews and even all the tools you actually need to make great music today, courtesy of our legendary CM Plugin Suite.
