How to A/B against commercial reference tracks in your DAW
Even the most experienced engineers use appropriate reference tracks when mixing. Here's how they do it
Want all the hottest music and gear news, reviews, deals, features and more, direct to your inbox? Sign up here.
You are now subscribed
Your newsletter sign-up was successful
When referencing, there are a few basic things to consider that’ll make the task both more useful and enjoyable. First, we strongly advise you not to ‘copy’ other tracks too slavishly, as you may make a track that naturally has a unique sound. It’s a good idea to find two or three pro reference tracks that are similar to yours in terms of the instruments used and overall tone, then use them as a general guide. After all, we’re not trying to copy the artistic elements of another tune - we only want our track to sit in the same sonic ballpark as the world’s best records!
Another consideration is to ensure the loudness levels of your mix and references are matched precisely. Typically, a mastered reference will be significantly louder than the mix, instantly making your track sound weak in comparison. This is not only demoralising, but will also likely make you boost the loudness of your mix to try and keep up. Turn the reference tracks down so that their average loudness matches your mix, and you instantly take loudness out of the equation, enabling valid comparison on an even playing field.
By listening to your mix against the references at equal level, it’ll become clear where your mix stands in terms of tone and levels. Listen out for boxy kicks, weak low mids and excessive build up in the 2-4kHz range in your mix, and if it sounds ‘wrong’ compared to the references, make the appropriate EQ adjustments. Also, make sure the dynamics of your track compare favourably to the references - specifically, that frequency bands of your mix are consistent in level when you listen between your mix and the references.
In the following walkthrough, we'll look at the A/B referencing process step by step. For more on the subject, pick up the February 2018 edition of Computer Music.
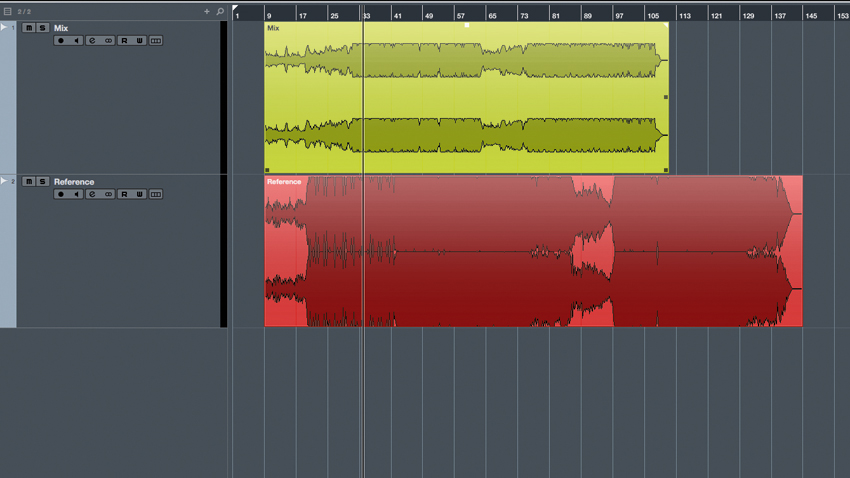
Step 1: Let’s get things moving by looking at how to A/B your mix against a commercial reference in any DAW. Start by importing Mix.wav and Reference.wav (click here to download), making sure any automatic warping in your DAW is disabled. We recommend using WAV references, as you don’t want to make your mix sound like an MP3!
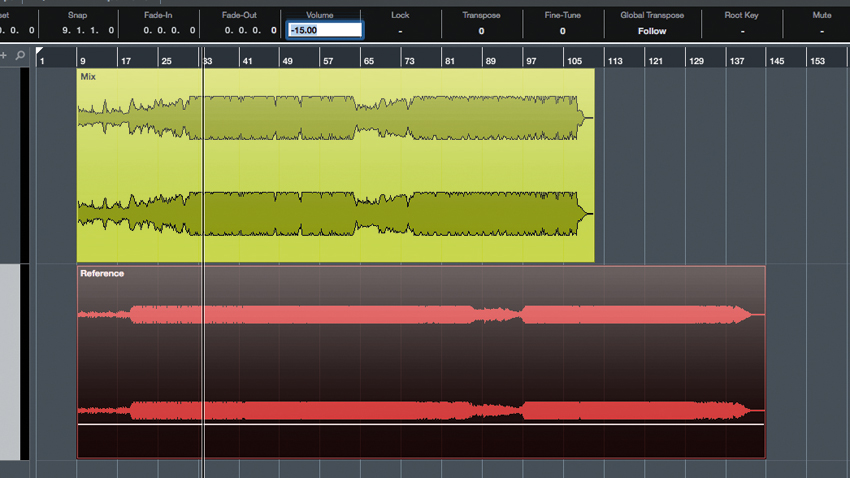
Step 2: You’ll see that the reference track (red) has been professionally mastered and limited up to 0dBFS, so to avoid blowing your eardrums apart, mute the reference channel and turn the audio region’s volume down - we've done this by -15dB here. Gain adjustments on the region itself (rather than the actual channel) mean you can leave the mixer’s volume fader at unity gain (0dB).
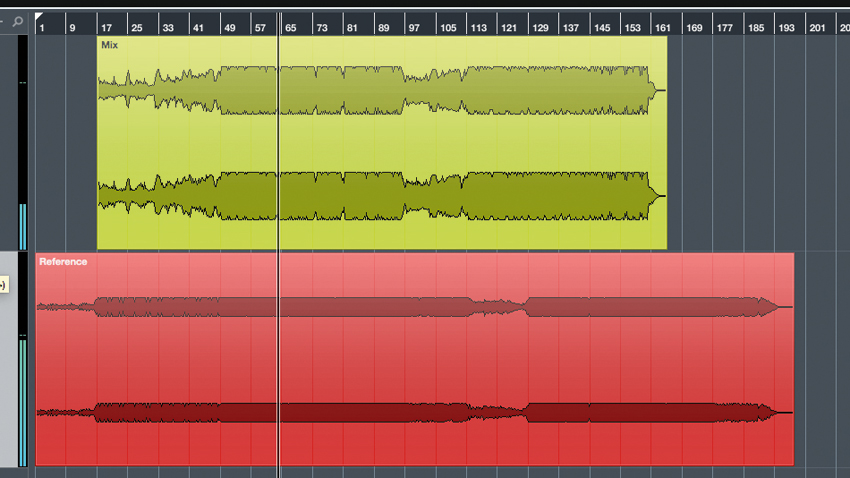
Step 3: Next, visually line up the drop of the reference track against your mix as best as you can. After pressing play, hit the reference channel’s Solo button to switch to the reference with one mouse click. Hitting Solo again switches back to the mix. This ‘one-click’ method is ideal for concentrating on the actual sound, rather than what buttons you’re operating.
Want all the hottest music and gear news, reviews, deals, features and more, direct to your inbox? Sign up here.
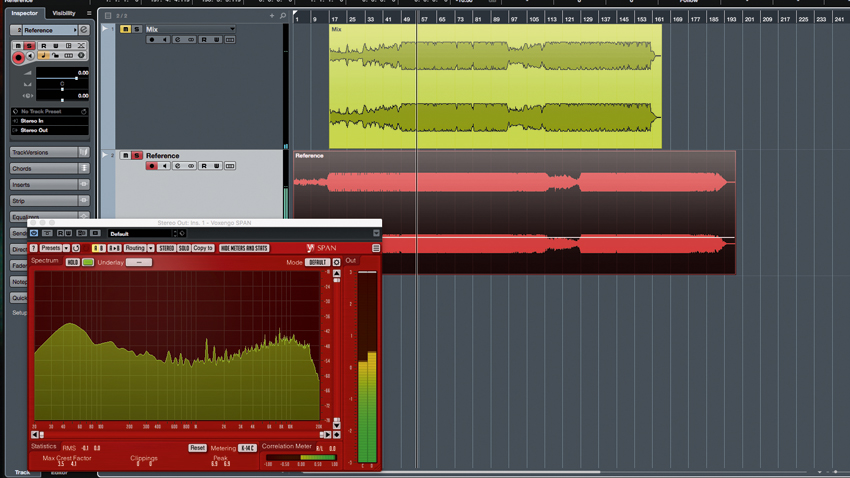
Step 4: It’s unlikely that the mix and reference are at the same volume level, so adjust the reference region’s gain as you flick between that and your own mix until the two both sound like they're at the same volume. Feel free to use an RMS meter if that helps.
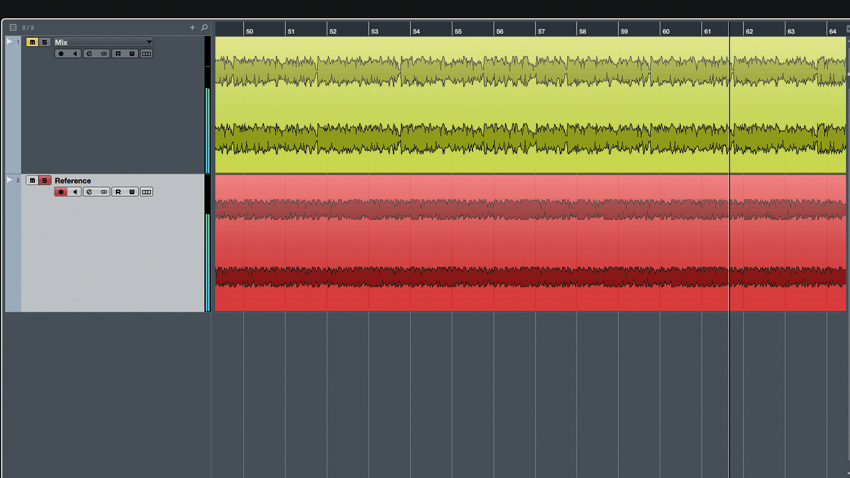
Step 5: Now, when you flick back and forth between your mix and the reference, you should be able to compare the overall tonal, dynamic and stereo balance. Avoid over-listening to the reference - quickly flicking back and forth will help you to capture the big picture in terms of the relative tone, dynamics and stereo balance.
Computer Music magazine is the world’s best selling publication dedicated solely to making great music with your Mac or PC computer. Each issue it brings its lucky readers the best in cutting-edge tutorials, need-to-know, expert software reviews and even all the tools you actually need to make great music today, courtesy of our legendary CM Plugin Suite.
