How to create an ambient synth drone using two plugins
In this tutorial we layer evolving sounds from two different synths to produce a drone-like texture
PLUGIN WEEK 2023: Ambient music is often underpinned by a drone-like texture. For this to really work and keep our interest, however, it needs to evolve and develop over time.
There are various techniques we can use to achieve this, and layering sounds either within a single synth plugin or by using multiple synths helps create the sonic interest we want.
Here we’re going to do a bit of both, creating our core sound using layers within one synth, Dune 3, which includes analogue-style oscillators and wavetable synthesis. Then we’ll add some sequenced sounds on top using a second synth, Dmitry Sches Thorn.
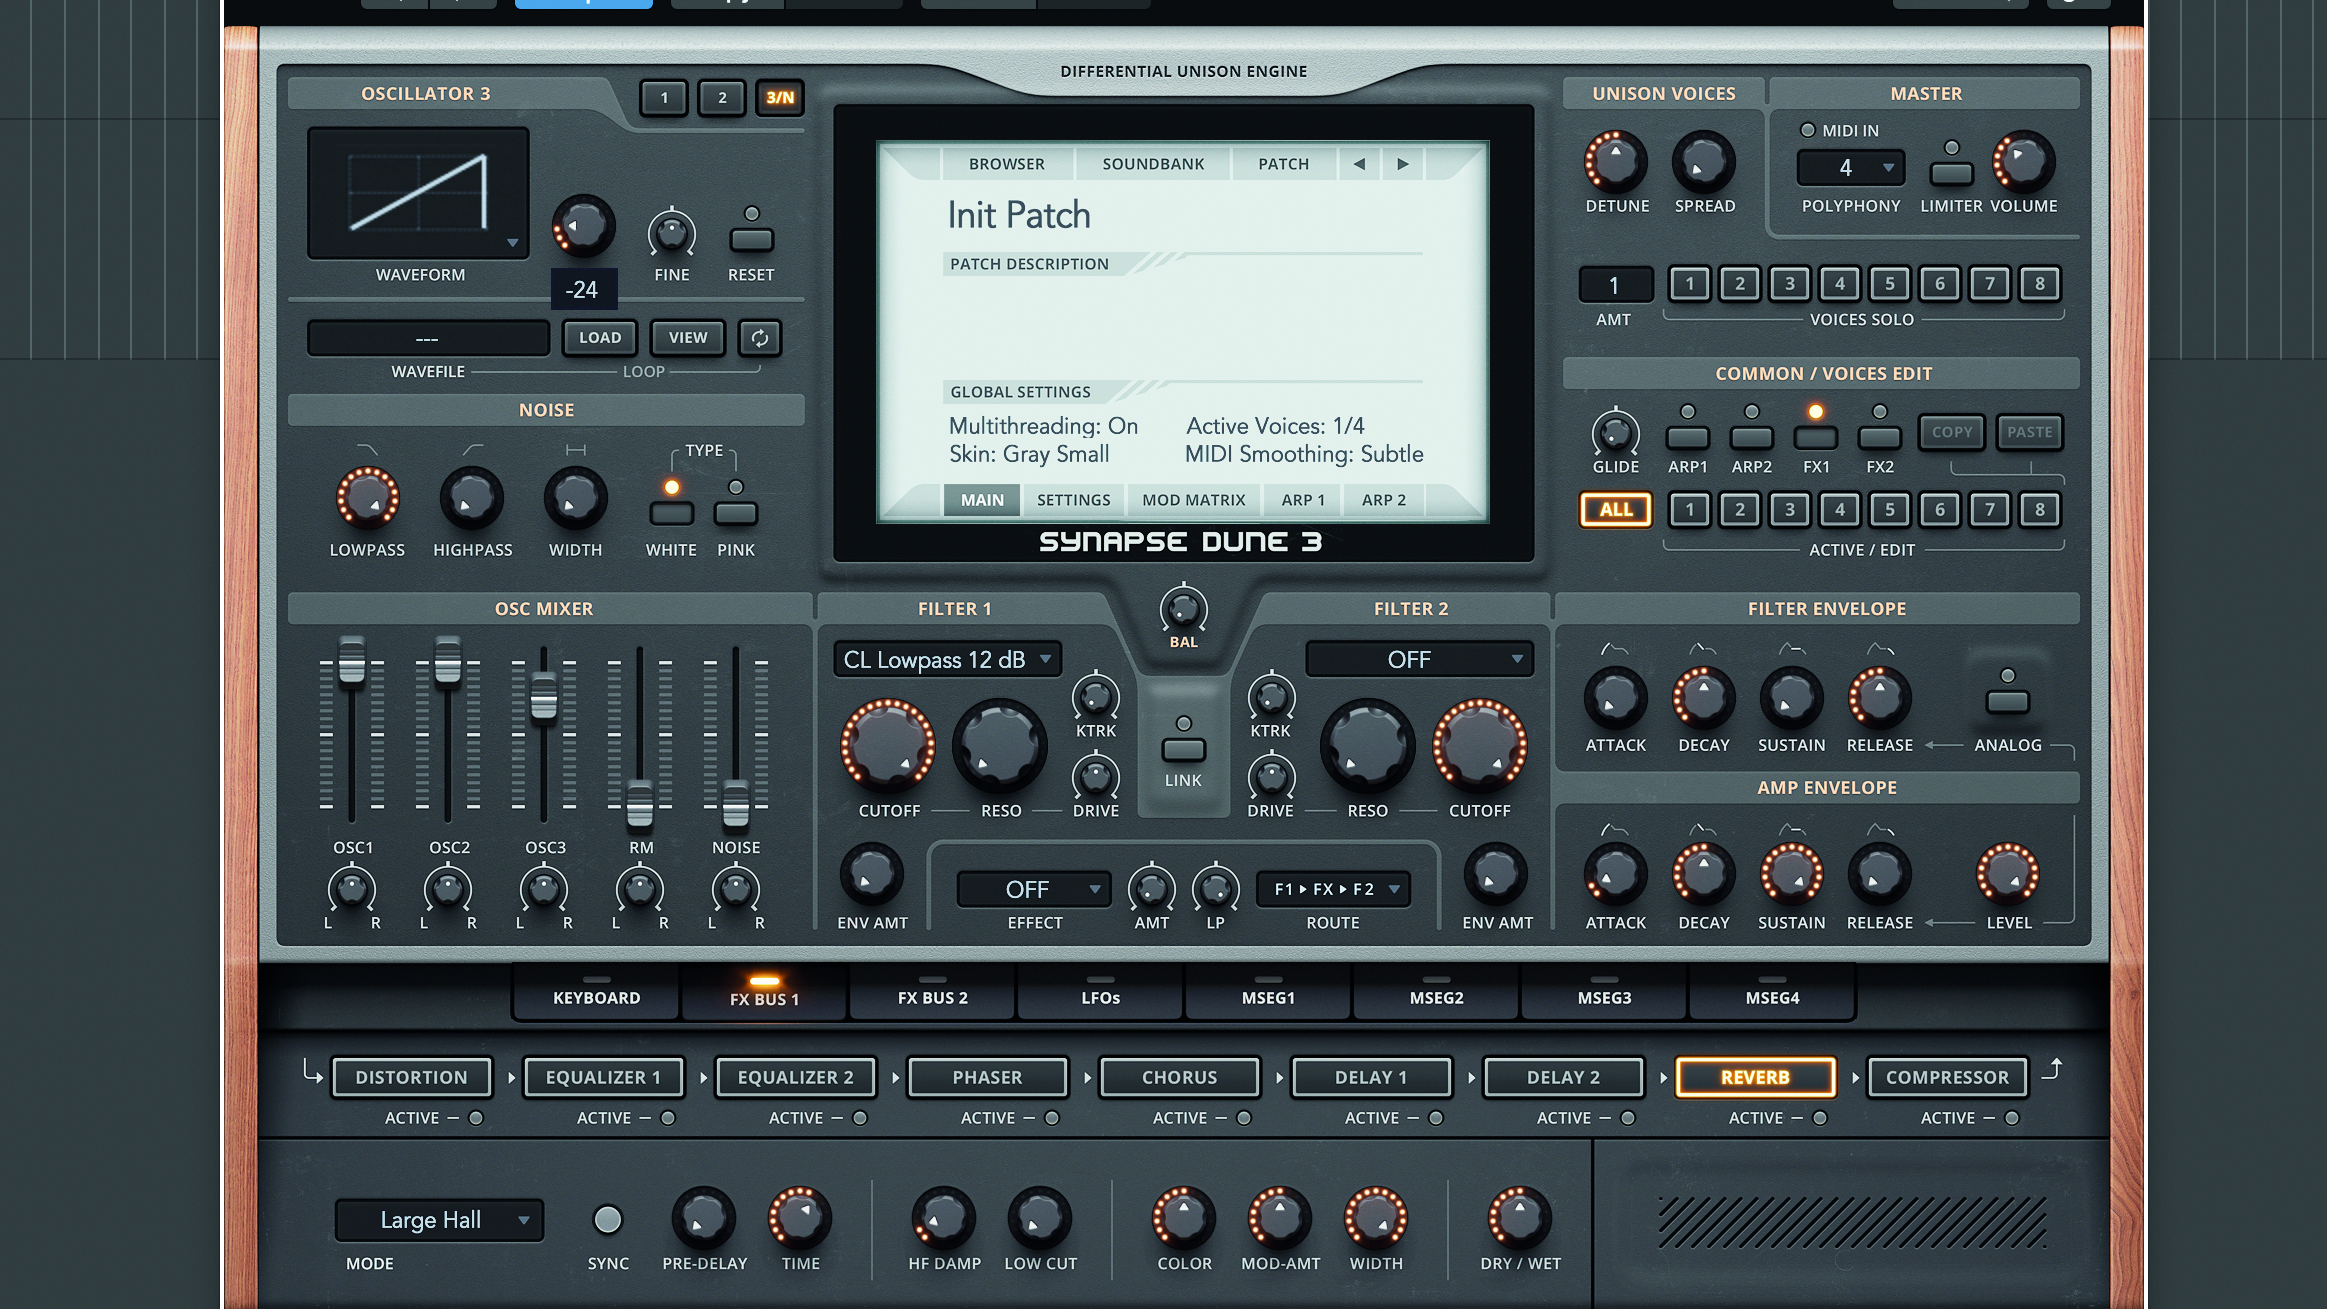
Step 1: We’re starting with a default preset, and will use the multipart design of Dune 3 for two layers. For the first layer select sawtooth waves for all three oscillators, with oscillator 2 an octave below (-12 semitones) and oscillator 3 two octaves below (-24 semitones).
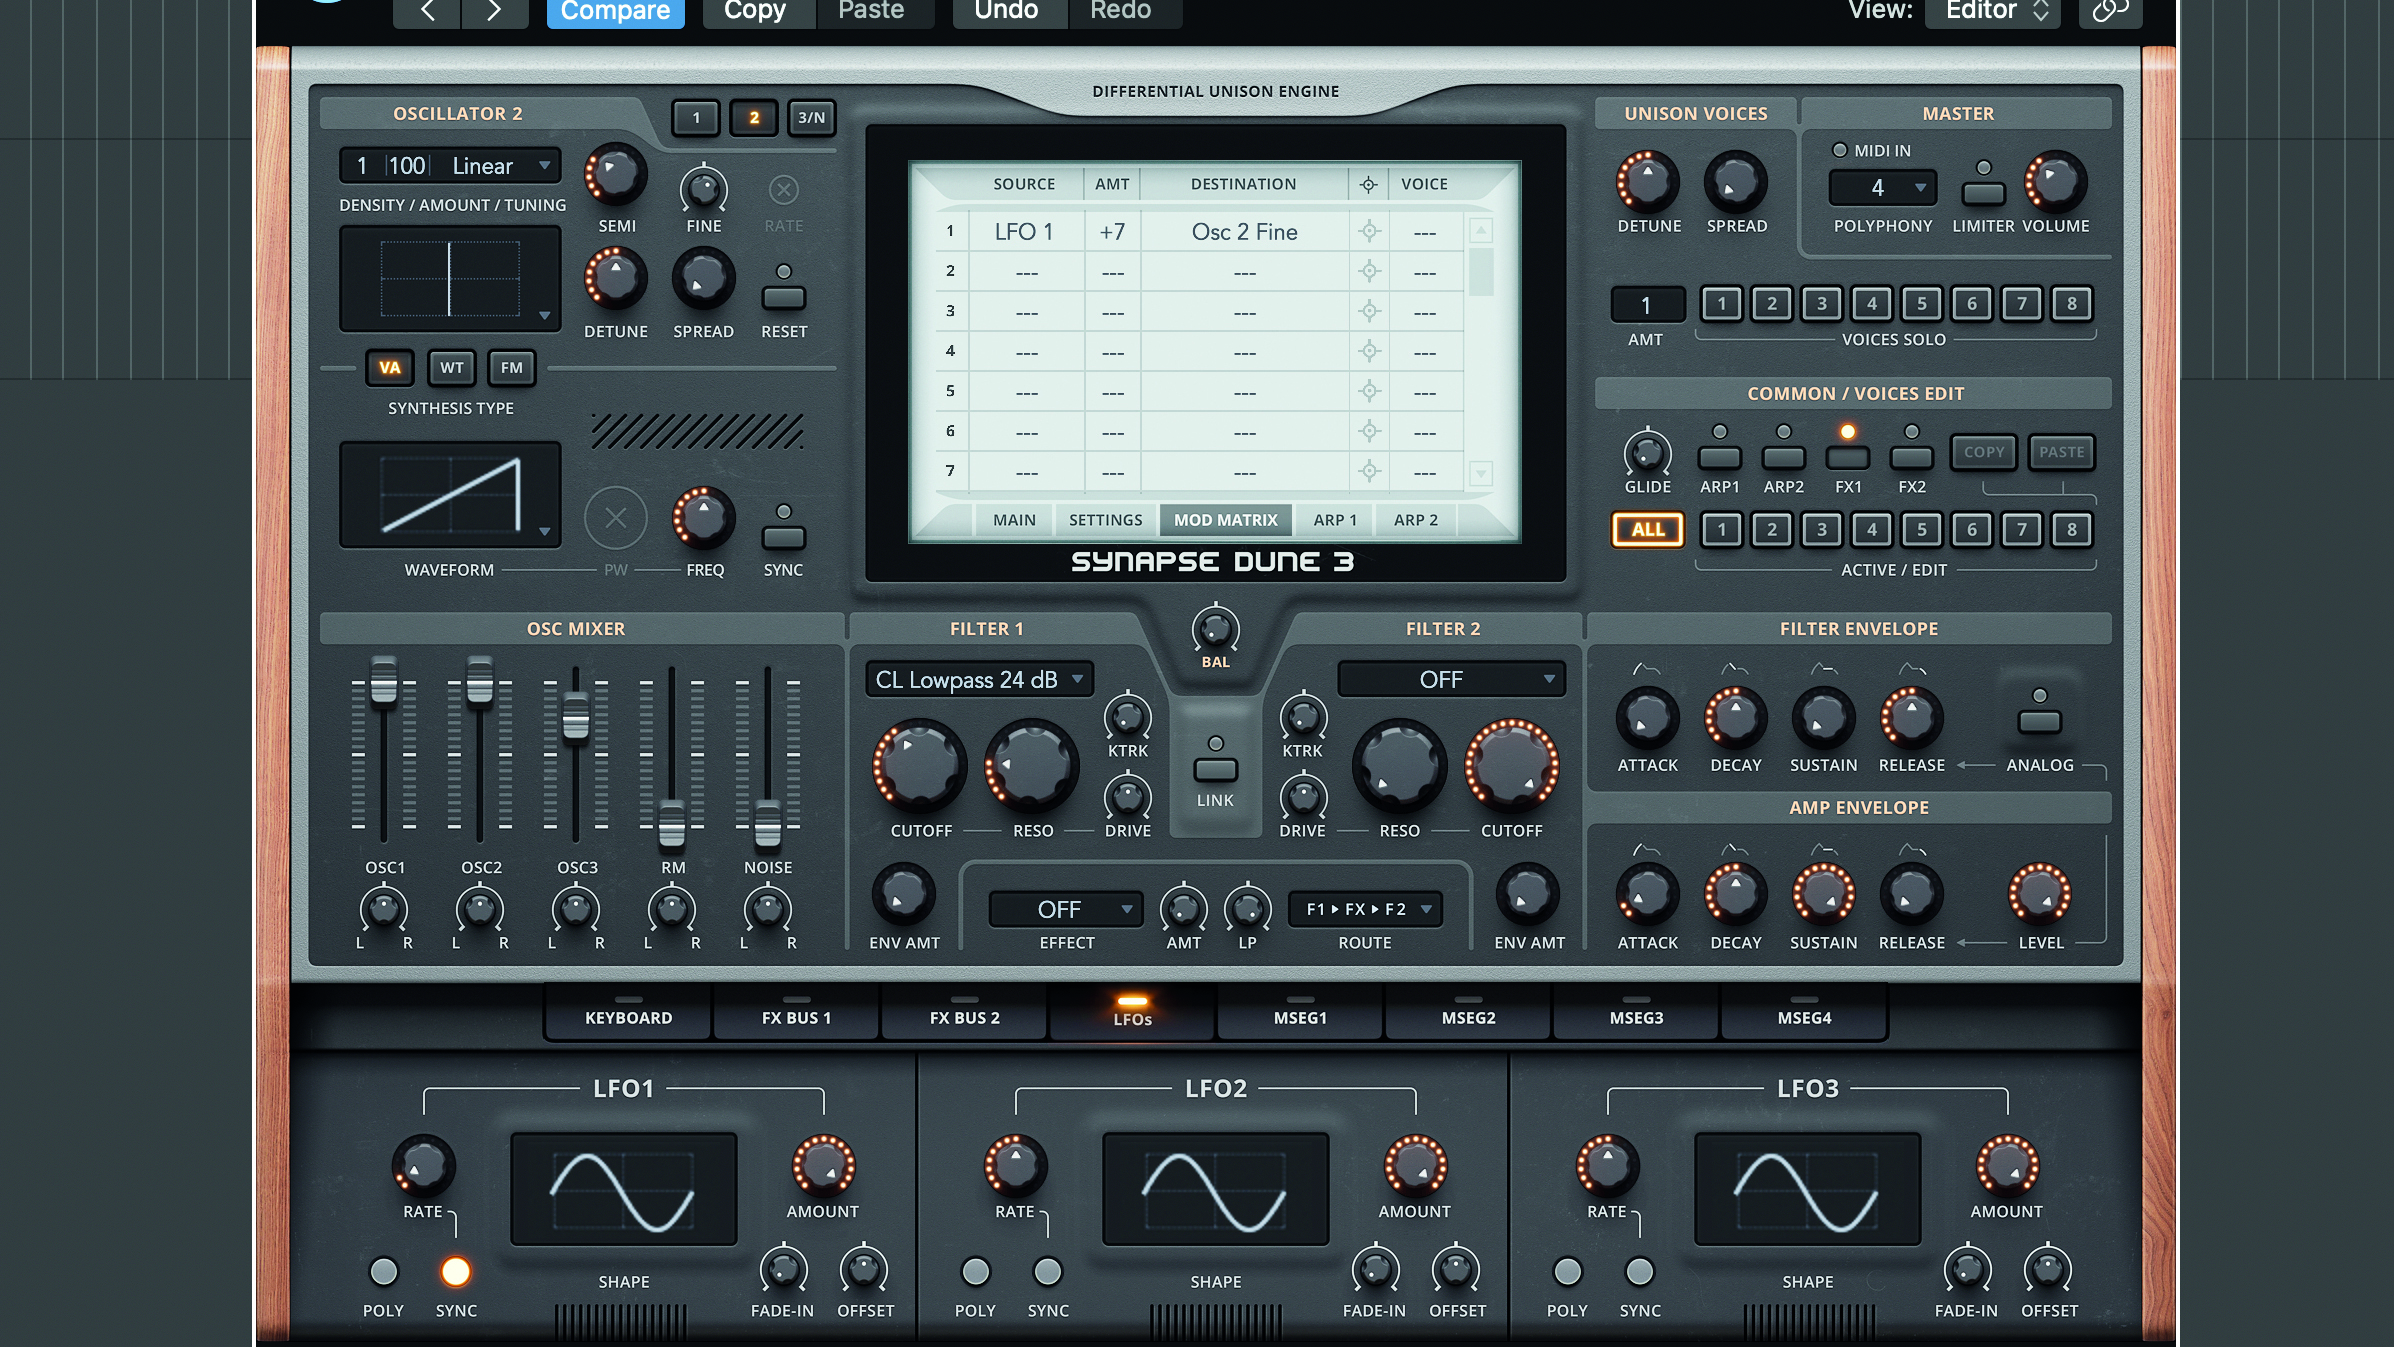
Step 2: For oscillator 2, offset the Fine detune slightly (about +25) and then modulate this very slightly using a tempo-synced LFO. We’ve set our LFO to a long period – eight bars. Now choose a low-pass filter, lowering the cutoff for a dark, brooding sound.
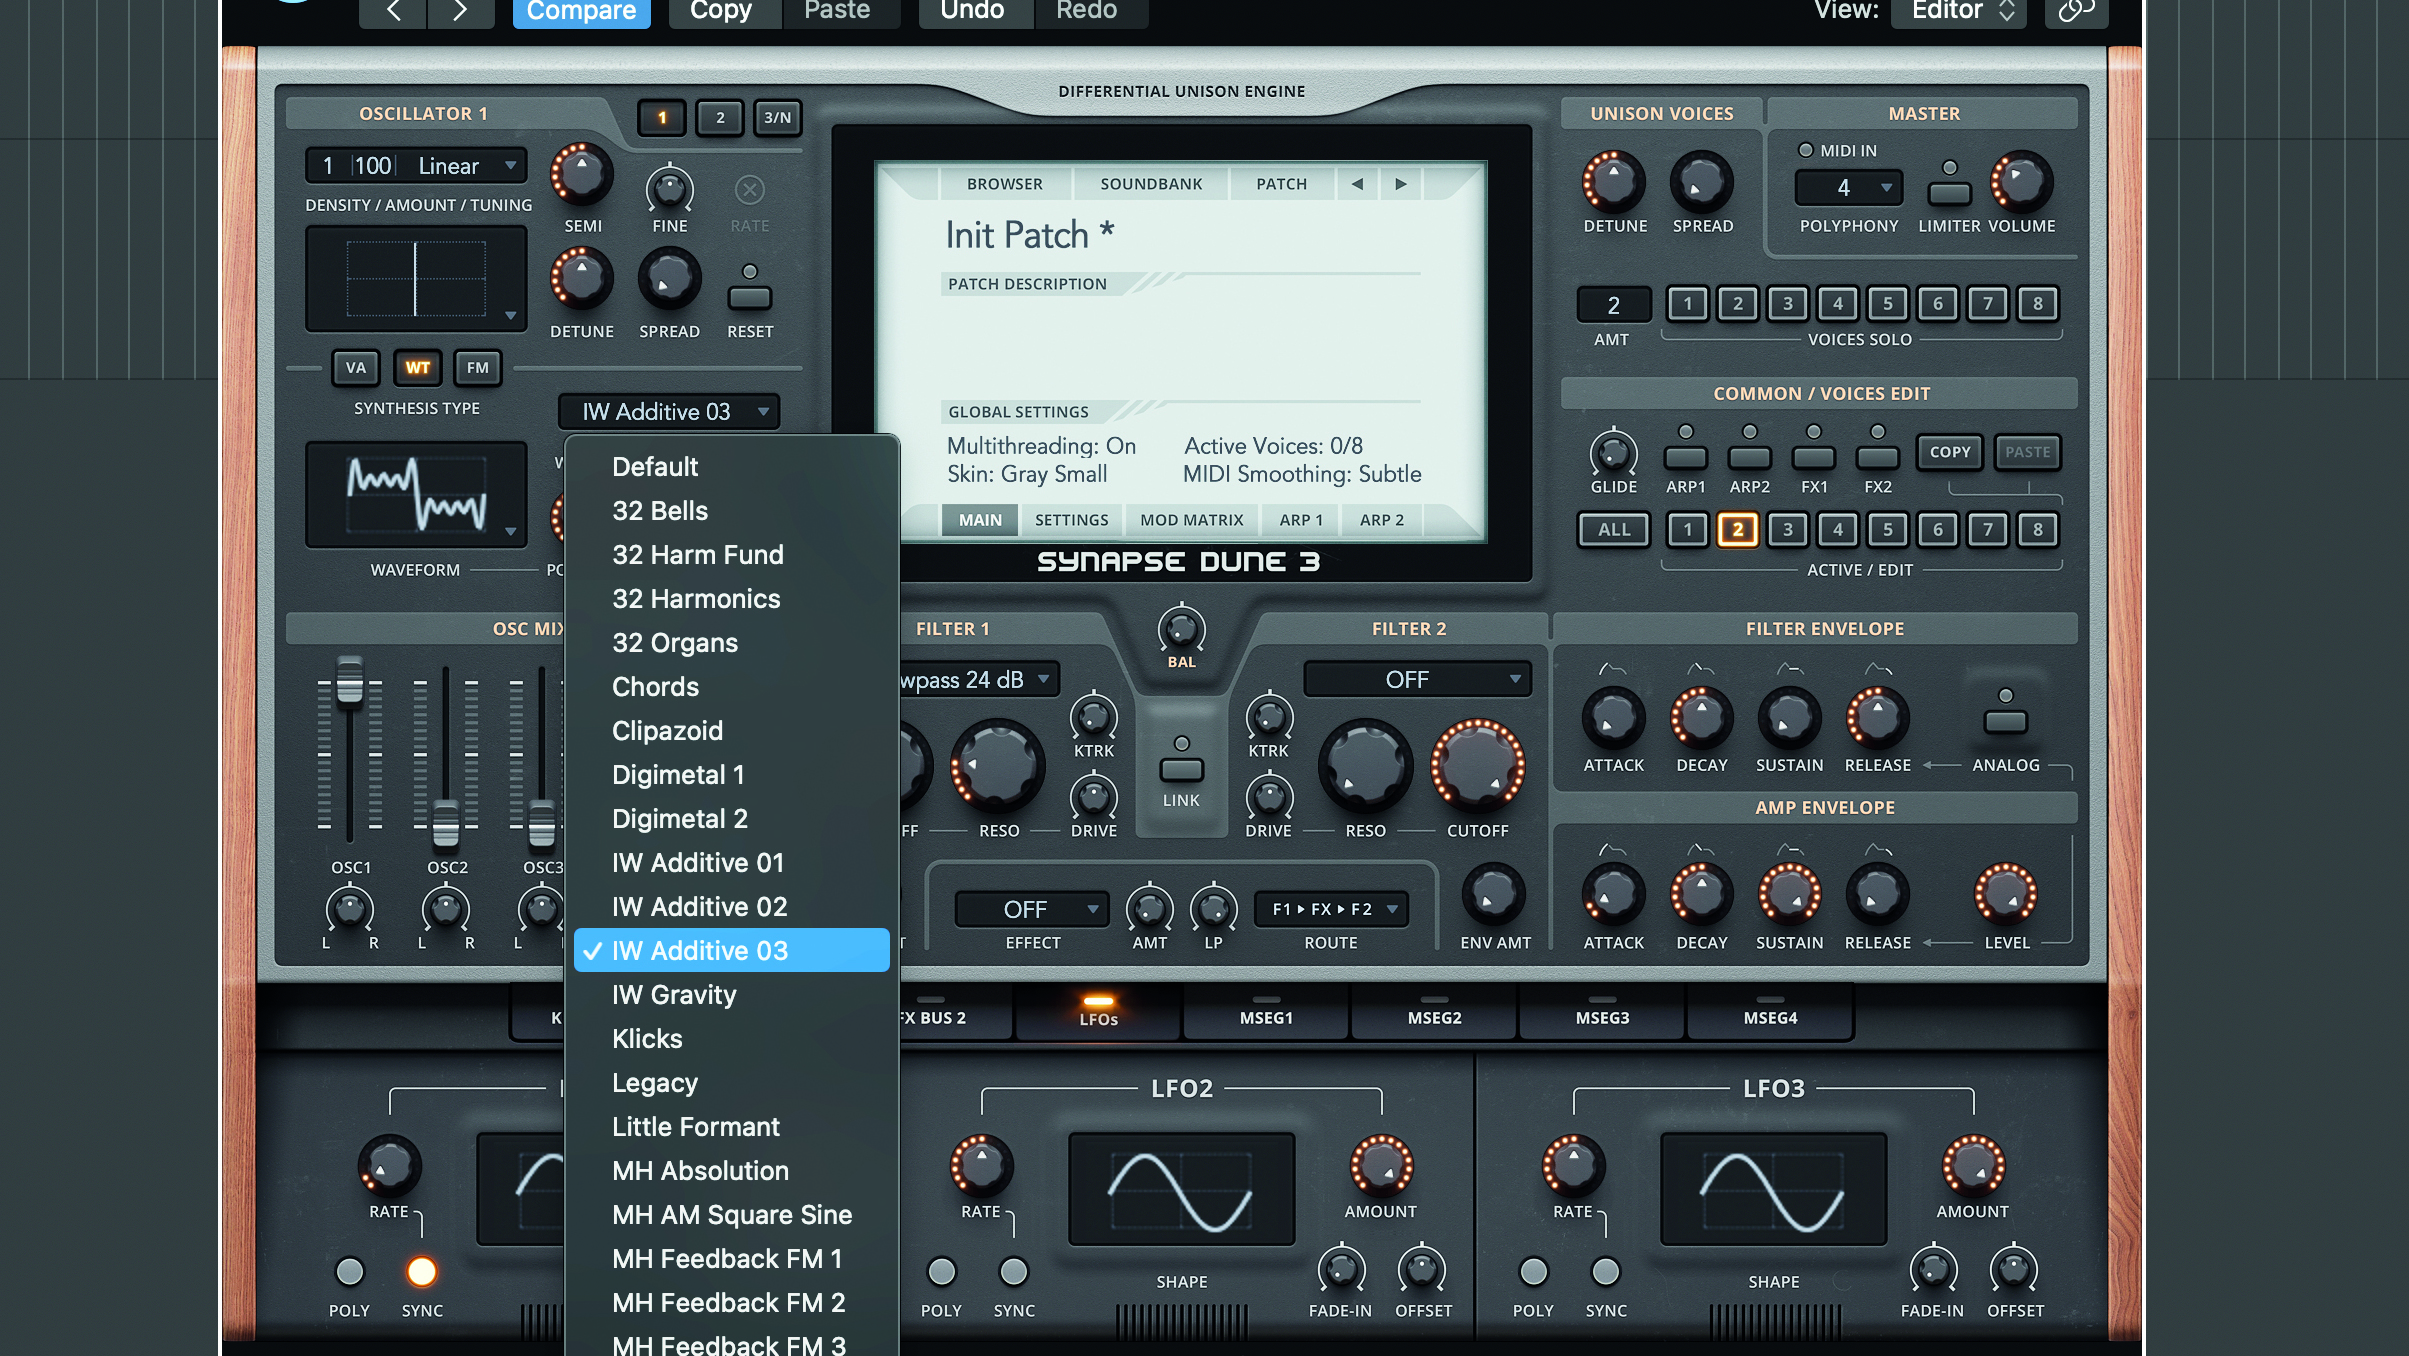
Step 3: Next, add a wavetable-based sound. Here we’ve chosen the preset IW Additive 3 and what we’ll do is use an LFO to modulate the wavetable position. We’ve set the LFO2 to a slow free time setting (about 0.01Hz) and a moderate mod depth.
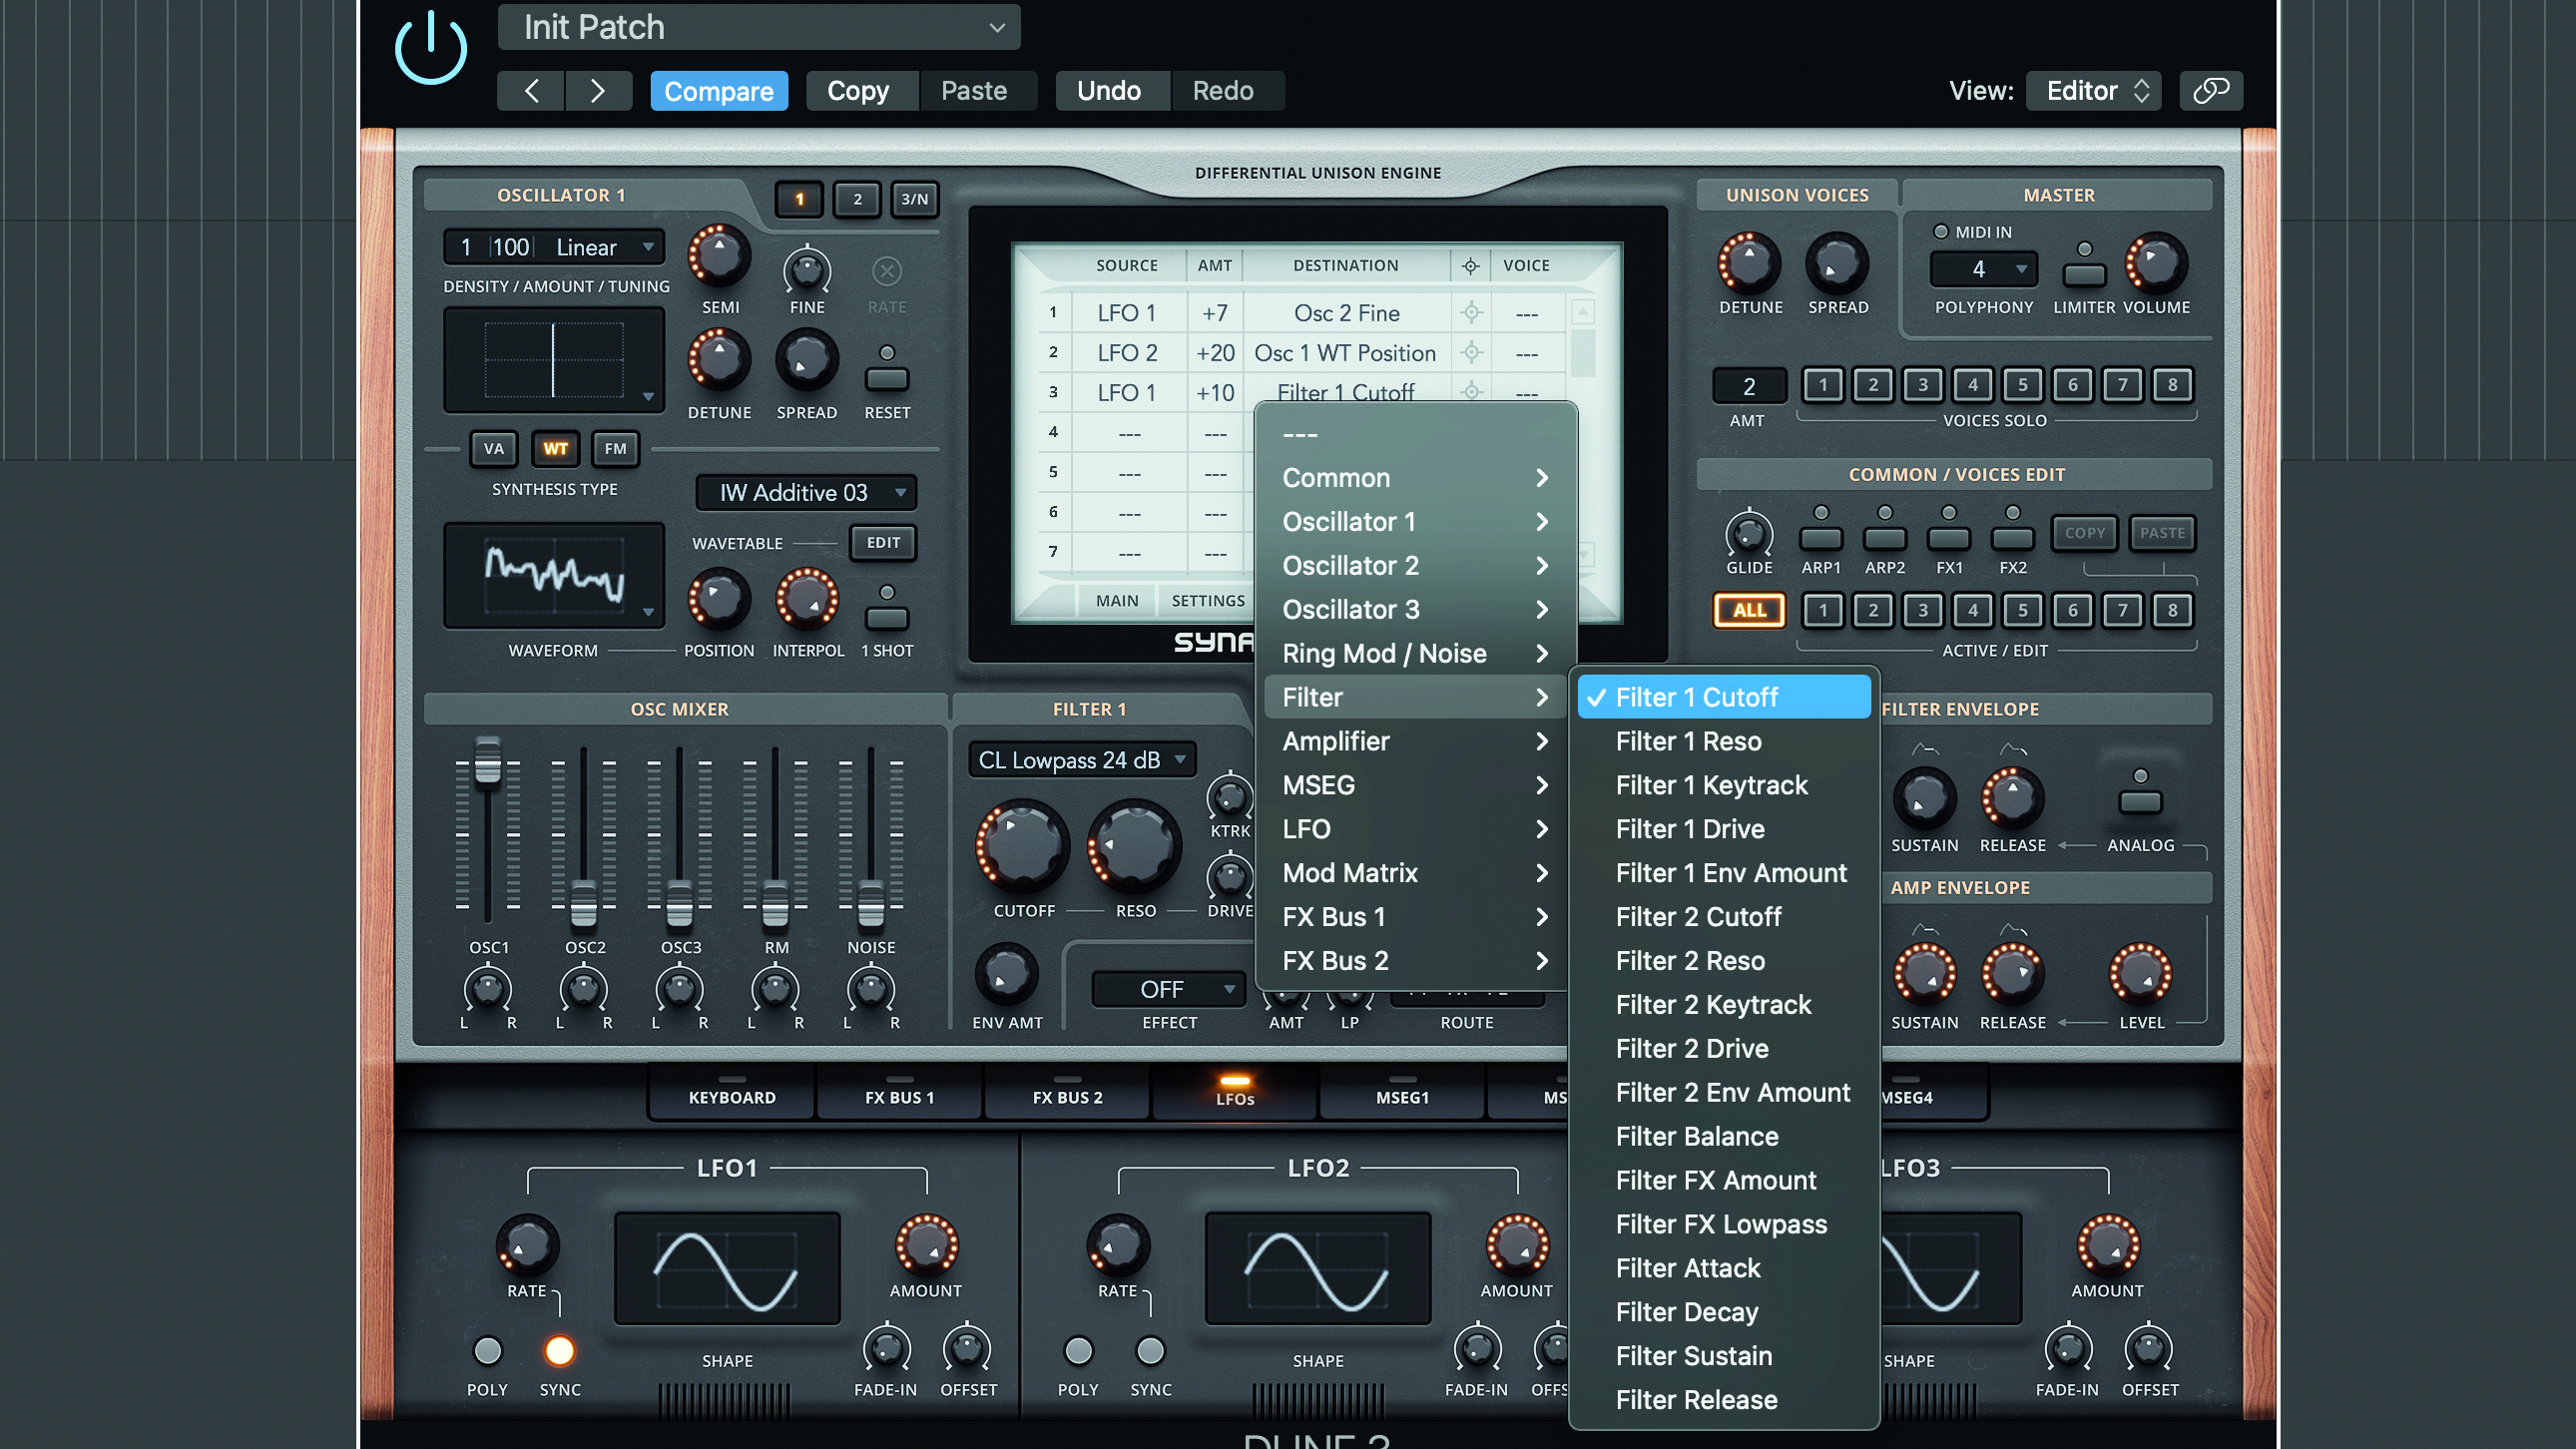
Step 4: Now try modulating the filter cutoff slightly. Here we’ve used LFO1 again with a moderate setting (about +10). Finally, adjust the amplitude envelope to taste and balance the oscillators and layers to taste. Here we’ve also panned the oscillators in our first layer.
Want all the hottest music and gear news, reviews, deals, features and more, direct to your inbox? Sign up here.
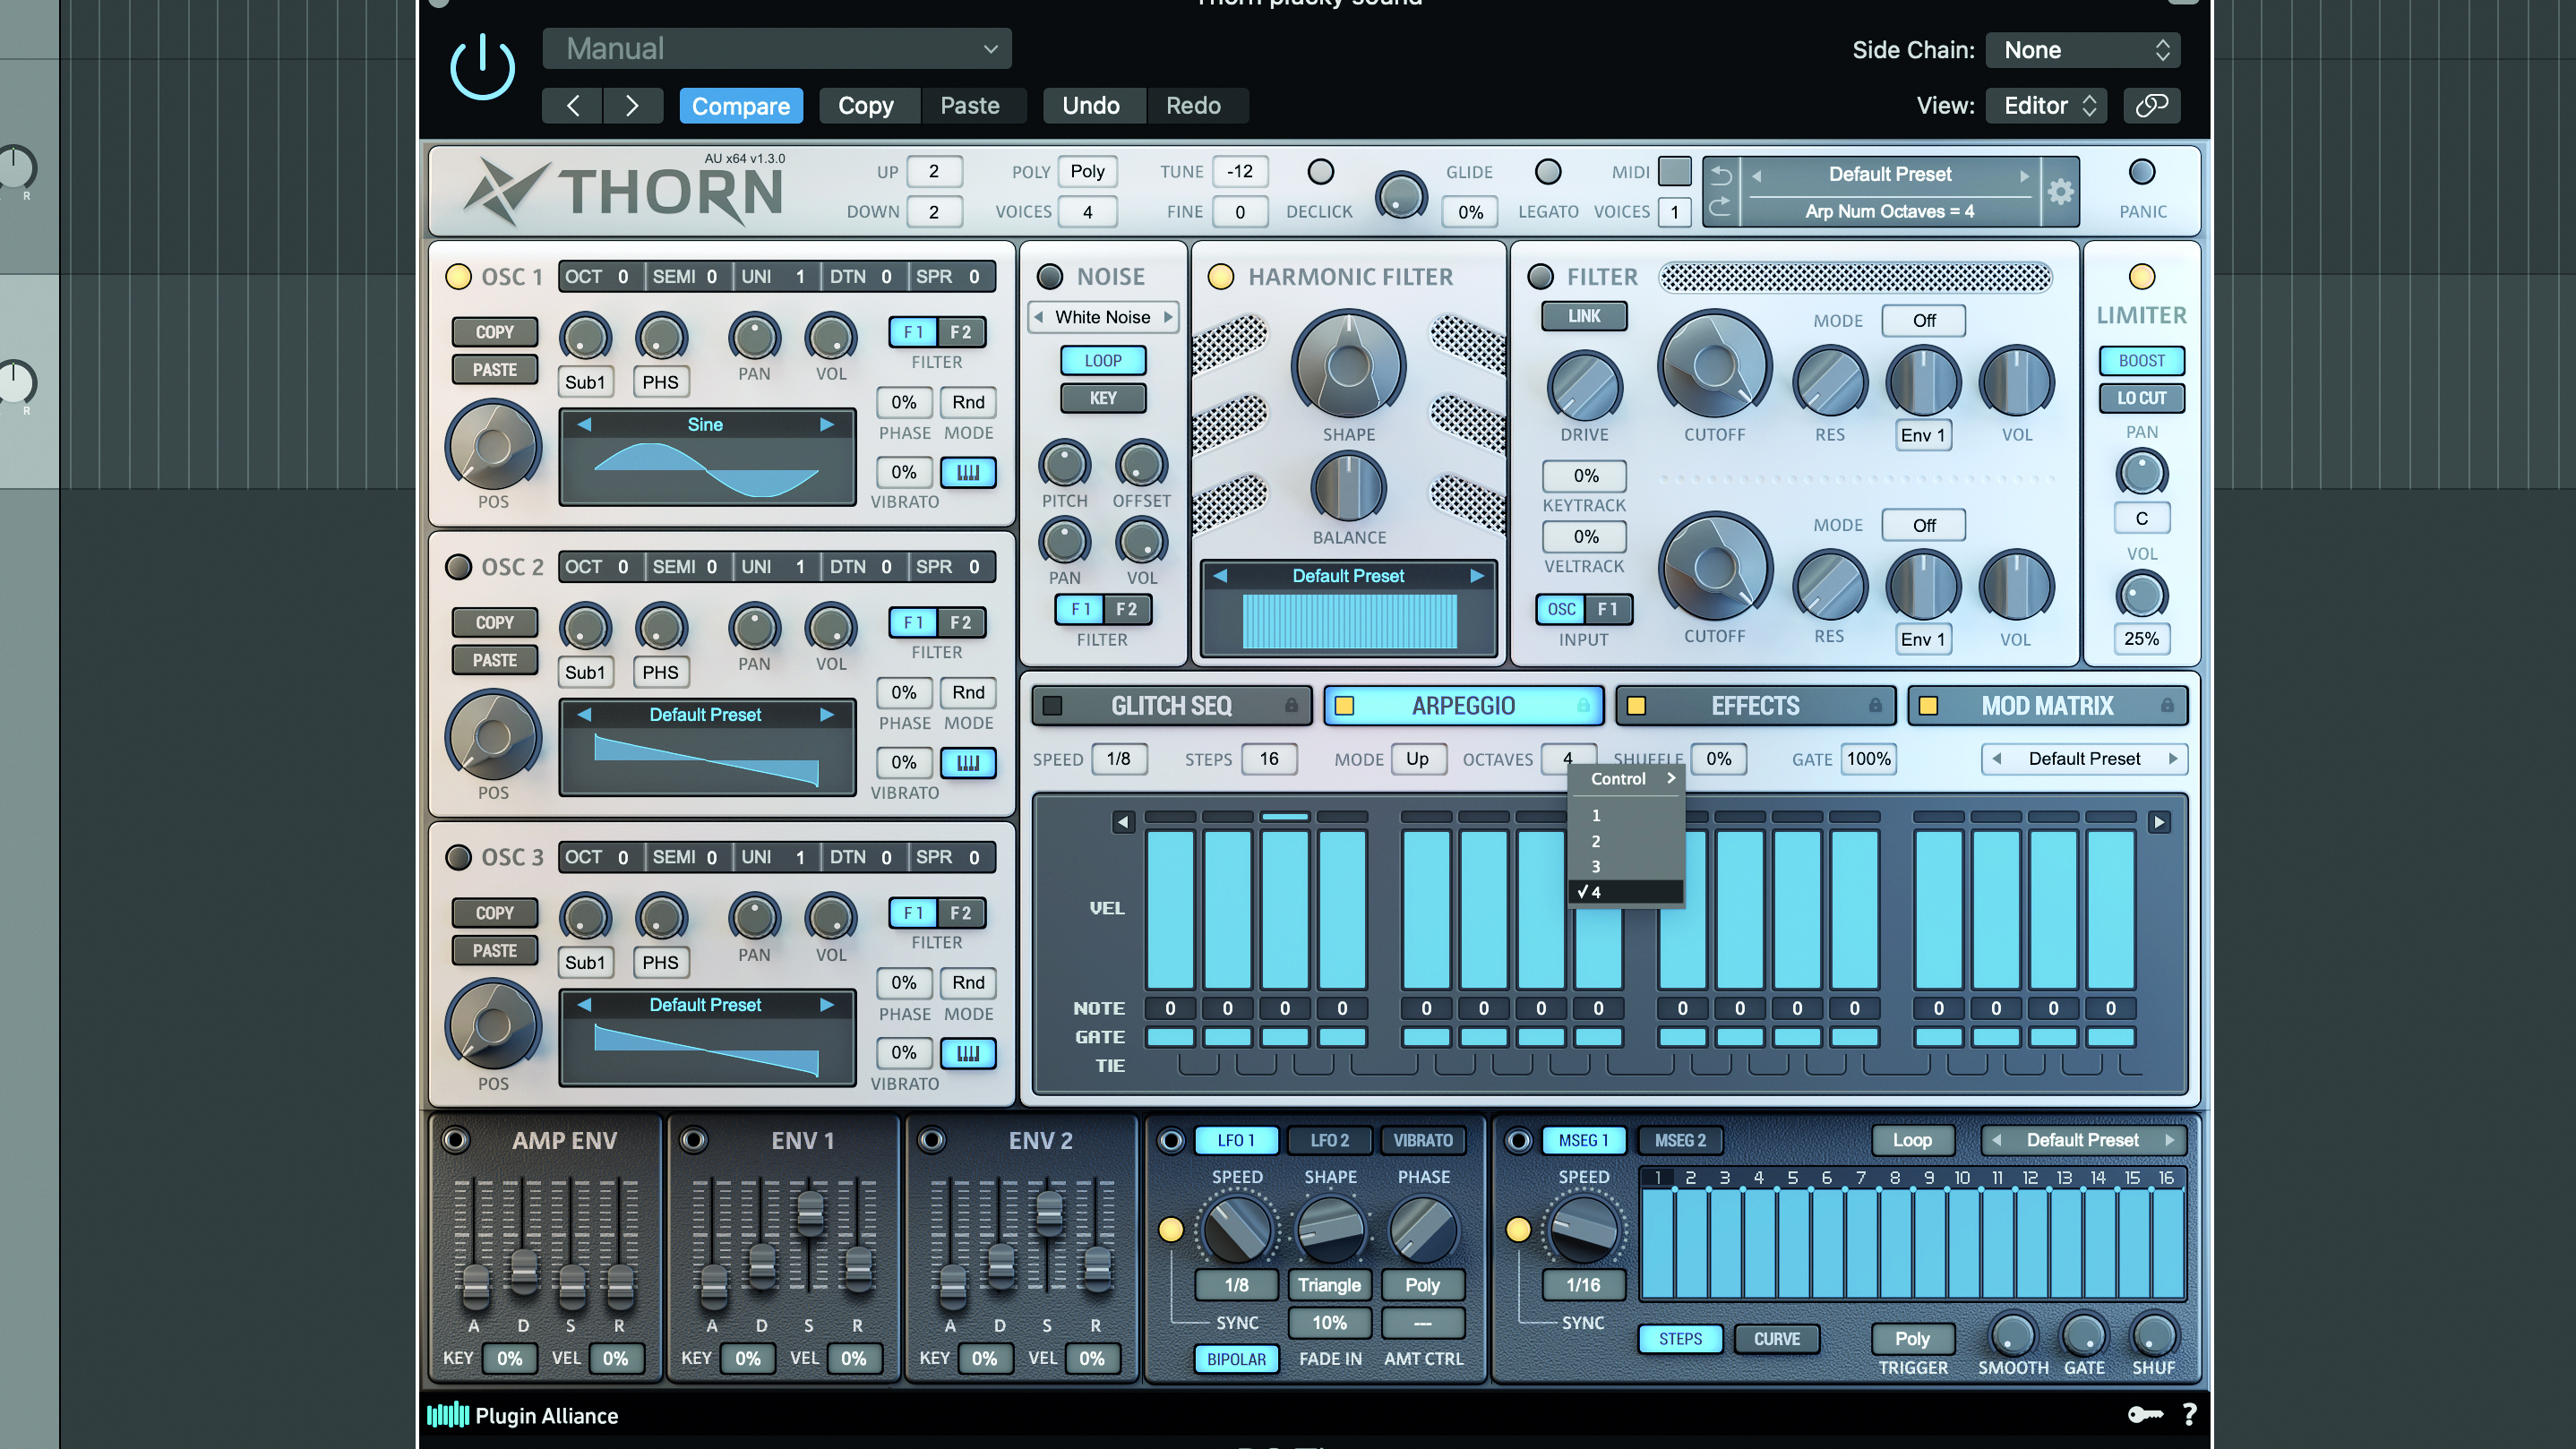
Step 5: For movement add a simple single note arpeggiator part. Here we’re using Thorn and have chosen a sine wave oscillator, setting the amplitude decay very short to create a tiny plucky sound. Now set the arpeggiator to 1/8ths and a four-octave setting.
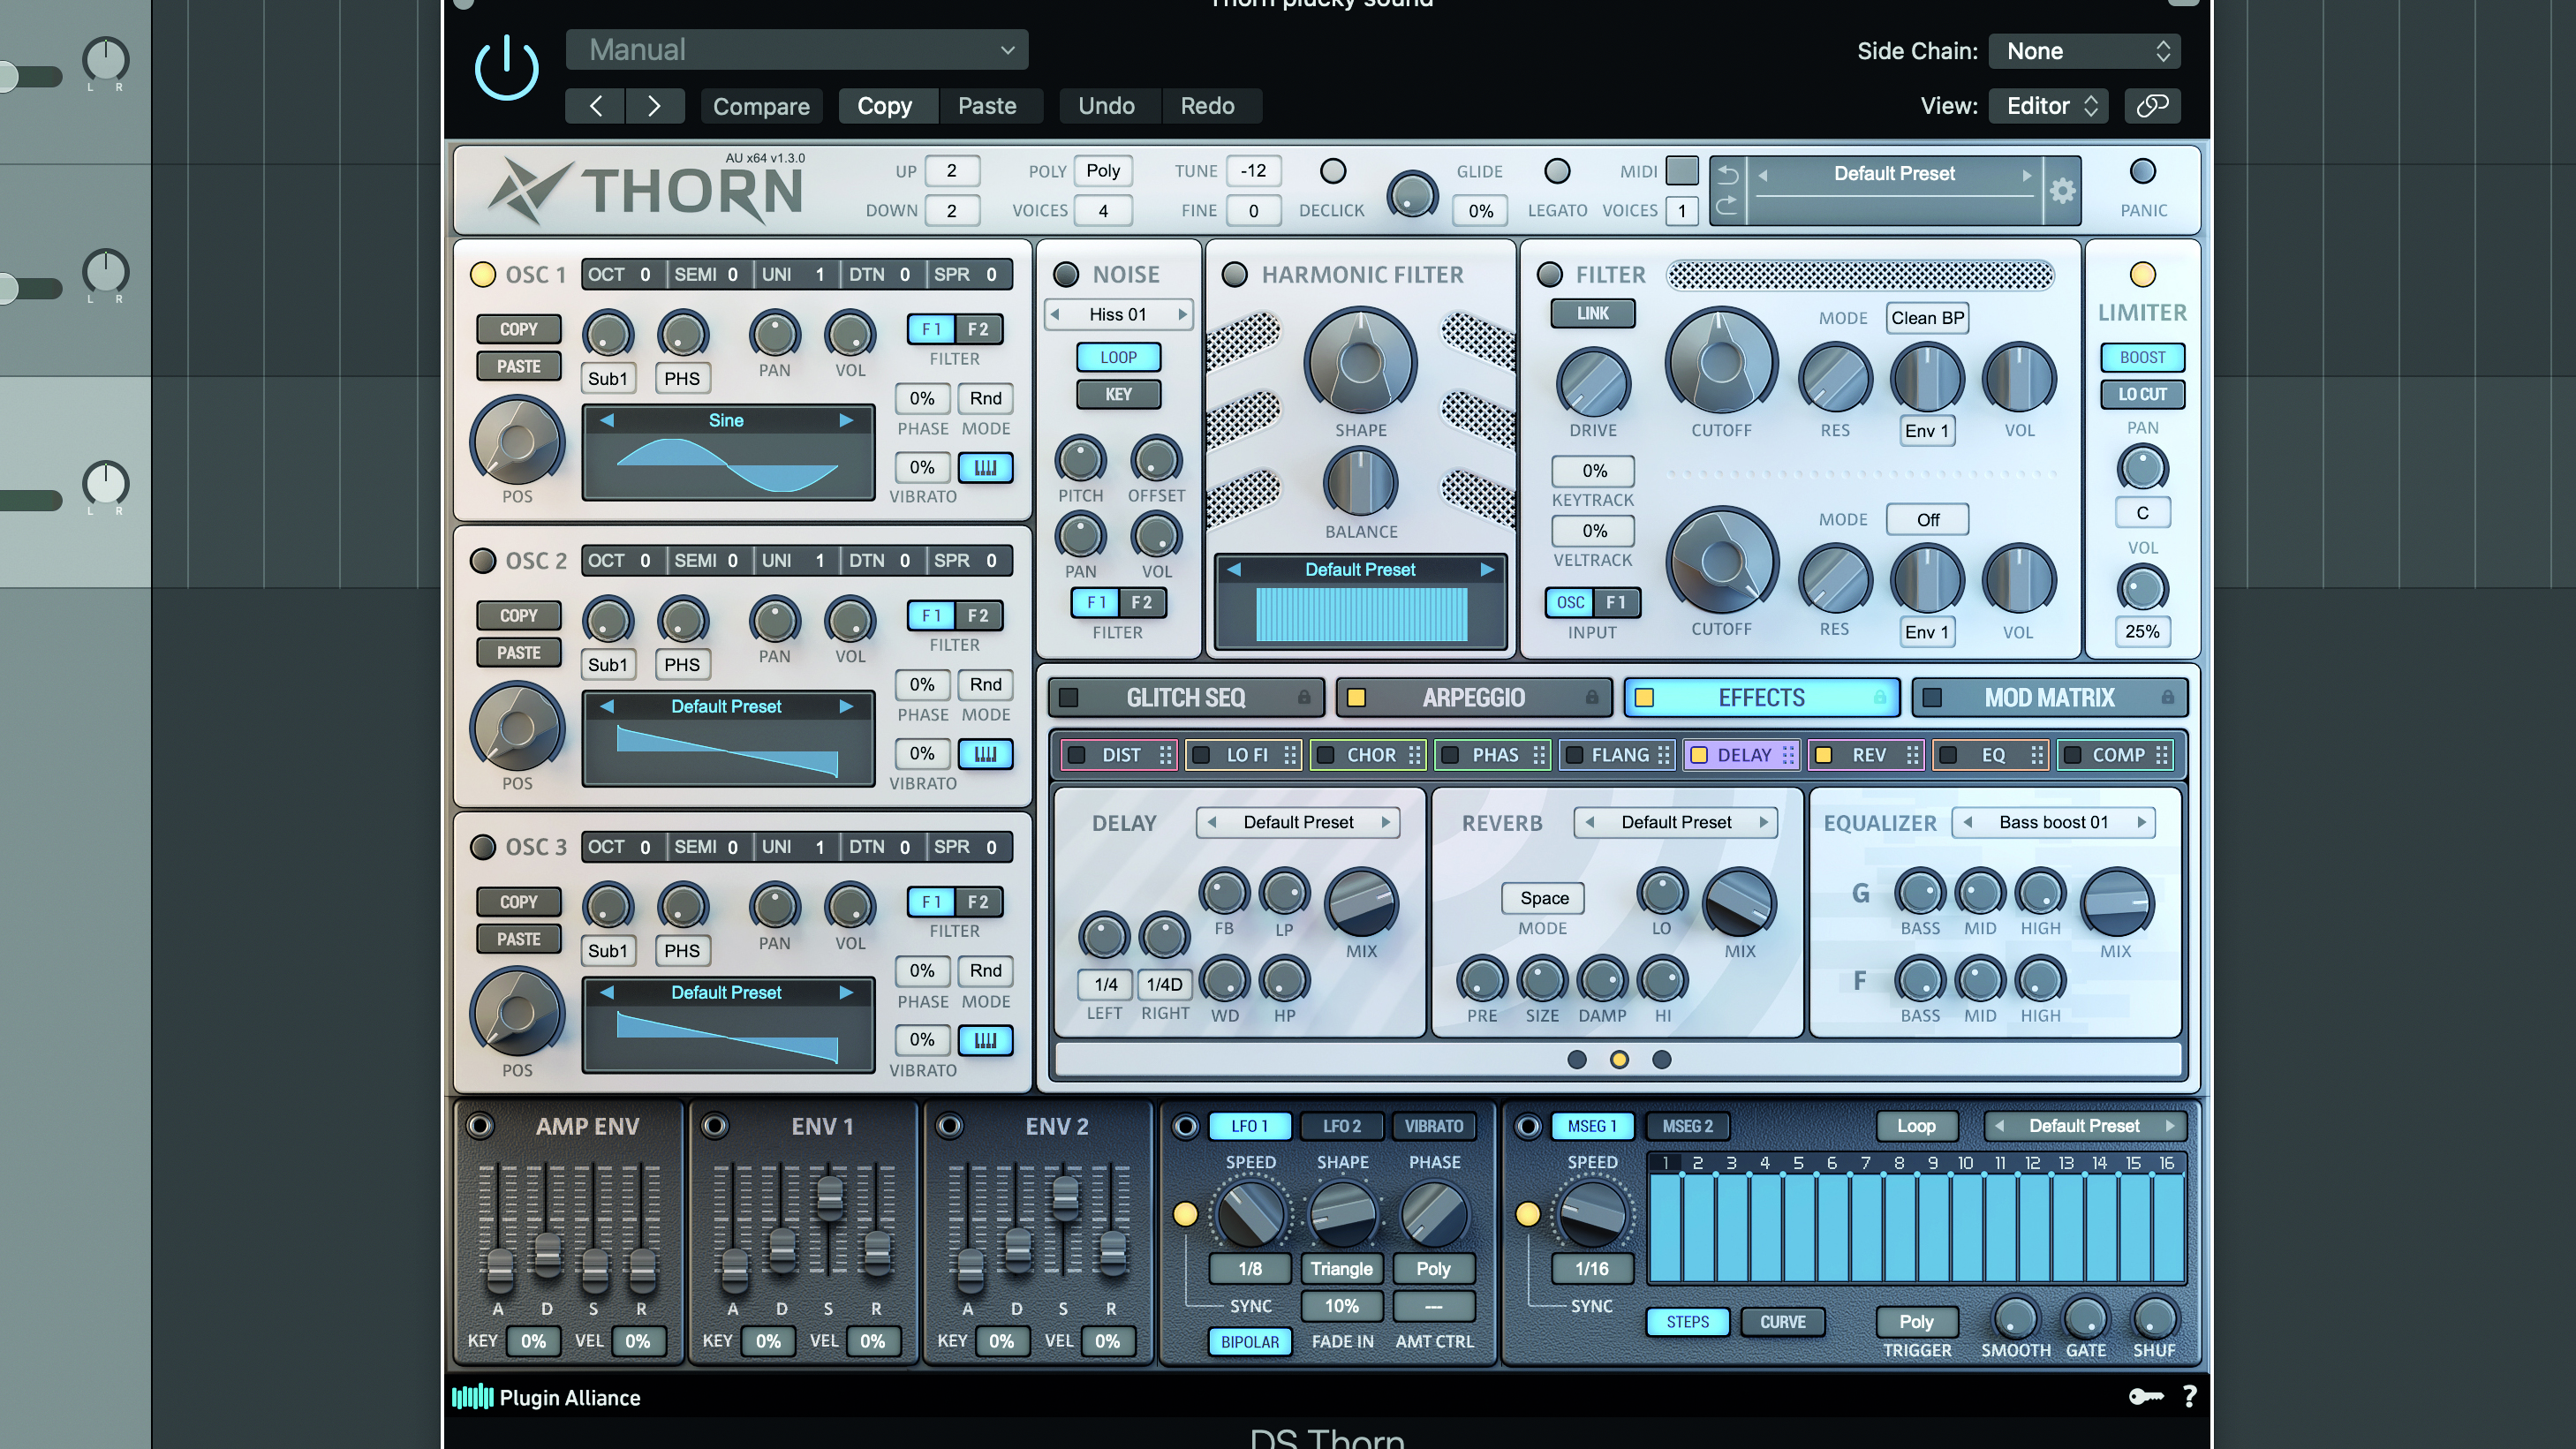
Step 6: Now use reverbs and delays to add width and space. Here we’ve used plenty on the arpeggiated sound, with some low level reverb on the drone. Finally, try automating the filter cutoffs to help integrate the sound into your track.
Future Music is the number one magazine for today's producers. Packed with technique and technology we'll help you make great new music. All-access artist interviews, in-depth gear reviews, essential production tutorials and much more. Every marvellous monthly edition features reliable reviews of the latest and greatest hardware and software technology and techniques, unparalleled advice, in-depth interviews, sensational free samples and so much more to improve the experience and outcome of your music-making.
