If you’ve been raving over the last few years, you’ll have likely noticed the renaissance of bassline house, with artists such as My Nu Leng, Chris Lorenzo and DJ Zinc combining influences from styles as diverse as grime, UK garage, jungle and house to forge a stomping, bass-heavy style that grooves along at around 128-135bpm.
The history of the genre runs deeper than this, of course, with bassline house originally gaining attention in the early 2000s thanks to big club hits by pioneers such as DJ Q, Jamie Duggan and Mr Virgo, as well as chart success for the likes of H “Two” O.
Read on for ten tips that will help you to get your bassline house game on point.
1. Mix As You Go
A good way of keeping the faith when making a dance tune in any style is to do some basic mixing as you put the track together. By sorting essentials such as volume levels and gain structure while you work, you’ll find that the track sounds more polished earlier in the process and, typically, will require less processing to sound like a finished product.
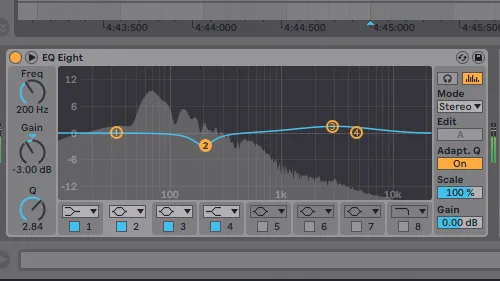
2. Mid Mayhem
A number of the higher-pitched synth basses used in bassline house carry most of their energy in the often-congested midrange area between 500Hz and 1.5kHz. If you want your mid bass to cut through more clearly, try using some broad EQ cuts to carve some of these frequencies out of the percussion, vocal and FX. Reducing the EQ amount when the bass isn’t playing will restore midrange weight for breakdowns and quieter sections.
3. Sizzling Sounds
While ear-piercing white noise bursts, shrill one-shot FX and distorted vocals sound great in any club track, it’s easy to overstep the mark and make the whole mix sound a bit ear-shredding. Applying a gentle low-pass filter at around 10kHz alongside a little de-essing to your FX bus will smooth out those high frequencies, leaving room for the percussion and synths to shine.
4. Stereo Special
Adding some extra stereo width to midrange synths can sound great, particularly when listening on headphones or studio monitors. We recommend adding it on an FX return aux, as this allows you to mix the wet effect in (with a 100Hz high-pass filter applied afterwards) to remove any stereo sub frequencies created by the effect.
5. Clean Compression
If you’re applying compression to heavily detuned or distorted synths, don’t discount your DAW’s stock offering. Unlike compression plugins modelled on hardware, your DAW’s in-the-box option won’t add any harmonic distortion or excitement when gain reduction is applied, preserving the character and cleanliness of your sounds.
6. Borrowed Time
Dialling in a few milliseconds of time delay to an offbeat hi-hat can make a big change to the character of your drums. Delaying the hat slightly behind the beat gives a more laid-back, lazy feel, while pushing it ahead of the beat adds pace to the rhythm track.
7. Down The Middle
As many of the synths in bassline house are coated with stereo effects and unison detuning, they can suffer from phase cancellation when summed to mono. Auditioning your mix through a mono utility plugin lets you hear which elements sound weak in mono, which can be fixed with mono FX sends or mid/side processing.

8. Kick Trick
A proven way of helping a 4/4 kick and snare fit together more easily is to take an EQ bell cut out of the kick roughly corresponding to the snare’s fundamental frequency. This’ll give the snare a little extra room, making the drum mix sound cleaner and neater. If you find that the EQed kick sounds too different when it’s playing alone, try bypassing the EQ cut with automation when the kick’s not clashing with the snare for a more invisible effect.
9. Sub Club
Sidechain compression on sub bass can be great for giving a kick drum more breathing room, but it can also take some of the low-frequency density away. Using a sidechain EQ plugin such as Wavesfactory TrackSpacer is a much more subtle, configurable way of achieving the same goal without removing too much bass from the mix. Fast attack and release times – plus careful use of sidechain filters – can give you crystal-clear results.

10. Percussion Power
If your percussion isn’t sounding strong enough in the mix, you might find that turning it up will end up making the higher frequencies sound cluttered or spiky. Instead, try adding some density to your percussion bus by using processing such as parallel compression, tape saturation or amp distortion to round off transients and increase the average loudness level of high frequencies.
