20 precision-tooled Pro Tools power tips
Get more from the perennial ‘industry standard’ DAW of choice with these techniques
Want all the hottest music and gear news, reviews, deals, features and more, direct to your inbox? Sign up here.
You are now subscribed
Your newsletter sign-up was successful
Still a pro studio staple, Avid's Pro Tools is also the DAW centrepiece of many a home recording setup.
If you're wondering what all the fuss is about, ready on to discover 20 of the tricks that Pro Tools can pull off.
1. Band-pass switching
Pro Tools has a great feature in its EQ3 1 and 7 EQs: automatically transforming an EQ band into a band-pass filter, allowing you hear the area in isolation. Hold Shift+Cmd on Mac or Win+Shift on PC, then move an EQ node to temporarily switch the EQ band to a band-pass. This allows you to find those troublesome frequency areas with ease.
Article continues below2. Turn off the click
Click tracks are great for recording, but they’re not always welcome during playback. You can set Pro Tools’ click to only sound during recording, which saves you constantly clicking that mute switch. Head to the Setup menu, then Click/Countoff and select Only During Record. The click will now automatically mute during playback, and come on when you’re recording.
3. Come on, my selection
We’ve all zoomed in on a piece of audio to perform a tight edit, highlighted the section and finely tuned the start and end points, only to click out of the area by mistake and lose our work. It’s extremely frustrating - but Pro Tools has you covered. Next time you lose a selection, just hit Option+Cmd+Z on Mac (Ctrl+Alt+Z on PC) to restore the last selection.
4. Get off the grid
For a lot of electronic music, you’ll often find yourself working in Grid mode - but being 100% locked to the grid doesn’t always bring the right feel. A quick shortcut to turn off grid snapping is to hold Cmd on Mac or Ctrl on PC as you drag a clip. You’re now free to place your sample off grid to fine tune that groove.
5. Clip Effects
If you’re fortunate enough to own a Pro Tools HD system, version 12.6 brought the new Clip Effects feature - a channel strip plugin that can process each clip independently. Select the clip and press Alt/Option+6 to bring up the new channel strip and get access to EQ, compression and an expander/gate for each clip discretely.
Want all the hottest music and gear news, reviews, deals, features and more, direct to your inbox? Sign up here.
6. Solo exclusive
By default, solo mode in Pro Tools latches. However, you can change this so that soloing one channel un-solos another - very handy for quick A/B checks between channels. To change the solo operation, head to Options > Solo Mode, and select X-OR.
7. Hunting transients
Pro Tools’ Tab to Transient function is an incredibly fast means of chopping up samples. Simply press the Tab key with an audio file selected and you’ll jump to the nearest transient; press it again and you’ll jump to the next one. If you skip past the transient you were after, Option+Tab on Mac or Ctrl+Tab on PC will hop back to the one before.
8. Group activity
Chopping up lots of audio on the timeline quickly builds up a large number of clips across several channels, making it fiddly to move things around in groups. You can link as many clips as you like by selecting them and pressing Ctrl+Option+G on Mac or Ctrl+Alt+G on PC. All clips can now be dragged around as one for easy transportation.
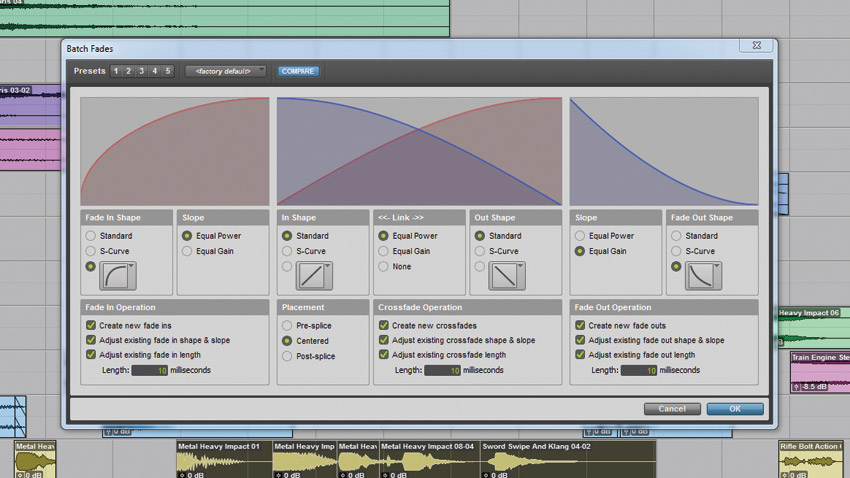
9. Better fades
Pro Tools 12.3 introduced improved fade options. Highlight a bunch of clips, then hit Cmd/Ctrl+F to bring up the Fade dialog. Batch fades allow for independent settings for crossfades, fade in and fade out. Also check out the new Fade Preset option, which allows you to store five setups.
10. Playlist loop recording
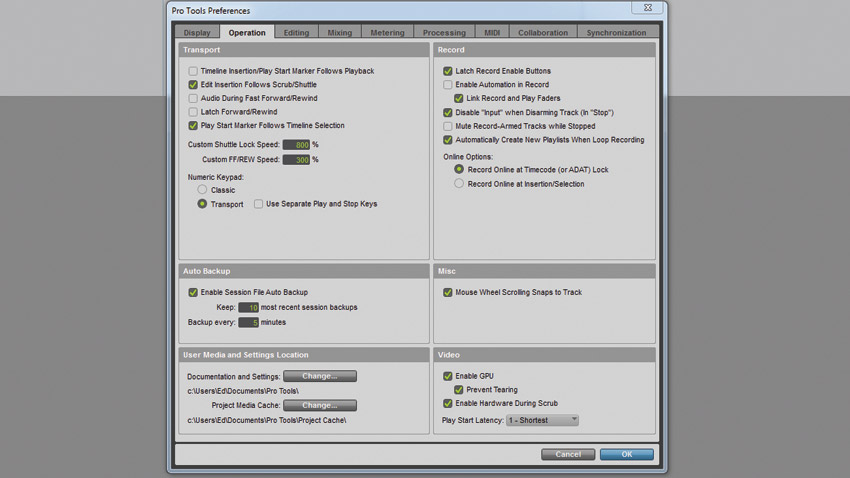
Step 1: When recording in a loop, the playlist loop recording feature stores all recording passes in one playlist, enabling you to find the best take easily. Head to Setup > Preferences » Operation, then select Automatically create new playlists when loop recording.
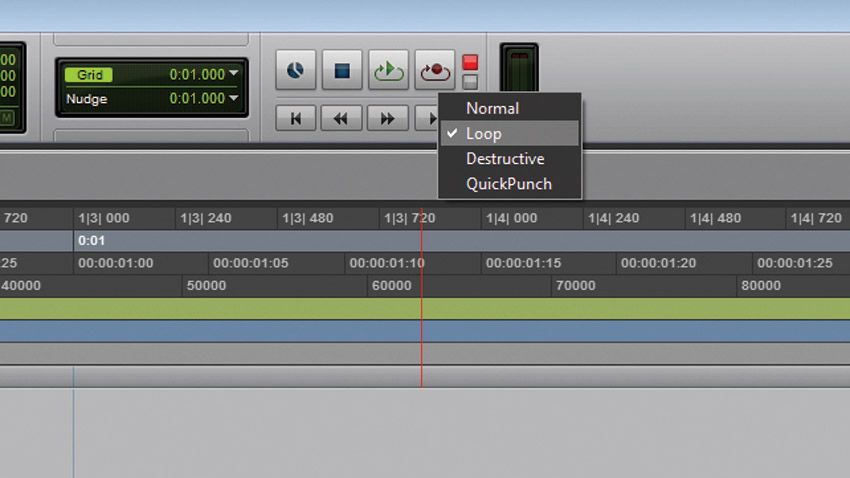
Step 2: Right click the Record and Play buttons in turn and select Loop to enable loop recording and loop playback. Now arm the audio track you want to record to, highlight the section you want to record over and start recording. Have a few attempts at the same part.
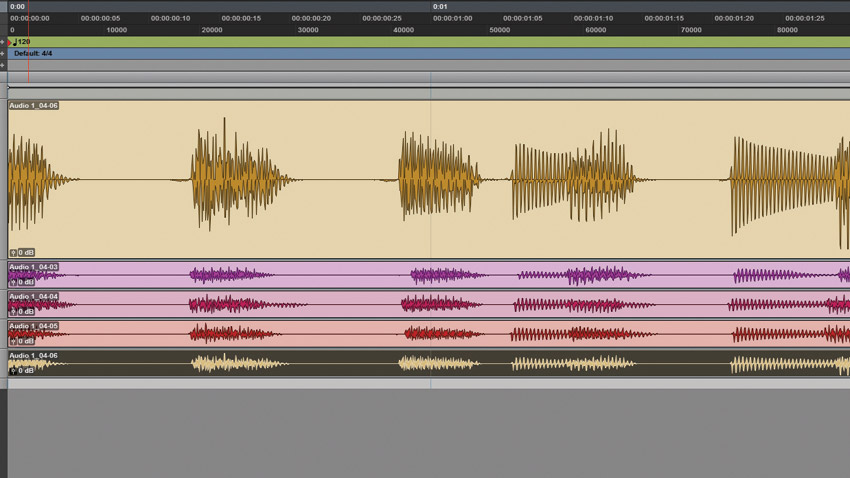
Step 3: Head to the Track View Selector dropdown and select Playlist. You’ll see all your passes listed in sub channels. Solo each take to find one you like. Once you've done that, click the clip then the corresponding up arrow to promote it to the main channel.
11. Wide boy
Did you know you can increase the width of the meters in the mix window? By default, Pro Tools shows the mix window with narrow meters. Hold Ctrl+Option+Cmd (Ctrl+Win+Alt on PC) and click any channel meter to swap to the wide meters. This can be very handy if you’ve selected the narrow mix view, but want slightly thicker meters.
12. Mousing policy
Efficient navigation around a session is essential for productive workflow. Apple’s Magic Mouse handles this particularly well, allowing for both vertical and horizontal scrolling. If your mouse only has a regular scroll wheel, vertical scrolling is no problem, of course - but you can also scroll horizontally by holding the Shift key.
13. Magic markers
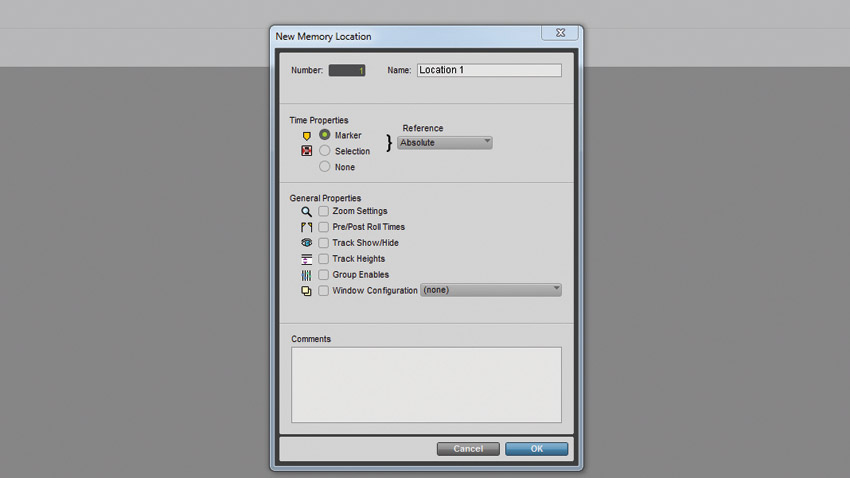
The Enter key will quickly insert a marker wherever the playback cursor is positioned. These aren’t just markers, though; they’re also memory locations which enable you to store many things, including zoom settings and track heights. You can easily flick between these positions by quickly pressing the . key on your numpad, then the number of the location, then . again.
14. Selective bounce
Pro Tools has an option for bouncing audio up to a particular point in the effects chain. Right-click an insert and select Commit - Up to This Insert. A new audio file is rendered on a new channel and the original channel is automatically hidden and deactivated, so you can always go back if you want to.
15. Slow it down
When working on a fast-paced track with lots going on, it can be tricky to pick out potential flaws with the rhythm. Pro Tools handily provides a shortcut for half-speed playback, slowing everything down to a more manageable pace. Simply hold down the Shift key before you hit the Spacebar.
16. Back right up
Power cuts, hard drive failures and careless mistakes can lead to the loss of a session. Pro Tools has an ultra-useful Automatic Backup feature, which can save your life if the worst happens. Head to Setup > Preferences > Operation, and make sure Auto Backup is checked. This feature is also great for rolling back to earlier versions of your track.
17. ’Suite as
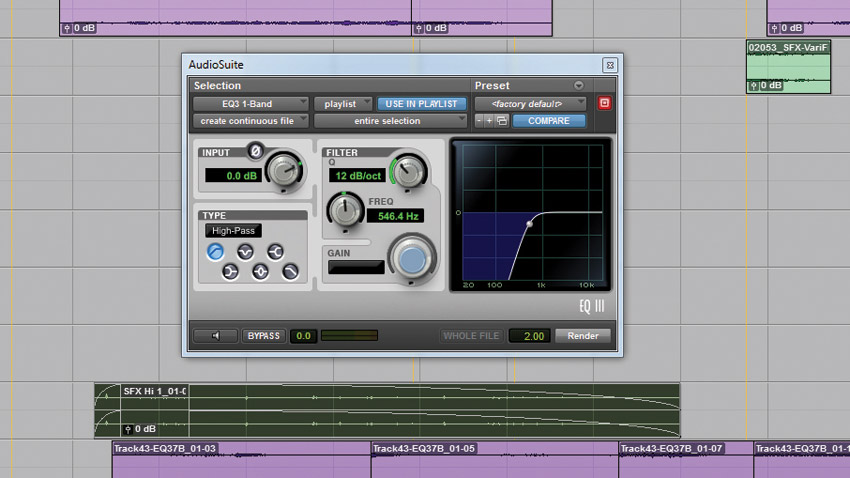
Real-time processing is great, but don’t overlook the Audiosuite option, which renders the effect into the clip. Real-time processing chews up CPU resources, potentially slowing your session down and introducing clicks and pops. If a particular effect is static, or only required on a particular clip, then use Audiosuite processing to keep things light, clean and tidy.
18. Louder sends
When creating a send, Pro Tools defaults its fader to -inf dB. This can be useful, but if you’re creating a lot of sends it can be a pain going through them all and raising the faders. Head to Setup > Preferences > Mixing, and uncheck the Sends Default to -INF box. Now, when you create a send, its fader will default to 0dB.
19. Redundancy notice
If you’ve been working on a track for a while, chances are you’ve got a pile of redundant audio sitting in your session’s folder doing nothing but taking up valuable disk space. Click the Clip menu and press Cmd/Ctrl+Shift+U to select all unused clips. You can now delete those files, freeing up disk space and keeping things tidy.
20. Meters made
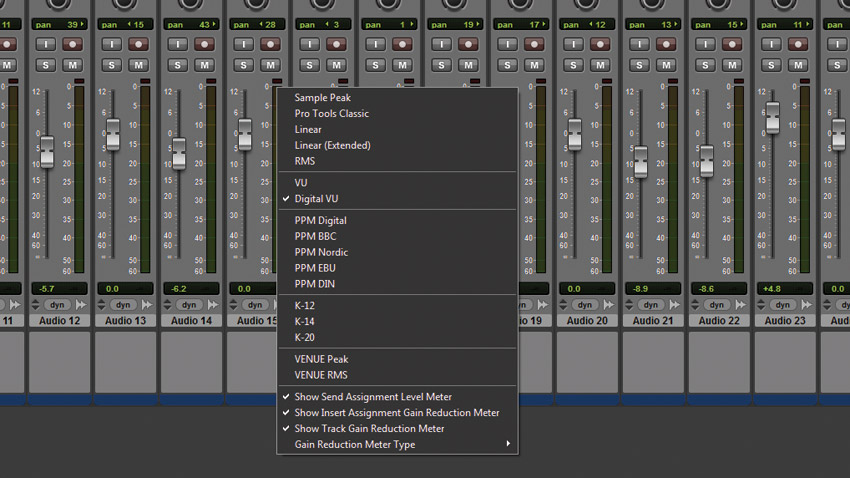
Pro Tools has you covered for customised metering, with a multitude of options for those dancing bars. Right-click on a channel meter and, depending on which version of Pro Tools you have, you’ll see several choices. By default, it’s the standard Digital-VU meter, but there are many more settings, including RMS and K-metering.
Computer Music magazine is the world’s best selling publication dedicated solely to making great music with your Mac or PC computer. Each issue it brings its lucky readers the best in cutting-edge tutorials, need-to-know, expert software reviews and even all the tools you actually need to make great music today, courtesy of our legendary CM Plugin Suite.
