Putting powerful audio editing at our fingertips is an expected feature in any self-respecting modern DAW. But with so many options available these days, it’s all too easy to become overwhelmed, and there’s nothing more tedious than drilling down into the manual when all you really want to be doing is producing music.
With these 10 tips, we’re going to unlock a selection of useful and universal audio editing features. They range from the simplest of cursor and keyboard moves to both nondestructive and destructive editing trickery, as well as some of the more complex audio manipulation features available, such as flexible timestretch editing and quantising.
By necessity, we’re going to be demonstrating each tip in one of two specific DAWs – Apple Logic Pro X and PreSonus Studio One 4. Even so, you’ll find that many of these features do exist in other DAWs as well, albeit under a variety of different names.
Each technique should help speed up your workflow and, when you’ve seen the benefits, maybe galvanise you into seeking out the many further editing features lurking in your DAW.
But that’s enough of the theory, let’s take your audio editing game to the next level.
1. Destructive editing

We’re all used to using nondestructive editing tools in our DAWs, and they’re often ideal, but there are times when more permanent changes are desirable.
In Logic Pro X, selecting and opening an audio region in the Audio File Editor reveals both Track and File options, and the latter make permanent changes to the original file. With the Editor open, use the local Audio File menu to make a backup of the original file, so you can return to your starting point if things go wrong.
Next, highlight a section of the file to edit, then choose a process from the Function menu. Options include gain change, normalise, reverse, fades and timestretch. Here, we’ve simply reduced a specific peak’s level.
2. Tab to transients

Whether you’re working on a live drum kit recording, multiple guitar takes or even vocals, locking down timing issues invariably involves eyeing up the most visible waveform indicators, which are usually the transients.
Studio One makes moving from one transient to the next simple, with its ‘tab to transient’ option. Just select the track you want to work on, place the playhead wherever you like and hit the Tab key to move to the next transient on that track.
3. Manual Flex editing
The quickest way to make accurate bespoke audio timing edits in LPX is to activate its Flex editing feature. Here's how it works... (Click or swipe through the gallery to view steps.)


4. Audio quantise

When you want the timing of your audio to be super tight, audio quantise is the way to achieve it. In Logic Pro X the simplest method for doing this with a raw audio file is to activate Flex Mode on the Track Inspector of the track in question.
Set the mode to Automatic if you’re not sure which one to use, and with the region selected, head to the quantise options in the Region Inspector and select a suitable quantise division.
We have a live shaker part. Once analysed, we initially use the Rhythmic mode and set the quantise to 1/16. This sorts the timing out, and if we select Show Flex Pitch/Time from the main Edit menu, we can see the waveform shifting into time and the way each section has been processed. However, there are some timestretching artefacts that sound a bit phasey.
Another option, then, is to set the Mode to Slicing. This shifts slices of audio in time without timestretching them, which proves ideal for our shaker loop.
5. Audio Event Slip

Moving blocks of audio around the arrangement screen is a mainstay workflow in most DAWs. But there may be times you want to leave a block in place but still move the audio. In Studio One, simply use Ctrl/Cmd-Alt-click to ‘slip’ the audio left and right within the region.
6. Ripple editing

Sometimes we need to make wholesale structural changes in the arrangement window, swapping, copying or reordering sections. The universal method is to juggle sections in free arrangement space, but a more efficient option is to employ a special editing mode that automatically closes any gaps that appear when changes are made.
In Studio One, this is called Ripple Edit. Activate the mode using the Toggle Ripple Edit button on the top bar. In this particular example, we want to reduce the intro section of our backing track in length by half, and by simply deleting that section, the remainder of the track is shifted forward. We can also insert a section via copy and paste and have the remainder of the track shift to the right to make room for it.
7. Multiple divide

Often it’s the simple things that make all the difference, and this little trick is a great example.
Holding the Alt key while clicking with the scissors tool in Logic Pro X divides an audio region into a series of equally-sized regions, the size of which is defined by where you make the first cut. If your region is tidily trimmed to the bar, this is a great way to divide it into equal beats or bars. But the region size follows the area to the left of the first cut and can therefore be used to create less quantised but still equally-sized regions, too.
8. Smart tools

Editing audio quickly requires efficient use of the tools available and the main one in most DAWs is the mouse pointer. This often handles a number of tasks, depending on its position, as seen with the Arrow tool in Studio One.
Here, when the screen is zoomed out, the tool only selects regions, but as you zoom in, more features appear. These include trimming of regions, range selection, adjustment of region fades and region levels. Also, by using the range selection tool and dragging or Alt-dragging, you can easily rearrange and copy regions and sections.
9. Remove silence

To remove noise between audio sections in real time, we can use a noise gate plugin. But another option is to actually delete the noisy sections of audio completely. This process – sometimes called ‘strip silence’ – is a bit like an offline gate, removing the silent sections from an audio region to create a series of smaller regions based on a user-defined threshold.
In Logic Pro X it’s called Remove Silence: with your audio region selected, select it from the Functions menu in the Arrangement screen. The main parameter to adjust is Threshold, but the results can be tweaked further with time adjustment for minimum silence, pre-attack and post-release. In the screenshot (left), you can see the resultant smaller regions.
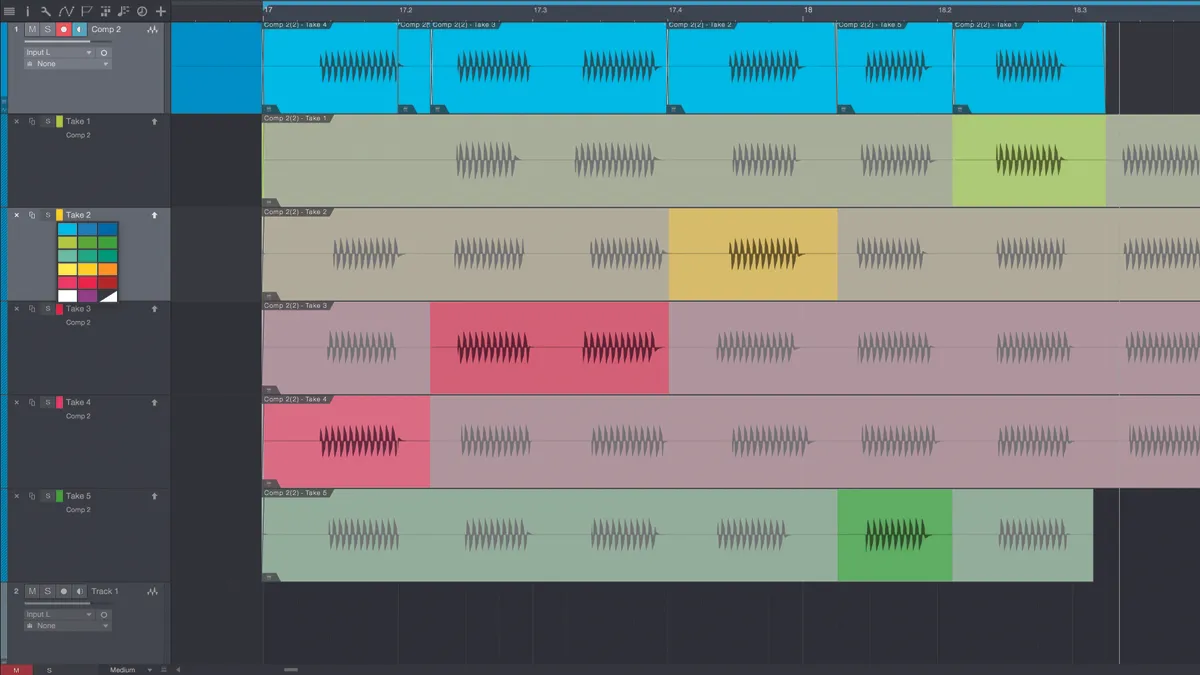
10. Comping from layers
Most DAWs can assist with compiling multiple audio takes. Here’s Studio One’s Layers… (Click or swipe through the gallery to view steps.)