To demonstrate the advantages of multiband processing, we'll use a specific plugin placed over a full-band pad sound.
The pad's level has been modulated with LFOs across the frequency range, causing its character to clash with some instruments. We want to reduce this movement at certain frequencies, giving our other instruments a chance to poke through the mix, but we want to leave the movement intact at other points of the frequency spectrum.
Adding a multiband dynamics plugin is the solution to this - not only can it be used like an EQ, lowering and raising levels of certain frequencies at will, but it can reduce the dynamic range of the bands it's working on at the same time, and in a completely customisable way.
We can keep the character of the pad sound poking through where we need to 'fill out' the mix, but reduce it where it detracts from the characteristics of the other instruments.

Step 1: We have a full-range pad sound that we want to move out of the way of other instruments. The pad modulates in amplitude across the frequency range, and we're looking to curtail this. We'll even out the amplitude across different bands while making space for other instruments.
Initial pad sound

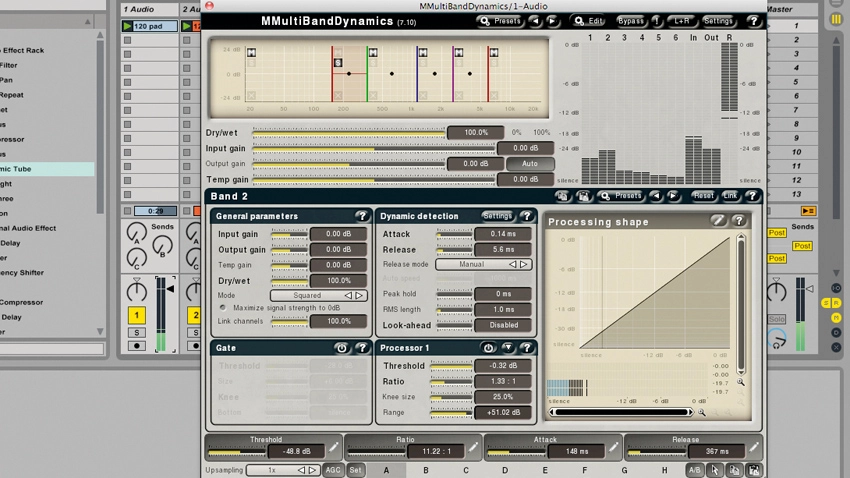
Step 2: Insert a multiband compressor plugin over the pad sound - we've gone for MeldaProduction's MMultiBand Dynamics here. We set up a 6-band compressor in order to gain as much control over the bands as possible. We set it to Linear Phase mode.

Step 3: By soloing bands (and the other mix instruments alongside them if necessary), we're able to ascertain the critical frequency bands both of our pad's character and of clashing frequencies with other instruments. The band soloed above contains the pad's lowest frequencies.

Step 4: To stop these modulating low frequencies clashing with the bass sound, we compress this band heavily with a very low threshold and a high compression ratio. Setting the Attack and Release settings high is fine for this long, sustained instrument sound.

Step 5: We go about curtailing other frequencies that are clashing with instruments, reducing them in level and in dynamic range. We can apply gain to other bands if necessary, bringing the character out in a space we otherwise couldn't have. But why not simply EQ the pad sound?

Step 6: If we'd used an EQ only, the pad's level modulation would have remained, but using compression has curtailed these LFO-based effects in the frequency ranges where we don't want them, but has kept them where we need more character in the pad sound.
Pad sound after processing
