Creating Kicks in Logic's ES2
Put some analogue-style oomph in your tracks
If you're producing any style of Electronic music having an individual kick drum sound is a no-brainer. Kick sounds vary wildly, but most of us require them to be deep, punchy, and with a bit of character. Subtractive synthesizers are ideal for producing these qualities. In this walkthrough we'll see how it's possible to make it happen with Logic's ES2.
Even producing something as simple as a kick can take time, and here we see the process happen in six steps - from loading up the oscillators needed as a basic sound source, right through to carefully sculpting the amplitude and frequency with envelopes and filters.
We also touch on some basic processing such as reverb, transient design and saturation to help give your kick sounds that extra touch of originality. After following this guide you should be able to create your own kicks from scratch using just about any subtractive synthesizer in your collection. As long as it sports a self-oscillating resonant filter you are good to go.
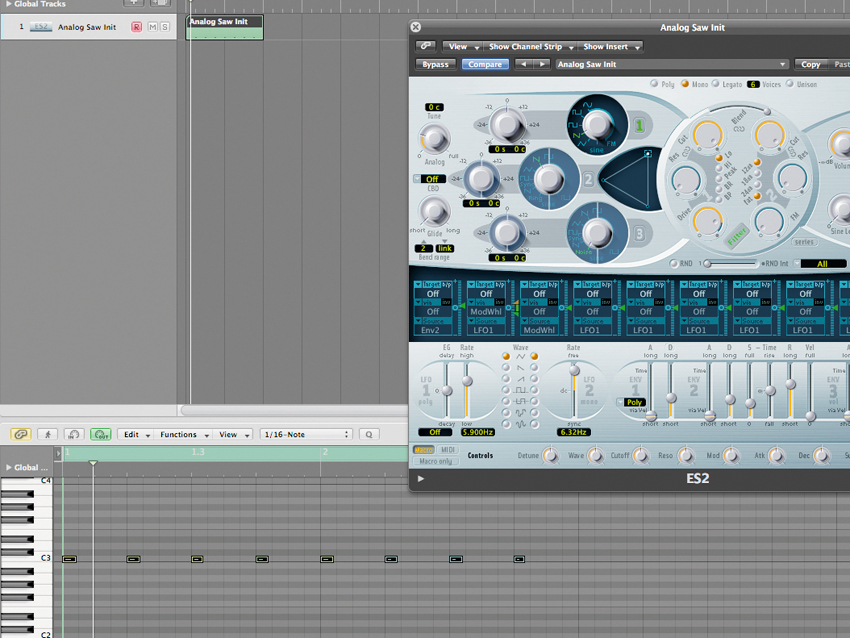
1. Here we will be creating an analogue-style kick drum in the ES2. To get started you will need to create an initialised patch. Once this is done start by creating a simple MIDI pattern for the kick drum part. Now we can begin to start programming our first drum sound.
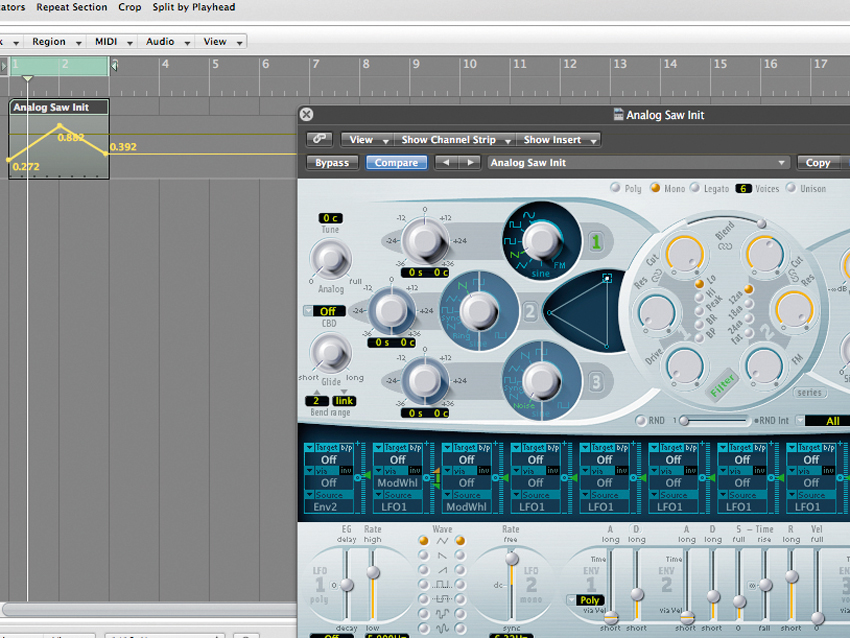
2. At this point you'll need to dial-up the resonance. This will induce self-oscillation in the ES2's filter and is essentially the main sound source for our kick sound. I have automated a sweep so you can hear the high resonance setting in the audio example.
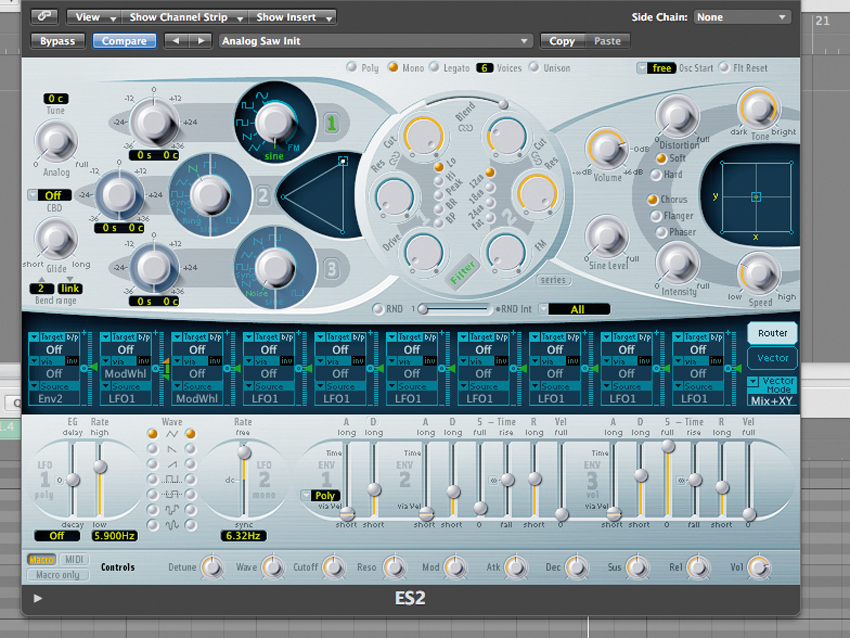
3. Now we make it sound deeper and more kick-like. Try transposing the sound down until you start to produce lower frequencies. Next, reduce the filter's cut-off and switch the main oscillator to a pure sine wave. We should now have something that resembles a kick.
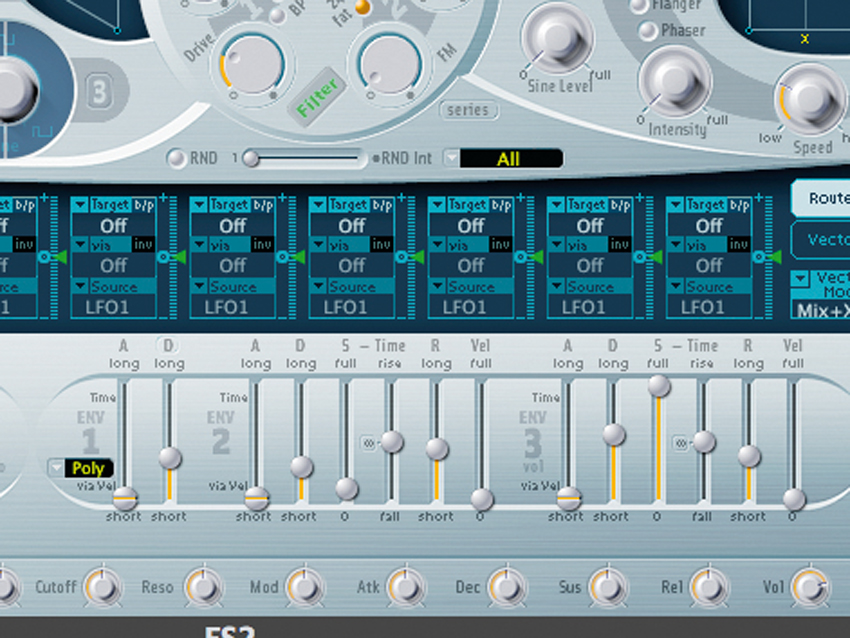
4. To add some punch to the start of the sound we need to use an envelope to modulate the filter cut-off. I have used envelope 2 here with a fast decay time and low sustain to induce a sharp resonance click at the front end of our kick.
Want all the hottest music and gear news, reviews, deals, features and more, direct to your inbox? Sign up here.
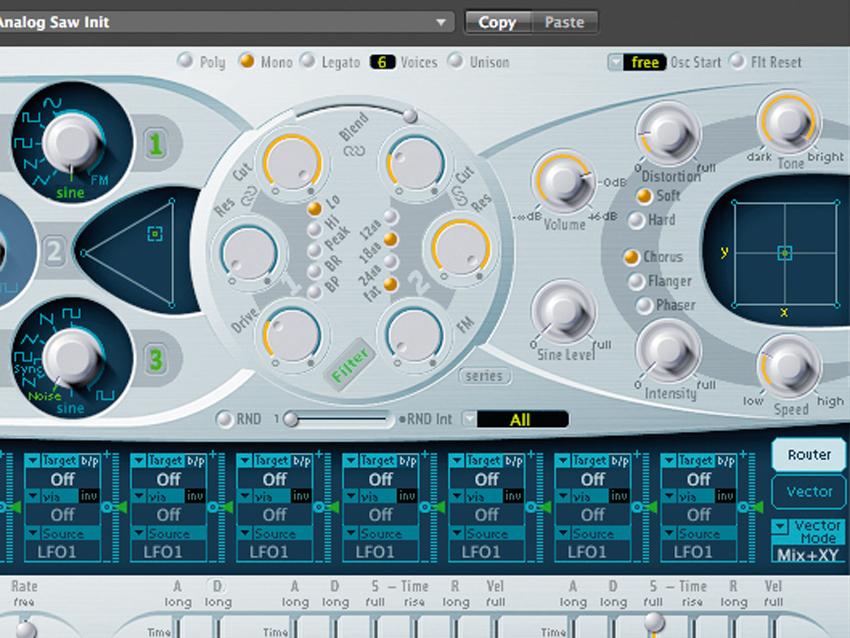
5. If you want to add a bit of grit to proceedings there are a few moves you can make here. I've added Distortion, Filter, Drive and a touch of Noise to pump things up a touch. You can also add some low end EQ at this point if you want to go deeper.
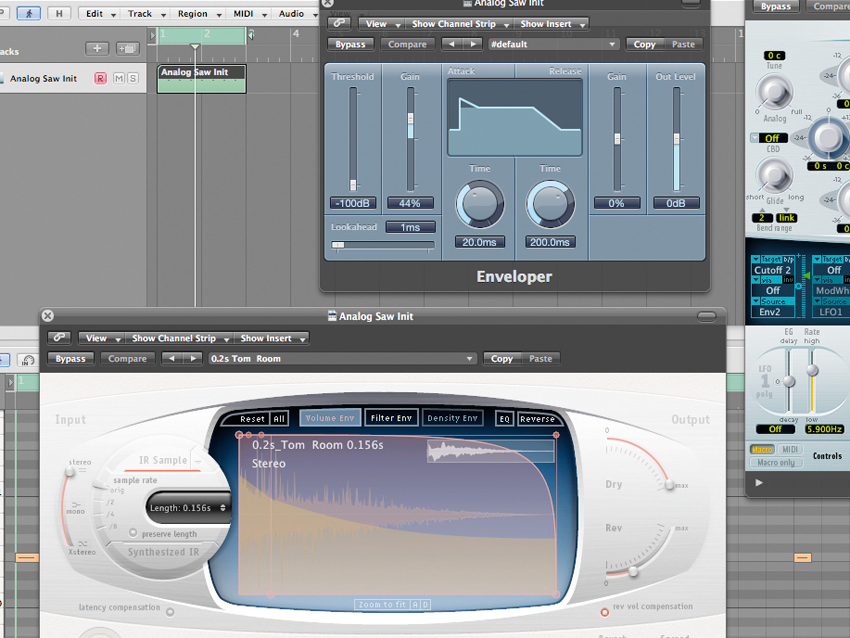
6. Once you have finished programming the synth you can add a little processing. In this case a transient designer was employed to enhance the initial punch of the sound and followed-up with some short room-style reverb. There you have it a 100% custom analogue style kick!
Future Music is the number one magazine for today's producers. Packed with technique and technology we'll help you make great new music. All-access artist interviews, in-depth gear reviews, essential production tutorials and much more. Every marvellous monthly edition features reliable reviews of the latest and greatest hardware and software technology and techniques, unparalleled advice, in-depth interviews, sensational free samples and so much more to improve the experience and outcome of your music-making.
