Despite being pronounced dead by the music press countless times over the years, house music is still a dominant force in pop music today.
Once-unknown names like David Guetta and Swedish House Mafia are leading a new wave of house productions, with household names like Rihanna and Beyoncé all getting in on the act.
Here we bring you 26 tips to help you produce club-ready house tunes that stand out from the crowd.
For more production tips, and to learn how to produce a house track from sound selection right through to mastering, check out Computer Music issue 168.
Save me!
It's often the case when synth preset-surfing that you encounter several sounds you love but that are unsuitable for the current project. Store such presets for each synth, naming them by sound type, within a top-level folder called Use Me!.
This will provide you with some interesting starting points whenever you begin a new project.
Always customise…
Don't get into the habit of blindly copying compressors, limiters and other plug-ins from one channel to the next without tweaking their settings.
Also, don't fall into the trap of always using the same plug-ins in the same order. A setup that sounds awesome on one bass might ruin another.
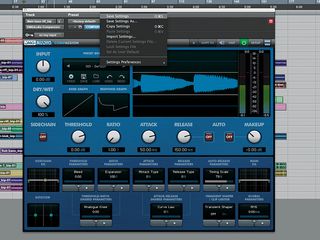
It's fine to copy a compressor, limiter or other plug-in from one track to another, but resist the urge to be lazy and make sure you tweak the effect's settings to suit the new material.
…Unless it's not required
Our last tip is a very important one, but don't forget that simpler, functional plug-ins like saturators, filters, etc, can often be adequately applied much faster by copying. So, don't feel the need to tweak these for the sake of tweaking.
If you find yourself regularly using the same channel strip of plug-ins, be sure to save the whole thing out as a channel preset to save you time in future.
To opposite effect
A good way to generate some movement in the mix is to use autopanners on different but similar channels, such as two pads playing the same notes.
Try opposing the starting points (left/right) on two otherwise identically set-up panners. Keep the Wet/Dry balance quite dry-biased, though, otherwise the mix might become unbalanced.
Bare is best
It's generally not a good idea to have lots of limiting, compression or other mastering effects on your master output when mixing, as it'll affect your perception of what the individual channels are doing.
When writing house, we normally keep some gentle but firm limiting running while writing and arranging, then remove it for mixing.
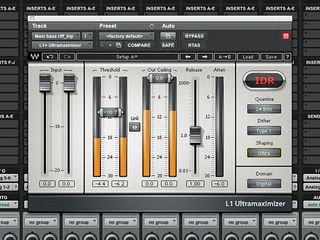
By all means add a limiter to your house track so you can hear its effect while writing, but remove it when mixing.
Duck and pump
When using sidechain compression for ducking and pumping you can also use multiple sidechain busses for extra control (one for ducking, one for pumping), enabling you to pump a bass without it ducking for other sounds, or duck a pad without pumping it.
Keep your reverbs in check
It's good to use a variety of reverbs for different effects, but doing this can take away from the sense of cohesion in a mix.
If you're worried this might be happening to your track, try firming up the limiting on the master output - this can give you a clue as to whether or not the issue will disappear after the mastering process.
Not too wide
We've use a lot of stereo-widening tools throughout our tracks, but we've resisted the temptation to whack them up to maximum. Excessive stereo widening can unbalance a mix and cause ear fatigue. Sometimes, panning the widened signal can mitigate the side-effects a bit.
Wide but weighty
Stereo-widening effects can create a lot of space in the mix, but they can also take away from the weight, punch and direction of individual parts. A good way to maximise space without detracting from the sound is to insert a stereo reverb, then apply your widening tool to the reverb rather than the dry signal.
All together now
One of the best ways to create a coherent, pro-sounding mix is to group similar sounds together on a bus or group channel and apply compression, limiting and/or saturation to the group.
By creating group busses for drums, higher synths and basses, for example, you'll reinforce the sense of an ensemble that we're keen to create.
Make it mono-friendly
It's important to check your mixes for potential stereo phasing problems. This is particularly essential with house, as many bars and clubs have mono systems, and nothing ruins a track like phase-cancelled bass.
So, use an analyser to check your track. We like Vengeance-Sound's VMS Analyser, as it explicitly tells you whether or not a mix is mono-compatible.
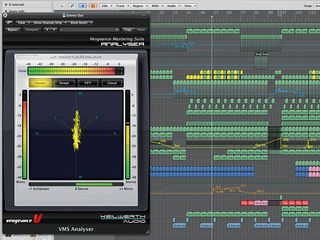
Employ an analyser such as Vengeance-Sound's VMS Analyser to check that your mix is mono-compatible.
Don't mind the gap
Be aware of the way that different note lengths sound different with certain synth patches. For example, some of our patches with very short release times almost don't sound at all when we write very short MIDI notes for them.
The temptation is to extend the MIDI note - but in the context of lots of layers of the same riff, these perceived gaps can actually sound great.
A helping hand
If you're not very confident playing fast riffs yourself, use an arpeggiator - either a MIDI plug-in, or one built into your synth. Put your basic MIDI sequence on the relevant track and play with the arp until you get something you like that complements your main melody or bassline.
For additional excitement, try shifting bits of the riff (or individual notes) up and down an octave.
Transfer the pattern
If you want to try your arpeggiator pattern out on another synth, you have a few options. You can manually draw in the notes to recreate it; you can render the riff as audio and slice it to MIDI, then detect the notes using a pitch-correction plug-in; or, using a tool like Waves Tune, you can actually generate a MIDI file from an audio input.
Don't hit the red
When adding effects as inserts, always keep an eye on the signal levels passing through the plug-ins. It's all too easy to let the level creep up into the red at output, especially if they don't all have level meters.
Letting this happen will result in a thin signal by the end of the chain as the signals are clipped and then attenuated.
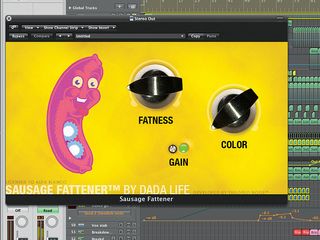
Be particularly aware of what's happening to your signal levels with meter-free plug-ins like this one.
Quality modes
Quite a few plug-ins these days feature a 'high quality' mode, which usually involves lookahead, linear-phase operation and/or other DSP wizardry. The trade-off for these fancy tricks is latency. So, when writing and arranging, stay in 'regular' mode to minimise latency and CPU hit. Then, when it comes to exporting your stems for mixing, go for the highest quality on offer.
Limit your limiting
When you're using a limiter across a full mix, keep the reduction meter peaking at about 3-4dB at most. Any more than that, and you risk damaging the dynamics of the track and causing audible damage to the signal. You can push it much harder on individual track elements, though.
Beef up the reverb
Fatten up a reverb by inserting a compressor or limiter after it in the effects chain. You shouldn't need too much, as it can create quite a dramatic effect, especially with a limiter.
You might also need to throw an EQ in afterwards, rolling off a little top and bottom end - both will be boosted, but neither create as much atmosphere as the mids, so they're just taking up space in the mix.
Delightful delay
The key to a great dance groove lies in the careful setting of track delay. This was originally intended as a corrective feature in MIDI sequencers, compensating for the latency introduced by cabled chains of MIDI devices.
However, it's come into its own in modern-day production, where it's used to push and pull elements backwards and forwards in time, making them sound more urgent or lazy. 1-10ms is usually plenty.
LFO for the win
Sometimes you might want to modify a particular sound at certain points in the track to make it seem more subtle - perhaps in the breakdown. One way you can do this is to use LFO modulation applied to a filter's cutoff frequency.
Most synths have a built-in LFO, but you can also use external plugs - such as Xfer's superb LFO Tool - on any sound source.
LFO/delay issues
LFO modulation effects are fantastic, but when using one that's synced to host tempo on a track-delayed part, the rhythmic effect can throw off your carefully set delay. It's often a good idea to render such parts as audio and then apply the track delay after.
Timing is everything
It's vital that any LFOs are triggered at the right point in the sound. Xfer's LFO tool lets you shift the phase (effectively the start point) of the modulation.
If your LFO doesn't do this but is tempo-synced, you can alter the phase manually by shifting the audio backwards or forwards, then bouncing the result and placing it back at the right point on the timeline.
Filter frenzy
Filter modulation is ubiquitous in dance music production, but be aware that it has quite a profound effect on a track's dynamics. With this in mind, you can have a lot of fun with quite heavy compression or limiting, which can actually accentuate the effect of the modulation.
Splashing out
Mastering house music requires very high quality plug-ins, and, sadly, DAW-bundled mastering tools don't quite match the clarity of dedicated third-party offerings.
If you're on a budget, it's cheaper to get a self-contained mastering plug-in that features all the requisite tools in one, than to buy a separate mastering compressor, EQ, limiter, etc. In this category, it's hard to beat iZotope's Ozone 4.
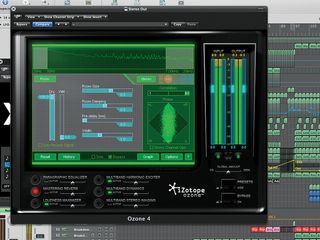
You need high-quality mastering tools when finishing up your house track, and iZotope's Ozone 4 is one of the best.
Compare to progress
When mixing and mastering, always compare your tracks to the very best examples in the genre you're producing. Doing this properly means using WAV/AIF files rather than MP3s, which are of a lower sound quality and hence not really suitable for comparison.
Don't forget the sidechain
Be careful when using your DAW's freeze function or exporting stems for mixing, as many DAWs won't include any sidechaining.
Get round this by bouncing any parts using sidechain processing individually through the master bus (set to 0dB with any plug-ins bypassed). You'll need to mute the output of the sidechain source channels, while still sending their signal to the bus.
For more on house production buy Computer Music issue 168, or subscribe to Computer Music to get essential production tips every month.


