How to program a dreamy ’80s-style polysynth
Get your synthwave on with our guide to making one of the most iconic sounds of the ’80s
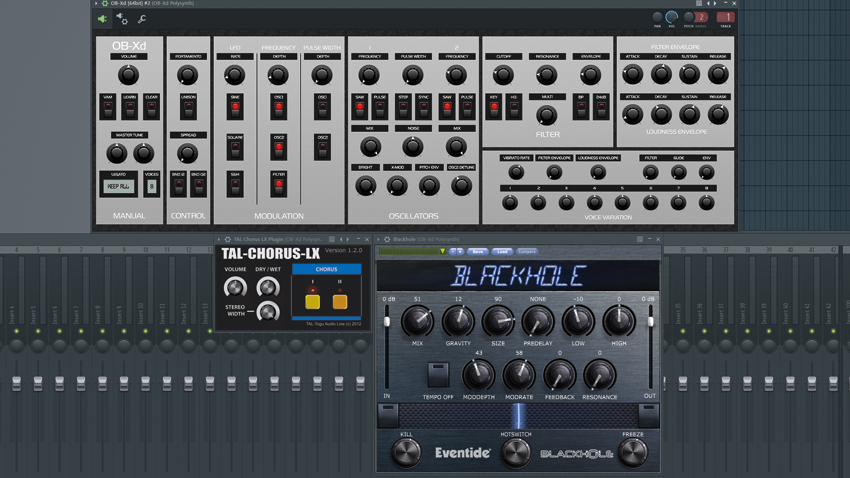
The 1980s was an important time for synth music. Analogue polysynths had dropped in price, making them more accessible to all. Digital instruments such as the Roland D-50 and Yamaha DX7 offered the luxury of polyphony, putting a wealth of new sound-design possibilities into the hands of the common music maker.
These synths were at the cutting edge, and they practically defined the sound of the era. So by using a sonic palette that draws on these 80s icons, synthwave producers have brought these nostalgic sounds into the 21st century with modern technology and cutting-edge production techniques.
When designing synthwave synth patches, there are a few signature tricks to consider. Pads and leads usually feature overt pitch wavering – dialled in via pitch modulation – to emulate the tuning drift of analogue oscillators, plus the wow and flutter of tape and VHS cassettes. Combine this with excessive tape-style saturation and noise/hiss layering, and you’ll have a synth with bags of analogue personality.
Ambience-wise, synths tend to be drenched in glossy reverb. Instead of using this just to blend channels and add depth, it’s as much of a defining characteristic as the raw synth timbre itself.
With all that in mind, then, let's work up a characterful polysynth patch suitable for a synthwave opus.
For more synthwave production tutorials, pick up the June edition of Computer Music.
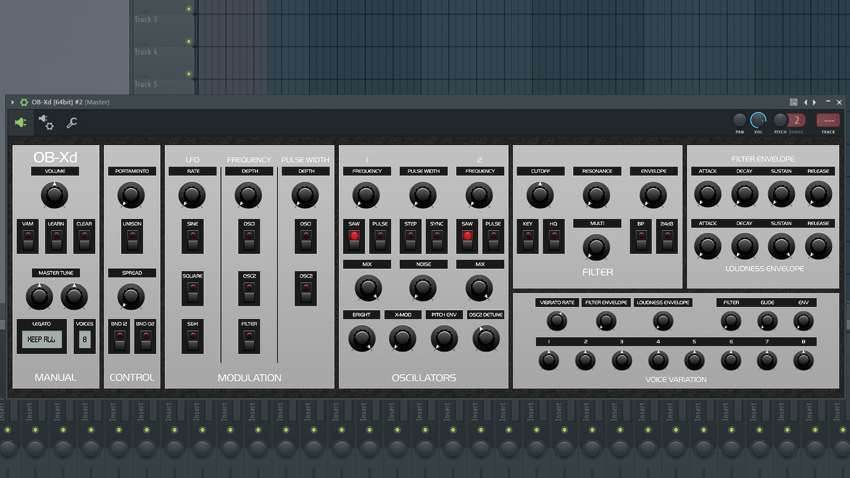
Step 1: Huge, ’80s-style polysynth patches are synonymous with synthwave, so some form of virtual analogue soft synth is a must-have. We’ll be using the freeware OB-Xd to create our patch. Load it onto a new channel in your DAW. We’ll begin by setting up our raw tone, so head to the oscillator section…
Want all the hottest music and gear news, reviews, deals, features and more, direct to your inbox? Sign up here.
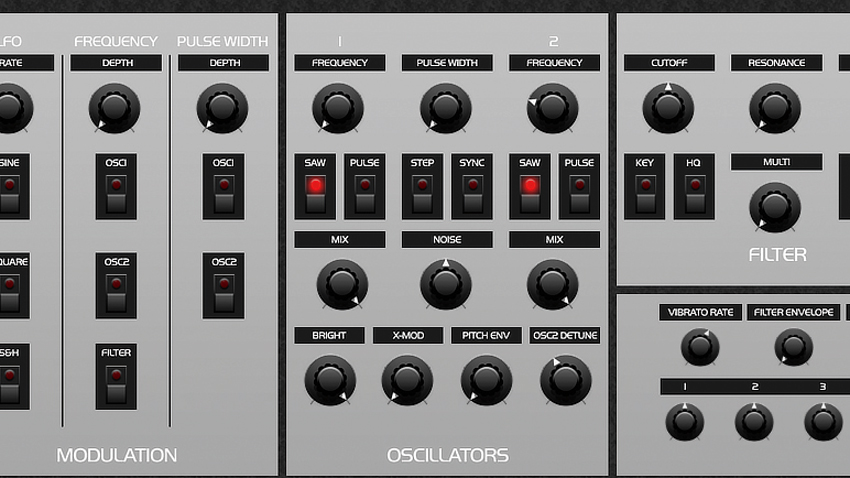
Step 2: By default, both oscillators are set to the same octave range. If we pitch Oscillator 2 up by one octave, we’ll give definition to the notes for a bigger sound. To achieve this, move Osc 2’s Frequency dial to 25. While we’re here, dirty the sound up a bit by turning the Noise dial to 50. It sounds a bit dull, though, so we’ll use the filter to brighten things up.
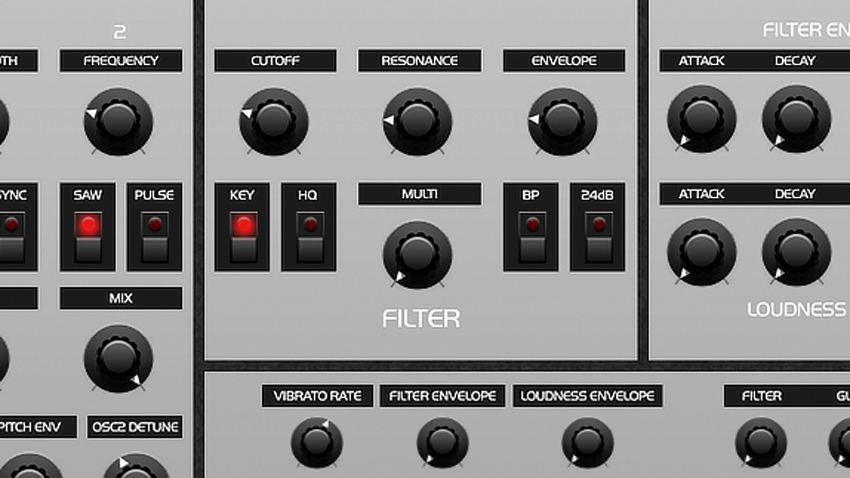
Step 3: Higher notes are getting lost. To combat this, click the button labelled Key to turn filter keytracking on. This opens the filter as we play up the keyboard. It’s a bit too bright now, so turn the filter Cutoff down to 25 to smooth things off, and add bite by setting the Resonance to 20. To dial in filter envelope modulation, turn the Envelope control to 20.
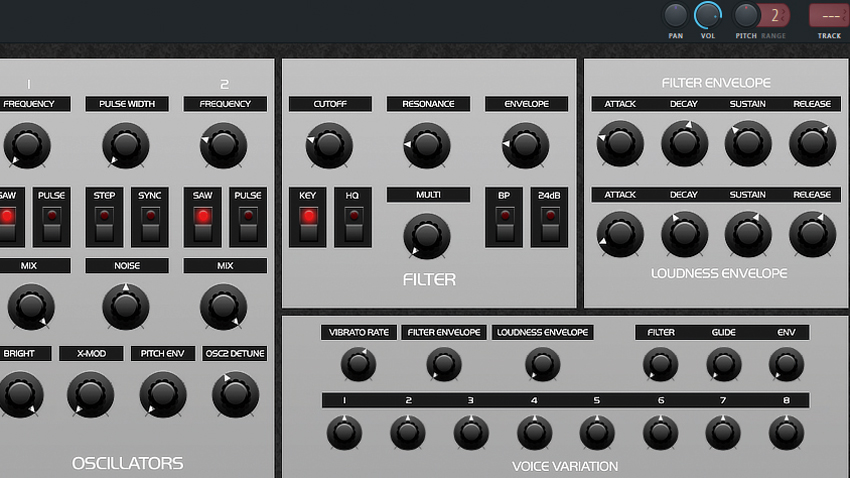
Step 4: Now to the Filter Envelope section. A slight filter fade-in will give us an ’80s feel, but we’d also like it to stay where it is when a note is held. To make this happen, set the Attack to 25, Decay to 55, Sustain to 35 and Release to 65. In the Loudness Envelope, set the Attack to 10, Decay to 40, Sustain to 60 and Release to 60 to shape the amplitude over time.
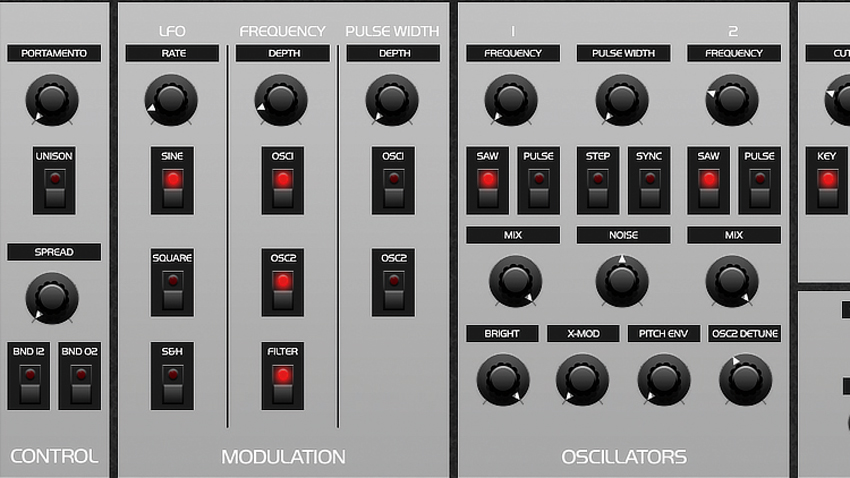
Step 5: Let’s modulate some parameters with the LFO. Head to the Modulation section and click the Sine button to add a sine wave LFO. In the Frequency section, click the Osc1, Osc2 and Filter buttons to route the LFO to these areas. Turn the Rate (controls the speed) and Depth (controls the amount) dials up to 12 to hear the LFO gently bend the sound and move the filter.
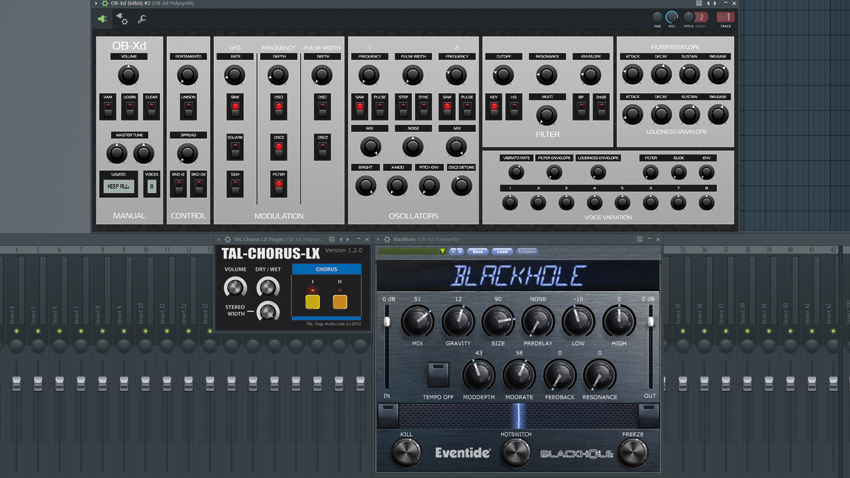
Step 6: Let's add chorus and reverb effects for a real ’80s feel. In FL Studio, we send the track to a mixer insert. For other DAWS, place the effects after OB-Xd in the chain. Insert TAL-Chorus-LX and leave it at its default settings. Next, drop in a reverb with a long decay time. Here we’re using Eventide Blackhole for enormous ambience and width. Dreamy!
Computer Music magazine is the world’s best selling publication dedicated solely to making great music with your Mac or PC computer. Each issue it brings its lucky readers the best in cutting-edge tutorials, need-to-know, expert software reviews and even all the tools you actually need to make great music today, courtesy of our legendary CM Plugin Suite.
