How to use a Wii Remote to control Ableton Live
Getting started
Step 1: Let’s kick things off by building a simple Theremin-style setup with Ableton Live. For this exercise, you’ll need a computer with Bluetooth, Live 7 or 8, OSCulator for OS X (the recommended license price is $29 but you can download a demo), the Wii Remote, and a couple of AA batteries. If you have a PC, try GlovePIE instead of OSCulator.
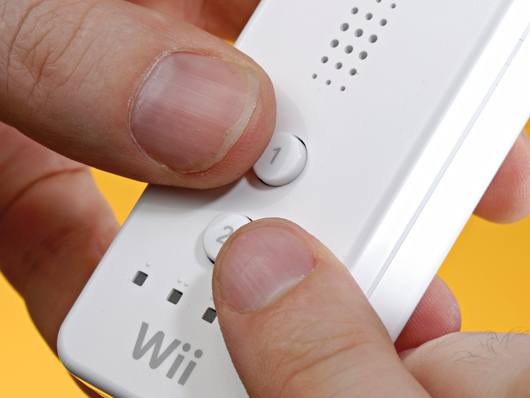
We’ll use Simpler for this example - it has the necessary controls - but you could also use other Live instruments like Operator and Analog (which even has its own Theremin patch). Begin by making sure Bluetooth is on, then launch OSCulator. Hold down the 1 and 2 buttons on the Wii Remote until OSCulator tells you that the Wii Remote is paired.
• For many more Ableton Live guides go to our massive learning hub: Learn Ableton Live and Ableton Push: music production tips and tutorials
Mapping
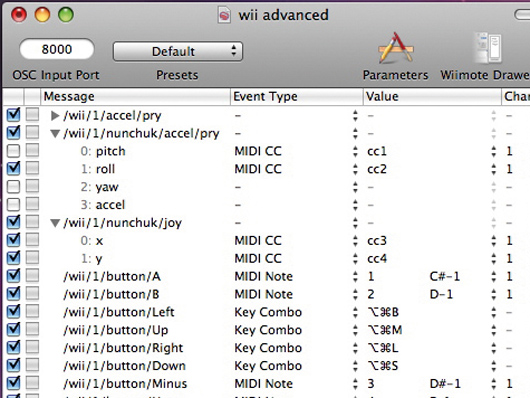
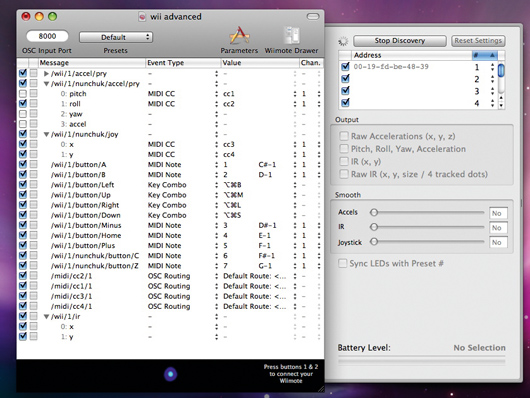
Step 2: We only need to map two controllers for this setup. Make sure that everything in the OSCulator message list is unchecked. In the Event Type list, next to pitch, choose MIDI CC, and choose a value of CC1. Do the same for roll, but choose CC2. Leave the MIDI channel at the default setting of 1. Now check the box next to pitch. Launch Live and create a new MIDI track, then load Simpler, and load the Analog Square waveform into it from the Live Library. Go into Lives’ Preferences and, under the MIDI/Sync tab, make sure OSCulator Out is selected for Track and Remote MIDI inputs.
Setting up Simpler
Step 3: Exit Lives’ Preferences, then go into MIDI Map Mode. Click on Tramps in Simpler, and you’ll see it instantly maps itself to the Wii Remote’s pitch. You don’t have to do anything else, really; the Wii Remote is so sensitive to movement, it’s sending almost constantly - that’s why you should only check the item in the OSCulator message list that you’re mapping at the time, otherwise it gets pretty chaotic.
Once that’s mapped, exit MIDI Map Mode. Tilt the Wii Remote backwards and forwards, and the Tramps value should change. Repeat this procedure with roll from OSCulator - map it to Sampler’s Volume control.
Waving the Wii Remote
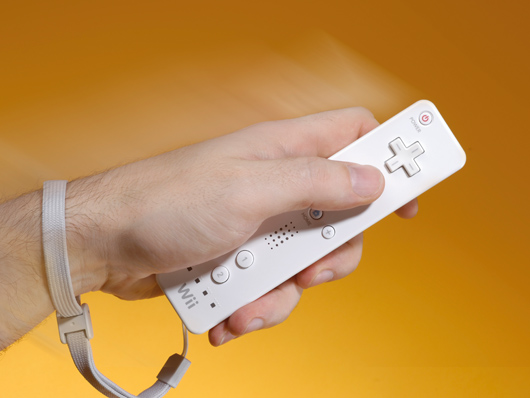
Step 4: You’ll need something to trigger a note from Simpler. In OSCulator, map the Wii Remote’s A button to MIDI note C2 - or any note that suits you, really. If any Wii Remote buttons don’t appear in the OSCulator list, just press them and they’ll pop up. Once mapping’s complete, go back to Live and check all three of the mapped values - pitch, roll, and button A. Now try it - get that Wii Remote moving around! Make sure the track’s armed, otherwise you won’t get any MIDI. If everything’s too twitchy and over-sensitive, go into the MIDI Mapping Browser and enter lower maximum values for the parameters
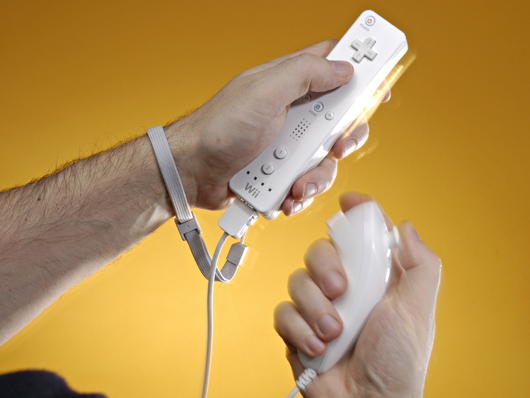
Adding the Nunchuk
Step 5: Now we’re going to use the Wii Remote to navigate round Live and control some of its basic functions, and at the same time, use the Nunchuk to attain some completely gratuitous effects manipulation (another way to go deeper would be to use the Wii Remote/Nunchuk combo to get very precise control over a soft synth or sampler, but you’ll have to use your imagination for that one).
For this exercise, you will of course need the Wii Nunchuk, too - it doesn’t need any extra batteries because it takes its power from the Wii Remote. Remember when you’re deciding how to map these things that two hands are required - so they’re going to get in the way if you aim to be touching the computer keyboard regularly.
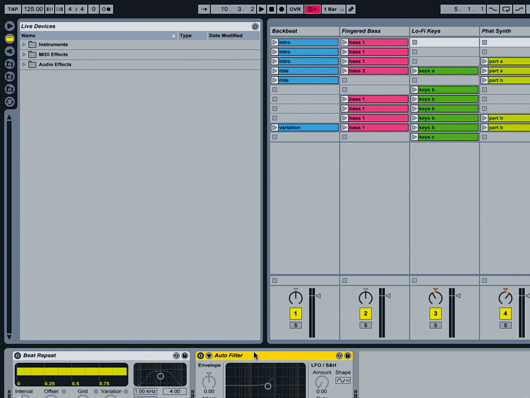
Setting up a Live set
Step 6: Make sure Bluetooth is turned on, then launch Live and launch OSCulator. Hold down the one and two buttons on the Wii Remote until OSCulator tells you that the Wii Remote is paired. Go back to Live - you’ll need some material to work with. Try adapting one of your existing Live Session View sets. We’ll be working with Scenes more than individual tracks, so don’t get too hung up on how many tracks you can control.
Let’s have some effects in the Master track - drop in a Beat Repeat and an Auto Filter in the chain after it. Go into Preferences and, under the MIDI/Sync tab, make sure OSCulator Out is selected for the Remote MIDI input. We’re not using the Wii Remote to send MIDI notes to any instruments, so leave Track unchecked.
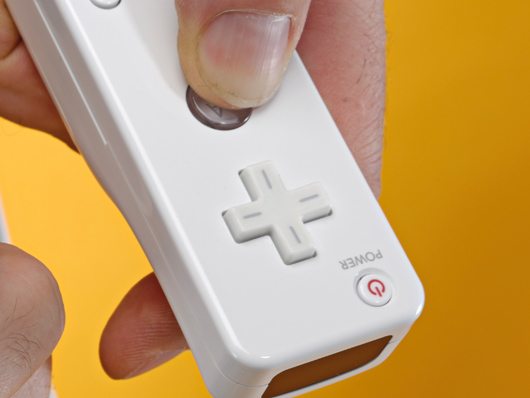
More mapping
Step 7: The Wii Remote has five buttons, and we’ll be using all of them. Go through each one in OSCulator (remember to tap them if they’re not already appearing in the list) and use the Event Type list to assign them to MIDI Notes - doesn’t matter what notes you use particularly, but we like to start from C-2 - why not?
For this setup, we’re not going to map the accelerometer features of the Wii Remote because it’ll get too flaky and hard to control (in our opinion), but we are going to also map the ‘+’ pad. Each of its positions (left/right/up/down) can be assigned separately in OSCulator, and we’re going to use them for keyboard shortcuts. Assign left to cod-alt-B (toggle Browser), right to cod-alt-M (toggle Mixer), up to cod-alt-l (toggle track view), and down to cod-alt-S (toggle sends).
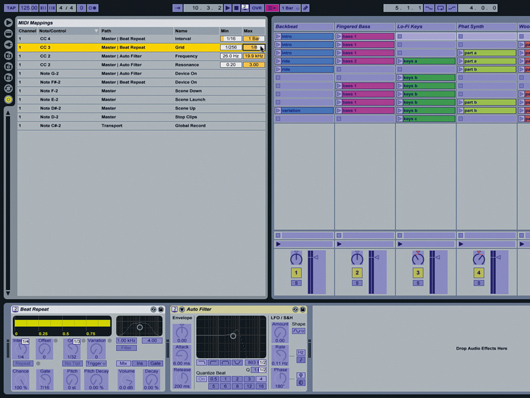
Nunchuk setup
Step 8: Connect the Nunchuk- tap the buttons and move the joystick if it’s not showing in OSCulator. Map the buttons to the next free MIDI notes, assign the joystick to MIDI CCs for X and Y, and map ‘roll’ to another MIDI CC. Mapping CCs is clunky because you have to temporarily disable the ones you’re not mapping - otherwise they all send at once and Lives’ MIDI Learn gets confused.
Enter MIDI Map Mode to assign the parameters. Here’s the list: ‘-’ = scene up; ‘home’ = scene launch; ‘+’ = scene down; A = reek toggle; B = stop clips; C = Beat Repeat On; Z = Auto Filter on; joystick X = Beat Repeat Interval; joystick Y = Beat Repeat Grid; Manchu roll = Auto Filter Frequency and Q. For Beat Repeat, use the MIDI Map Browser to restrict the Interval ranges.
Future Music is the number one magazine for today's producers. Packed with technique and technology we'll help you make great new music. All-access artist interviews, in-depth gear reviews, essential production tutorials and much more. Every marvellous monthly edition features reliable reviews of the latest and greatest hardware and software technology and techniques, unparalleled advice, in-depth interviews, sensational free samples and so much more to improve the experience and outcome of your music-making.
