How to program realistic drum parts: fills
Append your riddims with some rhythmic pyrotechnics
Want all the hottest music and gear news, reviews, deals, features and more, direct to your inbox? Sign up here.
You are now subscribed
Your newsletter sign-up was successful
Unless you want your faux-acoustic drum grooves to come across as unremittingly relentless, you need to know how to throw fills into them.
Whether it's brief punctuation or the marking out of phrases and song sections, the drum fill is as important and powerful a transitional tool as a screaming riser or dazzling spot effect -but much more versatile.
Here's how it's done…
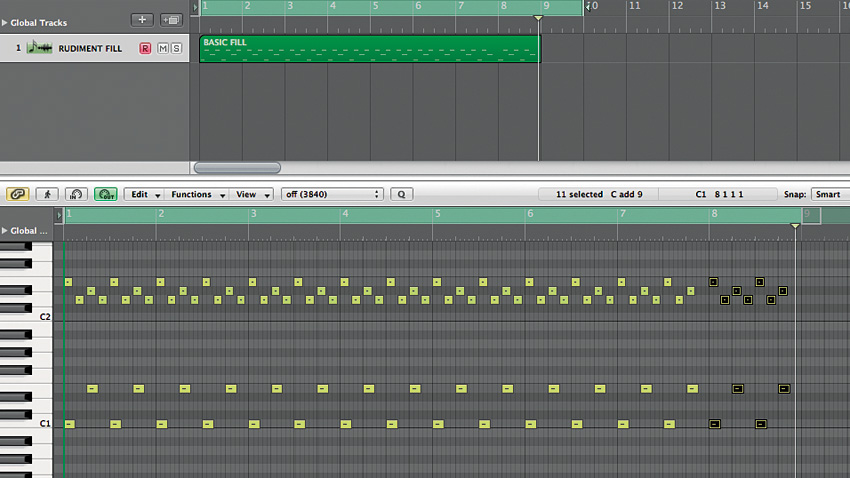
1. Drum fills can be long or short, but ultimately they need to work well with the other instrumentation in the track. They typically mark the end of eight- or 16-bar sections, but subtle one-beat fills are commonly used to signal the end of four- or even two-bar sections, too. Here, we're looking to use a one-bar fill to mark the end of eight bars.
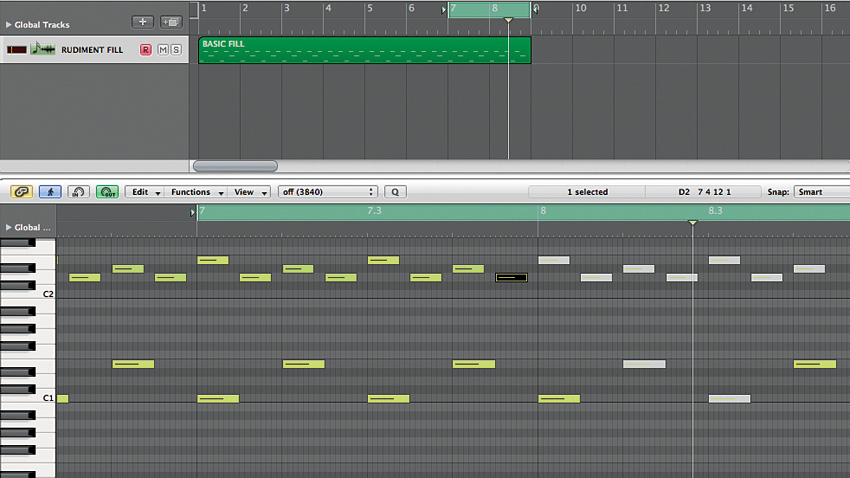
2. If you're happy recording your fills in with your MIDI keyboard or pads, that's the way to go. If not, a good starting point is to think about which beats will continue through the fill from the main groove. For our one-bar fill, we've kept the downbeat kick and the snare on beat 4. Everything else is muted, and we now have a start and end point to work within.
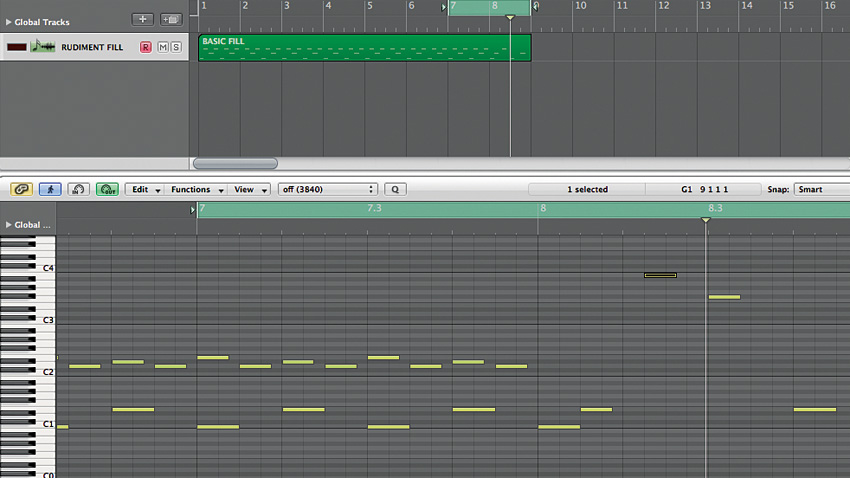
3. Working onwards from the downbeat kick, we want to try a 'pushed' fill moving from the snare to the rack tom, then the floor tom, then back to the snare on beat 4. Thinking in 16th-notes, the kick falls on the 1, the snare falls on 3, the rack tom on 6 and the floor tom on 9, which is the third-quarter note.
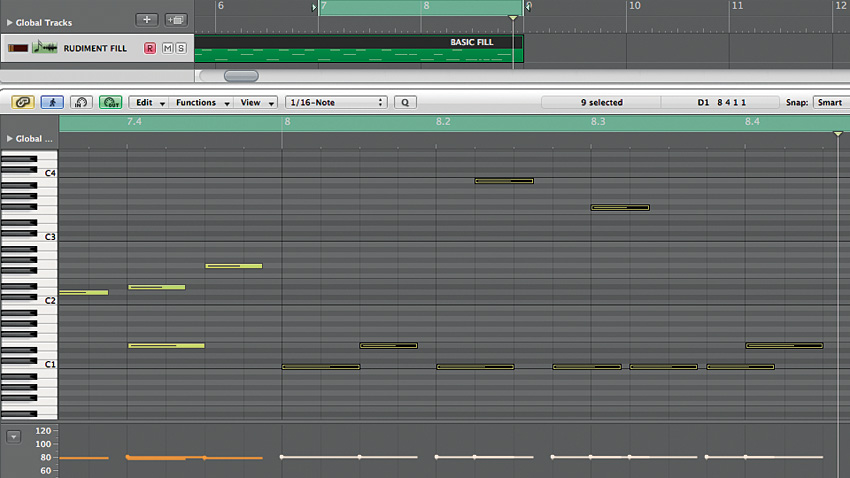
4. Let's fill the gaps between the snare and toms with extra kicks. Again, these have a syncopated feel -they fall on 16th-notes 5, 8, 10 and 12. That's the basics of the fill done, but we can instantly improve it by adjusting the timing. Try keeping the starting kick and end snare hard-quantised and modifying events 'inside' the fill.
Want all the hottest music and gear news, reviews, deals, features and more, direct to your inbox? Sign up here.
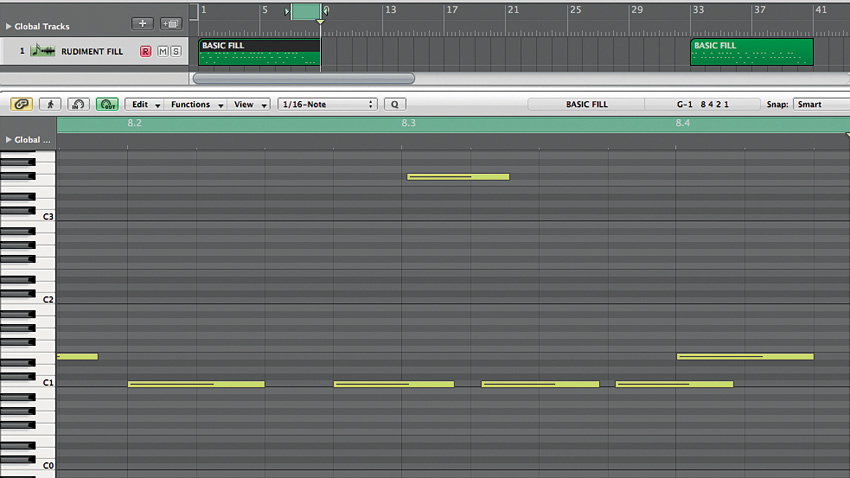
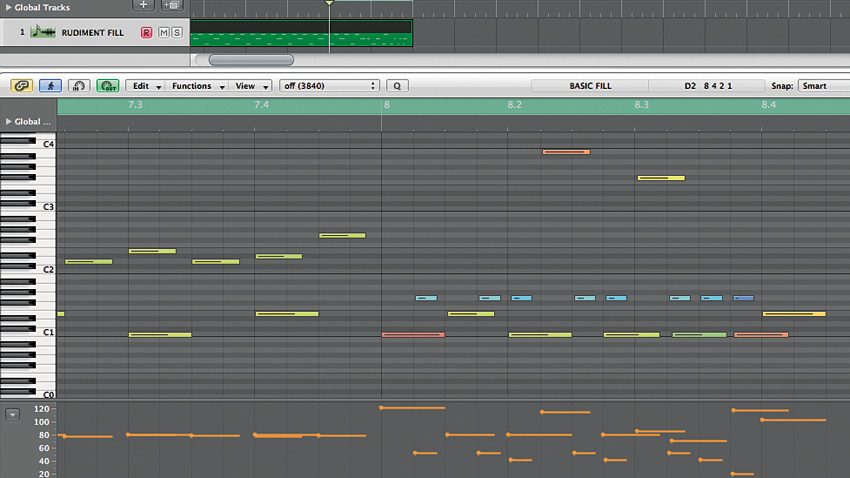
5. The next step is to adjust the final kick, which acts as a sort of grace note before the final snare. Here we're manually nudging it later, which helps to emphasise the final snare as it pulls everything back in time. Next, we can nudge the snare and toms slightly later to make the fill sound more laid-back.

6. Now we add some snare ghost notes. These essentially fill in the available 16th-notes between the snare and toms in the fill. We can shift their timing a little later, much like the toms. Also, as they're ghost notes, we keep the velocities lower and choose a softer articulation. Finally, we can increase the velocities of some of the main hits to enhance the overall feel.
Computer Music magazine is the world’s best selling publication dedicated solely to making great music with your Mac or PC computer. Each issue it brings its lucky readers the best in cutting-edge tutorials, need-to-know, expert software reviews and even all the tools you actually need to make great music today, courtesy of our legendary CM Plugin Suite.
