Advanced uses of reverb and delay
Going beyond the basics
Want all the hottest music and gear news, reviews, deals, features and more, direct to your inbox? Sign up here.
You are now subscribed
Your newsletter sign-up was successful
Reverb and delay are arguably the most vital effects in any mix, but there's a lot more to them than the obvious. Clever use of both treatments in this walkthrough results in the track having a much more coherent spatial identity…
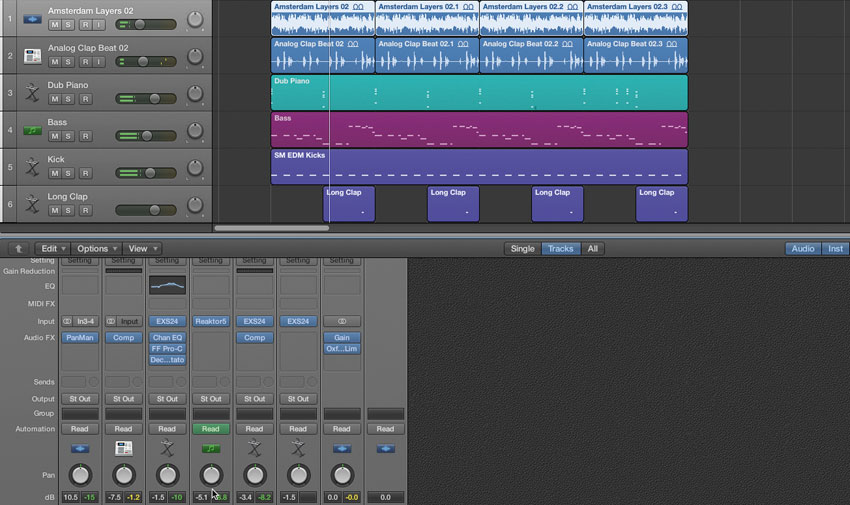
Step 1: This track is formed of imported synth and beat loops, alongside a programmed kick, dub piano part and kick and extra clap parts. As you can see in the mixer, some sounds have additional processing but nothing providing reverb or delay. These are required, as the 'natural' space in the existing sounds is too varied. The synth loop features its own native reverb, as does the clap sample. But the programmed sounds are too dry at the moment.
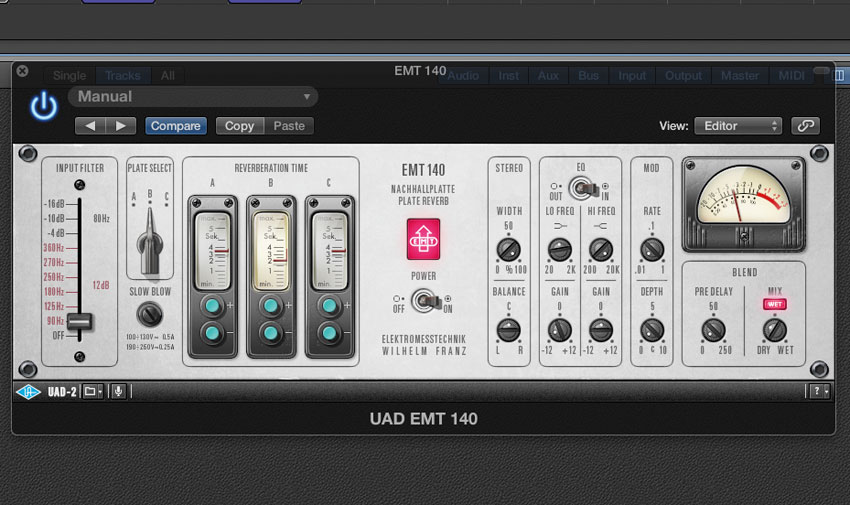
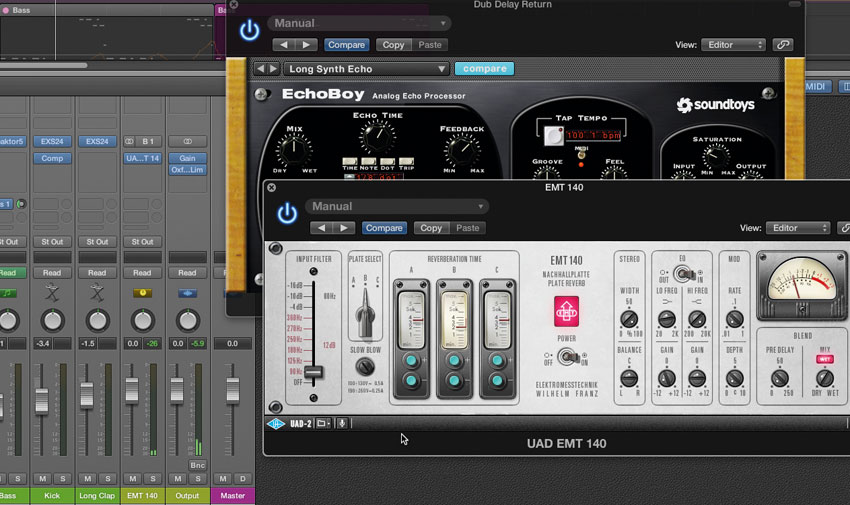
Step 2: Our bassline's cutoff movement frequently pushes it up into the low mid-range and even upper mid-range. Choosing a reverb to pick out these moments shouldn't overload the mix, so we send that channel to an auxiliary and select UAD's EMT 140 plate emulation. The default settings are tweaked to provide a shorter treatment (of around two seconds), whilst the EQ is engaged, providing a shelf roll-off on frequencies from around 800Hz downwards.
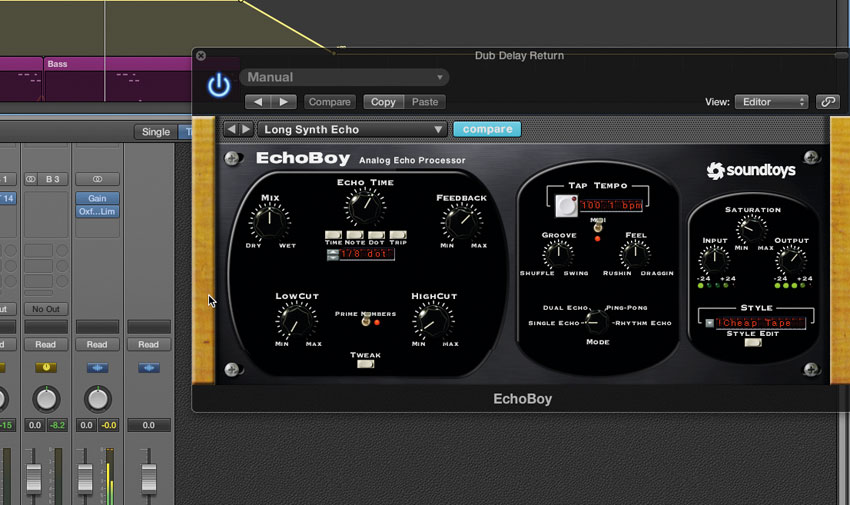
Step 3: The dub piano part now sounds even drier and less integrated. Rather than sending this to the same reverb, we set up a second auxiliary and set up SoundToys' EchoBoy. Using the Cheap Tape emulation produces nice, retro pitch wobbles which crackle nicely. We set the delay time to dotted 1/8th notes and set a generous amount of feedback. At the end of the track, we automate the return level from this auxiliary to stop the delays hanging on too long.

Step 4: To bring the piano closer to the growing sense of 'space' in the track, adding some reverb to it would make sense. Yet we don't want to take the sharp edge off the percussive nature of it either. A good compromise is to send the piano's dub delay to the EMT 140 auxiliary instead, automating the send level between the auxiliaries, so that the amount of reverb added to the delays varies from one piano chord to the next.
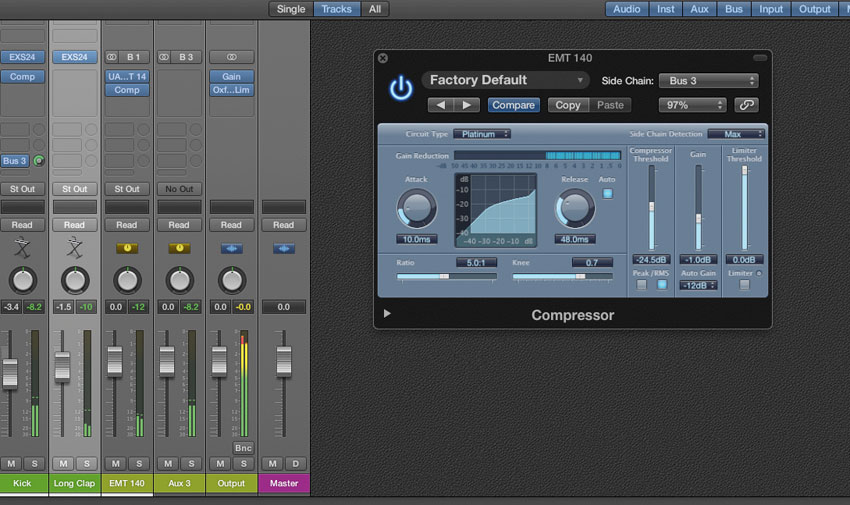
Step 5: We also send the clap and hat loop to the EMT 140 auxiliary to offer it into the same space as the other tracks in the mix. The mix isn't overwhelmed with reverb now but we could overcloud it. So we insert a compressor after the reverb, route the kick drum to Auxiliary 3 and turn off the latter's output. We then route Auxiliary 3 into the compressor as the side-chain source, so the reverb's level pumps in time to the kick drum, adjusting threshold and ratio to taste.
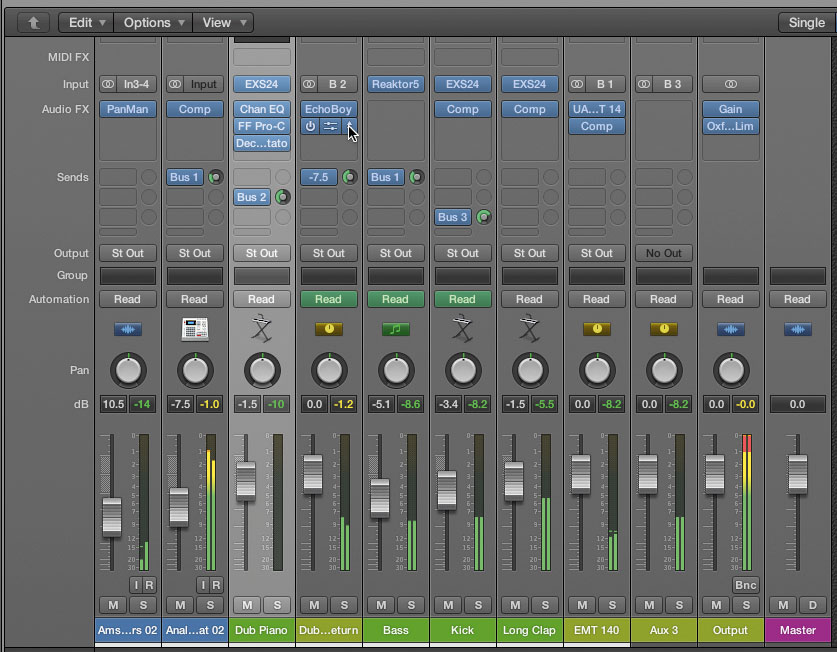
Step 6: And we add side-chain compression technique, triggered from the kick, to two more sounds. Firstly, the clap, with its own long reverb. The side-chain compression makes it feel more like 'our reverb' as it's being processed like the other sounds. Secondly, the dub piano delay buss is treated similarly, which is particularly audible at the end, as we've extended the kick drum pattern so these are the only two sound sources playing through the final few bars.
Want all the hottest music and gear news, reviews, deals, features and more, direct to your inbox? Sign up here.
Future Music is the number one magazine for today's producers. Packed with technique and technology we'll help you make great new music. All-access artist interviews, in-depth gear reviews, essential production tutorials and much more. Every marvellous monthly edition features reliable reviews of the latest and greatest hardware and software technology and techniques, unparalleled advice, in-depth interviews, sensational free samples and so much more to improve the experience and outcome of your music-making.
