Propellerhead´s Reason 4 has been available for a few months now, so we´re guessing that quite a few of you are using it. This latest version of the software studio is the deepest yet, though, so we´ve put together 28 tips to help you get more out of it.
We think there´s something here for everyone - whether you´re a long-time Reason user or a relative rookie. There´s a lot to get through, so let´s dive right in…
1. The single best Reason 4 tip is to read the manual! Existing users only need to read four chapters - Sequencer, ReGroove, RPG-8 and Thor. New users should set aside a day to read the entire manual without stopping (it´s mostly pictures!), then use Reason for a week and read it again. You really will get it all the second time round.
2. The best way to learn how to program your own patches in Thor (and every other synth) is to find some you like from the supplied presets and work backwards through the signal path. Switch things off - or change them - to find out how they affect the sound produced by the final patch.
3. The new Device Tool does speed up the process of adding instruments, but you should still use the Combinator to save any sequences of plug-ins you use regularly. This will not only speed up your workflow, but will also enable you to maintain a consistency of sound and style that will help make your productions stand out.
4. If you find the cables behind the rack a confusing mess, hold the mouse pointer over a connection point to find out what it´s attached to at the other end. Then, to make a new (or replacement) connection, click and hold over an input or output, and a list of all of the available destinations will appear. Select one and the cable will be added.
5. Groove quantise is great, but it can cause some pretty cluttered rhythms if you´re using more than one type simultaneously, particularly if the source material isn´t strictly quantised before you start. Thankfully, Reason 4´s Pre-Align button strictly quantises all note events before it applies any additional groove so you know exactly what it´s doing to each track.
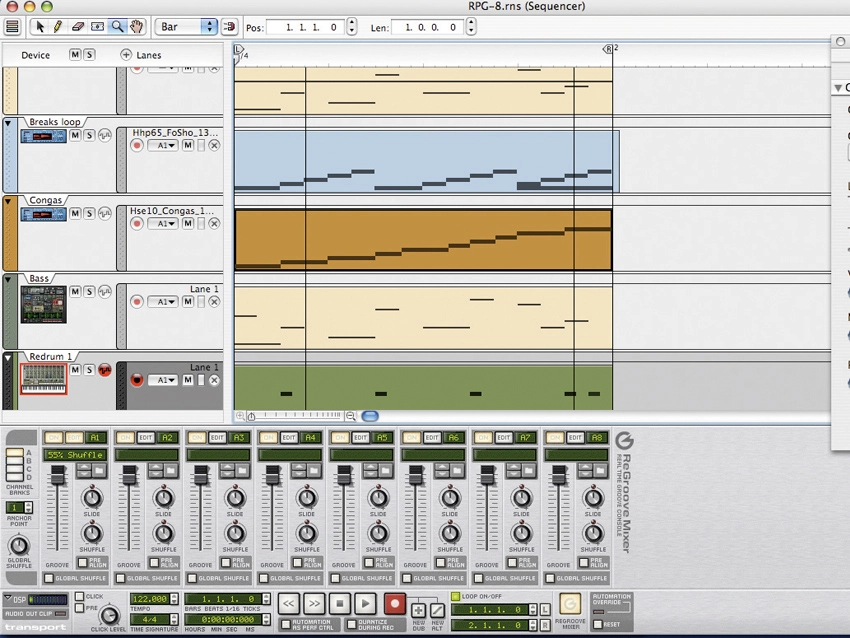
6. The RPG-8 enables you to come up with great patterns. To use them in your arrangement hold Ctrl, click anywhere on its interface and select Arpeggio Notes To Track to create a clip from your arpeggio. The same works with ReDrum as well - Ctrl+click on the step buttons and select Copy Pattern To Track to make a clip out of your currently selected sequence.
7. One of the oldest tricks in electronic music is a to add positive or negative delay to certain channels to make some elements seem either much more urgent or laidback. You can easily do this using the ReGroove mixer - simply tweak the Slide control. Negative values bring elements in faster for a quick, driving feel, while positive values delay the part for that chilled vibe.
8. Arpeggios needn´t just be used for synth lines. Try using RPG-8 for some more outrageous arpeggiation action, such as triggering a drum patch in the NN-XT sampler, or in conjunction with the BV512 vocoder for some crazy dual modulation. Also, try recording an extended section with RPG-8 in Random mode and see what comes out…
9. It seems like an obvious tip, but it´s amazing how many people don´t choose the Detach Sequencer Window option from the Window menu. Reason´s new features make the sequencer section a much friendlier place to hang out, even if only to get a few ideas down, so why not detach it and enlarge it to fit your whole screen?
"One of the oldest tricks in electronic music is a to add positive or negative delay to certain channels to make some elements seem either much more urgent or laidback."
10. Track lanes are a great way to house alternative takes and unused note clips, but before you even start arranging they´re ideal for placing the different parts for your intro, chorus, verse and bridge in order to easily audition arrangement ideas over an eight- or 16-bar loop, simply by muting and un-muting the lanes as your loop plays.
11. Build up a library of custom Groove Patches for use in the ReGroove mixer. With a little help from an audio editor and a copy of ReCycle!, these can be extracted from your favourite songs and applied to your own.
12. If you´re having trouble getting parts with different types of groove applied to sit well together because one or two hits are clashing, try applying the grooves permanently to the clips. You´ll be able to manually match up only the offending hits, while leaving all other note events intact.
13. When you record automation tweaks, Reason remembers the original ‘static value´ (the setting before you applied automation). So for any big build-ups and drops, you need only drag the automation clip´s ending exactly to the conclusion of the build and Reason will instantly snap to the static value when it gets to the end of it.
14. Creating Automation lanes for multiple parameters at once in the sequencer window is a snap in Reason 4. Simply select the channel, go to Edit»Parameter Automation, tick all the ones you want to create clips for and click OK.
15. At the earliest opportunity, make a note of all the keyboard shortcuts on offer. For example, you no doubt know that the magnifying glass tool enables you to zoom in on the sequencer by clicking or ‘boxing´, but are you aware that holding down Ctrl on PC or Alt on Mac and clicking with it zooms the view back out?
16. Try using RPG-8 arpeggios in another sequencer to trigger your plug-in synths and samplers. Highlight the RPG-8 module, right-click and select Arpeggio Note To Track. Export the project as a MIDI file using the Export MIDI File option from the File menu, and then import it into your sequencer of choice.
17. Thor´s third filter enables you to patch different signals into the left and right channels independently, so take advantage of this ‘under the hood´ feature to create all manner of cool stereo effects. For example, try panning different slices of a Dr. REX loop left and right, or running one channel of a stereo instrument through additional effects before routing it through Thor.
18. Thor enables you to emulate a vast array of classic synths, and a great way to do this is to look for synth manuals online and find out how many (and which types of) oscillators and filters they have and how they´re patched together - many even include detailed diagrams of the signal routing layout. You can then create Thor patches to emulate the architecture of each one.
19. Create heavy basslines by sending a REX drum loop through a Comb Filter in Thor, setting its frequency to around 273Hz and then sweeping the Resonance from around 70 to 127 and back. Record these tweaks and then tame the sound using an external low-pass filter or EQ.
20. If you have tried the previous tip, you can add even further spice to your build-ups by copying the REX file clip from the Dr. Rex channel to the Thor track and letting both play in build-ups. It works particularly well on Thor´s default Epic Poly setting.
21. You can make your RPG-8 arpeggios a lot less robotic and unnatural sounding by applying some real-time modulation to them (either using recorded automation or by drawing some in). A great parameter to play with is Gate Length. And whenever you get a section you like, try looping that automation clip.
"Thor enables you to emulate a vast array of classic synths."
22. Things can get very confusing with so many different types of clip on offer, but you can assign colours to them to make things clearer. Use one specific colour for each type of automation (filter cutoff, for example), another colour for drum parts, another for basslines, another for ReDrum patterns, etc.
23. Just about every parameter on the RPG-8 arpeggiator can be automated, and this includes the Octave Shift control. For some catchy little flourishes, use automation to sweep up from the lowest setting to the highest over one, two, four or eight bars. When used sparingly, this can be a great way to come out of breakdowns, build up to choruses or perform any other dramatic edits.
24. With Reason 4 making it so easy to apply real-time automation to everything, you´ll quite often find that you´re left with a number of automation lanes just sitting there cluttering up your arrangement. Select Delete Empty Automation from the Automation menu and all the empty ones will be instantly removed.
25. Just because the ReGroove mixer lets you use up to 32 different types of groove quantise simultaneously doesn´t mean you necessarily should. Electronic music needs to sound tight, so if that´s what you´re making, you might want to stick with one groove throughout. For music that´s meant to sound live, though, you can apply grooves more liberally.
26. You can get a great stereo arpeggio effect by creating two identical RPG-8 and synth combos (using identical clips to trigger them). Send then separately into the left and right channels of a sub-mixer and then subtly change the levels. You can also use the RPG-8 Pattern sequencer to create a panning effect.
27. Arpeggios are great but they can get repetitive after a while, or even sound a little mechanical straight away. A really good way to inject some variation is to automate some of the creative controls such as Mode, Octave or Insert over the course of a clip. This will change the note pattern being played and make it sound much more interesting.
28. Reason 4´s Combinator now enables you to alter the tuning of the individual synths contained in a patch, making it much easier to try out different settings. To make your changes, simply open the Combinator´s Programmer section, click on the device in question on the left, and alter the Transp setting for it.
