Guitar setup: how to restring a nylon-string classical guitar
Restring with success using our classic method
Introduction
If your strings sound dull, suffer from poor intonation, are hard to keep in tune or look rustier than a fisherman’s lunchbox, replace them.
Nylon classical strings are available in two formats: tie-on and ball end. Both types are covered in our guide ahead.
If you care about tone, buy a quality set of ‘normal tension’ classical strings from the likes of Rotosound, D’Addario or Dean Markley.
Oh, and never fit steel strings to a classical guitar. Most nylon-strung guitars don’t have trussrods to protect their necks from the increased tension of steel strings, which means the neck on your guitar will warp.
With that out the way, here's how to restring your nylon-string guitar, classical style…
1. Remove and replace
When you’re restringing your classical guitar, remove then replace the strings, one by one.
You definitely need a string winder for this. Trust us, it will save you a lot of time.
2. Ball-end bliss
If you’ve gone with the ball-end jobs, simply run the string through the correct hole in the guitar’s bridge.
With that done, you can jump to step 9 for the rest of the stringing process.
3. Tricky tie-ons
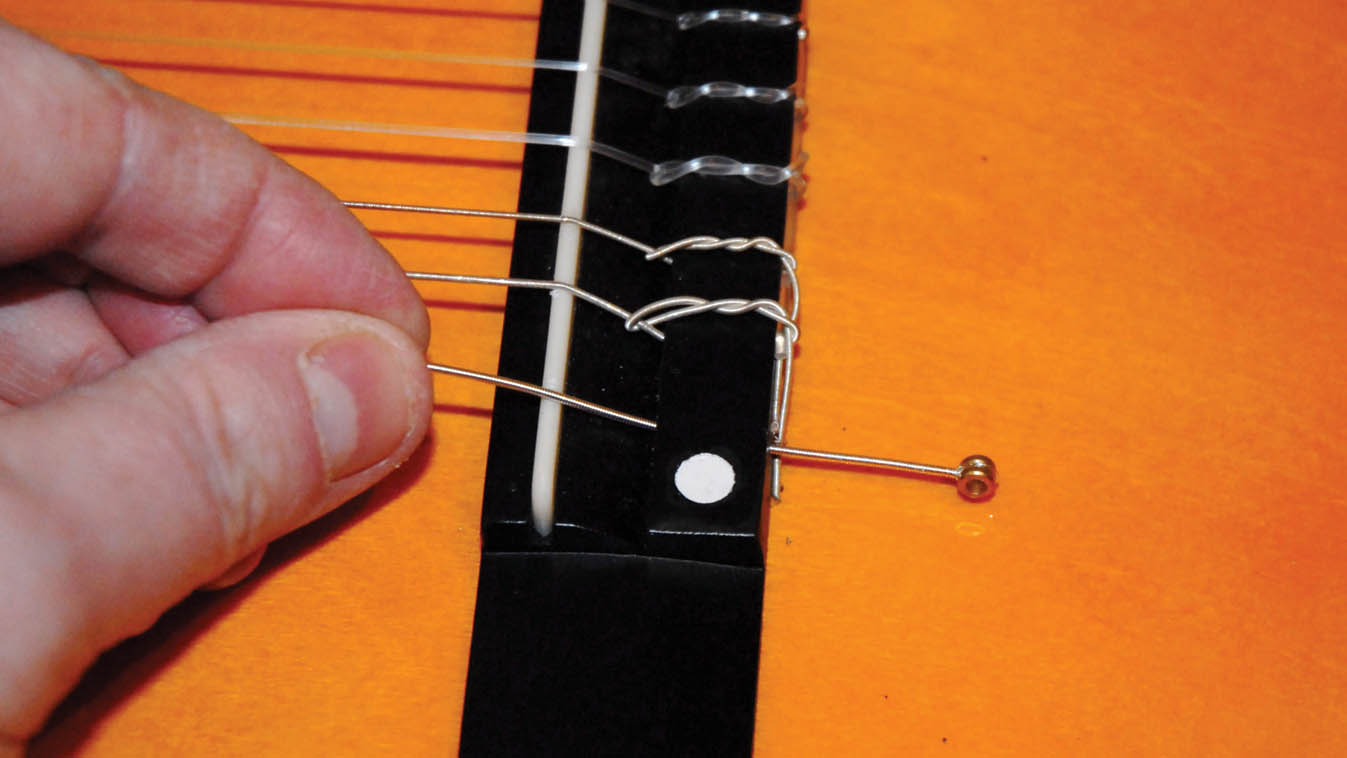
Fitting tie-on classical strings is a little more involved. Begin by poking the end of the string through its corresponding hole in the bridge. Allow yourself a couple of inches of string to work with.
4. Double back
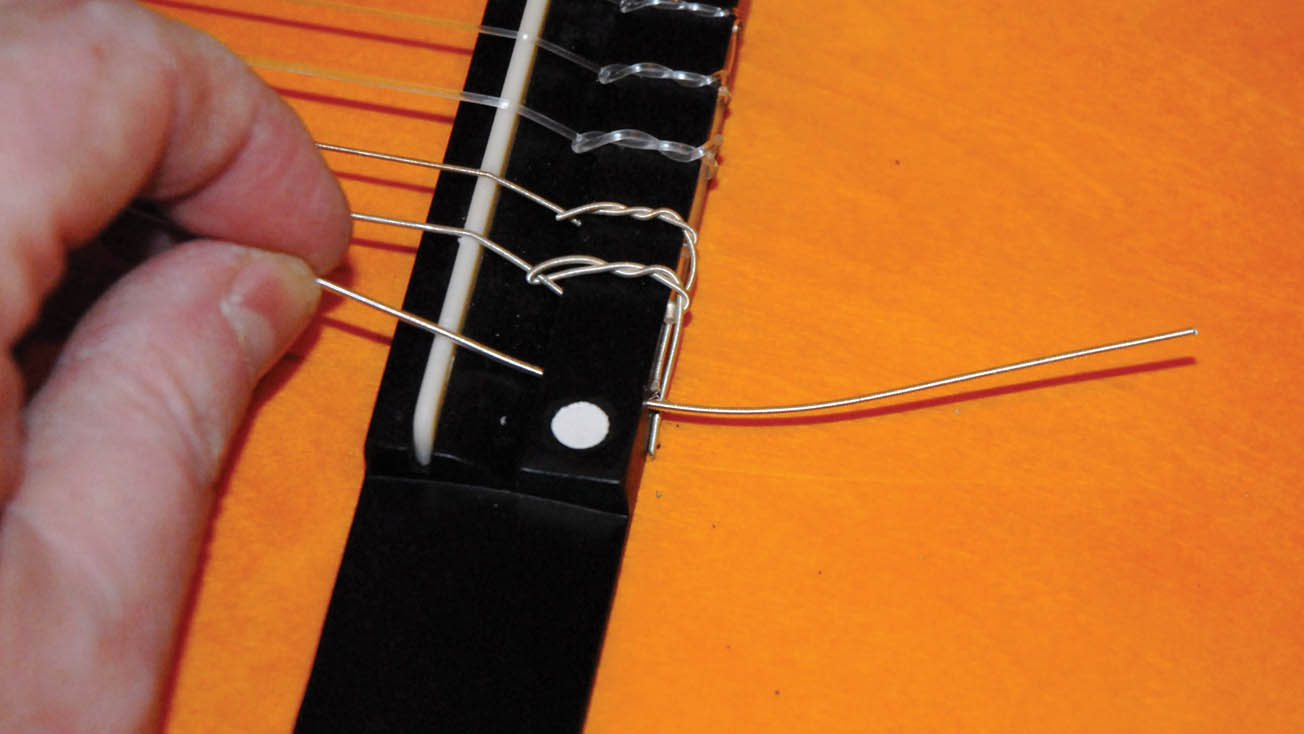
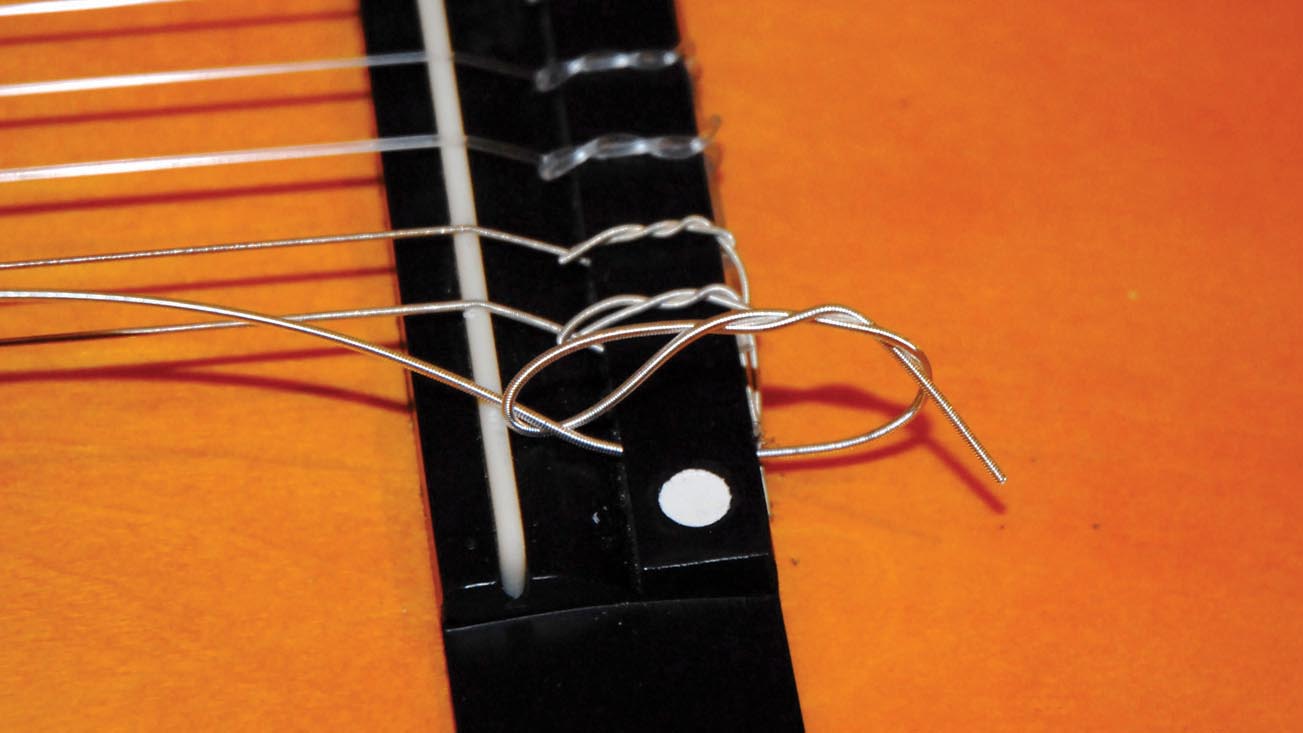
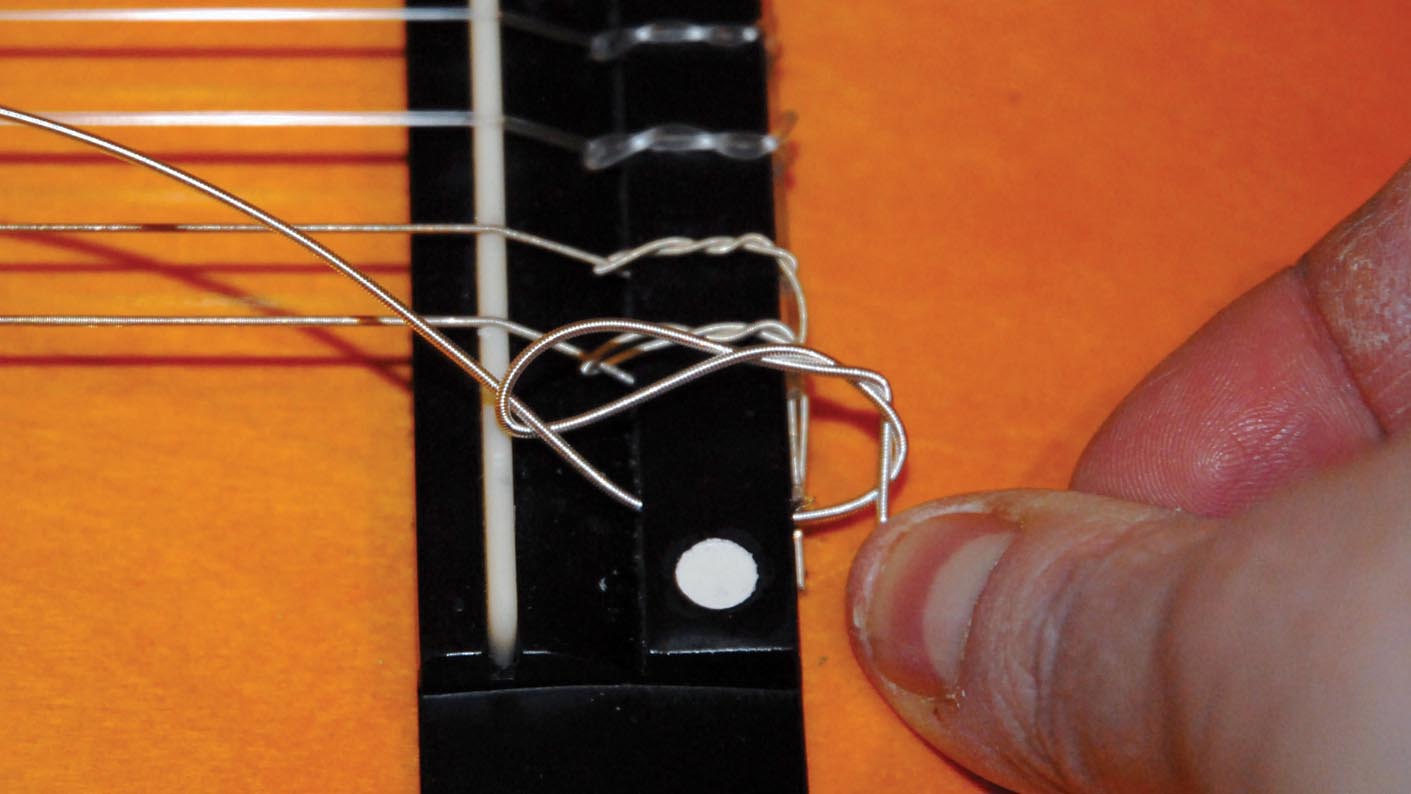
Next, double back across the bridge and pass the end of the string under itself. Take a good look at the pic to make sure that you are doing this properly. Nail it, then move on.
5. Feed the string
Feed the string under itself again. You can do this once or twice. We prefer to do it twice so that we end up with a more secure knot when we’ve finished fitting the string.
6. Lock the knot
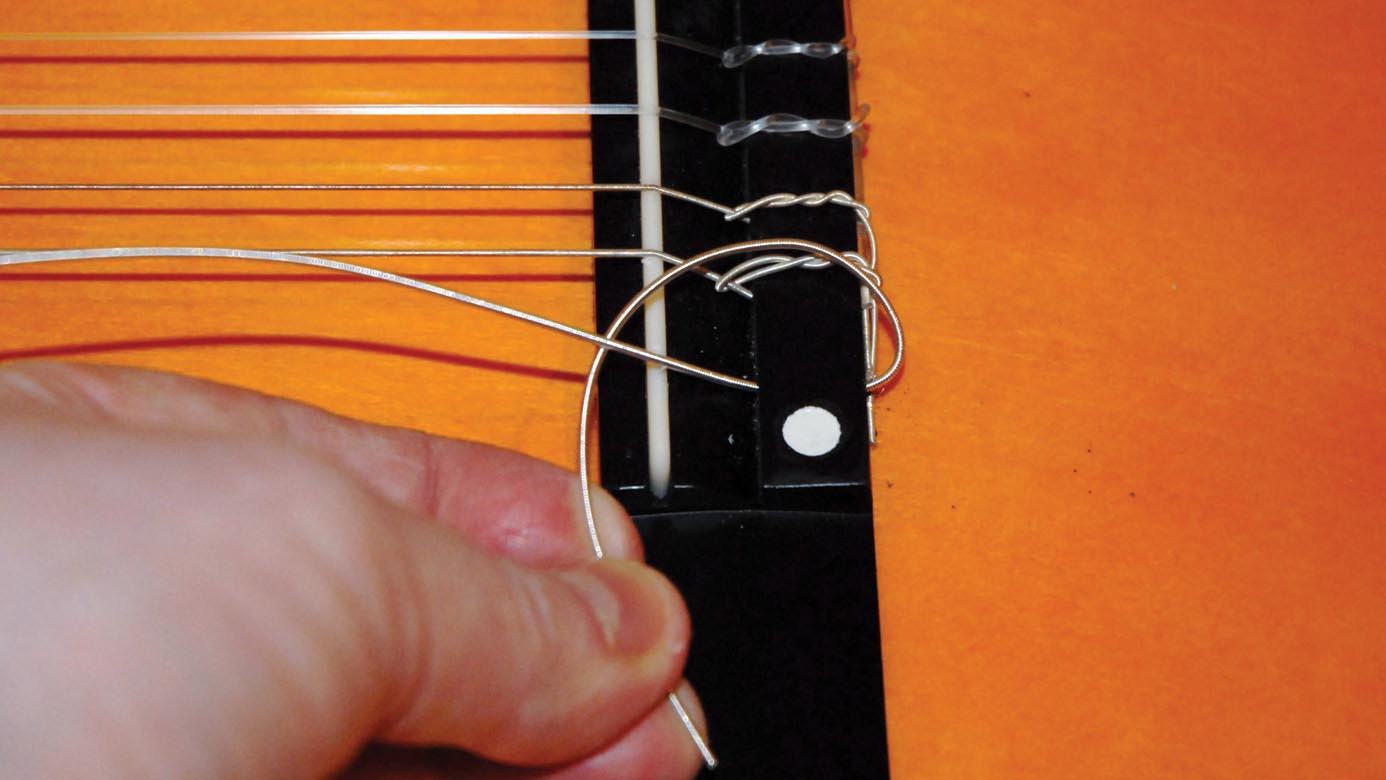
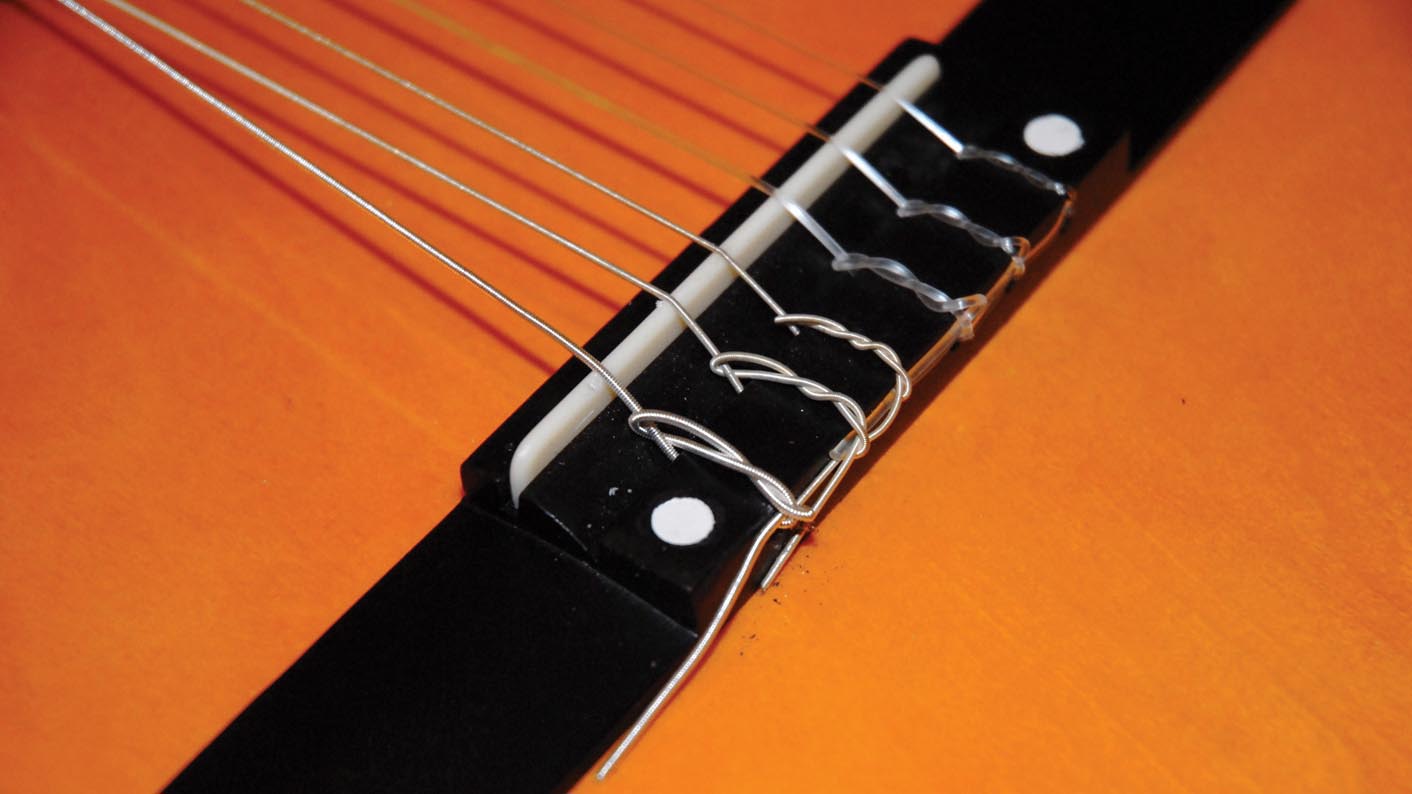
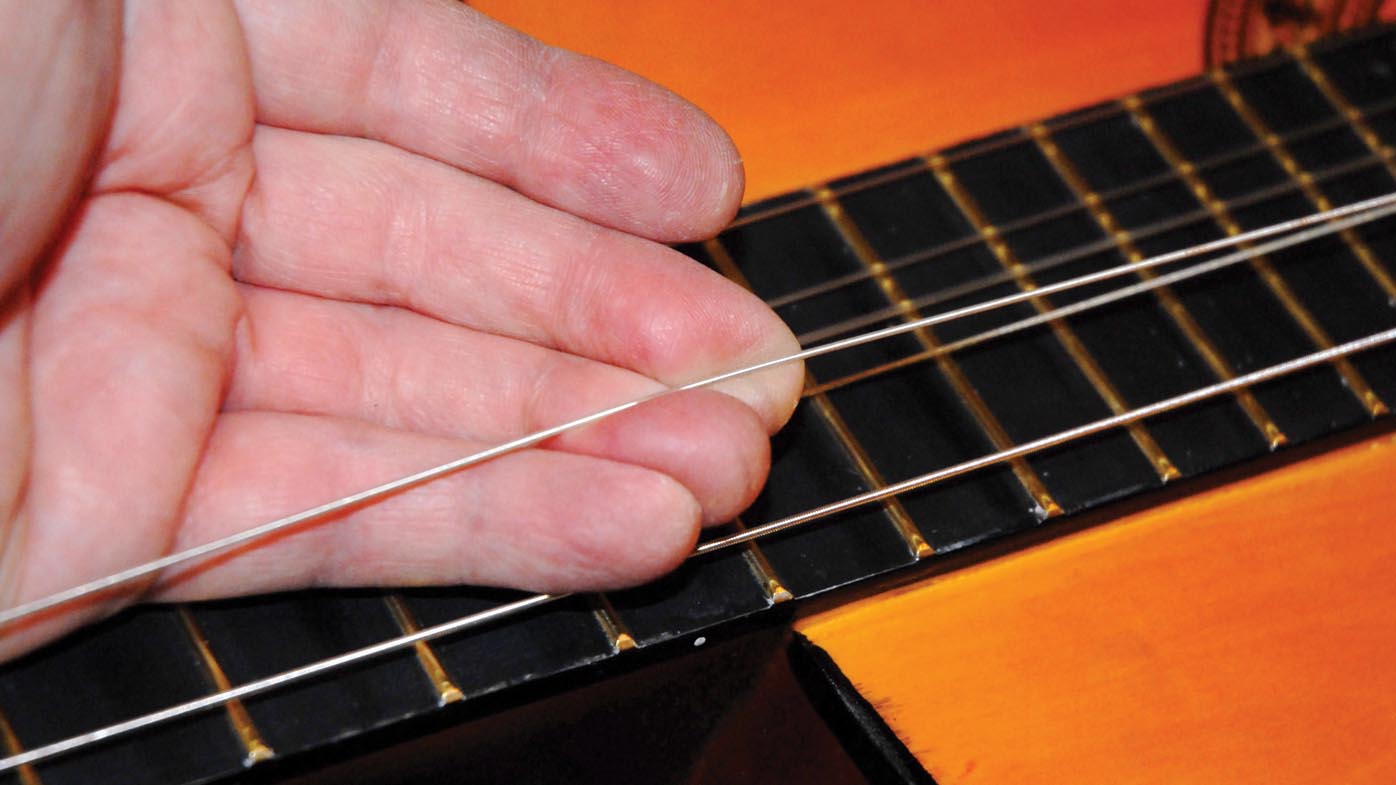
Hold down the string on the soundboard (aka ‘face’) of the guitar as shown. Next, pull on the rest of the string to lock the knot in place. Make sure you give it a good hard tug.
7. Leave the loose ends
You should end up with a tight, tidy knot. Don’t be tempted to tidy up the loose end. If the knot slips during tuning you might need that half inch of excess string to save the day.
8. Double wraps
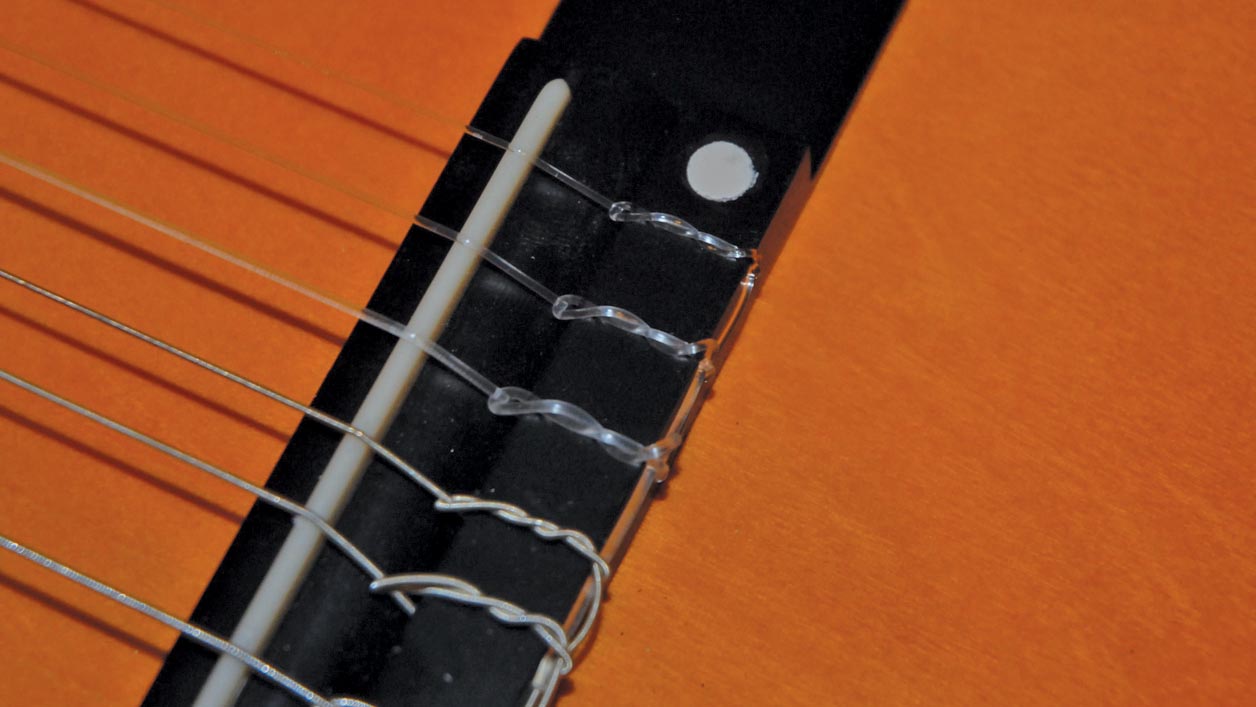
When you fit the three high strings you must double the number of wraps in the knot. These plain nylon strings are more prone to slippage than the wound lower strings.
9. It's a trap
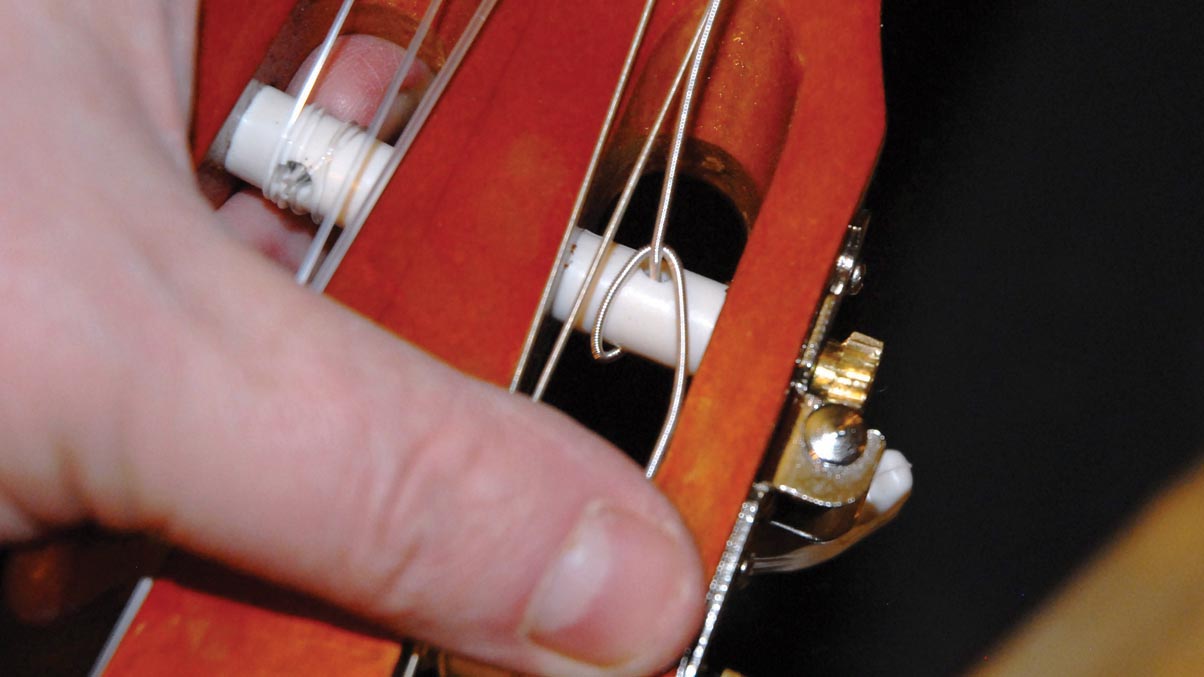
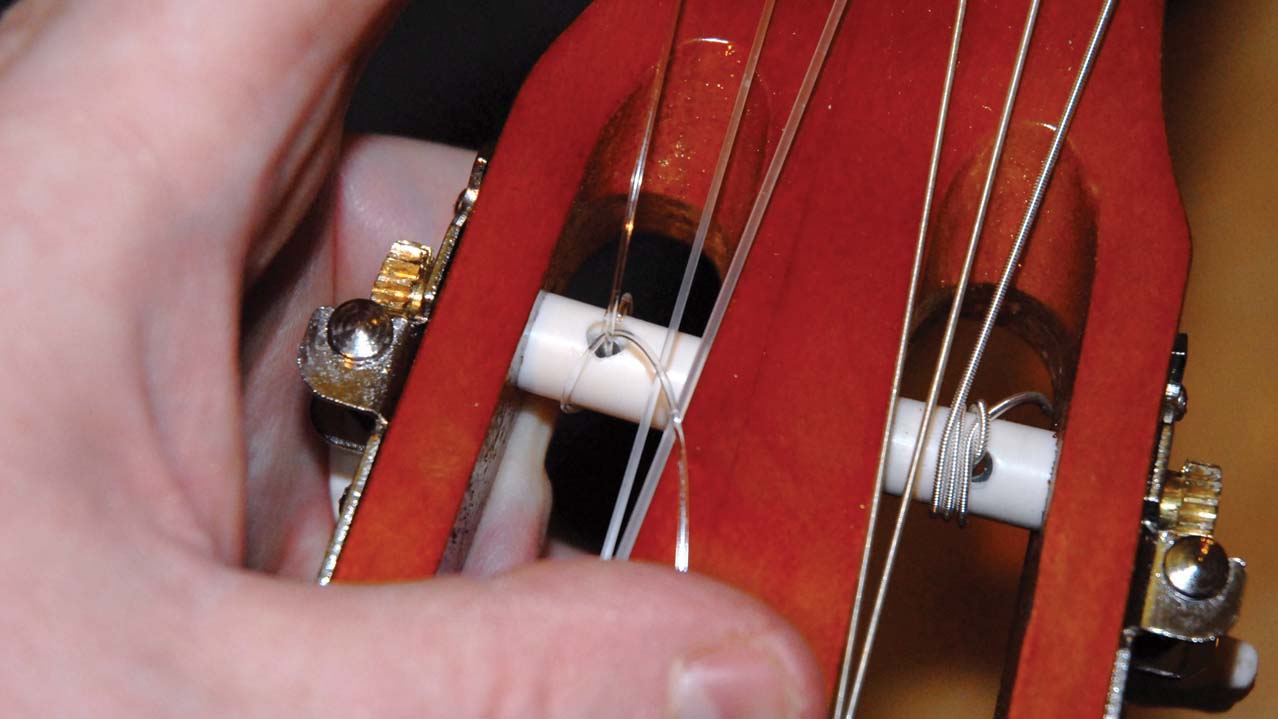
Poke the string through the hole in its machinehead post. As you wind it on, trap the loose end between the windings and post to prevent the string slipping when you tune the guitar.
10. Double up
When you’re slipping a plain nylon string through its hole in the machinehead post, do it twice for some extra grip. Again, trap the loose end of the string between the windings and the post.
11. Tune up, stretch out
It’s now time to tune the guitar to pitch. As ever, you’ll save a lot of time if you stretch the strings. Remember the old guitar restringing mantra: tune, stretch, then tune again until the tuning settles.
12. Trim the strings
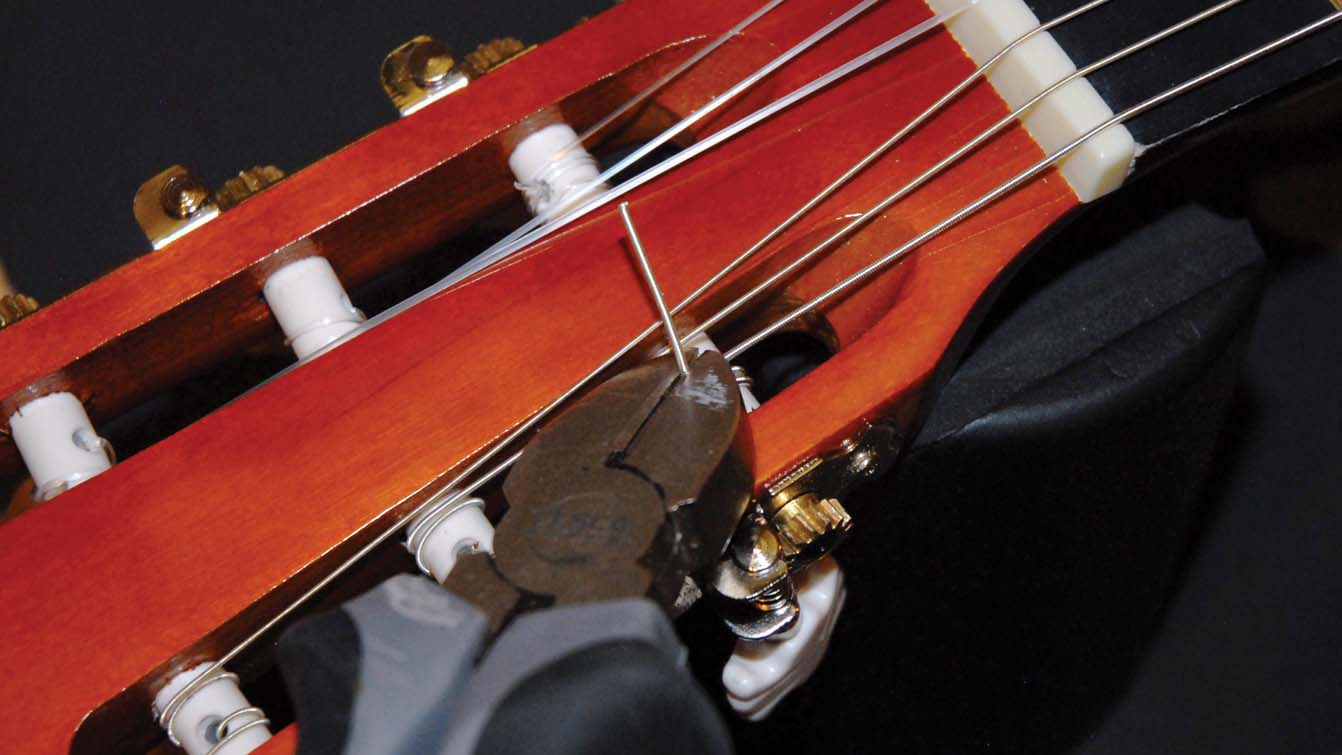
When the tuning has settled down you can trim any excess string from the machineheads.
You should now have a guitar that has better tone, intonation and tuning stability than you started with.
“I can’t play jigs or reels or any of that traditional Irish stuff, but I have got a good ear for blues, the tonality of it”: 3 ways to supercharge your lead guitar playing like Rory Gallagher
“A well-crafted sequence is successful wherever you may wish to use it”: Use these tried and tested chord progressions to build an engaging song