
The lifeblood of electronic music and a genre that’s still omnipresent today, the intense energy of techno holds a hypnotic allure. Today, we're digging deep into the workings of this essential genre, and show you how to craft club-ready future techno classics.
From the foundational DIY sounds of its Detroit-based origin story to today’s slickly produced floorfillers, techno is one of the most pivotal genres within the electronic music sphere, defined by stable four-to-the-floor rhythms, squealing leads and throbbing, impactful bass. Here we’re going to explore modern techno and highlight how you can get your footing in this most impactful of genres. To grasp techno’s centrality to the modern scene, it’s important to get a little context on the genre’s birth.
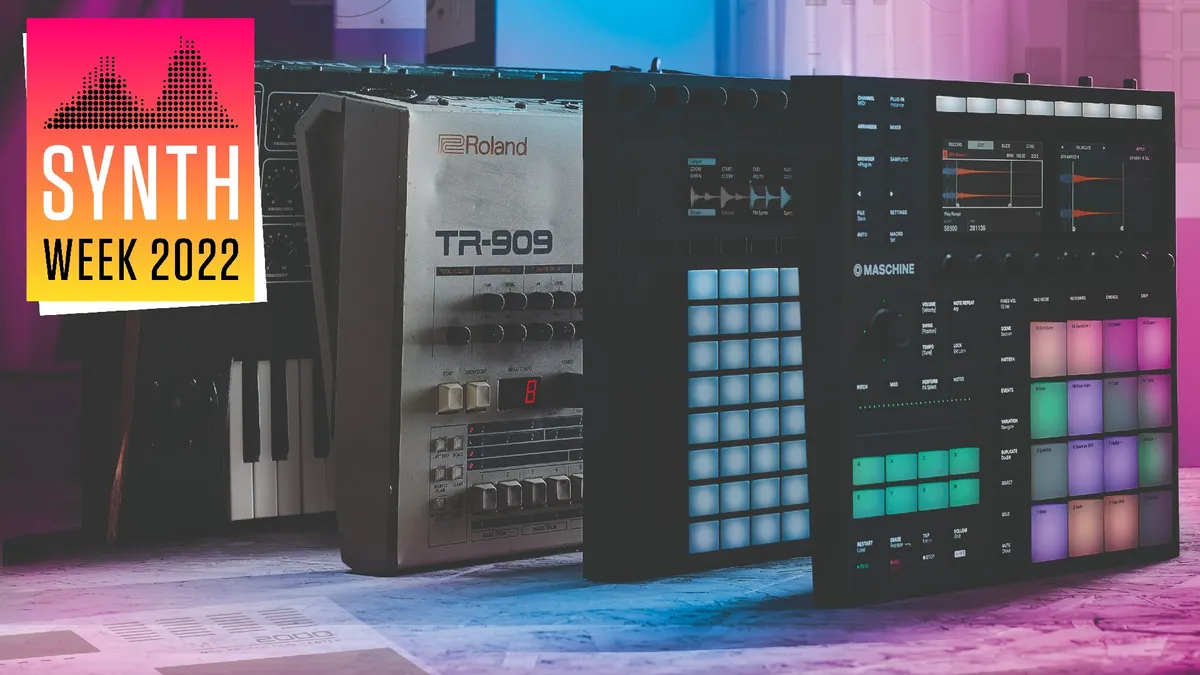
40 years of techno: celebrating the hardware and heroes that built a genre
The genre was invented by The Belleville Three – Juan Atkins, Derrick May and Kevin Saunderson, and ’80s Detroit culture had a profound influence on these three innovators, whose early compositions may have been influenced by a fascination with futuristic ideas and machines. Juan Atkins formed a group called Cybotron and their first single Alleys of Your Mind sold 15,000 copies on the independent Deep Space label in 1981. Shortly after, Atkins began a solo project under the name Model 500. In 1985, Model 500 released No UFOs on Juan’s own label Metroplex. It’s a record considered by many to be the first techno production.
The technology and hardware that was becoming available in the early ’80s influenced the burgeoning sound of techno. New drum machines and synthesisers were produced that allowed music producers and hobbyists to create music in their bedrooms. This hardware-originating sound has remained a prominent part of the genre, and has become embedded into its fabric.

Produced from 1980 to 1983, the Roland TR-808 is one of the most influential drum machines of all time. It allowed users to easily program their own rhythms using the built-in 16-step sequencer and used analogue synthesis to produce drum sounds, as opposed to using pre-recorded samples. The TR-808 is perhaps best known for its contributions to hip-hop and electro, however it was also harnessed by the early techno pioneers. Roland then introduced the TR-909 Rhythm Composer, commonly known as the 909 in 1983. It was the first of the Roland drum machines to use samples for some sounds, and the first that used MIDI functionality, allowing it to synchronise with other devices.
OK, that’s all the context you need. Now let’s get started and dive into the practices and techniques employed by today’s techno titans…
Build your techno toolkit
Techno has branched out far from its roots in Detroit and has evolved into a wide array of sounds, including big room techno, main stage techno, soulful techno, purist techno, acid techno and lots more. One consistent element in all of these styles is that the kick is often the main focus of the track. With that in mind, it’s best to start production with the kick drum and build the rest of your track around the kick.

To learn what type of kick sound is appropriate to use, use a reference track in the same style that you’d like to create. This will assist you to select or create an appropriate kick sound. You may want to choose the key of your track first and choose a kick that’s in the same key. There are many good quality sample packs available to use as a starting point. To really carve your own niche, why not spend half a day crafting kick drums so that there’s a custom-made library available for your personal use.
Choose a kick that has a strong transient that will cut through the mix. If the kick has a solid body but lacks a sharp transient, layer the kick drum with the transient from another kick. You could also try layering the kick drum with another sound, like a tom. To add some character, a third layer could be added to give the kick a click in the higher end. Adjust the levels of all three kick layers to have them sit in the mix together. Shape each kick drum using EQ to make them blend together.
You can try this layering method instead of compressing the kick. All of the kick layers can be grouped together, and processed as one kick. Use a ‘notes to frequency’ chart to find the fundamental frequency using the key of your kick drum. Place an EQ such as FabFilter’s Pro-Q 3 on the main kick drum (or kick group) and boost the fundamental frequency of the kick between 1 and 3dB, and use dynamic EQ if your EQ offers this feature. Try a shelf EQ to roll off the frequencies below 30Hz to give the slope a more natural feel.

A popular sound is the techno rumble, which can be created from the kick. One of the best ways to create this rumble is by using a convolution reverb. Create an auxiliary/return track and put a convolution reverb on it. Next add a filter like FabFilter Simplon and apply a high-cut filter to cut off all the frequencies above 200Hz.
Shape this sound further by adding a DI like Kush Audio REDDI. Send the grouped kick drum to this return track and mix in the rumble from the return track to your kick. You’ll need to determine the level that the kick should play at. Use your reference track as a guide for the kick drum level and don’t try to guess where a kick sits in the mix. In general, a kick can sit around -5 or -6dB.
In techno, percussion tends to be pretty minimal. For hi-hats, it’s recommended that you use the classic 909 closed and open hi-hats. You can use Battery, or find samples online. A good choice is D16 Group’s Drumazon – a recreation of Roland’s 909. It’s fun to use and has a swing feature that suits techno grooves.
Start with the closed hi-hat and program a 1/16 note rhythm. Leave the first 1/16 note off, as this is where the kick drum plays. If you’re using a sampler like Battery, try adjusting the length of the sample and listening to what works best. To add variation to the pattern, set the velocity of each hi-hat to a different level. Use a transient designer plugin like iZotope Neutron to enhance the transient of the hi-hat and make it stand out in the mix.

Try increasing the attack and cutting sustain to create dynamics. Make the hi-hat sound wider using an imager (the one in Ozone 10 works great). Now, put a delay plugin on the track, like Soundtoys’ Echoboy to add a subtle delay. To give the hi-hat more character, try using a distortion/gain plugin like Kush Audio’s Omega 458a and turning up the gain. This type of processing gives the 909 hi-hat an analogue-type sound with more body.
Open hi-hats are programmed on the off beats in a 16th-note pattern. You may want to adjust the decay of the open hi-hat in a sampler, depending on how open you want the hi-hat to sound. Use a few of the same processes that were used on the closed hi-hat, like using a transient designer to bring out the attack of the sound. Add character using a vintage distortion (we used Kush Audio Omega TWK) until it sits nicely in the mix. Add in additional percussion such as a snare or clap, and if you wish, a shaker or toms. You’ve now got the bones of a banger.
Sub bass
Modern techno typically deploys sub bass, which sits beneath the kick drum. To create the sub bass, use a synthesiser, such as Serum. Turn the oscillators off and use only the Sub. Set the waveform shape to Sine, and the Octave to -1. In the key of your song, record the root note on the offbeat, so it plays after the kick drum. The kick and sub bass should make an ‘oompa’-type rhythmic pattern when played together.

Bounce the Sub Bass track to audio and use the fade tool to shape the envelope of the audio by adjusting the fade on the sub bass audio file. Use a plugin like Kickstart 2 to sidechain the sub bass to the kick drum, so that the beginning of the sub bass is slightly ducked. To ensure that the kick and sub bass work well together, you can use EQ to cut the fundamental frequency that was boosted in the kick out of the sub-bass and use a low-shelf EQ in order to roll off frequencies below 30Hz.
Developing your techno track
Techno productions can draw listeners in by including dynamic changes and creating a particular sonic environment. On an aux/return track, you can use your favourite reverb to set the tone for the sound. A few good reverb choices are Lexicon 224, FabFilter Pro-R or KSHMR Reverb. With techno that’s made for mid-sized clubs, try a small hall and for big room techno, use a large hall, like a warehouse or cathedral. Send the hi-hats, shaker, claps and other percussion to the reverb via the sends in your DAW.
Modern techno often includes a rolling bassline. To create the sound, load up your favourite bass synth, like Serum or Sylenth1. Saw or square waves with a fast attack or a fast filter envelope work well. Program a simple MIDI bassline in a 16th-note pattern and leave the first note of every beat as a rest to prevent it from clashing with the kick.
To make the bassline stand out, try adding a bitcrusher. Rolling bass only needs to be audible in the midrange and an EQ or filter can be used to carve away the low end and top end. To ensure the rolling bass ducks out of the way of the kick, side chain it to the kick drum or use a volume ducker like Kickstart 2 for the sidechain.

The next part of creating a techno track is to find some inspiration to create the main melodic line. In techno, the melody is usually quite minimal. To draw listeners in, a catchy synth riff will work well, even if it’s just one or two notes. The type of sound you use is entirely up to you and your vision for the track.
If you’re creating a track that’s more minimal, perhaps like the Ben Klock and Marcel Dettmann-style, you may want to use an analogue synth and record a melodic line into your DAW. You can listen to the recording, and choose the best part to loop. If your aim is to create Detroit-style techno, spend some time designing a good chord patch in your synth so you have an inspiring and authentic sounding patch to start with. Draw in the chord progression on your own if you’re musical, or you can use a chord pack or plugin (like Captain Chords Epic) that will help you to create a simple chord progression.

Lastly, if you’d like to create rave-style techno or modern big room techno, you’ll need to craft a lead patch in your favourite synth or use a preset from a sample pack. To generate an idea quickly, you can use a plugin that will generate a MIDI pattern and send the MIDI output to another synth with the sound you’ve chosen. This is a good trick to quickly create the main idea for the track. There are many MIDI-generating plugins out there; try a quick Google search and choose the best option for you.
Many classic and new techno tracks include acid lines, or are focused around an acid bassline that’s modulated with automations. An acid bassline can be used in addition to the rolling bass line as long as space is created for it in the mix. It can also be used as the main melodic line in your track. The acid sound was originally created on the Roland TB-303 – the legendary bass synthesiser that was first released in 1981. Designed to simulate bass guitars, the 303 was a commercial failure and was discontinued in 1984. DJ Pierre’s early acid house group Phuture released the Acid Tracks EP in 1987, essentially inventing acid house. The 303 sound hasn’t gone out of style since, and the 303 sound is still a staple in many contemporary techno tracks.

Nowadays there are many good recreations of the TB-303, and one of the most well-known is Roland’s own TB-303 plugin. With a little programming know-how, it’s relatively easy to create a simple acid line that can be used as an element or the leading line of your track. The 303 will sound best in a mix with additional processing, like distortion or saturation on top. FabFilter Saturn 2 works well for this type of processing, or for a more extreme sound, Universal Audio Raw Distortion, or Brainworx the bx_blackdist2, which are both plugin versions of the Pro Co Rat distortion pedal. To make the acid sound more interesting and keep it changing throughout the track, you’ll need to automate parameters like the Cutoff Frequency, Resonance, and Envelope Modulation.
Once the main synth line has been created, you may find it needs a supporting line. If you’ve chosen a big lead sound for the main lead, try pairing it with a synth stab, a higher pitched arpeggiated synth line, or a plucked synth. A simple trick is to automate the pitch on a plucked sound during a transition. You can achieve this using the pitch transpose in your DAW, or zplane’s Elastique Pitch. A sustained pad sound can be added and used during the buildup or breakdown of the track.
Processing audio
Sound design is a big component of techno and to create truly original sounds, you’ll need to spend time processing audio. Once you have all the main elements of a track (drums, bass, synths, etc) export them as .wav files and open them in a new session in your DAW. This will allow you to create experimental sounds that require lots of plugins and heavy processing to avoid overworking your computer’s CPU.

Try adding effects one after the other and once you’ve created a sound you like, bounce the tracks to audio. When you commit to a sound, this helps you to move the track forward and stop endlessly tweaking. Though there are countless effect plugins on the market, some good ones to try include: Cableguys ShaperBox 3, Output Portal, FabFilter Saturn 2, Soundtoys Crystallizer, Valhalla Supermassive, Native Instruments Guitar Rig, Polyverse Manipulator or Supermodal, effect plugins by Unfiltered Audio and GoodHertz.
Techno effects and arrangement
Lastly, you’ll need to add effects to the track. Effects sound more natural when they’re made from existing parts in the track. Create return/auxiliary tracks with effects processing plugins, and send your percussive parts to these tracks. The results can be recorded to new tracks, and processed with filters, delays and reverbs.
Once all of the main parts of your track have been created, begin arranging. The best way to learn to arrange is by studying a reference track in the same style. Some techno tracks are built with more of a loop-based approach, and rely less on a traditional song structure. Some modern techno, for example tracks by producers such as Eli Brown, Space 92 and Deborah De Luca, incorporate more melodic elements and defined arrangement structures.
Generally in techno something new is introduced into the track every 16 bars, or an element is removed. Techno arrangements use dynamic changes to hold the listener’s attention. A typical track arrangement could look like this:

Before you begin, ask yourself if your loop is interesting enough in terms of percussive grooves, character, melodies and harmonic elements. Original mixes and extended versions of tracks will each have a different type of arrangement. Once you’ve created a strong eight-bar loop, you can turn it into a full track by sculpting the different parts. If you’re new to arranging, it’s helpful to create markers in your DAW to name each one of the arrangement sections, or create an additional MIDI track with the name of each part.
One of the main goals in an arrangement is to create dynamic contrast between sections. The intro of a techno track can be the kick, as well as atmospheric and percussive elements, and generally no bass. The construction part of the track reveals the ‘story’ of the track and sets the tone and feel. It achieves this by introducing the elements of tracks, musical ideas and sounds. In the construction section, hi-hats, percussion, bass and melodies can be added.
The breakdown section of a track serves to introduce a dynamic change before the full beat or drop and softer or more melodic elements are introduced. The build up normally follows a breakdown part, and only works in contrast to the drop. Its main purpose is to build up the tension and prepare listeners by creating anticipation for the drop. A high level of anticipation is built, which makes listeners aware that something big is about to happen.

Arrangement 101: How to escape the 4-bar loop and turn ideas into complete tracks
When writing your track, one way to begin is by starting with the drop. This is the main part in the song that people will dance to. There are different types of drops that can be used, depending on the melodic and percussive elements. In the most common style of drop, all of the parts play at the same time. The main point of this drop is to create contrast with the breakdown and buildup. If there is a complex melody, the first drop could play without it, and the melody could be included in the second drop.
A minimal drop includes mainly drums and bass, and has to be in contrast to the buildup. The minimal drop is good for drums and a bassline that work well together without additional elements. In the deconstruction section of a track, elements are removed as the track begins to wind down as it moves towards the outro. The outro section is usually only percussion, and sometimes includes a bassline. The main function of an outro is to allow a DJ to mix out of the track smoothly.

It’s definitely wise to use automation to create movement and change in the track elements. For synths, automate the filter cutoff, a send to a reverb, and sustain and decay automation. Try tricks like sending the synth to an aux/bus with ping-pong delay, and automate the send before a transition. Dada Life’s Endless Smile is a recommended plugin for transitions, delay and reverb. Use it on a synth, and increase the intensity during a buildup, and then make it more dry towards the drop. Try adding snare rolls and reverse claps during transitions.
Finish the track by mixing and mastering it. To start any mix right, begin by leveling your tracks so they all play at the right volume. Use EQ to clean up sounds and remove problematic frequencies. Add dynamic processing and use references for your mix and master to help ensure that your track will fit into your desired sub-genre of techno.

There are a lot of advanced tools like Neutron 4’s Mix Assistant and Ozone 10 Master Assistant that can be helpful in the mixing and mastering processes. Once your track is completed, check its mono compatibility and test it out on as many systems as possible. When you have a demo you’re proud of, it’s time to send it out to labels and DJs. Best of luck taking your techno track to the next level!