How to use short delays as an alternative to reverb in a mix
Sometimes we want to add tight space to sounds, and this technique provides an excellent stand-in for reverb
Want all the hottest music and gear news, reviews, deals, features and more, direct to your inbox? Sign up here.
You are now subscribed
Your newsletter sign-up was successful
Delay lines form the basis of quite a few effects, and each individual technique is worthy of its own masterclass. Today we’re looking at how we can use short delays.
When we mention delay as an effect it usually conjures up images of long repeating style echoes, or even spins. But much shorter delays can also be very handy. When we combine delayed and original signals, if the delay is very short (less than about 30ms) it’s impossible to differentiate the two signals (the Haas effect).
Here, we’ll be looking at delays that are a little bit longer than that from around 40ms to 100ms, but are still shorter than the traditional ‘Elvis’ slapback echo, which is around 135ms.
The concept is that a short delay with minimal or no feedback replicates the early reflections you hear in a space. This is the same concept you find in the first stage of a typical algorithmic reverb (early reflections).
However, by adding a delay or delays from scratch you’re creating a simpler and more easily editable version of this, and also not getting drawn into editing a reverb plugin of course. The technique works well on vocals, but is also great for adding space – but not too much – around sounds including drums and other instruments.
Short delays on vocals
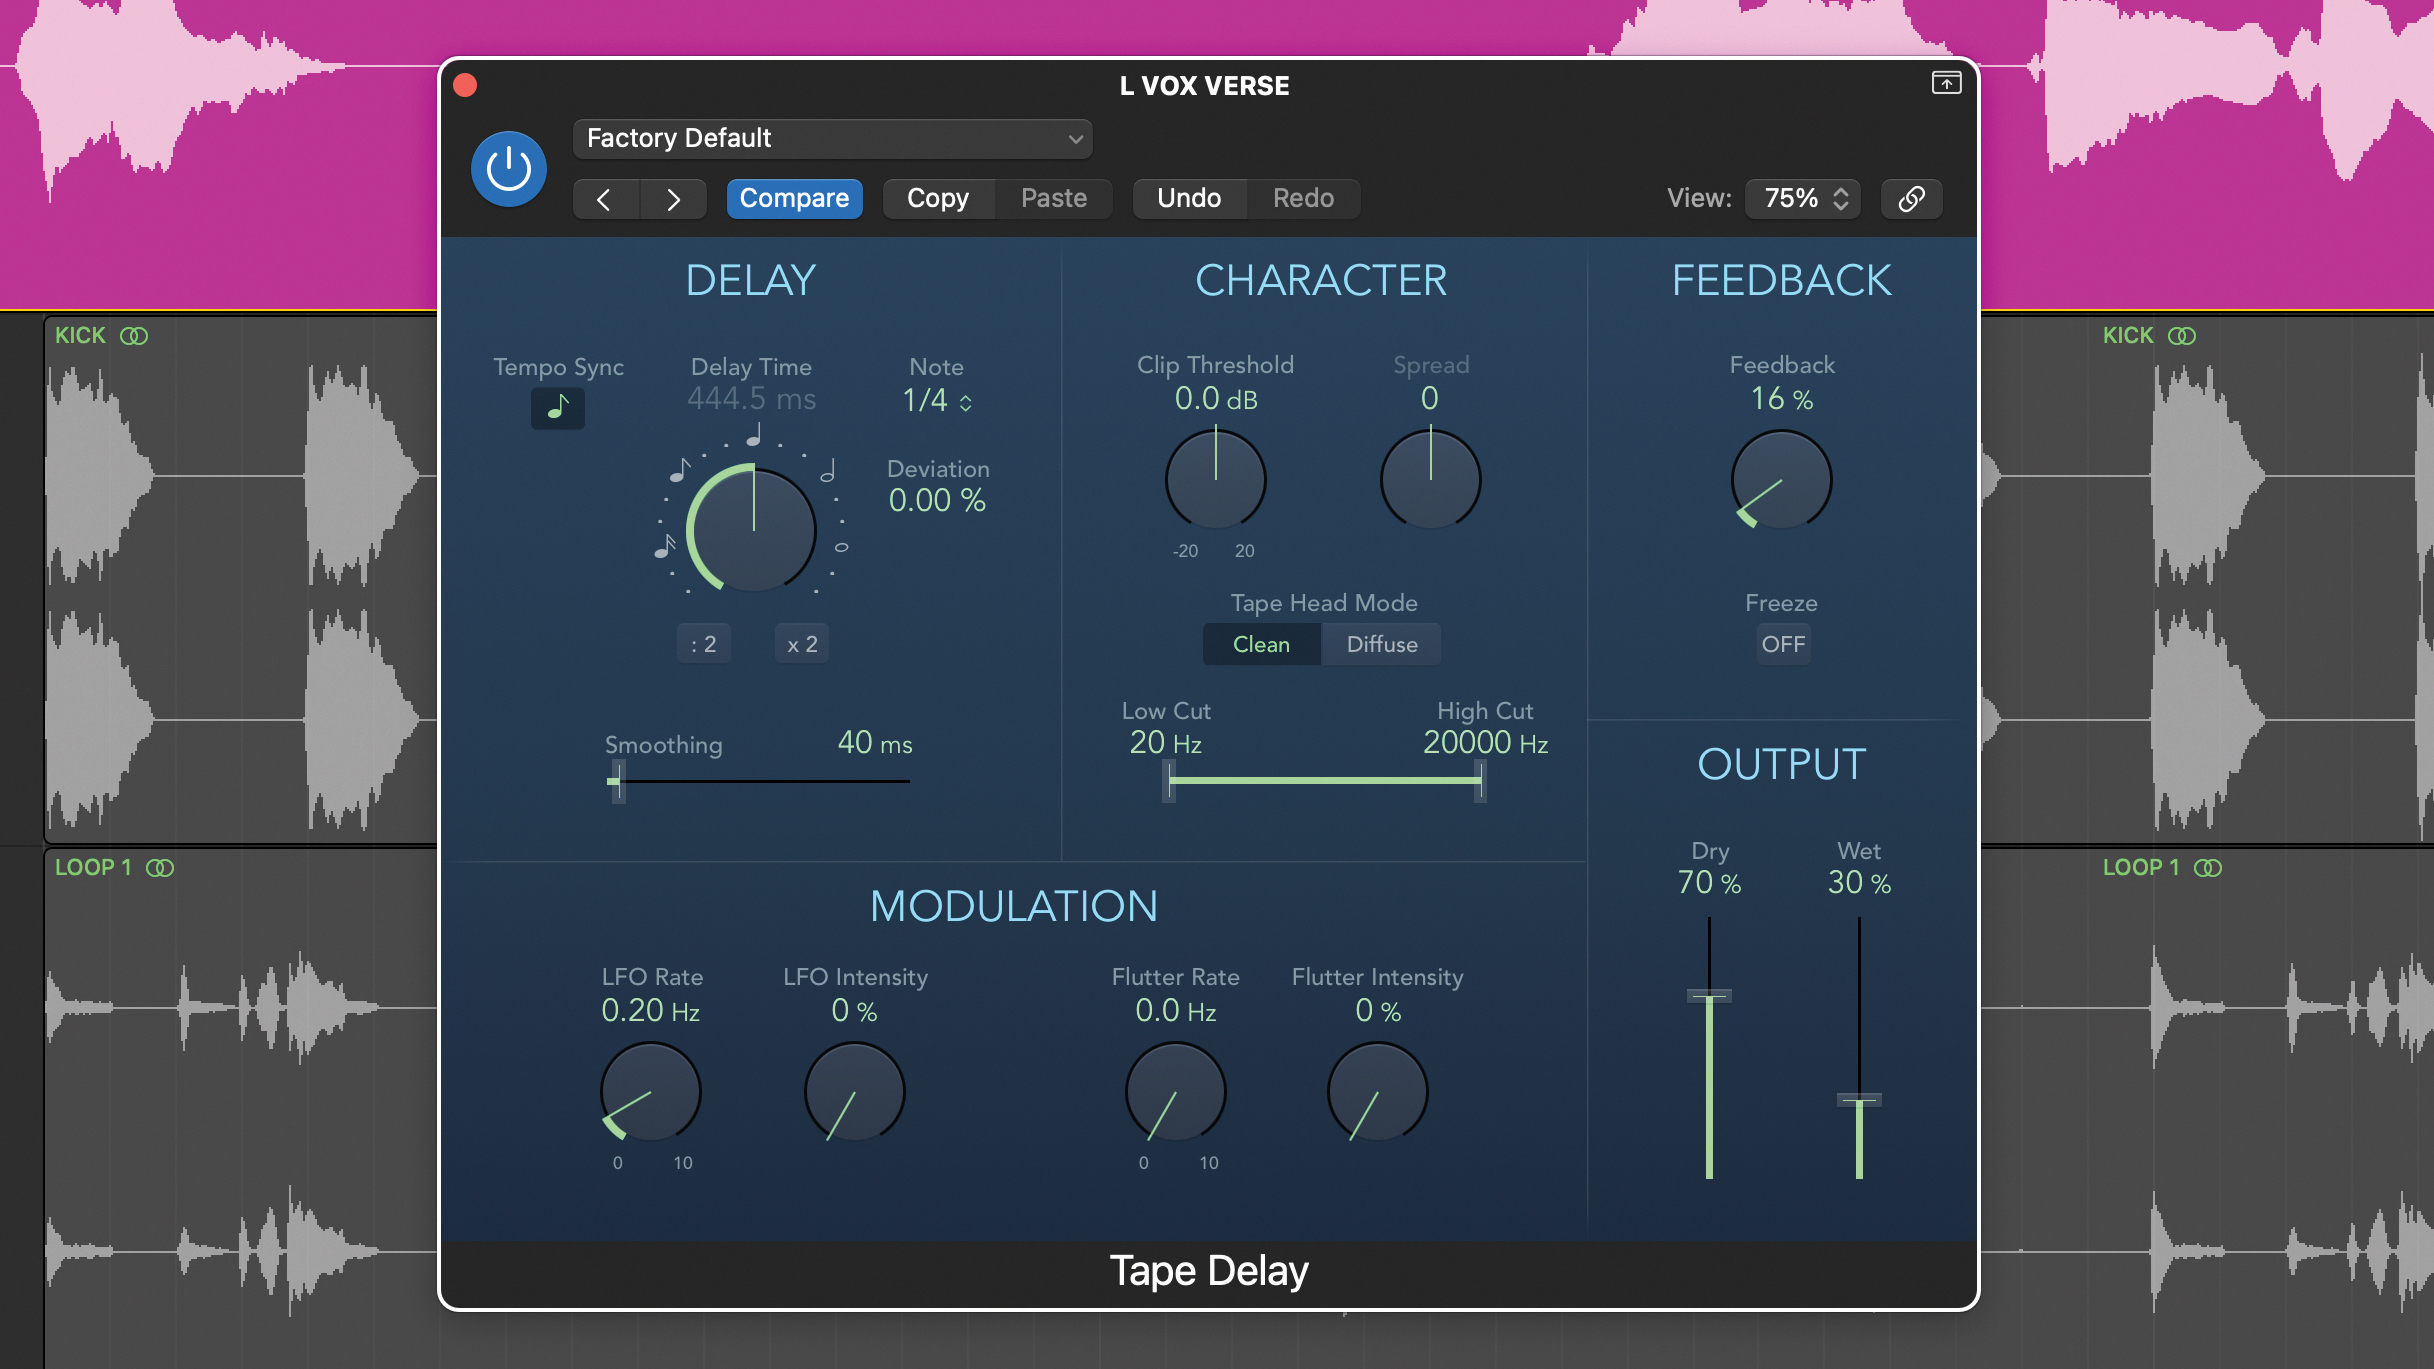
Vocals are ideal for this sort of treatment as you can keep them reasonably upfront and also blend in a small amount of longer reverb if required. Let’s start with the simplest option which is a single mono delay, using our delay as an insert. Remember, you can also use an auxiliary, which we’ll move onto shortly.
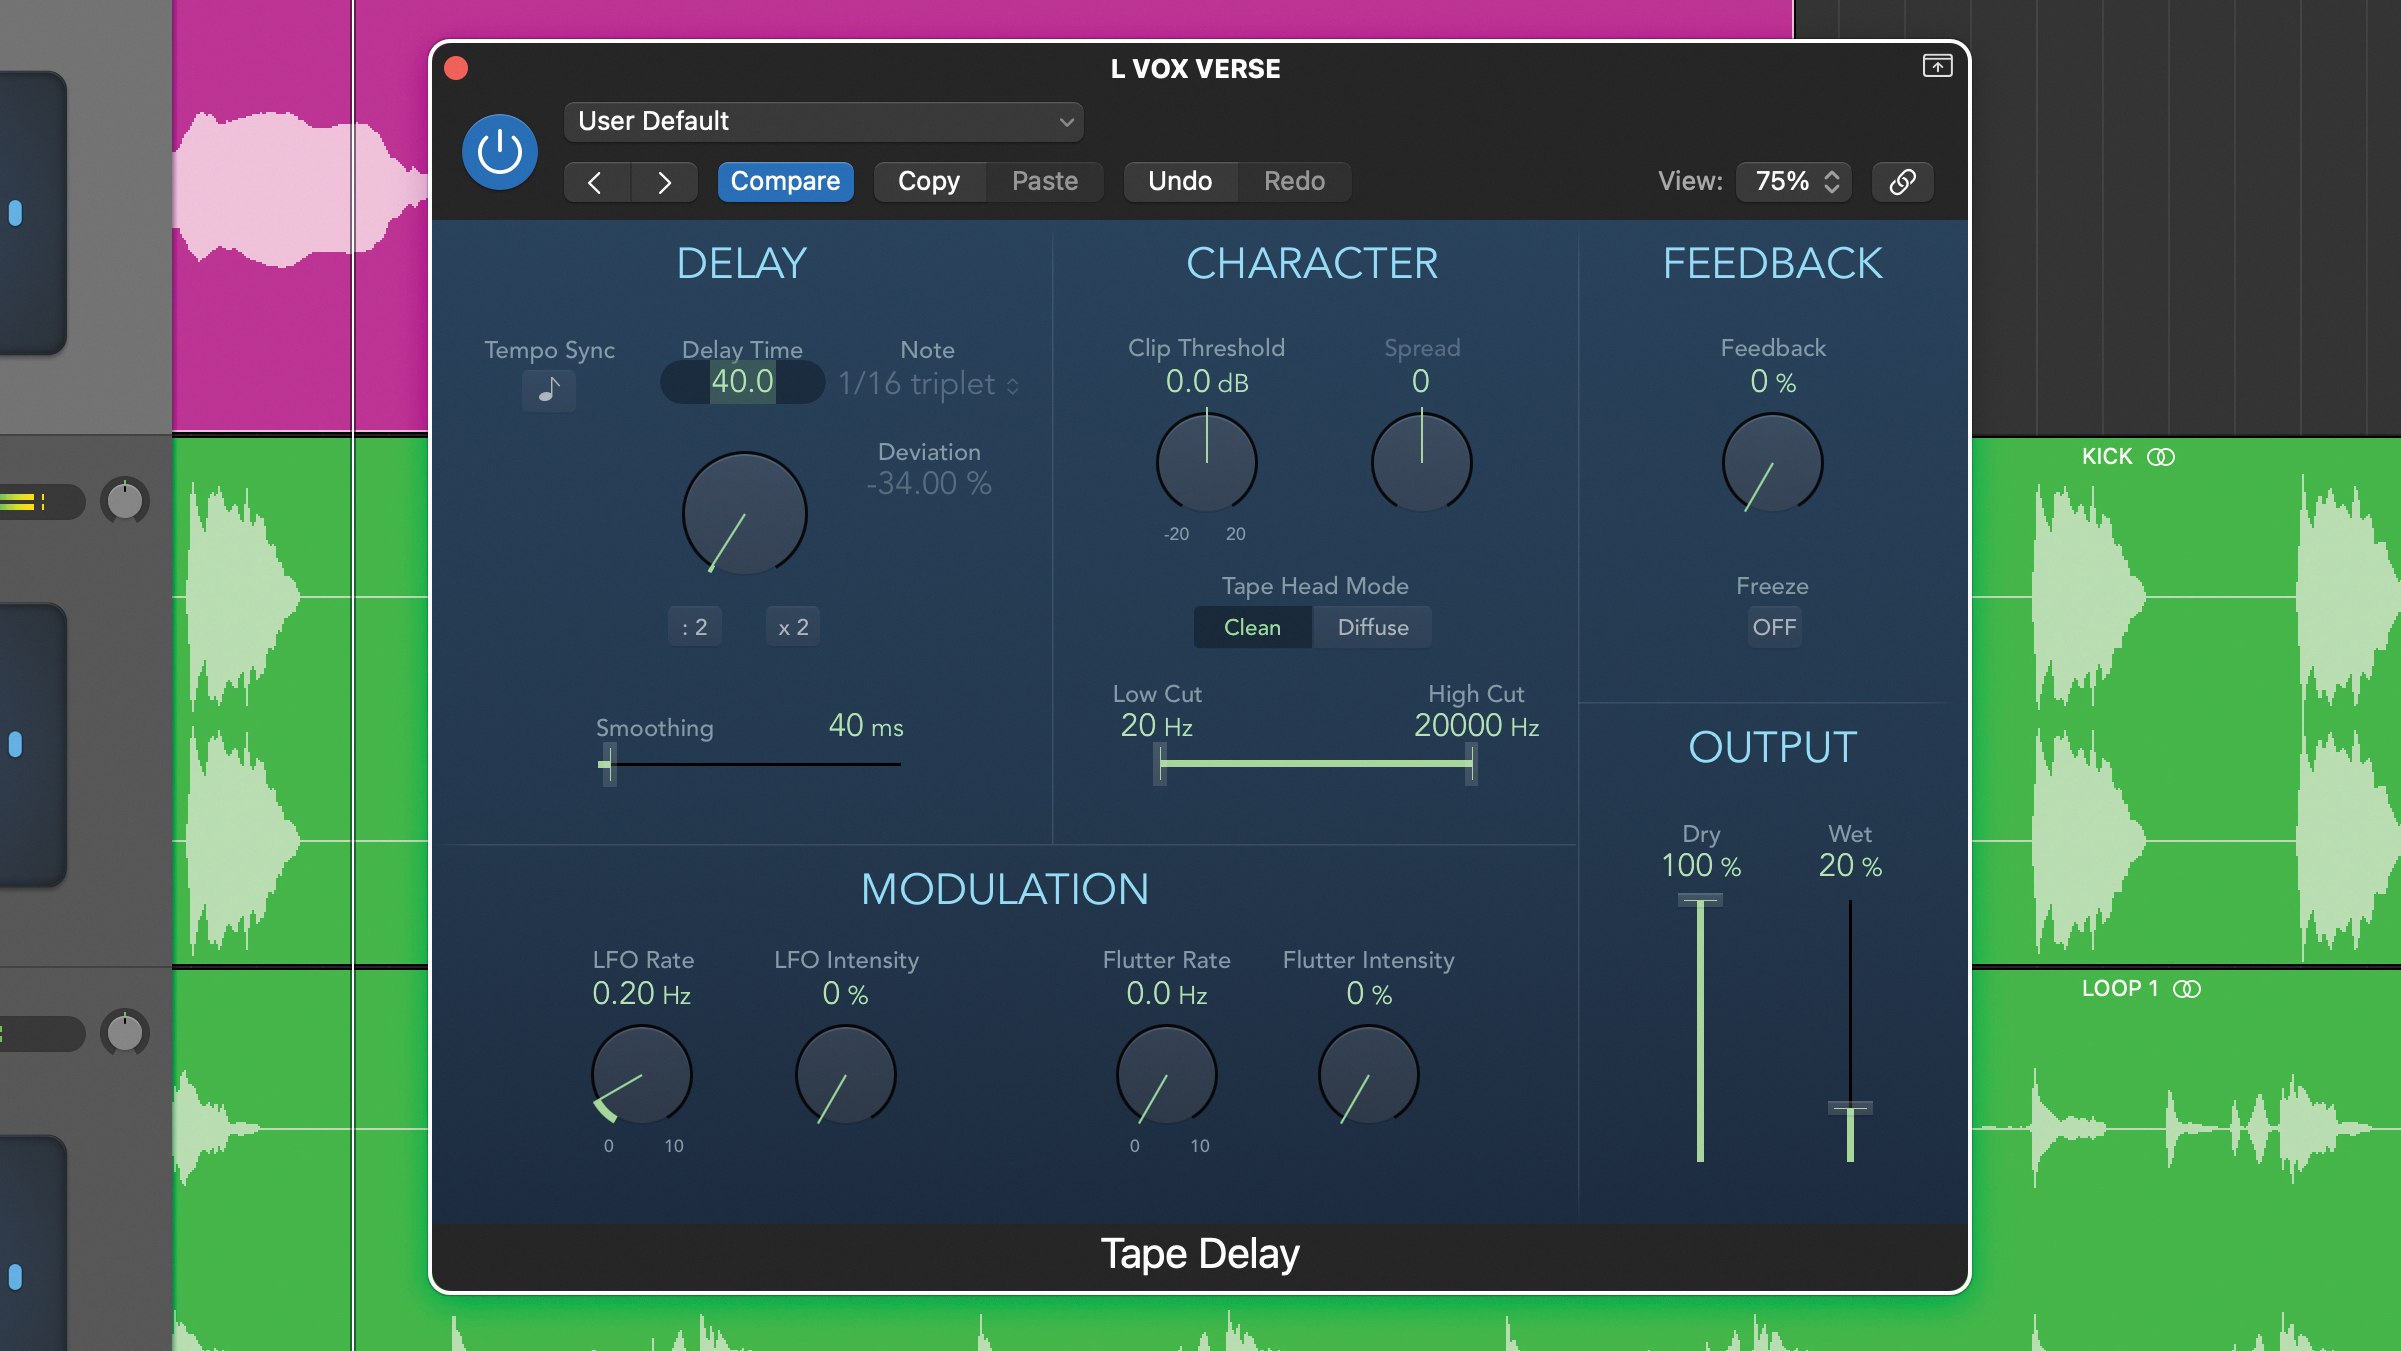
First thing to do with our delay is make sure that it’s not synced to the DAW tempo. Then set the feedback to zero and wet level to zero. Our starting delay for this effect is about 40ms, and we’ve then blended this in using the wet level of the delay, so dry level is 100% and wet level for us at around 20%.
Want all the hottest music and gear news, reviews, deals, features and more, direct to your inbox? Sign up here.
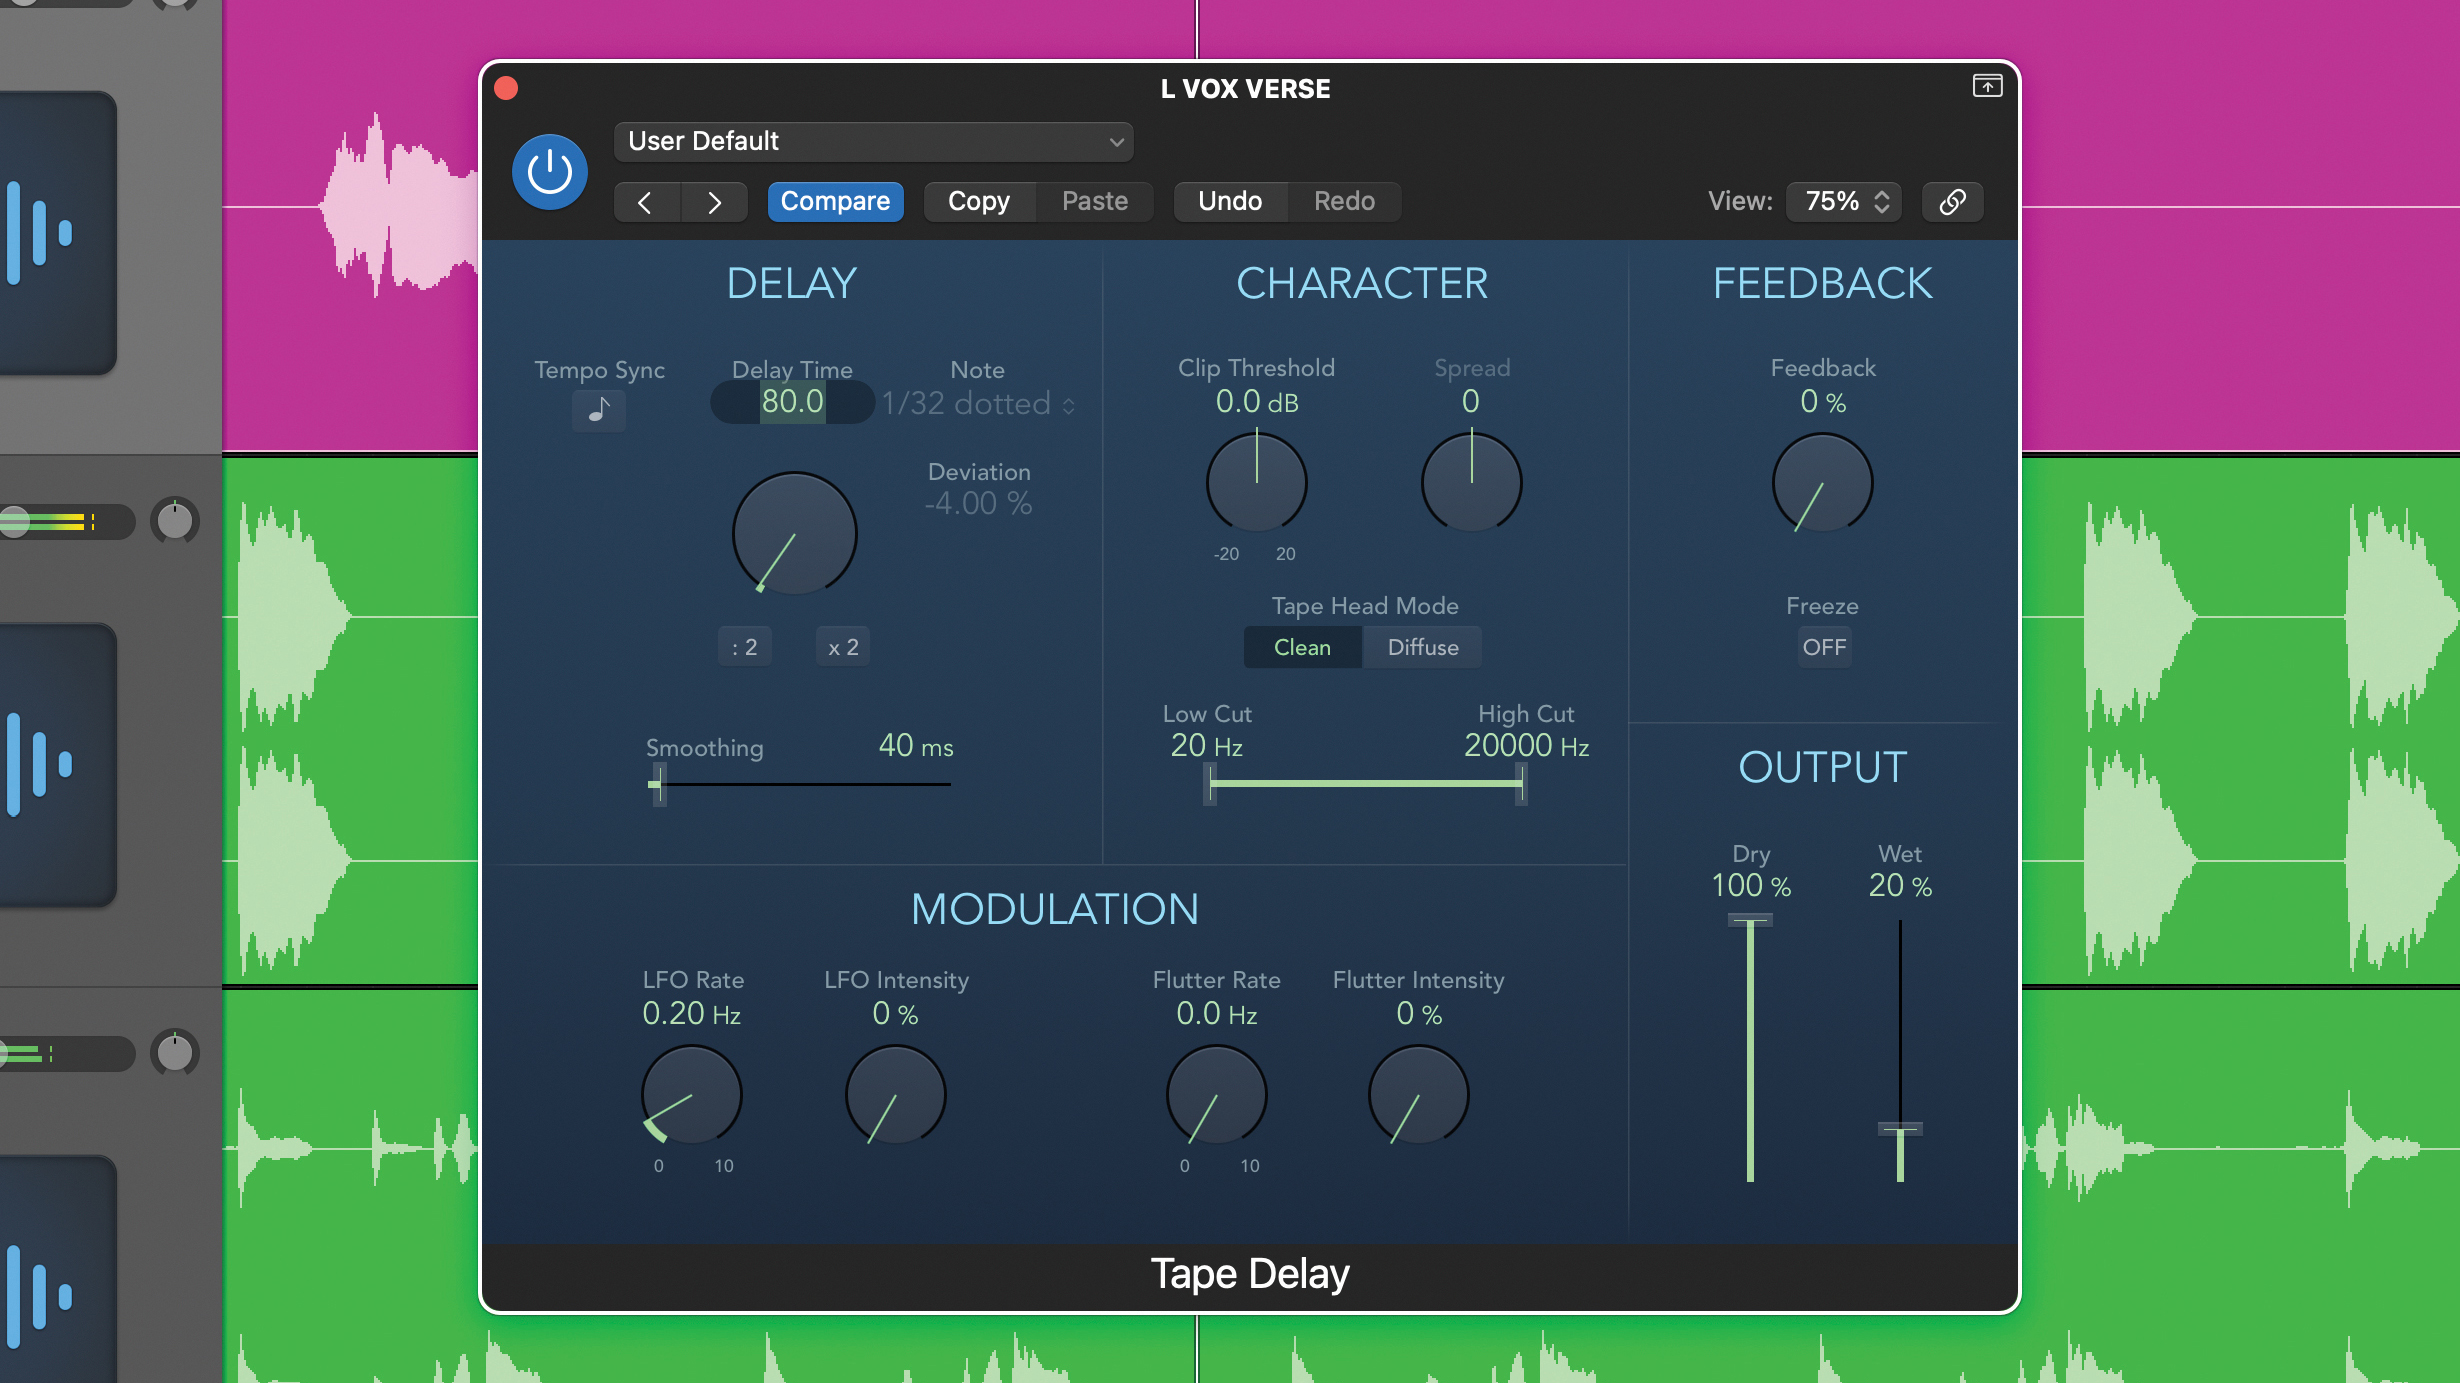
This adds tight space around the vocal – make sure you bypass to compare as this makes it much clearer. However, if you want a slightly deeper effect that moves the vocal away more, try a longer delay. We’ve doubled ours to 80ms but try any value up to the point where the slapback becomes obvious.
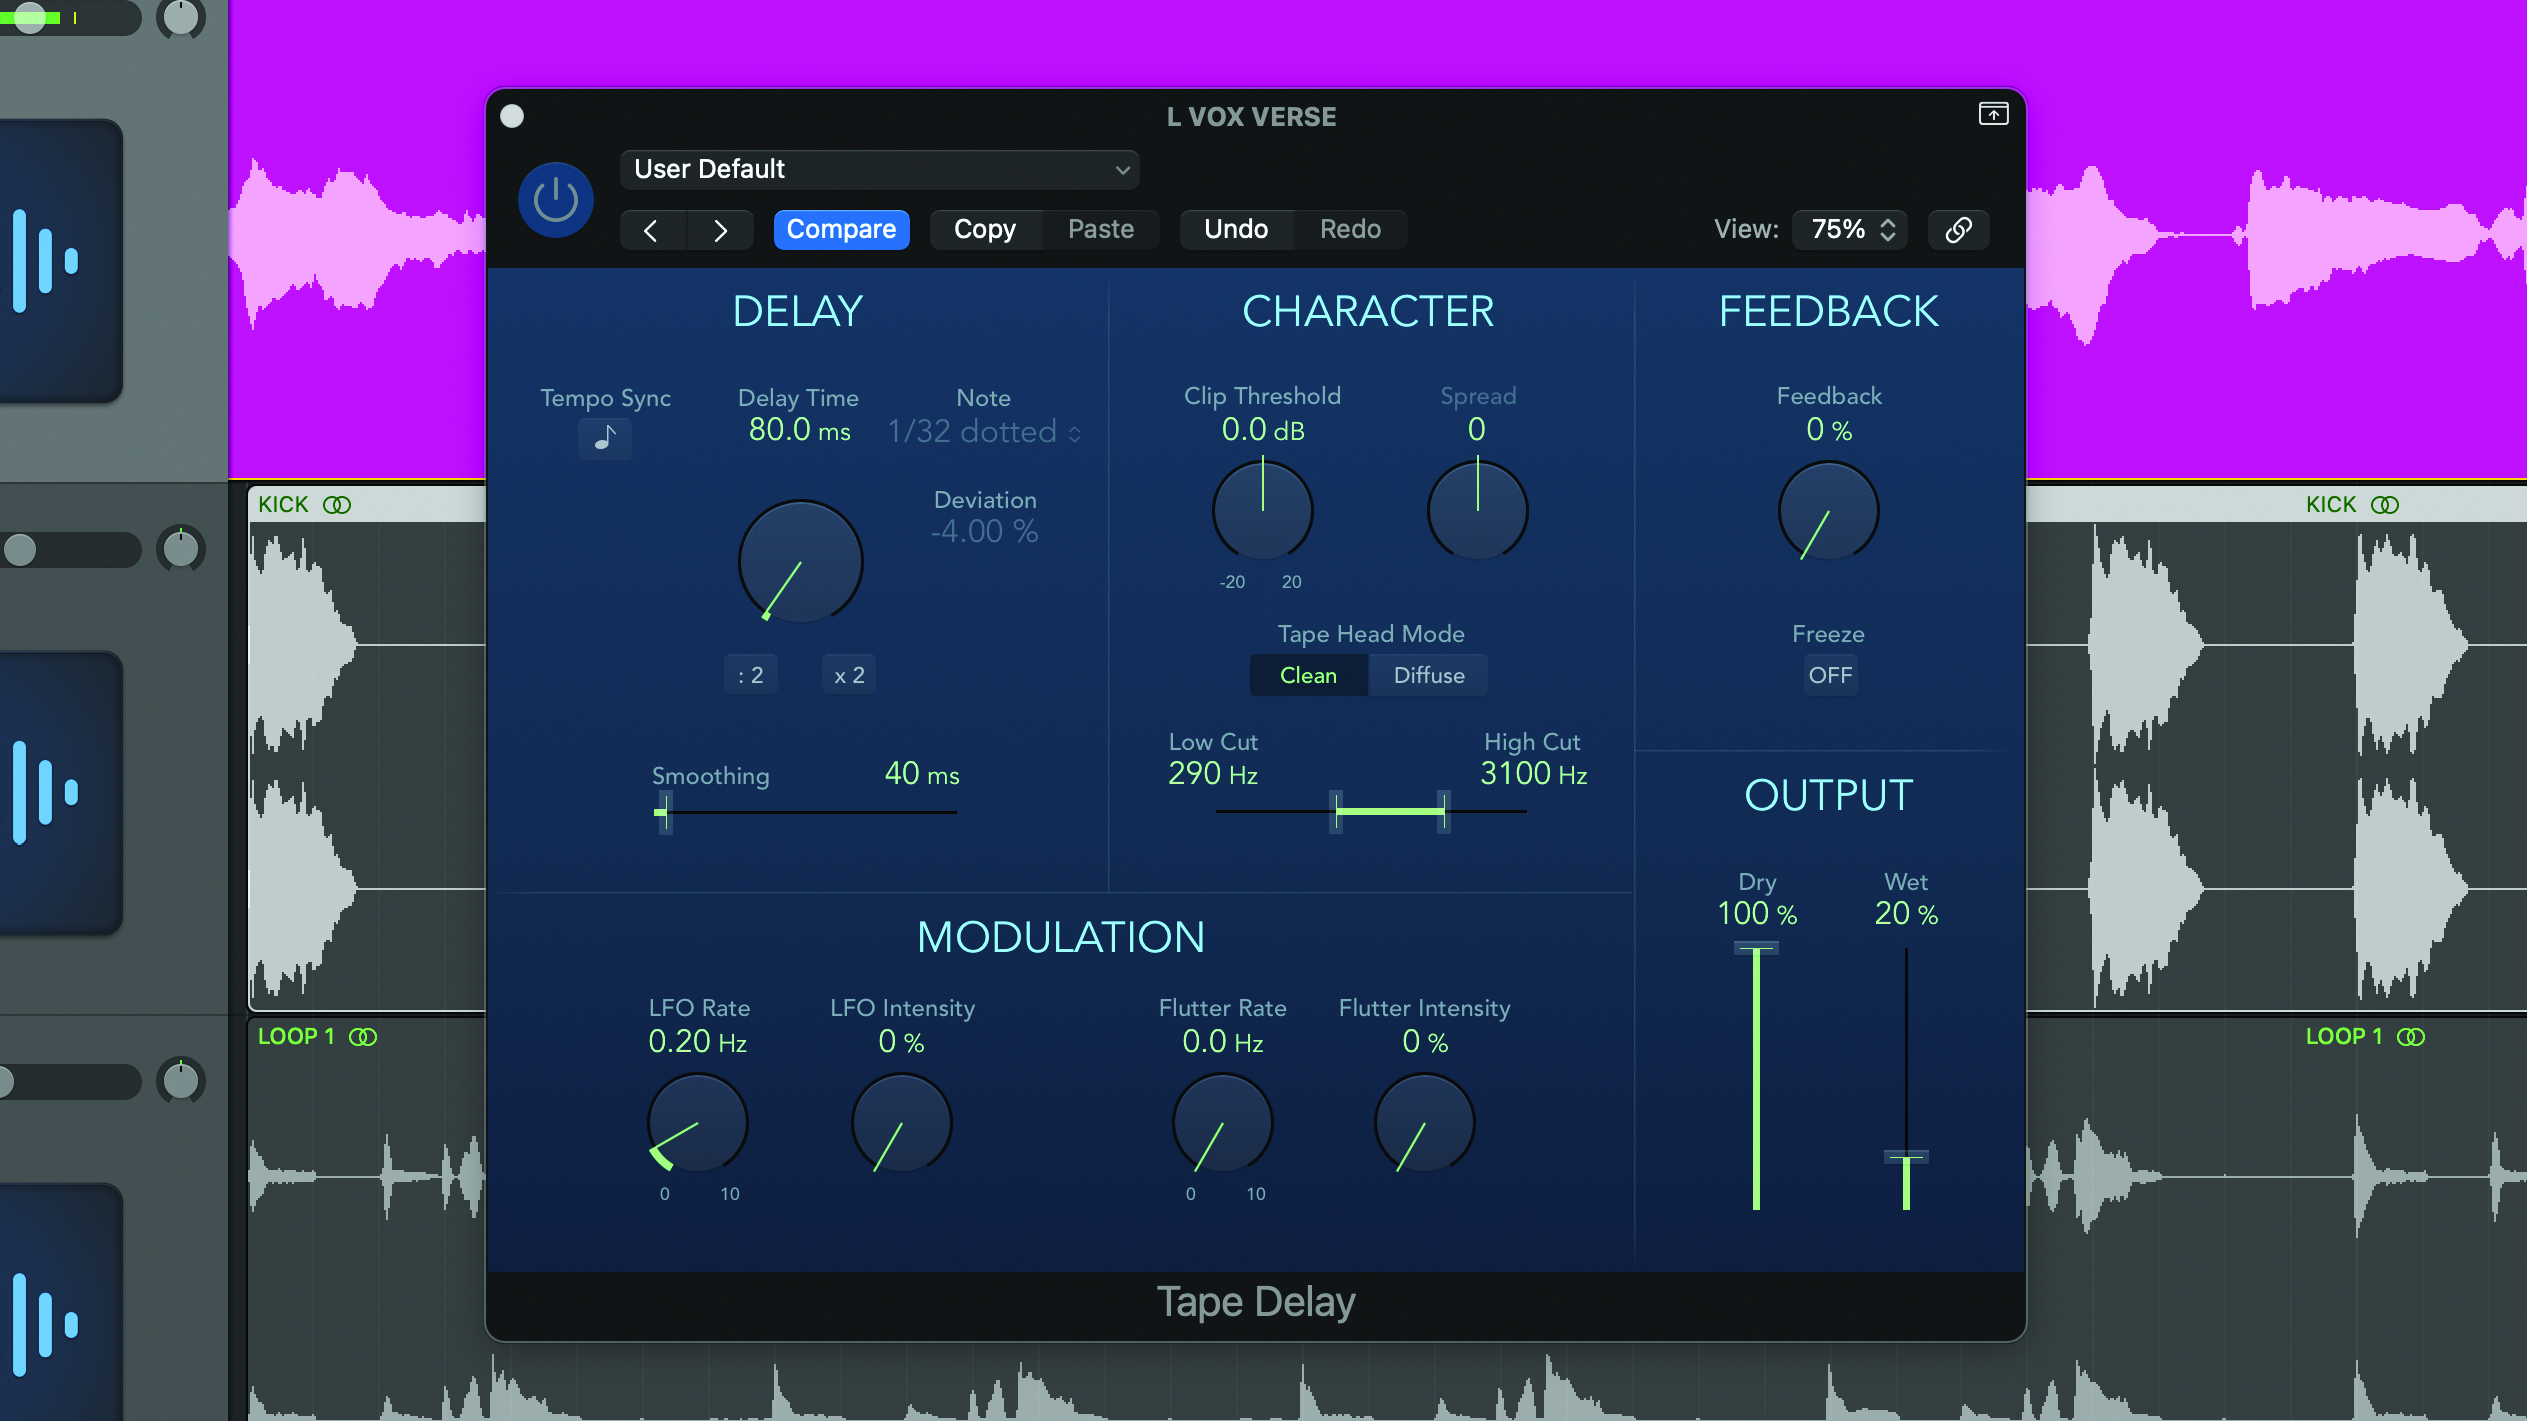
This simple effect can be tailored in a number of ways including distortion and modulation (see: Pro Tip). However, the first and simplest way is to narrow the delay frequencies using high and low pass filters. You should have this option within your delay. We’ve set ours to about 300Hz and 3kHz respectively for a more focused effect.
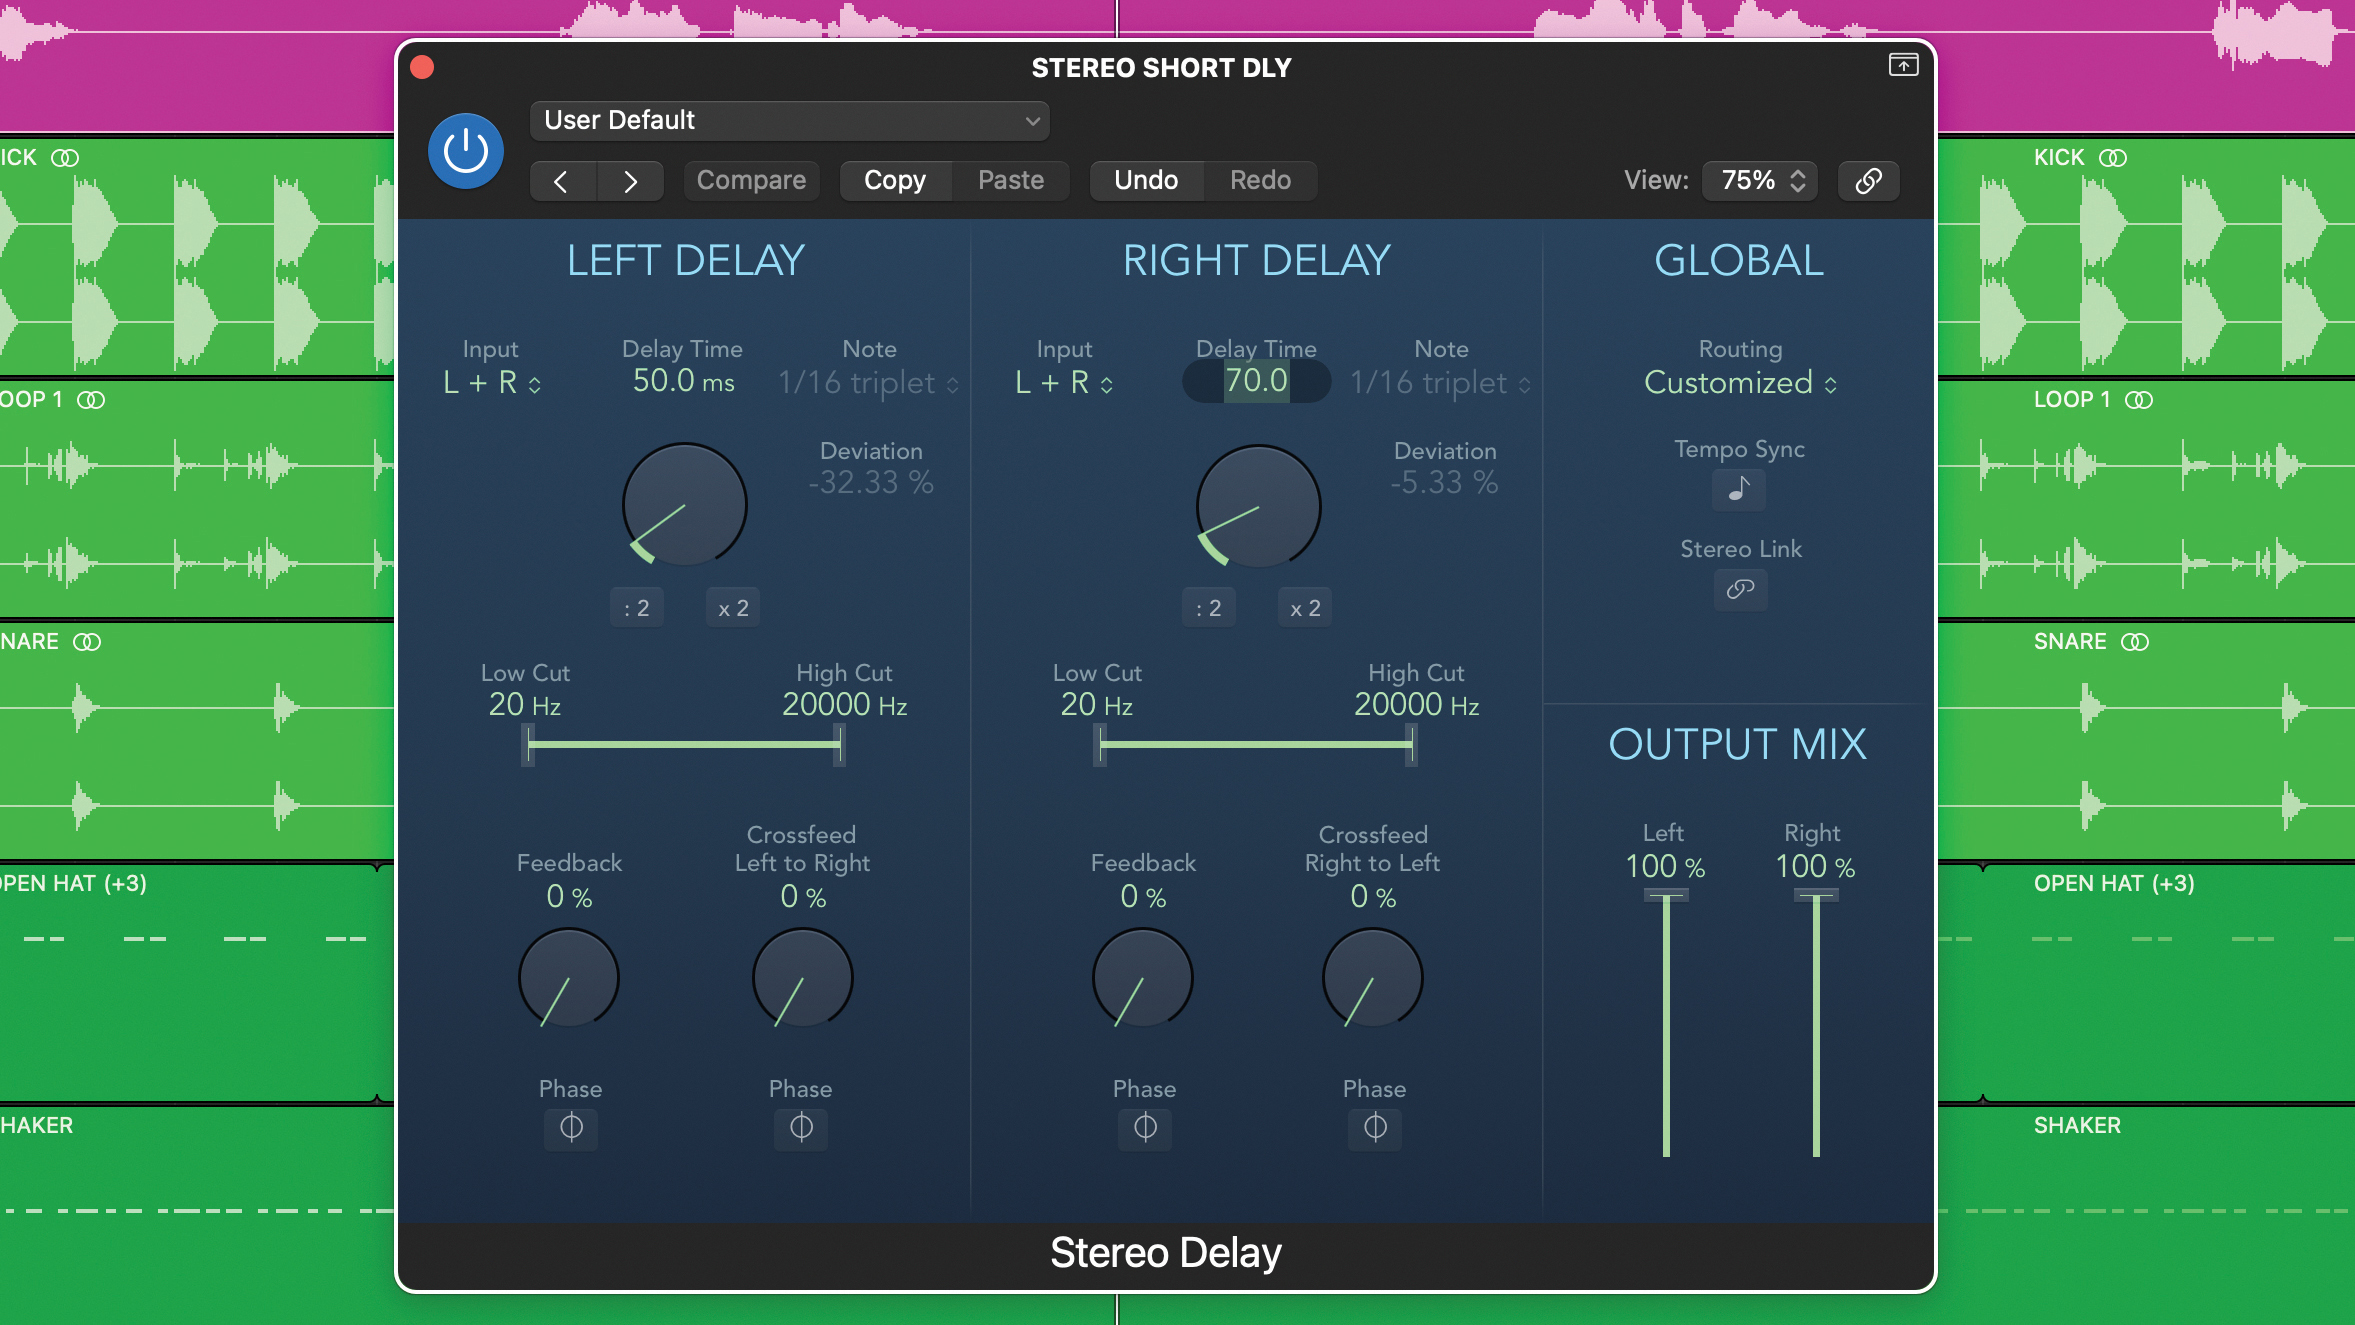
Now let’s try a stereo delay. We’re going to continue with vocals but this time use an auxiliary for the delay plugin. Once again, zero the feedback of both sides and deactivate the tempo sync if engaged. Now set each delay with an offset between them. We’ve set ours to 50ms left and 70ms right.
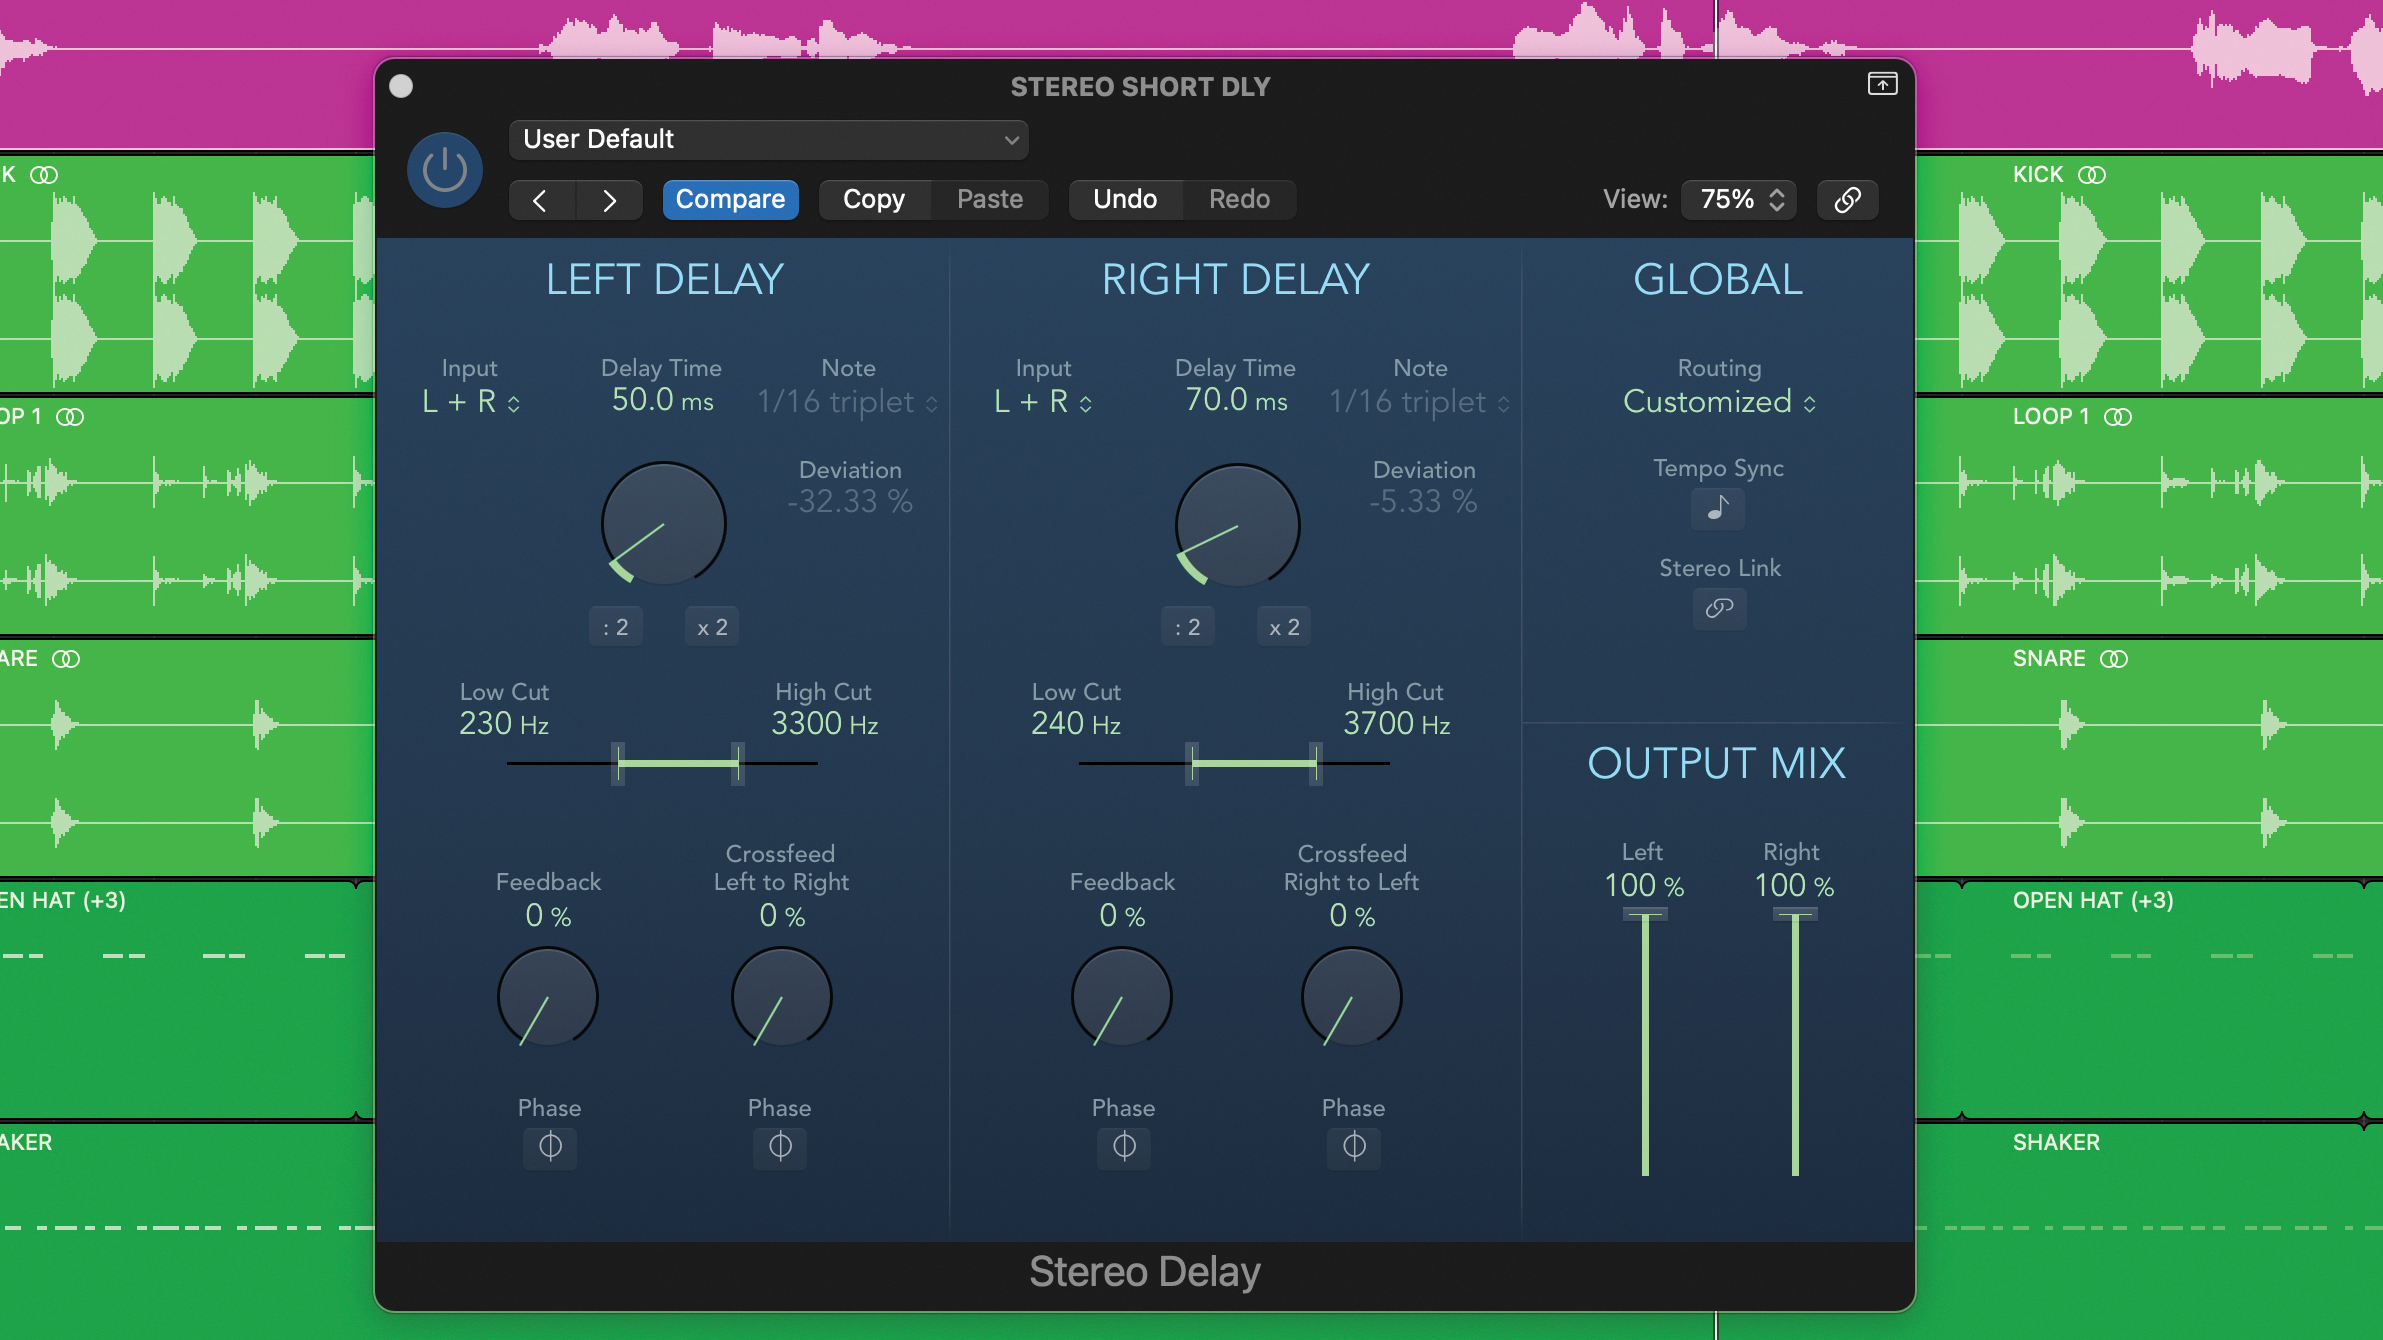
Gradually increase the send to the delay and you’ll hear a small space appear but this time with some width. Set the send level to taste and much like reverb, modest amounts often work best. Finally, much like the single delay option you can finesse the effect using the filters to create a more focused sound.
Short delays on beats
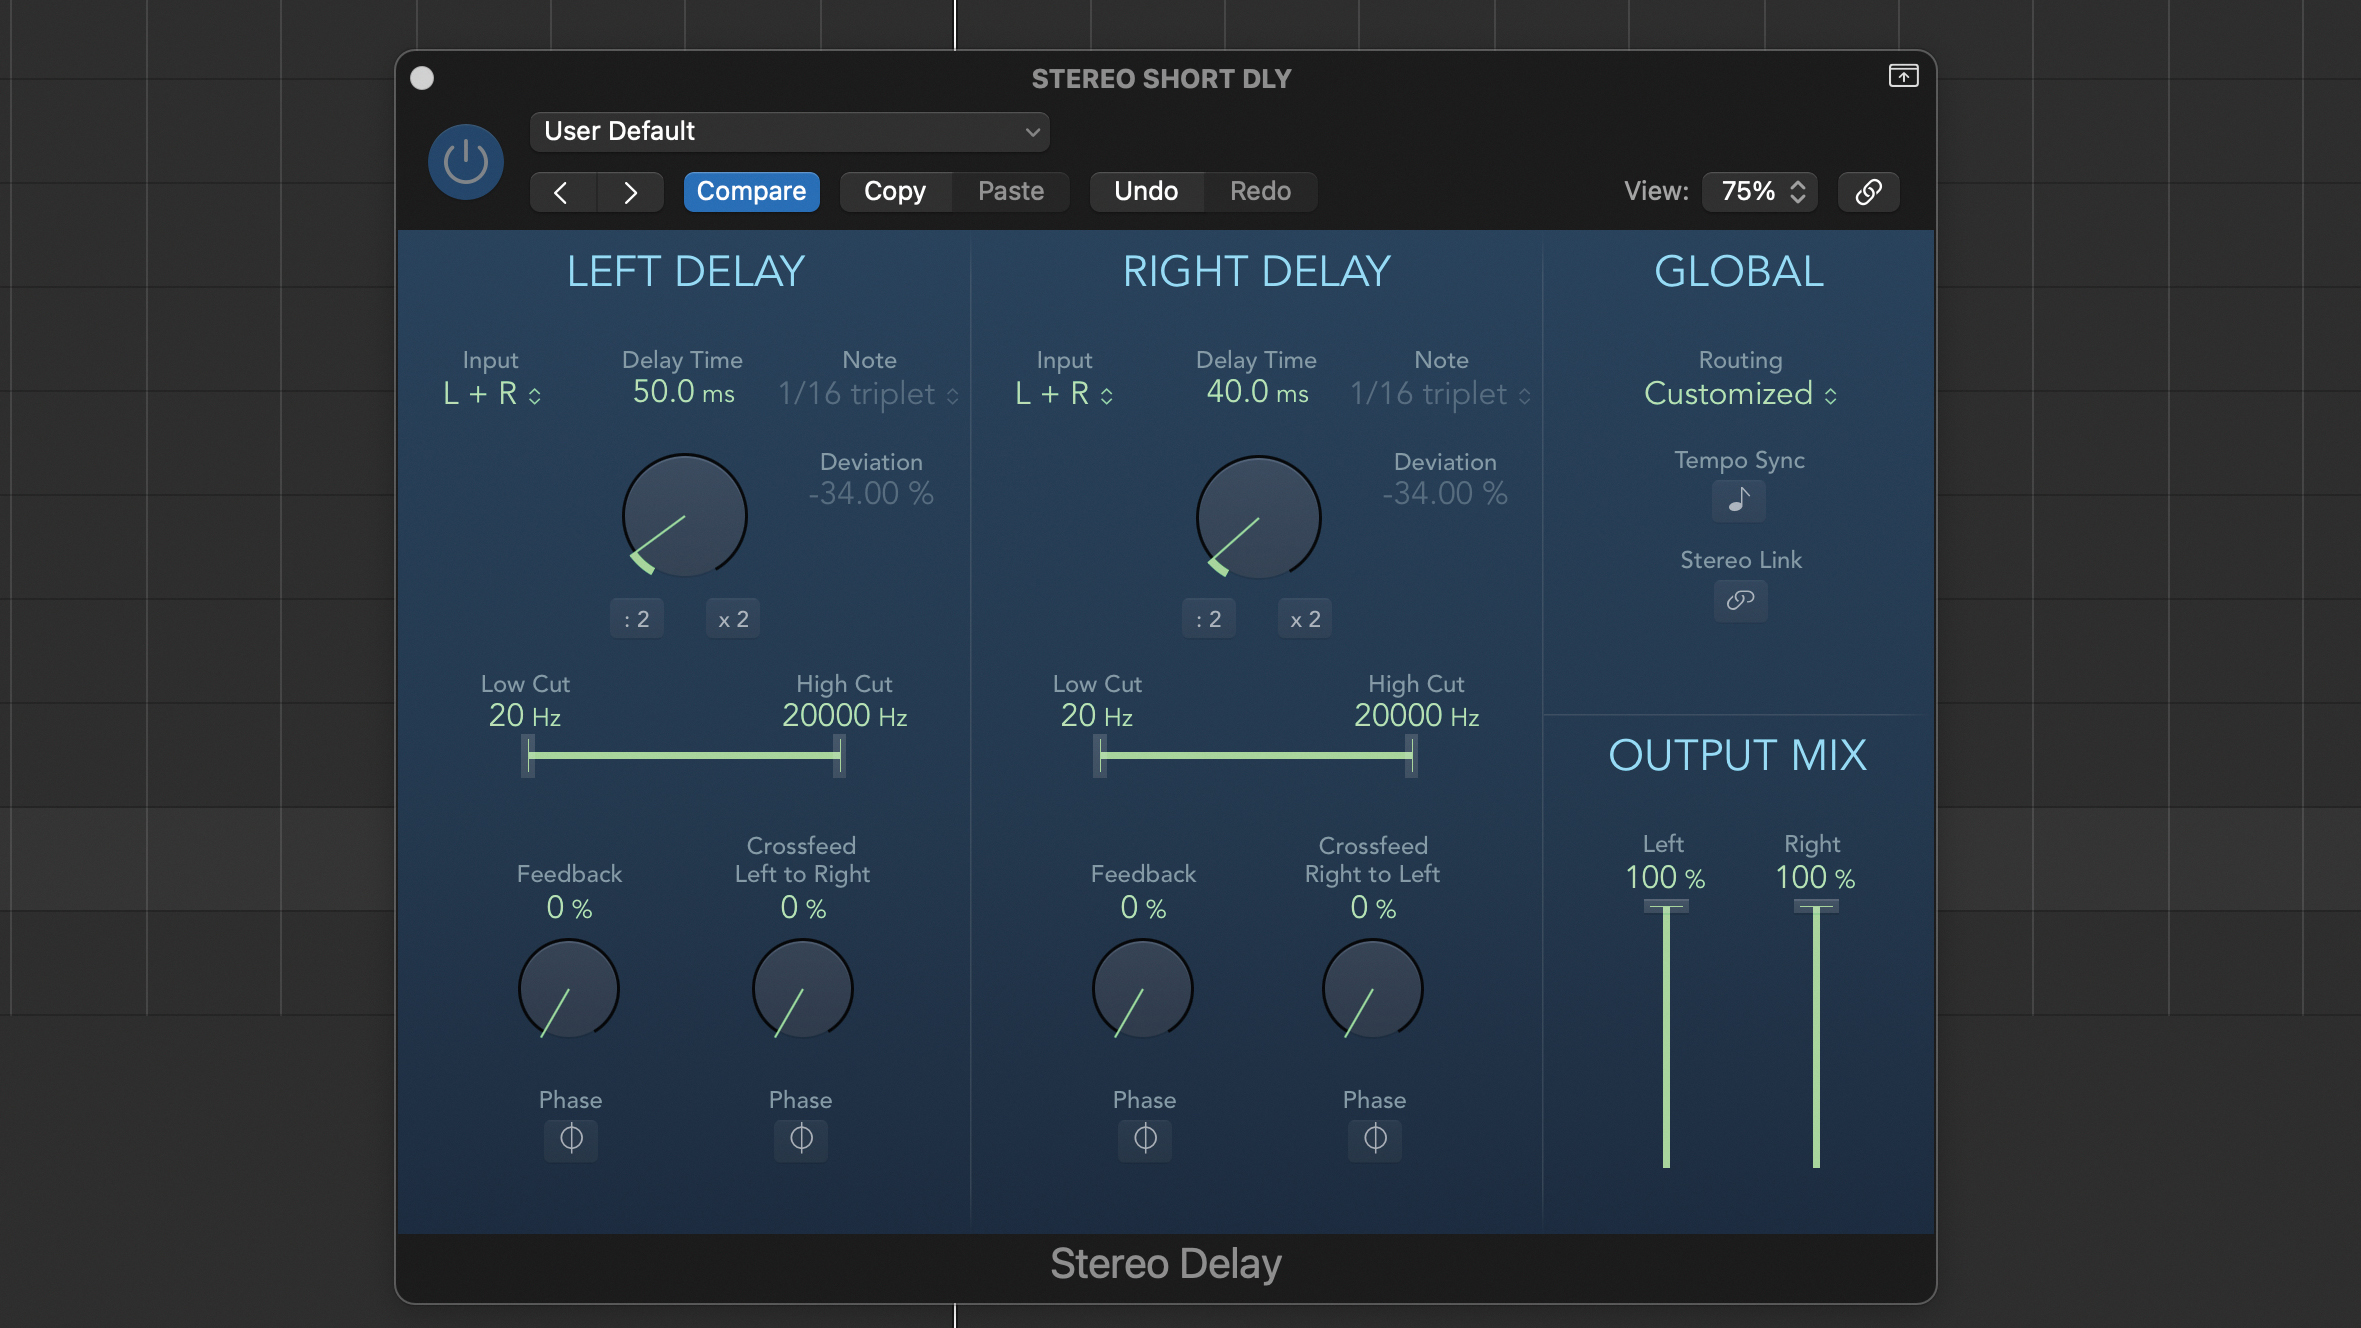
Short delays can also work very well with beats, so let’s stick with the stereo delay effect but repurpose it. Snares and back beats generate obvious clattery room reflections in real spaces that we can easily create using delays. Start with timings that are quite similar – here we’re using 50ms left and 40ms right.
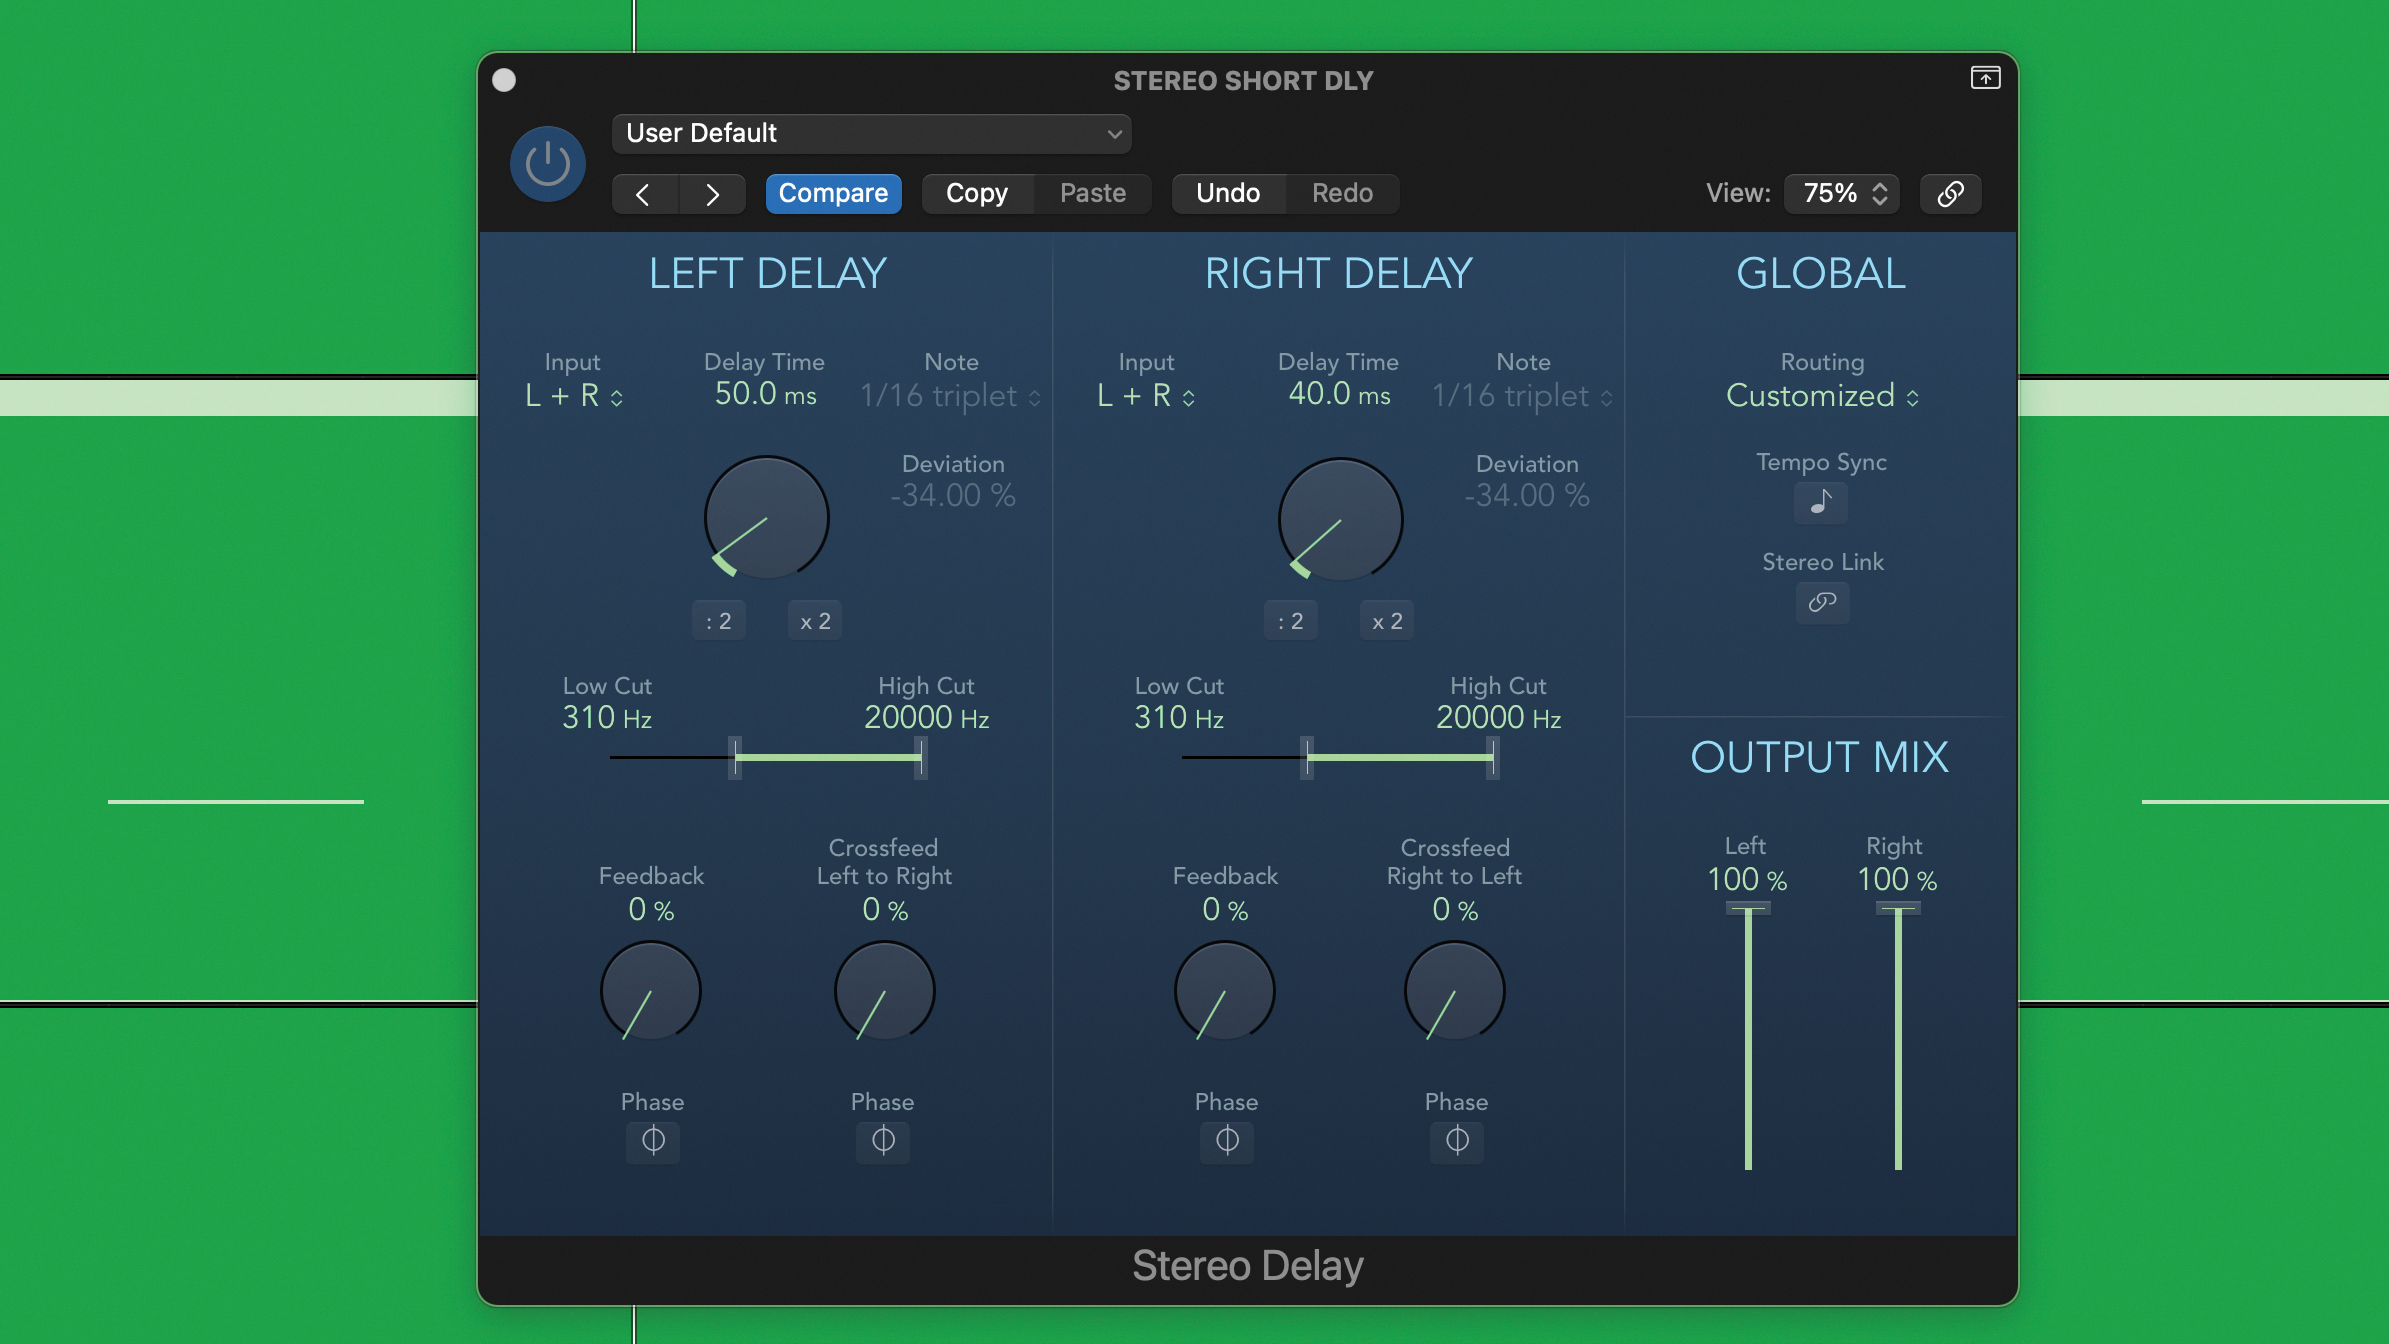
We’re processing a hip-hop backbeat. As we increase the send level it gets wider, bigger and more smeared, and it’s only at higher send levels that the delays are obvious. Try and find the sweet spot where the effect feels as one with the dry sound. Once again, use the filters to finesse the effect.
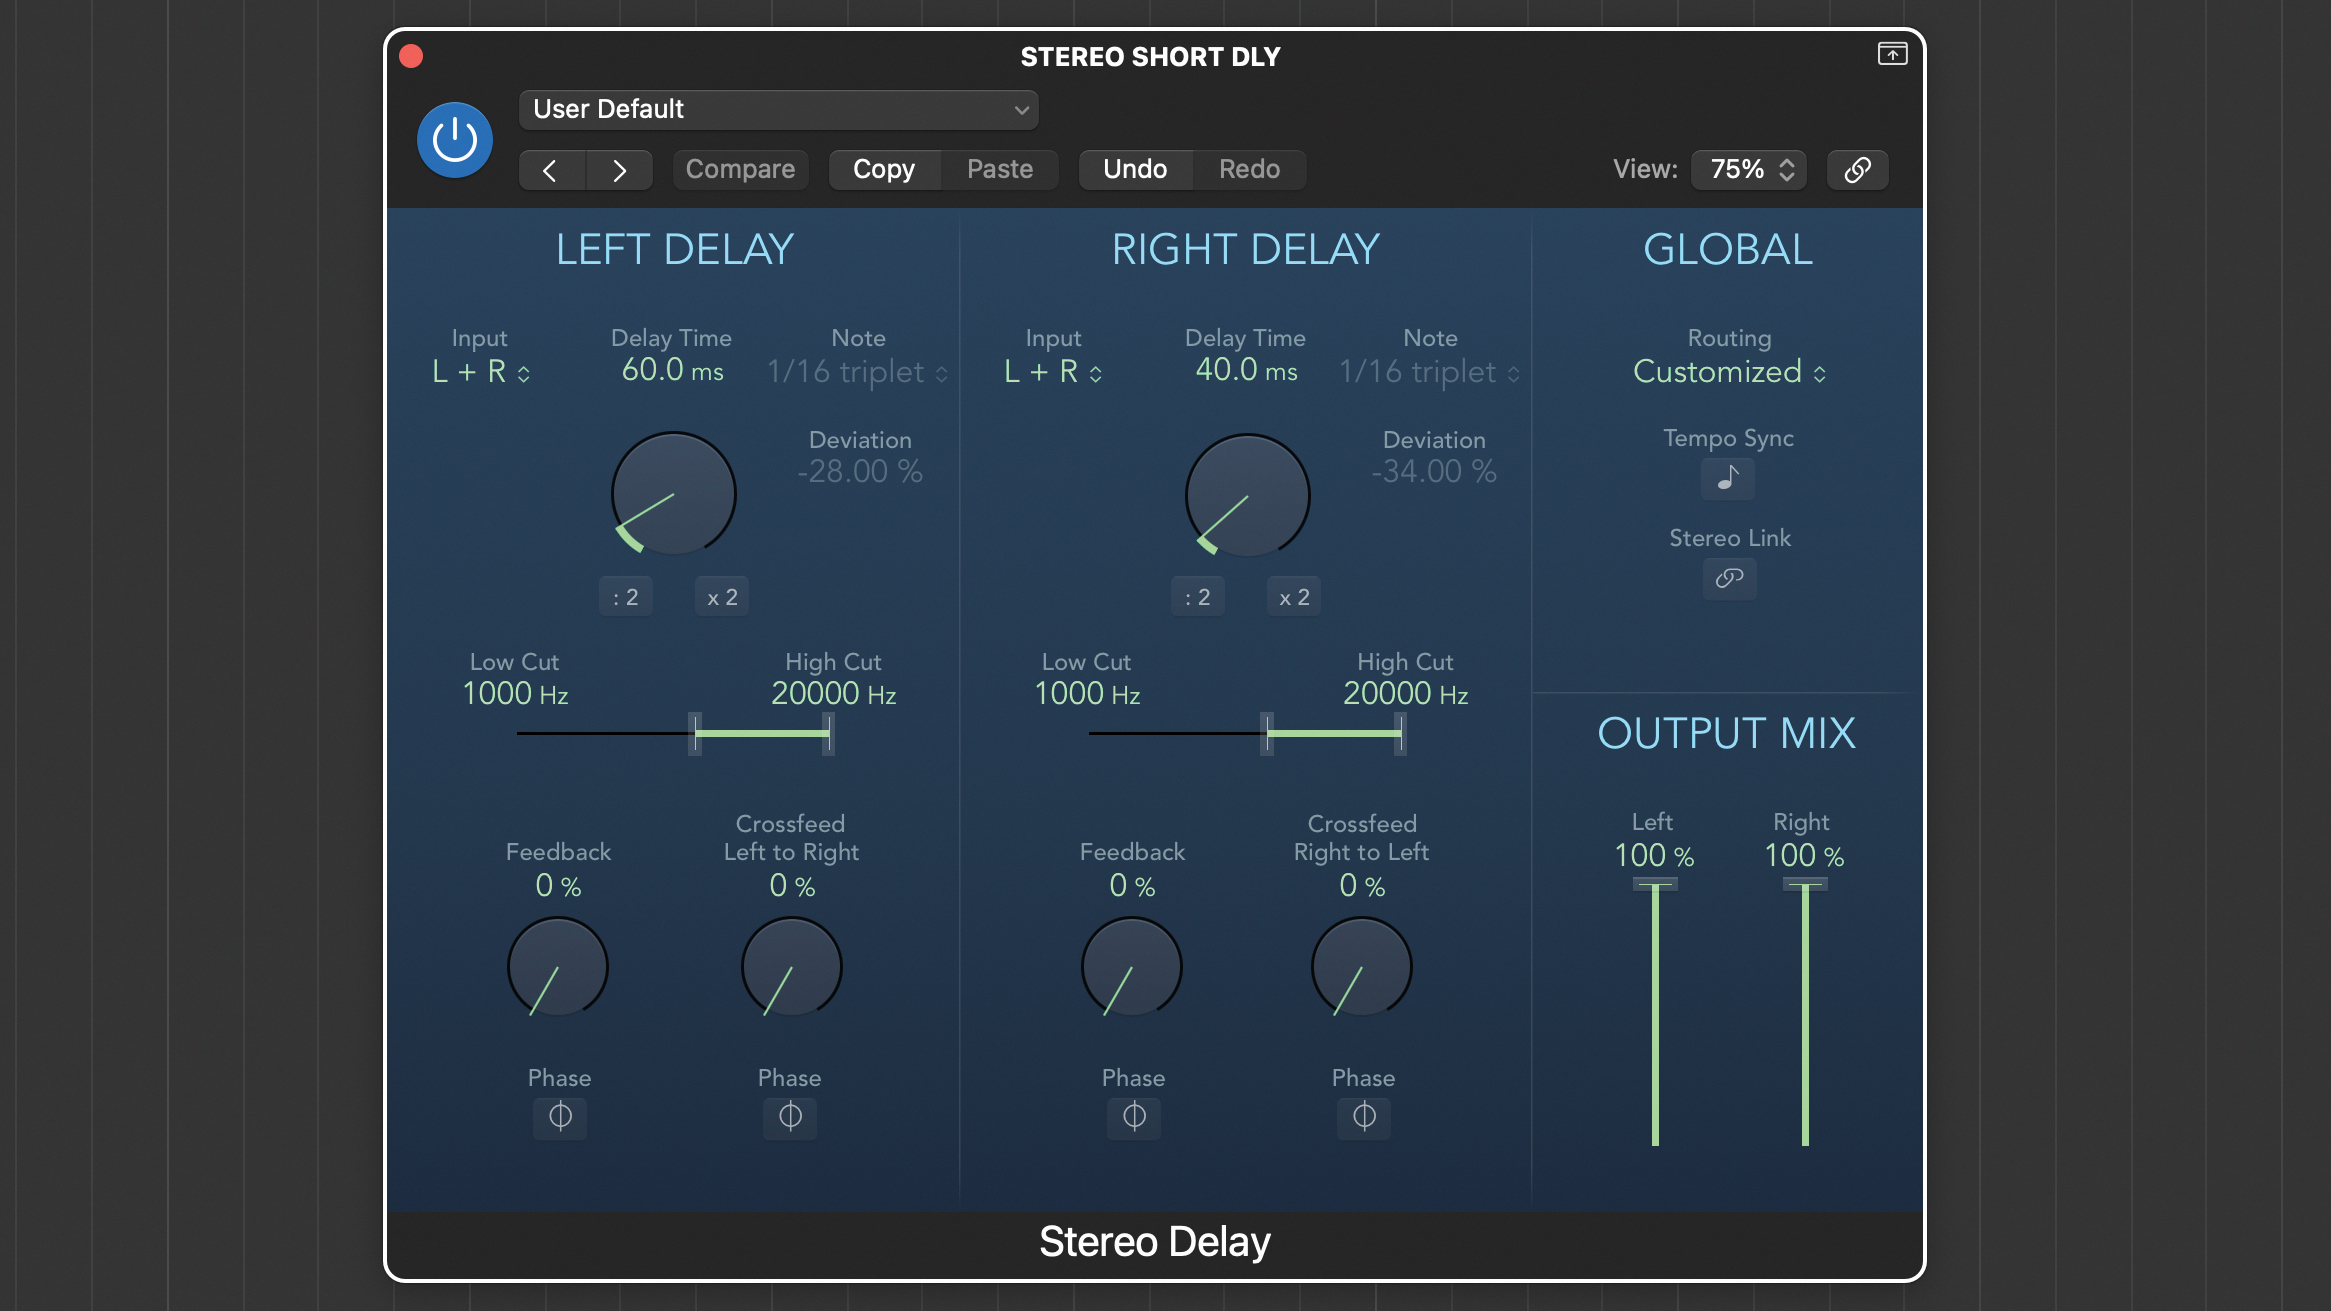
The same kind of processing also works really well with drum kit snares, providing useful depth particularly if the room mics aren’t really delivering. Here we’ve set the delay times to 60ms left, 40ms right and filtered off just the low frequencies (high pass 1kHz) to create slightly clattery reflections.
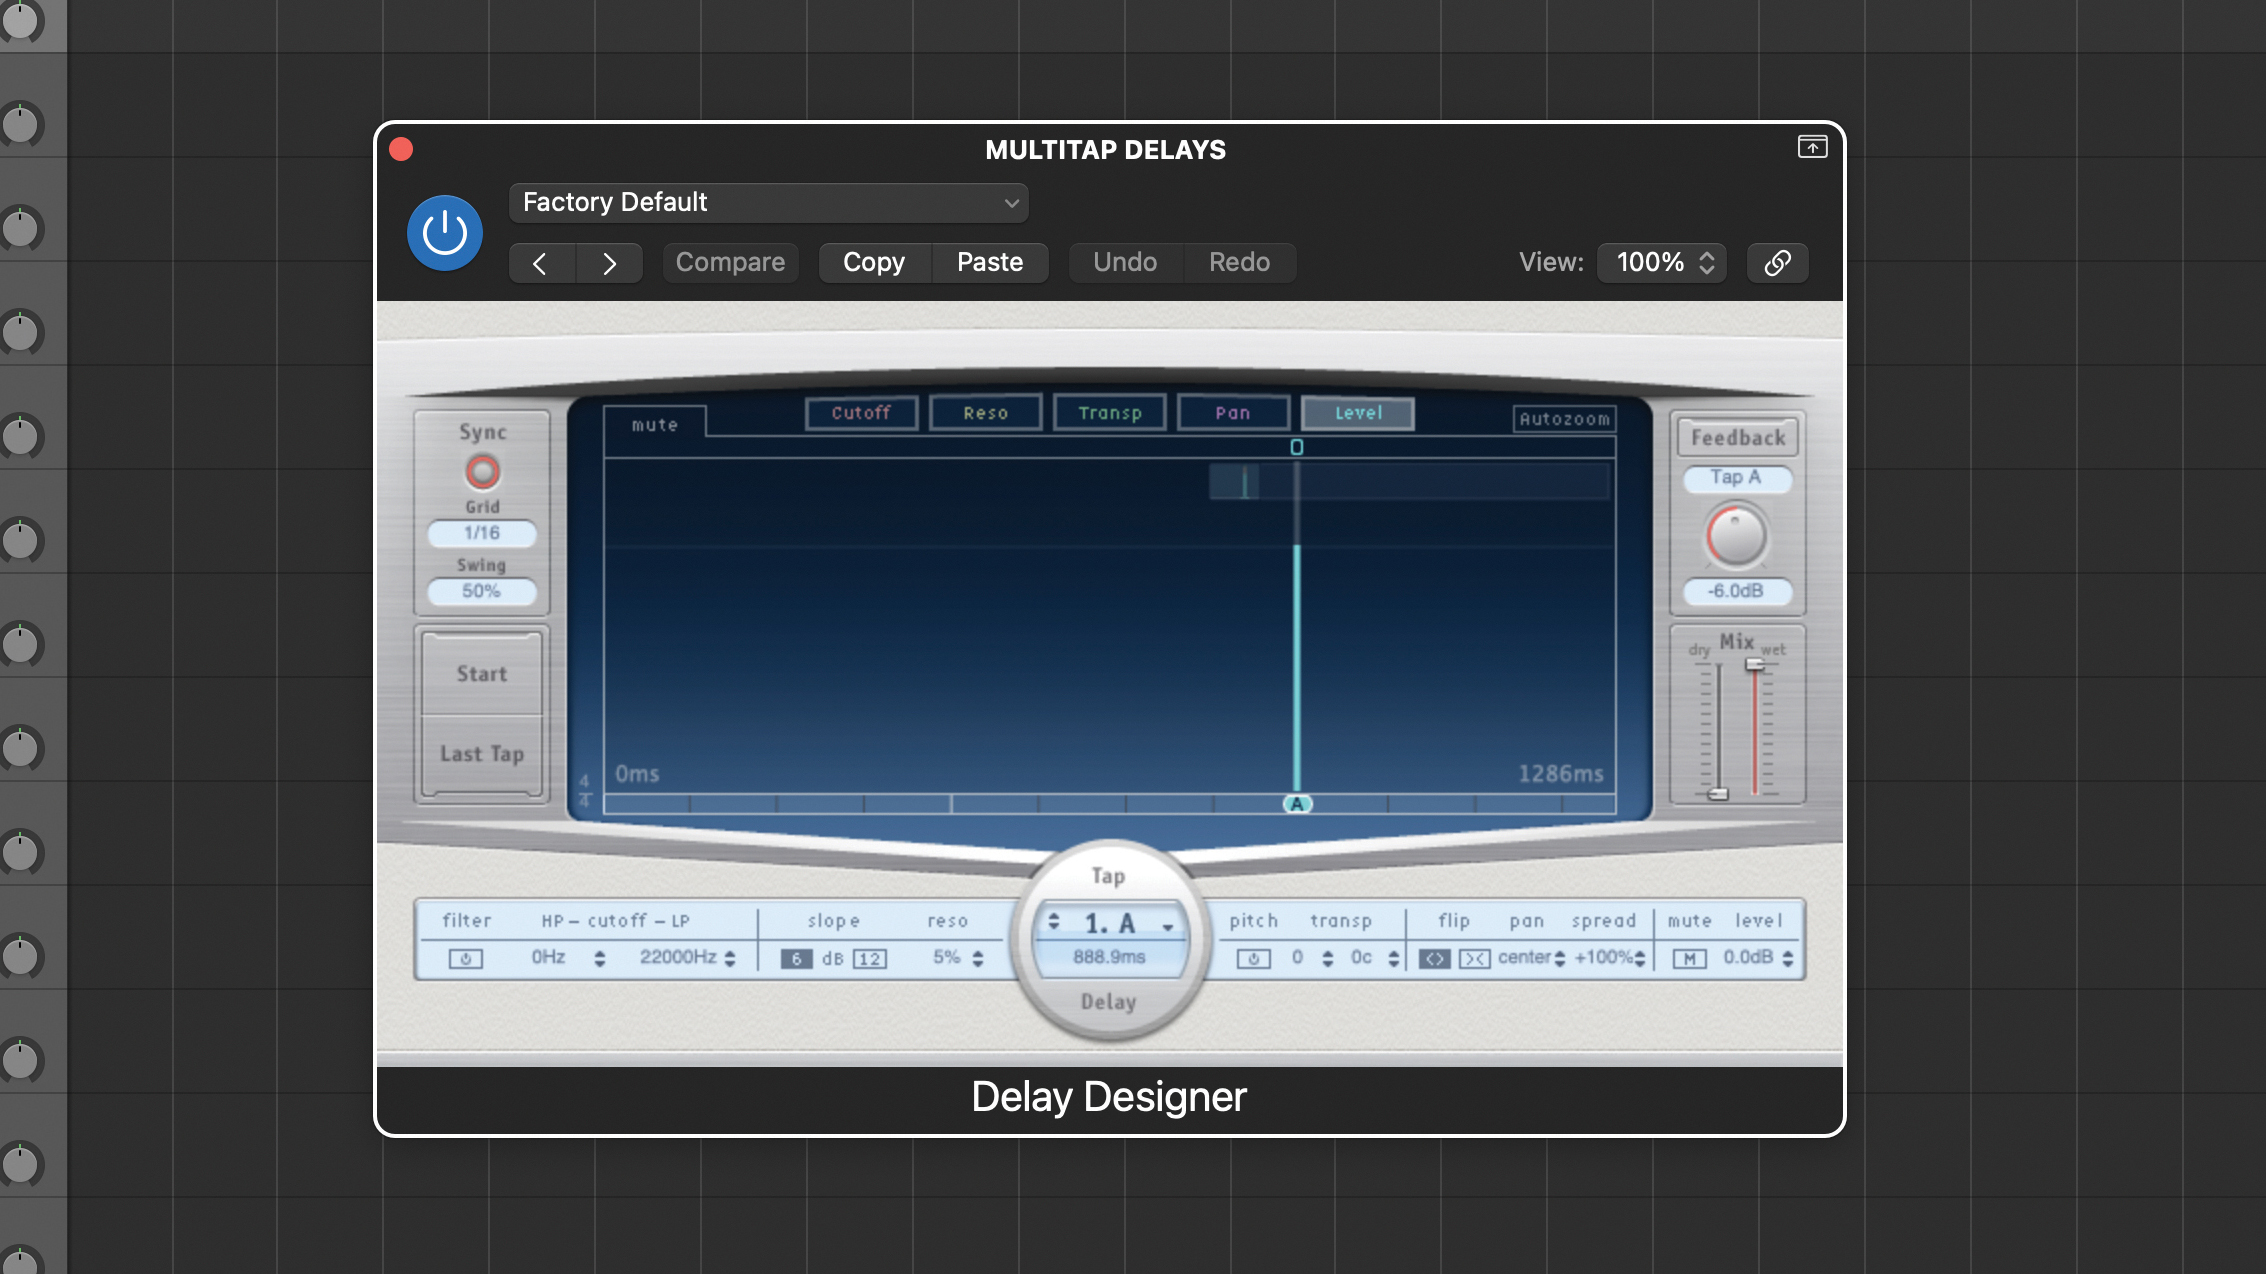
So far, we’ve only tried single or double delays, but there’s nothing to stop you investigating more complex multiple tap delays to create richer effects. Just remember, to do this you’ll need a more capable delay, where you can ideally specify not only multiple individual delay timings, but also panning and levels.
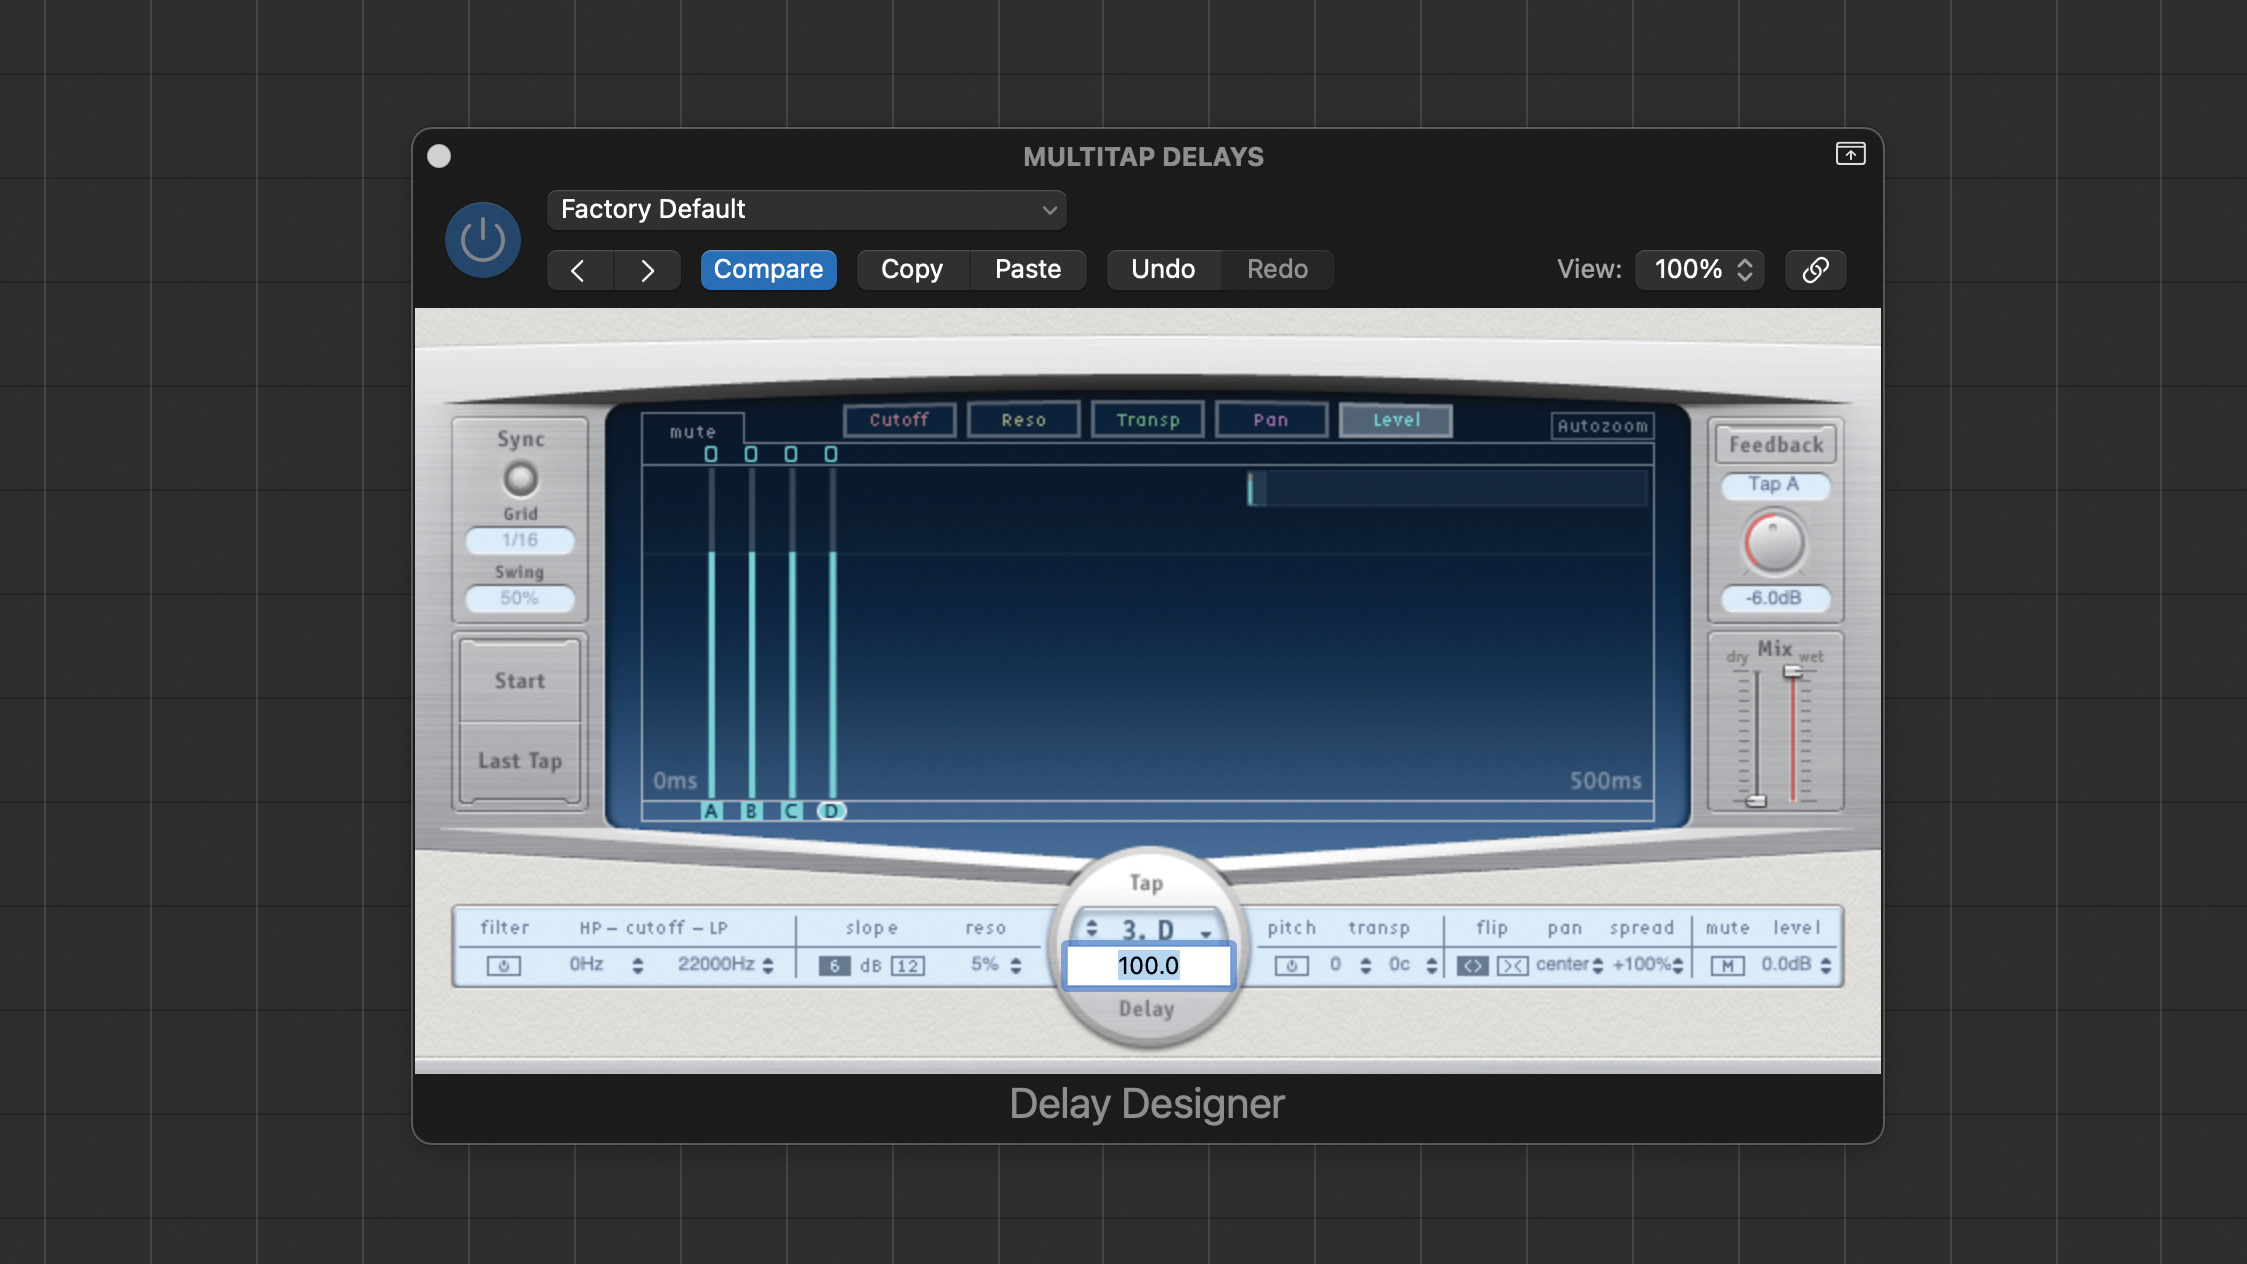
Bearing in mind we’re trying not to get into slapback territory you don’t want the longest delay any longer than roughly 100ms. So working back from that number, we’ve set ours to 100ms, 80ms, 60ms and 40ms with no feedback. You can, of course, try different timings within the timing limits originally discussed.
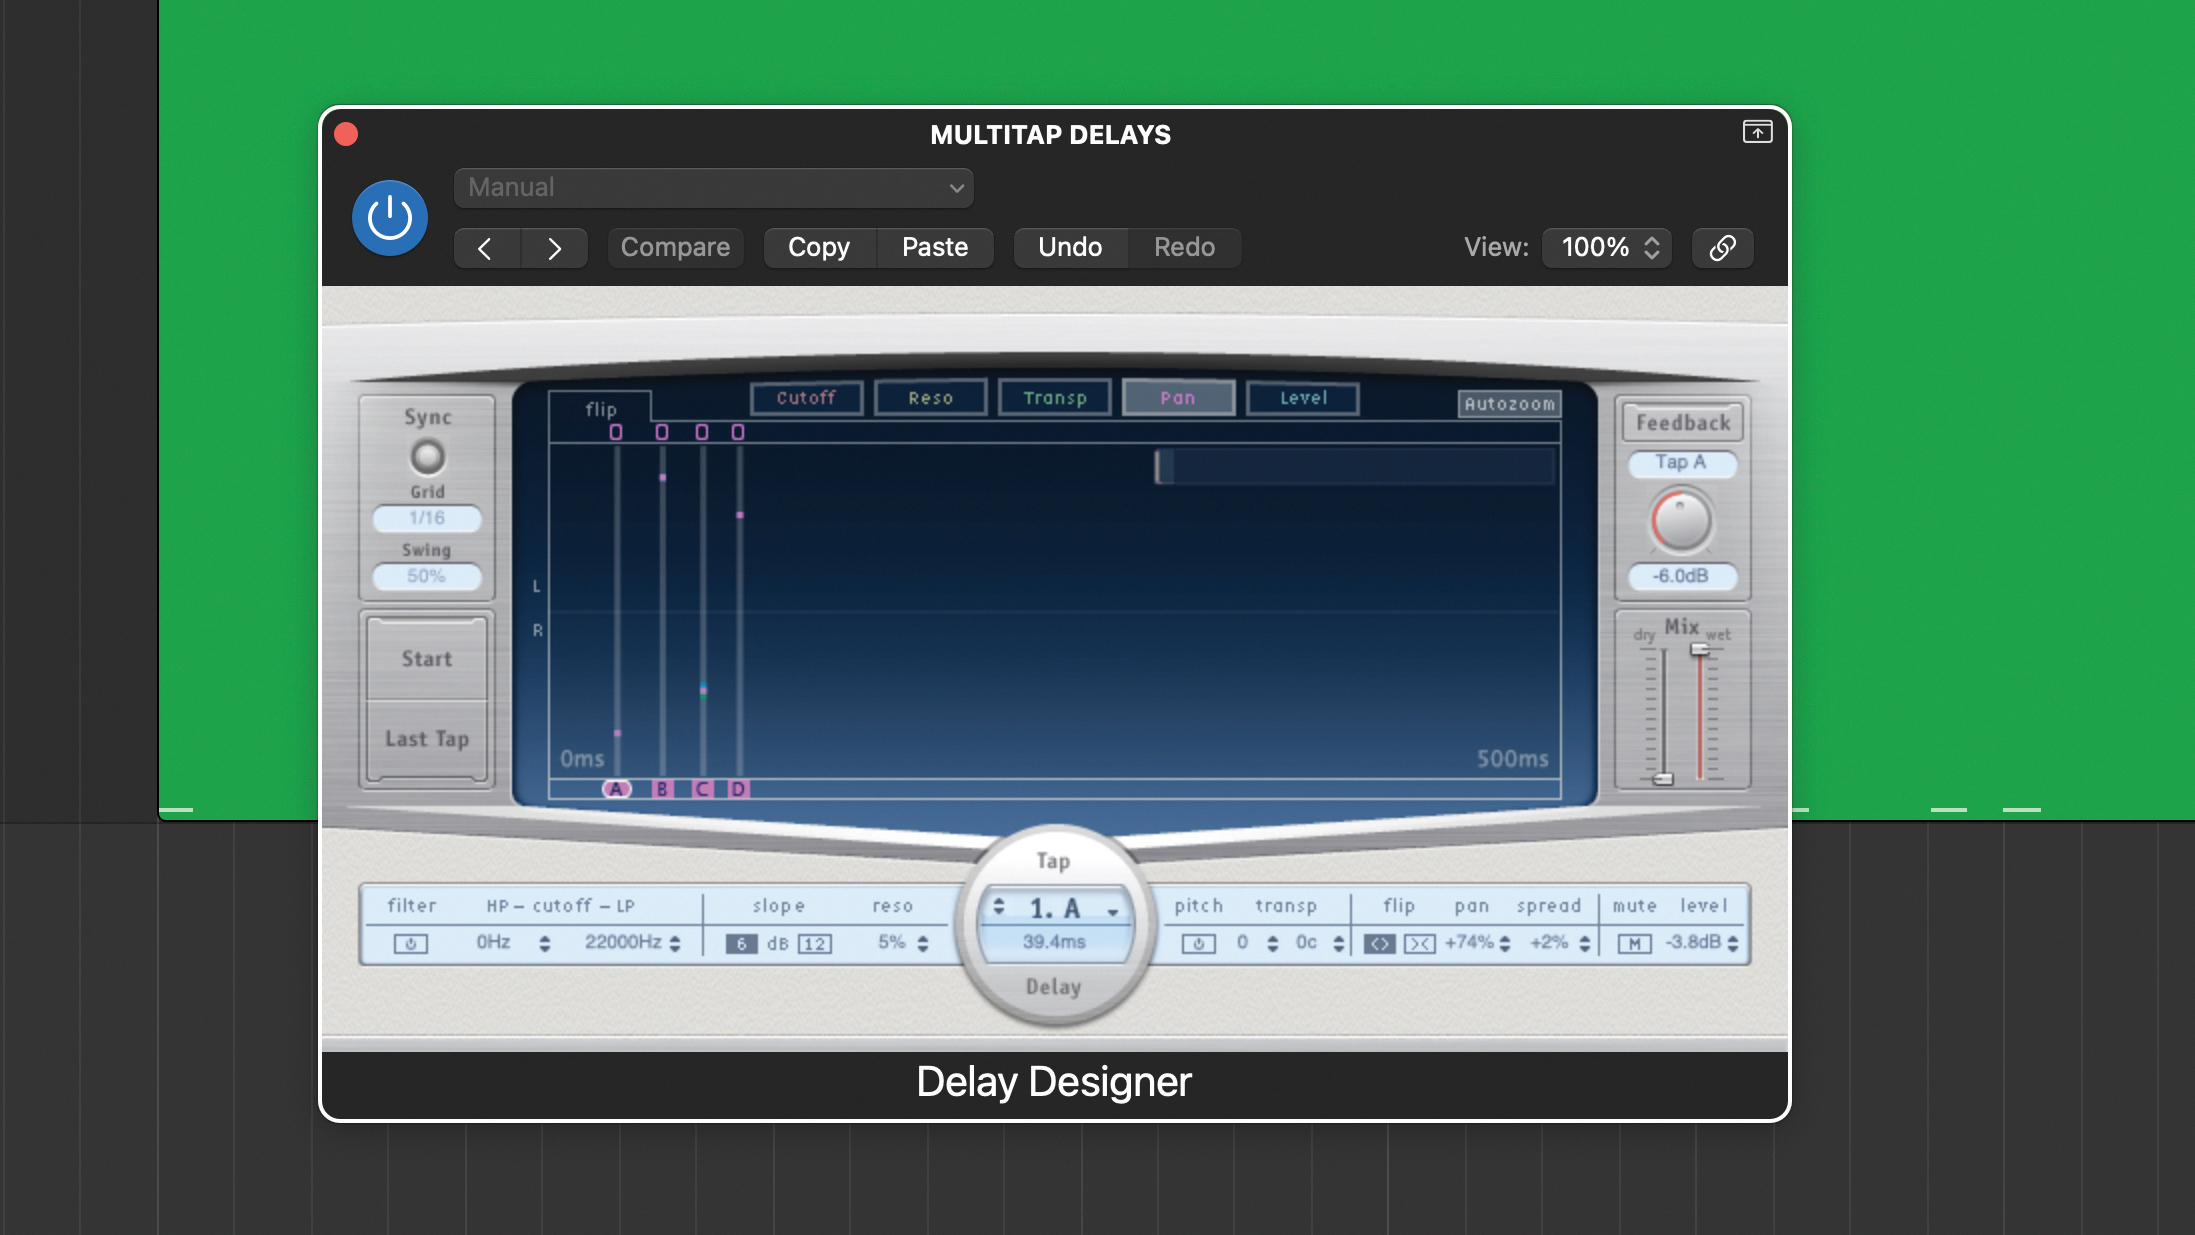
Finally, we’ve panned the delays, with the two shorter ones hard panned to opposite sides and the two longer ones panned but more centrally. Trying this out on all our example audio produces a more complex, thicker result giving the sounds space while keeping them present and close.
Pro tip
In our walkthrough examples we focus primarily on choosing delay times, delay types and using filters and panning to modify them. But there are plenty of other ways we can shape the delay returns.
Best saturation plugins 2023: Bring your mix to life with these studio secret weapons
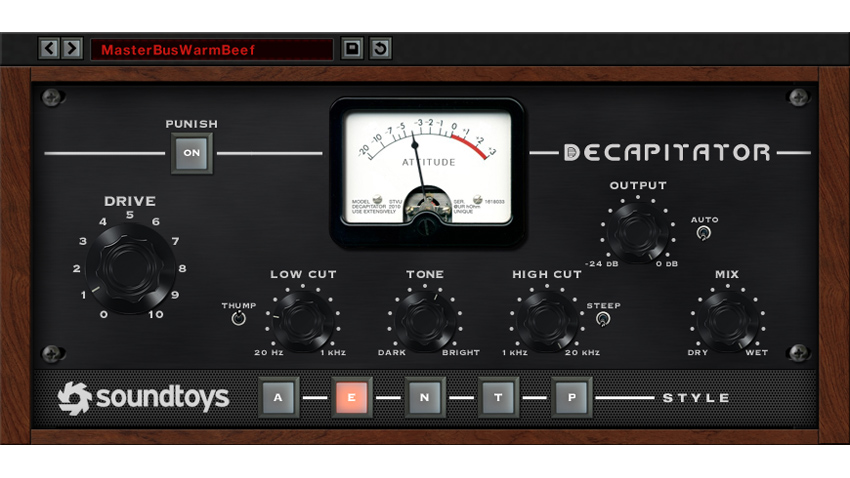
One quite powerful option is to use distortion. In some delays, particularly tape delay emulations, you’ll find integrated saturation or even selectable types of distortion which you can adjust to taste. But even if you’re using a simple delay effect and that effect is on an auxiliary you can grab your favourite distortion processor and insert it straight after the delay.
The distortion not only adds flavour but also smears the delays helping them blend. Another obvious choice is pitch modulation. This can work really well, even on short delays and adds some real time change to the delays, helping them blend. Try using slow to medium speed (up to about 0.70Hz) and maximum depth.
Modulation options vary on delay plugins, so once again, if your delay doesn’t include modulation you could process the post delay auxiliary return. Finally, although filtering usually does the trick, you can try more aggressive EQ on the delay returns. This is easy to achieve if using an auxiliary.
Recommended listening
1. Billie Eilish - Oxytocin
Short delays can be great for adding tight space to close-up vocals like these.
2. Green Day - Revolution Radio
For fast rock drums, short delays can help deliver a tight snare with some space.
Jon is a London based platinum award winning mixer, producer, composer and club remixer with a diverse CV that spans dance, pop, rock and music for media. He’s also a long term contributor to MusicRadar's music technology tutorials and reviews. Whether working alone or collaborating he usually handles final mixdowns, so you’ll also find MusicRadar peppered with his handy mixing tips.
