
Tremolos (or, technically, vibratos) are great when they’re working, but a nightmare if you don’t look after them.
This guide covers how to balance a USA Fender Deluxe two-point Strat vibrato, but the principles are the same for Floyd Rose designs and similar for six-screw Strat tremolos.
The original six-screw ‘synchronised tremolo’ was a Fender design, but the Deluxe vibrato was keeping up with the Floyd Rose version whilst maintaining a more traditional look. It’s an upgrade on the old-style Strat trem, which had six wood screws attaching the vibrato plate to the body. The two posts when combined with a knife edge means much less friction - and, trust us, friction is the enemy with vibratos!
Maybe you changed string gauge? Or drop tuned and now the vibrato is out of whack? This guide will save you going around in circles.
Watch out for the tuning-up stage too, which you could find tricky - that’s the curse of the floating vibrato!
What you need
- Strings
- String cutters
- String winder
- Guitar tuner
- Short jack lead
- Radius gauges
- Engineer’s ruler
- Allen key
- Philips screwdrivers
- Flat head screwdriver
Step 1

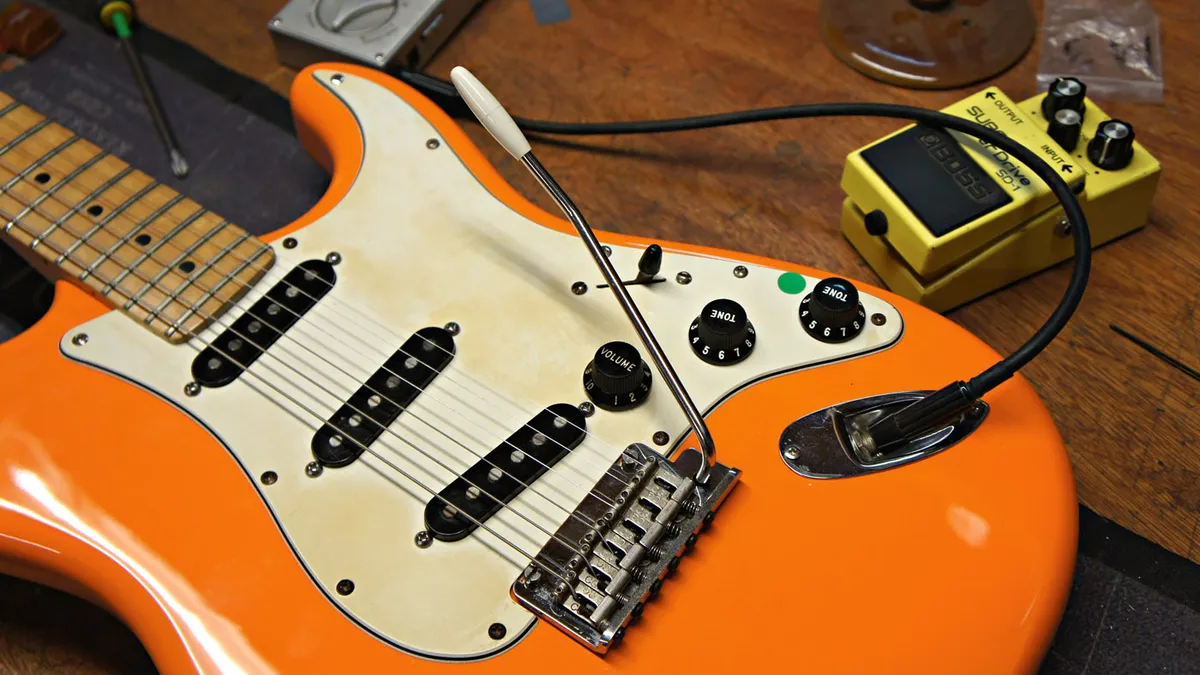
To get this vibrato sweet we’ll need to do a basic check on its workings first. With no springs or strings present, screw in the vibrato arm and check that the vibrato can move freely without anything stopping it. This is particularly important if you are setting a six-screw style vibrato. Check knife edges on two-point trems for wear.
Step 2

String up your guitar. It’s important that you’re sure about your string size. If you change gauge later you will have to re-balance the trem again! The guitar needs to be set up correctly first so that our vibrato can follow suit. We are using an understring radius gauge. Whilst in tune, don’t worry about the vibrato being at a mad angle.
Step 3

The radius gauges are used to ensure that the saddles have the same profile as the fretboard’s radius. On this two-point, modern-style vibrato as found on USA Strats, we will set the 12 grub screws to a comfortable setting with the correct radius and make sure they don’t protrude and jab your hand while playing.
Step 4

The intonation must be set at this stage. Play a harmonic at the 12th fret then compare it to the fretted note at the 12th fret. If it’s sharp, move the saddle backward; if it’s flat move it forward. The intonation is very important at this stage as it will mess up the vibrato’s balance if changed later.
Step 5

Fender two-point vibratos have two ways of setting the string height: the 12 grub screws and then two master bolt posts at the side. With the radius now set at the correct curvature you can fine tune the overall string height at the bridge with these two posts. It’s exactly the same as a Floyd Rose, except that the radius is preset.
Step 6

Now, your vibrato may have been going wild before either tipping forward or backward (particularly if you have changed string gauge) so it’s time to tame it. First, let’s retune the guitar to whichever tuning you’re going for. Now we have the saddles set and won’t be moved, we can properly balance the vibrato.
Step 7

It’s possible at this stage that the vibrato is dumping forward. It could be an increased string gauge that’s presenting more pressure than before; the strings pull the springs tighter and so it has settled in this location. If you’re in tune and this is the scenario, you need to add more pressure to the springs to balance it.
Step 8

Bottomed out and touching the paintwork? This is what happens if the strings are now at a lesser tension - maybe you have dropped a string gauge or dropped tuning. The vibrato springs are pulling more than the strings are and in this tug of war, they’re winning. The remedy is to loosen the springs on the back.
Step 9

This is what we’re after: tuned up and balanced flat! This means the vibrato arm can be lifted up and dropped with pitch control in both directions. Fender’s factory settings say to tilt the vibrato forward by about 3.2mm. This would give you a little more lift when you pull up on the trem arm but it comes down to personal preference.
Step 10

Changing the spring settings is all about the two, large screws inside the rear of the vibrato cavity. Tighten them in and you pull the springs more; loosen them and you allow the strings to pull the vibrato upward. Changing the spring’s setting changes the pitch, so make the change and then re-tune!
Step 11

Retune you say? This is the curse of floating vibratos. Tune the sixth string, then the fifth string, and the sixth string is back out of tune. Here’s a good tip if the vibrato is sitting low: over-tune the sixth string by about 20 percent, then follow suit with the other strings, decreasing your over-tune with each string.
Step 12
Keep going, you will get faster at the retune/rebalance act. We will admit it’s a tricky procedure to get right! Here’s the good thing about floating vibratos: you can tweak the action with the two post bolts. Just make sure that when it’s time to re-string, you buy the same brand and gauge again.
