Want all the hottest music and gear news, reviews, deals, features and more, direct to your inbox? Sign up here.
You are now subscribed
Your newsletter sign-up was successful
We love a classic synth sound here at MusicRadar, but we especially enjoy the development of certain sounds that are viewed as very contemporary in make-up, but can be traced back to ’80s classics.
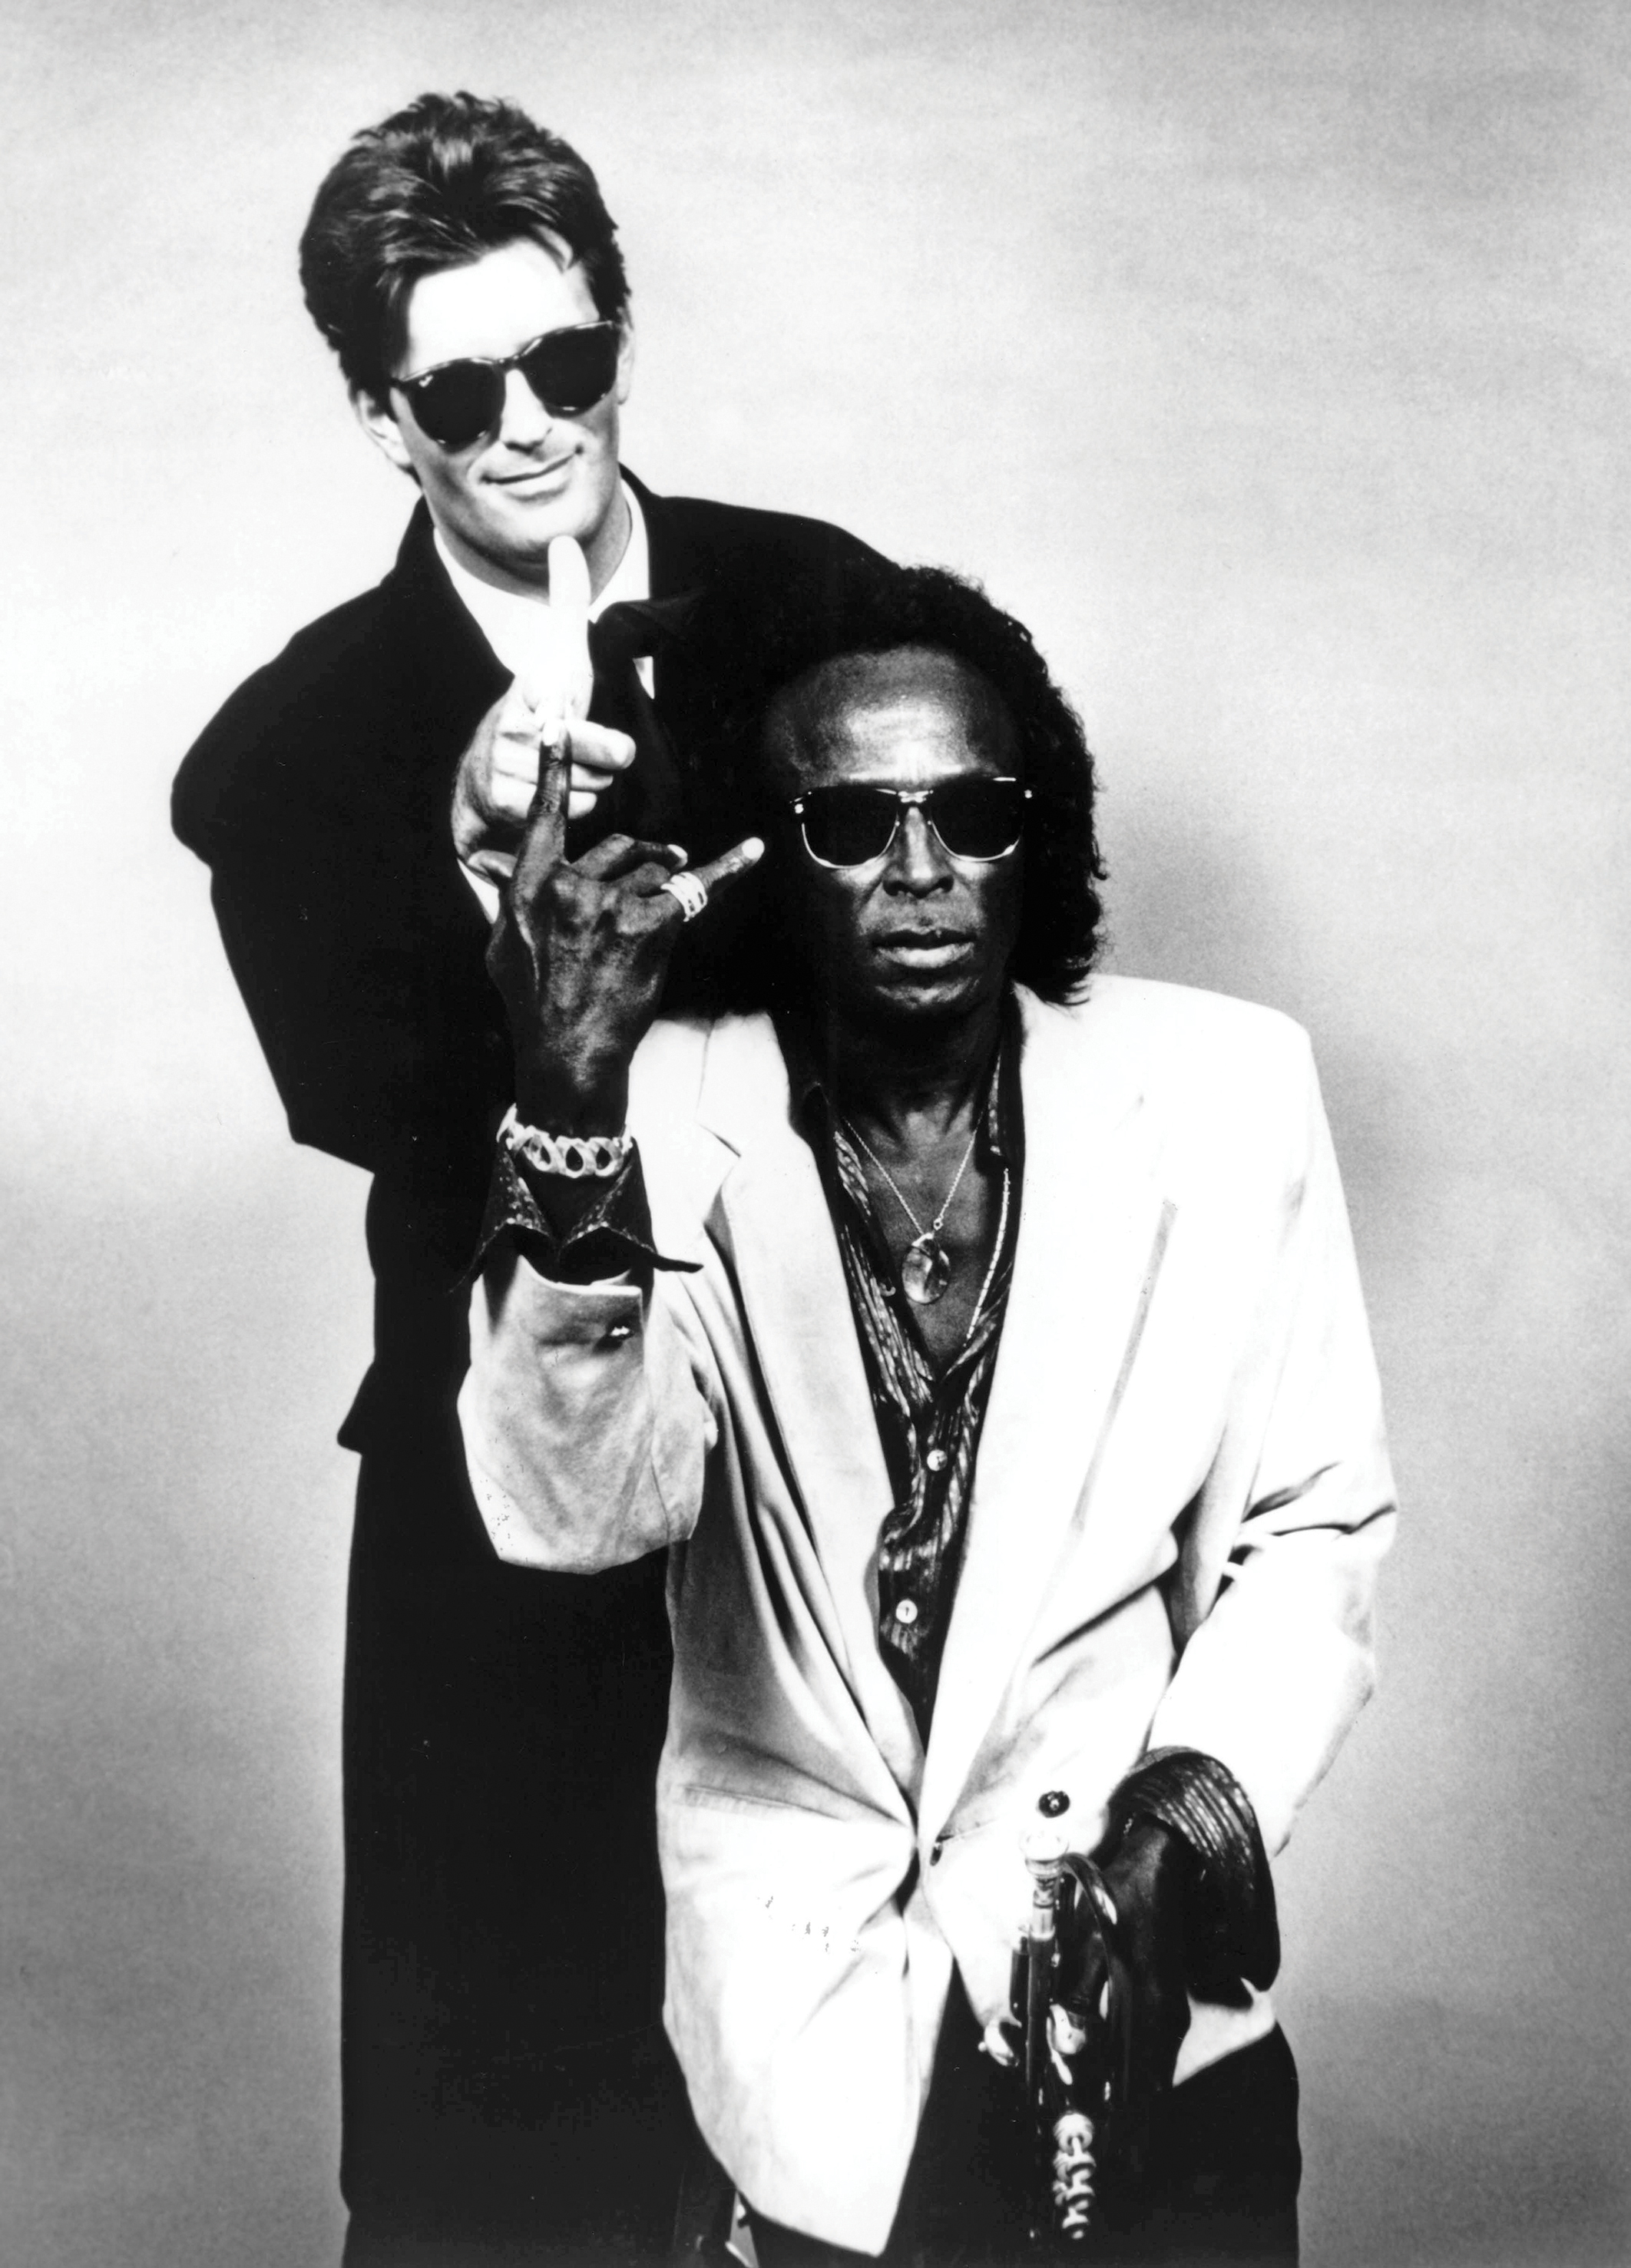
Todays patch is a case in point. The short and snappy synth stab became a benchmark in the mid-’80s, thanks to bands such as Level 42. One of their most famous tracks, The Sun Goes Down, makes extensive use of such a sound, but it was just a couple of years later that Green Gartside and David Gamson, better known as the evolving combo Scritti Politti, made even greater use of such sounds, through their albums Cupid and Psyche ’85 and Provision.
The level of sophisticated programming and live playing on both of these albums set a very high bar for productions to follow, coupled with some highly original songwriting, employing technology to shore up the compositional mastery. It was partly due to their use of punchy synth sounds, which may have previously been regarded as relatively commonplace, being deployed across the stereo image, that created continual interest. They were also partial to mixing and matching different sounds, to create unique sequences.
Article continues belowWe’re going to create a relatively simple synth patch which we spread across the stereo image in much the same way. There are a couple of approaches to this technique, but we’re going to keep things simple, with what we believe to be the easiest method for achieving the same goal.
We're going to use ZebraCM, a free synth plugin that comes bundled with every issue of Computer Music Magazine, but you can follow along using whatever soft synth you have to hand.
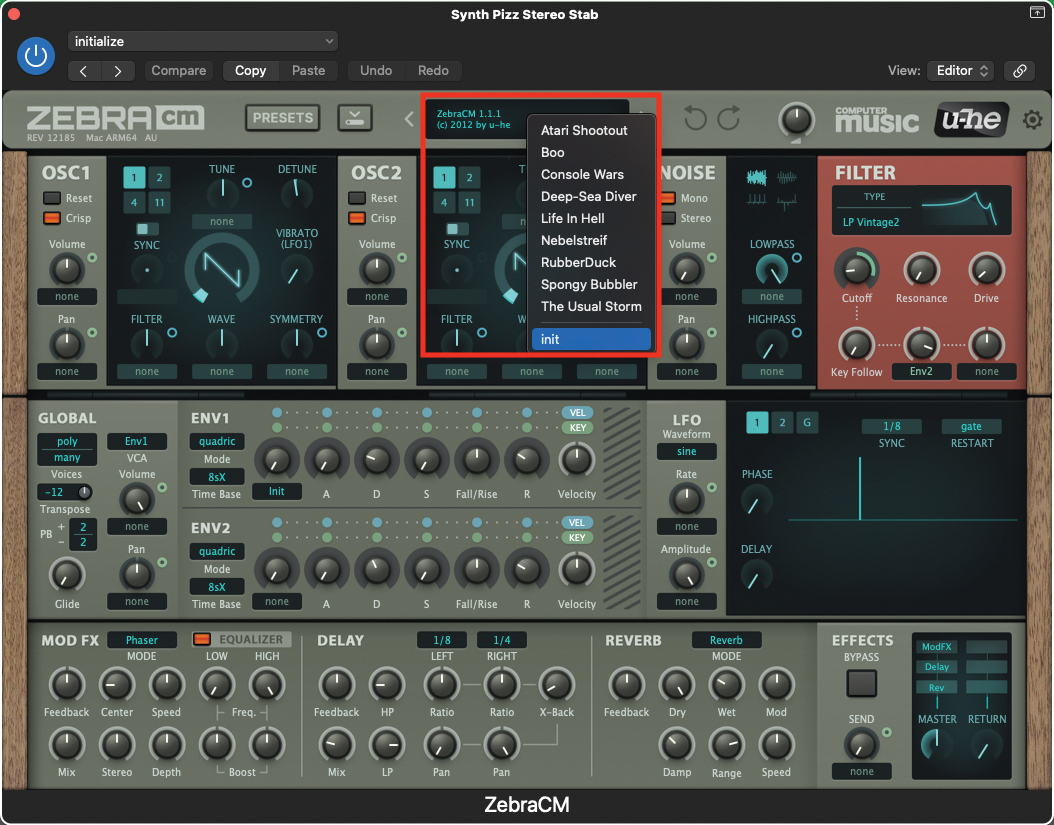
Let’s begin by initialising a patch on the ZebraCM. Open up your DAW and load up the plugin. Once the plugin window is open, move to the central display at the top of the window, click to reveal the drop-down menu, and select ‘init’ from the bottom. This will initialise the patch to a suitable default.
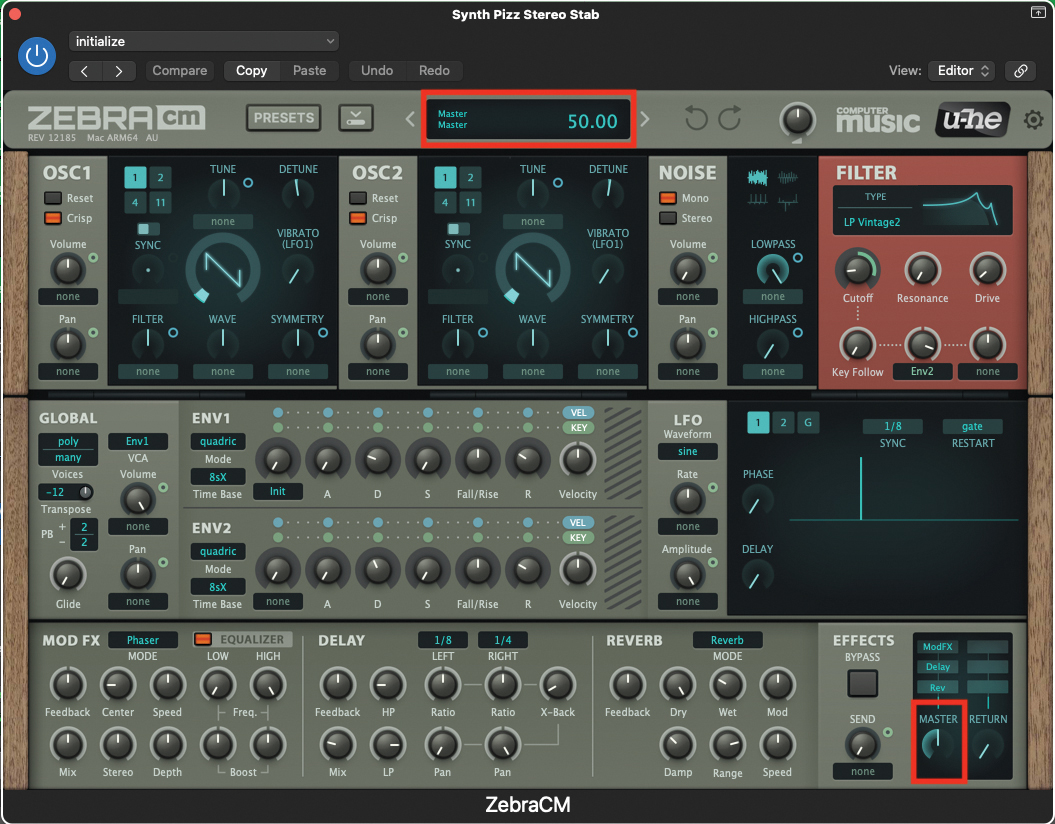
As the ZebraCM defaults to full volume upon intialise, now would be a great time to reduce your Master volume to a level of 50. Do this now and it will save your speakers and eardrums! Just as a reminder, every time you tweak a pot or setting on the plugin, you will see an accurate value/numeric in the upper display.
Want all the hottest music and gear news, reviews, deals, features and more, direct to your inbox? Sign up here.
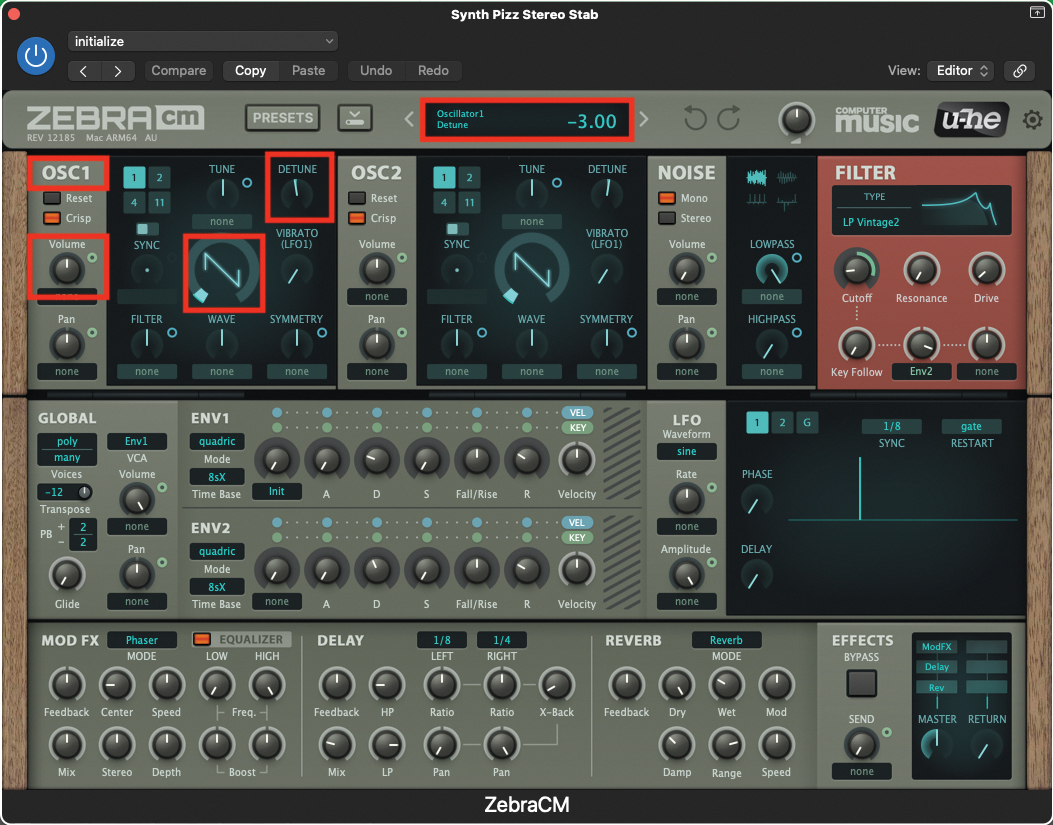
The general make up of this patch is relatively simple, in subtractive synthesis terms. Turning our attentions to OSC1, we will largely be working with the default settings of a Sawtooth Wave, set to a volume of 100. To thicken the texture between the oscillators, we will however detune OSC1 by -3 cents.
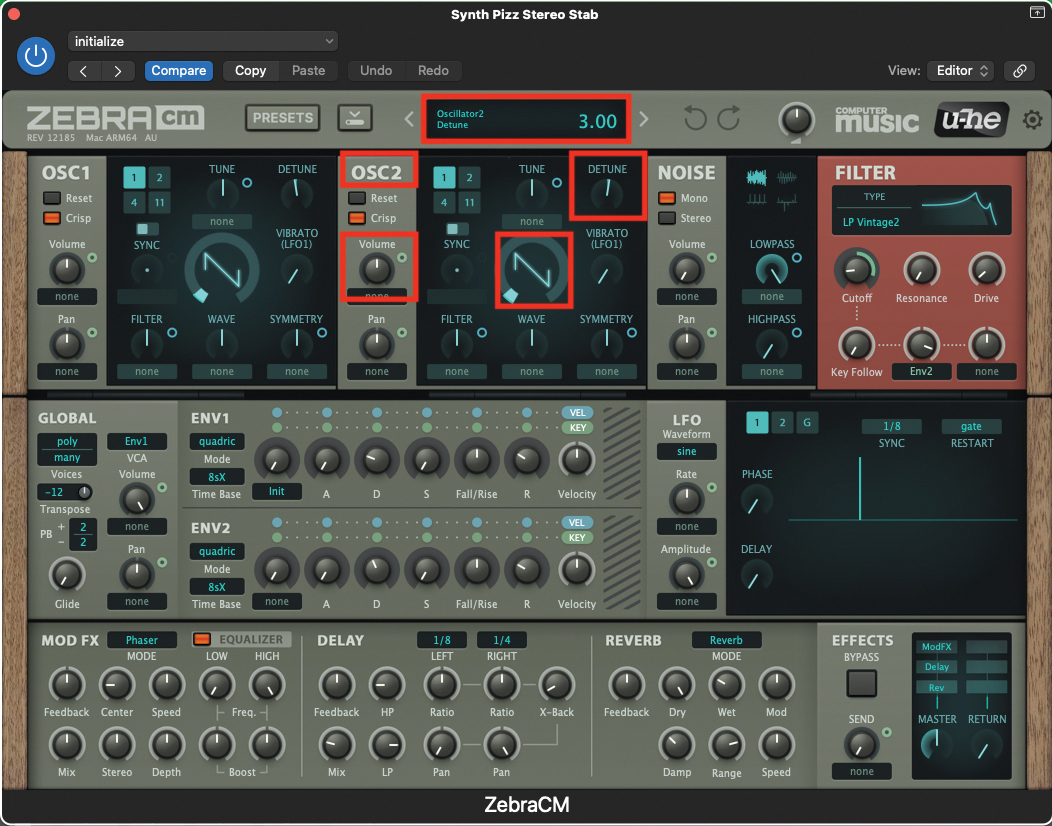
OSC2 requires a pretty similar set up to OSC1; working with the default Sawtooth, we will need to turn up the volume to 100, to match OSC1. We will also need to subtly detune OSC2, to a value of +3 cents, which will nicely counteract the detuning of OSC1.
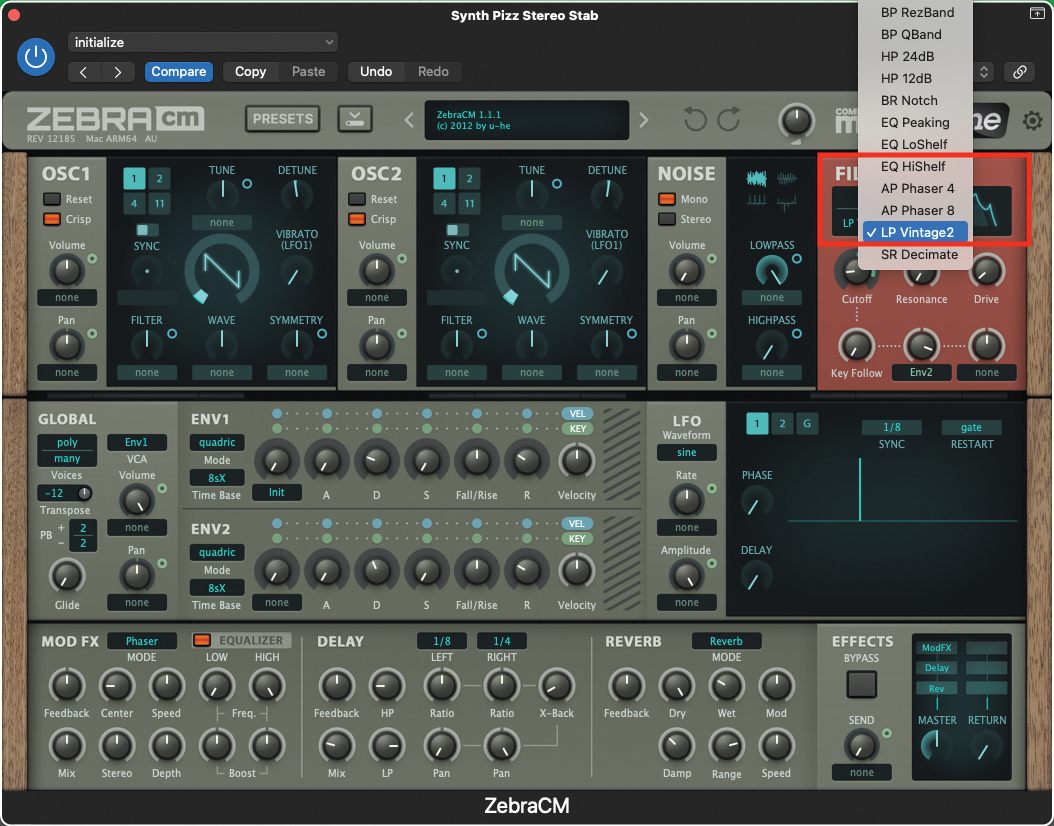
As with all of our ZebraCM patches, you can use whichever filter suits your purpose, however certain filter sounds lend themselves to certain styles of production and music. The LP Vintage 2 filter is a perfect candidate for this patch. Click on the filter-window graphic to reveal the drop-down menu.
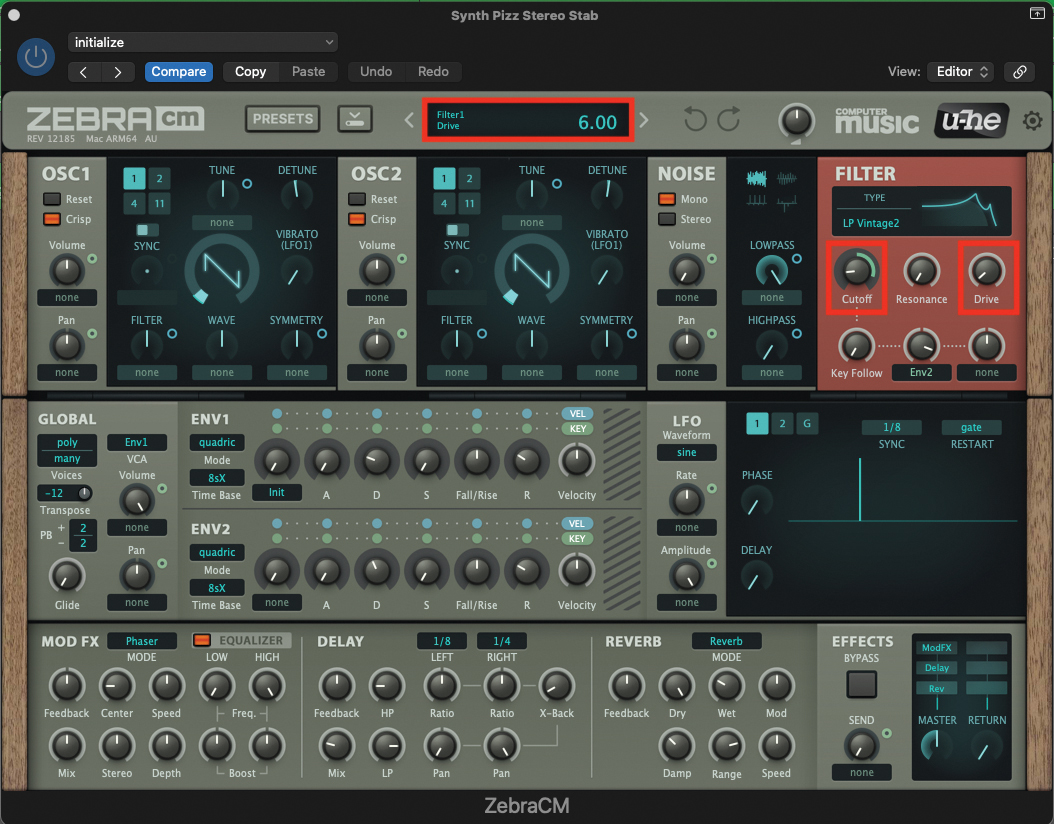
Having selected the filter type, we can now set the Cutoff pot to a value of 27. This is a relatively low and closed value, but will be exaggerated in the next step, once we apply some modulation. We can also apply the overdrive at this stage, setting the Drive pot to a value of 6. It is subtle, but it does colour the sound beautifully.
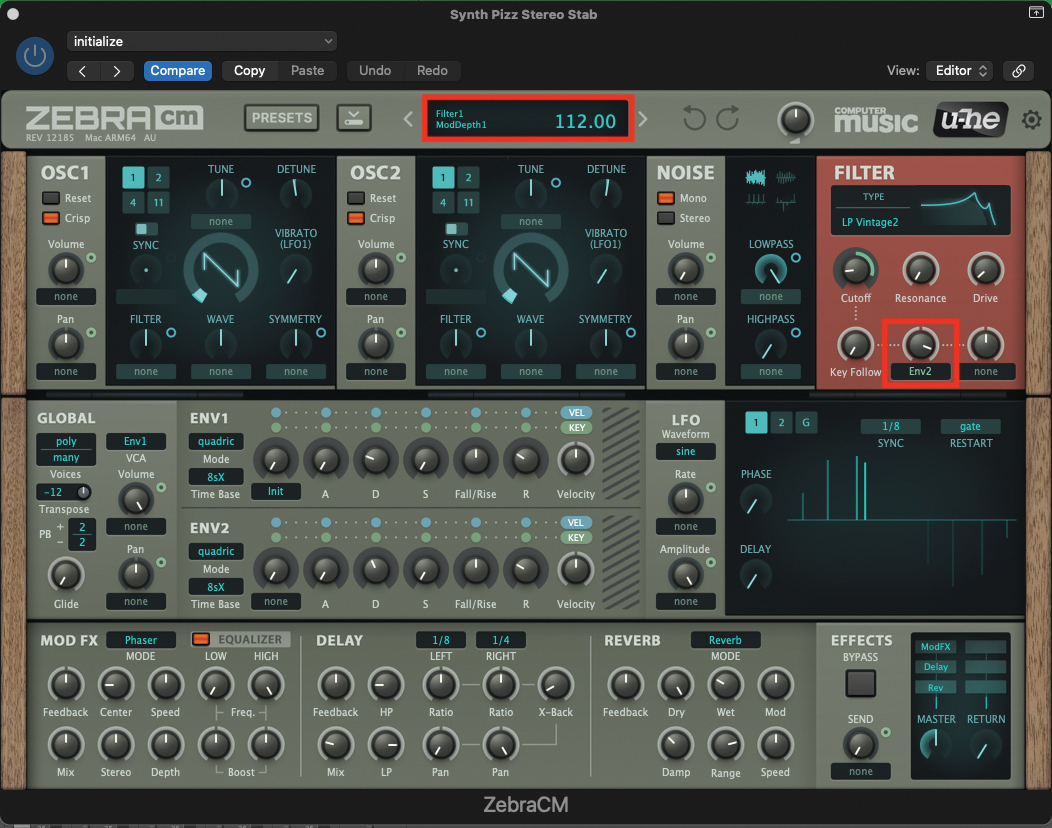
We will be applying some modulation to the Cutoff pot, via ENV2. Use the default-assigned pot for this purpose; leave it set to ENV2 and assign to it a value of 112. This is how we create the ‘bite’ at the front of each note, as the filter accentuates each note we play.
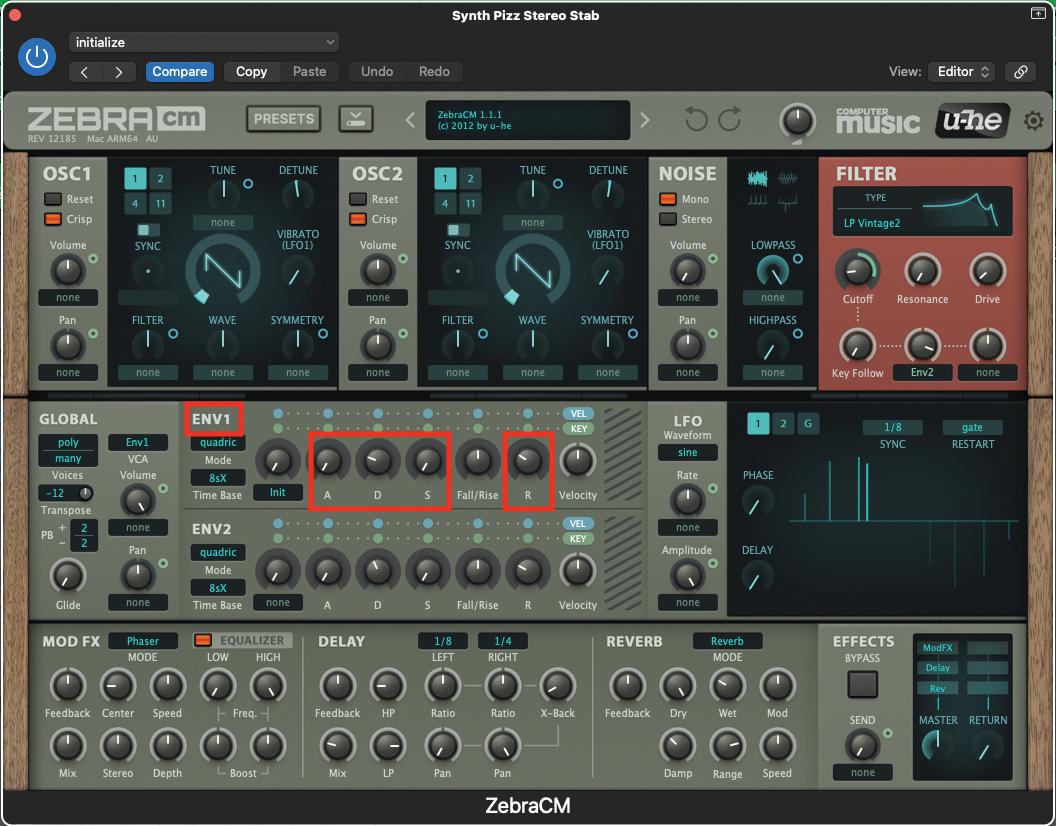
ENV1 will be used to control the volume or amplitude of our patch. Set the Attack pot to a value of 0, the Decay pot to a value of 27, the Sustain to 0, and finally the Release to 31. The Sustain value is set to 0, as we do not require any form of sustain for the sound. It will also mean that the Decay phase plays out without interruption.
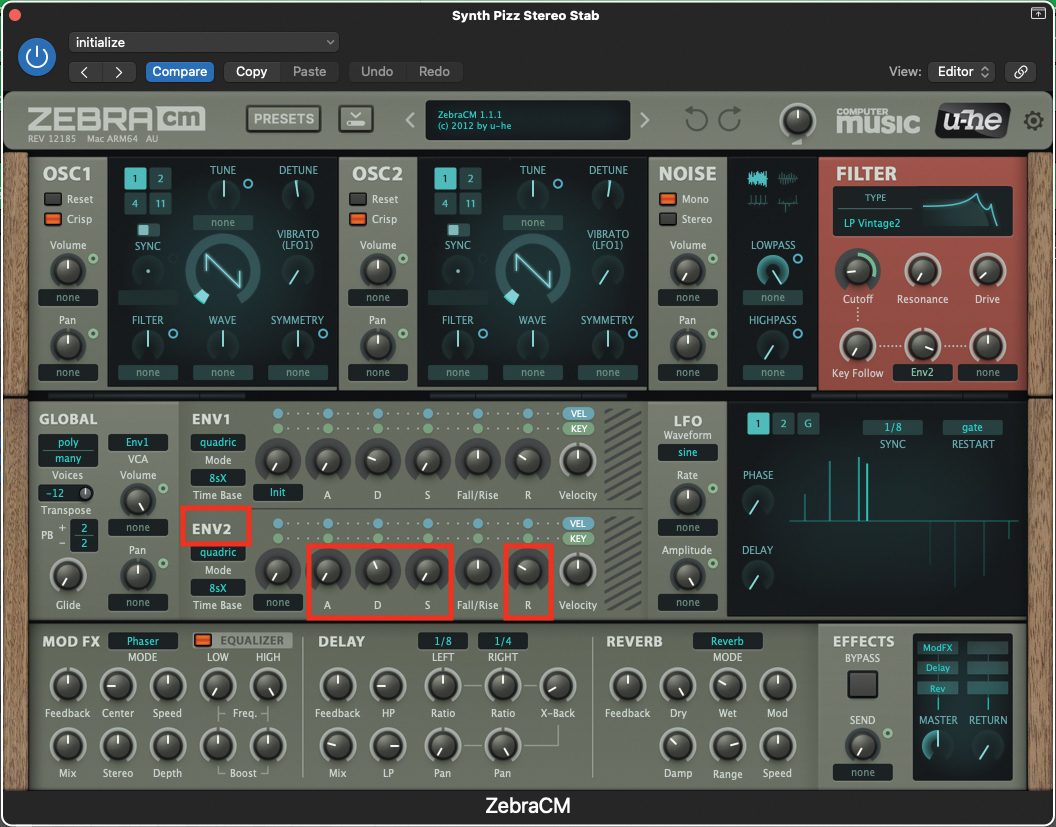
ENV2 will require some similar settings to ENV1, but these values are heading in the direction of the filter Cutoff pot. Set the Attack pot to a value of 0, the Decay pot to a value of 42, the Sustain to 0, and finally the Release to 30.
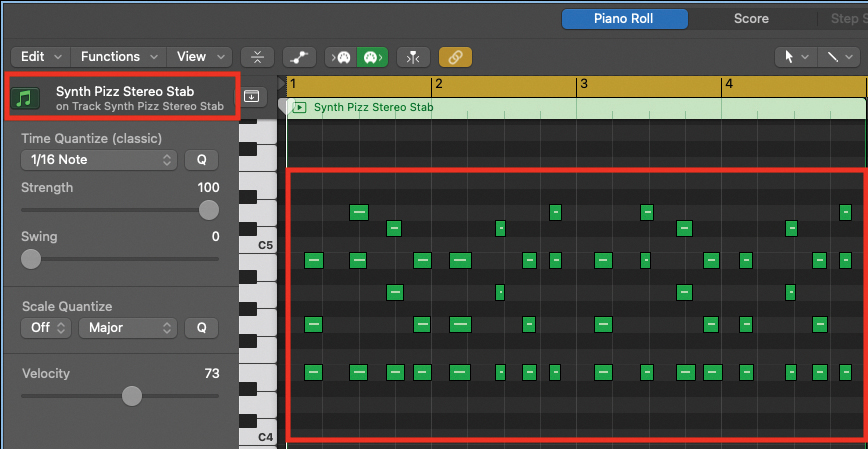
This concludes the building of our ZebraCM patch, but we can now turn our attention to creating a cool stereo effect. Firstly, compose or import some suitable chords, which you would like to use in your track. Once recorded, open the notes you have played in one of your DAW’s editors.
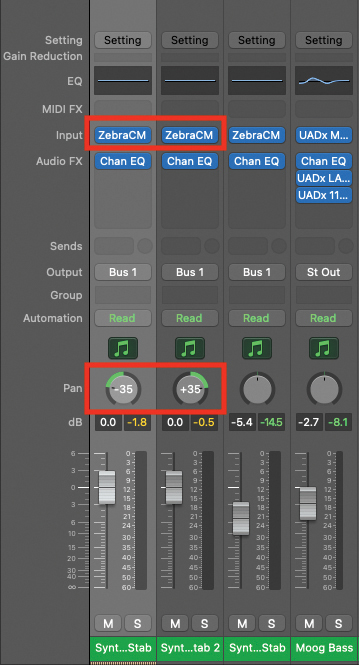
Create a second instrument channel, within your DAW, and copy and paste our ZebraCM patch to this new location. This means that you should have two tracks/channels with identical ZebraCM patches available. Pan one ZebraCM to the left and the other to the right.
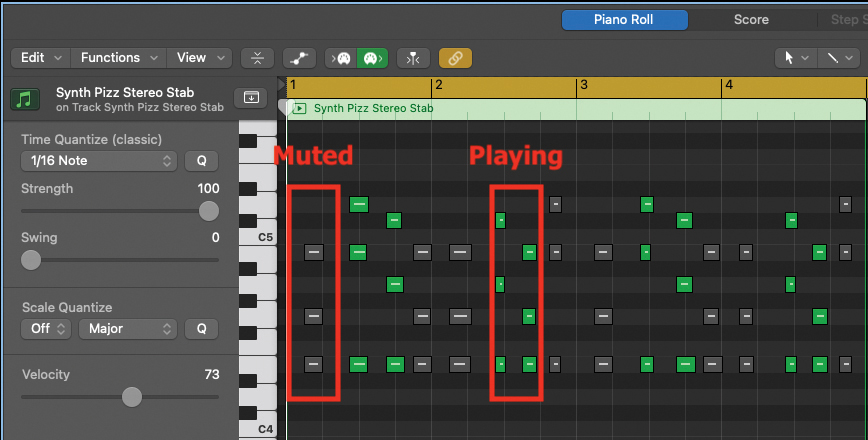
Now you can copy your composed sequence of notes to both tracks. By muting notes within your note-editor, you can make them play back on the left or the right of the stereo image, individually. This creates a really great production texture, without the need for automation.
Pro tip
One great thing about synth patches is that while some might sound dated initially, it is the repurposing and placement that can make all the difference. Our created patch really exists on two levels; in the first instance, it is a classic example of a short and snappy synth patch.
This immediately opens up possibilities for using alongside repetitive sequences or with arpeggiators. Greater interest can be applied to this patch, by adjusting the decay phase of ENV2, either in real time or through automation. This will effect the initial brightness and decay of the filter, while undoubtedly introducing interest to your track.
If we then add in our second component, relating to stereo placement through the use of two instrument settings, we move firmly into the production realm. By placing chords in different locations, within the stereo spectrum, it also provides enormous interest for anyone listening on headphones.
You could take this concept even further, by adding further carbon copy examples of the same patch, placing each channel in a different place across the image. You could even take it to the next level and alter the sounds further. Your listeners will love you for it!
Recommended listening
1. Scritti Politti - Boom There She Was
This extraordinary piece of work from the ’80s features Roger Troutman on Talk-box and Marcus Miller on bass, with clever synth programming and panning throughout.
2. Jon Hopkins - Everything Connected
Taken from his groundbreaking album Singularity, this track begins with our snappy synth sound. Hopkins continually alters the decay phase of the patch to create continual interest.