How to loop like Ed Sheeran in your DAW
Fancy a little Ed Sheeran looping action? Look no further than this first episode in a new series of masterclasses exploring popular, modern production processes
Want all the hottest music and gear news, reviews, deals, features and more, direct to your inbox? Sign up here.
You are now subscribed
Your newsletter sign-up was successful
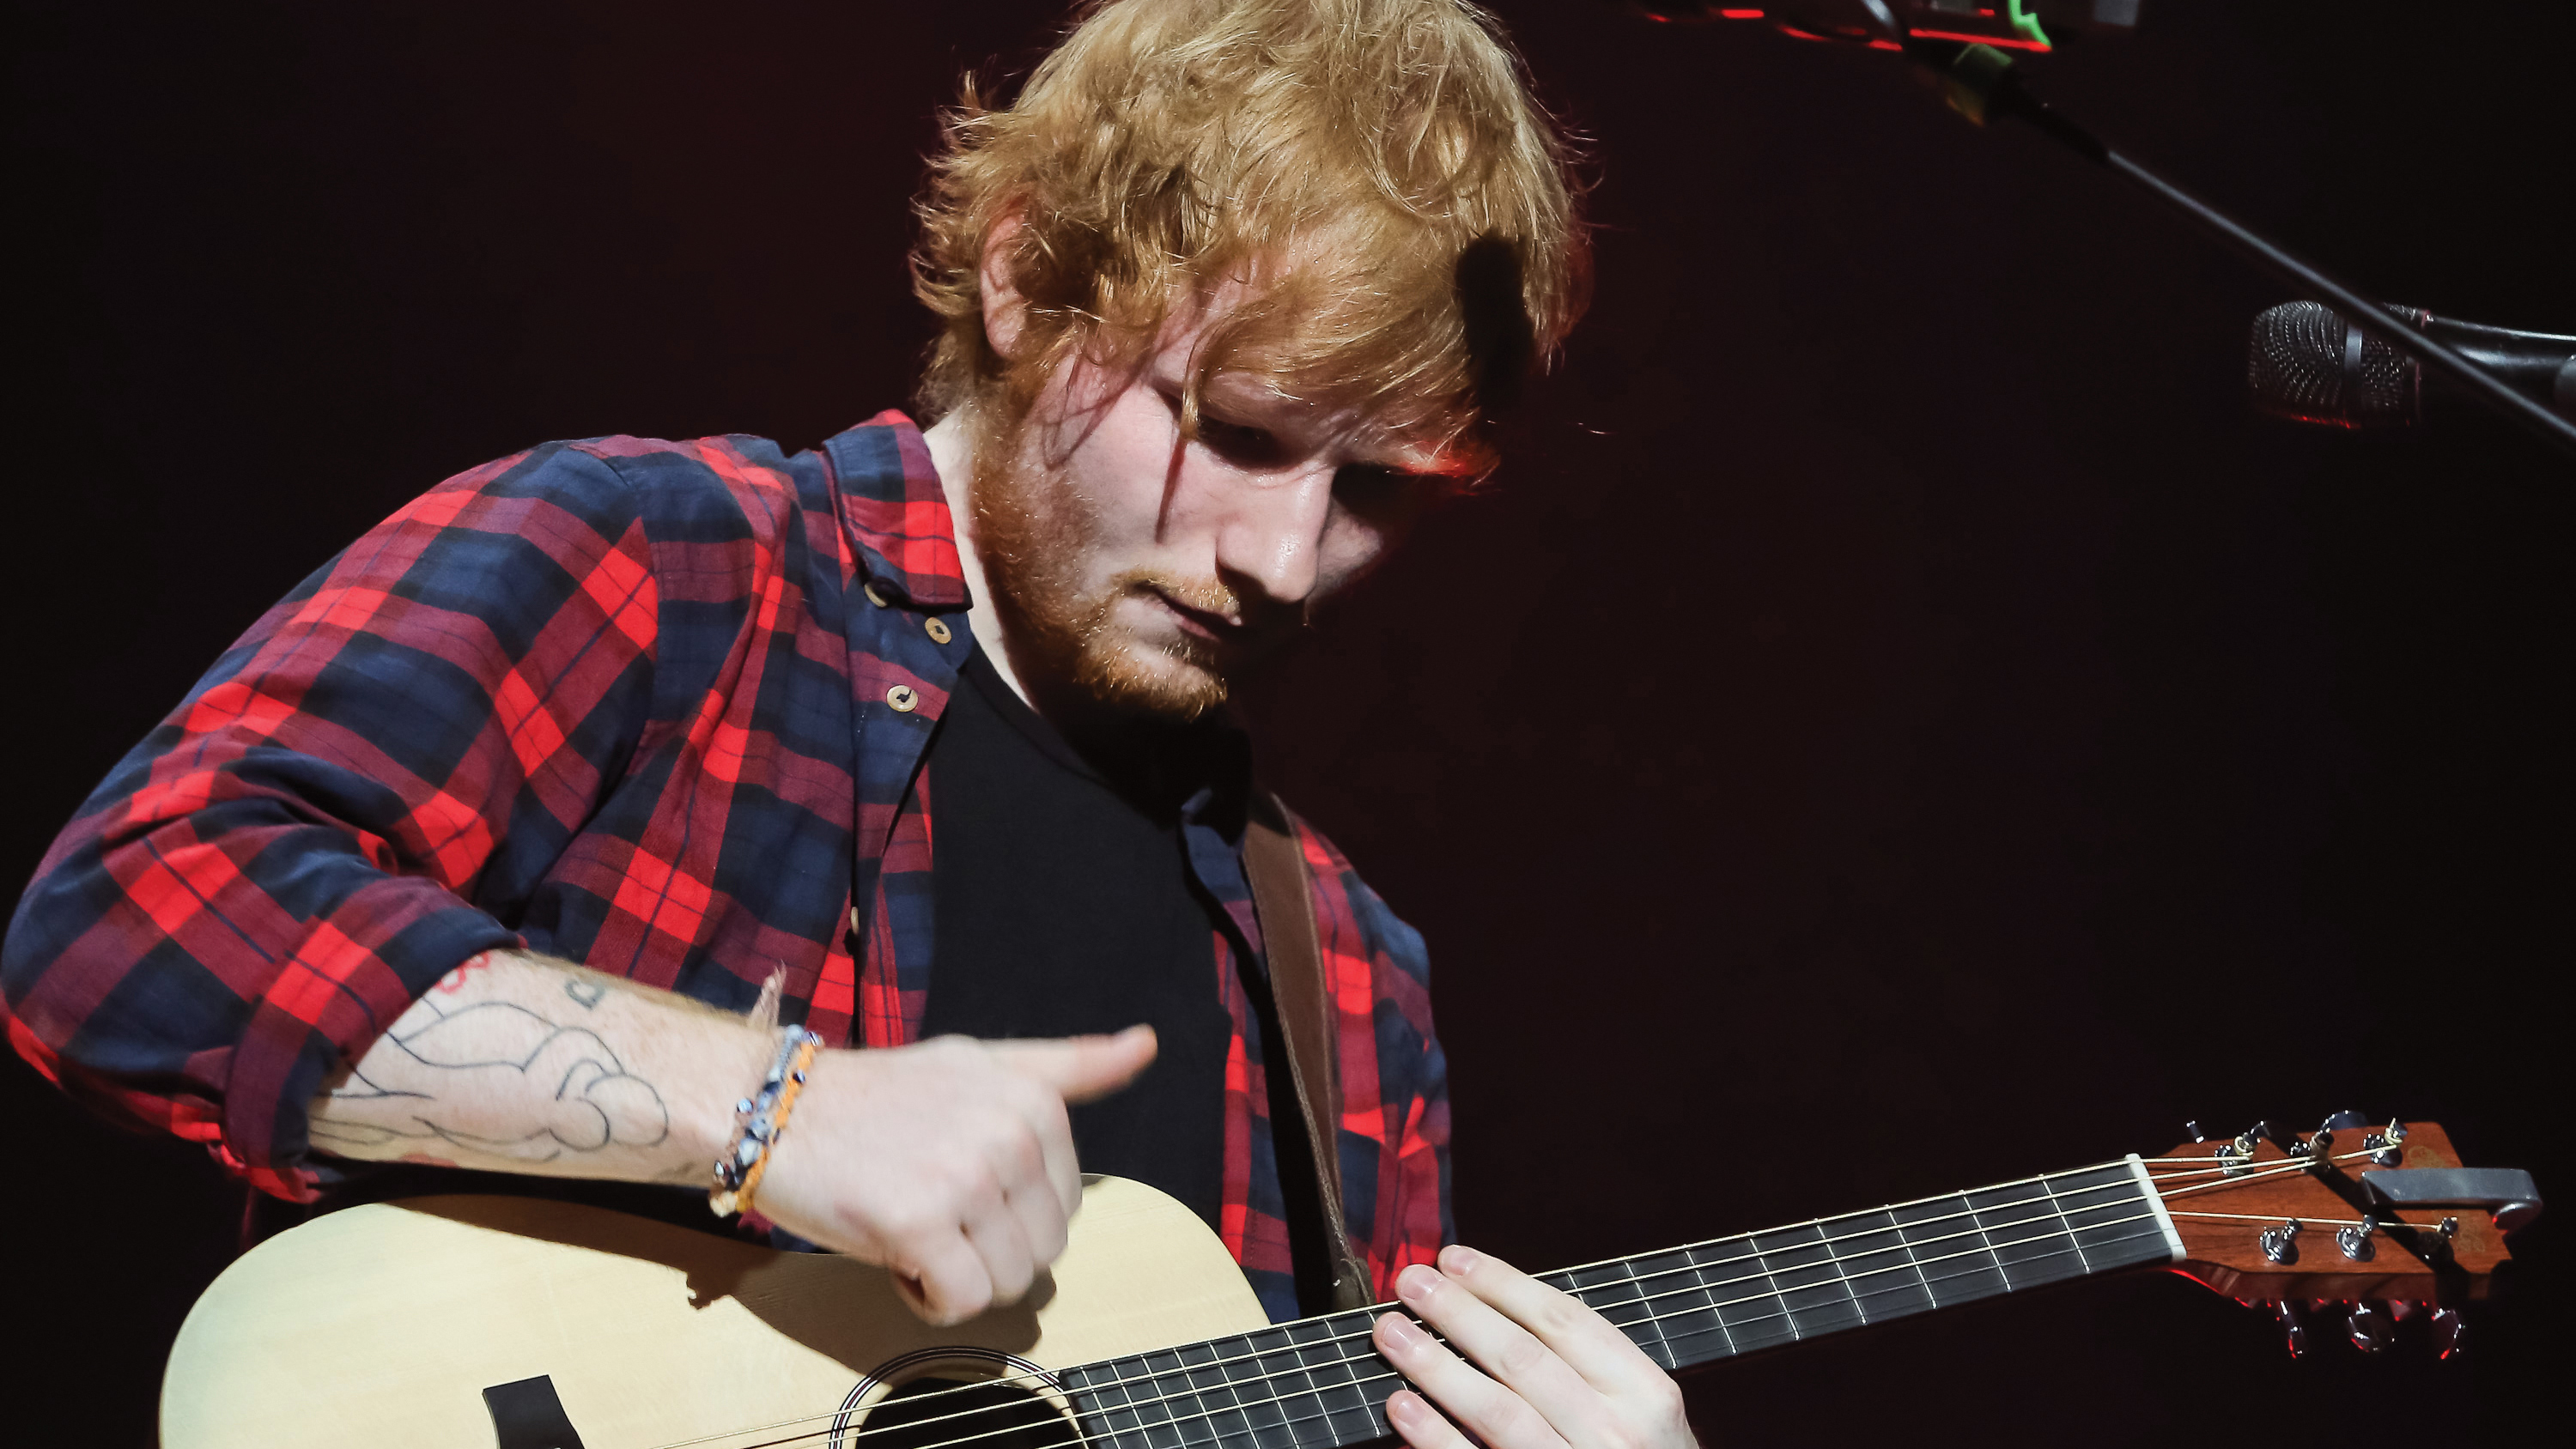
The phenomenon that is Ed Sheeran’s rise to fame has, of course, been mostly down to great songwriting, but his live abilities have also been a big factor. One of the most captivating aspects of these performances is watching him build up tracks with live looping.
We’re going to explore this kind of looping in this first tutorial in a new series where we analyse popular processes used by contemporary artists in music today.
Ed creates these loops using hardware loopers on stage, basically recording a loop of, say, his guitar playing, and then adding more loops one by one as the audio cycles around.
He has used a variety of hardware loopers in his time, including a Boss RC-20 and Boss RC-30, but now uses a looper called a Chewie Monsta Loop Station, and one made specifically for him. However, rather than using hardware, in this tutorial we’re going to look at a very basic way of doing live looping in your DAW.
There are quite a few software loopers available that will do a decent job of live looping, and many DAWs ship with good examples. However, with some software loopers, it can be fiddly to export all of the loops you record as individual stems – useful for later processing.
Our tutorial doesn’t use a specific looper (although we will discuss them later) and also leaves you with all of the loops you have recorded on separate audio tracks so you can then use them in further projects.
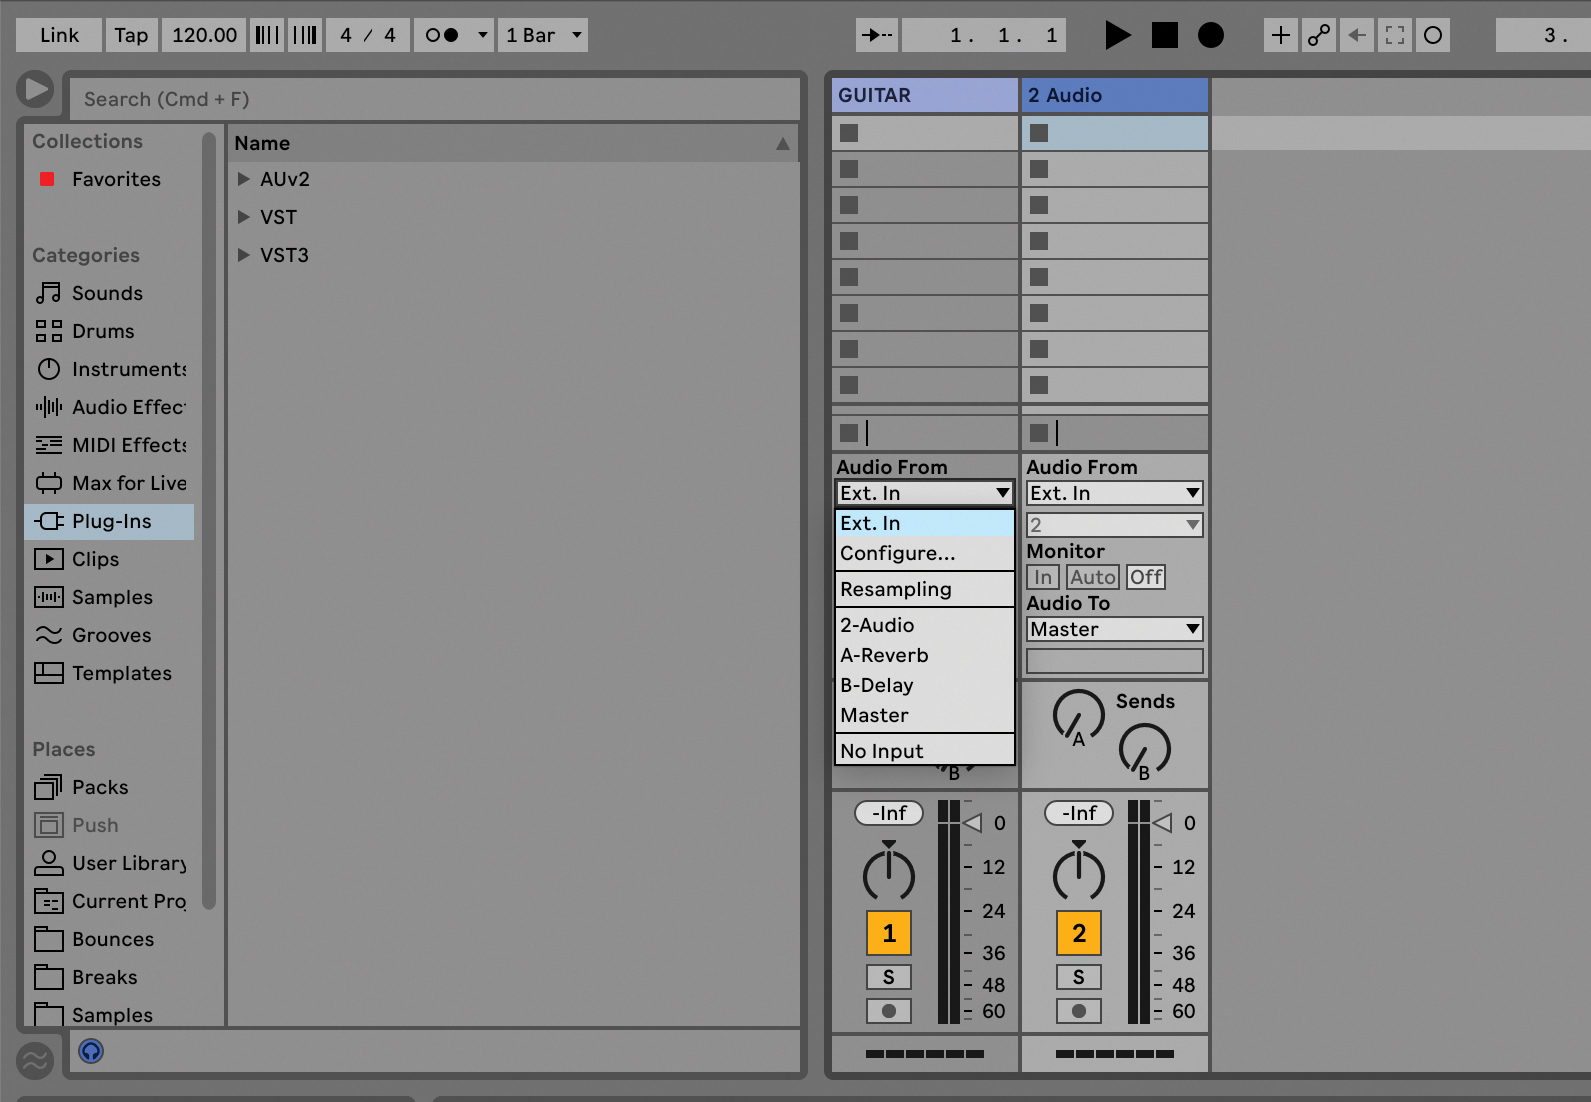
We’re going to use Ableton Live in this tutorial but the main principles can be transferred to many other DAWs. First create an audio track which will be used to monitor whatever you are looping – in this case it’s a guitar like Ed’s. We have it recording on channel one on our interface and routed to the main monitors so we can hear it.
Want all the hottest music and gear news, reviews, deals, features and more, direct to your inbox? Sign up here.
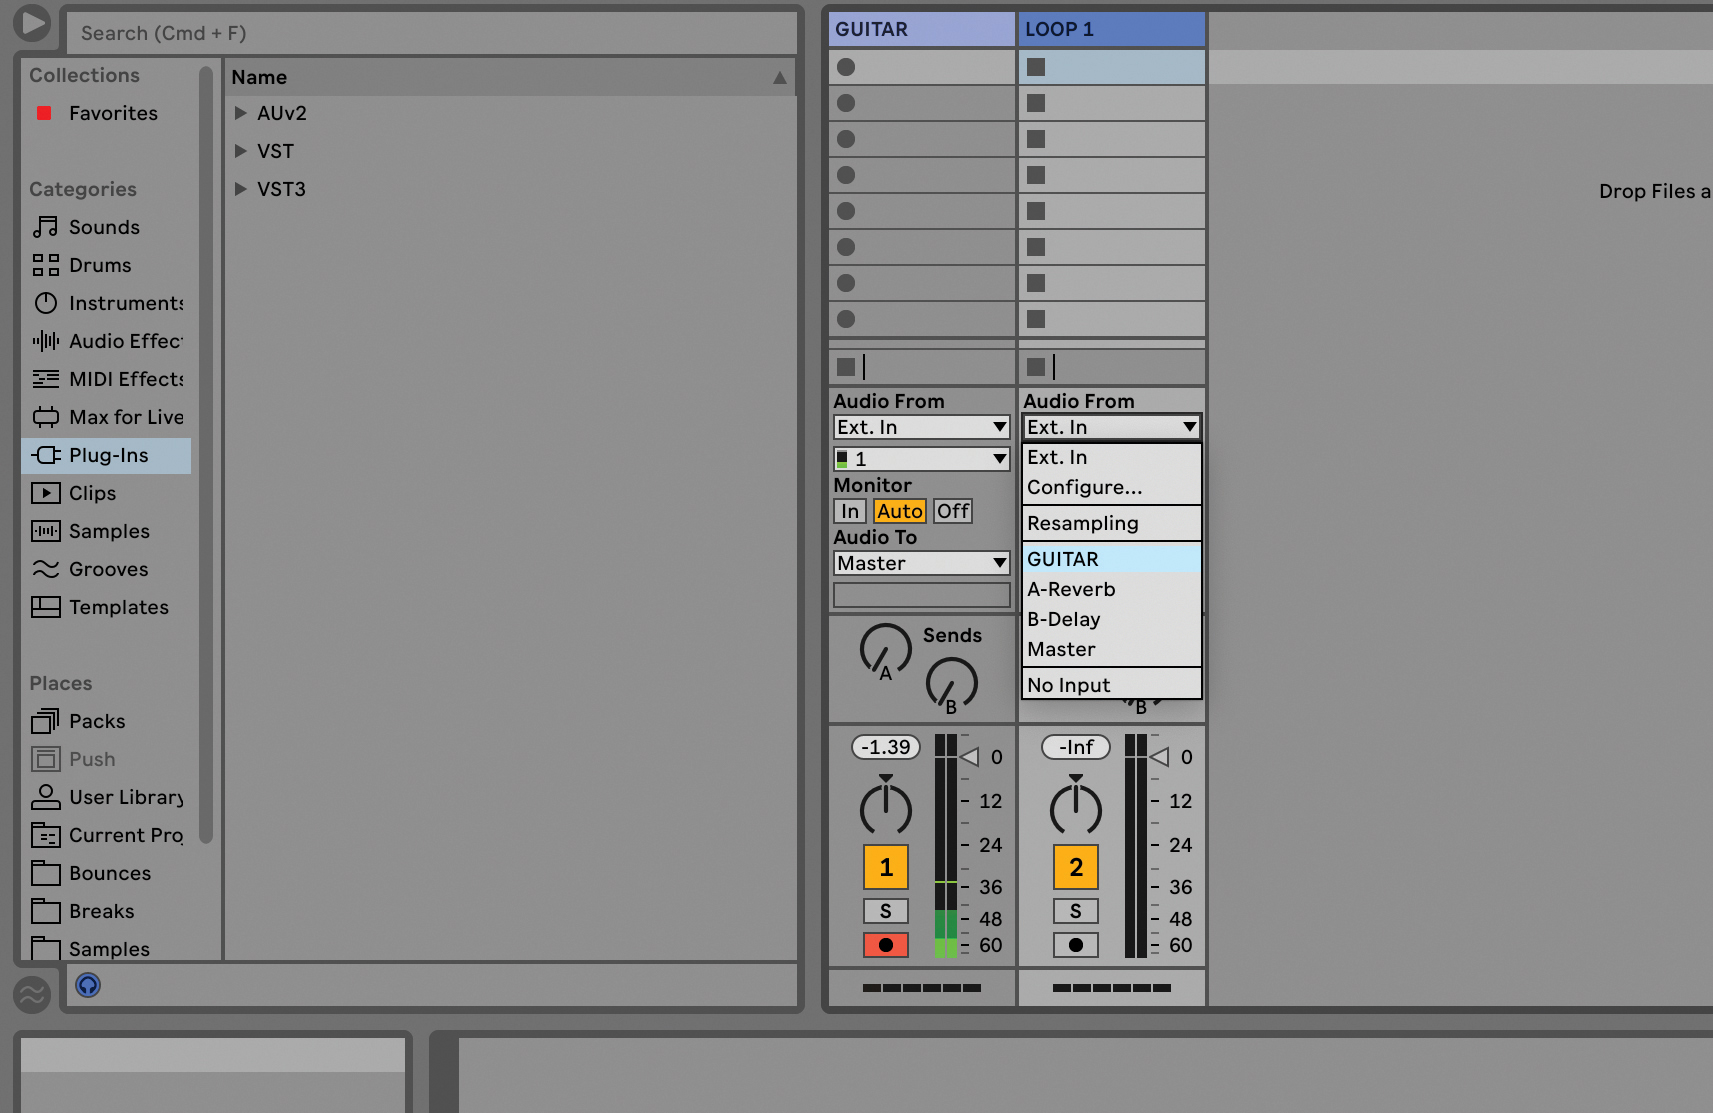
The idea is that we are going to send audio from the first track into further audio tracks that we set up – as many as we want to loop. So create another audio track and select the first track you created as its input, in our case ‘GUITAR’.
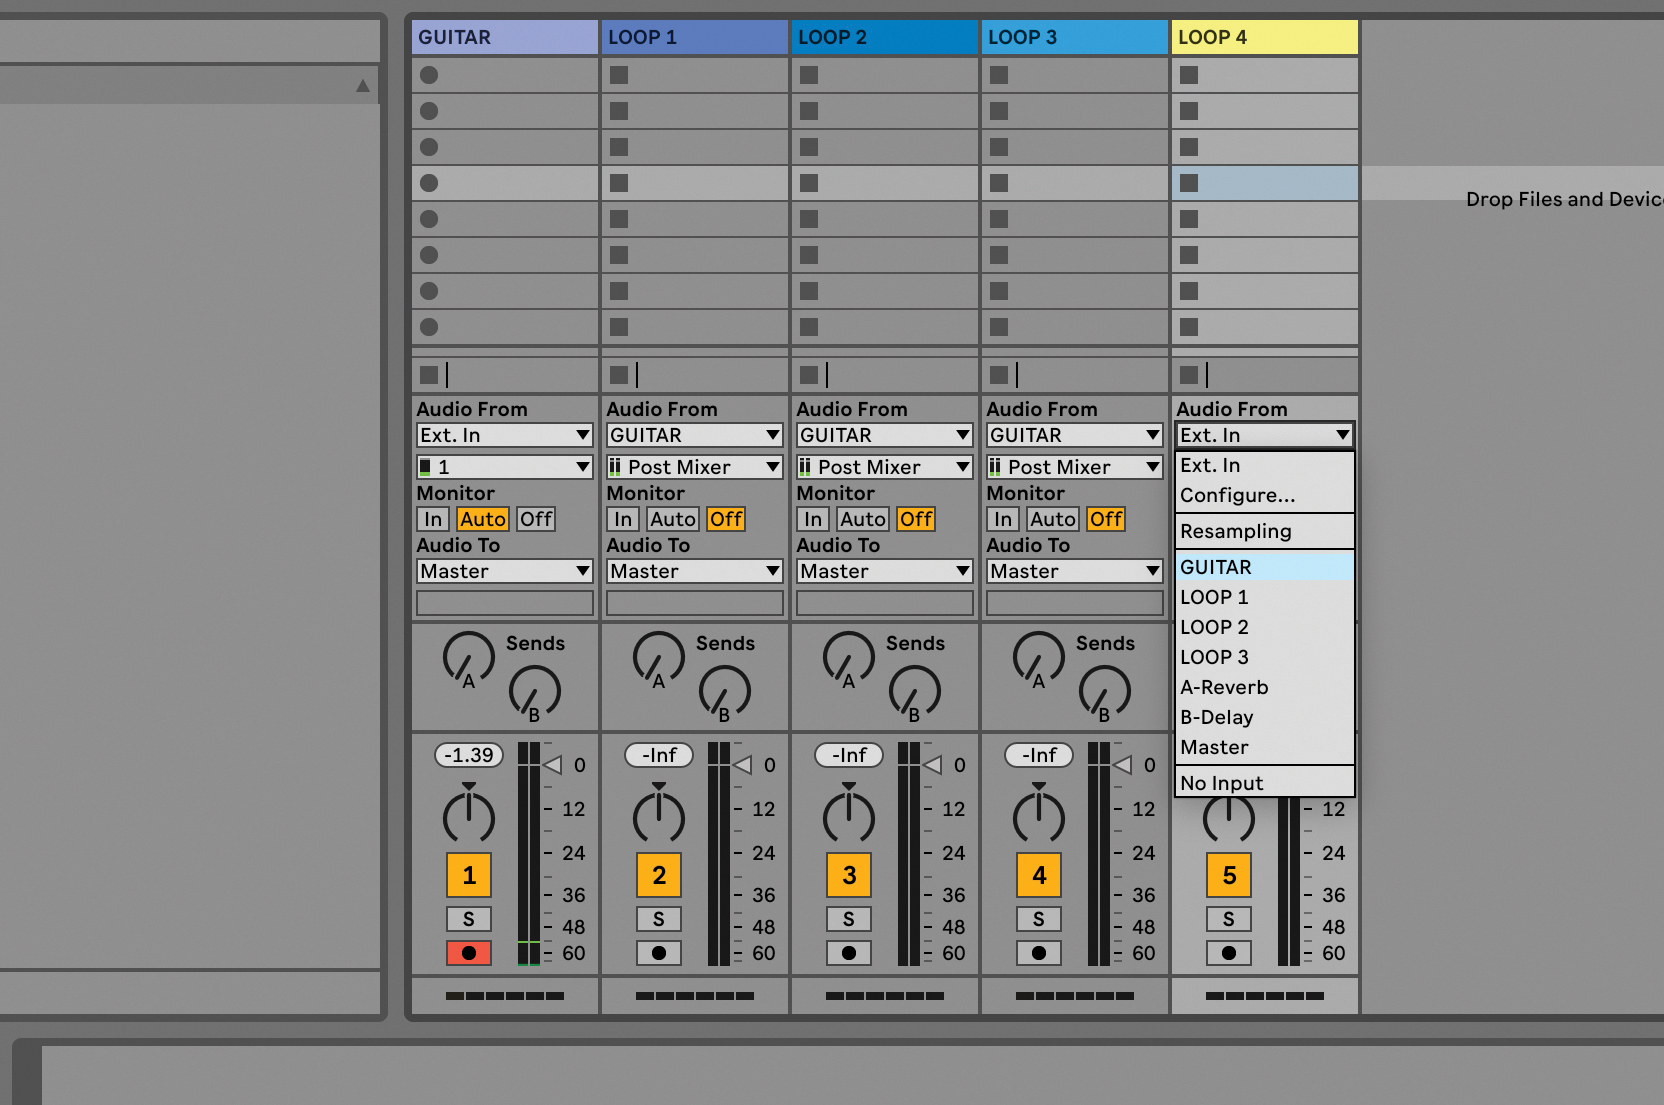
Keep creating as many audio tracks in this way as you’ll want to loop, always selecting the first main channel featuring the instrument you are looping as their input source.
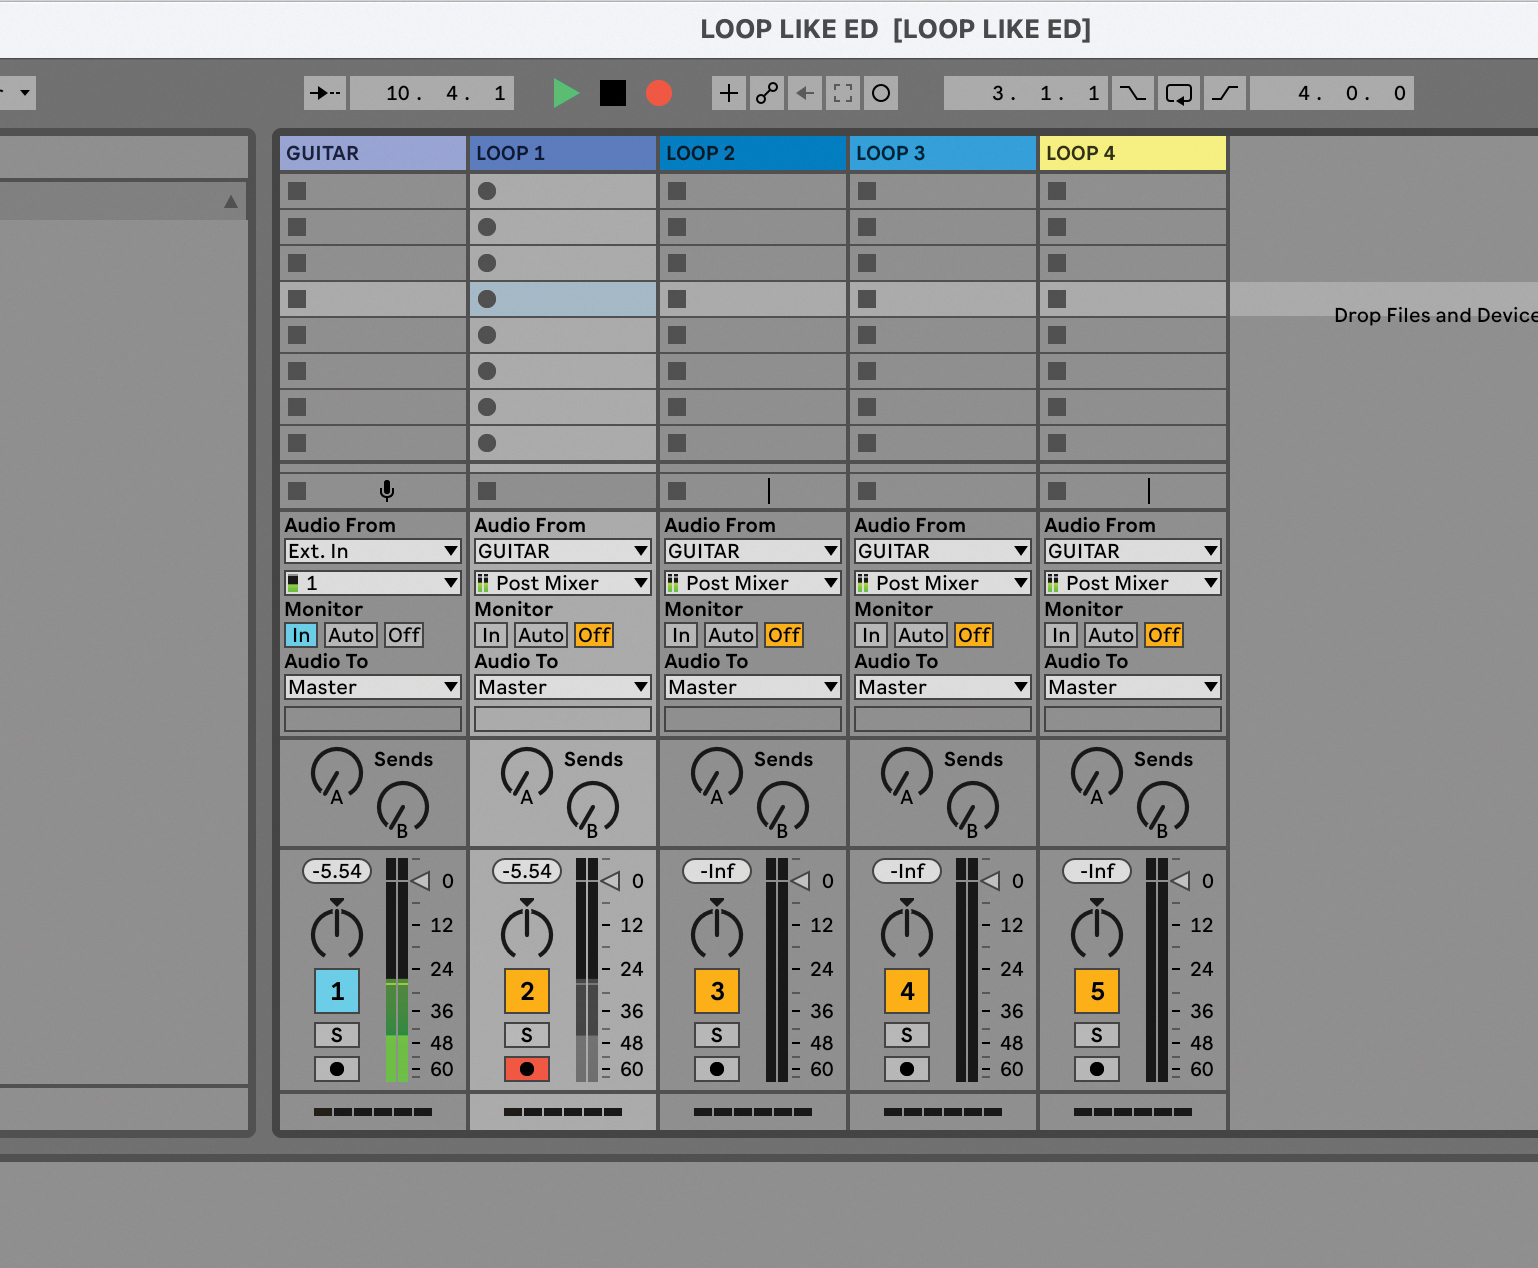
Make sure only the source channel is sending sound to your main monitors as this is the only one you want to hear for now. So in this case we have selected Monitor Off for all of our ‘looping’ channels.
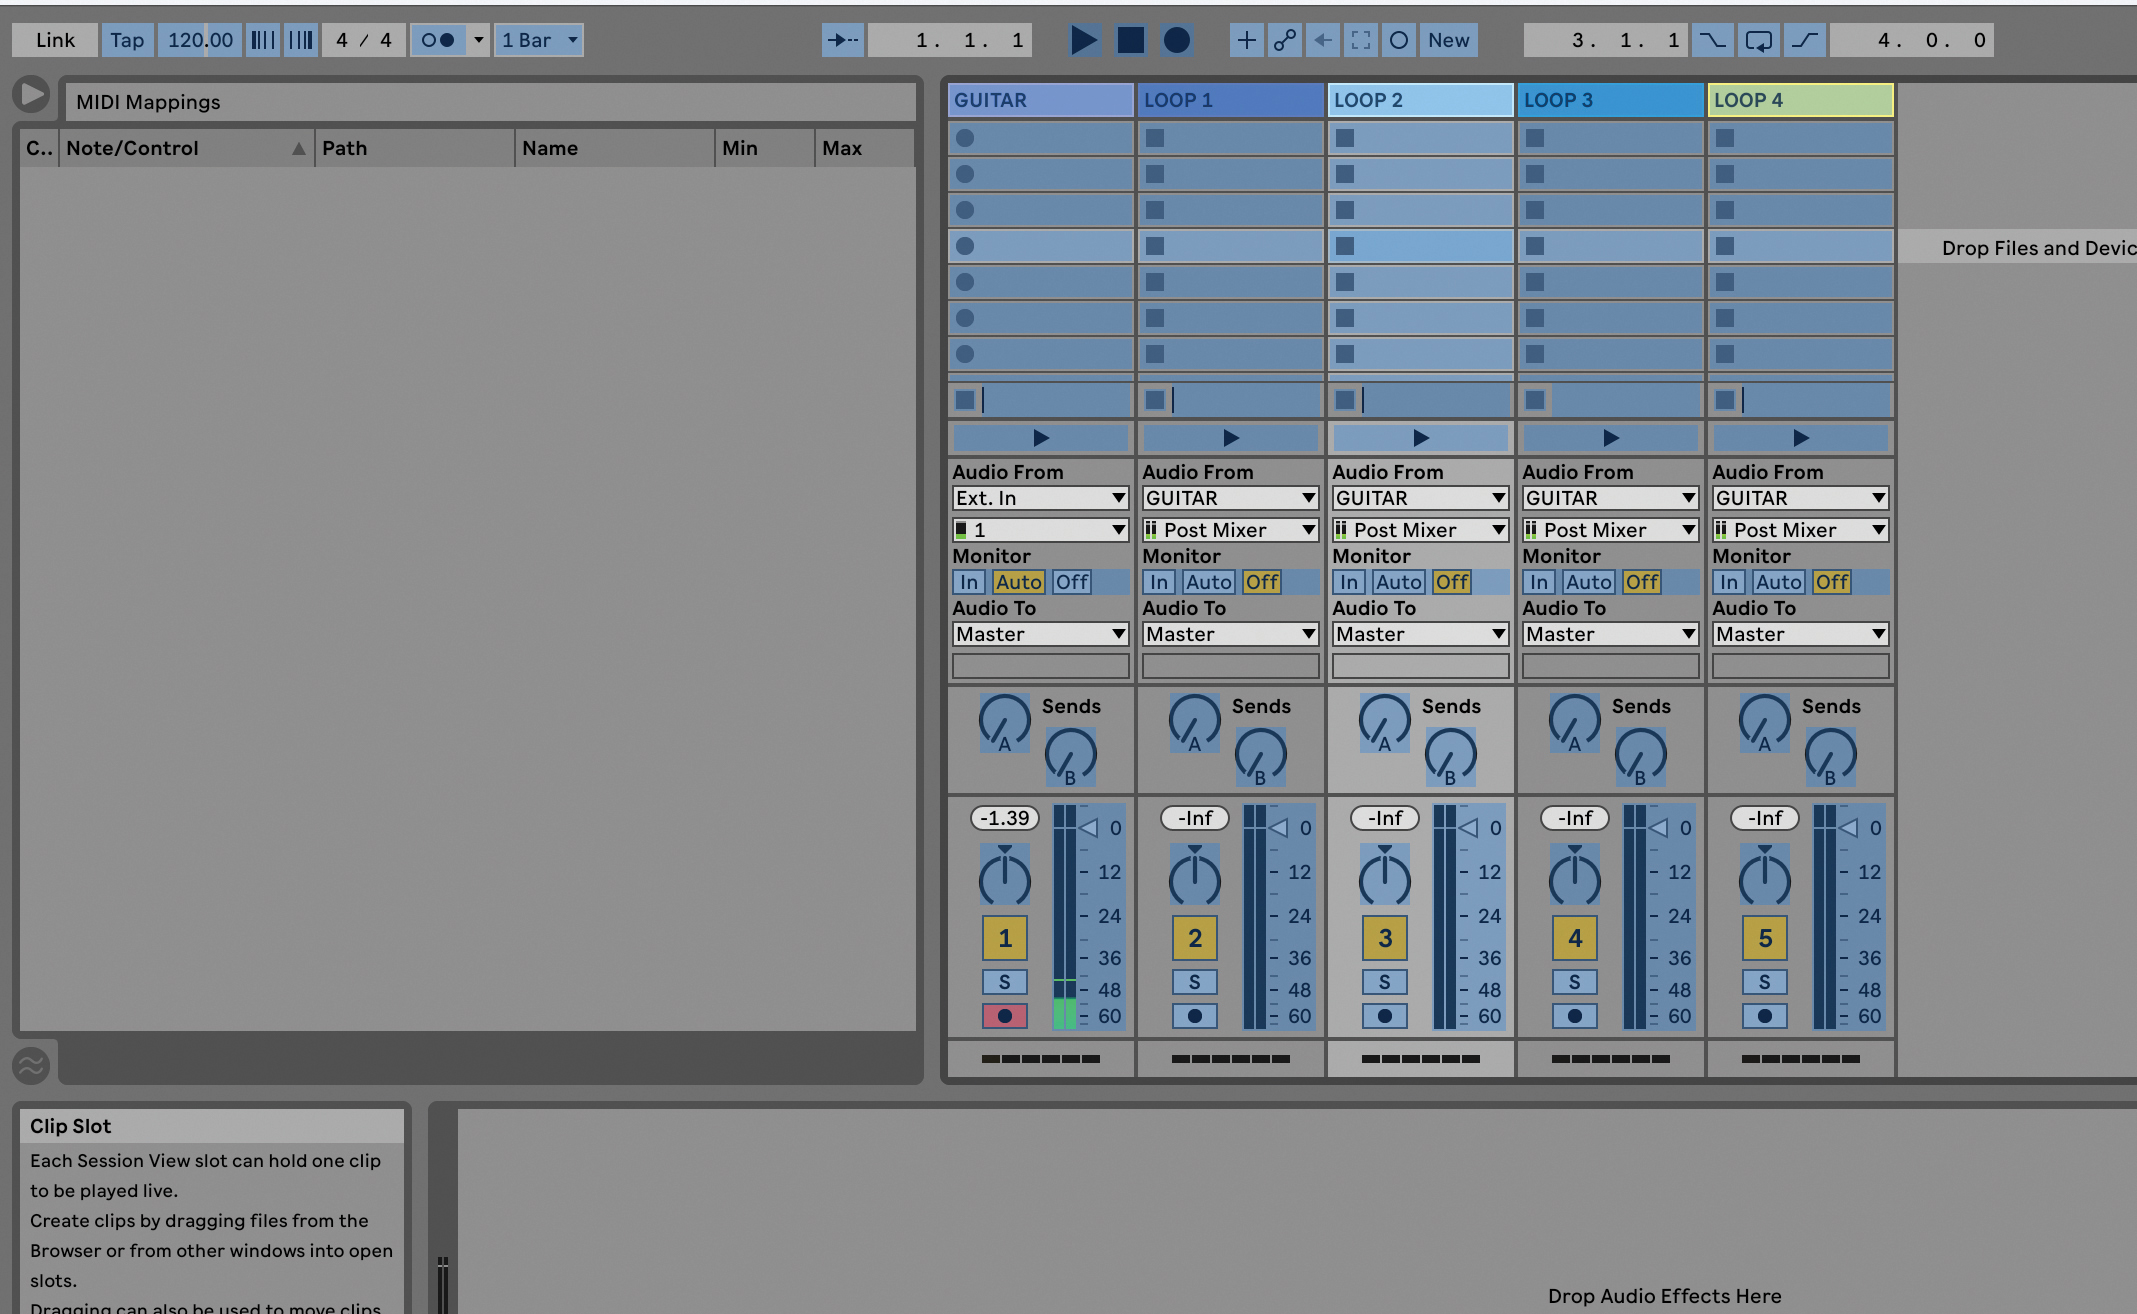
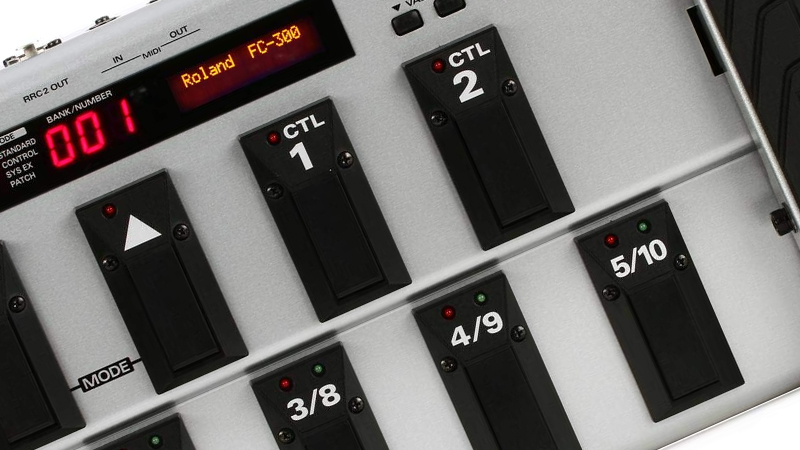
You will have to manually arm each track to record and move from left to right to build your loops. Your DAW should have a way of setting a MIDI control to do this, so you could trigger it with a footswitch or a key/button from a controller. There’s more detail on this in the box over the page.
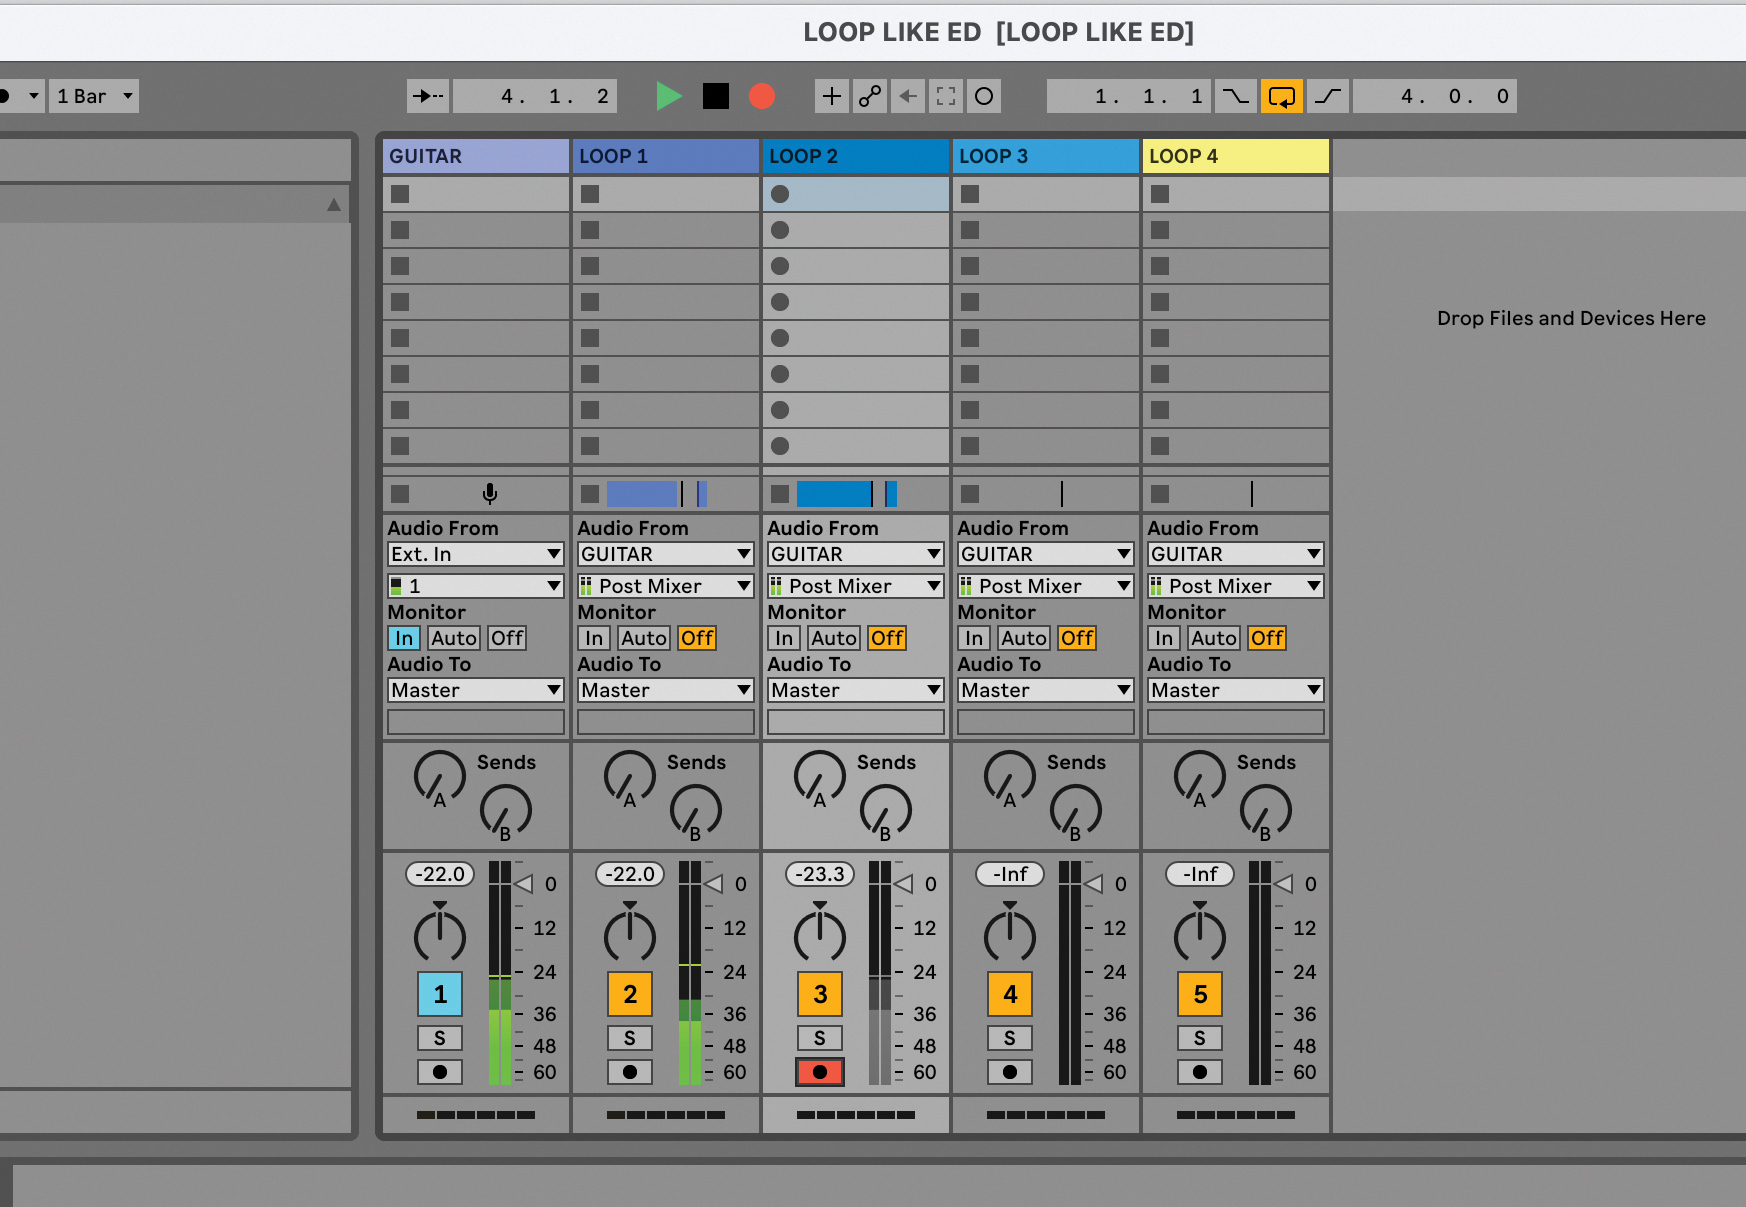
Now you are ready to record, so play your guitar and the first run-through will be recorded into the Loop 1 channel. Then subsequent loops will be recorded into the next loop channel as you step through with your footswitch/key.
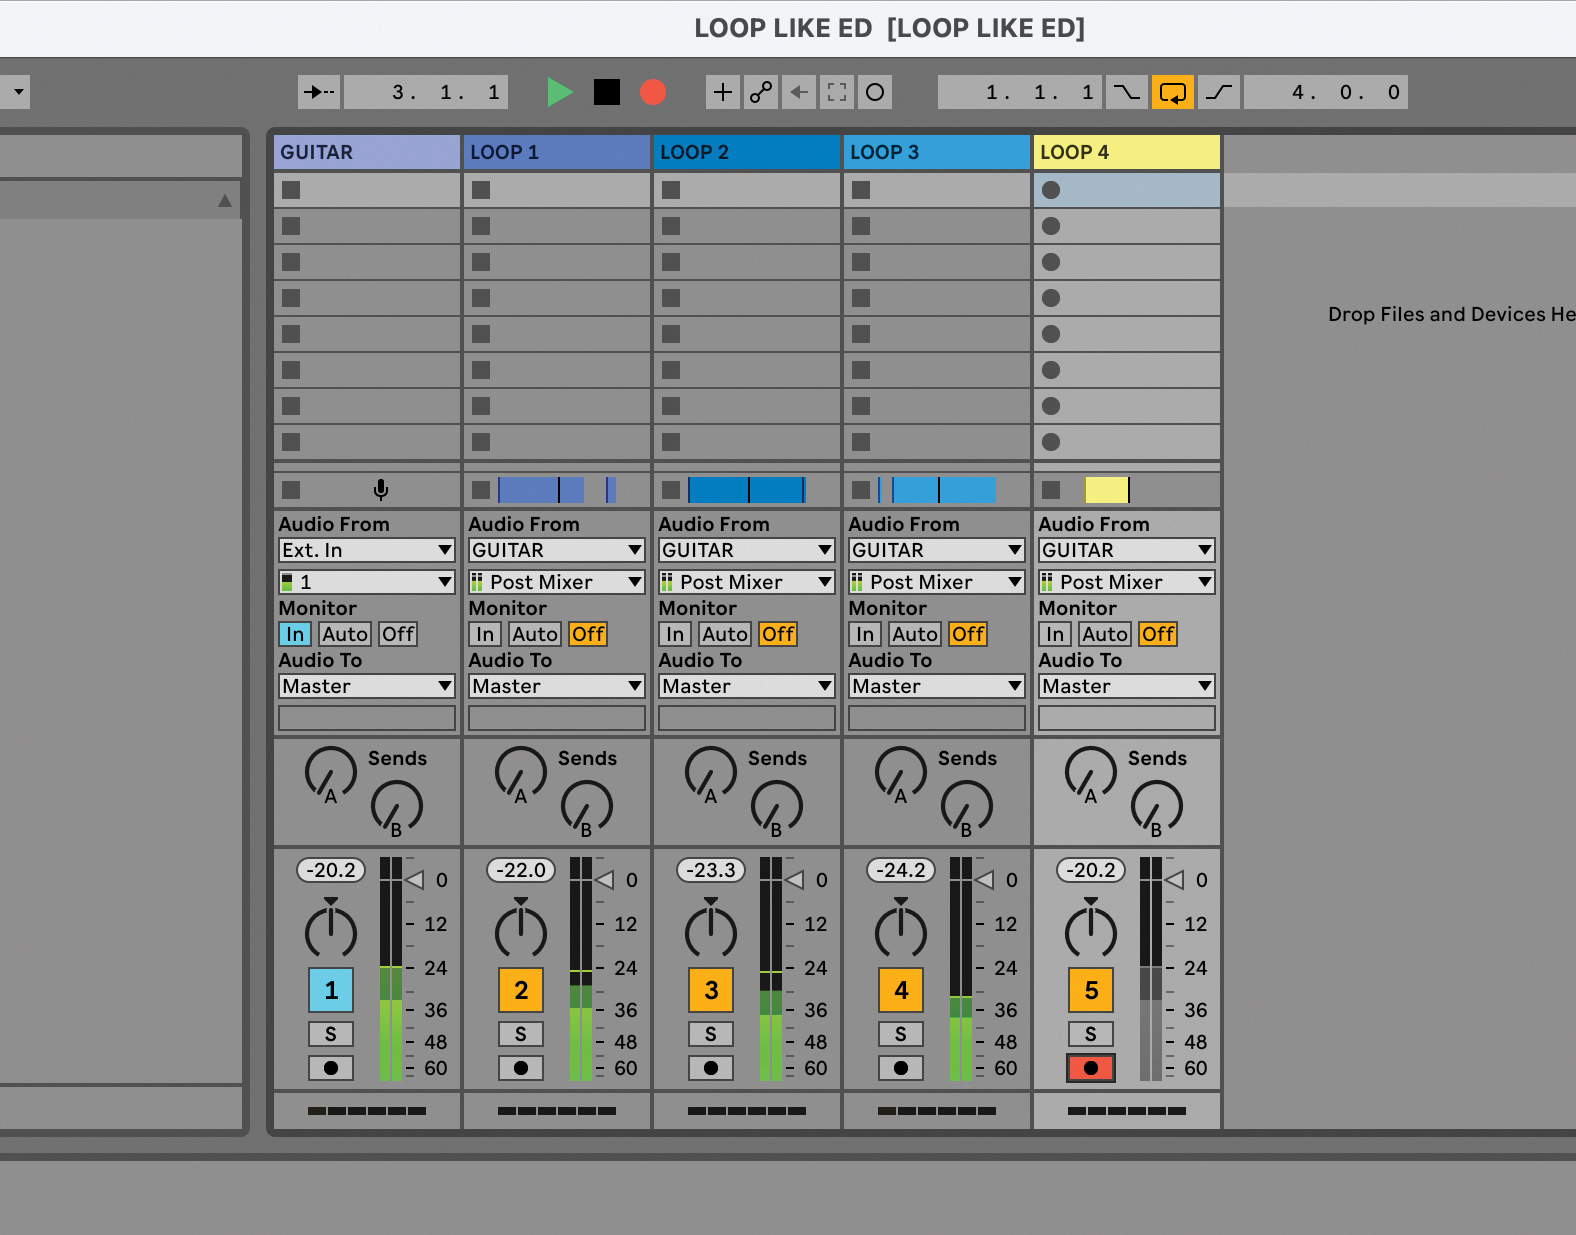
As you step through each recording, the previous one should carry on playing through as your next one is recorded. Note we said ‘should’. When looping you have to be careful that the first loop isn’t recorded over by the second. In some DAWs you might have to disable recording on the first track – another manual trigger MIDI setup.
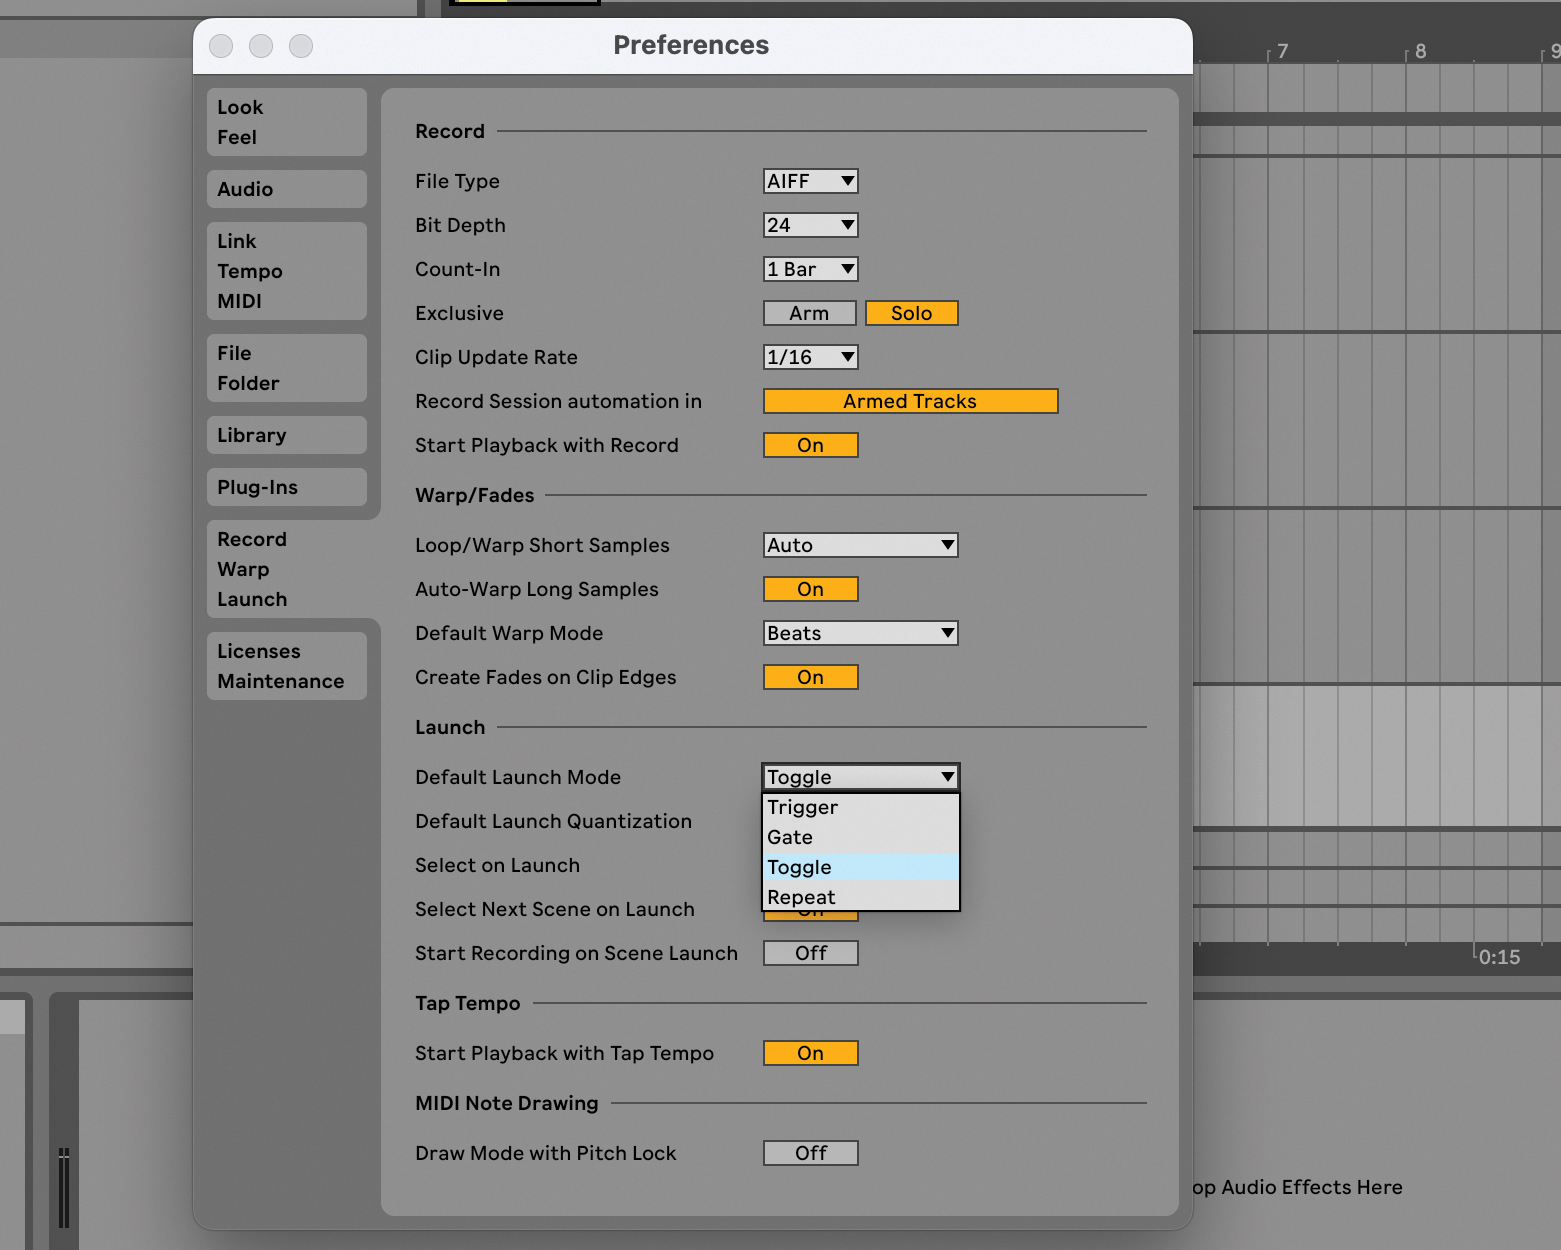
In Live we found we had to set up the recording preferences slightly differently from standard, as each track was initially being overwritten as we stepped through. Set recording preferences up as shown if this is happening to you.
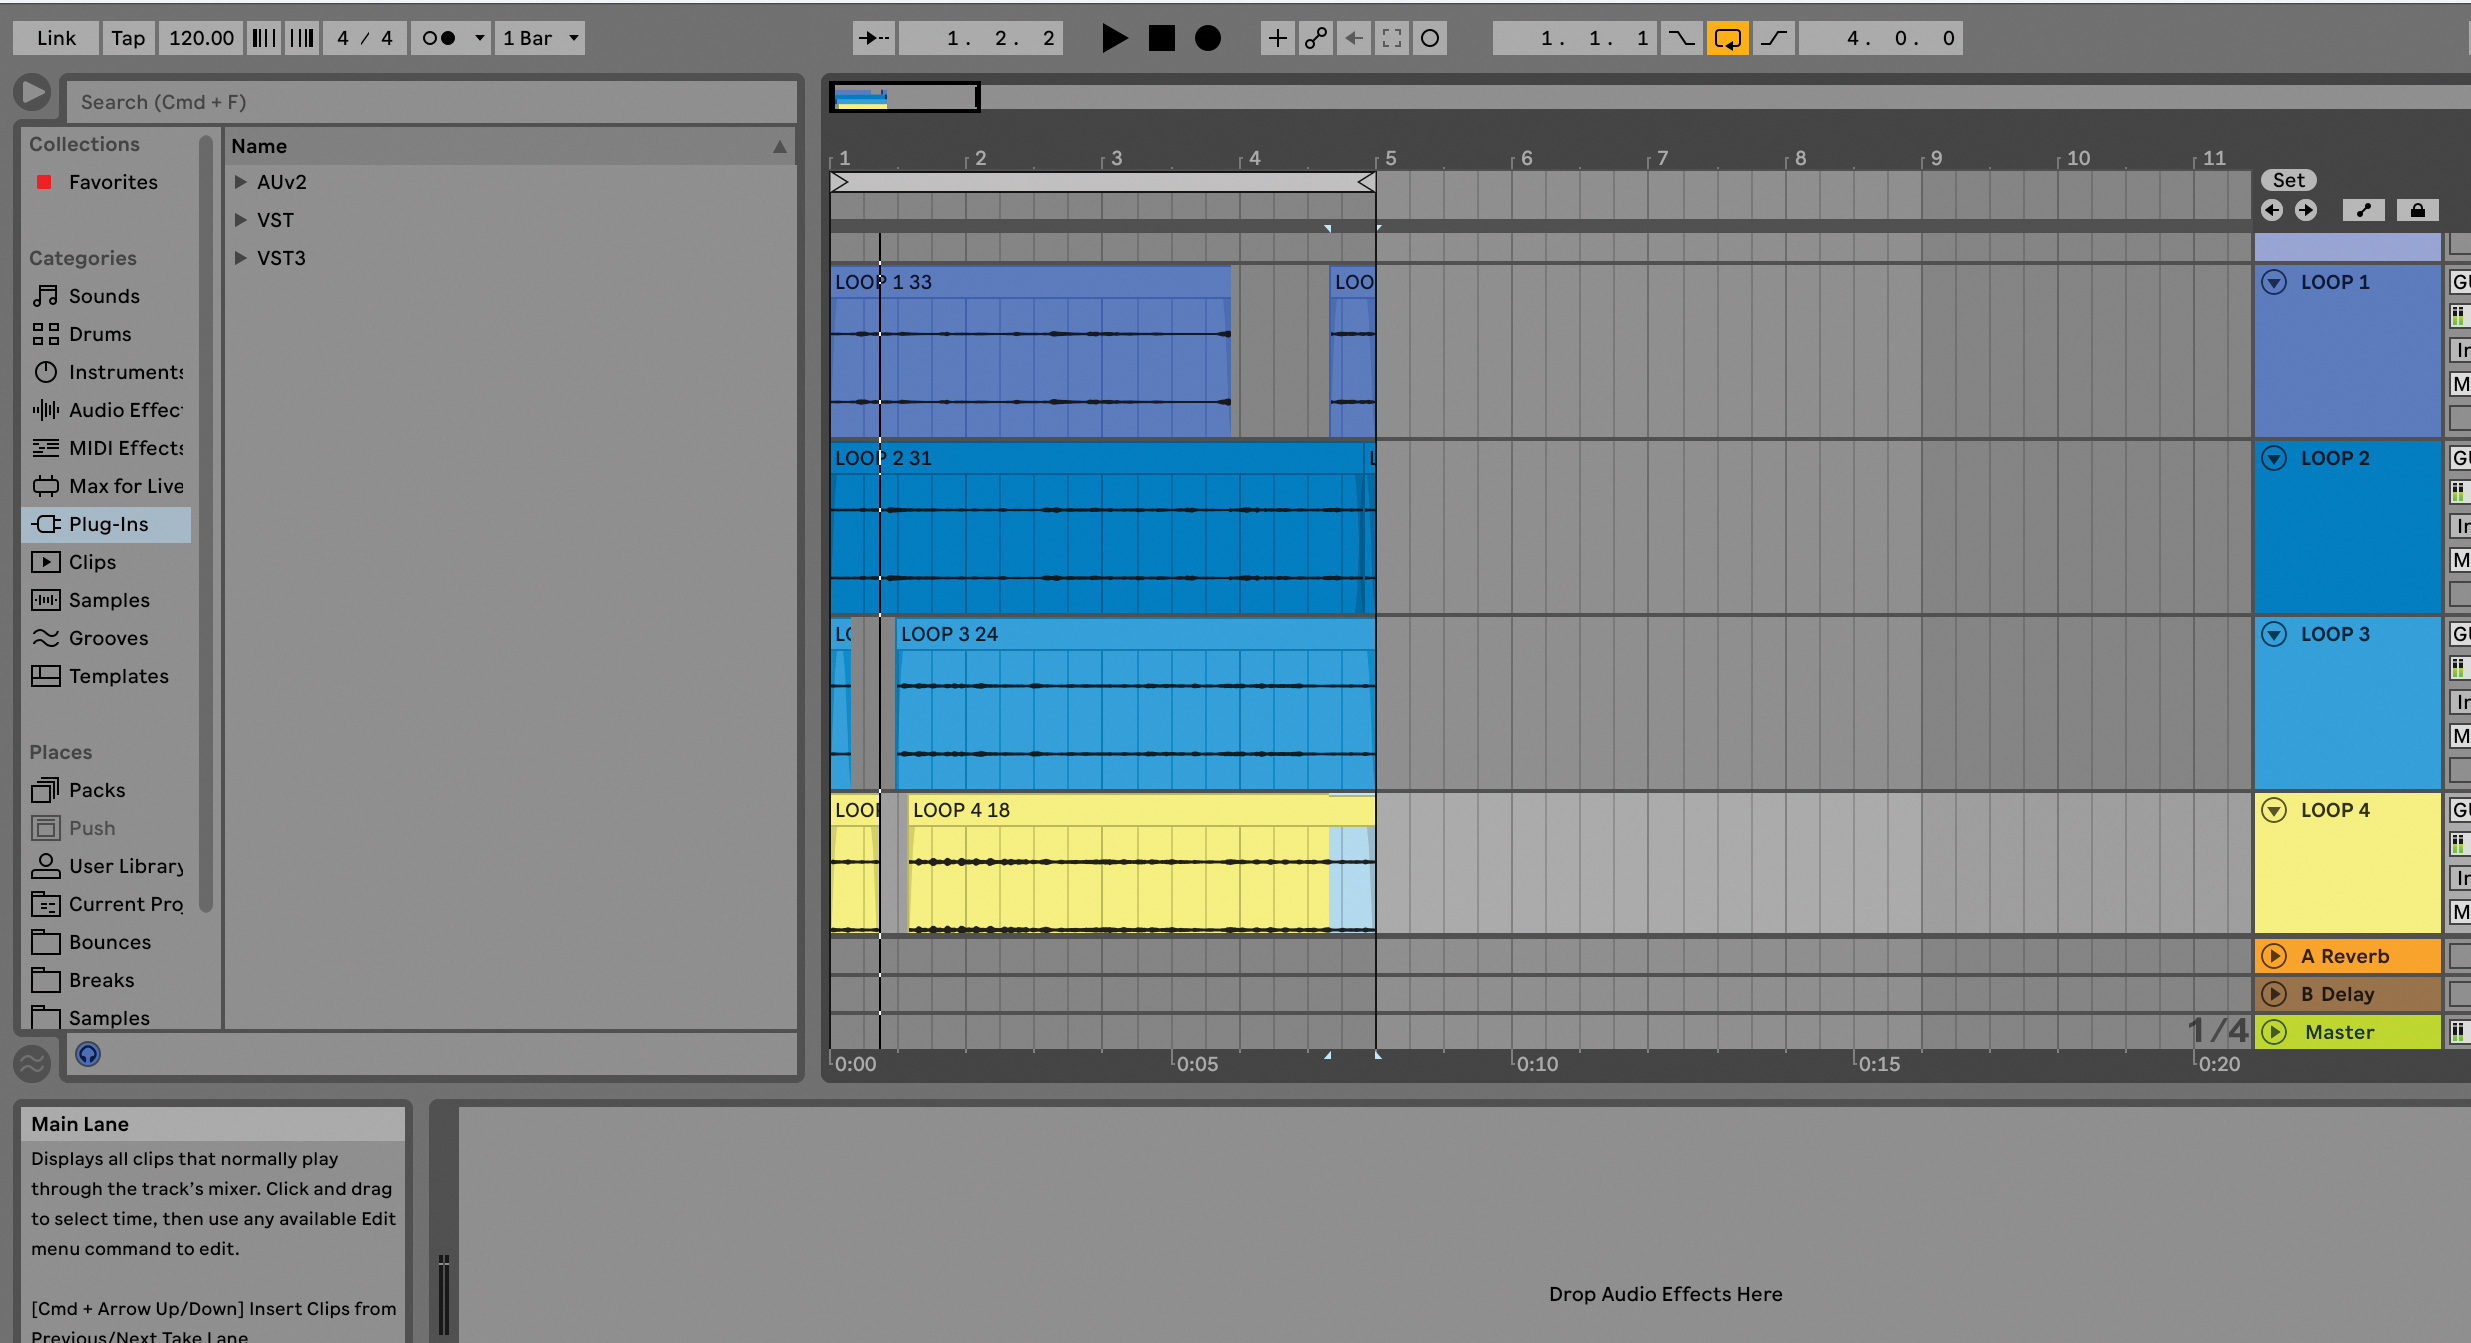
The great thing about this very basic looping setup is that the audio tracks are recorded onto separate tracks so you can then either keep them looping, mix the loops up, edit each one individually, or use them in further and different projects.
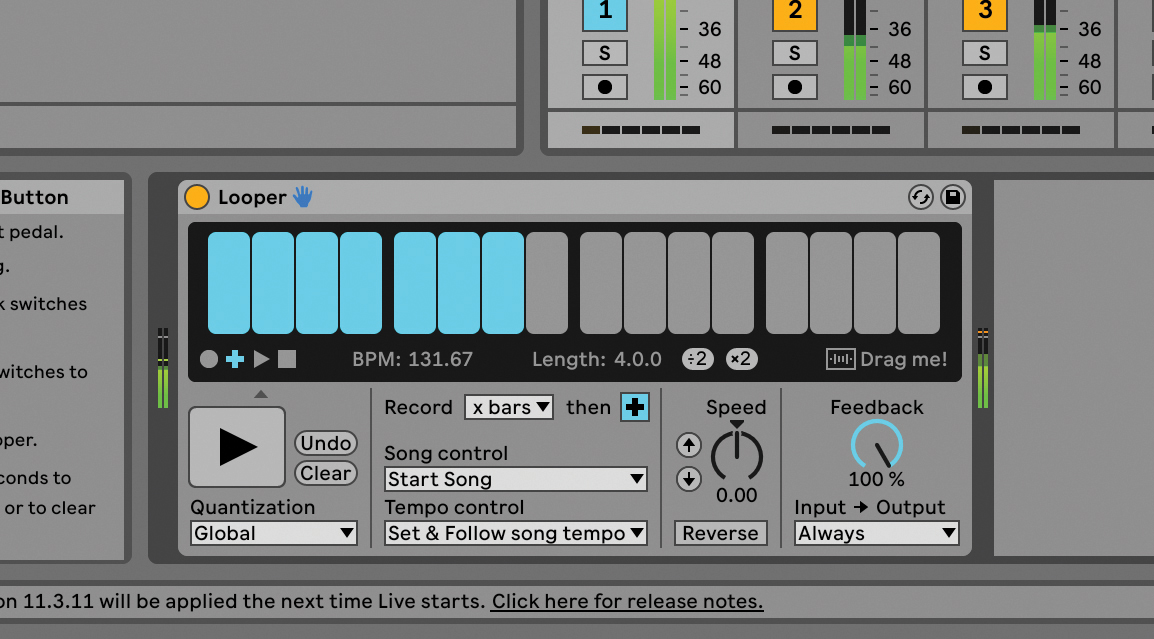
Many DAWs have loopers built in which can make some aspects of looping easier, but might not allow our easy creation of individual looped tracks. Live has its own audio effect: Looper. Simply click the large button to start recording, again to overdub and a third time to just have it playing (for maybe when you just want to practise).

Further presses of the button alternate between playing and overdubbing of loops. Looper also features some other neat effects like reversing the previous loop.
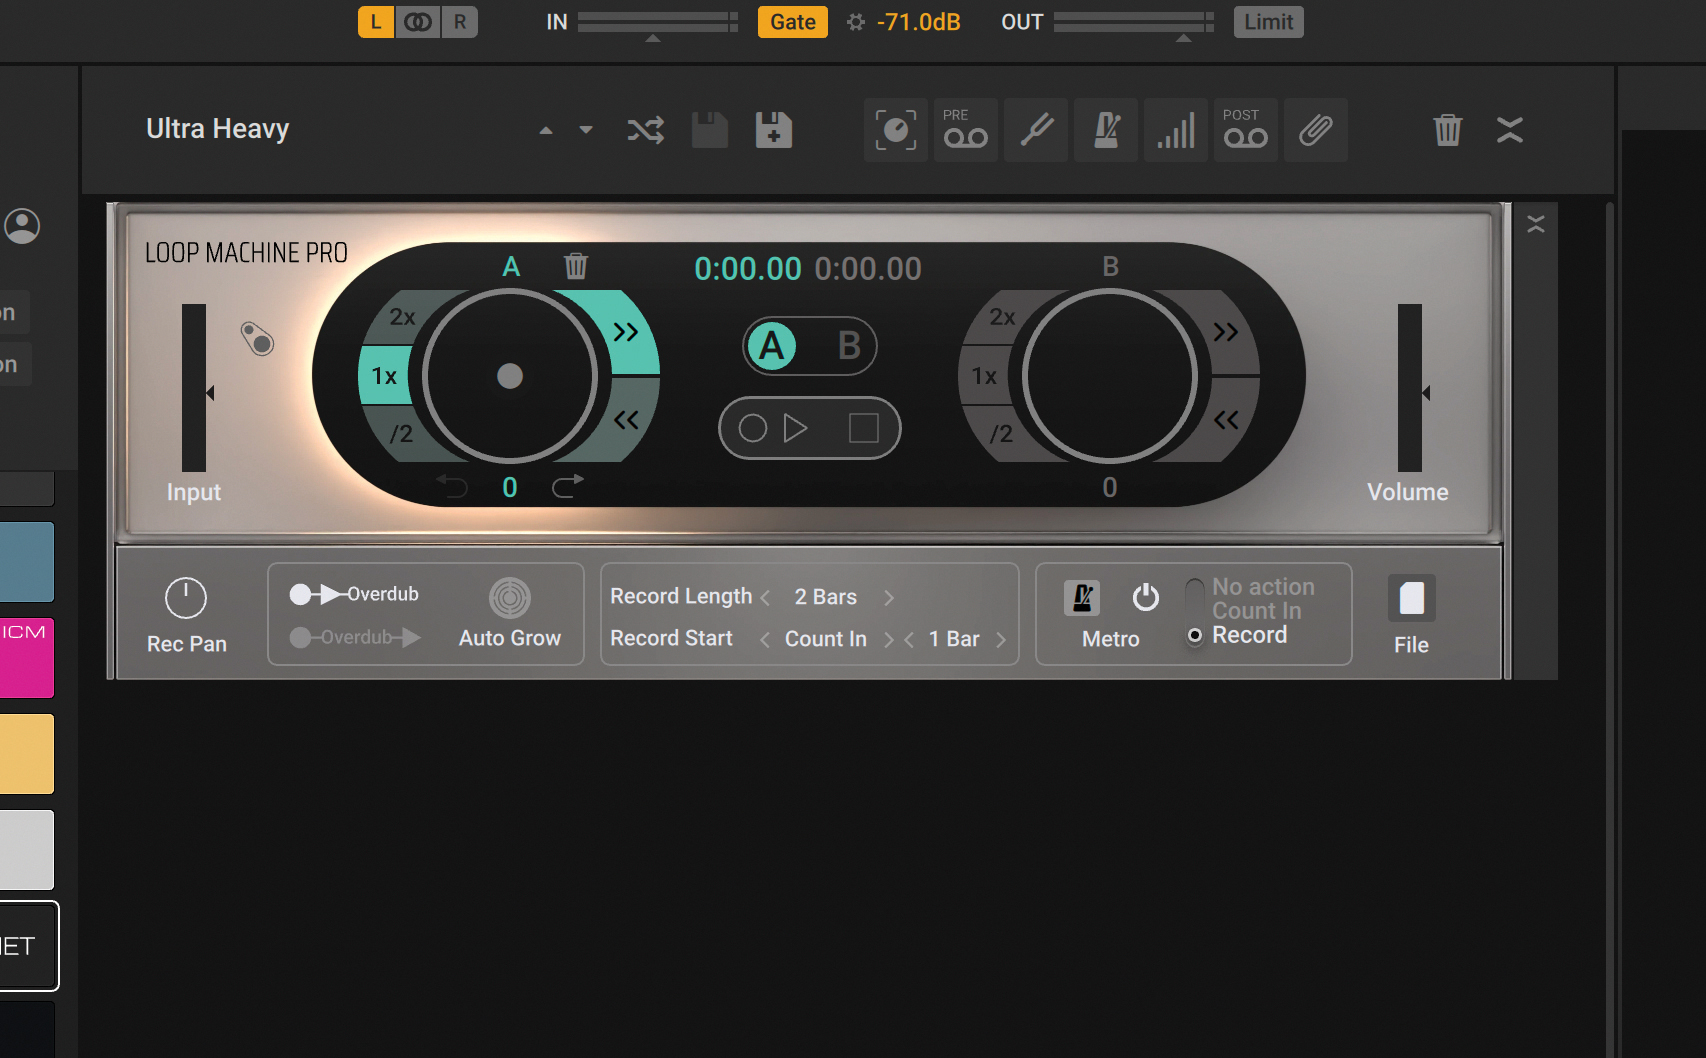
Other third-party loopers are available and one of the most recent we have looked at was in Native Instruments’ Guitar Rig Pro 7. Loop Machine Pro is very easy to use, has multiple loop speed options and also features two looper tracks (A and B).
Pro tip
One of the aspects of using a dedicated software looper like Ableton’s Looper is that you will need to click something – in this case the large button on the left – to get it to start recording (or stop). Using a mouse is OK if you are a singer – and have your hands free – but if you are a guitarist then you don’t really want to be reaching for a mouse every time.
How to incorporate foot controllers into a live electronic set
This is where a foot pedal or external MIDI controller comes in handy. Simply set up your MIDI learn option in your DAW. In Ableton Live, this is done with the ‘MIDI’ icon which turns all assignable controls blue, including that big one on Looper. Then play your connected MIDI controller or press your footswitch and it will be assigned for hands-free looping.
This might, you think, negate the point of doing looping in software in the first place – why not just use a Boss looper? But actually MIDI footswitches and controllers are very cheap – around £10 for a single switch, £30 for four switches. The extra switches could also be assigned to other looping functions – in our tutorial we needed to arm audio tracks, for example – so could be a worthy investment (and will look better than a mouse if you are looping live on stage!).
Recommended watching
1. Ed Sheeran - Shivers (Live)
Ed has had to explain his looping on stage as some question how he does it and assume it is done with backing tracks. Here he explains his Loop Station before playing Shivers.
2. Elise Trouw - How To Get What You Want
This is a brilliant example of how to do looping. Elise uses MIDI notes to trigger and record loops and it is incredible to watch her construct this tune.
Andy has been writing about music production and technology for 30 years having started out on Music Technology magazine back in 1992. He has edited the magazines Future Music, Keyboard Review, MusicTech and Computer Music, which he helped launch back in 1998. He owns way too many synthesizers.
