How to make an infinite riffing synth patch
We show you how to create a patch to run the duration of your track, and possibly even further!
Want all the hottest music and gear news, reviews, deals, features and more, direct to your inbox? Sign up here.
You are now subscribed
Your newsletter sign-up was successful
There was a time when music technology would only allow the sequencing of a few notes. A far cry from the DAWs of today, the limit of four, eight or even 16 notes (if you were lucky) was very much the norm.
As with all things creative, the level of technology was never an issue for creating great music. This note-based limitation gave rise to a number of tracks, beginning in the ’70s, where a short sequence of notes would be constructed, and run the duration of the track. This was debatably most notable throughout the ’80s; ask an artist like Howard Jones, and he will tell you about many a hit song that featured a synth riff repeating continuously.
This technique was by no means limited to the annals of history. While artists such as Vangelis were also using this technique, on tracks such as Chung Kuo, from his highly regarded China album, contemporary electronic artists have taken this concept to a new level, extending the note count to several bars at a time. In essence, the technique is the same, but the musical emphasis alters slightly, as the riff plays out over a longer period of time.
There are many electronic artists that subscribe to this, with Scandinavian act Röyksopp being particular devotees to this pursuit. But what use is a great riff without a great sound? This month, we create a patch with pure riff potential.
This tutorial uses the ZebraCM synth from the Computer Music Plugin Suite, a collection of free plugins that come bundled with every edition of Computer Music Magazine.
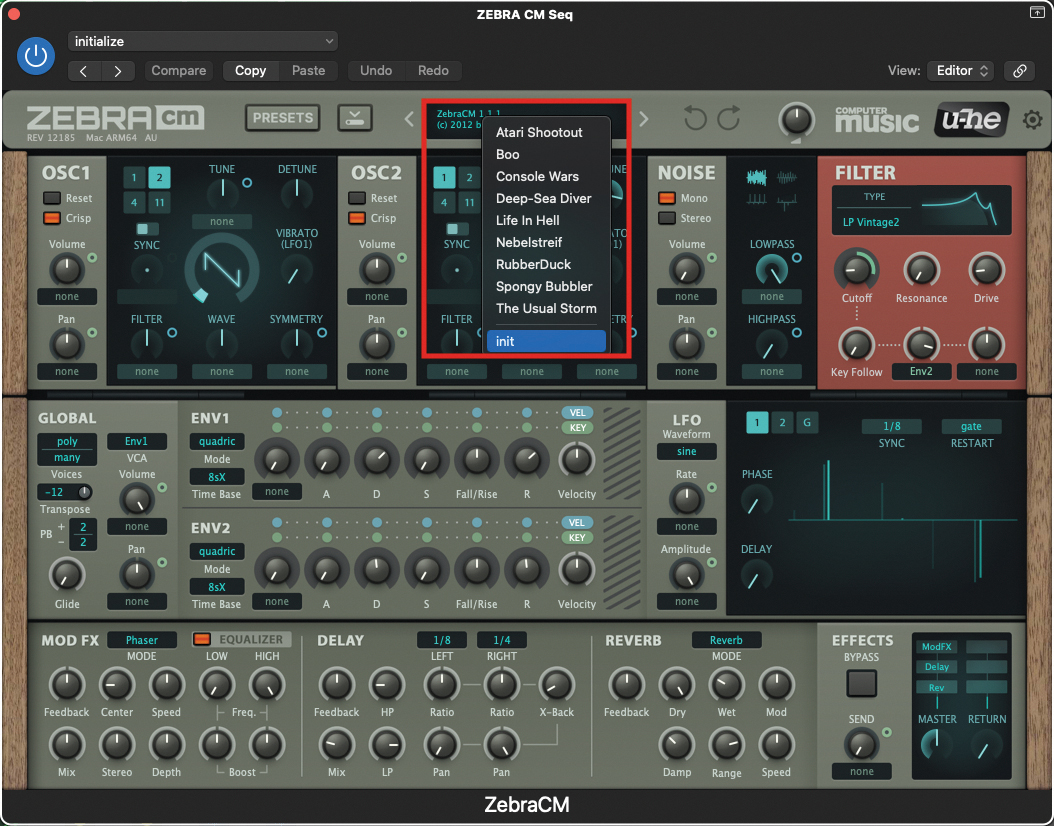
Begin by initialising a patch on the ZebraCM. Open up your DAW and load up the plugin. Once the plugin window is open, move to the central display at the top of the window, click to reveal the drop‑down menu, and select ‘init’ from the bottom. This will initialise the patch.
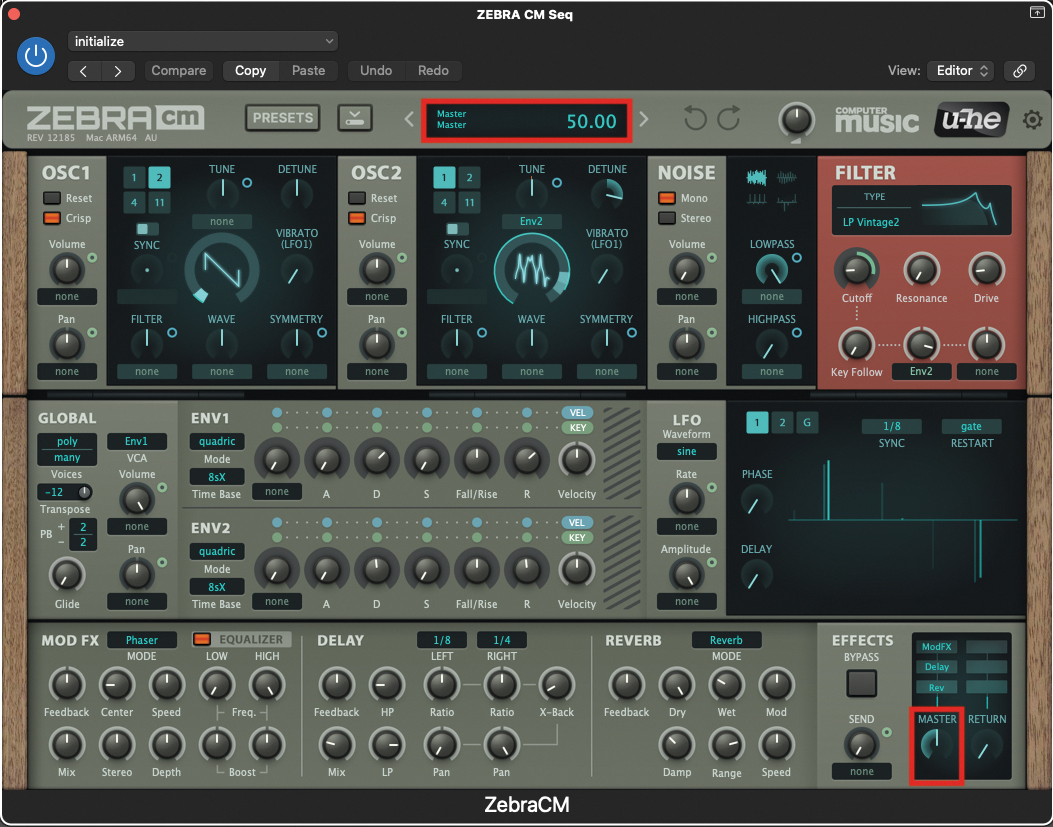
Before we get creative, it’s a good idea to reduce your master volume to a level of 50. Just as a reminder, every time you tweak a pot or setting on the plugin, you will see a value/numeric in the upper display. We’ll often reference this number, for accuracy.
Want all the hottest music and gear news, reviews, deals, features and more, direct to your inbox? Sign up here.
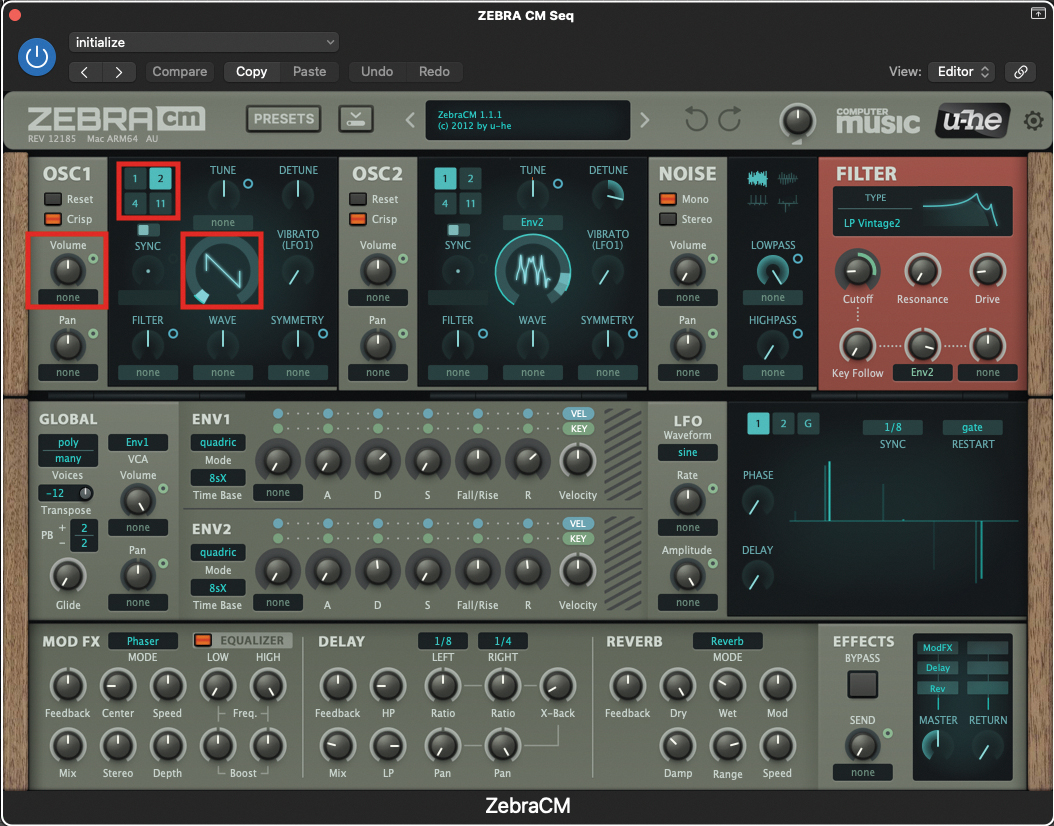
We begin our sound creation with OSC1; leave the waveform set to a Sawtooth, and the volume set to its default level of 100. To thicken the texture of the oscillator, press the turquoise 2, located on the upper left side of the OSC1 section. This will activate aliasing, creating a richly duplicated wave.
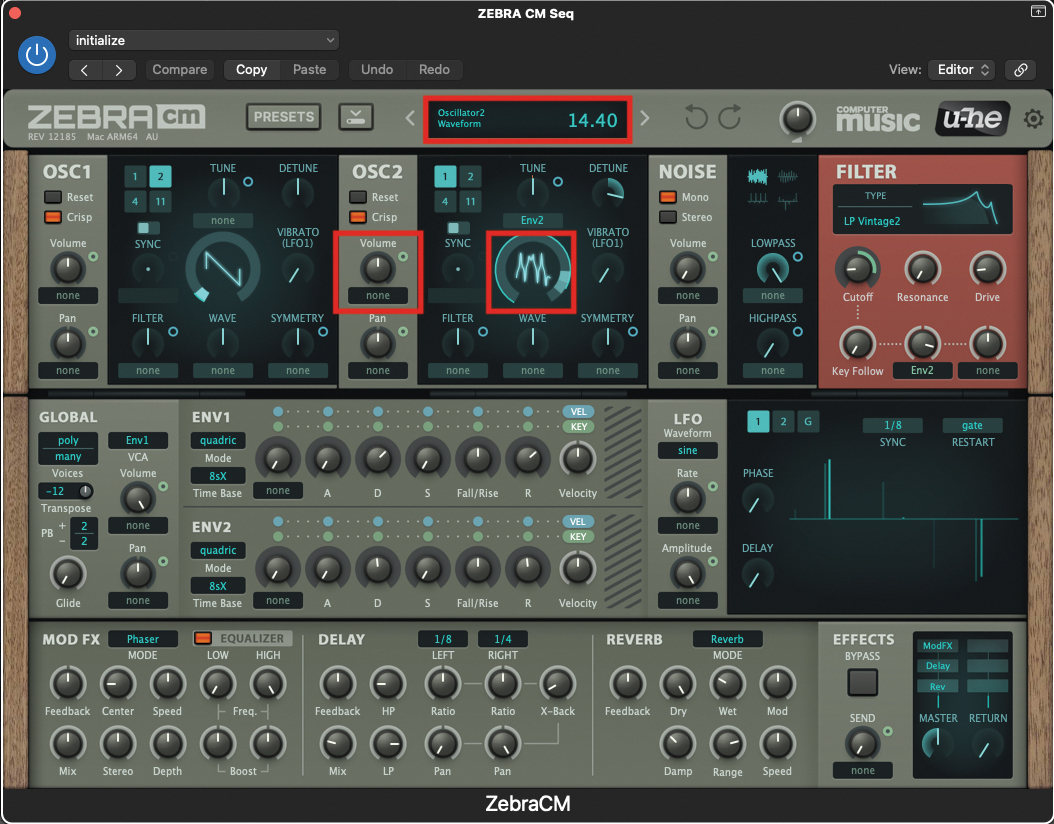
Moving across to OSC2, we are going to use a more complex wave to add some colour to our sound. Click and hold on the waveform, and drag up until you reach a value of 14.40. In order to hear this sound, we also need to increase the volume, to a matching level of 100, much like OSC1.
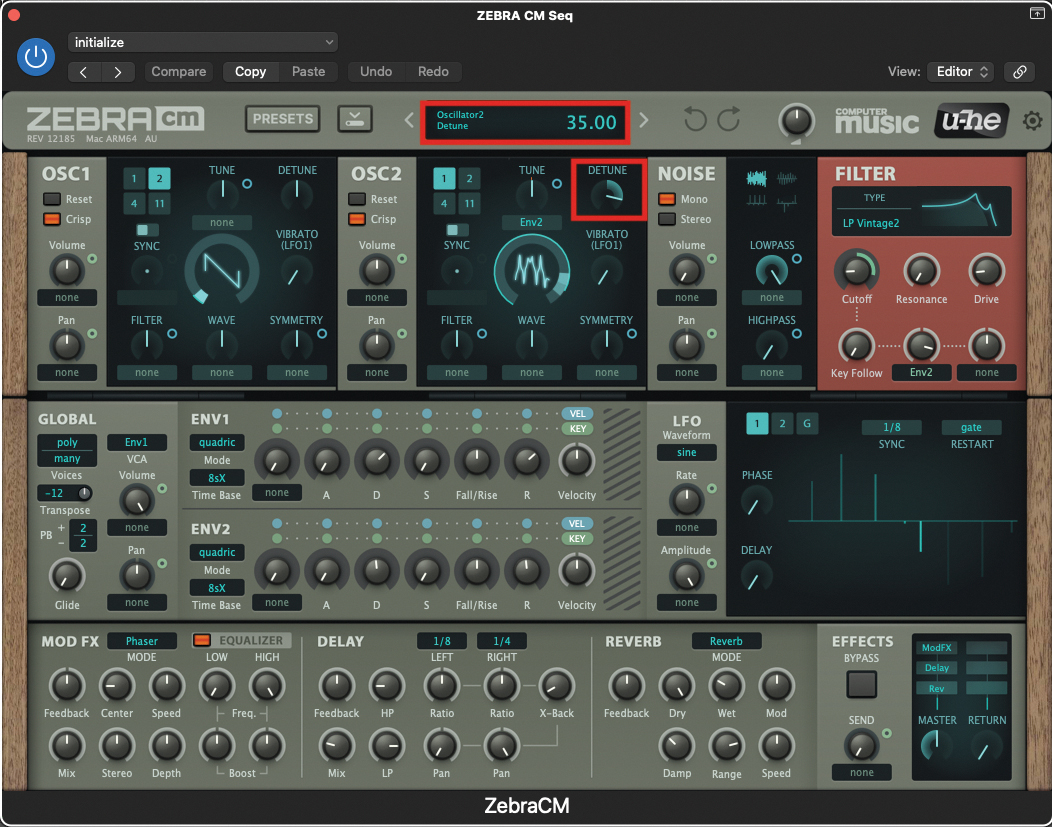
Next, we are going to work on the tuning of OSC2. Using the Detune pot, set this to a value of 35. It should create a very out of tune texture at this stage, but we will rectify this in the next step, by inducing some modulation.
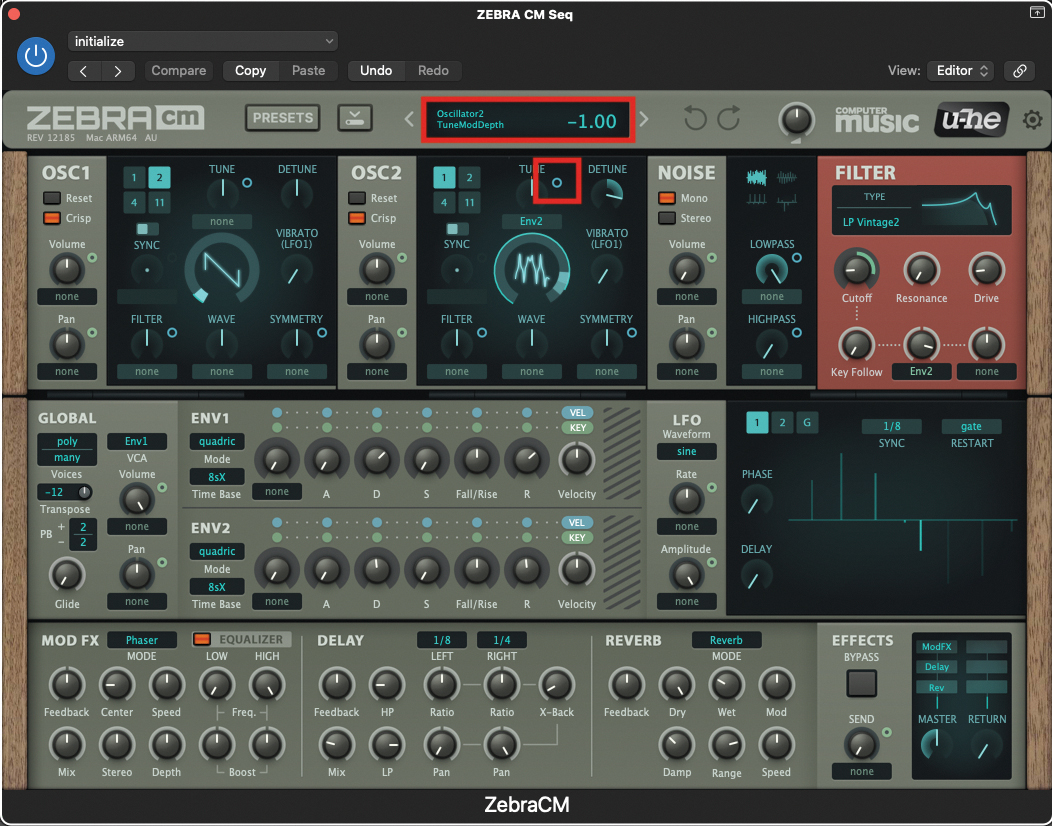
We are going to use ENV2 to modulate the pitch of OSC2. This modulation path is already assigned by default, but we do need to indicate a value. Locate the small turquoise circle, just to the right of the OSC2 Tune pot, and click, hold and drag downwards, to create a value of -1.
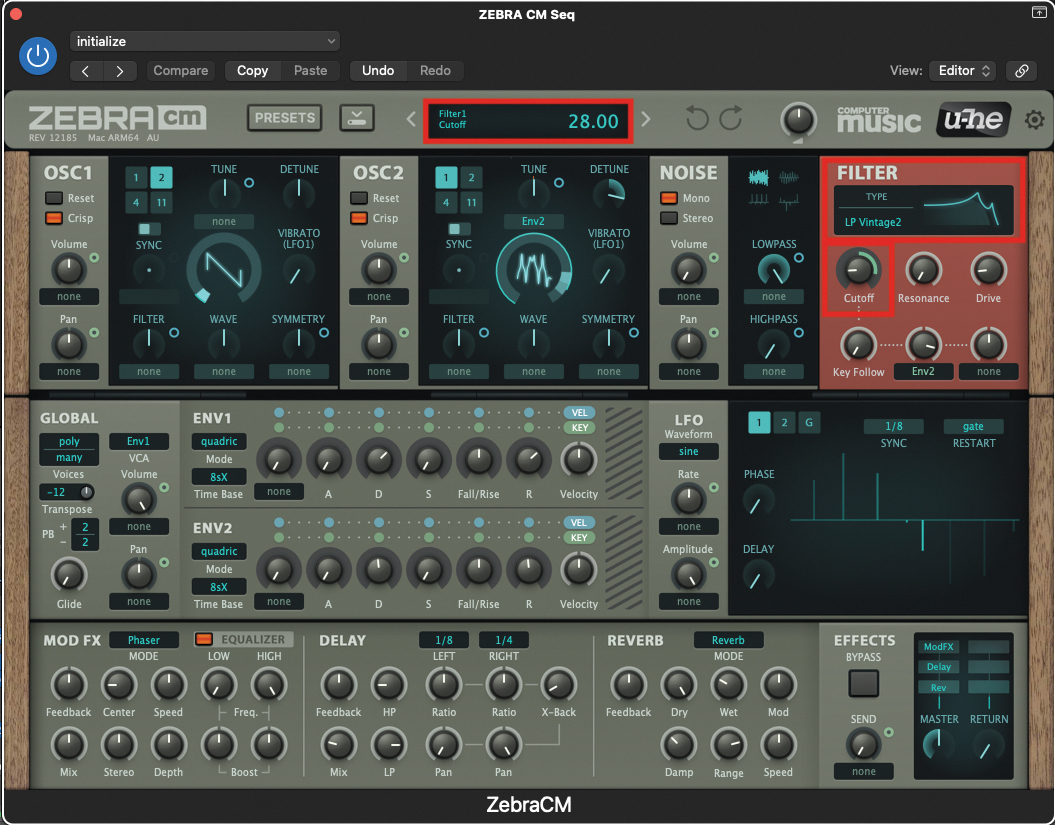
It’s now time to move to the filter section on the right hand side. Change the filter type to the one described as LP (Low Pass) Vintage 2. Once selected, set the Cutoff pot to a value of 28. This classic filter sound is perfect, with a degree of timbral colour.
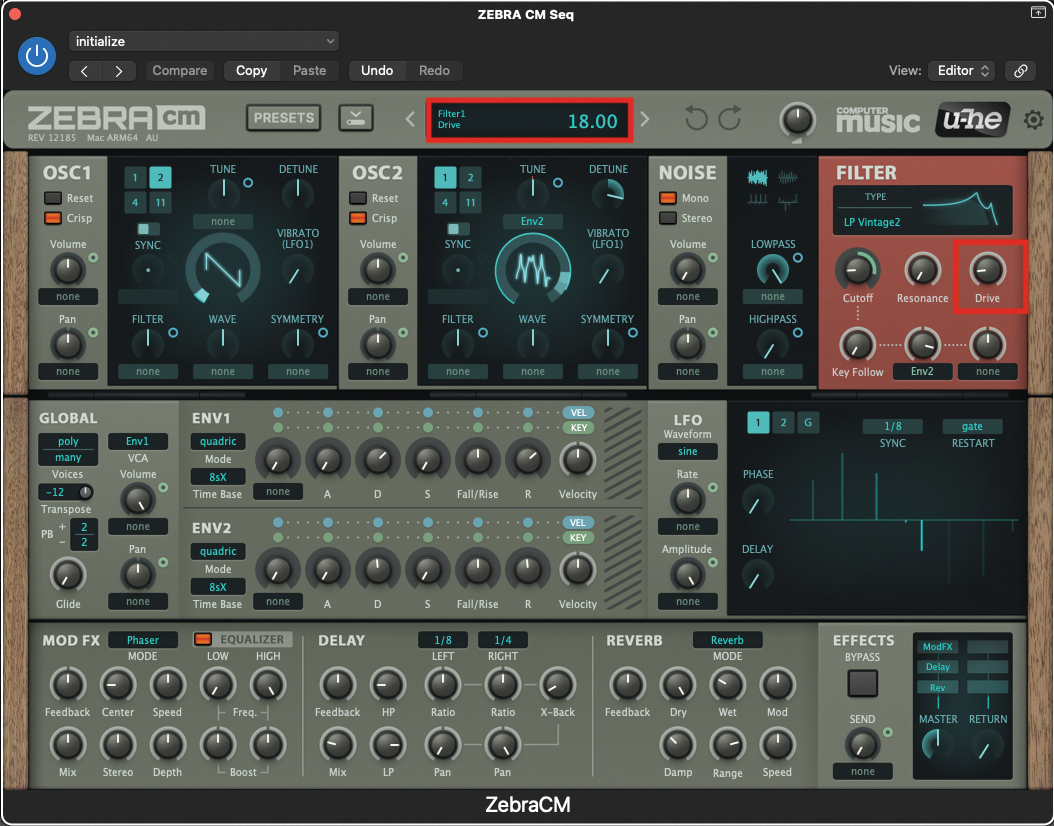
To add an even greater degree of colour to our patch, we can use the overdrive (located within the filter section) for distortion. Set the Drive pot to a value of 18. You can take this further for a more distorted signal colour.
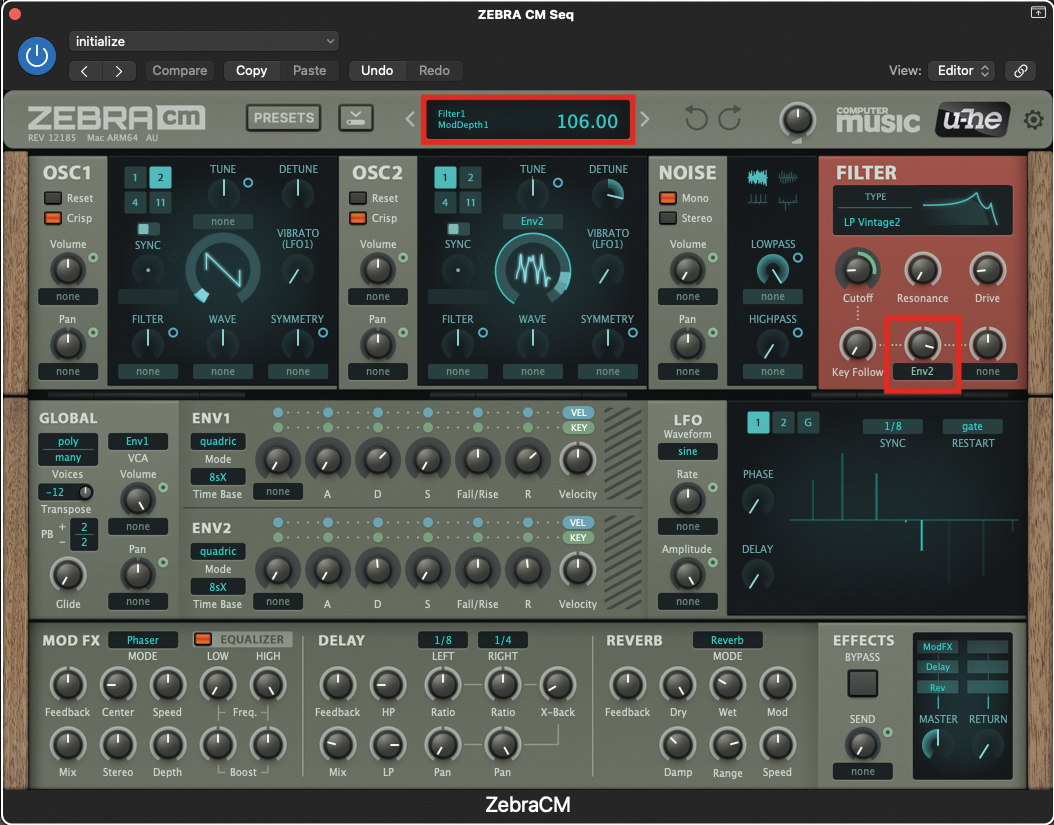
While ENV2 is controlling a small degree of pitch modulation on OSC2, we combine its use by also employing it to add some filter bite through cutoff modulation. Set the pre-assigned ENV2 pot, located within the filter section, to a value of 106.
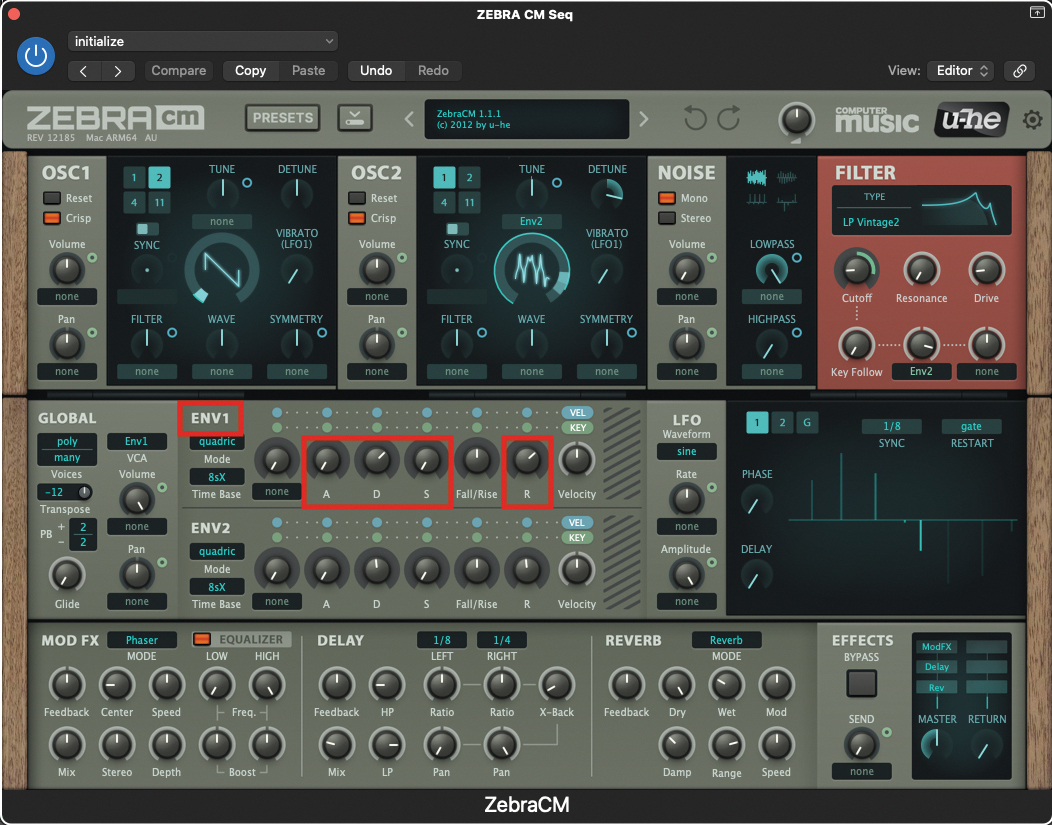
ENV1 is controlling the amplitude (volume) of our patch. Set the Attack pot to a value of 0, Decay to 65, Sustain also to 0, and finally the Release pot to a value of 66.
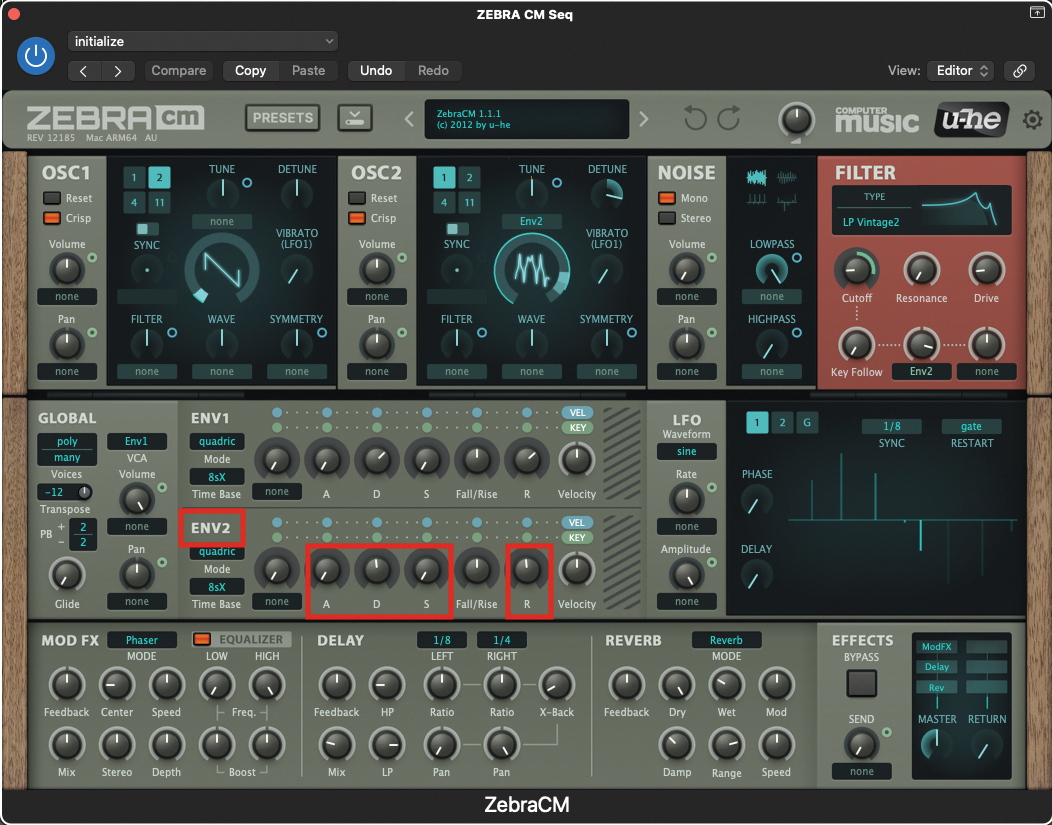
ENV2 is controlling both the filter cutoff and the pitch modulation of OSC2. Set the Attack pot to a value of 0, Decay to 48, Sustain also to 0, and finally the Release pot to a value of 48.
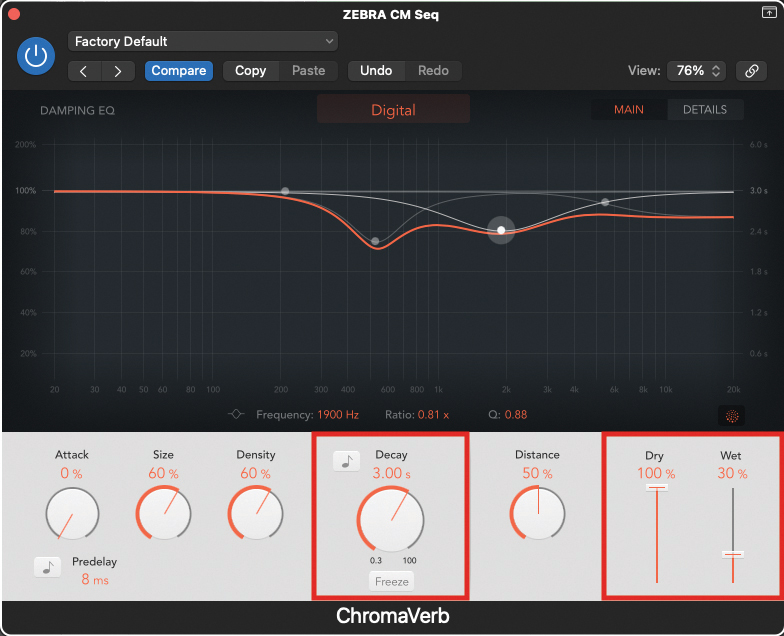
That’s it for our patch. You can embellish the effect further by adding either or both delay and/or a long tail reverb to prolong the sense of harmony. A top tip is to keep the balance of the effects relatively low in the wet/dry settings.
The art of riffing
Creating the perfect riff, under any circumstances, is an art in itself. In essence a riff is a set of musical notes, assigned a specific melody and rhythm, which is often incredibly catchy. Some of the most identifiable riffs from musical history have become earworms of the highest order.
When discussing his guitar playing in a recent interview, Keith Richards of The Rolling Stones said that a solo lasts for a moment, whereas a riff lasts forever. Think about all the great guitar riffs which have emanated from Nile Rodgers over the years, beginning with the likes of Good Times or Freak Out, from his early years with Chic.
’80s pop icons A-ha came up with one of the most iconic synth riffs of all time through their hit Take On Me. But it is worth considering your options, and trying to make a riff which is a little more sympathetic to a track, and may well run the duration.
In constructing the perfect riff, think about the chords you have in play within your production, and take some of the key notes from those chords, adding rhythmic interest, while following your chord progression. We live for the perfect riff, and with the tutorial on the previous pages, we have the perfect sound to support one!
Recommended listening
1. Röyksopp - Here She Comes Again
Röyksopp’s extended riff in this song plays out over a period of four bars, providing the backbone for the entire track, supporting the haunting vocal.
2. Vangelis - Chung Kuo
This vintage and relatively traditional riff is based around only four notes, which have become incredibly identifiable as part of Vangelis’ work.

