How to record, overdub and capture multiple takes
Master the art of overdubbing and learn how to capture multiple takes
Want all the hottest music and gear news, reviews, deals, features and more, direct to your inbox? Sign up here.
You are now subscribed
Your newsletter sign-up was successful
RECORDING WEEK 2022: With your mics set up and cue mix monitoring sorted, you should have everything in place to start recording. You might be recording a song from scratch to a click track or reference beat, or adding live instrumentation to an existing track.
Either way, this is the point at which it really pays to have an understanding of how your DAW handles tracks, overdubbing, alternative takes and all the rest of it, so you can keep everything organised.
Some DAWs provide a virtual layer system that lets you stack takes on top of each other – a more elegant system
This might sound a bit on the unnecessary side if you’re simply recording one track, but the unlimited track count found in many DAWs can result in an abundance of takes, and the more you record, the more you have to sift through later, so any streamlining features are surely welcome.
Different DAWs handle multiple takes and the ongoing compiling and editing of them in different ways. Let’s consider how they might handle a few takes.
Let’s say you’re recording a song from scratch. You’re recording to a number of individual tracks and want to do a number of takes. The obvious method is to record one take after the other sequentially in the arrangement window. You can see the takes laid out in front of you, and you can edit sections together for a master take if required. It’s a universal approach that does the job.
However, some DAWs provide a virtual layer system that lets you stack takes on top of each other. Returning to our initial example, as long as you record the takes to a click and start at the same position on the timeline, this should be a more elegant solution. Plus, if you want to spin through and change your initial master take, even after you’ve continued overdubbing onto it, you can.
Handling multiple takes:
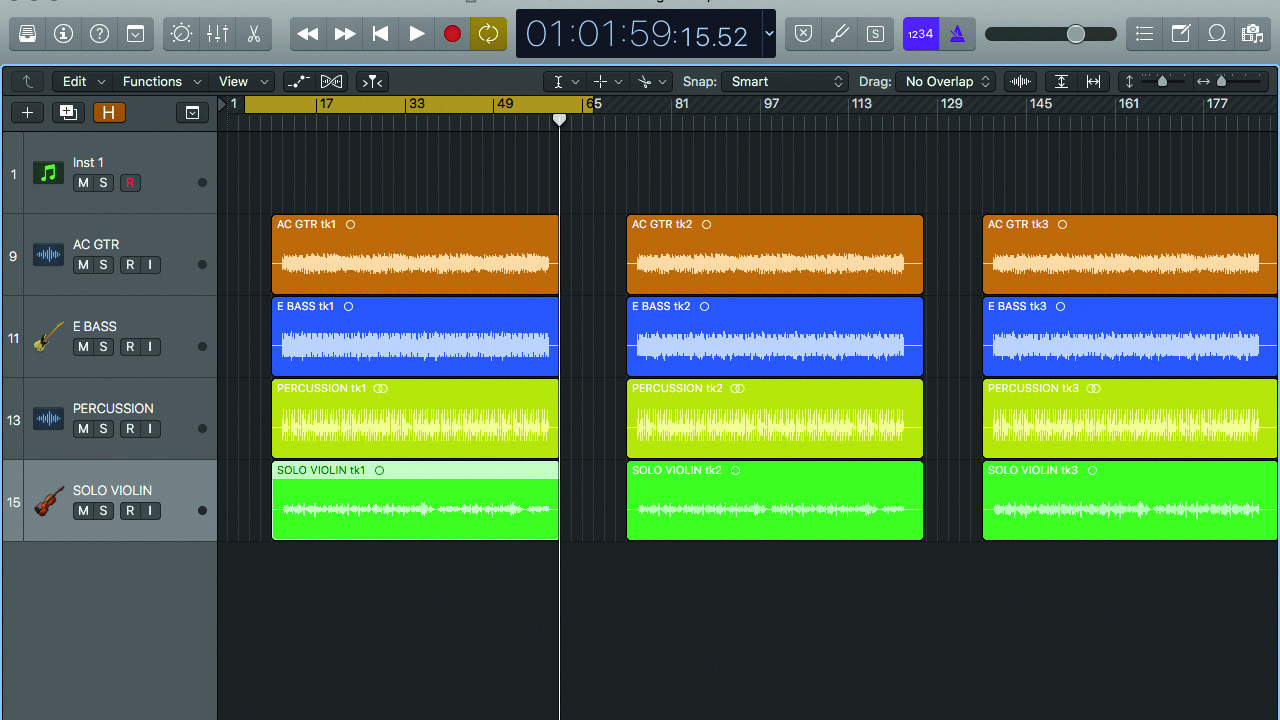
Step 1: This method will work in any DAW and requires no specific features. Start by recording a few multitrack takes one after the other. Ideally record to a click or timing reference, as it’ll help when editing multiple takes together. The method will still work without a click, but joining takes will be less predictable.
Want all the hottest music and gear news, reviews, deals, features and more, direct to your inbox? Sign up here.
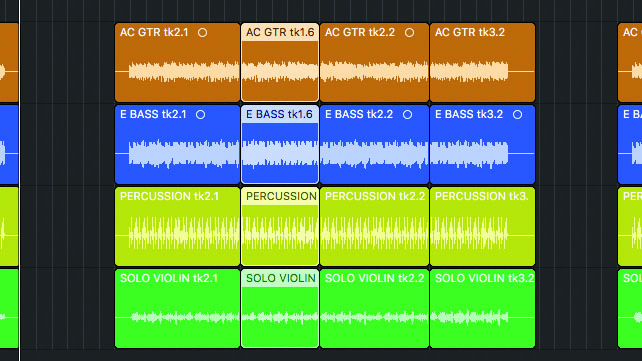
Step 2: Play through the takes, highlighting and separating the sections that you like. Ideally, group the tracks so you can edit them collectively. If one of the takes stands out as a good one, use it as the master, then simply copy over sections from other takes to create your final track.
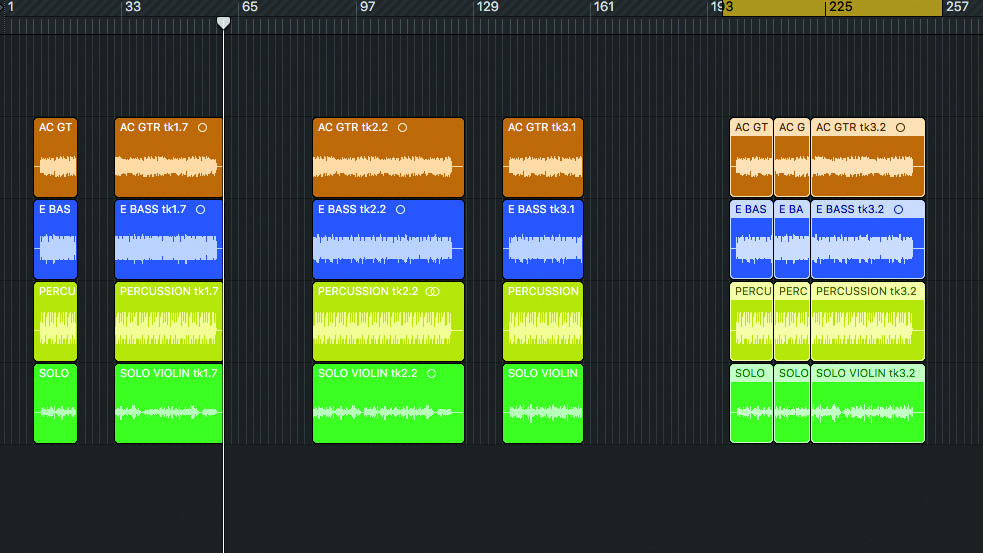
Step 3: Alternatively, grab the sections you want and move them to a separate section on the timeline. This works well when the takes have been recorded with looser timing. Finish up by checking the edit points. You’re now ready to overdub additional instruments on new tracks.
Handling multiple takes: The ‘alternatives’ method
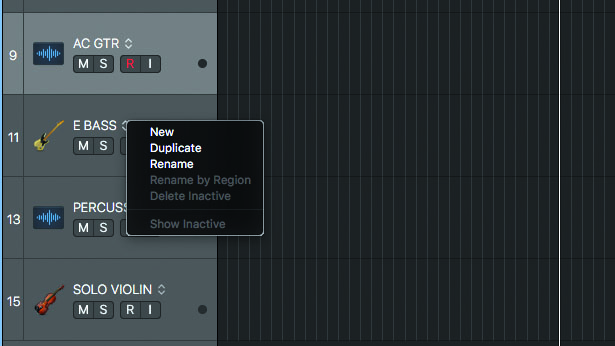
Step 1: The other form of take handling goes by different names in different DAWs, but the idea is the same. In Logic Pro X it’s called ‘Alternatives’ and you can activate it at any time by selecting Show Track Alternatives. You’ll see each track now has an Alternatives sub menu where you can select, create and delete alternatives.
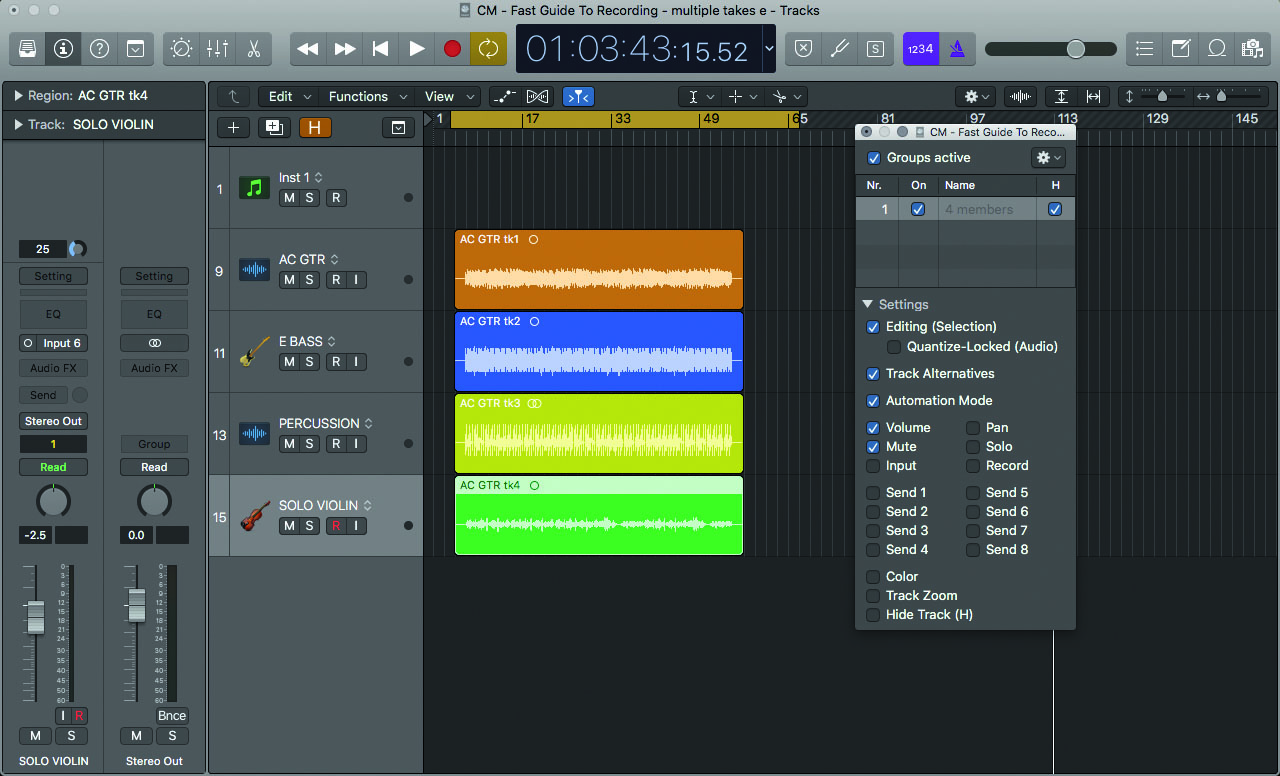
Step 2: Start by recording a multitrack take, then set up a group for the recorded tracks and make sure the group editing options include alternatives. Now select a new alternative. You’ll see the tracks are cleared and an alternative has been created for each of the grouped tracks. You’re ready to do a new multitrack take.
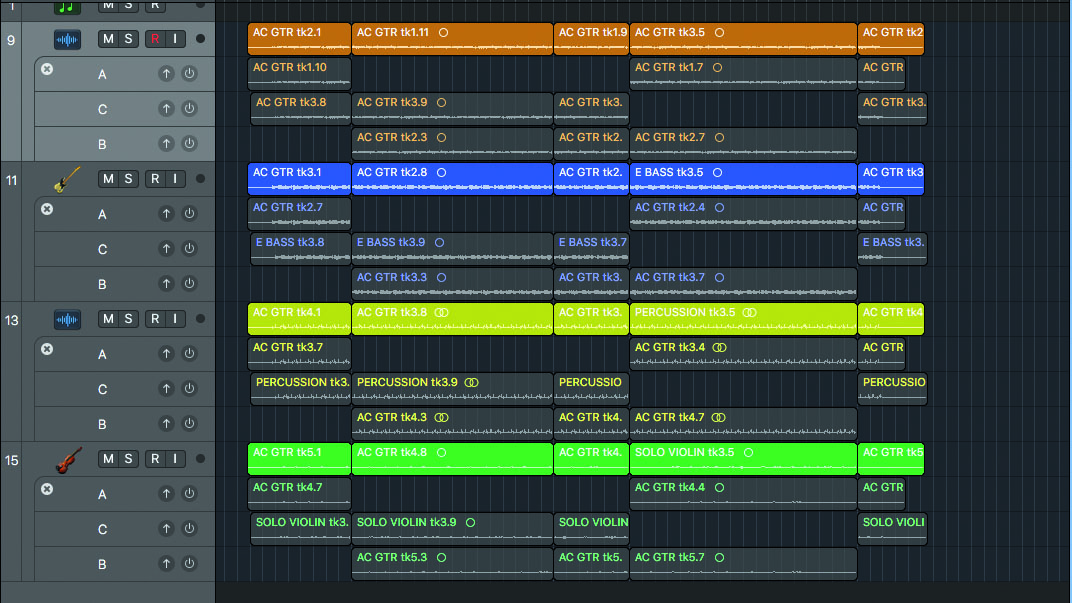
Step 3: Repeat this step for each new take, then use the Show Inactive option to view all takes together. Listen to each take, editing the sections you want to use, then move them onto a fresh alternatives track. Hide the inactive tracks and adjust or crossfade the section joins so that they sound natural.
Computer Music magazine is the world’s best selling publication dedicated solely to making great music with your Mac or PC computer. Each issue it brings its lucky readers the best in cutting-edge tutorials, need-to-know, expert software reviews and even all the tools you actually need to make great music today, courtesy of our legendary CM Plugin Suite.
