A tech explains how to change your electric guitar strings like a pro: "The method we're demonstrating here is the quickest, best for stability and easiest to de-string when it’s time"
"The lock-wrap method here will soon become second nature"

Ok, 'how hard can it be?', you're thinking. Well, hold on there, Einstein, because we could be doing you a favour by teaching you how to put your electric guitar strings on the way the pros do.

As a guitar tech, I see an awful lot of setup jobs that come in with tuning stability complaints, only to find the strings have been wound on badly or just plain wrong. In actual fact, it is easy to do right if you know what you're doing, and it has clear advantages.
I’ve experimented with different styles of stringing up and different ways of wrap-locking or tying them on, and the method we're demonstrating here is the quickest, best for stability and easiest to de-string when it’s time. That last point is the bane of many a guitar tech’s lives: untying knotted rusty strings that stab you!
The lock-wrap method here will soon become second nature, and if you have three-a-side tuners like a Les Paul you will have to learn it backwards, too, so it locks correctly. Arm yourself with the tools and stash them in your gigbag so you’re always ready for a change.
What you need
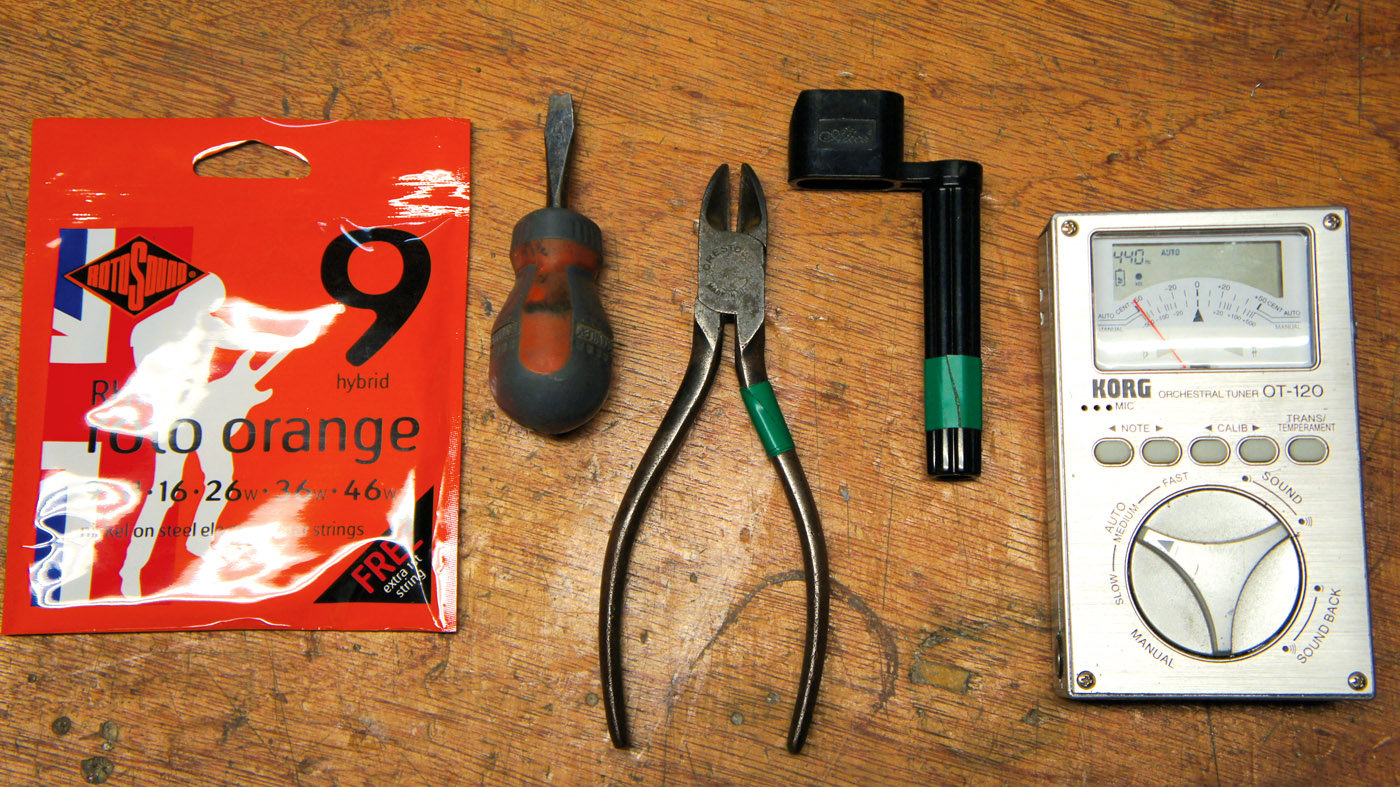
- Fresh strings
- Decent string cutters
- Tuner
- String winder
- Stumpy flat-headed screwdriver
Step 1
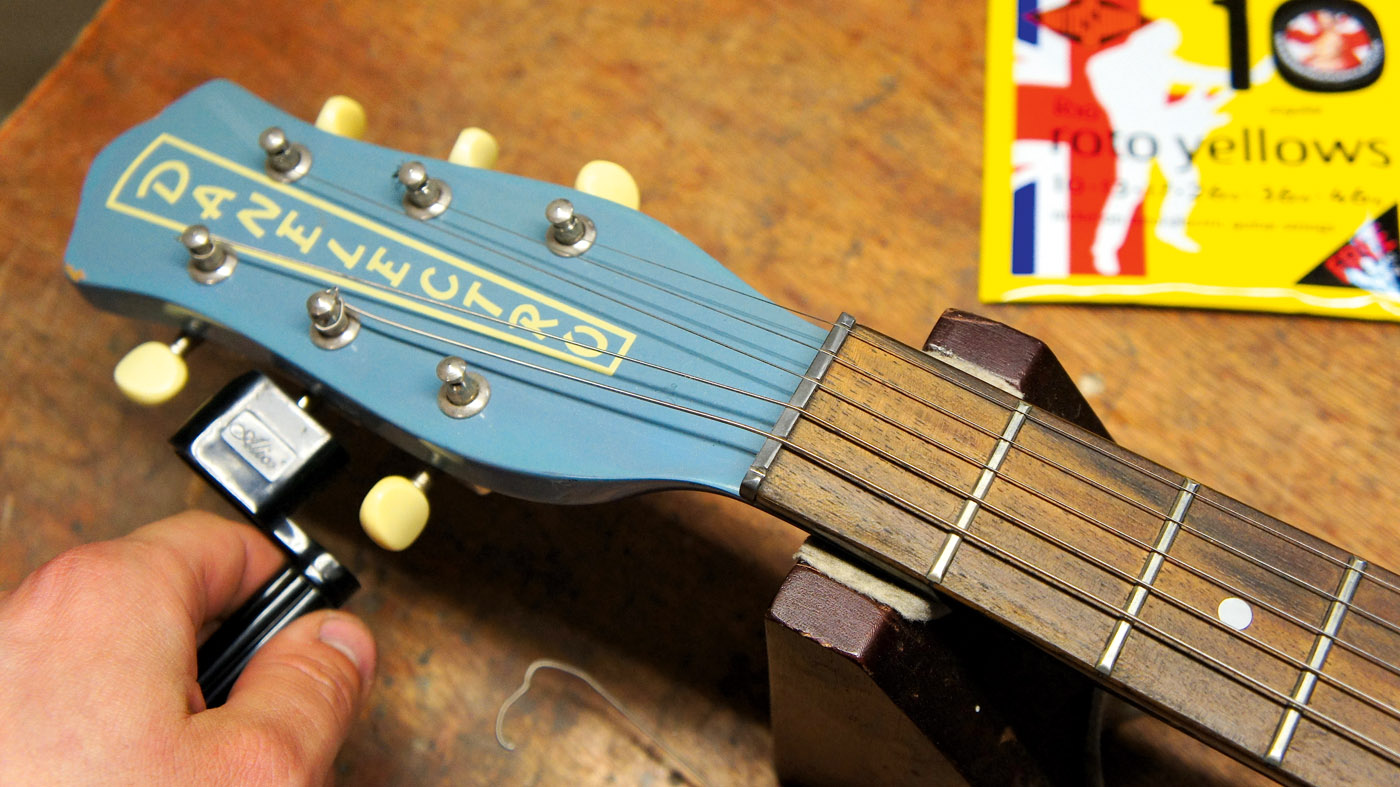
Out with the old and in with the new. Slacken off your old cruddy strings with a winder to save time, chop them with a pair of wire cutters and chuck them in the bin. We religiously coil them up to stop them springing out the bin or pronging us.
Step 2
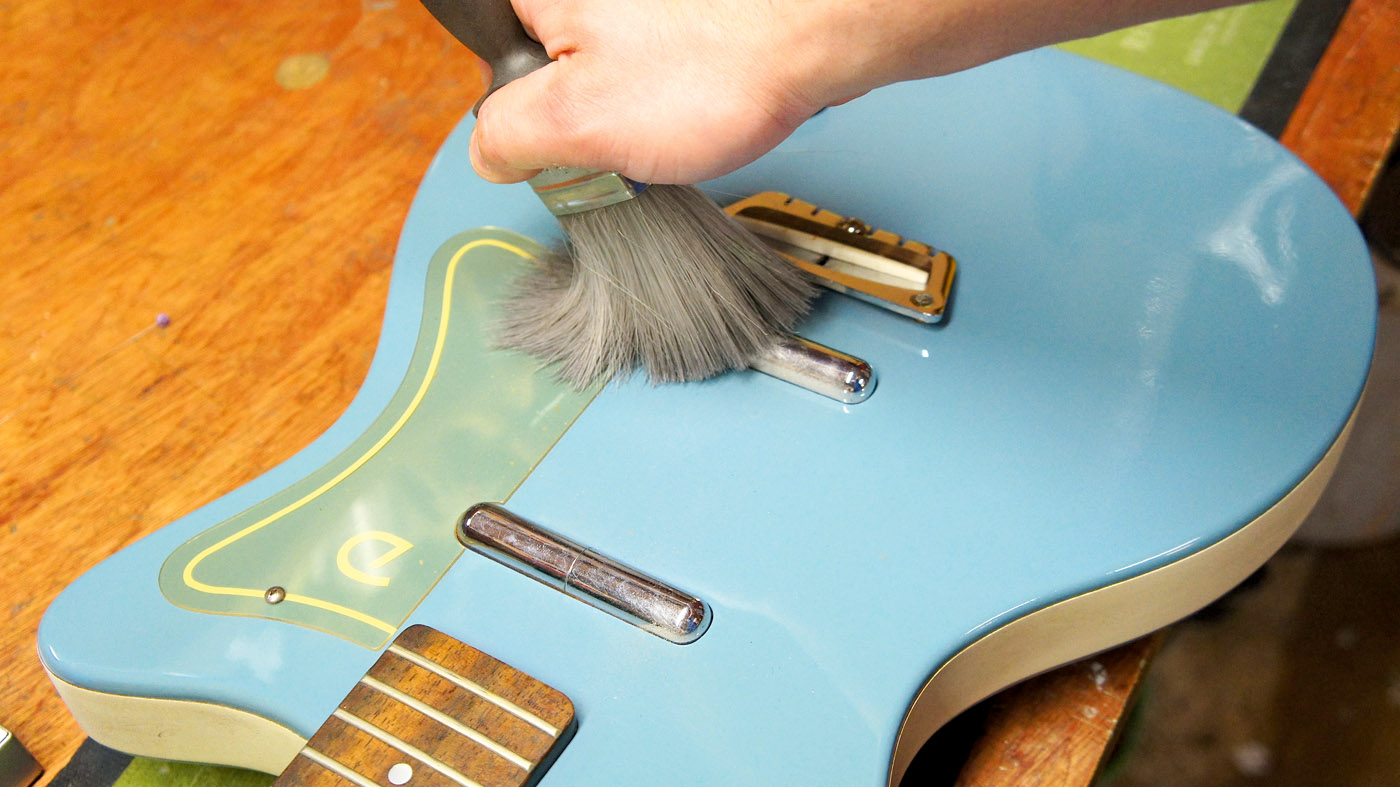
What good are fresh strings if they’re about to be put on a dirty guitar? You can guarantee that fretboard goop will transfer straight to your spiffy new strings. Brush out dust with a soft paintbrush and give your fretboard a clean. Pamper the fretboard (if it’s rosewood) with some lemon oil while you’re at it for a real treat.
Step 3
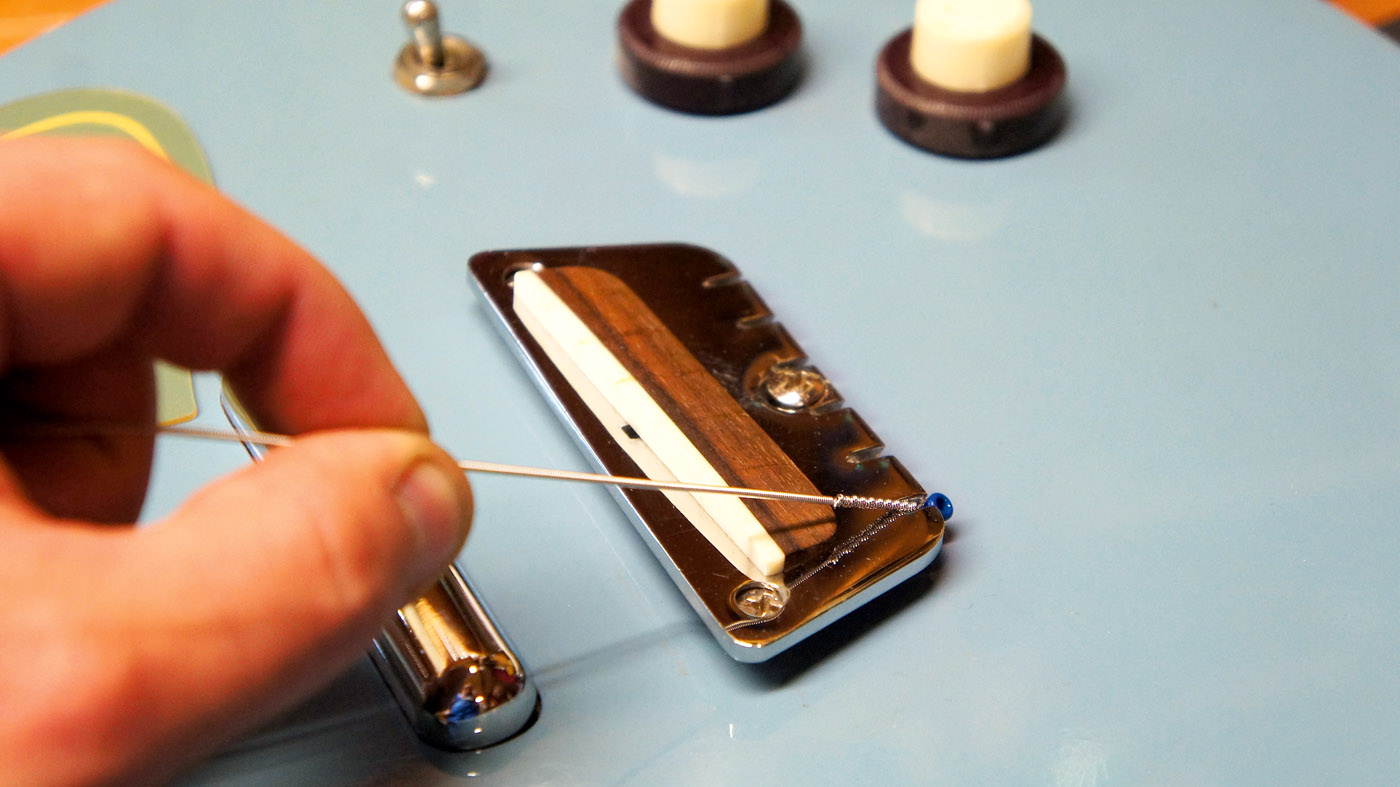
This Danelectro U2 has an incredibly simple string mounting system. Strats and Teles pull through the back and Les Pauls through the tailpiece, but make sure that when it’s pulled through it’s settled, too. If the winding of the string near the ball-end is caught, the string will jump through when some real pressure comes into play.
Want all the hottest music and gear news, reviews, deals, features and more, direct to your inbox? Sign up here.
Step 4
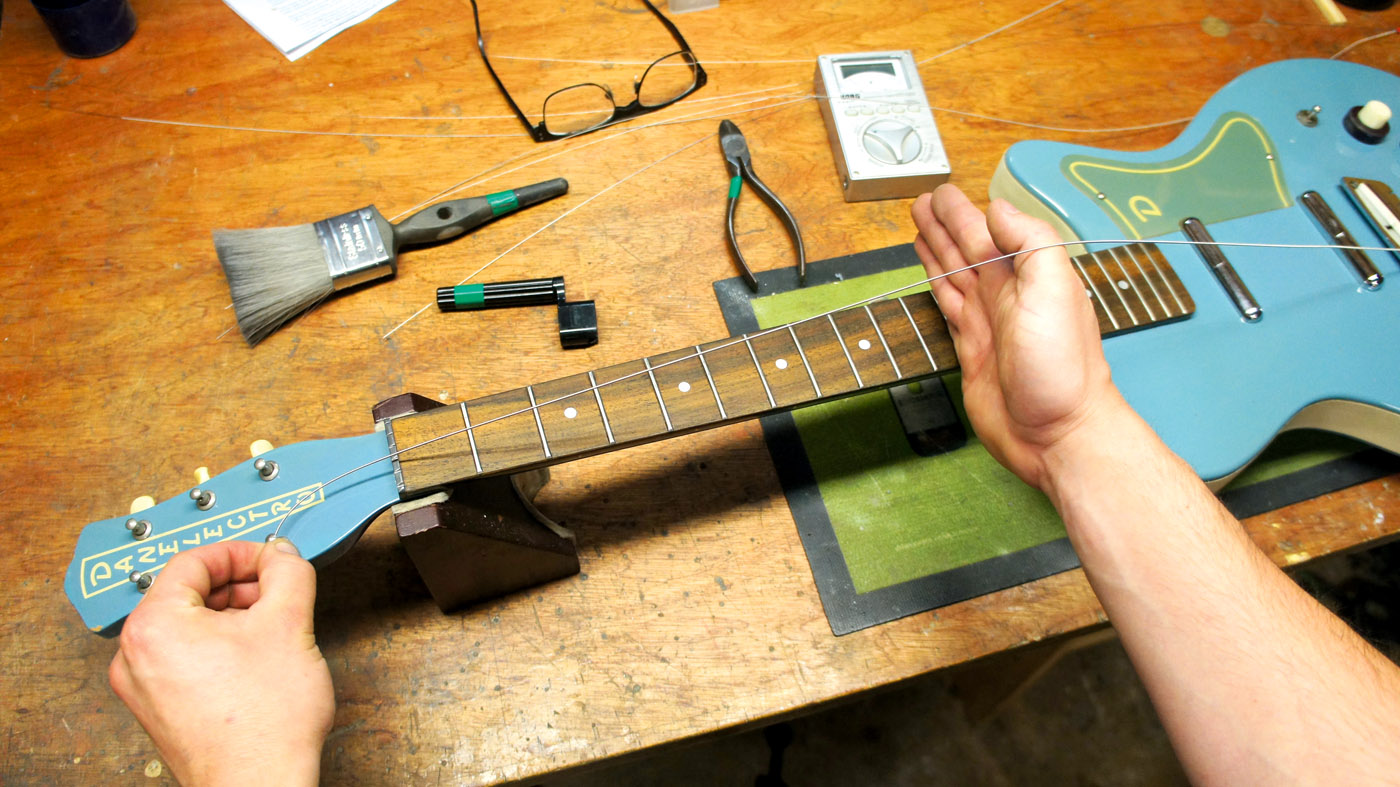
Feed the string end through the tuner hole and do your best karate chop at 12th fret! This hair-brained technique will ensure that each string gets the same amount of slack. Why’s that important? So that each string has the same amount of winds wrapped around and therefore the same elasticity when you do a string bend.
Step 5
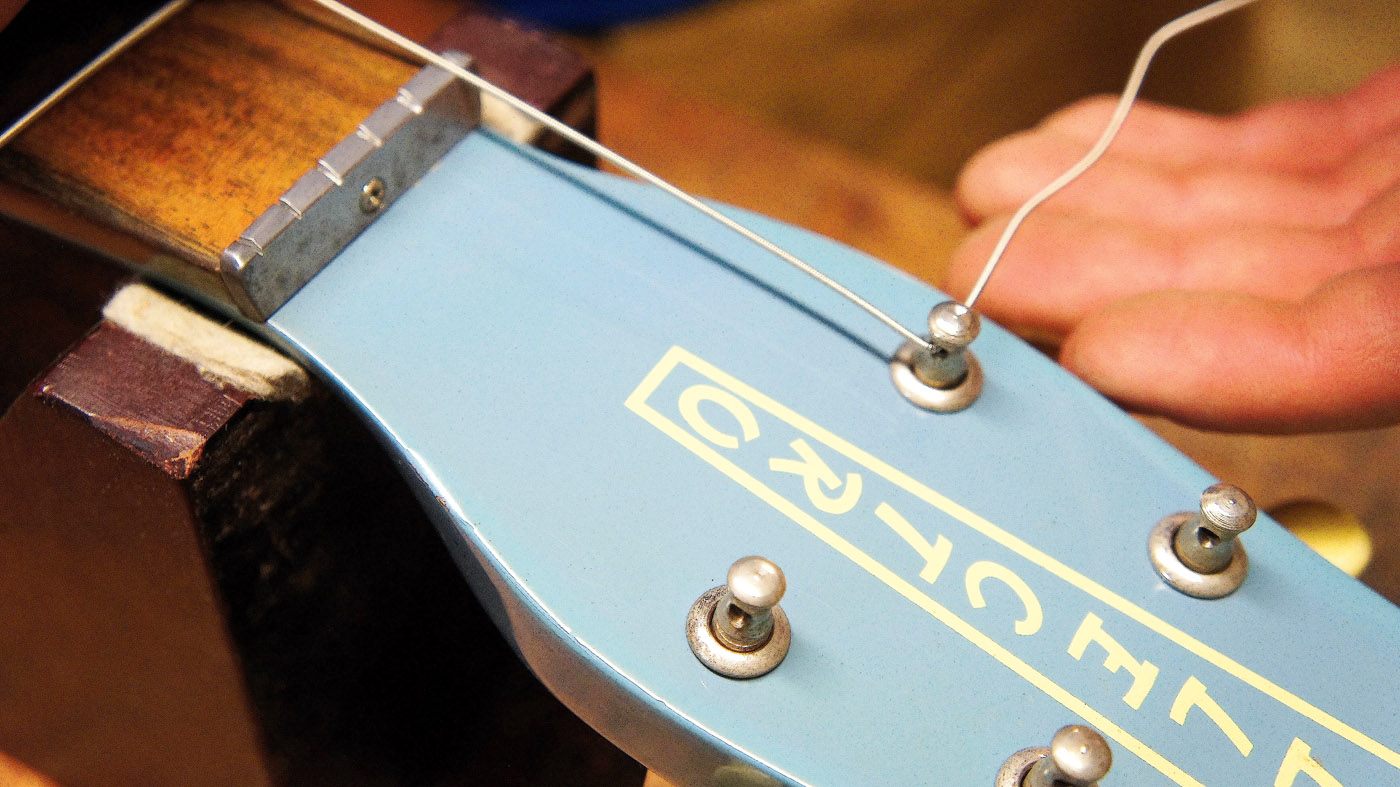
Before the fiddly thing moves, kink the playing side of the string against the tuner hole - this marks out the length we will use. A small kink will do. With your right karate chop hand, now hold the string and present some tension - this will hold everything tight as we wind.
Step 6
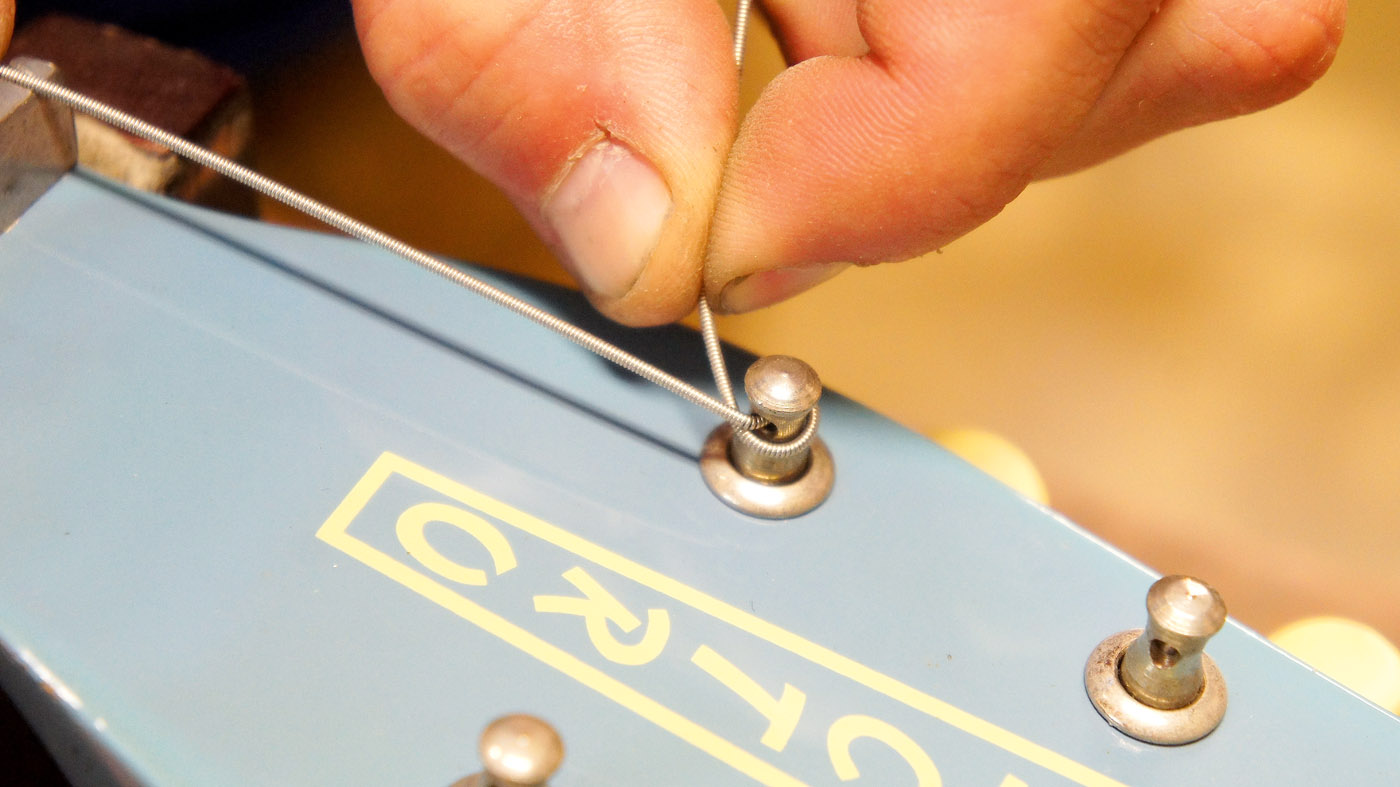
We’re beginning the wrap-lock now so wrap the loose side of the string clockwise back round the tuner and feed it under the kink we just made. Keep the tension with your right hand as you do this. For a left-handed tuner you’ll be wrapping anti-clockwise to follow the same logic.
Step 7
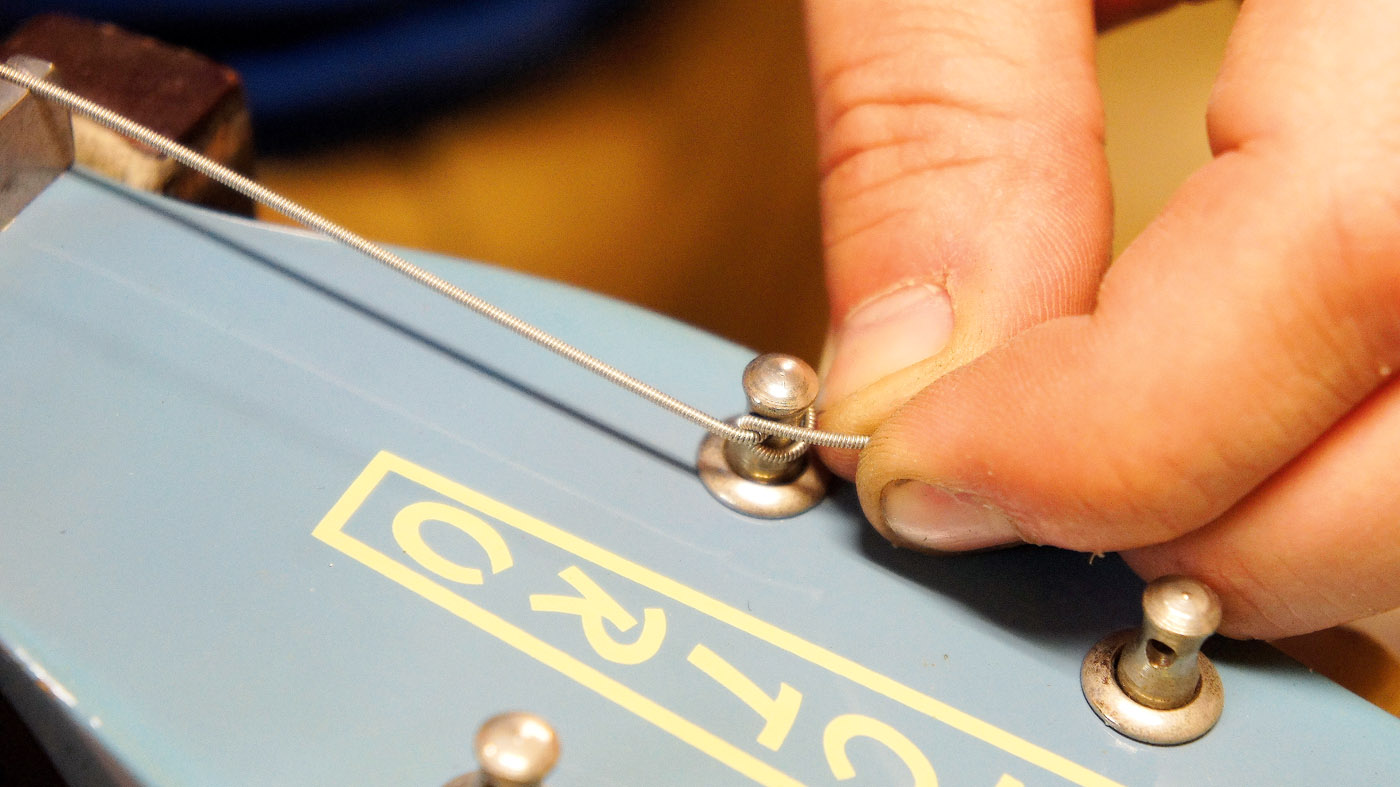
Holding tension with your right hand, bend the loose side of the string up and over the kink with your left hand. This makes a sharp hoop and is the start of our lock. Tug the loose end to assert your dominance and give it a good bend!
Step 8
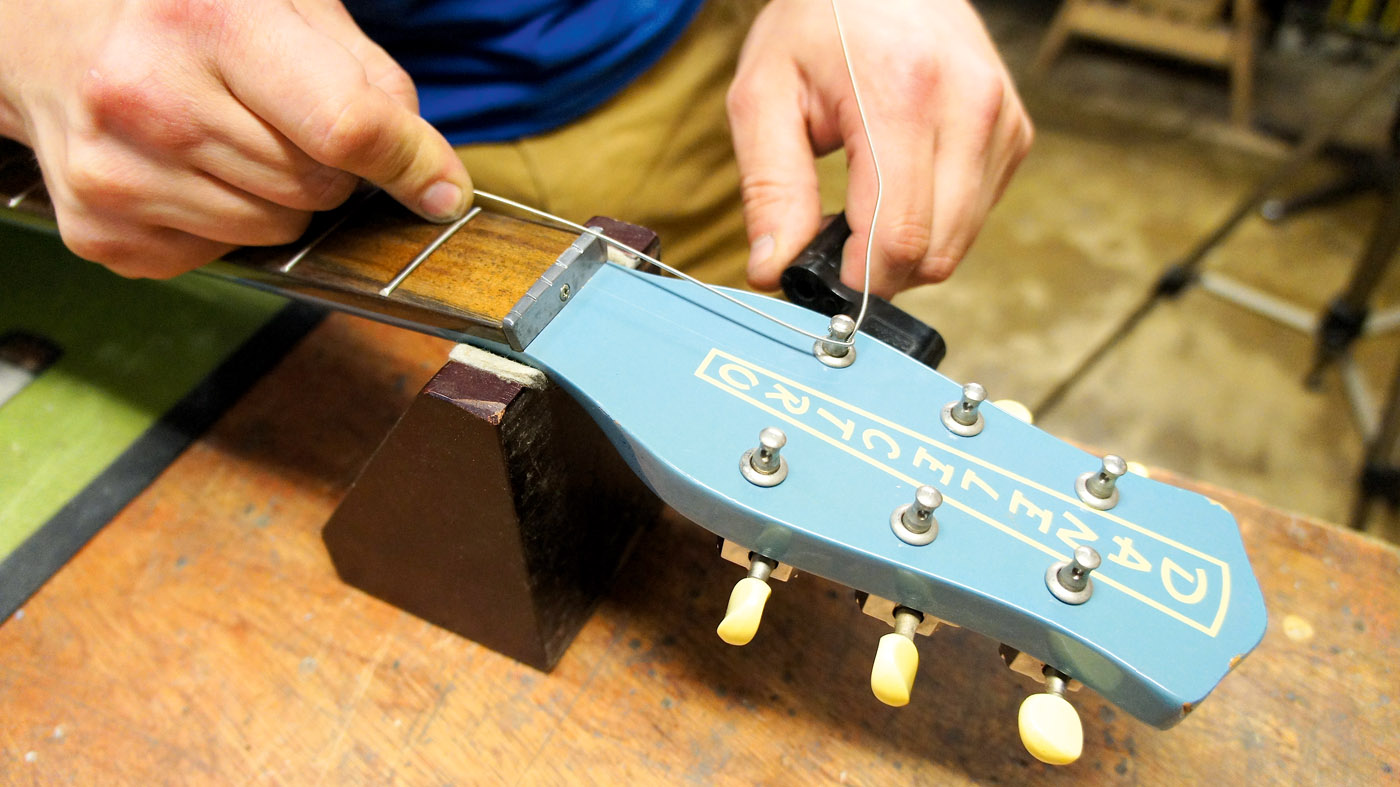
Let go of the loose tail and wind away; a string winder makes this task a lot faster and easier. Wrap the string under the kink we made earlier. To be clear, the string should be wrapped clockwise around a right-handed tuner. The start is now trapped under the winds of the string, which is where the method gets its reliability from.
Step 9

Do it five more times! Keep tension up with your right hand as that’s the key to making a tight, neat wind. Follow the steps for the left-handed tuners (in our case third, second and first) in a mirror image - at least you have the first few strings as an example. Trim off the ends of the strings.
Step 10

Don’t bother to tune up the strings to pitch yet; we’re going to stretch them in. Stretching strings in just sends the winds home and settles everything down; give it a sensible yank and you’ll hear the pitch drop down. Repeat if you like and you’ll notice the pitch drop less.
Step 11
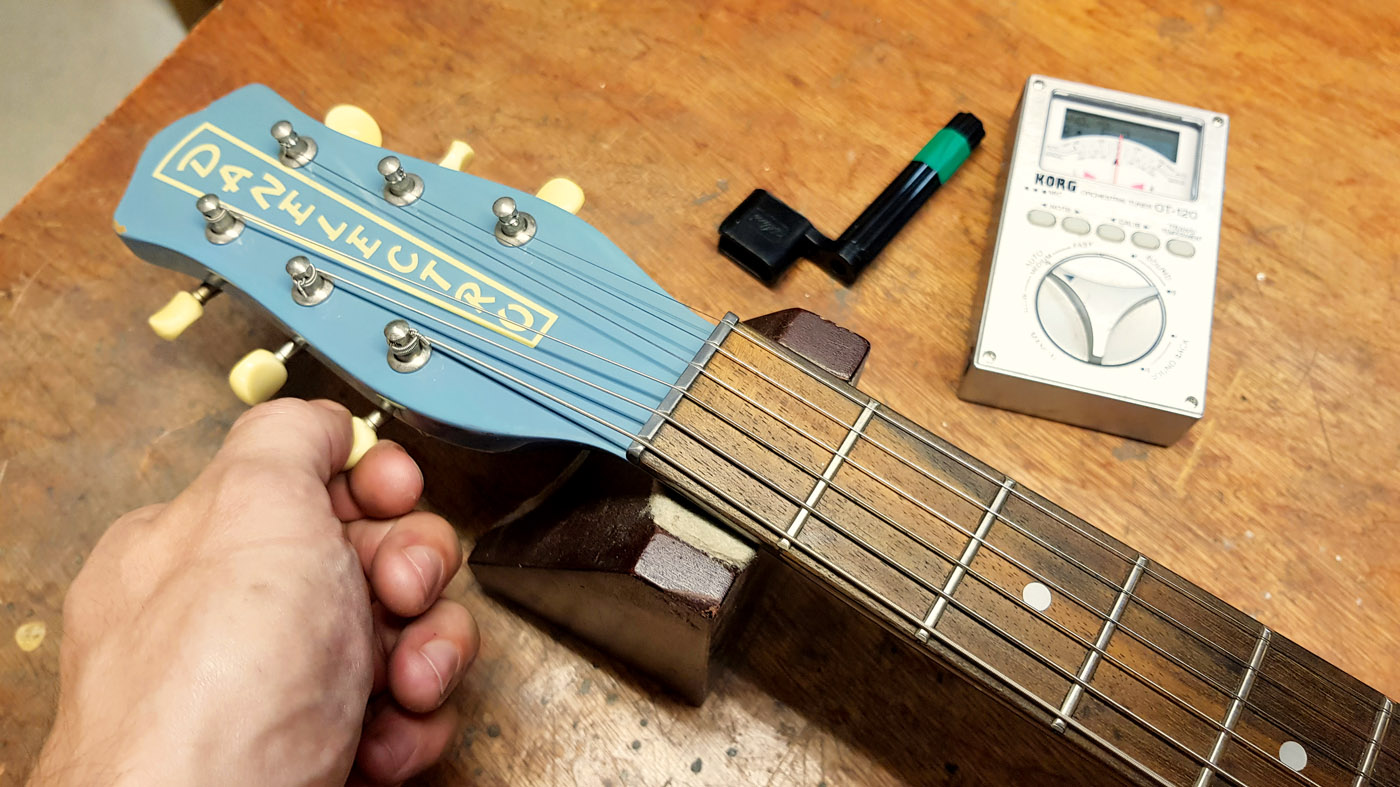
Carry out a final tune-up, get it up to pitch at last. You will have a small amount of re-tuning to do as the neck bends forwards a little under the pressure of each string - that means the first string you wound will be flat.
Step 12
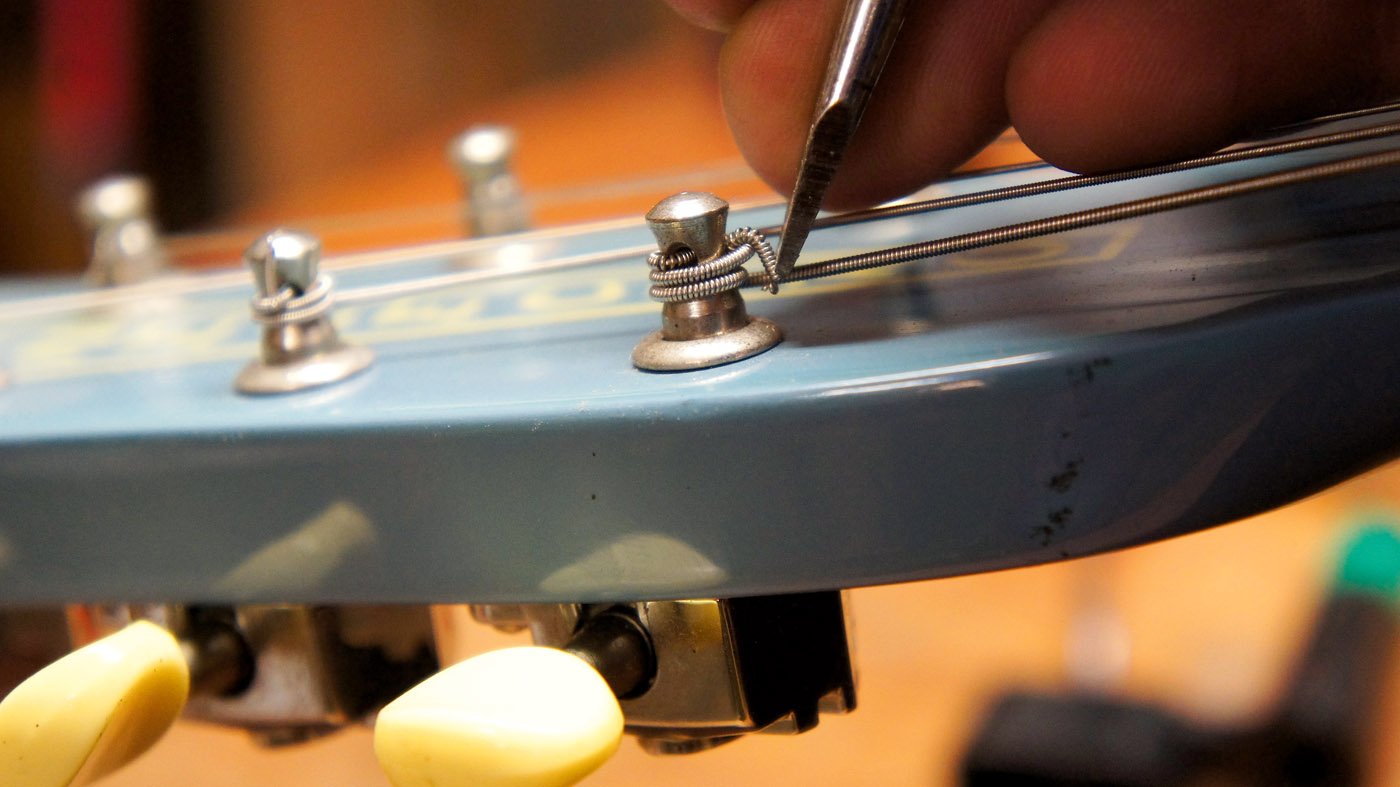
Bend down the ends of your strings with a larger, flat-headed screwdriver. This stops them from puncturing your fingertips and from scragging your gigbag to pieces, too. The extra kink also adds yet another level of stability to the string wind.
Jack runs an independent guitar setup and guitar repair service in Manchester, England. He serves the musicians of the Northwest of England, working on electric guitars, bass guitars, acoustic guitars and more. Jack has been writing the Fix Your Guitar column in Total Guitar Magazine since 2017.
