9 tricks that'll make your mix sound less harsh and easier on the ear
Make sure your productions aren't too piercing

Want all the hottest music and gear news, reviews, deals, features and more, direct to your inbox? Sign up here.
You are now subscribed
Your newsletter sign-up was successful
It's all very well wanting your mix to cut through, but harshness is something that's definitely best avoided.
Here are nine ways to make your productions sounds easier on the ear, so that your audience will want to listen to them repeatedly, and for longer.
1. Dithering heights
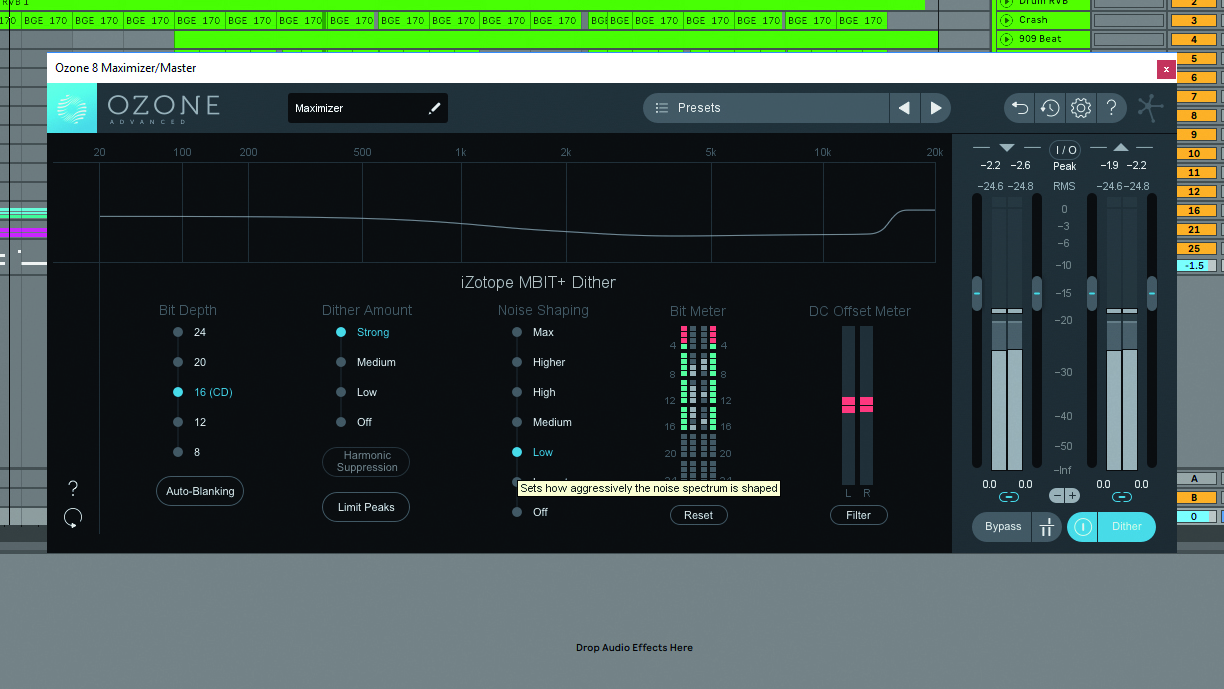
If your mix sounds bright and breezy when played back from your DAW, but ends up feeling more sizzly and noisy when exported to 16-bit audio, try using a more subtle, basic dithering algorithm. As dither is essentially random noise that’s mixed into the signal to mask truncation errors from bit-depth reduction, it can add a layer of crispiness that’s often undesirable, particularly when using harsher settings with noise shaping dither, such as the one included with iZotope Ozone 8’s Maximizer.
2. Manual labour
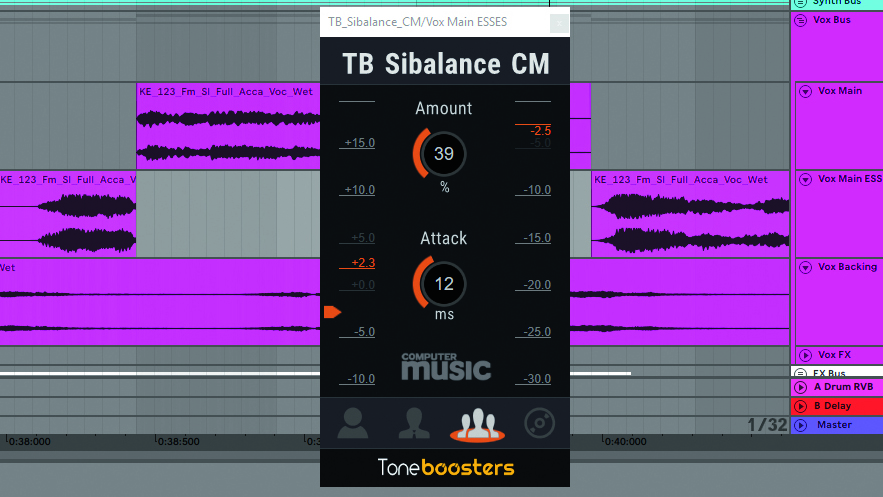
If you’re de-harshing an overly strident vocal take, you might well find that using a de-esser on the whole take will also remove too many sibilant frequencies from the bits that don’t need processing, leading to a dull end result. Instead, place the offending words or syllables on their own channel, then process those parts alone to tame the sizzle without affecting the rest.

3. Smoother sends
Paying careful attention to the harshness of your auxiliary return signals can help to deliver a more polished, professional overall mix. For example, if you’re mixing in bright aux reverb alongside a dry vocal, you can try some de-essing before or after the reverb effect on the aux, as well as using it on the dry vocal take. This’ll give you a smoother vocal sound that doesn’t end up stinging your eardrums.
4. Biro-free
Cassette tape is widely acknowledged to be a dull-sounding playback format that struggles to effectively reproduce high frequencies. This is terrible news if you want to sell your hi-def, glossy music on a cassette… but that makes it an ideal effect to tame overly harsh frequencies! Klevgrand’s DAW Cassette is a great in-the-box option – or alternatively, why not try grabbing an old hi-fi stack from your local charity shop?

5. Release me
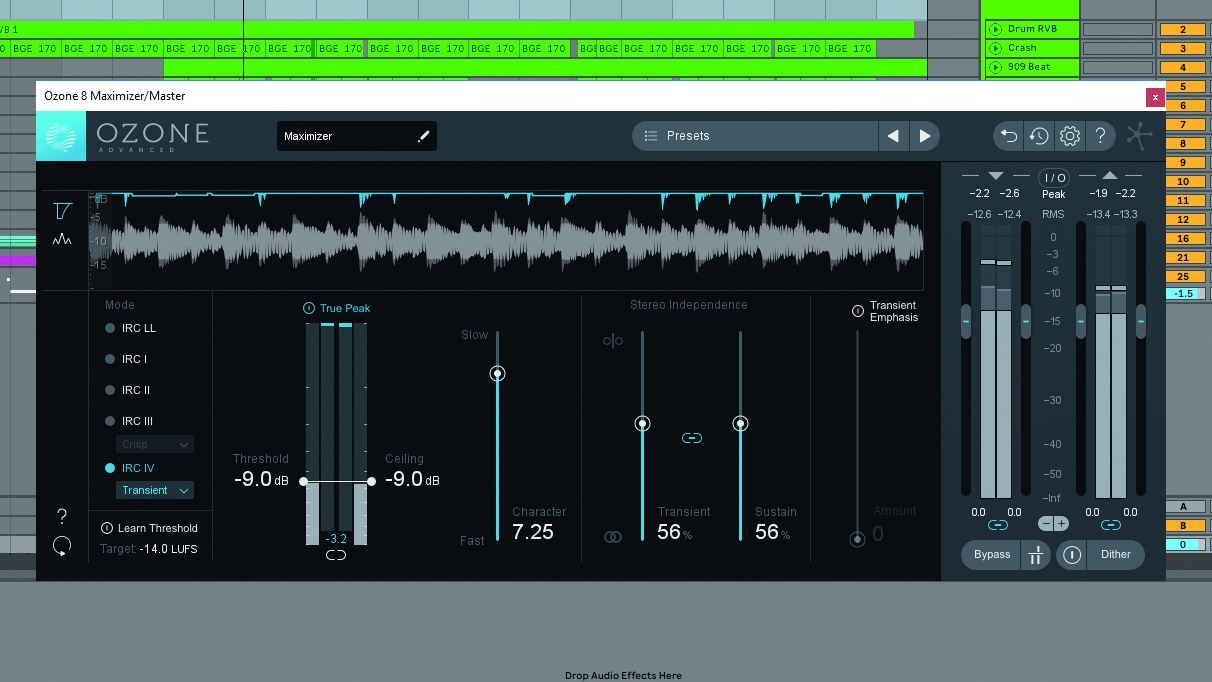
Brickwall limiting has many positive uses in the studio, but did you know that adjusting the release time can substantially change the tone of the output signal? Faster release times can add high-frequency distortion to the signal, giving a brighter tone; while slowing the release down will give you a duller, smoother effect that can help control shrill drums or dynamic pianos.
Want all the hottest music and gear news, reviews, deals, features and more, direct to your inbox? Sign up here.
6. Wide on time
If you’re using EQ notches to remove harsh frequencies from a signal, try not to make your Q widths too narrow. This can sound unnatural when done to excess, particularly with real instruments or the human voice. Instead, make your notches a bit broader to give a more natural, smoother sound.
7. Tape smoothening
As discussed earlier, magnetic tape can’t reproduce high frequencies in the same transparent way as digital playback systems. To combat this, manufacturers of reel-to-reel tape machines introduced variable playback and recording speeds that allowed higher ‘resolution’ and better high-frequency reproduction, but at the cost of playback time. We can adjust this in modern tape saturation plugins such as Waves’ Kramer Master Tape by switching between 30/15/7.5ips, with slower settings giving a duller tone.
8. Plugin, plug out
If you’re finding that many of your channels have a fatiguing, harsh timbre, you might well be using too much processing. Sometimes, digital plugins simply don’t interact well with each other, particularly if you’re using older software that isn’t coded to deal with overloading volume at the input. To test the theory, solo the offending channel, then disable all the plugins. From this clean slate, you can then reactivate each plugin one by one until you find out what’s causing that annoying harshness.
9. Get it right first time
When tracking vocals, the best approach is to reduce specific issues at source. For example, by placing a pop shield between the vocalist and microphone, you’ll reduce low-frequency plosives; and by moving the vocalist slightly off axis to the mic, the
singer’s sibilant bursts of air will pass over the mic diaphragm, greatly reducing harsh sibilance. Problem-solving processing at a later stage will always sound more unnatural, so get your recordings right the first time for best results.
Computer Music magazine is the world’s best selling publication dedicated solely to making great music with your Mac or PC computer. Each issue it brings its lucky readers the best in cutting-edge tutorials, need-to-know, expert software reviews and even all the tools you actually need to make great music today, courtesy of our legendary CM Plugin Suite.
