
You don't have to use a sampler to sample: you're effectively doing it every time you record a piece of digital audio. And when you're dealing with digital audio, there are some well-known pitfalls that you should avoid falling into and tricks that will help you to handle it better.
Here, we've picked out eight particularly common issues that anyone who works with audio on a computer will have to deal with.

Plumb the depths
The bit-rate of a digital audio file refers to how many bits of information are used to represent each sample. A higher bit-rate means greater audio fidelity. So when recording audio at 16-bit, the only way to get a full quality recording is to record as close to the point where the wave clips (0dB) as possible, making full use of the dynamic range of the system - a recording that peaks at -6dB is effectively only 15-bit.
Obviously, this isn't always easy, so many modern soundcards enable you to record at higher bit-depths, such as 24-bit, which results in a much higher resolution recording without having to risk clipping the signal.

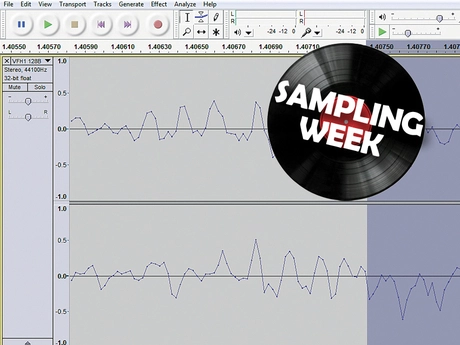
Zero tolerance
When cutting, pasting and deleting sections of digital audio, abruptly starting or cutting off a wave midway can result in an unnatural dropout, which often produces a click sound upon playback. To avoid this and other unnatural wave shapes when editing digital audio, it's useful to pay attention to their zero-crossings. This is the point where the wave has no amplitude - in a graphical wave editor, it's usually the middle point, marked by the horizontal axis.
Many wave editors enable you to toggle automatically finding zero crossings when selecting sections of audio, so it's wise to use these functions. Otherwise, you'll need to zoom in and make sure you cut precisely at these points.
Smoothing things out
Sometimes when making an edit, the zero crossing won't be where you need it. For example, lengthy low frequency waves can make cutting out a sound cleanly on zero crossings quite awkward. However, in these situations, you can actually create your own zero crossing by using the Fade In and Fade Out functions of your sample editor or DAW. So, make your edits without being concerned about where the cuts occur on the wave, then zoom in and highlight any awkward joins and use the Fade In or Fade Out function to create a smoother gradient and avoid clicks.
In the loop
To turn a short sample into a continuous tone, you'll need to find a point where you can make it loop seamlessly. The best point to loop a simple lead or bass tone is usually on a single-wave cycle. However, you'll soon discover that any imperfections in the join result in unwanted buzzing sounds. To avoid this and improve your chances of being able to loop a tone smoothly, it's once again a good idea to look for zero-crossings at which to set Loop Start and Loop End points.

Sneaky peaks
In digital audio, when a wave exceeds a certain level, anything above gets shaved off, which results in clipping. Digital clipping is not generally thought of as a desirable effect. It can be subtle or it can produce audible distortion, but the abrupt nature of digital clipping tends to make it fatiguing to listeners either way. Therefore, it's very important to avoid clipping when making audio recordings, as it can't be rectified later on. This is best achieved by recording at a decent bit-rate and choosing a recording level with enough leeway for loud notes to remain well within the safe range.
Treating your cuts
Reverb is an effect designed to emulate the natural echoes and reflections of a sound in an enclosed space. So, as well as being useful for giving sounds a natural ambience and sense of space in a mix, reverb can be used to add tails to sounds and samples that end too abruptly. When cutting a snare drum out of a loop, you may find you have to cut the sound off before it's had time to ring out naturally
To give just one application, you can use a volume envelope to smooth out an abrupt ending on your sample, then add a plate reverb to give a good approximation of a snare drum's natural decay.

Compress to impress
When recording digital audio from a live source, you can minimise noise levels and obtain optimal bit-resolution by getting the signal as loud as possible, just as long as you don't risk any loud peaks clipping the signal. For this reason, it can sometimes be a good idea to record with some compression on the input going into the computer - this is also a good way to protect your soundcard or recording device from very loud peaks that may damage the circuitry. Many preamps feature built-in compression, otherwise an inexpensive, second-hand hardware compressor can be used between your preamp and recording device.

Listen up
When working with digital audio, it can be easy to fall into the trap of making decisions based on what you see, rather than what you hear. The visual interfaces of modern DAWs have revolutionised the way we create music and work with audio, particularly when it comes to viewing and editing waveforms up close and in relation to track and time markers, as this makes correcting timing issues and removing unwanted noise extremely easy and accurate. However, certain aspects of music production, such as making arrangement decisions, can be somewhat falsely influenced by what you see, so make sure you're paying more attention to your ears than your eyes, and even turn your computer monitor off from time to time and just listen.
Liked this? Now read: How to make the perfect loop
Connect with MusicRadar: via Twitter, Facebook and YouTube
Get MusicRadar straight to your inbox: Sign up for the free weekly newsletter
