How to trim the fat from your kick drums
We show you how to make those kick drums lean and mean
Want all the hottest music and gear news, reviews, deals, features and more, direct to your inbox? Sign up here.
You are now subscribed
Your newsletter sign-up was successful
A solid-sounding low-end is essential in any dance music mix, and this is particularly true for minimal styles because there's less going on in the mids and highs to cover up inadequacies in the bass frequencies.
Getting the lows right can often be the hardest part of a mixdown, but you can save yourself a lot of headaches by simply preparing your sounds sensibly in the first place.
In this tutorial, we'll show you how to make your mixing life easier by 'slimming down' your kick. Once we've got rid of the excess low-end, stereo information and even a little dynamic range, our kick will be leaner, punchier and sits more happily in the mix.
Article continues belowA particularly important technique we'll use is tuning the kick to the same pitch as the bassline. This is a simple thing, taking just a few seconds, but it instantly makes a mix sound better. Getting these fundamentals right only takes minutes but will improve the sound of your music more than any expensive mixing plugin!
For more on making minimal beats sound massive, check out Future Music issue 285, which is on sale now.
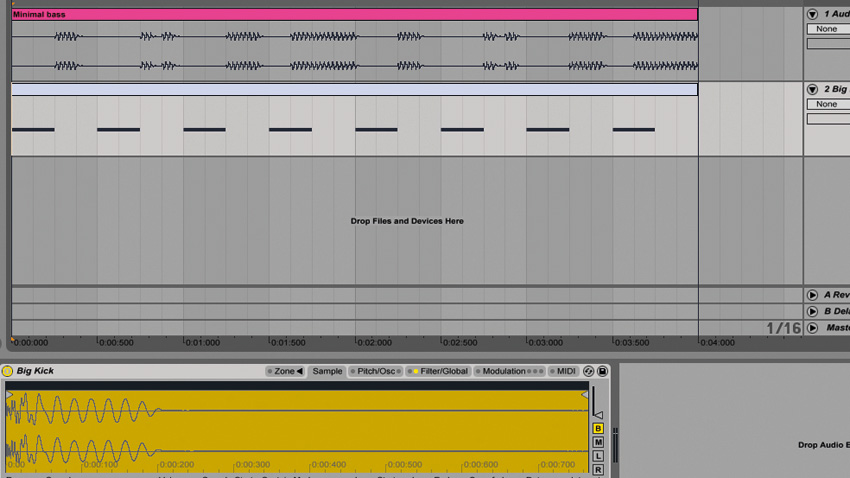
Step 1. Here's a minimal synth bassline that plays between each beat. The bass plays between the kick of our 4/4 kick part, but its tail is so long the sounds overlap. And the kick isn't tuned to the same note as the bass, which makes the overlapping sound worse.
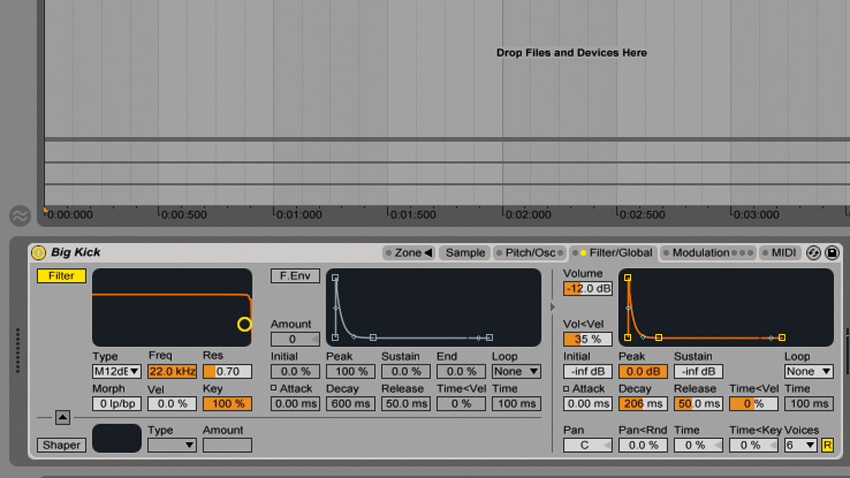
Step 2. Detuning the kick's sampler patch by -2 semitones makes it sound much better, but it will be improved further if we prevent the sounds from overlapping. So we turn the sampler's Sustain and Decay down, going for a Sustain level of -infdB and a Decay of 206ms.
Want all the hottest music and gear news, reviews, deals, features and more, direct to your inbox? Sign up here.
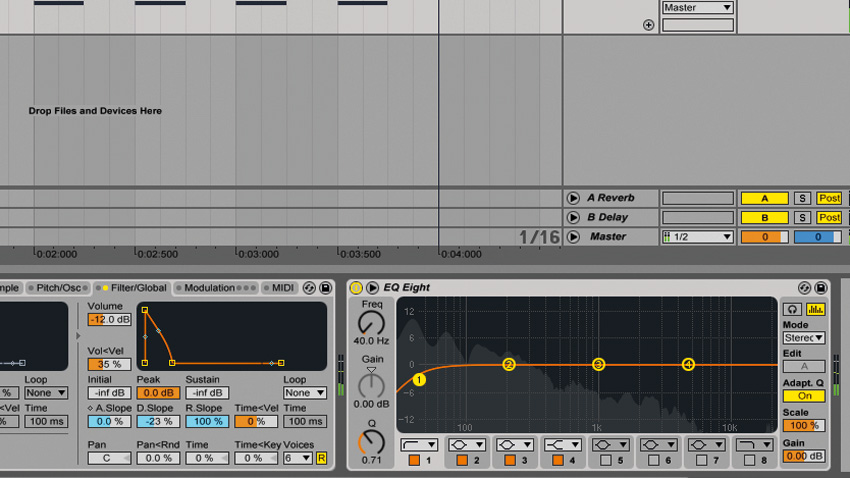
Step 3. Ableton Live's Sampler has a Decay Slope parameter, which allows us to fine-tune how quickly the kick's volume level drops. A setting of -23% works well here. Despite curtailing the kick's subby tail, there's still a lot of low-end energy, so we use an EQ Eight to high-pass the signal at 40Hz.
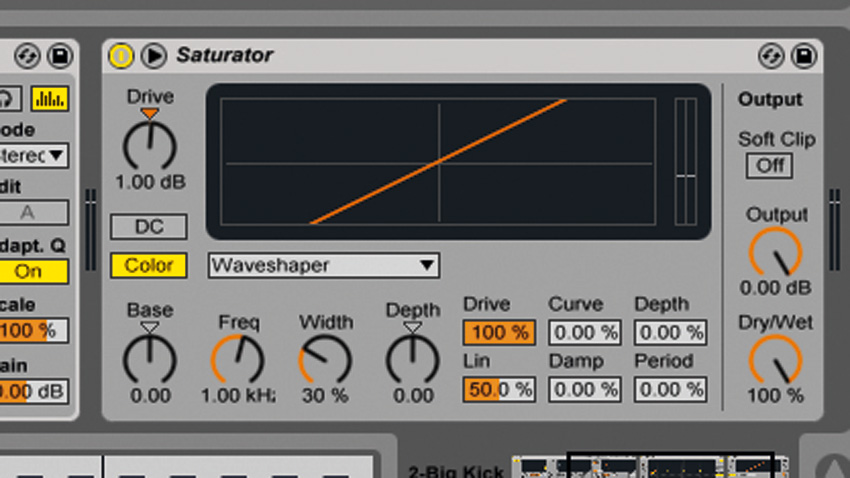
Step 4. The kick sound uses up a lot of headroom; we can scrape a bit back with a little saturation. Add Live's Saturator effect and set its Drive to 1dB. Set the mode to Waveshaper and click the triangle at the right-hand top of the effect's interface to bring up the waveshaper's parameters.
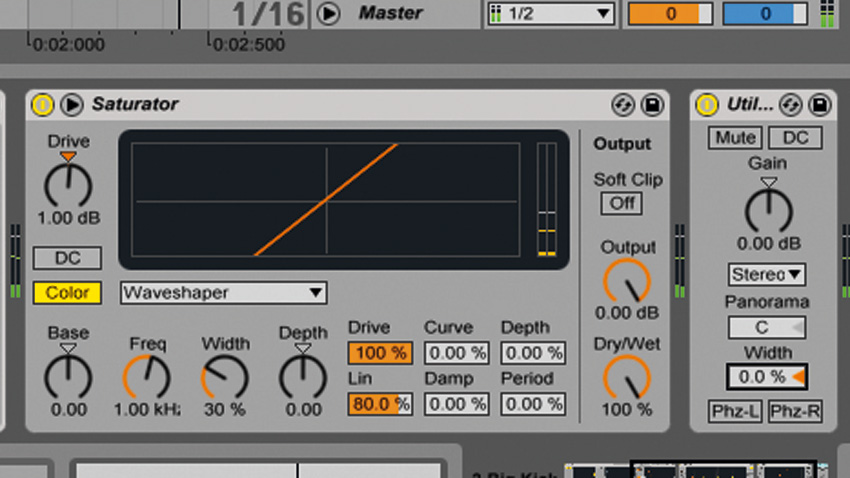
Step 5. Set the waveshaper's Lin parameter to 80% - this gives us around the same perceived volume at the raw signal, but it doesn't peak so loudly. The left and right sides of the signal peak at different levels - this kick is stereo. To make it mono, add a Utility effect and turn its Width down to 0%.
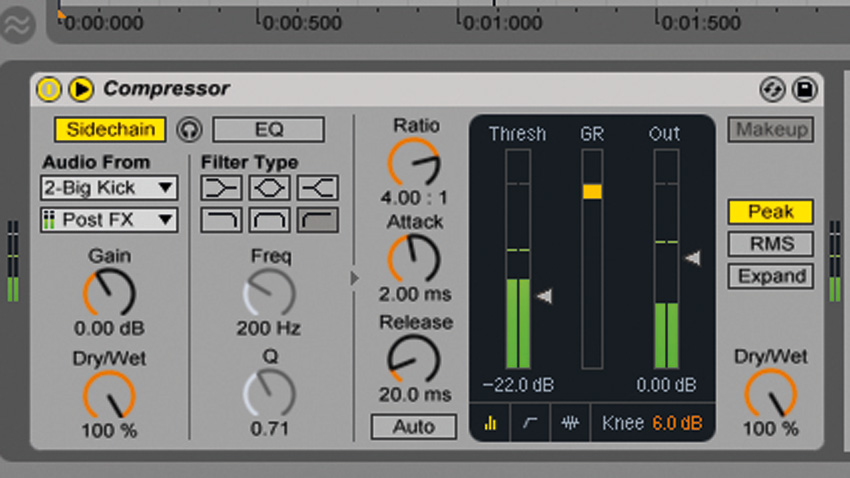
Step 6. We can squeeze more headroom out of our mix by compressing the bassline with a sidechaining input fed from the kick. This will imperceptibly duck the bass' volume when the kick plays. We've used a Ratio of 4:1, a Threshold of -22dB and a Release time of 20ms.
Future Music is the number one magazine for today's producers. Packed with technique and technology we'll help you make great new music. All-access artist interviews, in-depth gear reviews, essential production tutorials and much more. Every marvellous monthly edition features reliable reviews of the latest and greatest hardware and software technology and techniques, unparalleled advice, in-depth interviews, sensational free samples and so much more to improve the experience and outcome of your music-making.
