How to split your sub bass into multiple bands
This simple trick will make your bass-centric mixdowns much easier, and let you push your subs to the limit
Want all the hottest music and gear news, reviews, deals, features and more, direct to your inbox? Sign up here.
You are now subscribed
Your newsletter sign-up was successful
These days a lot of electronic music styles are based around 'bass' sounds that don't necessarily just occupy the low-end of the mix - sometimes they include everything from the sub bass frequencies up to the very highest of highs! These basses can sound massive but can be tricky to mix.
We can make life easier by splitting these kinds of parts into two or more bands, which allows us to process the sub bass separately from the rest of the signal. There are plugins dedicated to this very task: for example, Blue Cat Audio's MB-7 Mixer enables you to split a signal into up to seven bands and process each one with its own plugins.
It's also possible to split signals into separate bands manually by setting up your own crossover filter, and in this example, we'll see how this can be achieved using FabFilter's excellent Pro-Q 2 equaliser. For the highest degree of accuracy we'll use the effect's linear phase mode, which means our filtering won't affect the phase of the original signal.
For more on making and mixing sub bass, pick up Future Music 291, which is on sale now.
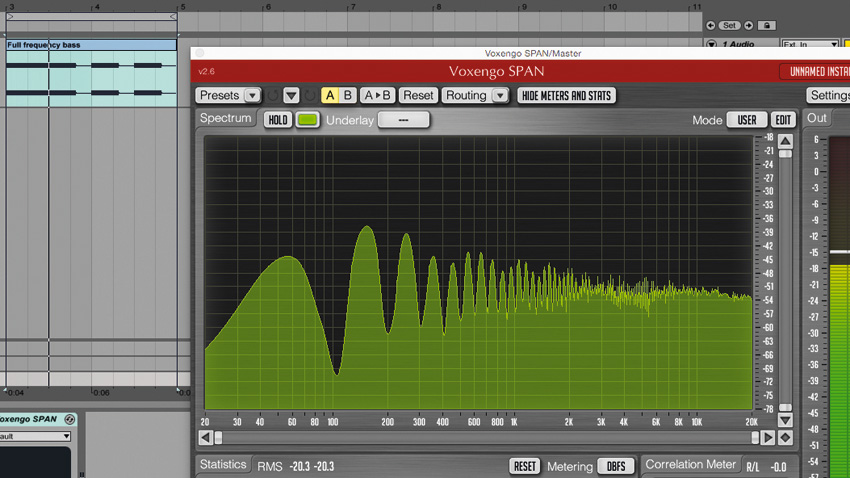
Step 1: Launch your DAW and drag Full frequency bass.wav onto an audio track. If you examine this sound with a spectral analyser, you'll see that it contains a broad range of frequency content, right down into the sub frequencies. This makes it tricky to mix, so let's split the sub part onto its own channel.
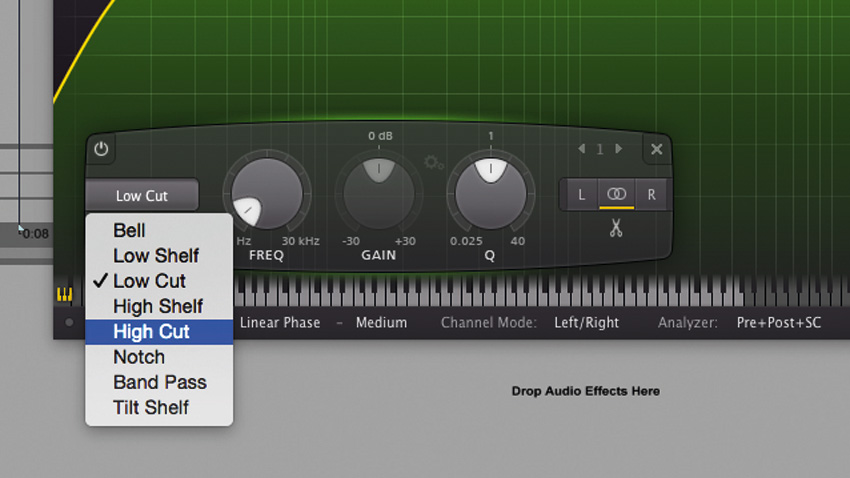
Step 2: Add FabFilter's Pro-Q 2 onto the audio track, click Zero Latency and select Linear Phase mode. Double-click the main display to create a new filter band, click the filter type on the left-hand side of the spectral analyser and select High Cut.
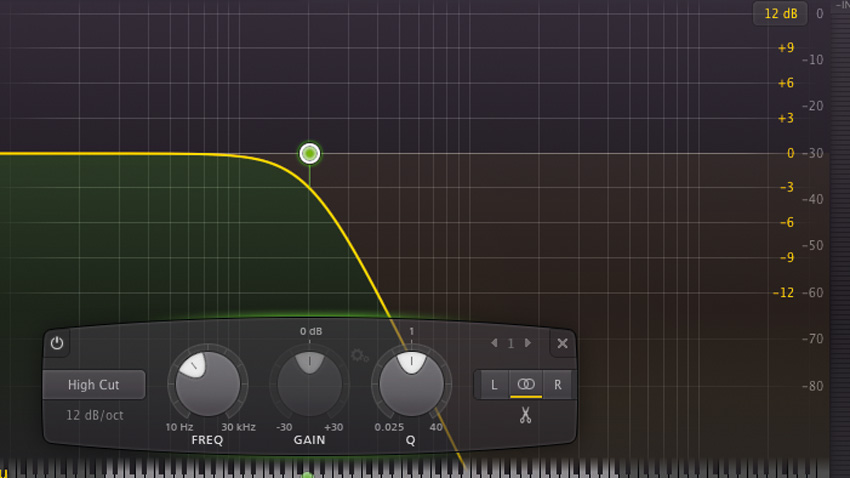
Step 3: Double-click Freq and set the frequency to 200Hz. This gives a 3dB reduction in the signal at 200Hz. As we're stacking up two versions of this track, we want a 6dB reduction at the crossover frequency, giving us the same amplitude at that frequency as the original version of the signal.
Want all the hottest music and gear news, reviews, deals, features and more, direct to your inbox? Sign up here.

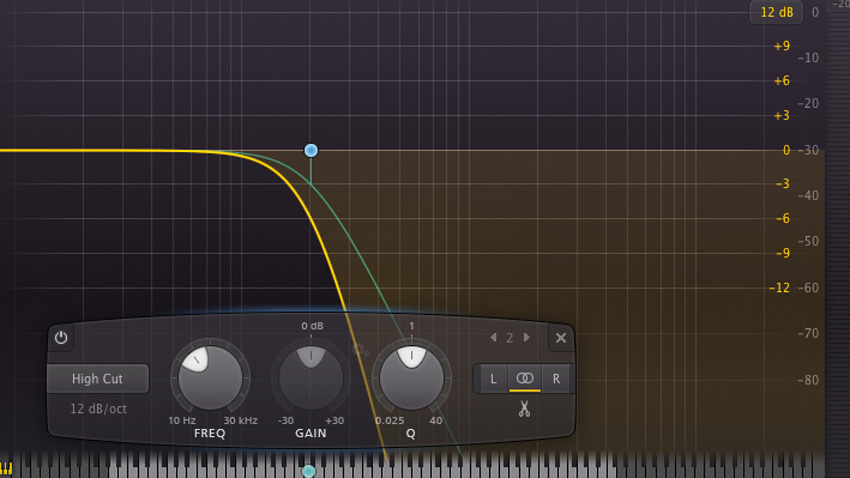
Step 4: To do this, we simply create another band and give it exactly the same settings as the first: a High Cut with 12dB slope at 200Hz with a Q of 1.00. Now Pro-Q 2's yellow frequency response curve will show a 6dB reduction at 200Hz - perfect!
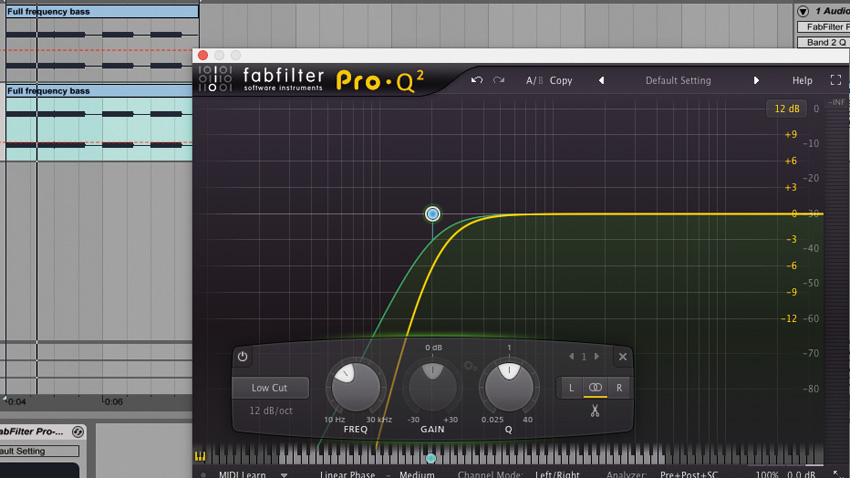
Step 5: Next, we need to create the band that will contain all the frequencies above the sub. Duplicate the audio track and set both of Pro-Q 2's bands on the new track to Low Cut. Now we have a multiband version of our bass, let's use make it sound as big and bad as possible.
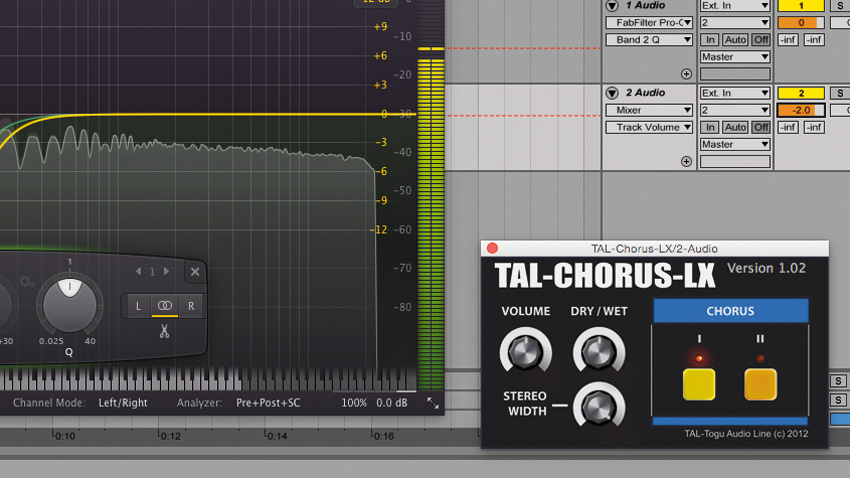
Step 6: Our bass is mono. While that's good for the sub, a bit of stereo can work wonders for the mids and highs. Add a chorus effect to the Low Cut version of the bass to make the overall effect larger. Turn down this version of the bass by a couple of dB, so it doesn't overwhelm the low-end.
Future Music is the number one magazine for today's producers. Packed with technique and technology we'll help you make great new music. All-access artist interviews, in-depth gear reviews, essential production tutorials and much more. Every marvellous monthly edition features reliable reviews of the latest and greatest hardware and software technology and techniques, unparalleled advice, in-depth interviews, sensational free samples and so much more to improve the experience and outcome of your music-making.
