How to enhance a kick drum in Ableton Live
If only the biggest and baddest beats will do for your re-edits, you'll need to do a little drum replacement. Luckily it's's easier than it sounds
Want all the hottest music and gear news, reviews, deals, features and more, direct to your inbox? Sign up here.
You are now subscribed
Your newsletter sign-up was successful
You don't need dedicated drum replacement software to fix the odd weak kick drum - all the tools required are already at your disposal in your DAW. In this tutorial, we'll show you how to beef up a sub-par kick in a dance track.
• For many more Ableton Live guides go to our massive learning hub: Learn Ableton Live and Ableton Push: music production tips and tutorials
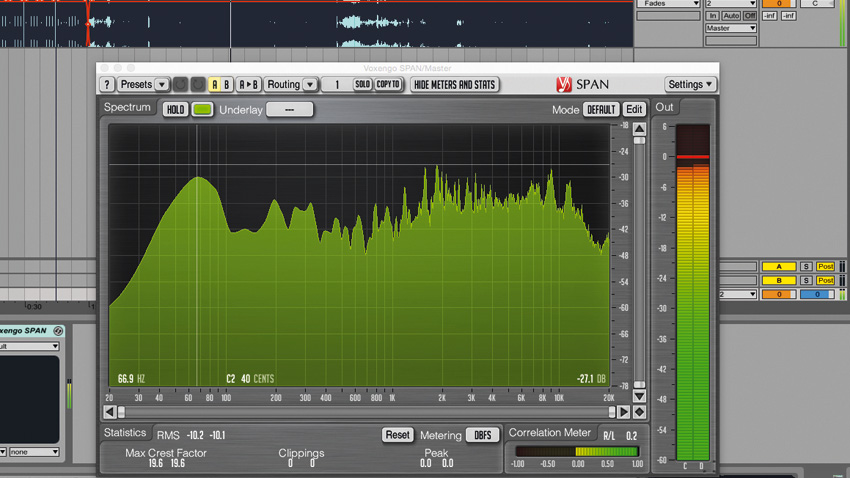
Step 1: Load the Edit.als project up in Live, and put Voxengo's excellent free spectral analyser SPAN on the master buss. Play the project back and hover the mouse pointer over where the kick peaks in SPAN - you'll see this happens at 67Hz, or C2.
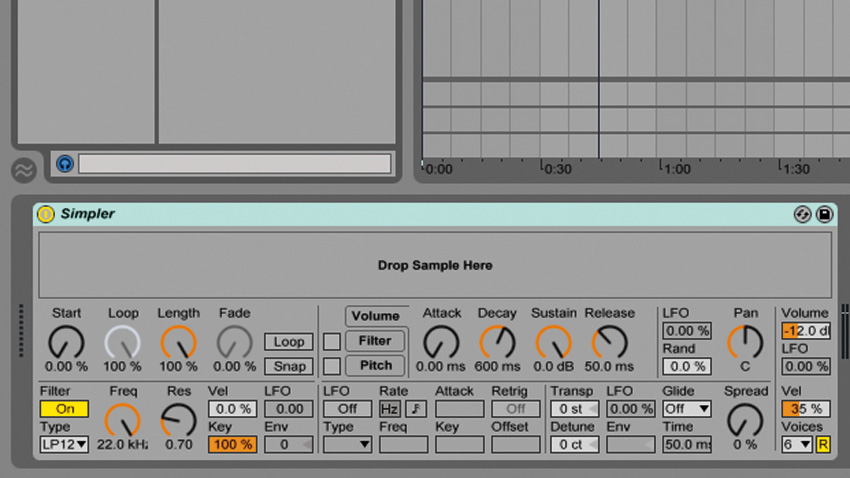
Step 2: We can double check the key of the track by loading up a synth and tapping along with the track, and this confirms that C is indeed the key we're working with. Let's find a compatible kick drum sound to supplement the track with. Add a MIDI track, and put an instance of Simpler on it.
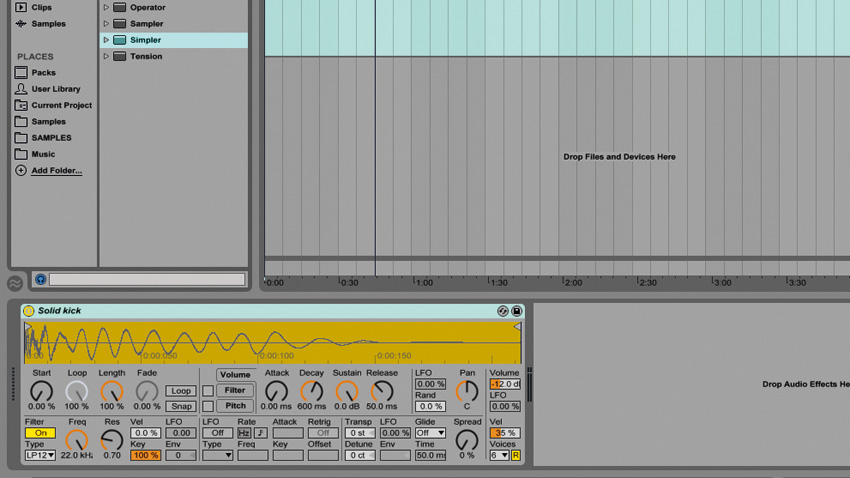
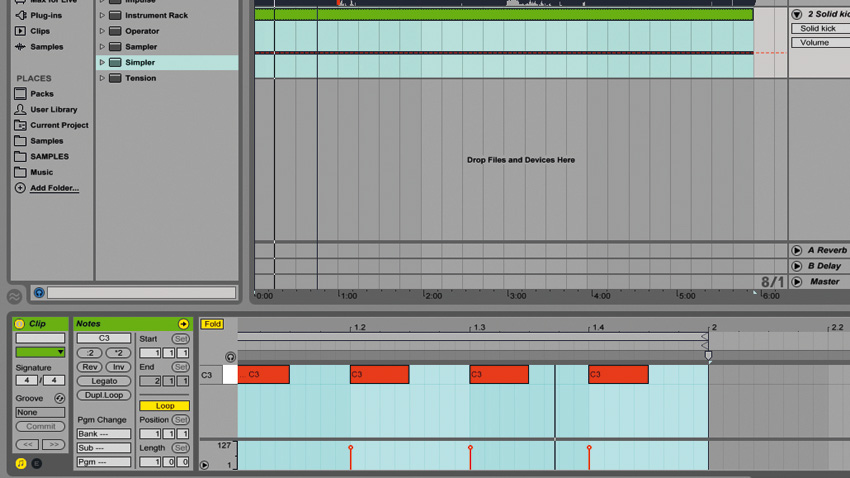
Step 3: Sequence a four-to-the-floor kick pattern like so, and loop the clip so that it plays for the entire track. Now we just need to find a suitable kick drum - here's an appropriate candidate in the form of Solid kick.wav.
Step 4: Drag the sample onto Simpler to load it up. It's already tuned correctly so we don't need to worry about transposing it. Turn up Simpler's Volume to -4dB, and play the project back. You'll notice that, while the new kick drum is providing us with more character in the mids, the extra headroom it's eating up is causing our project to clip the master.
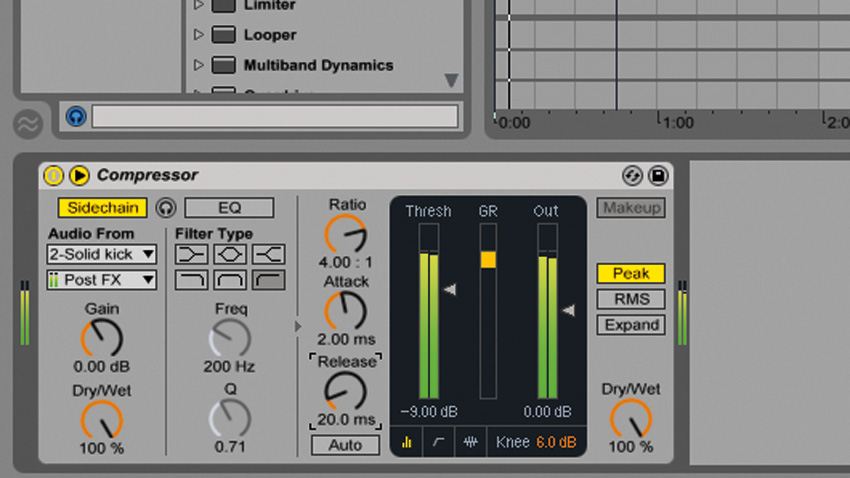
Step 5: We can remedy this by ducking the original track when the kick plays. To do this put a Compressor effect on the audio track, and set its sidechain input to the Simpler track. Bring down the Threshold to -9dB, set the Ratio to 4.00:1 and set the Release to 20ms.
Want all the hottest music and gear news, reviews, deals, features and more, direct to your inbox? Sign up here.
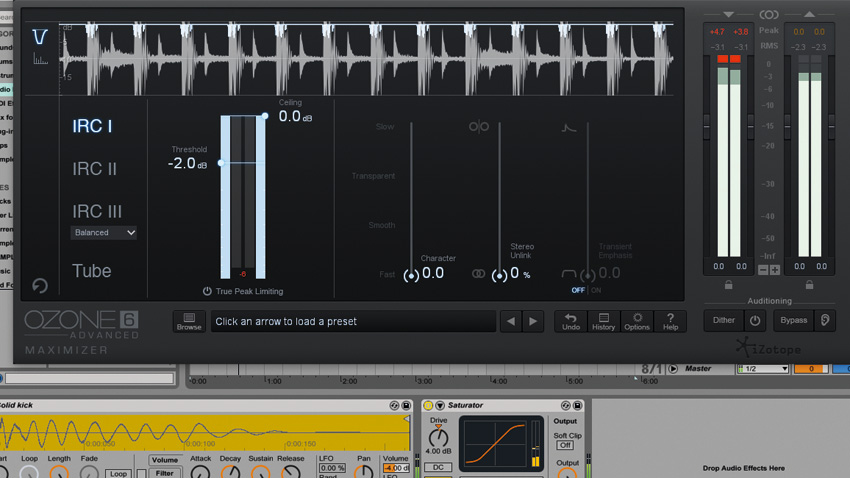
Step 6: Our mix is still clipping, so put a limiter such as iZotope Ozone's Maximiser on the master. We can now get away with pushing the mix a bit. Add Live's Saturator to the Simpler track, and gradually turn up the Drive level until the kick is banging enough for your taste. 4dB gives us a good balance of solidity and presence.
Future Music is the number one magazine for today's producers. Packed with technique and technology we'll help you make great new music. All-access artist interviews, in-depth gear reviews, essential production tutorials and much more. Every marvellous monthly edition features reliable reviews of the latest and greatest hardware and software technology and techniques, unparalleled advice, in-depth interviews, sensational free samples and so much more to improve the experience and outcome of your music-making.
