9 'alternative' synth plugins that you need to try: "These synths tread their own path, offering a completely different experience that was never expected to be a mainstream phenomenon"
What if titans like Vital, Serum, Phase Plant and Pigments didn’t exist? Here are today’s coolest ‘alt’ synths for the contrarians and the experimentalists
Audio technology is capable of astonishing feats. From the most faithful capturing of analogue oscillation to the most advanced modulation and processing you can imagine, today’s top synths use these technological heights to their advantage. But so do the synths that aren’t hitting the big leagues, and others that have been treading their own path.
Today’s top synths need no introduction, but there are plenty more options laying slightly lower in the background. For every Arturia Pigments and u-he Hive, there are at least a couple of alternative options that haven’t been quite as successful. Some aimed to make it big but didn’t catch the right wind – others bravely trod their own path, offering a completely different experience that was never expected to be a mainstream phenomenon. It’s these synths that we’ll discuss here.
Physical modelling has undergone a small resurgence recently, with a few synths appearing in the last few months. Reason Studios’ Objekt made a dent in public consciousness, with its versatile setup allowing a bevy of sounds and textures to be made. Objekt has a real-world sound that fits right into Reason, and the workflow and possibilities you get through using it with the rest of the DAW are very expansive.
Meanwhile in the physical modelling space, Physical Audio’s Modus, also recently launched, offers a ‘fantasy’ instrument setup combining strings and plates connected together by springs and rattles. It’s a synth that requires a bit of work to get started with, and it’s got a sound all its own. We’ll take you through the basics in this tutorial, with a few steps to get you running with the main features of Modus.
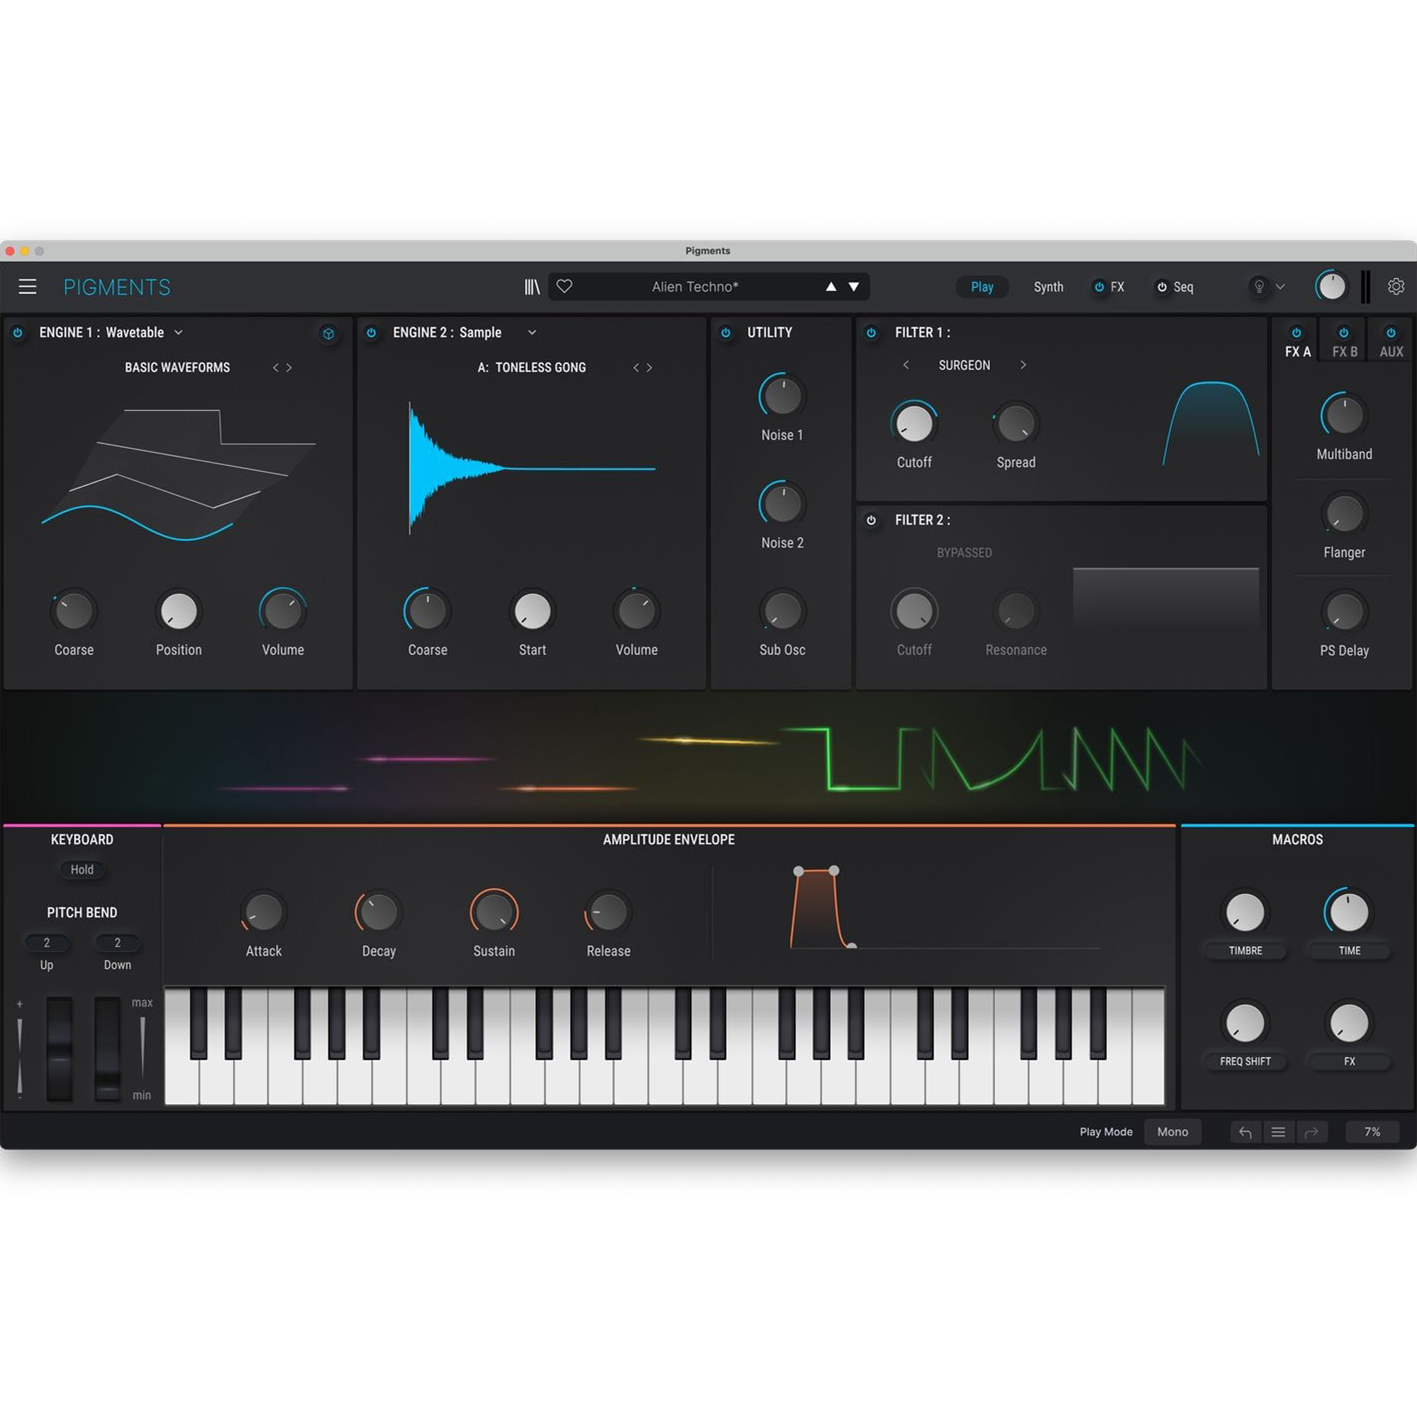
Best synth plugins 2024: Synth VSTs to suit all styles and budgets
Newfangled Audio’s Pendulate takes a similar modelling-based approach to its oscillators, but this time those oscillators are inspired by oscillations in the real world: sources like turbines and vortices that would – as once imagined – make for nice synth sounds when scaled up into the audio range. As it turns out, they did, and we’ll show you how to get the most out of this synth as well.
In AI Land, the previously long-in-the-tooth Synplant has received a major ‘v2’ upgrade, and has added a few interesting new features. Alongside the lovely ‘DNA’ view, where you set various settings for each patch, there’s also a new mode that can load a sample and extrapolate it out across the entire keyboard with more than just simple tuning adjustments underlying it all. We’ll be taking that for a spin as well.
First up, though, something that’s all the more traditional, but certainly still quite different: Cherry Audio’s Sines synth lets you build both analogue and digital-style patches using only sine waves as building blocks. As it turns out, these singular components are more than enough to get you some bread-and-butter synth patches – including complex waveforms – and the rest of the synth’s architecture helps to take things into lesser known territories.
Want all the hottest music and gear news, reviews, deals, features and more, direct to your inbox? Sign up here.
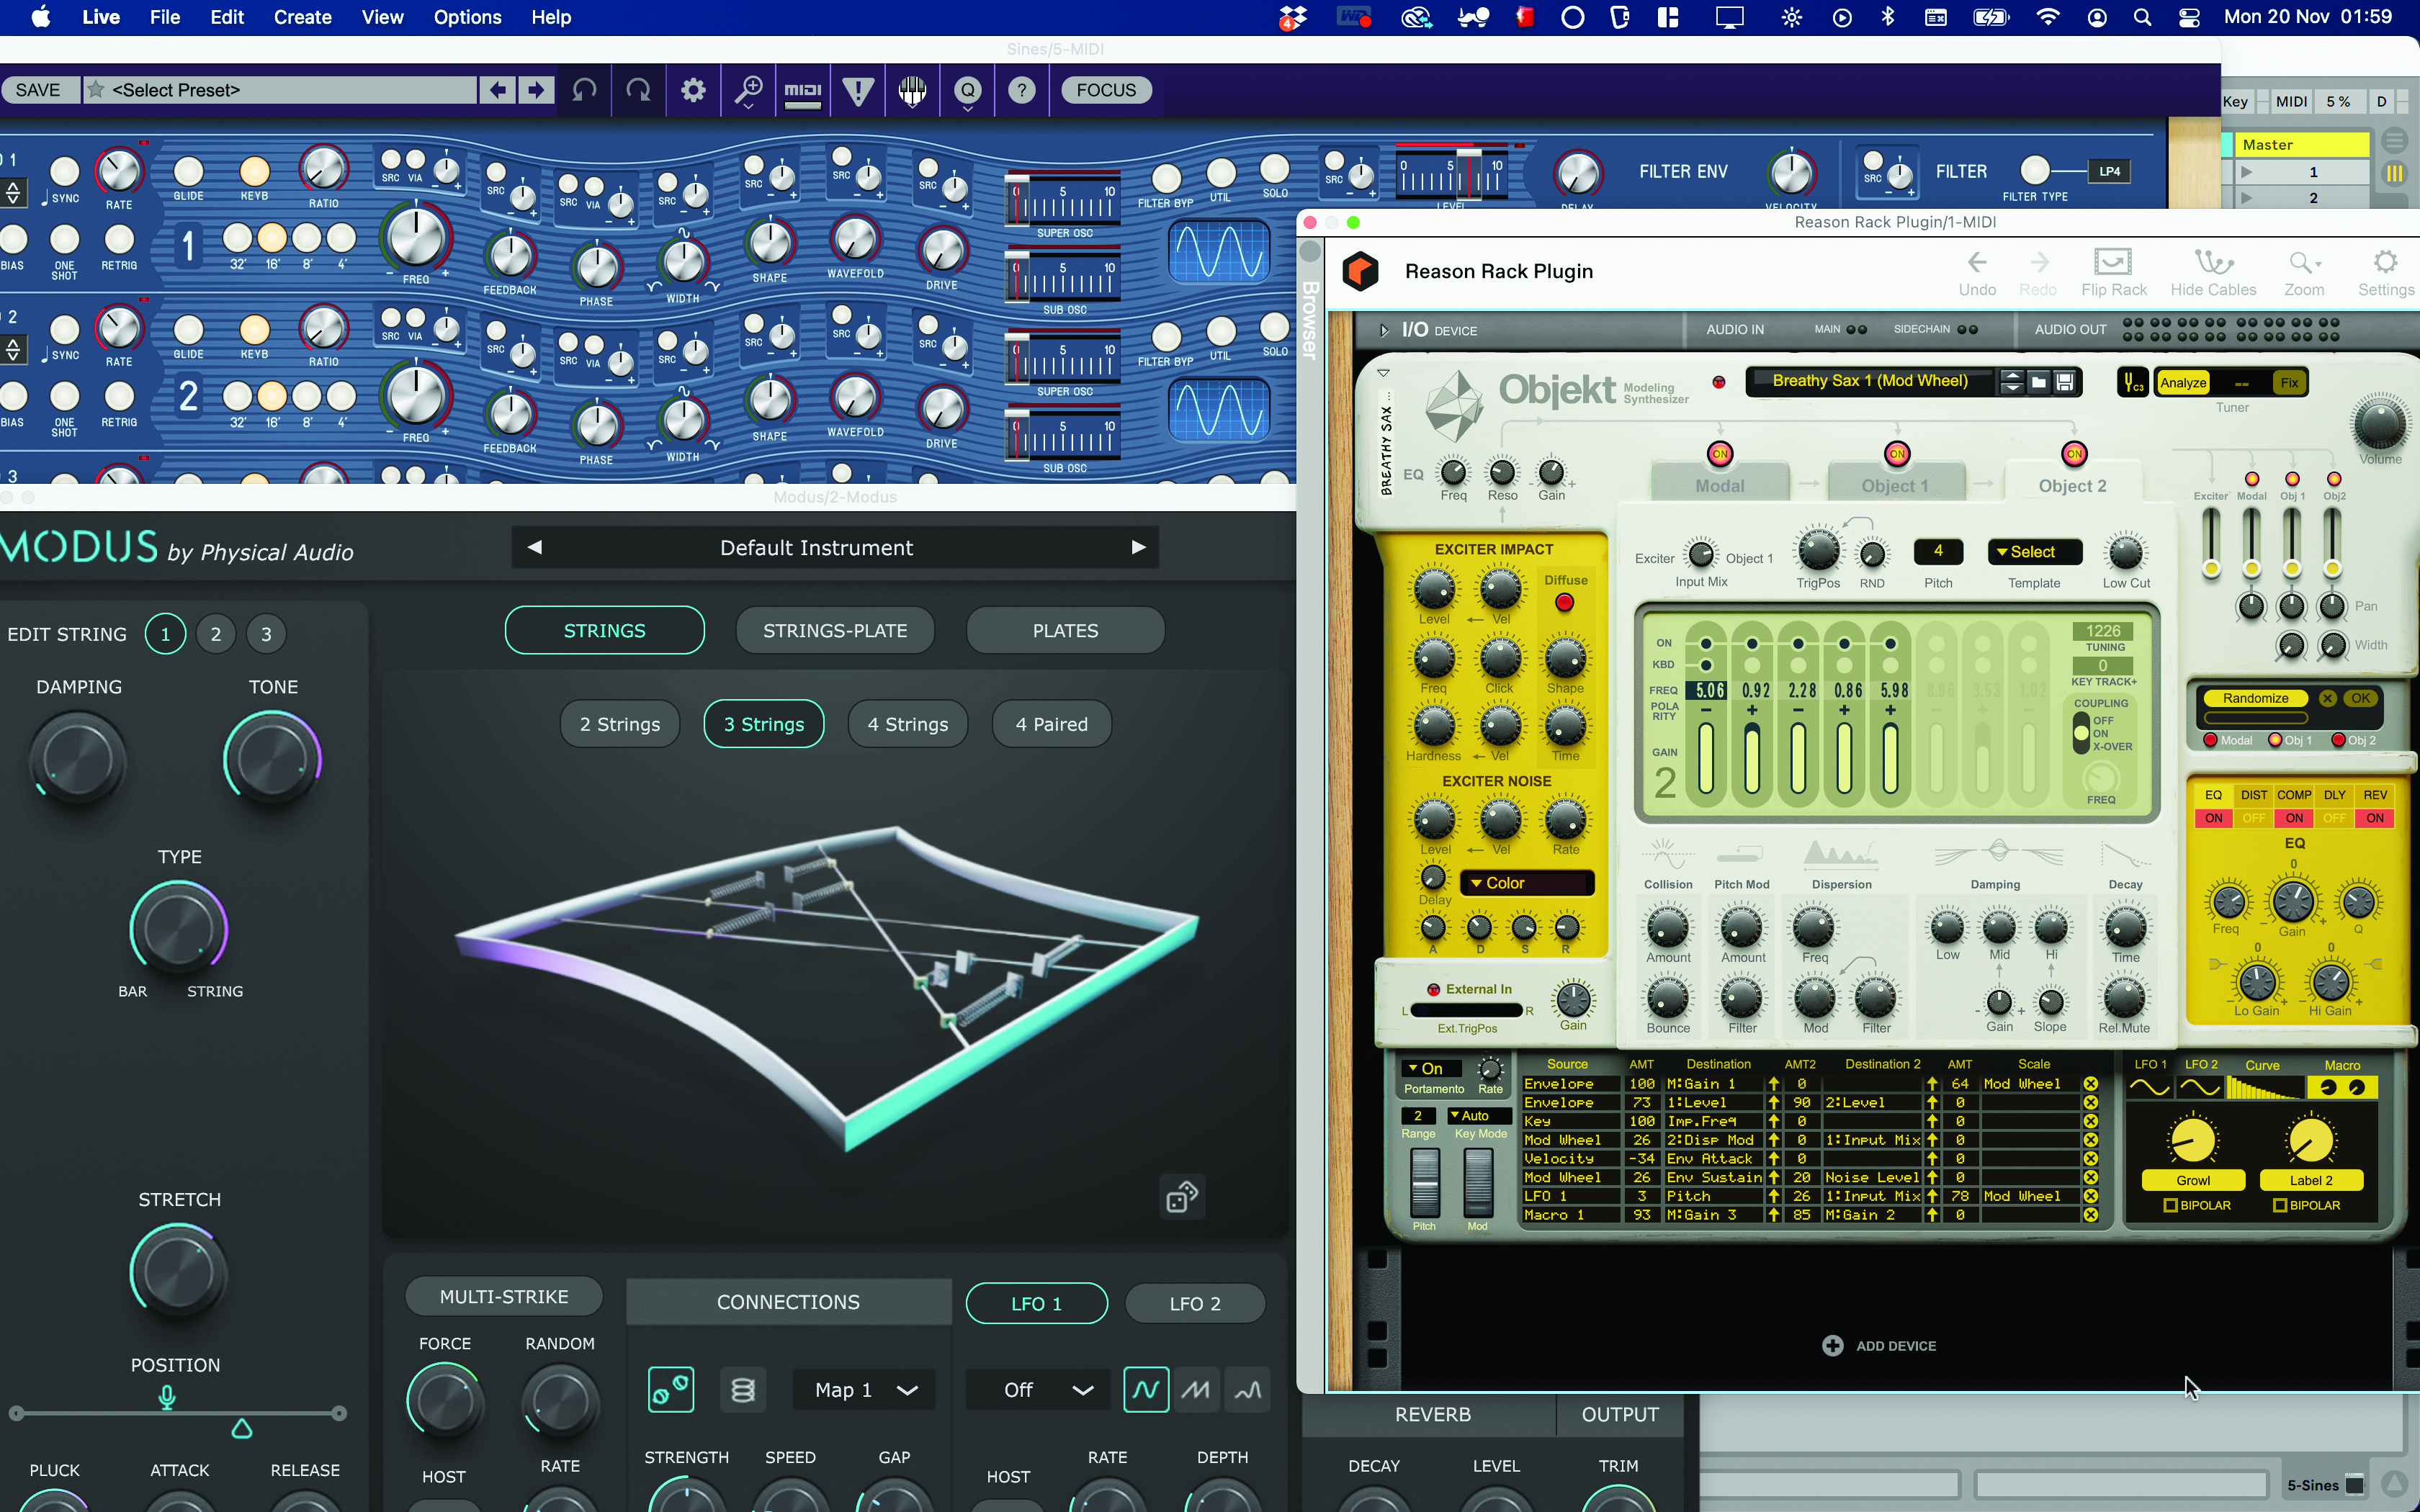
Cherry Audio Sines
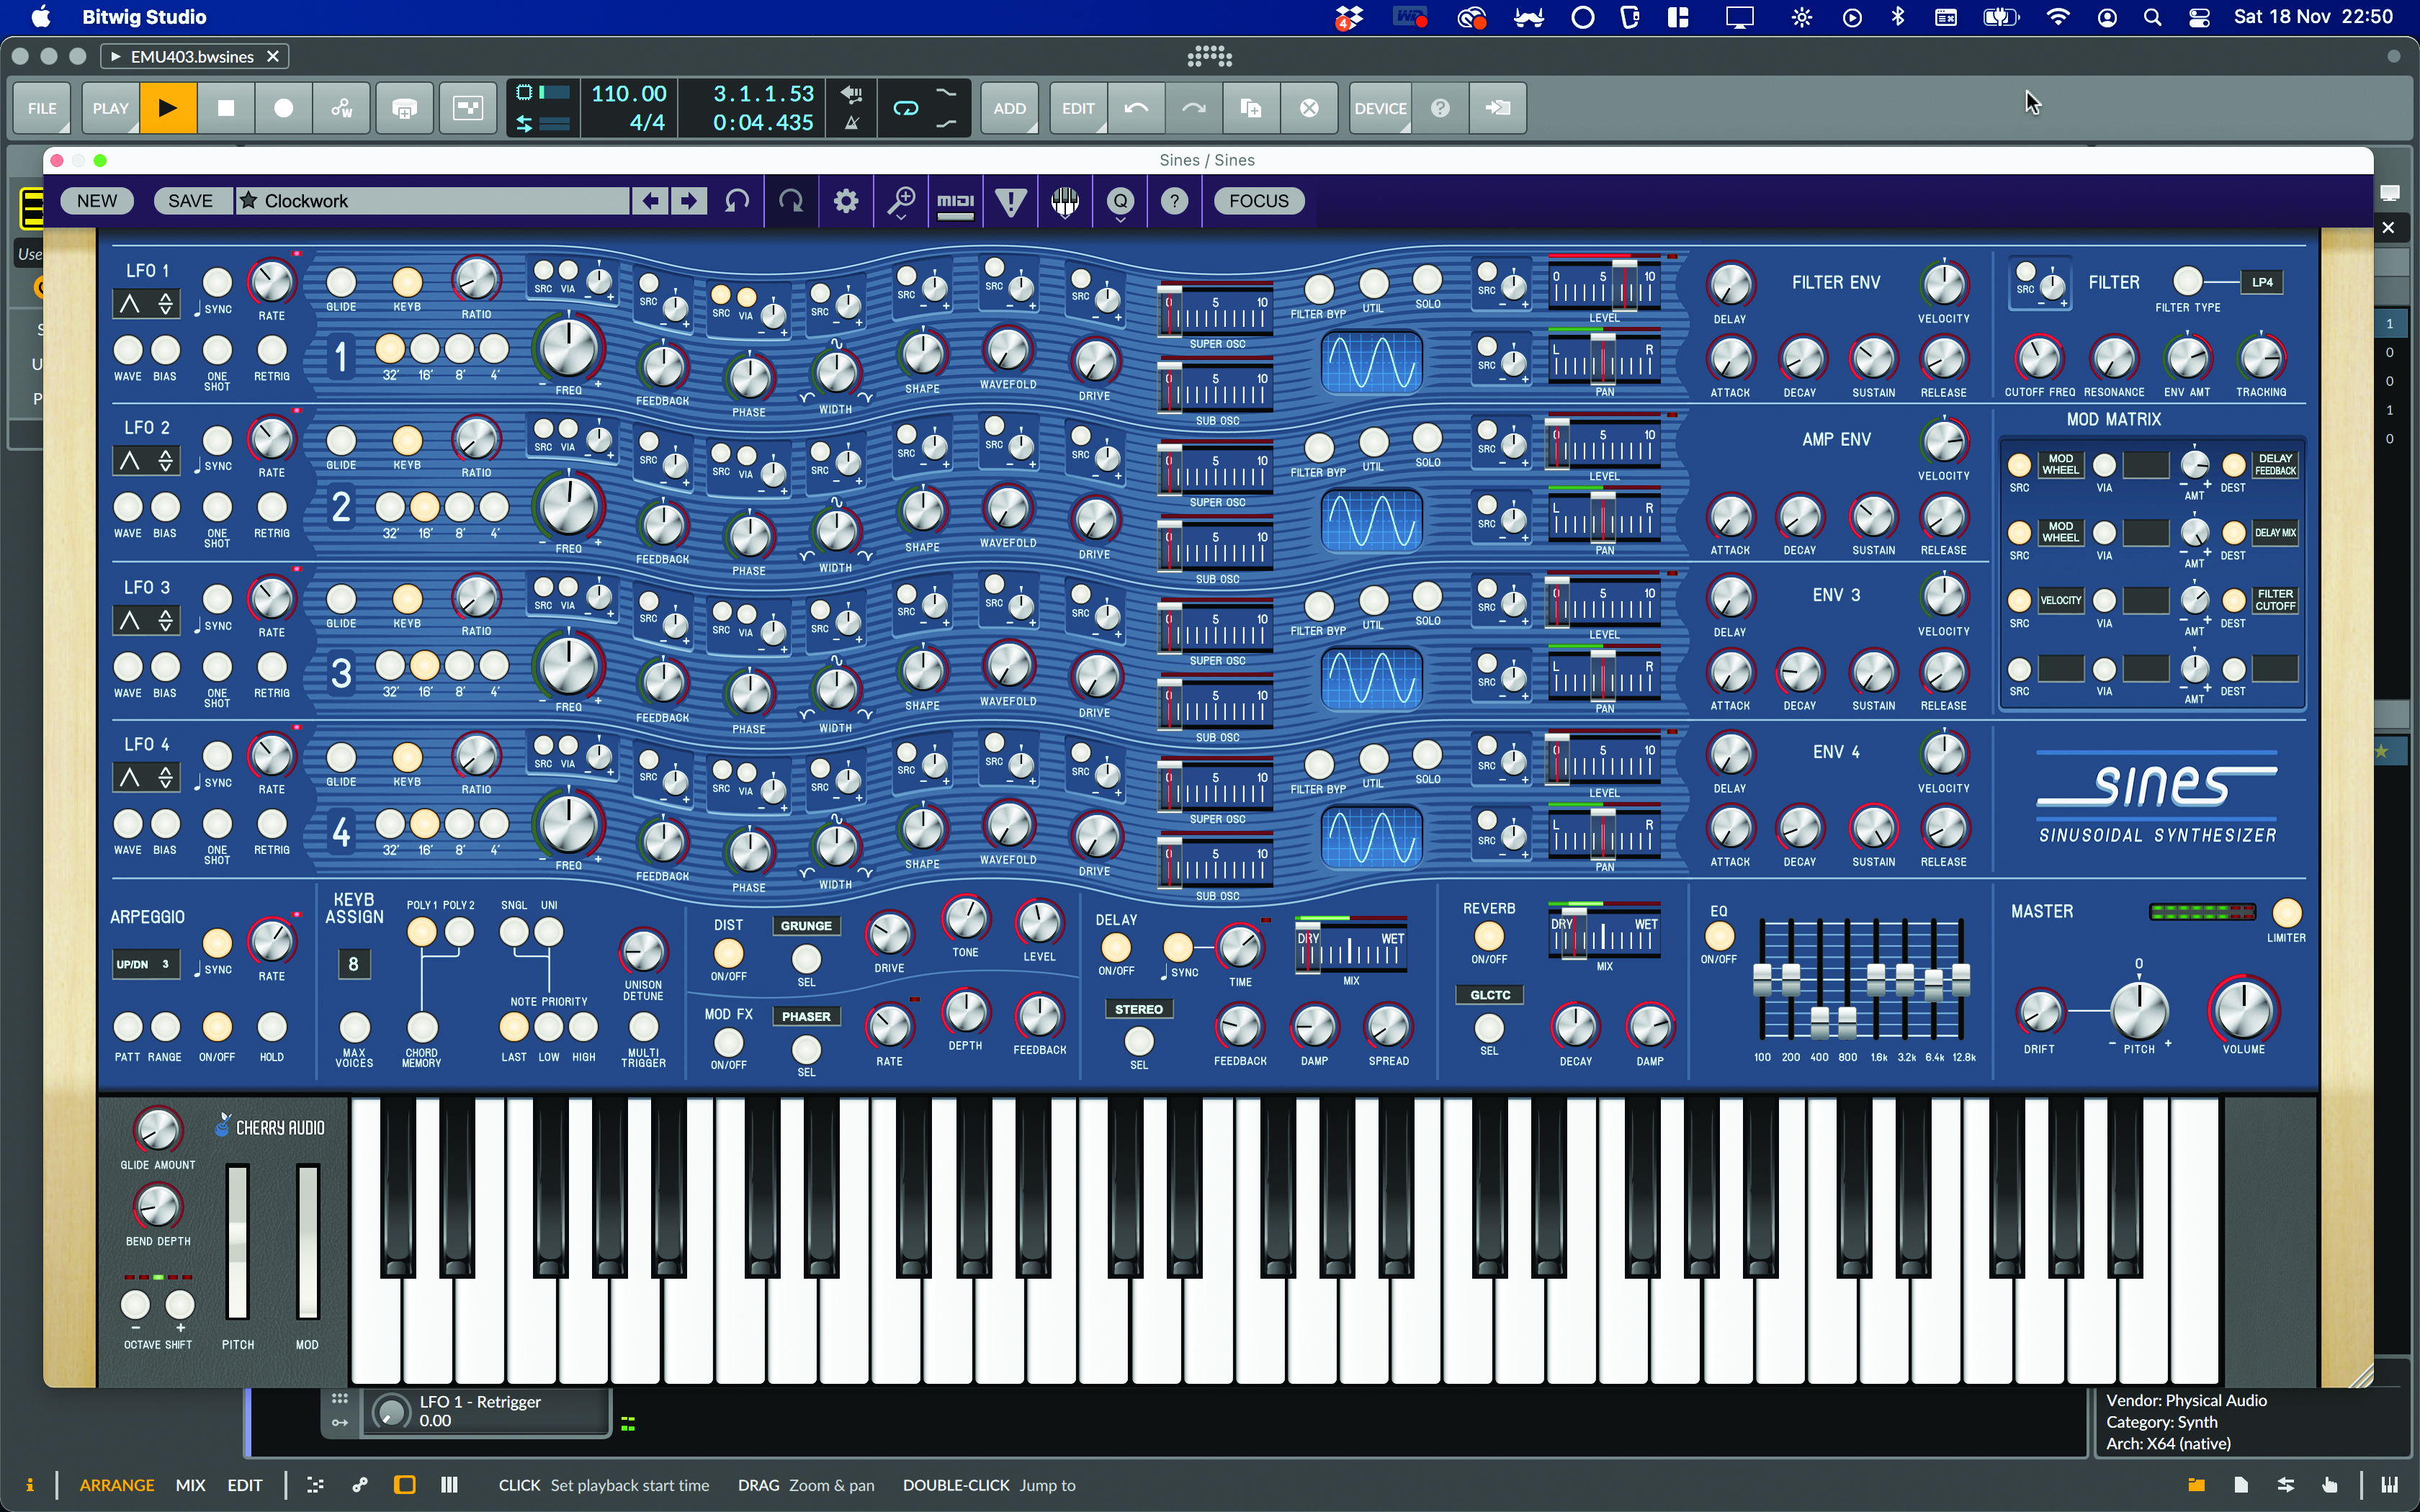
Cherry Audio’s Sines synth gives you four oscillators that can act as audible synth oscillators or LFOs. You can combine these in many ways and include effects to really sound out a lot of sounds, but let’s look at the individual oscillator controls…
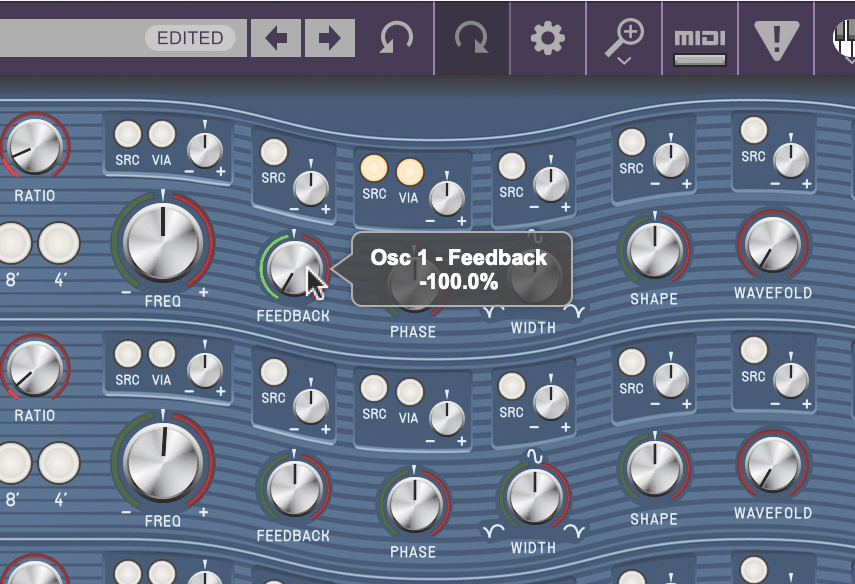
The oscillator starts as a sine, but with the Feedback control, which makes the oscillator modulate its own phase, it turns into something more like a saw wave. Negative and positive values of Feedback invert the sawtooth shape.
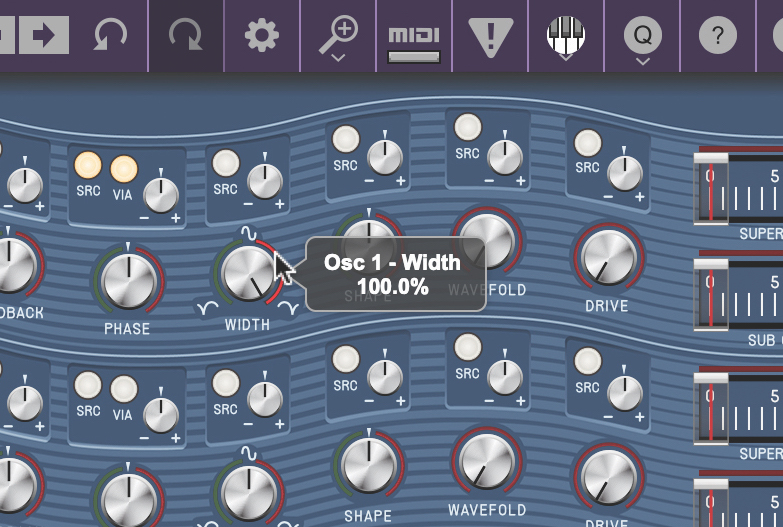
Using the Width control, we can make the oscillator into something that’s more like a parabola, but one at a lower level than the original sine. The sound is weaker but definitely not very sinusoidal.
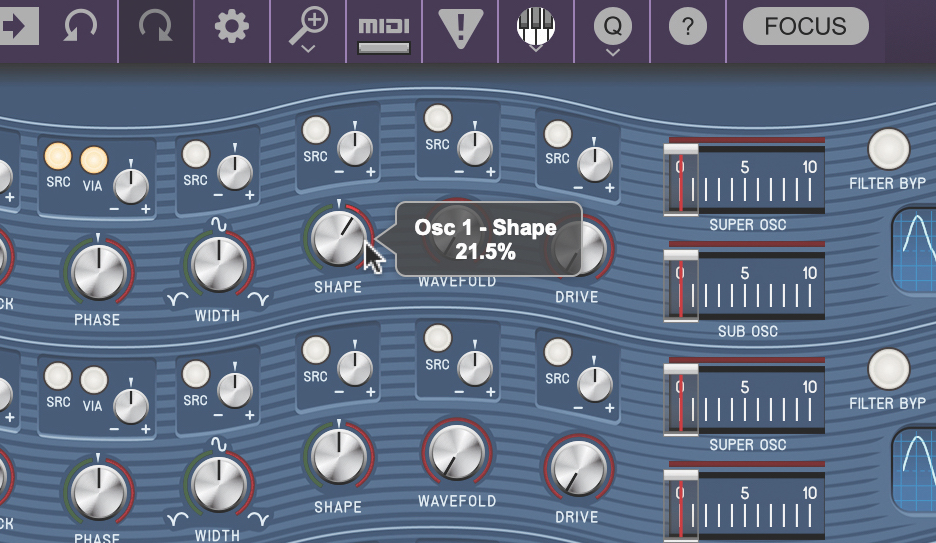
At a reasonably low positive level, the Shape control makes the sine more like a triangle wave. Turning it down into the negative region, though, makes the resulting sound and oscillator shape something like a rounded square.
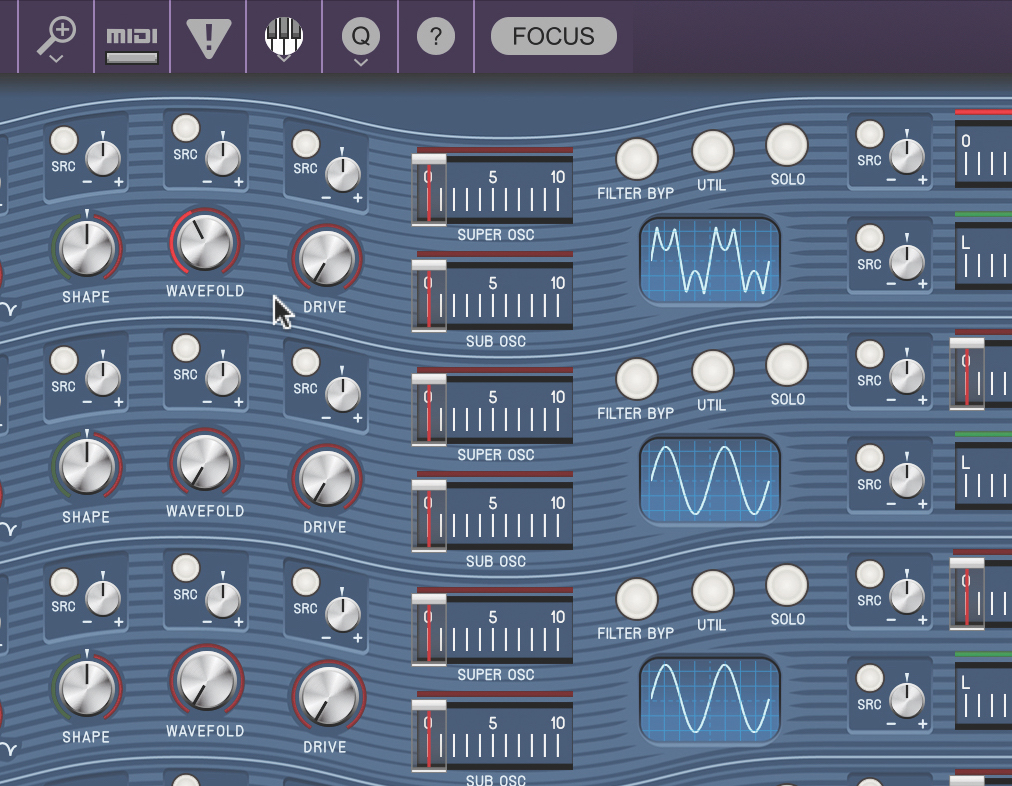
Next, the Wavefold parameter brings the tops of the waveform back in on themselves, eventually inverting the waveform at its extreme value.
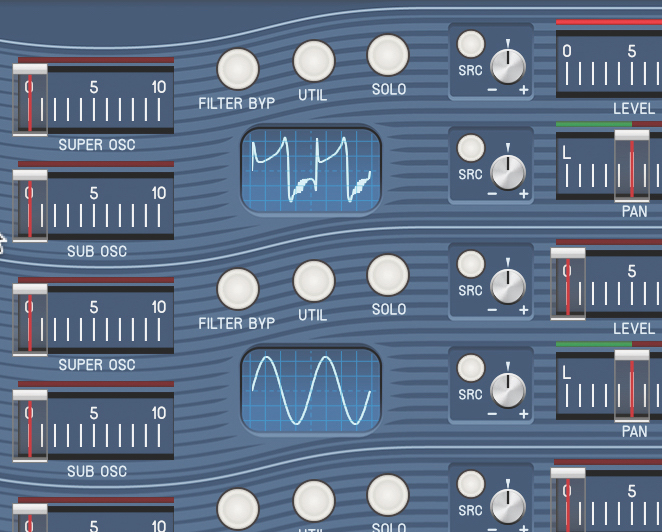
Now, when we mix these waveform modifications together, we truly get the most out of Sines. Add clipping with the Drive parameter, plus phase modulation for pseudo-FM, and we’ve got a monster on our hands!
Physics-based oscillators with Newfangled Audio Generate
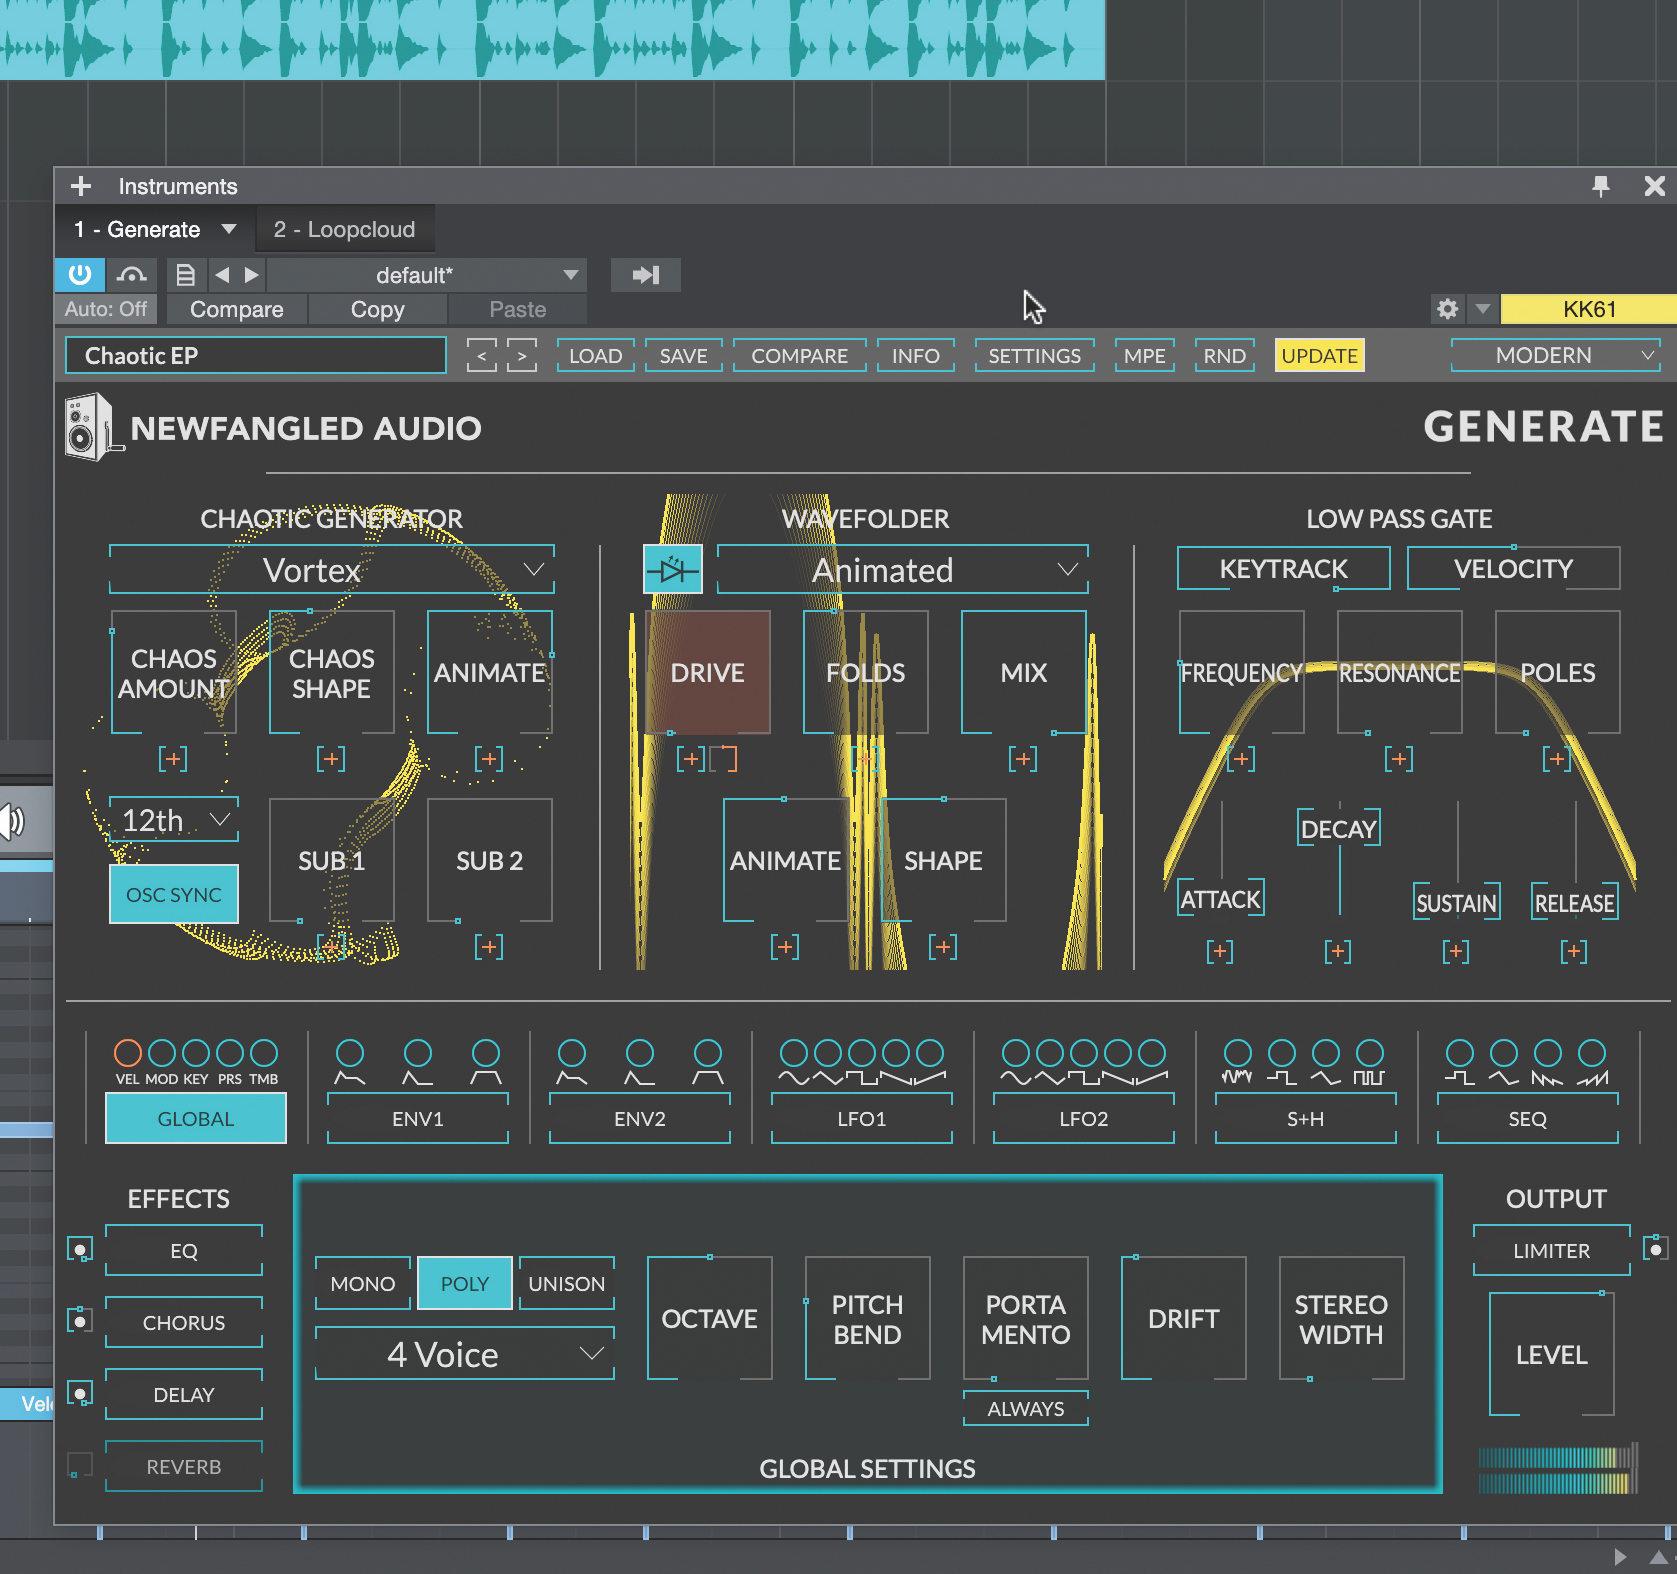
Newfangled Audio’s Generate synth has oscillators inspired by the movements of real oscillations. The Vortex oscillator, for example, is quite different to the sound of the next one.
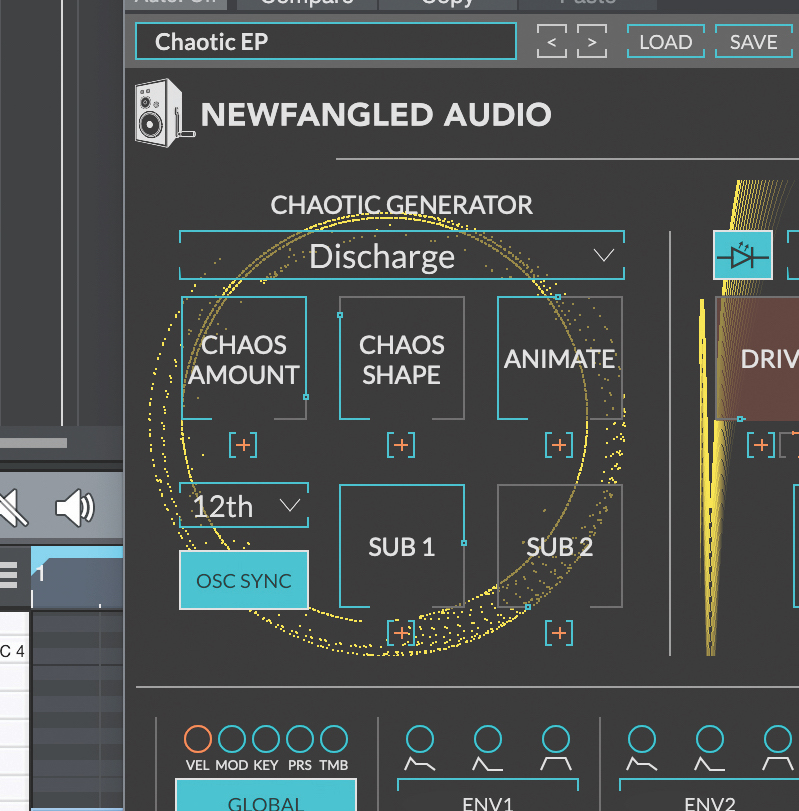
Discharge adds a slightly rougher, gnarlier wave into the bargain. Here we’ve tweaked it a little for its Chaos Amount and Shape (all oscillator types here have these), and we’ve turned up one of the Sub controls too.
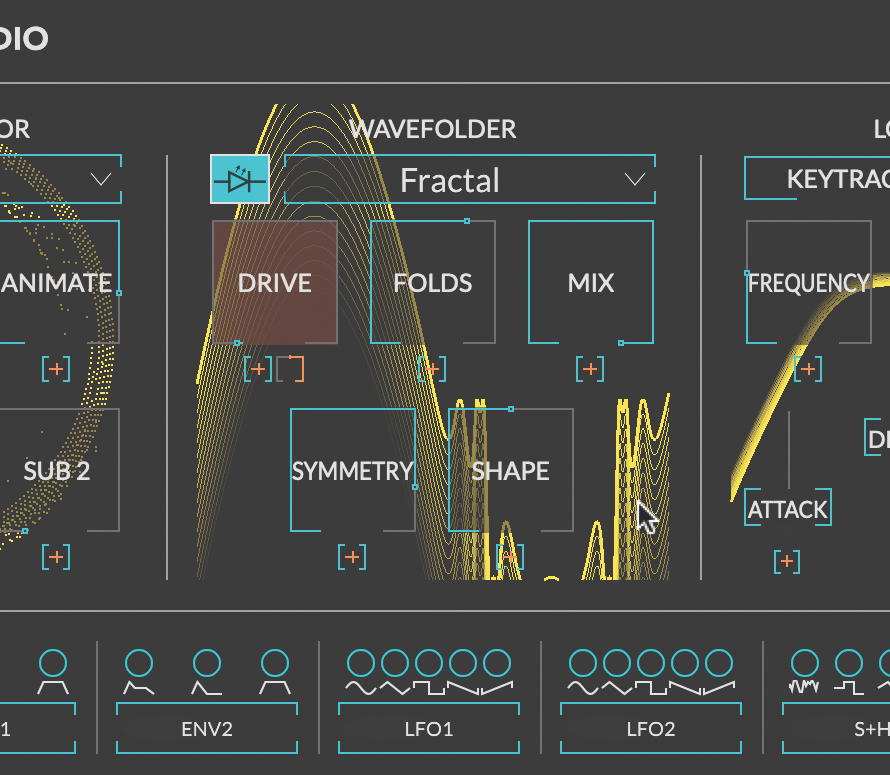
To get the oscillator moving even more, we can increase the Animate control, and we’ve also attended to the Wavefolder’s controls here too.
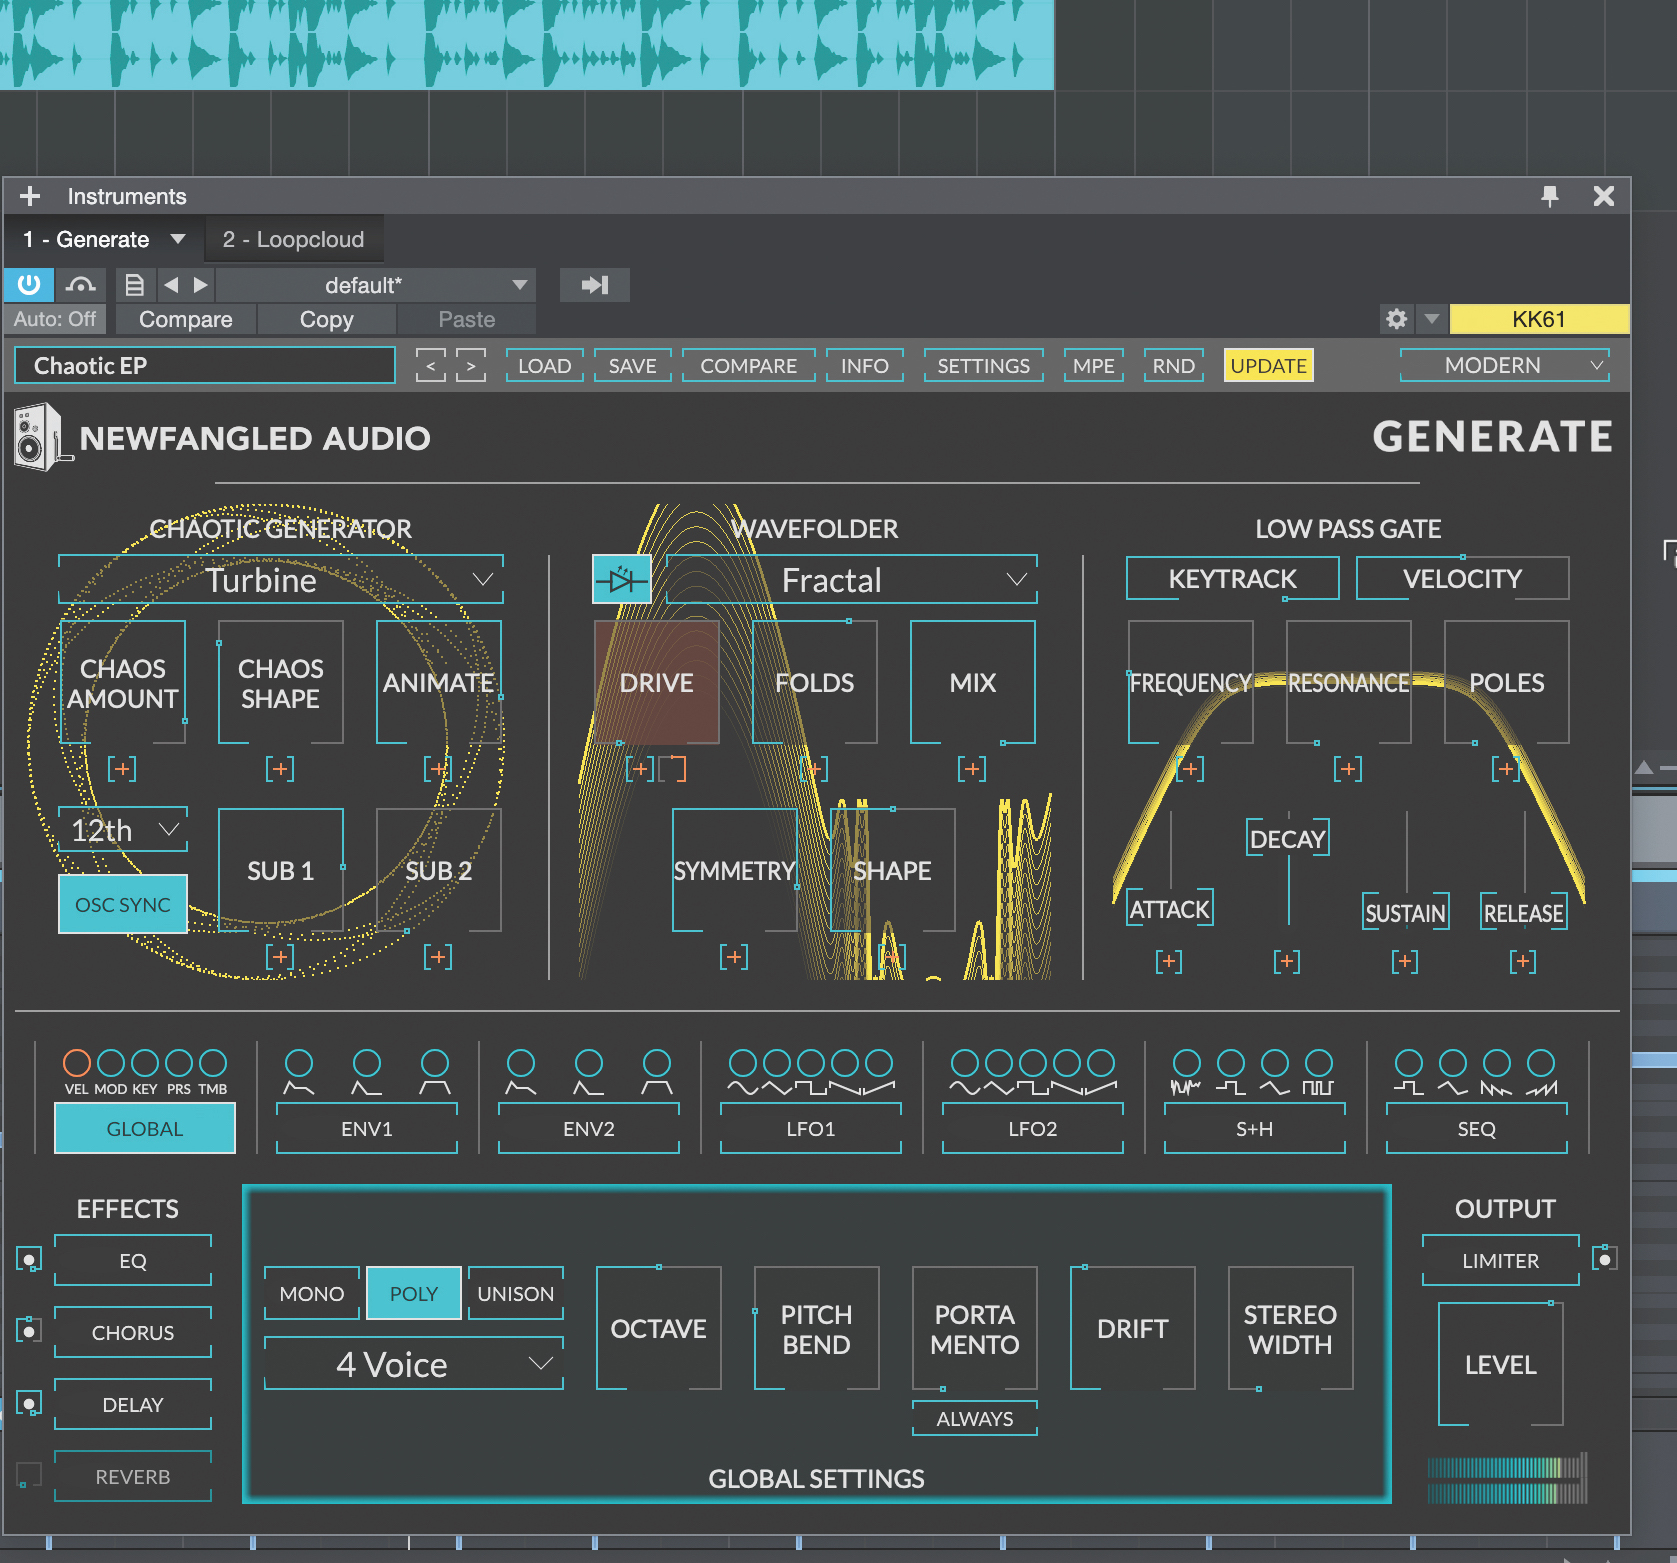
Here’s the same sound with the Turbine oscillator switched in. A compelling, inharmonic oscillator that makes lots of musical sense, captivating for basslines and synth leads alike.
Synthesis: what's in a type?
‘Synthesis type’ is a strange concept, when you consider it. Subtractive synths are supposedly the ‘bog standard’ sort of synthesiser, in which a complex waveform is filtered down to leave something simpler to work with. We’re often led to believe that this is worlds away from, say, an FM synthesiser, but most FM synths you work with probably came replete with their own filters, envelopes and so on.
Additive synthesisers can be considered a far cry away from a subtractive synth, although you can argue that any sound can be created by the right additive combination
Perhaps the synthesis type comes mostly from the oscillators in question rather than the processors that come after them. Additive synthesisers, for example, can be considered a far cry away from a subtractive synth, although you can argue that any sound can be created by the right additive combination. When a new plugin with a ‘revolutionary type of synthesis’ comes around, it’s not that you shouldn’t believe it, but it’s best to judge by the sound coming out of it rather than by the way it makes its waveforms in the first place.
Madrona Labs Kaivo and its radical possibilities
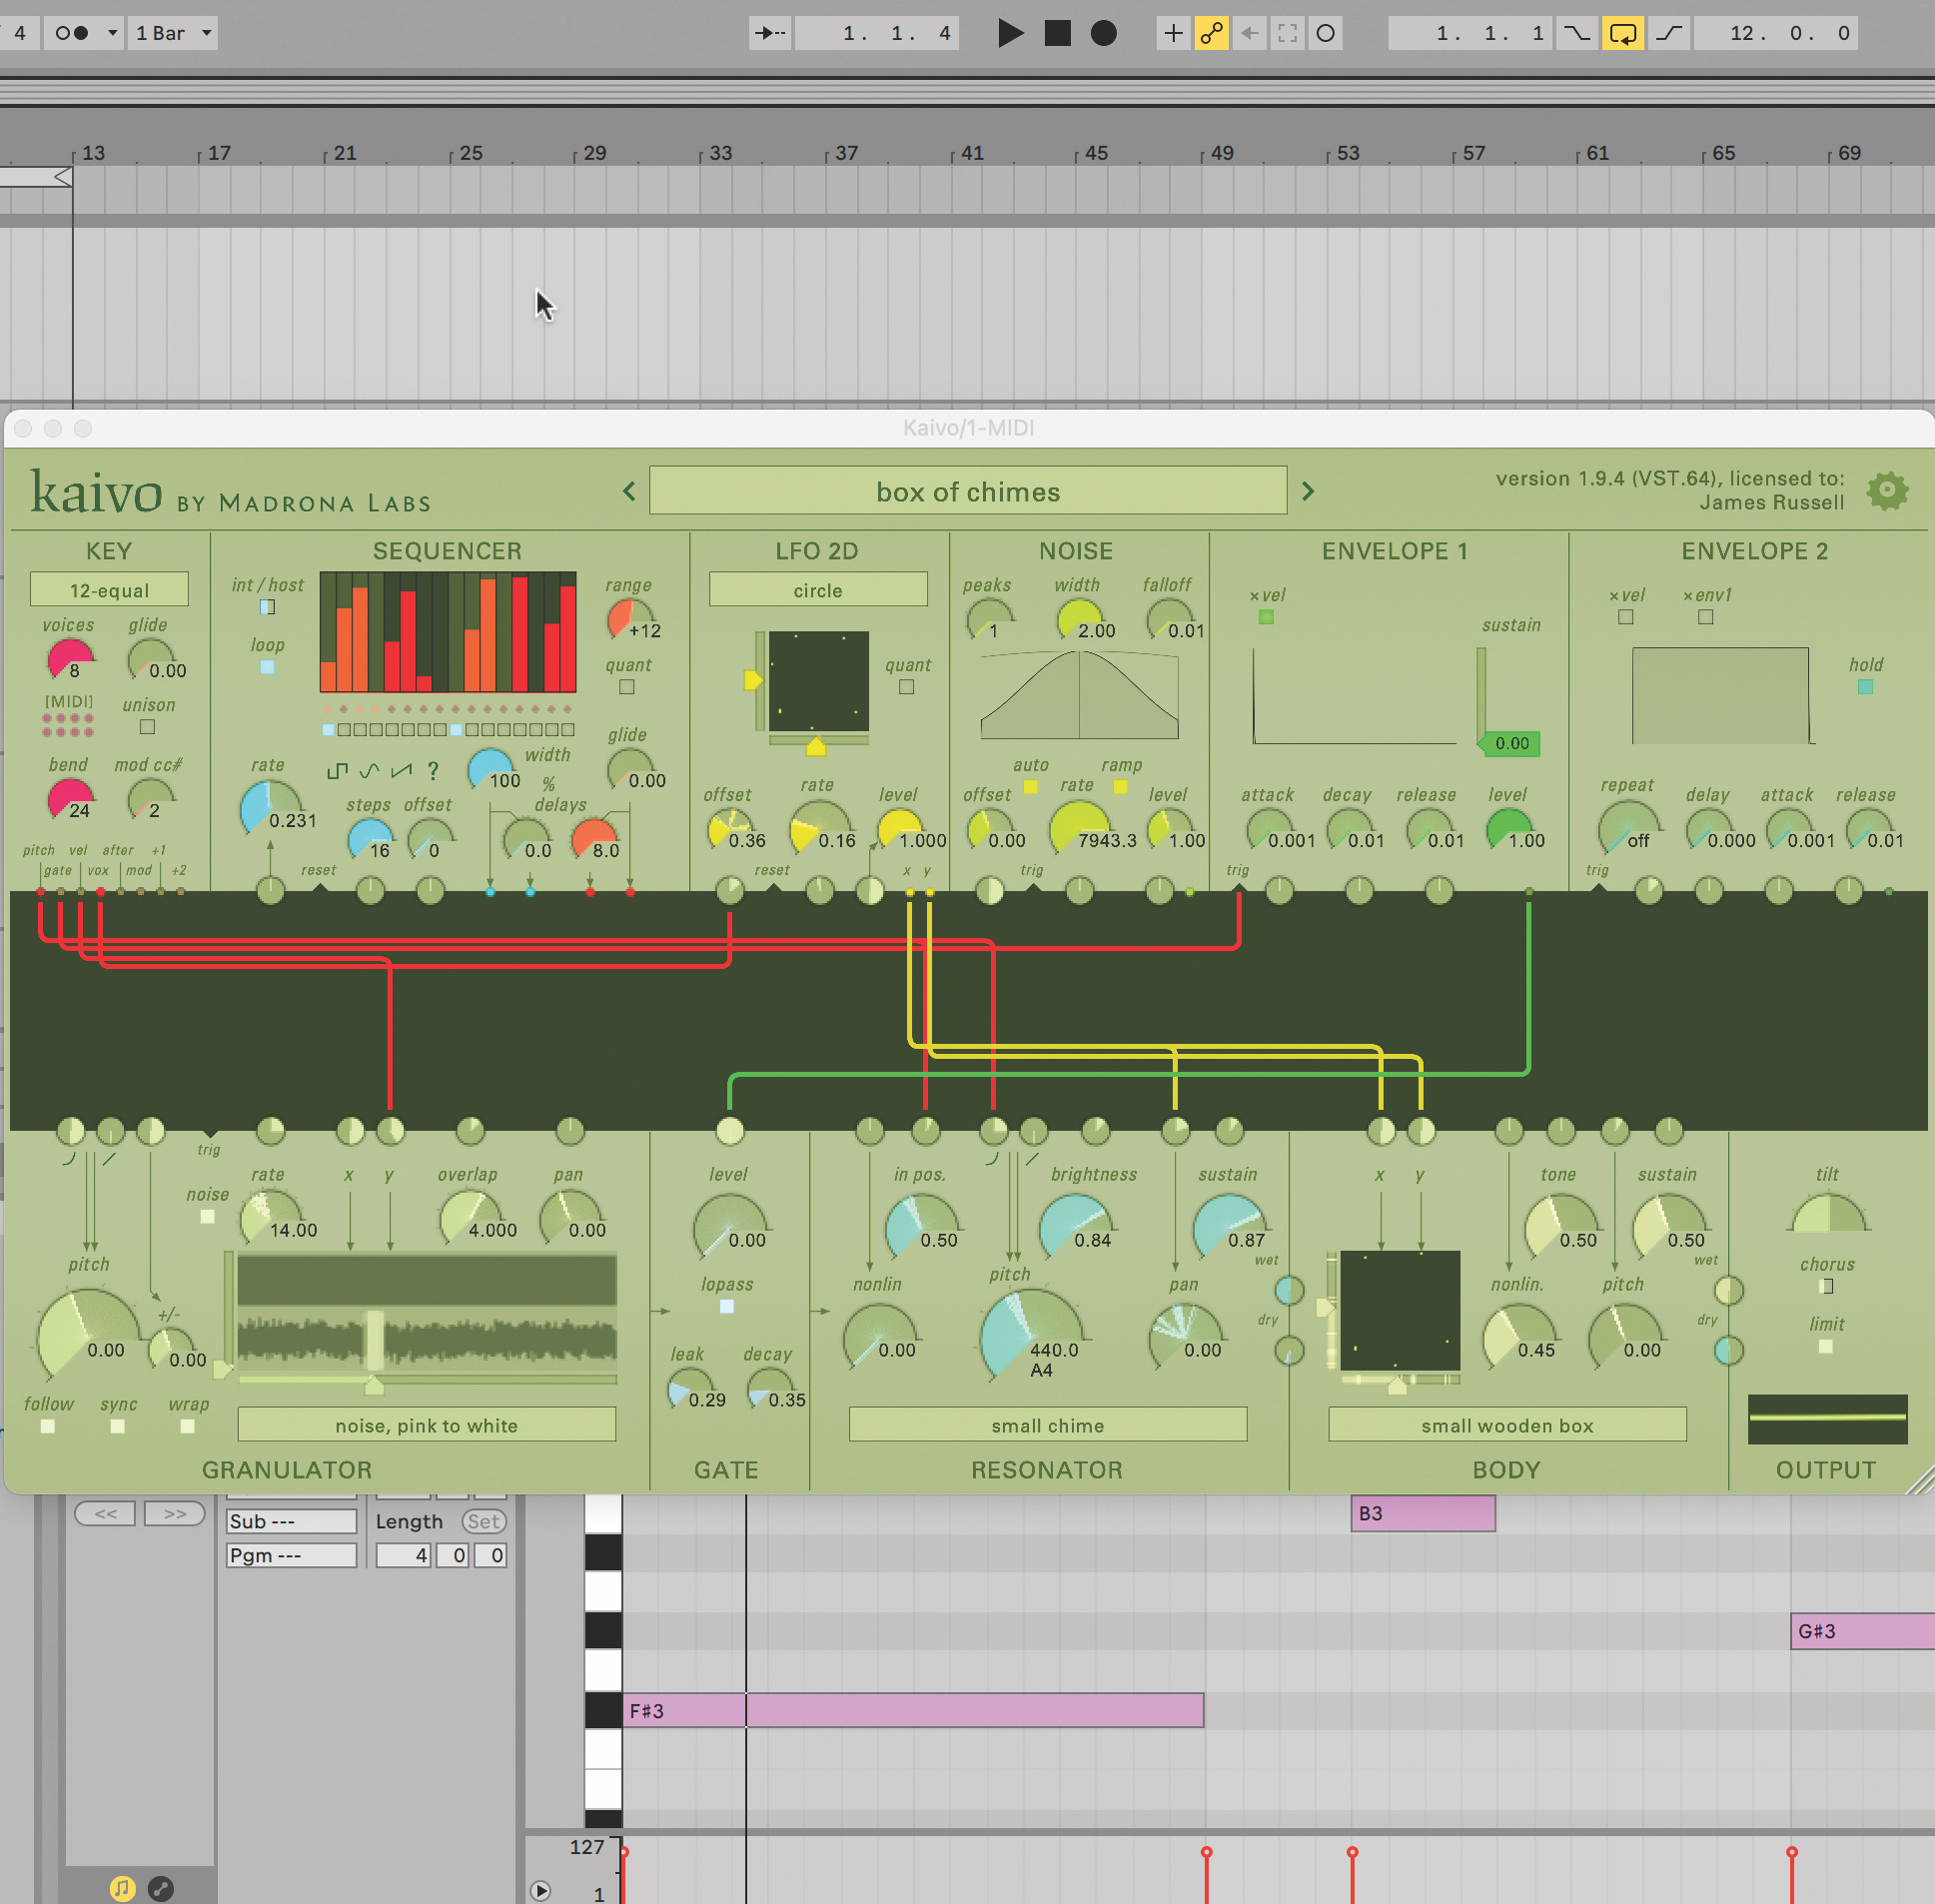
Kaivo is one of the most experimental synths out there, and although it’s a hell of an instrument to learn, its sonic possibilities might keep you occupied for far longer than the time outlaid on getting to grips with it.
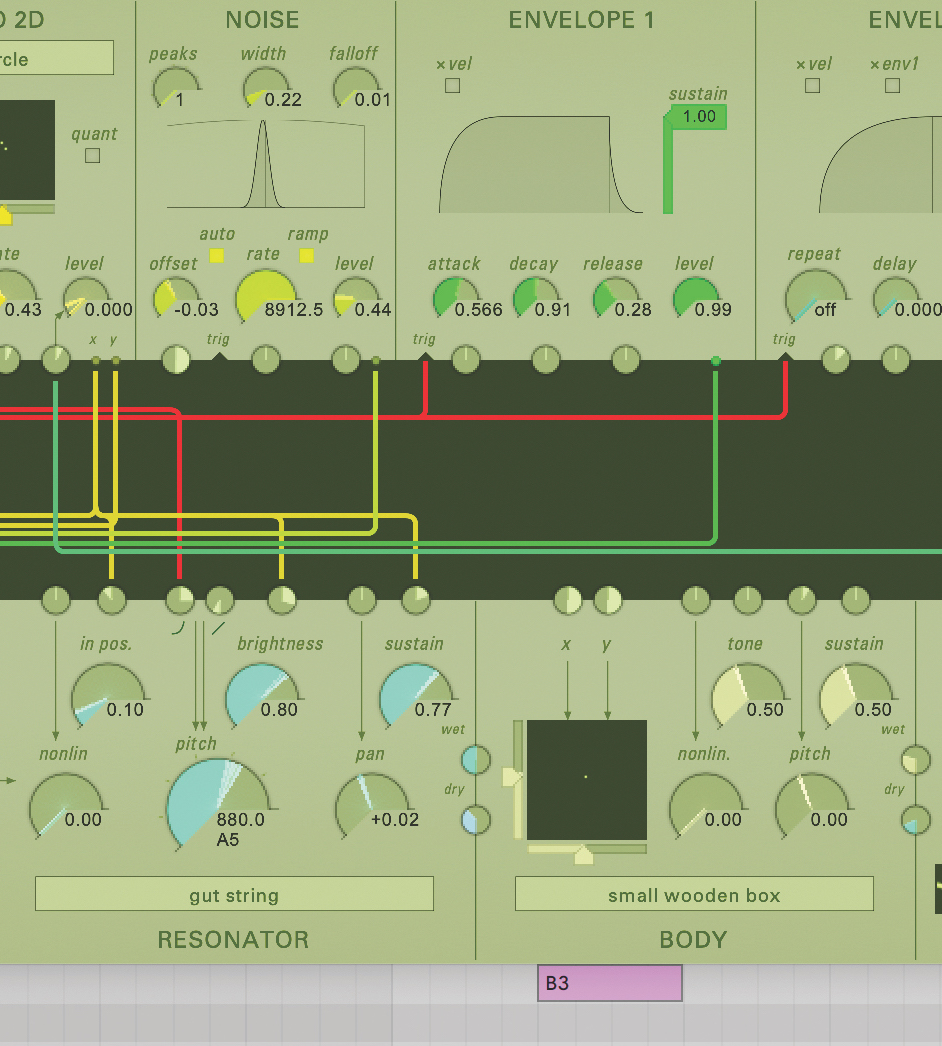
Kaivo has both physical modelling and granular aspects, employing its Resonator and Body sections at the bottom of the interface. With the flexible patcher, the signals from here can actually be sent wherever you like.
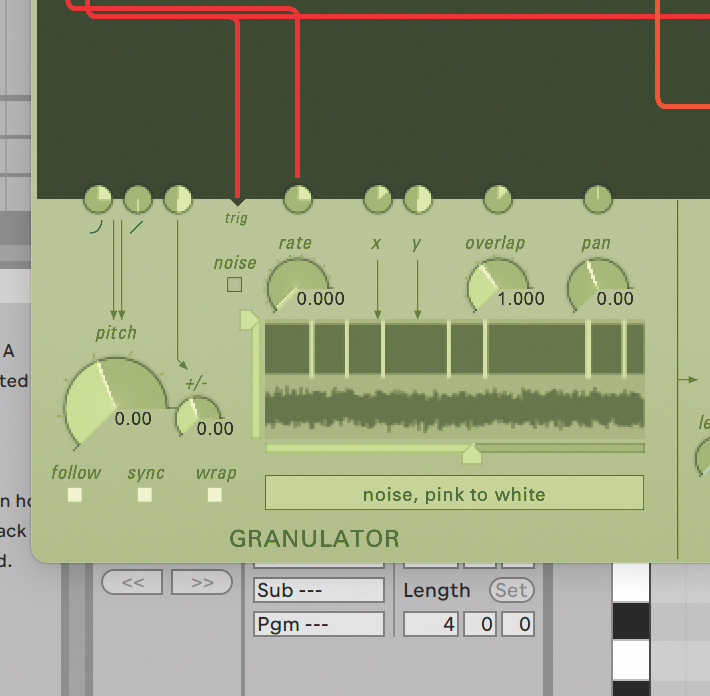
In the granulator, multiple sources can combine and modulate their playback to spark off a new sound source. This varies from anything like simple sines to make additive-style combinations, to entire sampling-based patches too.
Physical modelling and exciter choices
Reason Studios’ Objekt synth aims to replicate real-world acoustics using simple controls and a realistic signal path. The difference in tone between settings can be huge, which hints at the depth and breadth of real acoustic instruments as sources.
The synth starts with an Exciter section that leads into a set of harmonics to dial in for two virtual ‘objekts’, then offers parameters such as Collision, Pitch Modulation, Damping and Decay. There’s enough variation in here, and again, the tonal breadth is so huge, that there’s huge potential in this setup already.
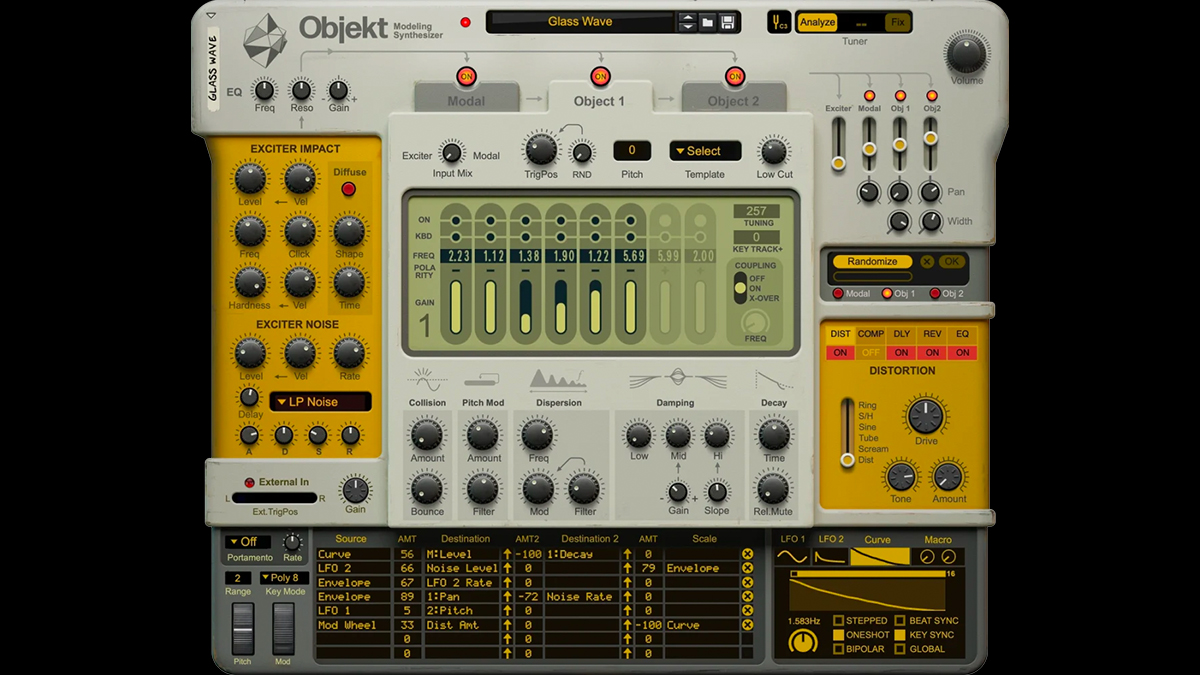
Superbooth 23: Reason’s ‘organic’ Objekt synth promises sounds that you can’t create anywhere else
Objekt also touts a Randomize control that lets you make small variations on a patch and come out with something similar but different – auditioning before you commit.
Below we’ll only focus on Objekt’s Exciter section, showing off the tonal variation that can be achieved from only modifying the way the instrument is struck rather than changing the instrument itself.
If you consider any real-world acoustic instrument, you can safely split it into two parts: the resonating part, and how you set that in motion. A piano has strings and soundboard combo, with felted hammers; a drum has a skin thin that resounds through its frame, set in motion by a stick or a hand slap. It’s these ‘exciters’ – the hammer and the stick portions – that we’ll focus on in this walkthrough.
Adapting Exciter tones in Reason Studios Objekt
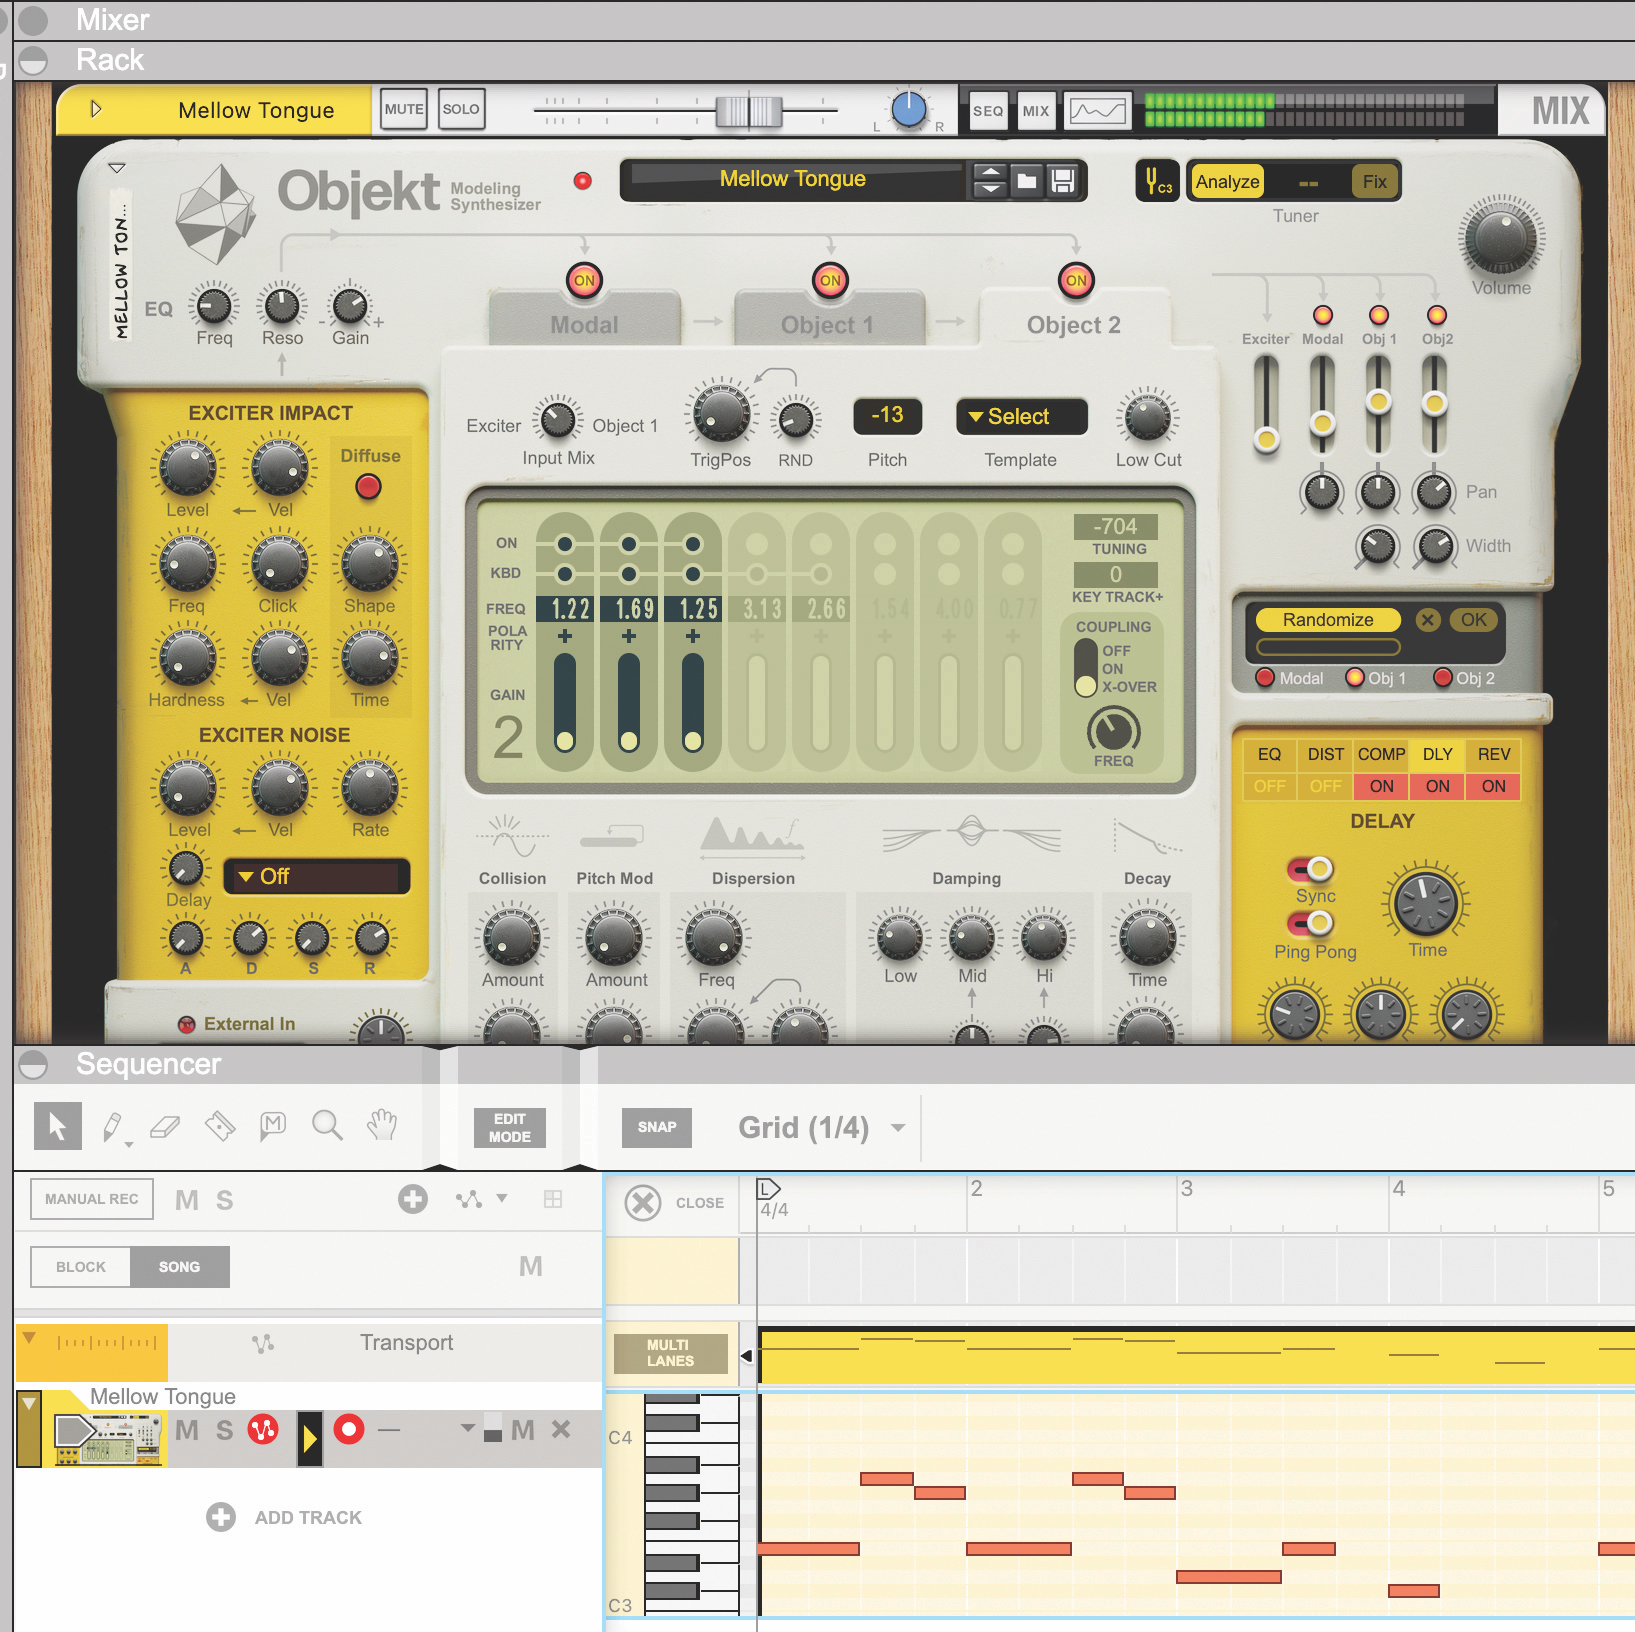
With a bell-like sample loaded, we’ll start to play around with this physically modelled patch, but Objekt has a number of ways to have a dramatic impact on the sound. We’ll ignore the tonal side of things here and concentrate on the Exciter section.
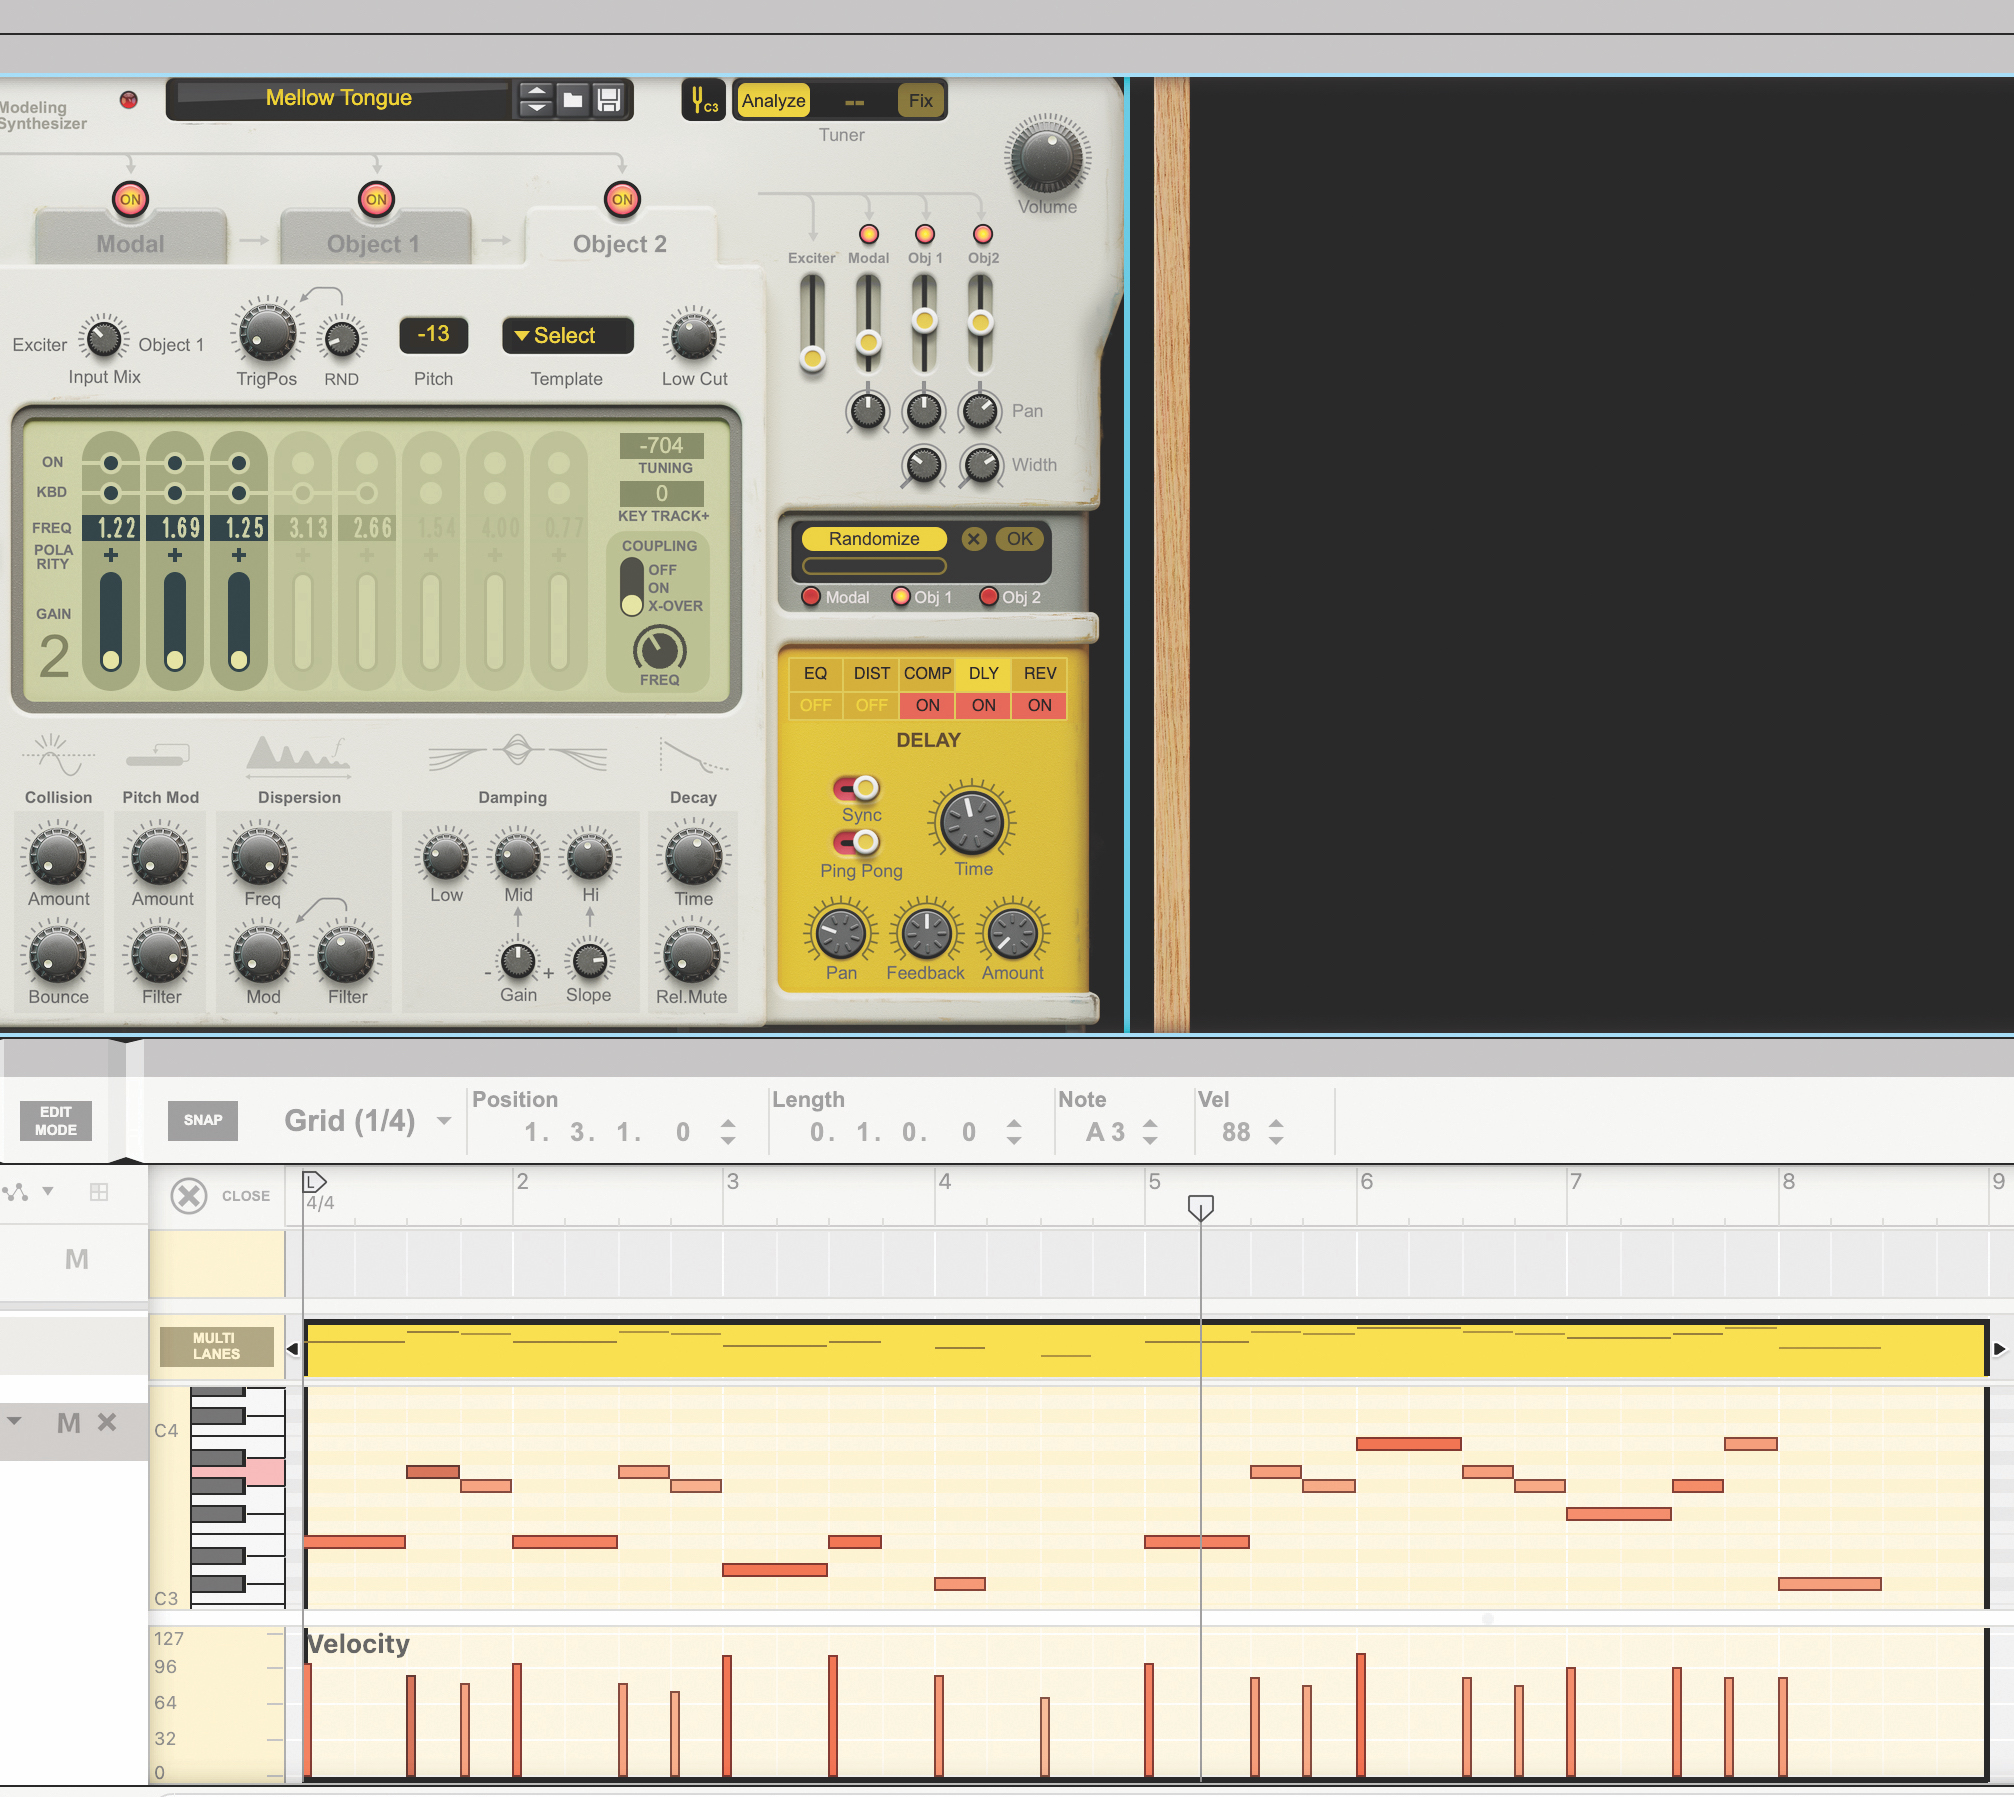
We can hit the Diffuse button to immediately get a softer, more variable effect from the Exciter sound. The Freq dial literally changes the Exciter frequency, making it higher or lower as an impact. It has a big impact on the body of the sound too.
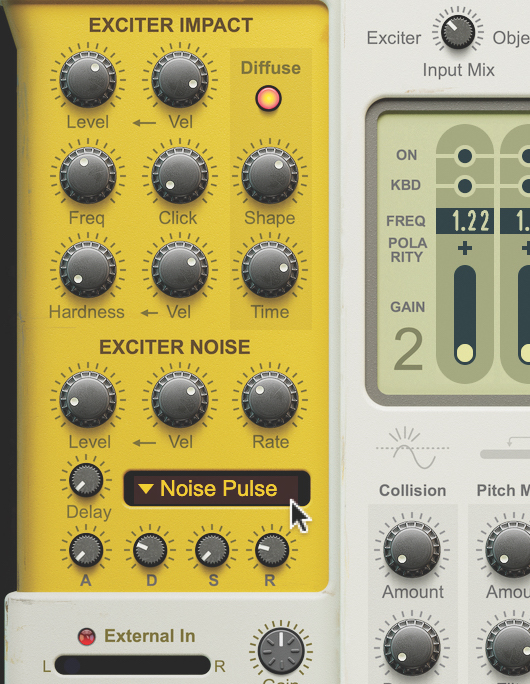
At this point, we can add a noise signal to the Exciter sound, opting for a Noise Pulse from the dropdown of options. We make sure to adjust the Attack and Decay settings to bring this in only at the start of the sound.
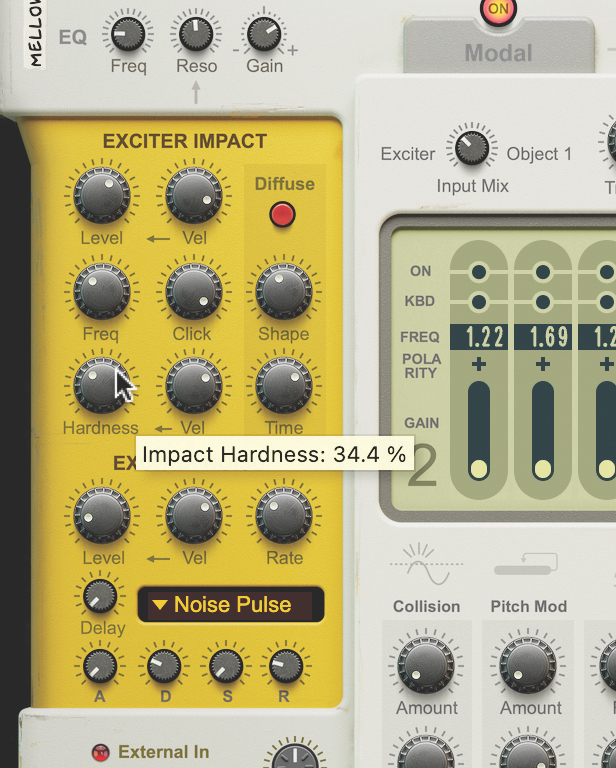
We turn to the ‘Click’ or ‘Clickiness’ of the Exciter, and also the ‘Hardness’ control that stiffens impact. We turn the Diffuse off again to show the sound properly in our audio files. We also re-adjust the Exciter Freq in light of our changes.
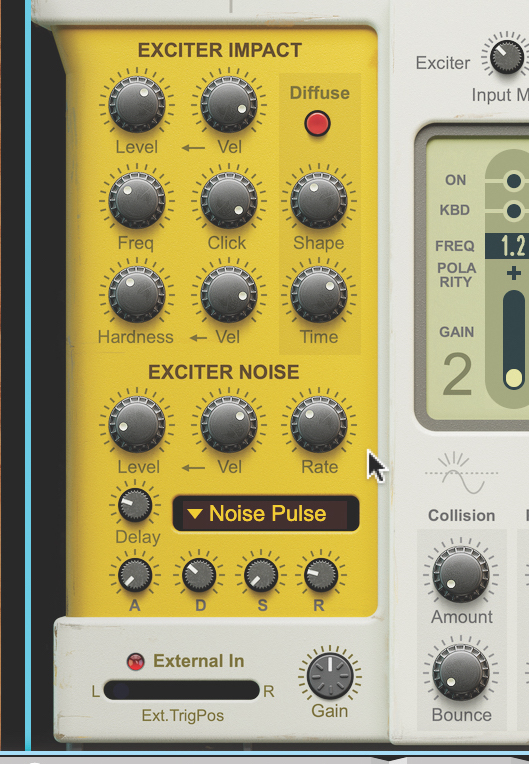
Now we get the Hardness to link to Velocity more strongly, and we work on the noise section as well to get everything more cohesive and whole. We even introduce a bit of delay to the noise onset, to help pick out the ‘mallet’ impact.
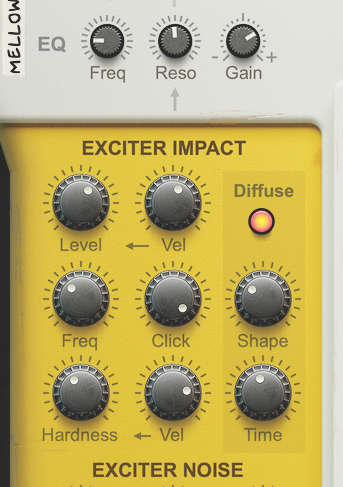
We return to the Diffuse section and can now set variance of Shape and Time (hit timing) as we go. The impact we’ve had on our once-clean bell is telling. The whole construct now wobbles while ringing out with our harder hits, pushing it further.
Understanding the conceptual instruments behind Modus
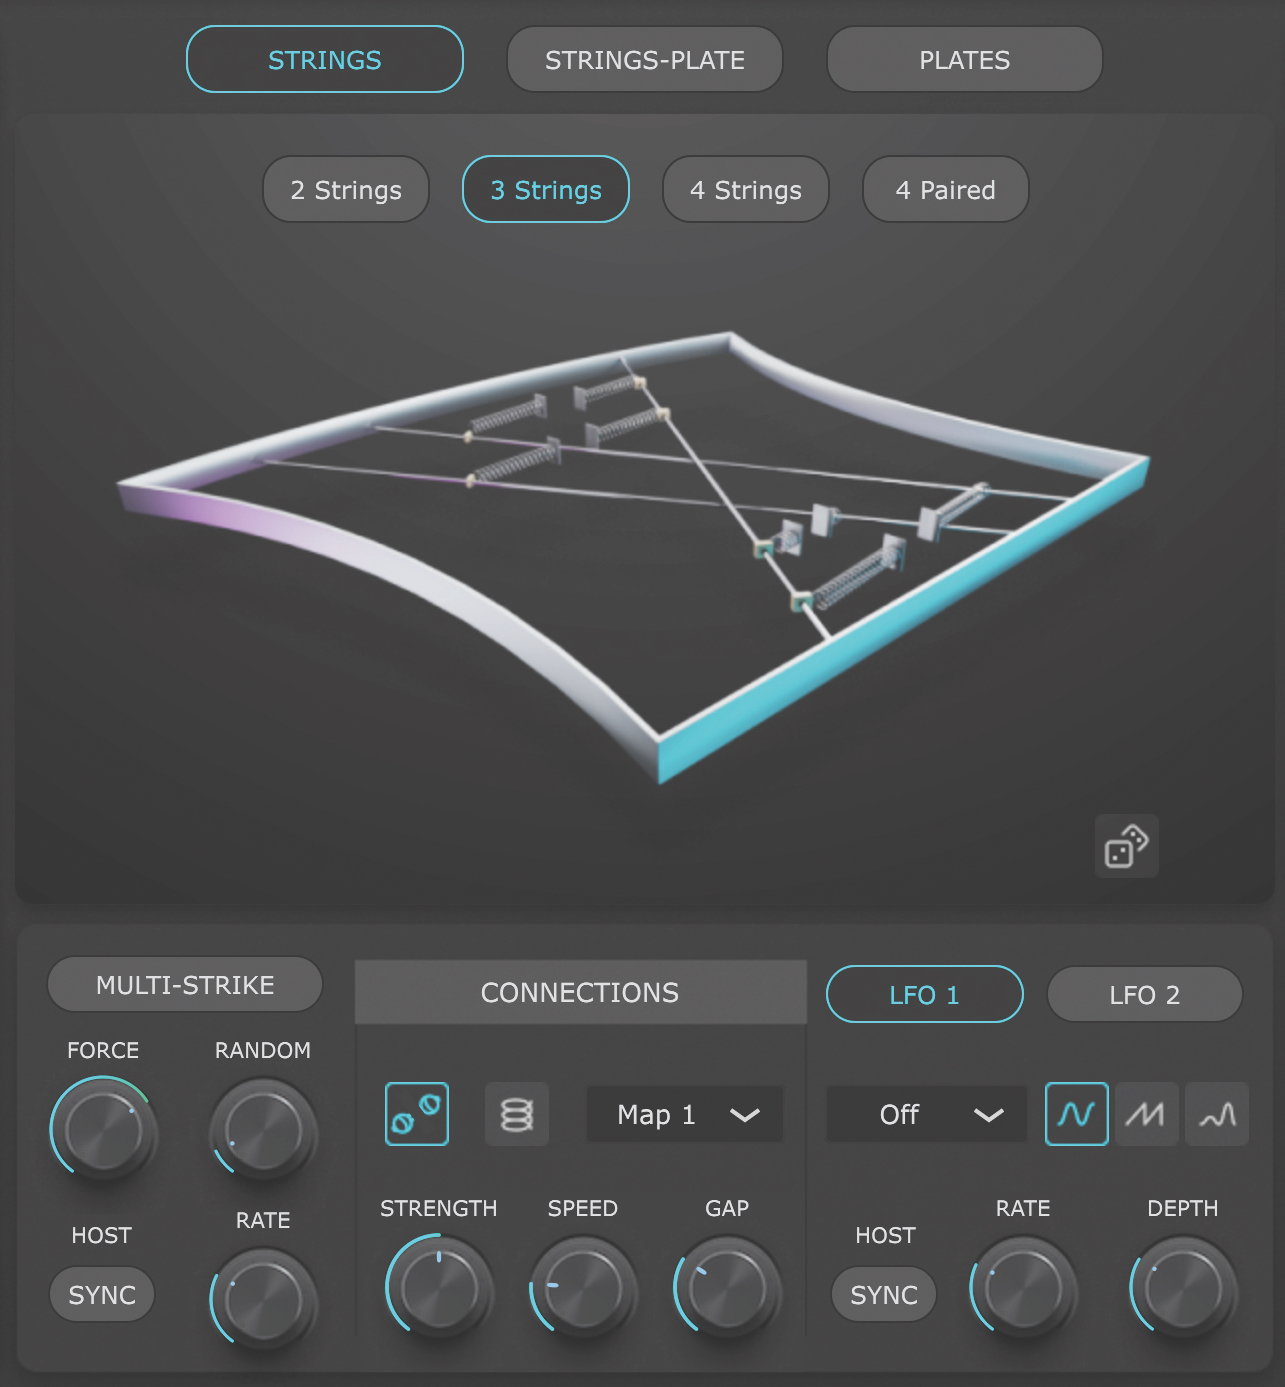
Physical Audio’s Modus is a physical modelling instrument like no other. Load it up and you’re met with a virtual setup where three strings are connected to each other by a few springs. We can change the connection ‘mapping’ of those springs, but that’s not the big deal here.
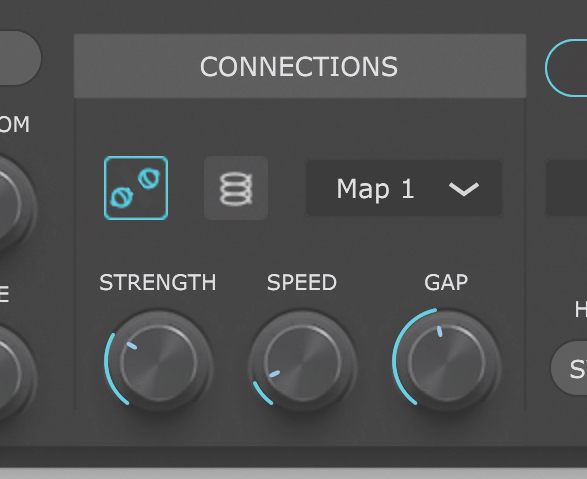
Here, we’ve increased the Connection Strength between the rattles that connect each spring to itself. As the virtual rattles hit each other and interrupt the springs and therefore the strings’ vibrations, the result is a discordant tone.
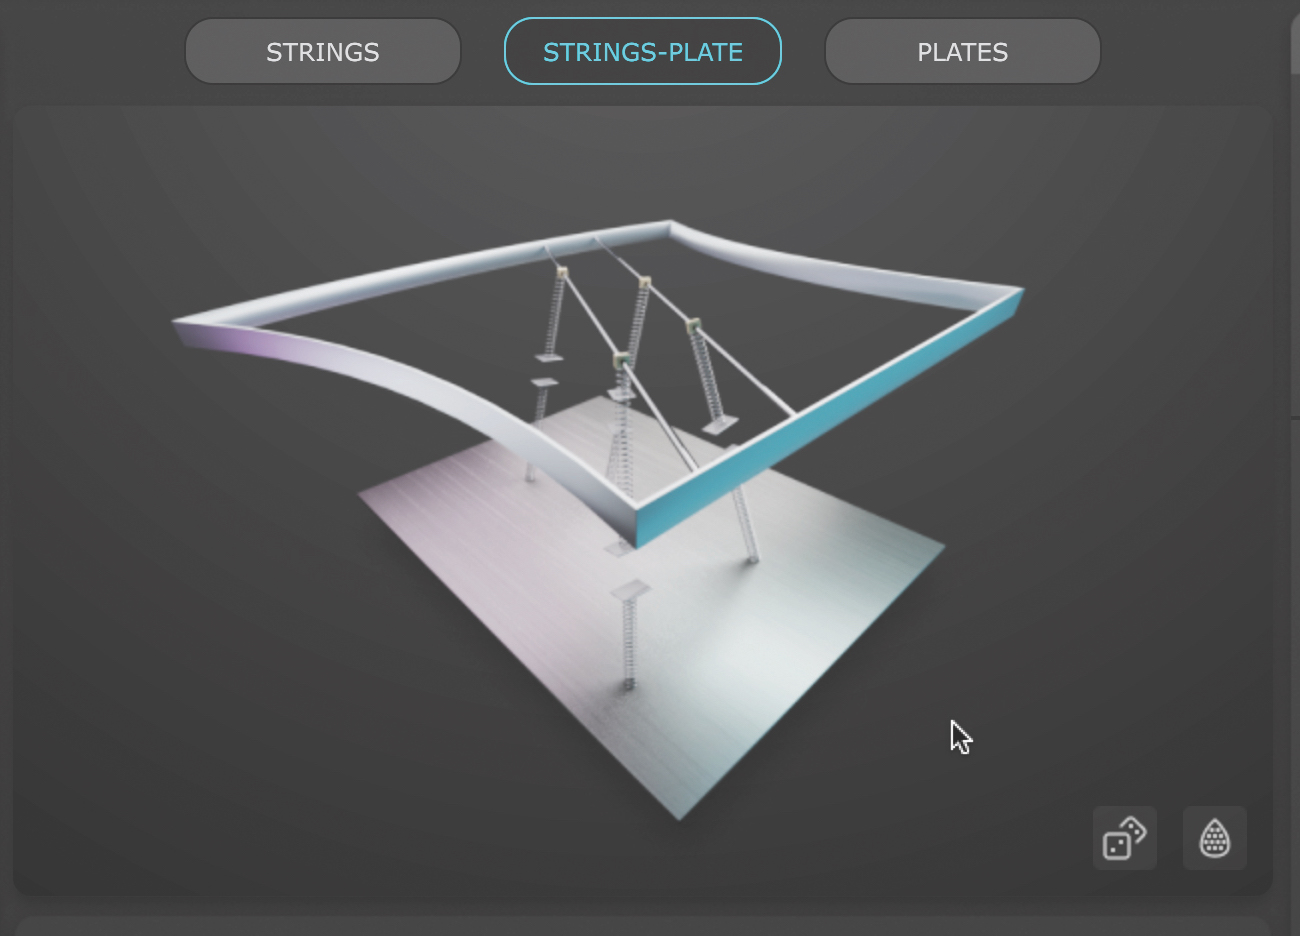
We can change the whole setup of this virtual instrument. In the Strings-Plate model, our strings (now two) are connected by the springs to a resonant plate. The string is plucked, the energy transits the rattling springs to the plate, where it’s reflected and conducted back through the whole system.
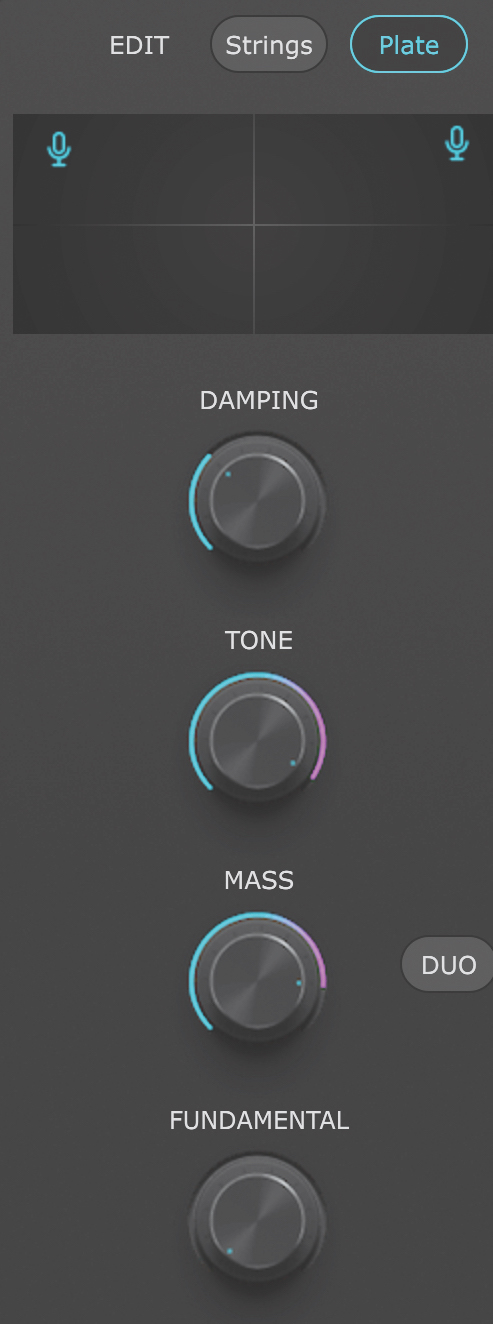
The result is something like a reverberant soundboard, and we can change the properties of that too, using the Edit panel’s Mass and Damping controls to curtail the vibrations and leave some character. Here we can also determine the mic positioning on the plate, or something akin to that.
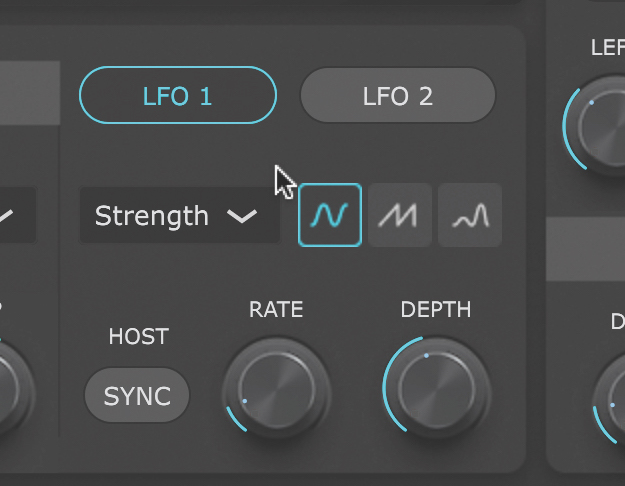
We have some more standard-feeling controls too, such as the LFOs for connection properties (LFO 1) and effect parameters (LFO 2), both of which are active in this setup. We won’t be going into the filter, drive, delay and reverb until the end of this walkthrough.
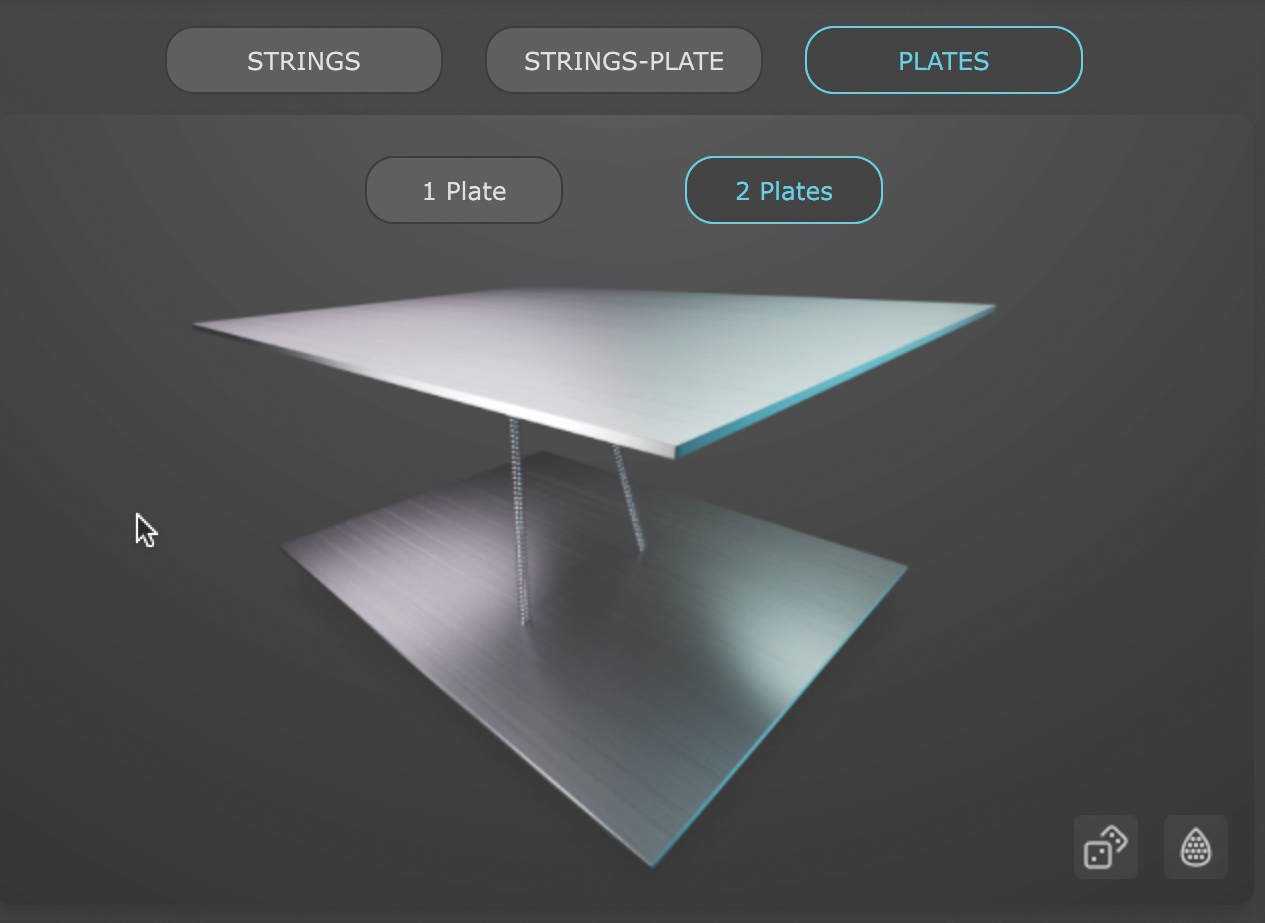
The final of our model types, Plate, lets you discard the virtual strings and connect one or two plates using those same springs we’ve seen so far. By adjusting both the plates’ behaviours, and adding a tiny bit of filter Drive, we can make a metallic tone.
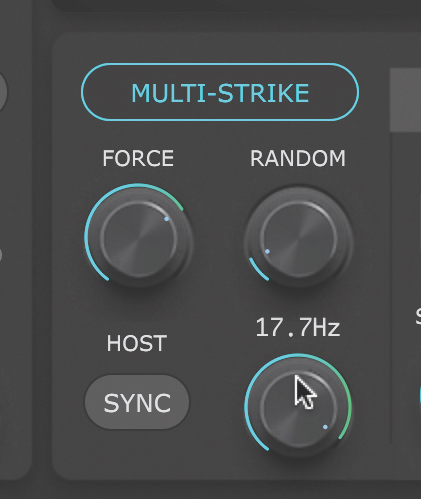
Now for some further soundmaking features: there’s the Multi-Strike control, which turns a struck sound into a quickly struck sound, making for a nice performance feature. And the String’s Edit panel lets us mess with the physical properties of the plucked and resonating strings.
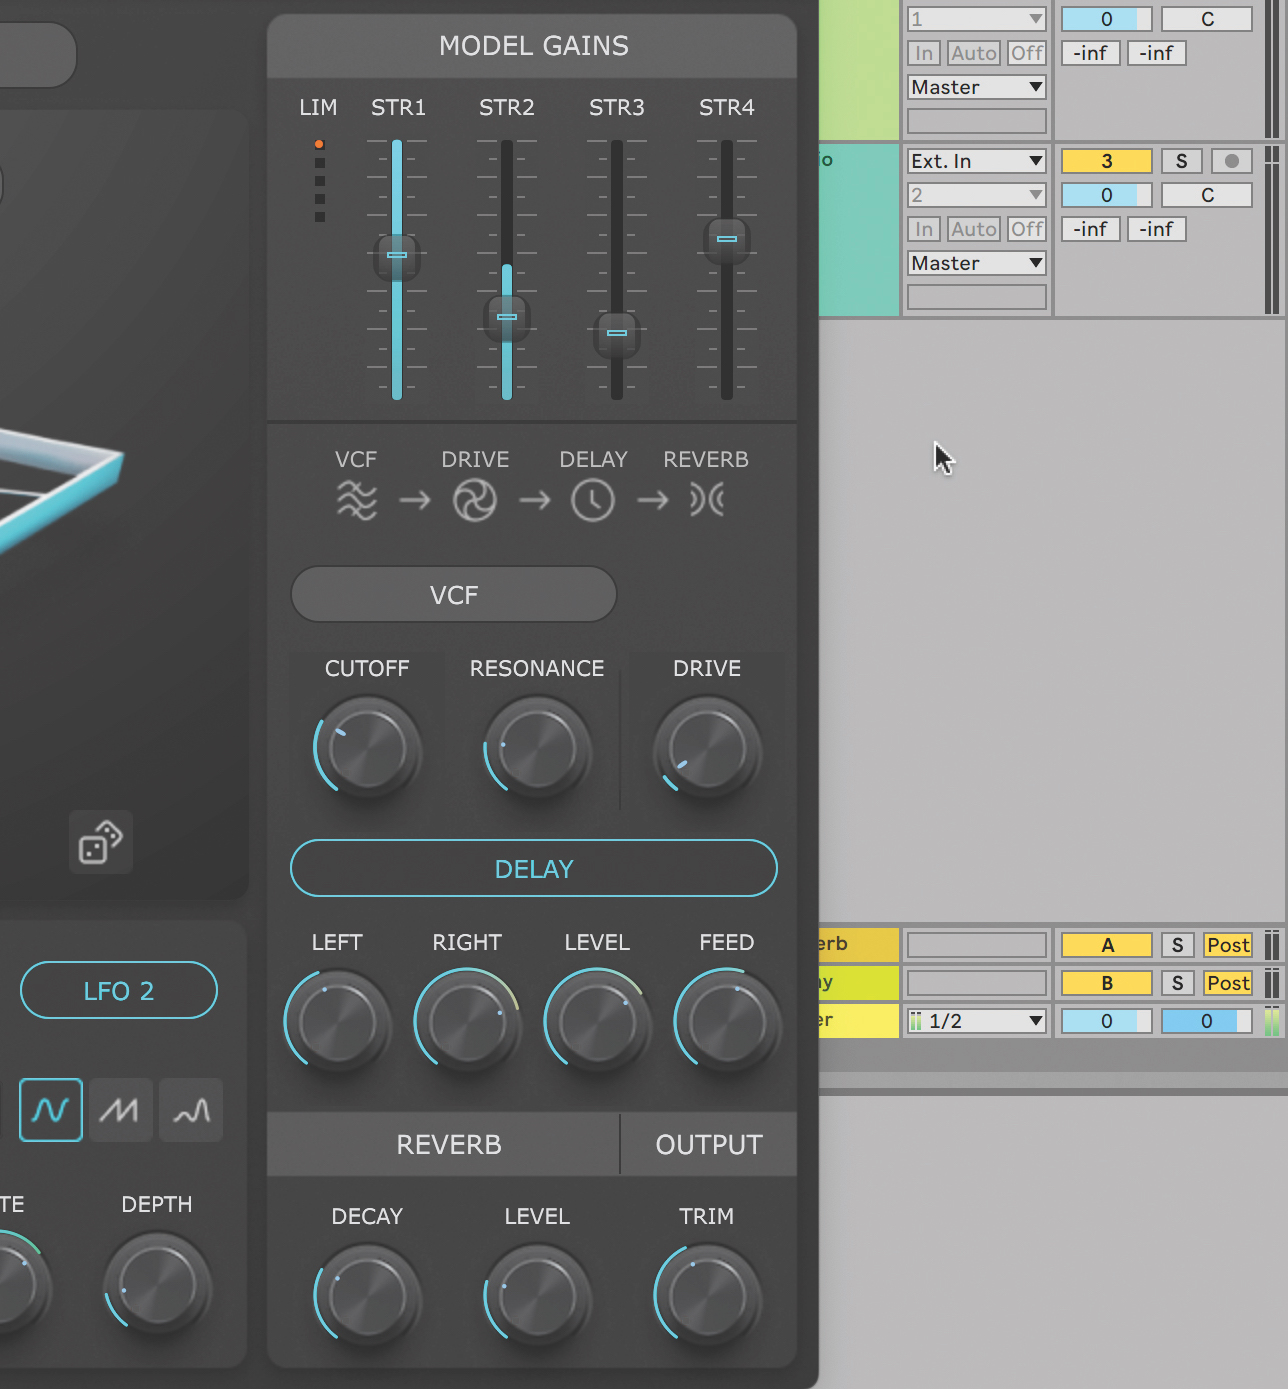
Finally, the onboard effects include a ladder-style filter with a Drive control, a basic Delay processor and a Reverb too. There’s a signal mixer on hand, and this is backed up by a limiter – especially useful if feedback builds up.
Pro tip
Physical modelling is a processor-intensive activity, but uses almost no memory. That means that, when you run a physically modelled instrument, your CPU is doing the heavy lifting, but your RAM will feel almost no burden. This is the opposite of today’s vast ROMpler libraries of sampled instruments, which often have a huge footprint and download size. A physical modelling instrument, by contrast, will often only be a few megabytes in size.
Evolutionary synthesis
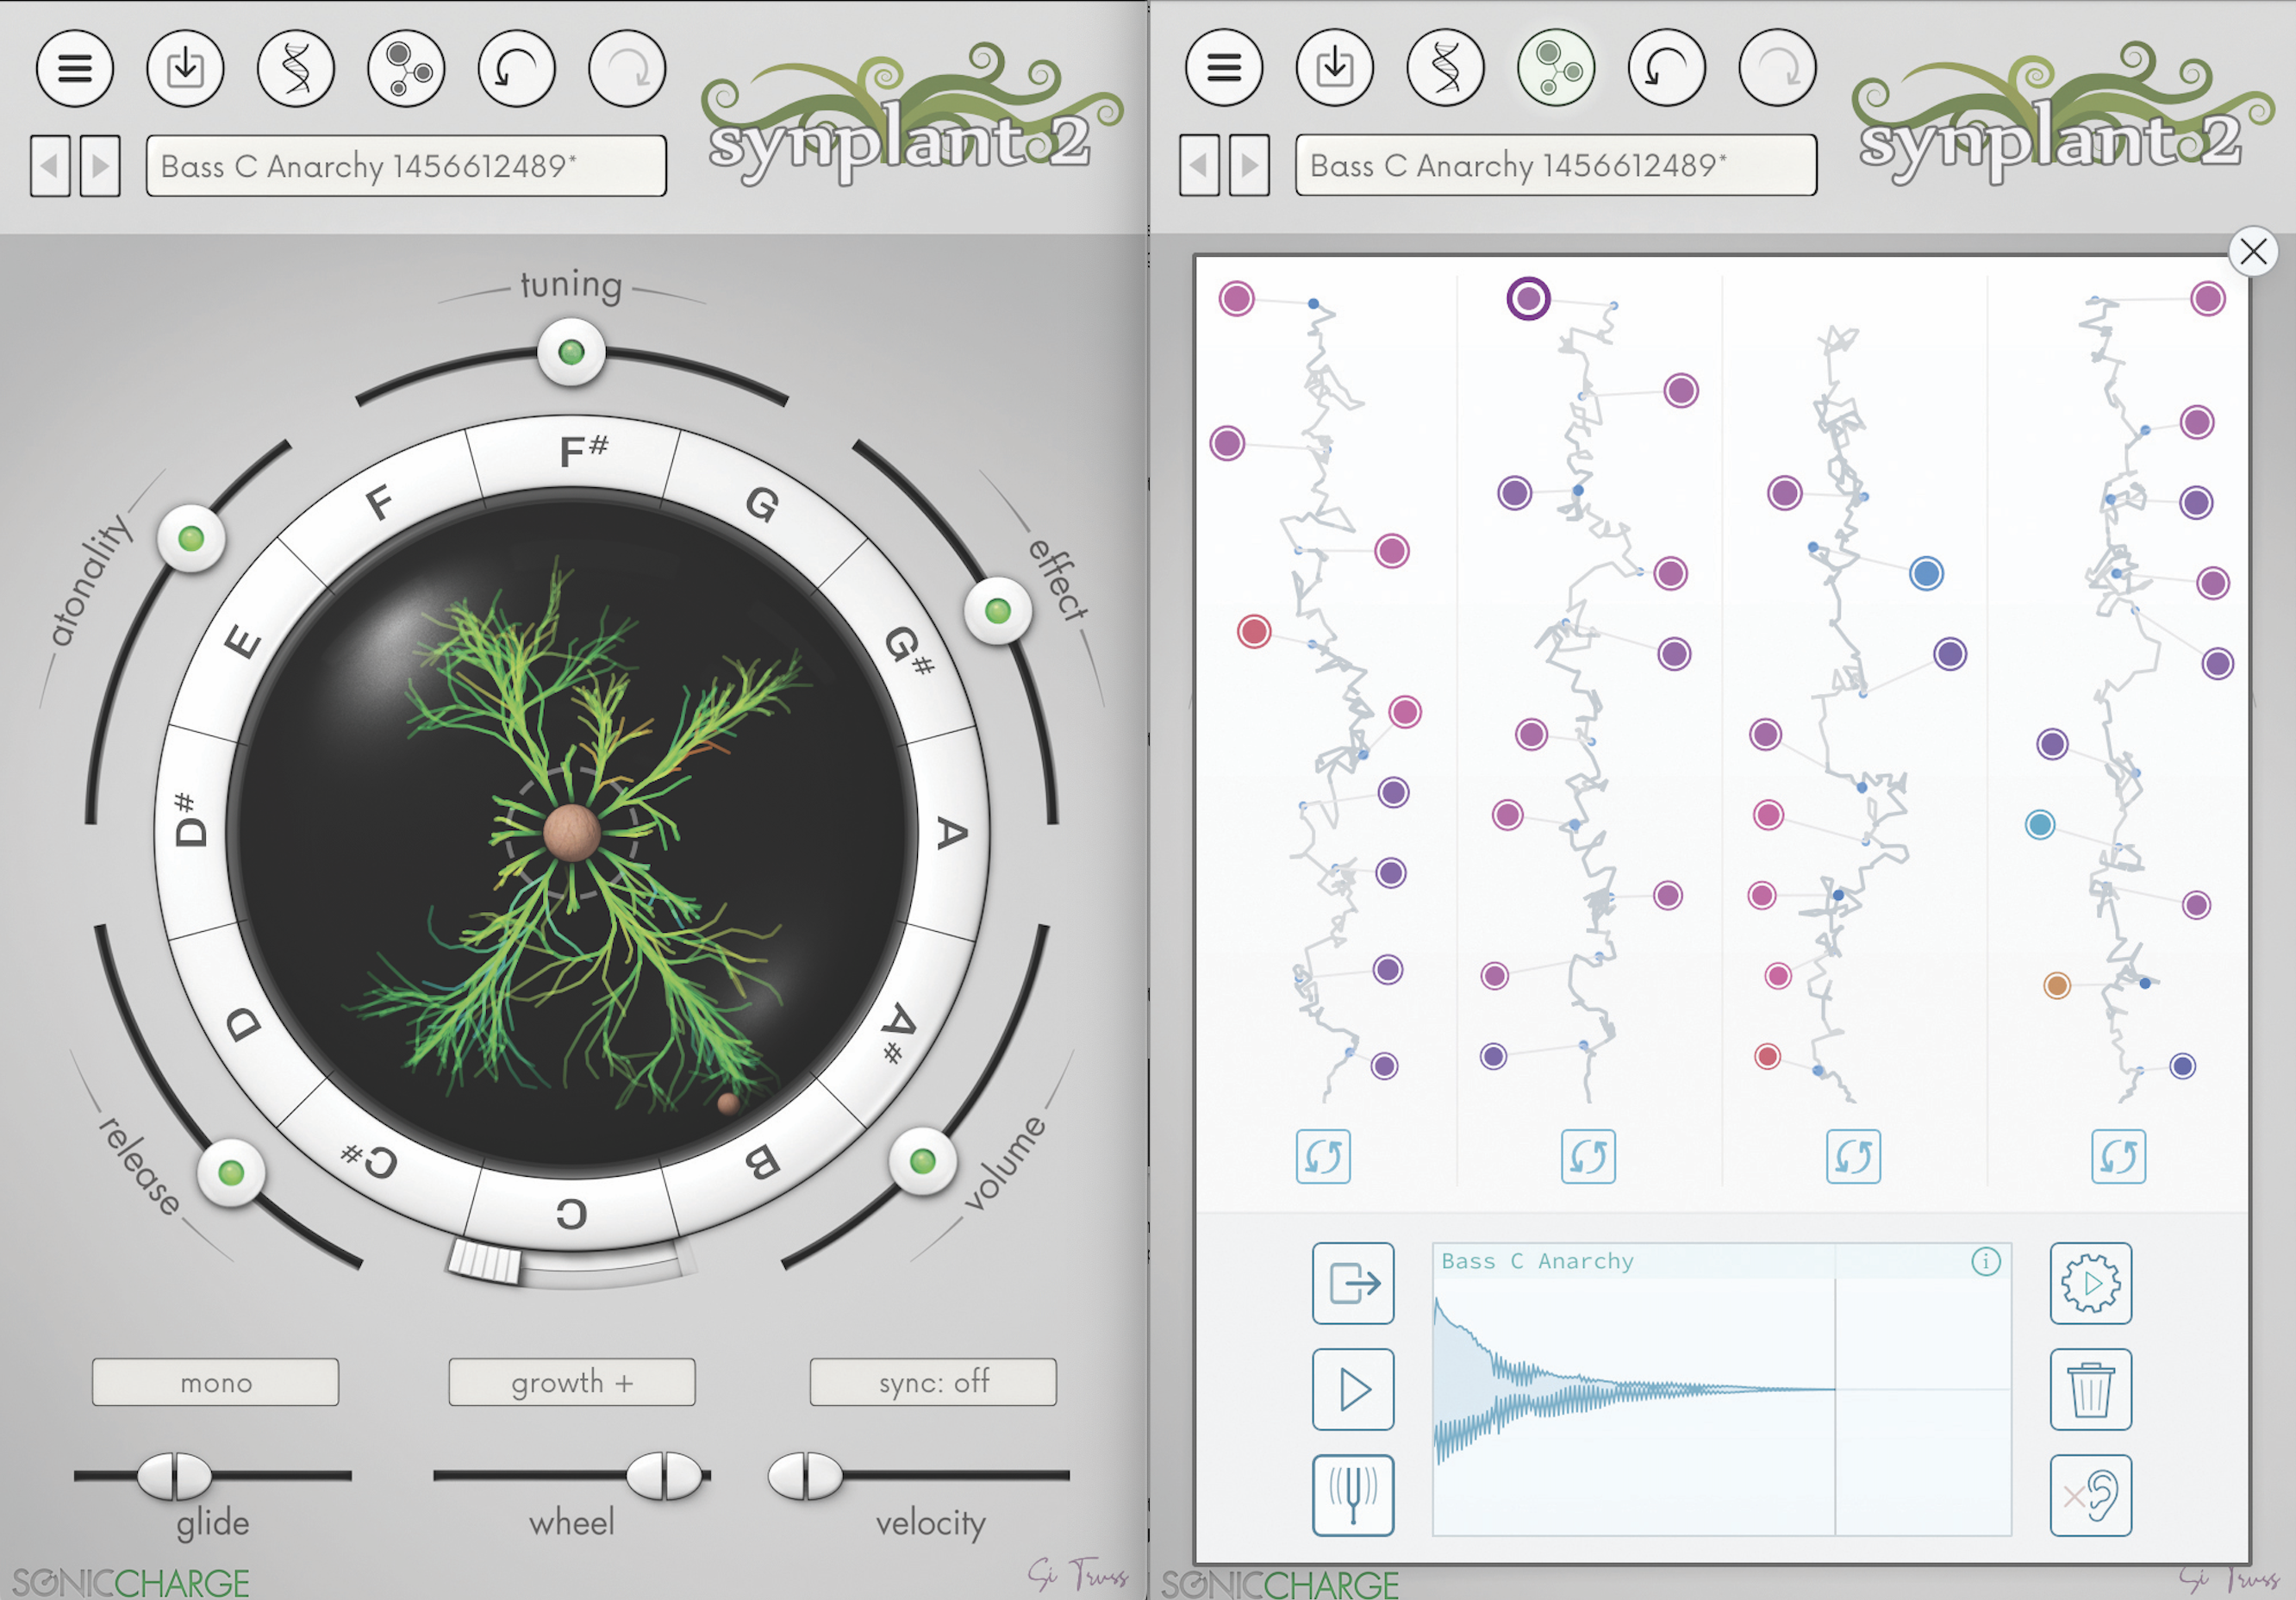
Synplant 2’s Genopatch mode lets you load in a single sample and can interpret it to resynthesise it. You could do this in a sampler, but the method of playing it across the keyboard is to simply tune the sample, which gets sonically more tenuous the further you move from the original pitch. And what about the sounds that remain constant with every note? Noise, exciter sound, transient attack and so on might stay the same with each note in the real world, but when tuning a sample in a sampler, these elements too will be retuned with each note.
Synplant’s resynthesis engine intelligently analyses the properties of the sound you’ve loaded and dials the appropriate controls into its synth section to recreate it
Synplant’s resynthesis engine intelligently analyses the properties of the sound you’ve loaded, and dials the appropriate controls into its synth section to recreate it. This solves the exact problems mentioned above, and also saves a lot of memory while doing so.
But synthesis can only match its detection and analysis capabilities, and audio is… a complex artform. Fortunately, Synplant 2 offers users a choice of resynthesised sound, and even lets sounds be ‘evolved’ in the classic Synplant sense, creating new iterations and variations to help make that match.
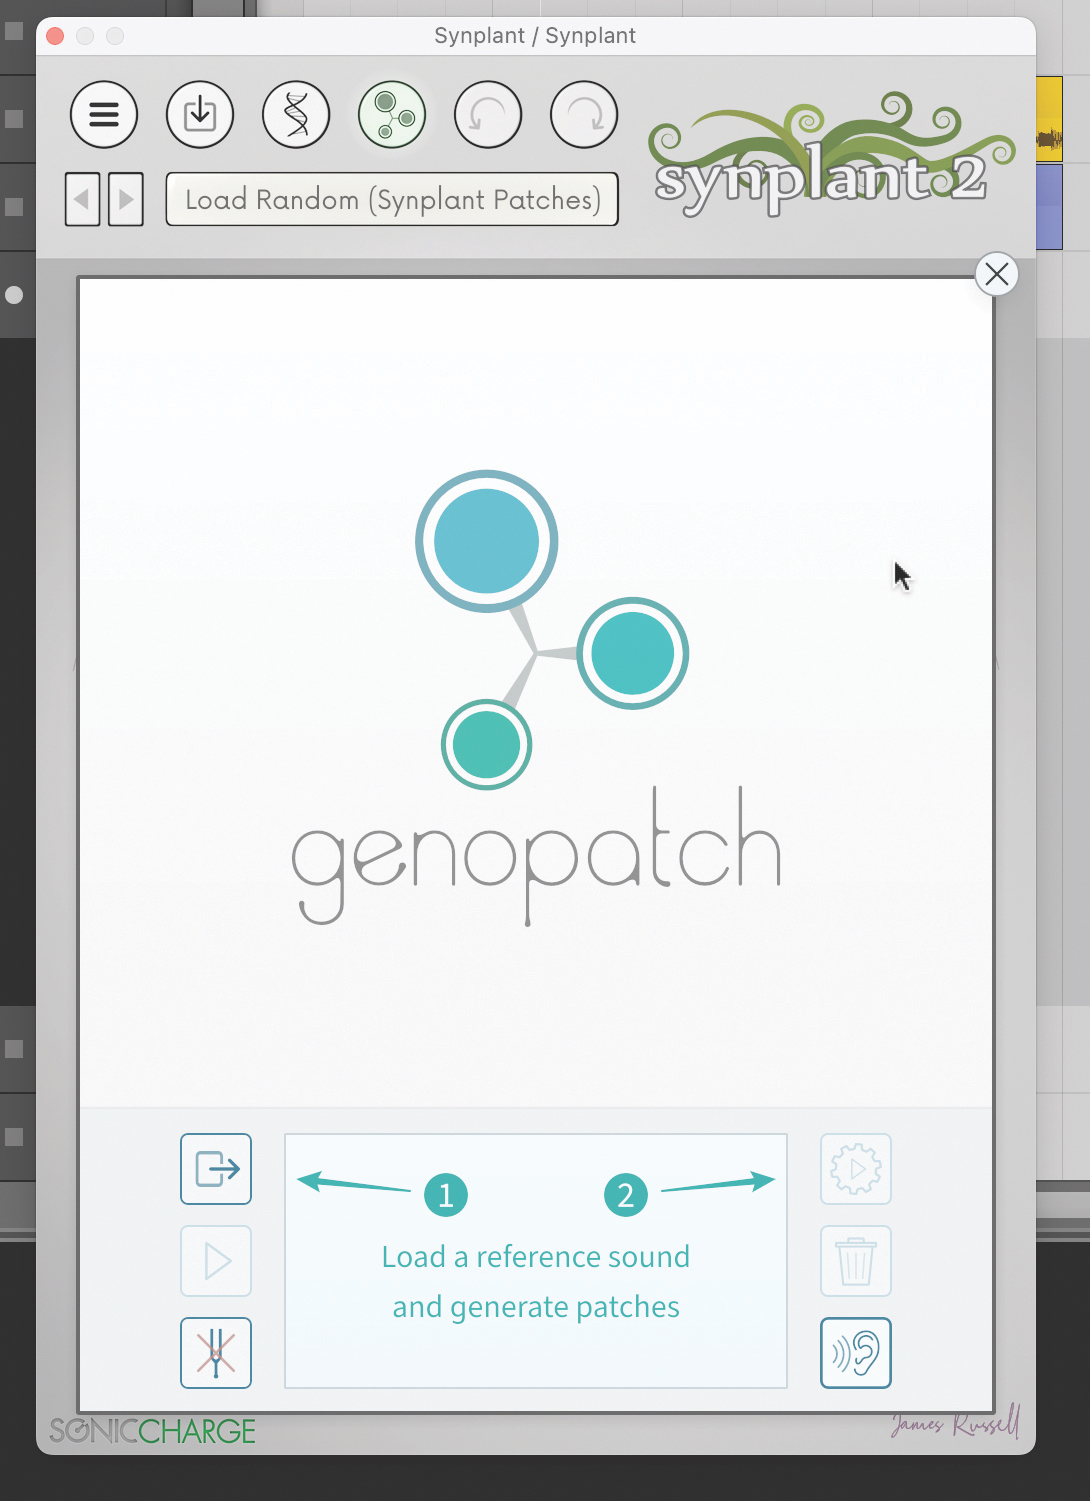
Using Synplant’s Genopatch mode, we can drag in a one-shot sample and have the synth emulate it across the keyboard. Here’s a flute ‘stab’ with lots of reverb. We’ve imported it into the Genopatch window and trimmed it. Let’s click ‘Generate Patches’…
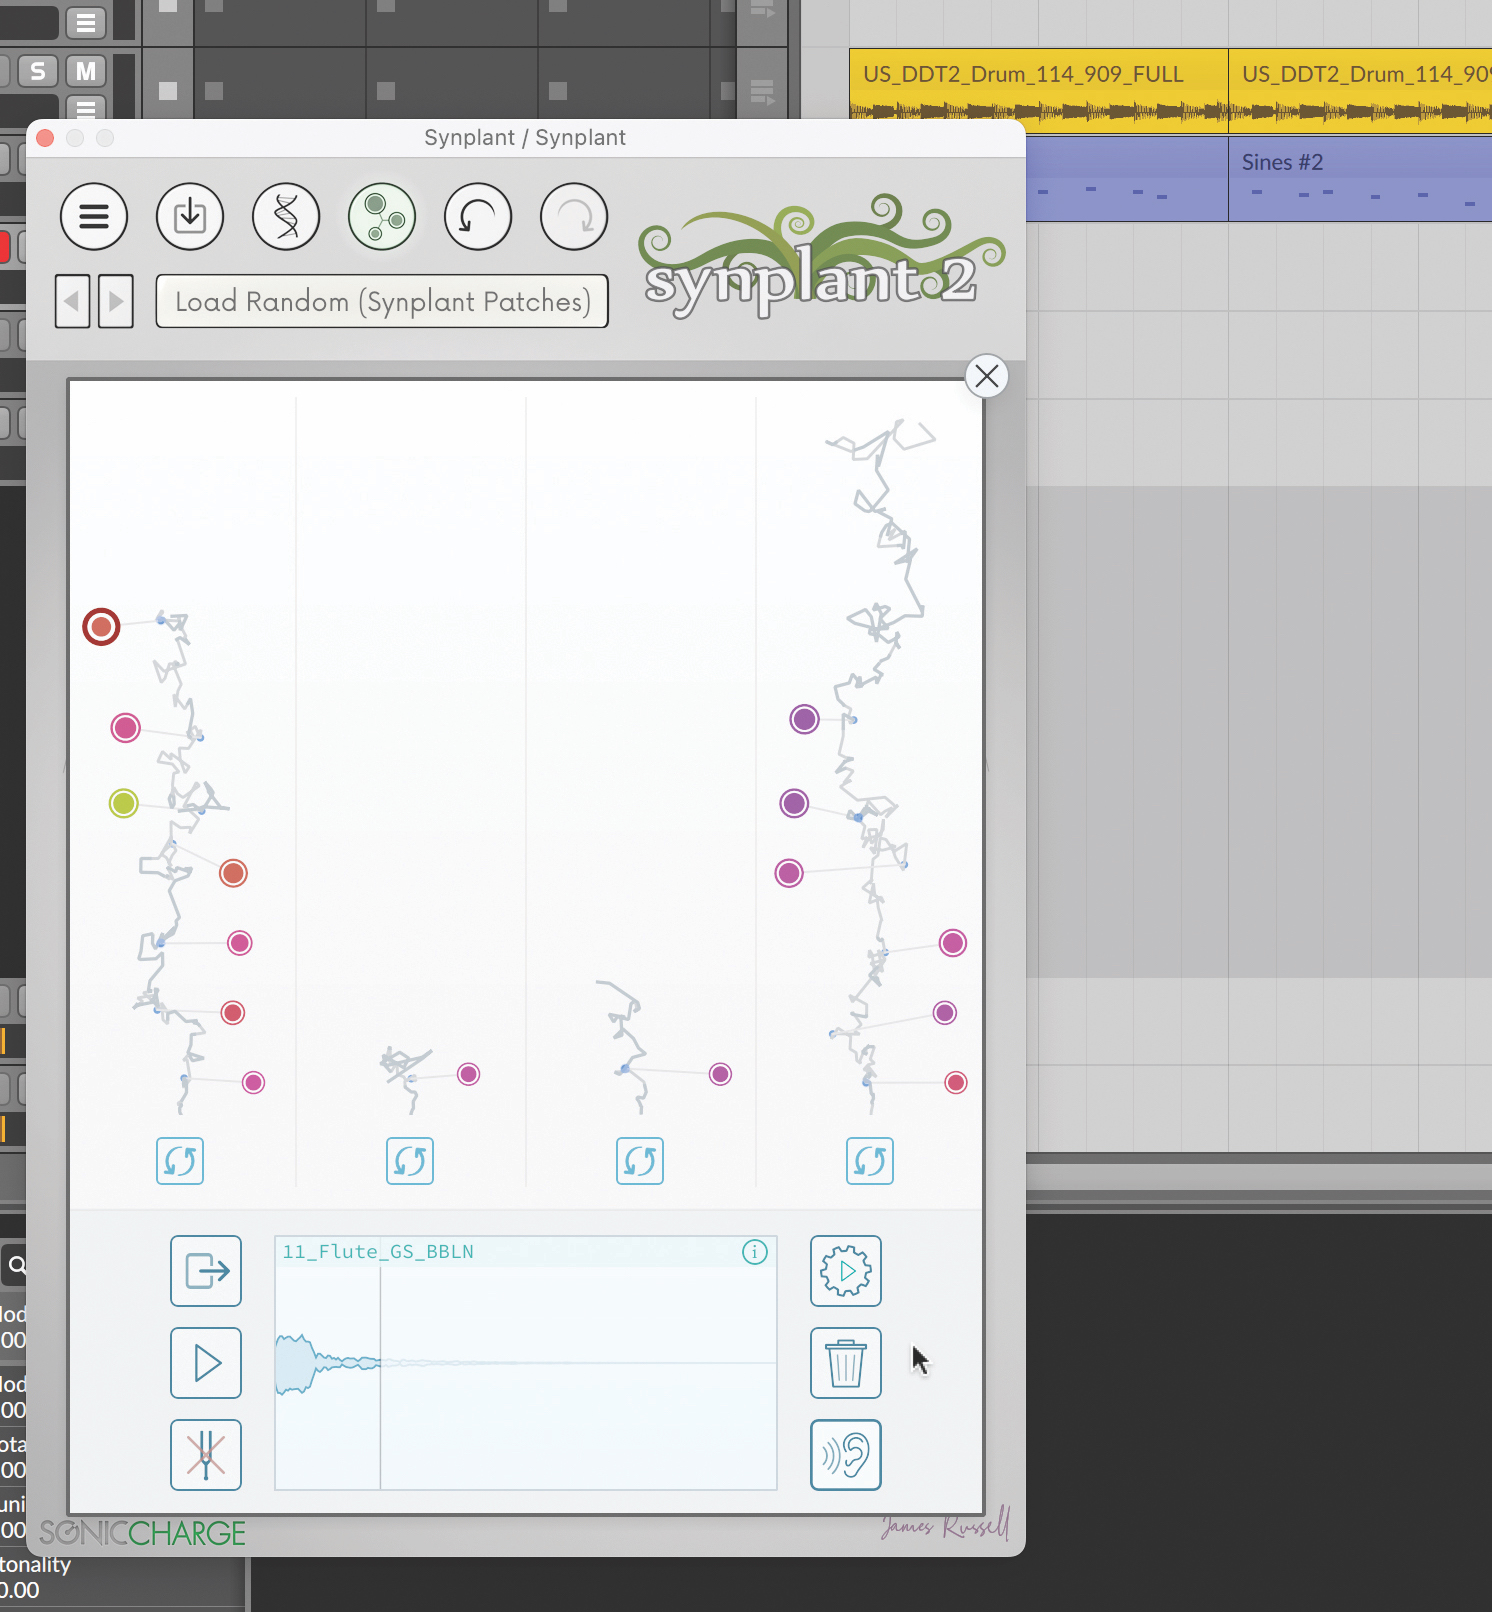
The synth sets about analysing the sound and conjuring resynthesised, new versions of it. These sounds can then be auditioned with a click. Some seem pretty close, while some are misguided. That’s fine; we get to pick which to work with.
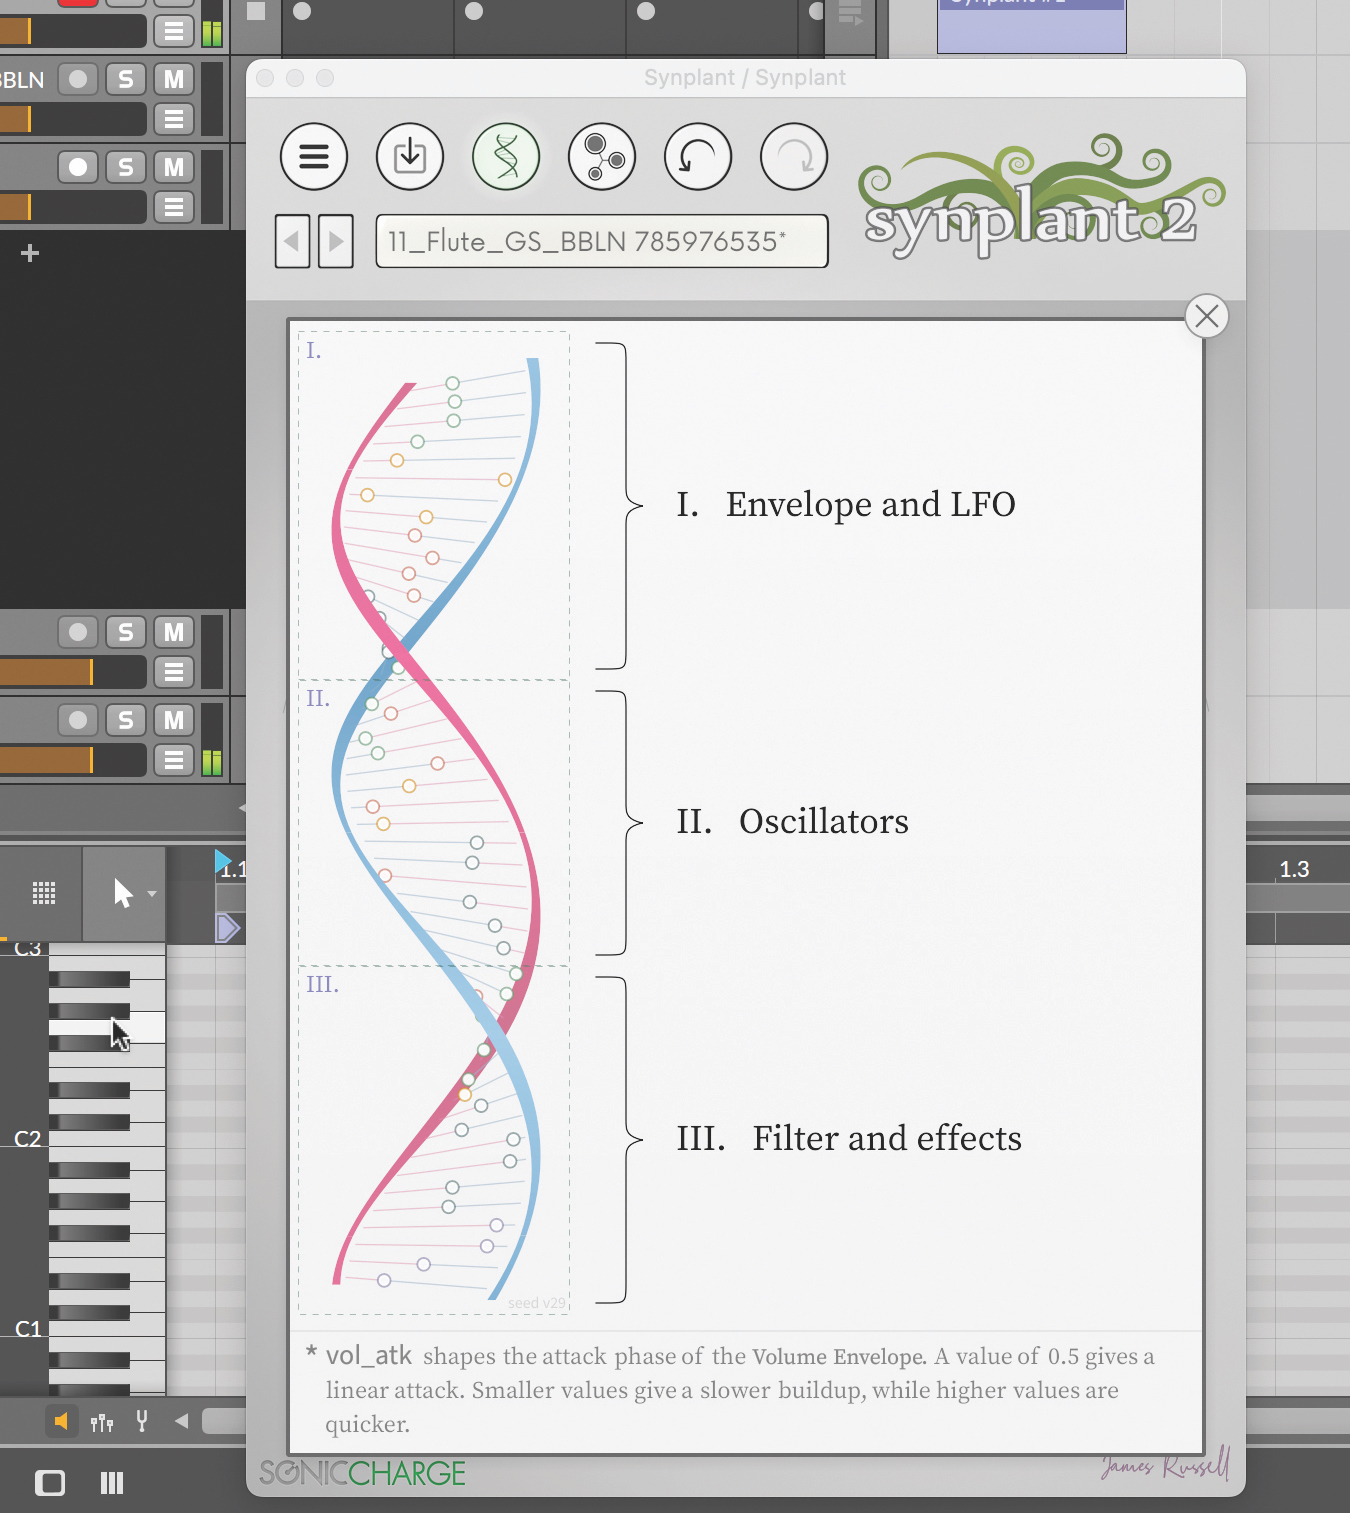
Auditioning one patch, we hear that the original flute patch has been resynthesised fully. That noise is now generated with an oscillator, so sounds the same at each note; with a simple sampler, the noise signal would have been tuned, too.
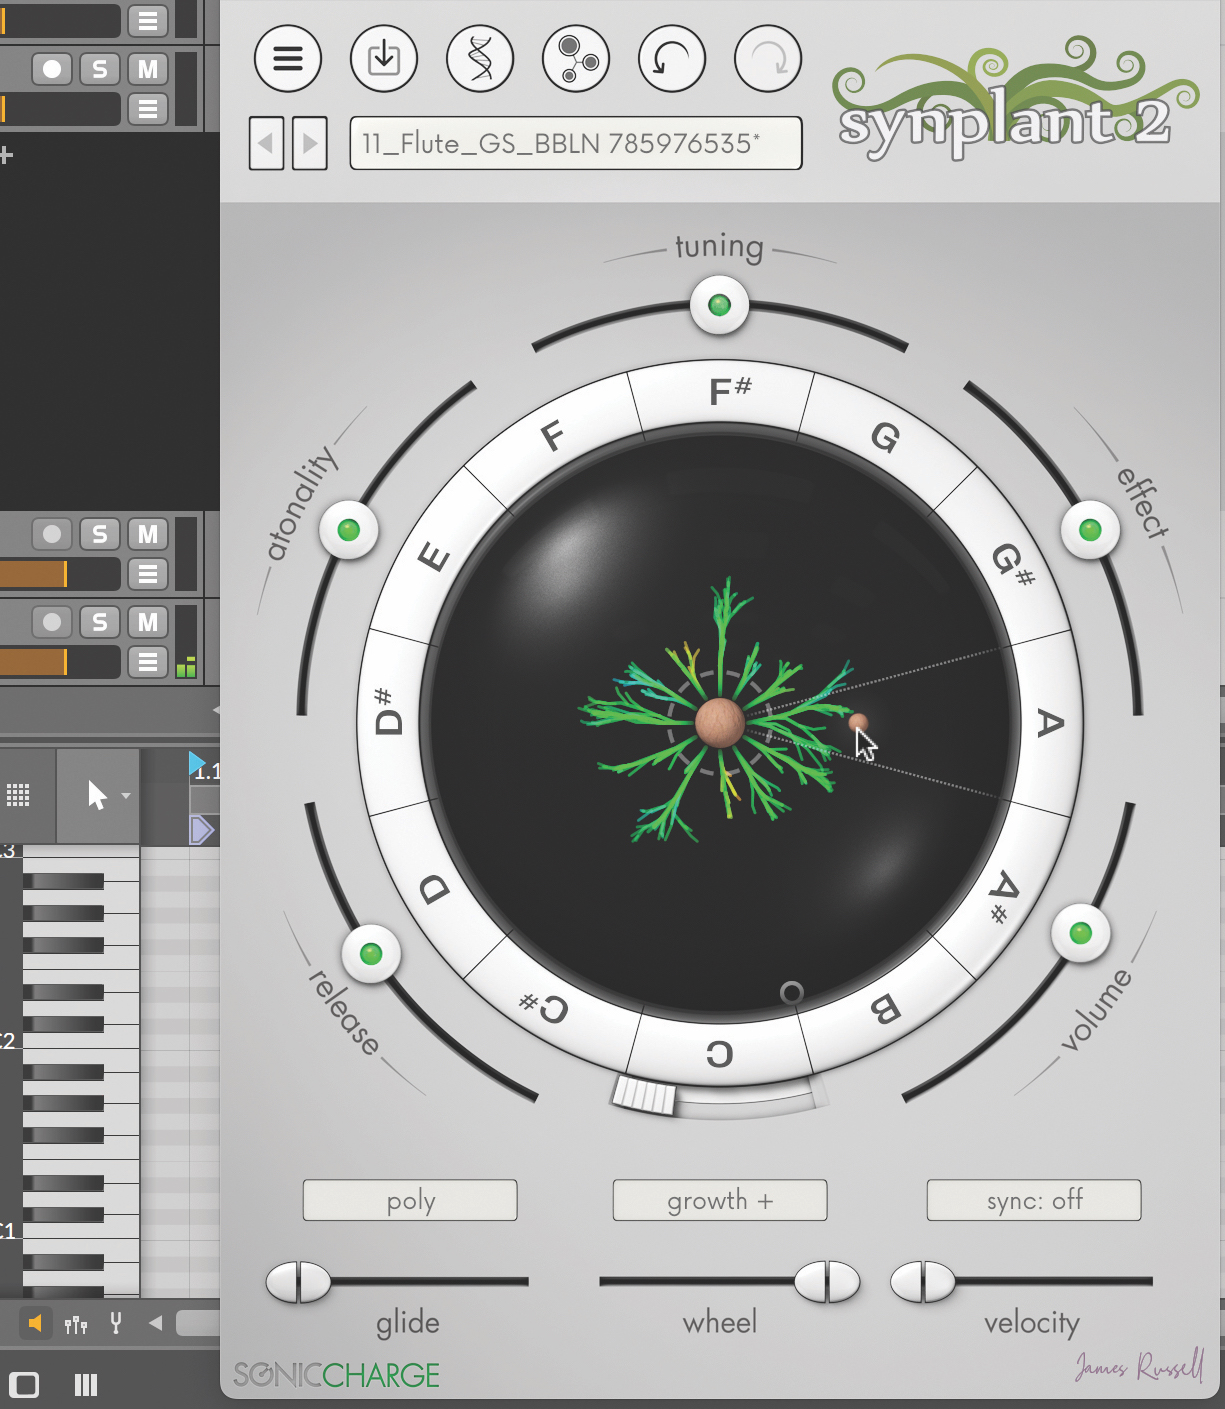
Now, using Synplant’s classic ‘growth’ panel, we can evolve variations on our flute patch, and re-evolve those we keep. This now feels like the polar opposite of our resynthesis, which gets us to a specific sound we’re looking to recreate.
Three more alternative synths to try
1. Universal Audio Opal
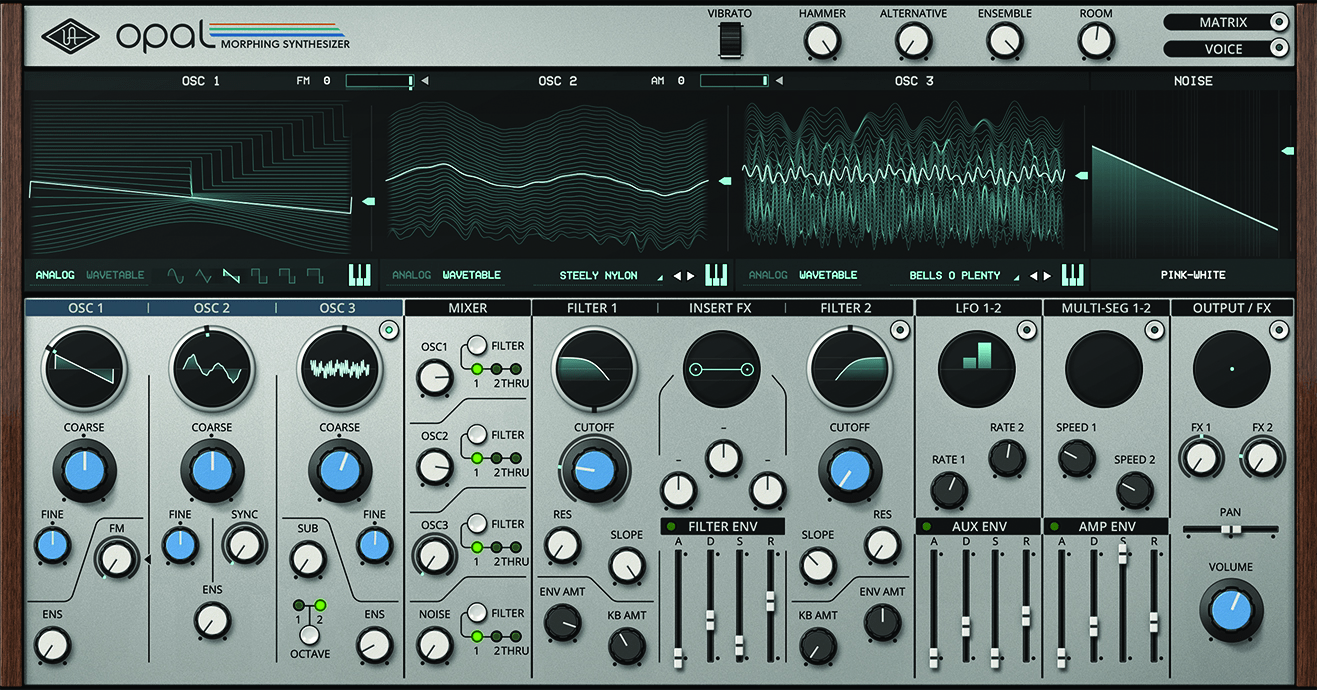
Opal is a powerful and versatile synth that combines analogue emulation with wavetable synthesis for a wide range of sounds, from classic analogue leads to modern digital soundscapes. It features a unique morphing filter that lets you create complex, evolving textures, as well as a variety of modulation options.
2. Native Instruments Reaktor Prism
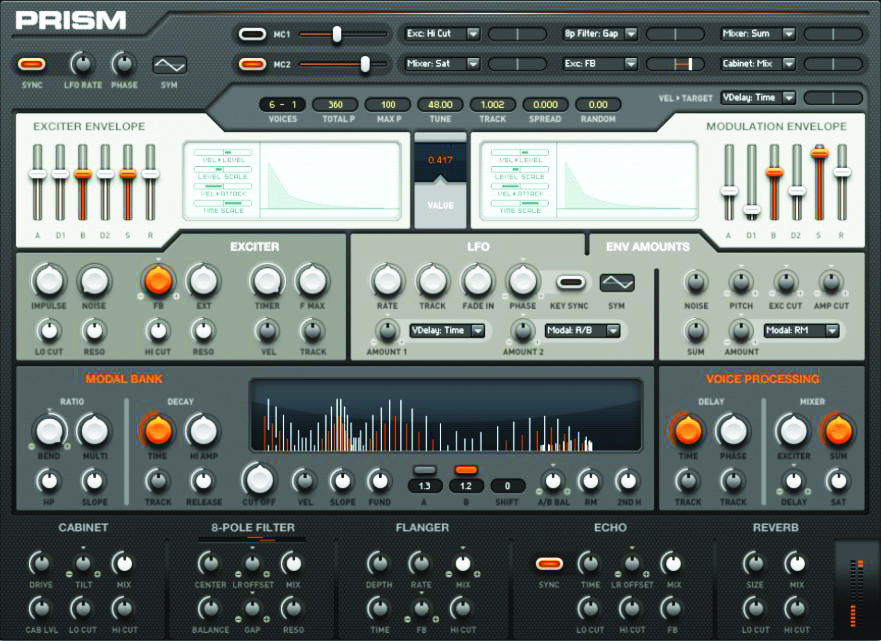
A versatile synth and effect processor that uses a unique modal synthesis engine to generate a wide range of sounds. Its core component, the Modal Bank, comprises multiple interconnected resonators that can be modulated to create rich, complex textures.
3. Dawesome Novum
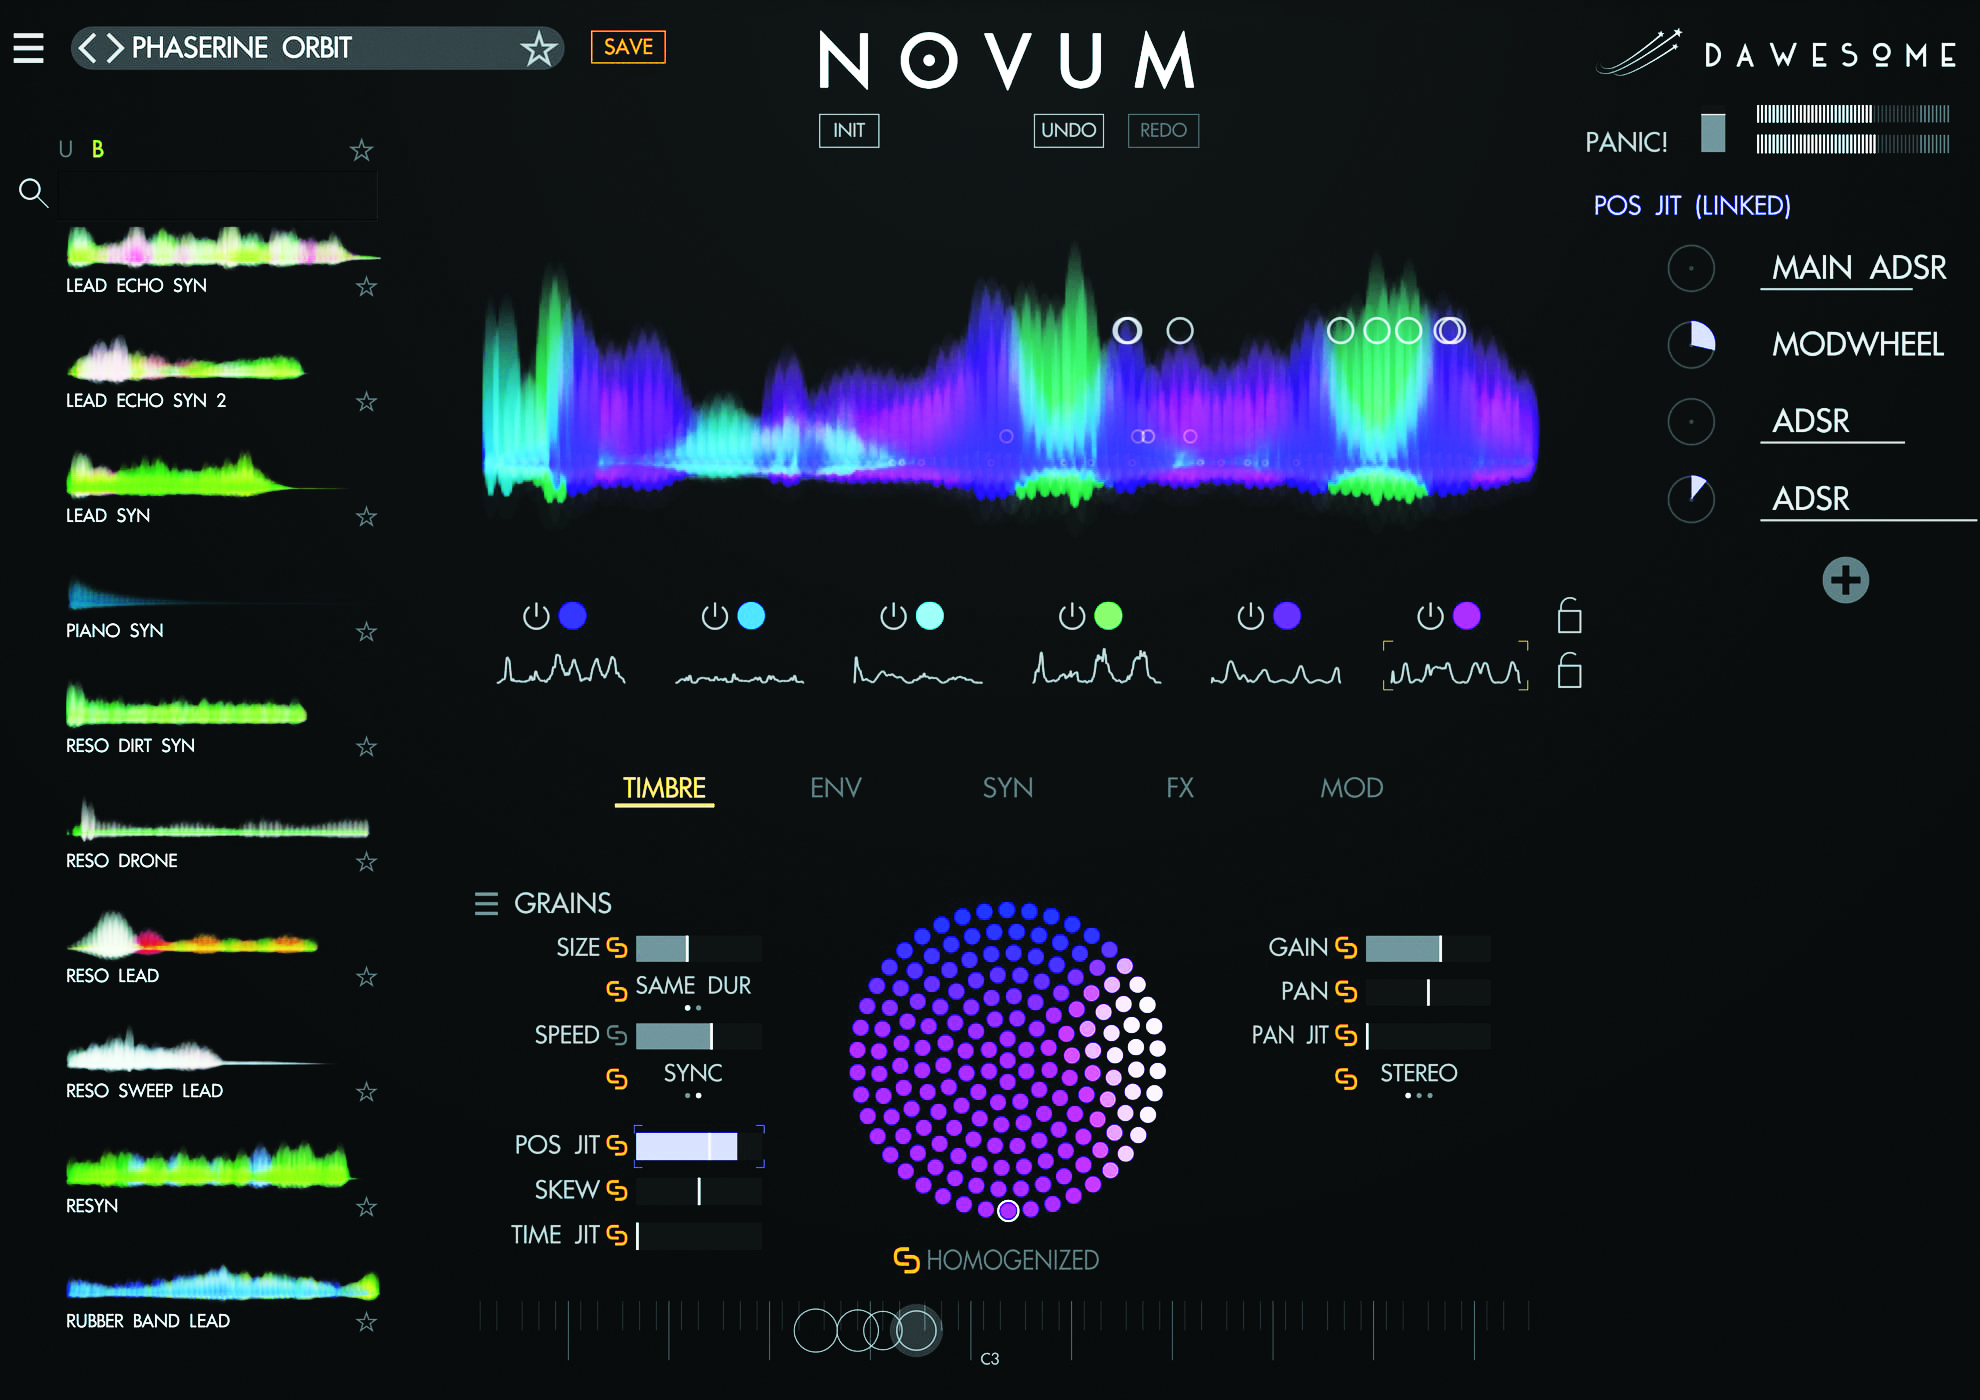
Novum combines sampled oscillators (with a large bank), and gives lots of control over how they’re played back. There’s a lot of chopping and changing in this granular synth, all in the name of customisation.
Future Music is the number one magazine for today's producers. Packed with technique and technology we'll help you make great new music. All-access artist interviews, in-depth gear reviews, essential production tutorials and much more. Every marvellous monthly edition features reliable reviews of the latest and greatest hardware and software technology and techniques, unparalleled advice, in-depth interviews, sensational free samples and so much more to improve the experience and outcome of your music-making.
