How to use submixing to glue your mix together: "Long before DAWs with massive track counts became the norm, mixers began grouping together and processing similar tracks to help them balance their mix"
If your mix just won’t gel, this technique could be just what you need to finalise your track’s core elements
Want all the hottest music and gear news, reviews, deals, features and more, direct to your inbox? Sign up here.
You are now subscribed
Your newsletter sign-up was successful
A mixing technique that’s commonly mentioned but not always understood is submixing. This technique groups audio signals together prior to the main mix bus and can help balancing and mix cohesion. Long before DAWs with massive track counts became the norm, mixers began grouping together and processing similar tracks to help them balance their mix.
Sometimes this was for convenience, but could equally be down to limited resources, and the need to share specific processors. Either way, it turned out to be rather good at getting the mix to gel, and certain mixers even became well known for their submixing methods (Michael Brauer is probably the most famous example).
In a DAW environment, resources are usually limited by our CPU’s capabilities, so running our favourite compressor on numerous tracks isn’t often a problem. Even so, submixing can still form an important part of our mix, both from an organisational and sonic perspective. And once set up, it can also save time, be more CPU efficient and allow us to process each submix as one.
In this tutorial, we’ll investigate submixing using regular buses. This is a universal method that should work on all DAWs. That said, many DAWs now include their own streamlined options for setting up submixes, and we discuss some of these in the Pro Tip.
Right then, let’s get to it.
Step by step submixing using regular busses
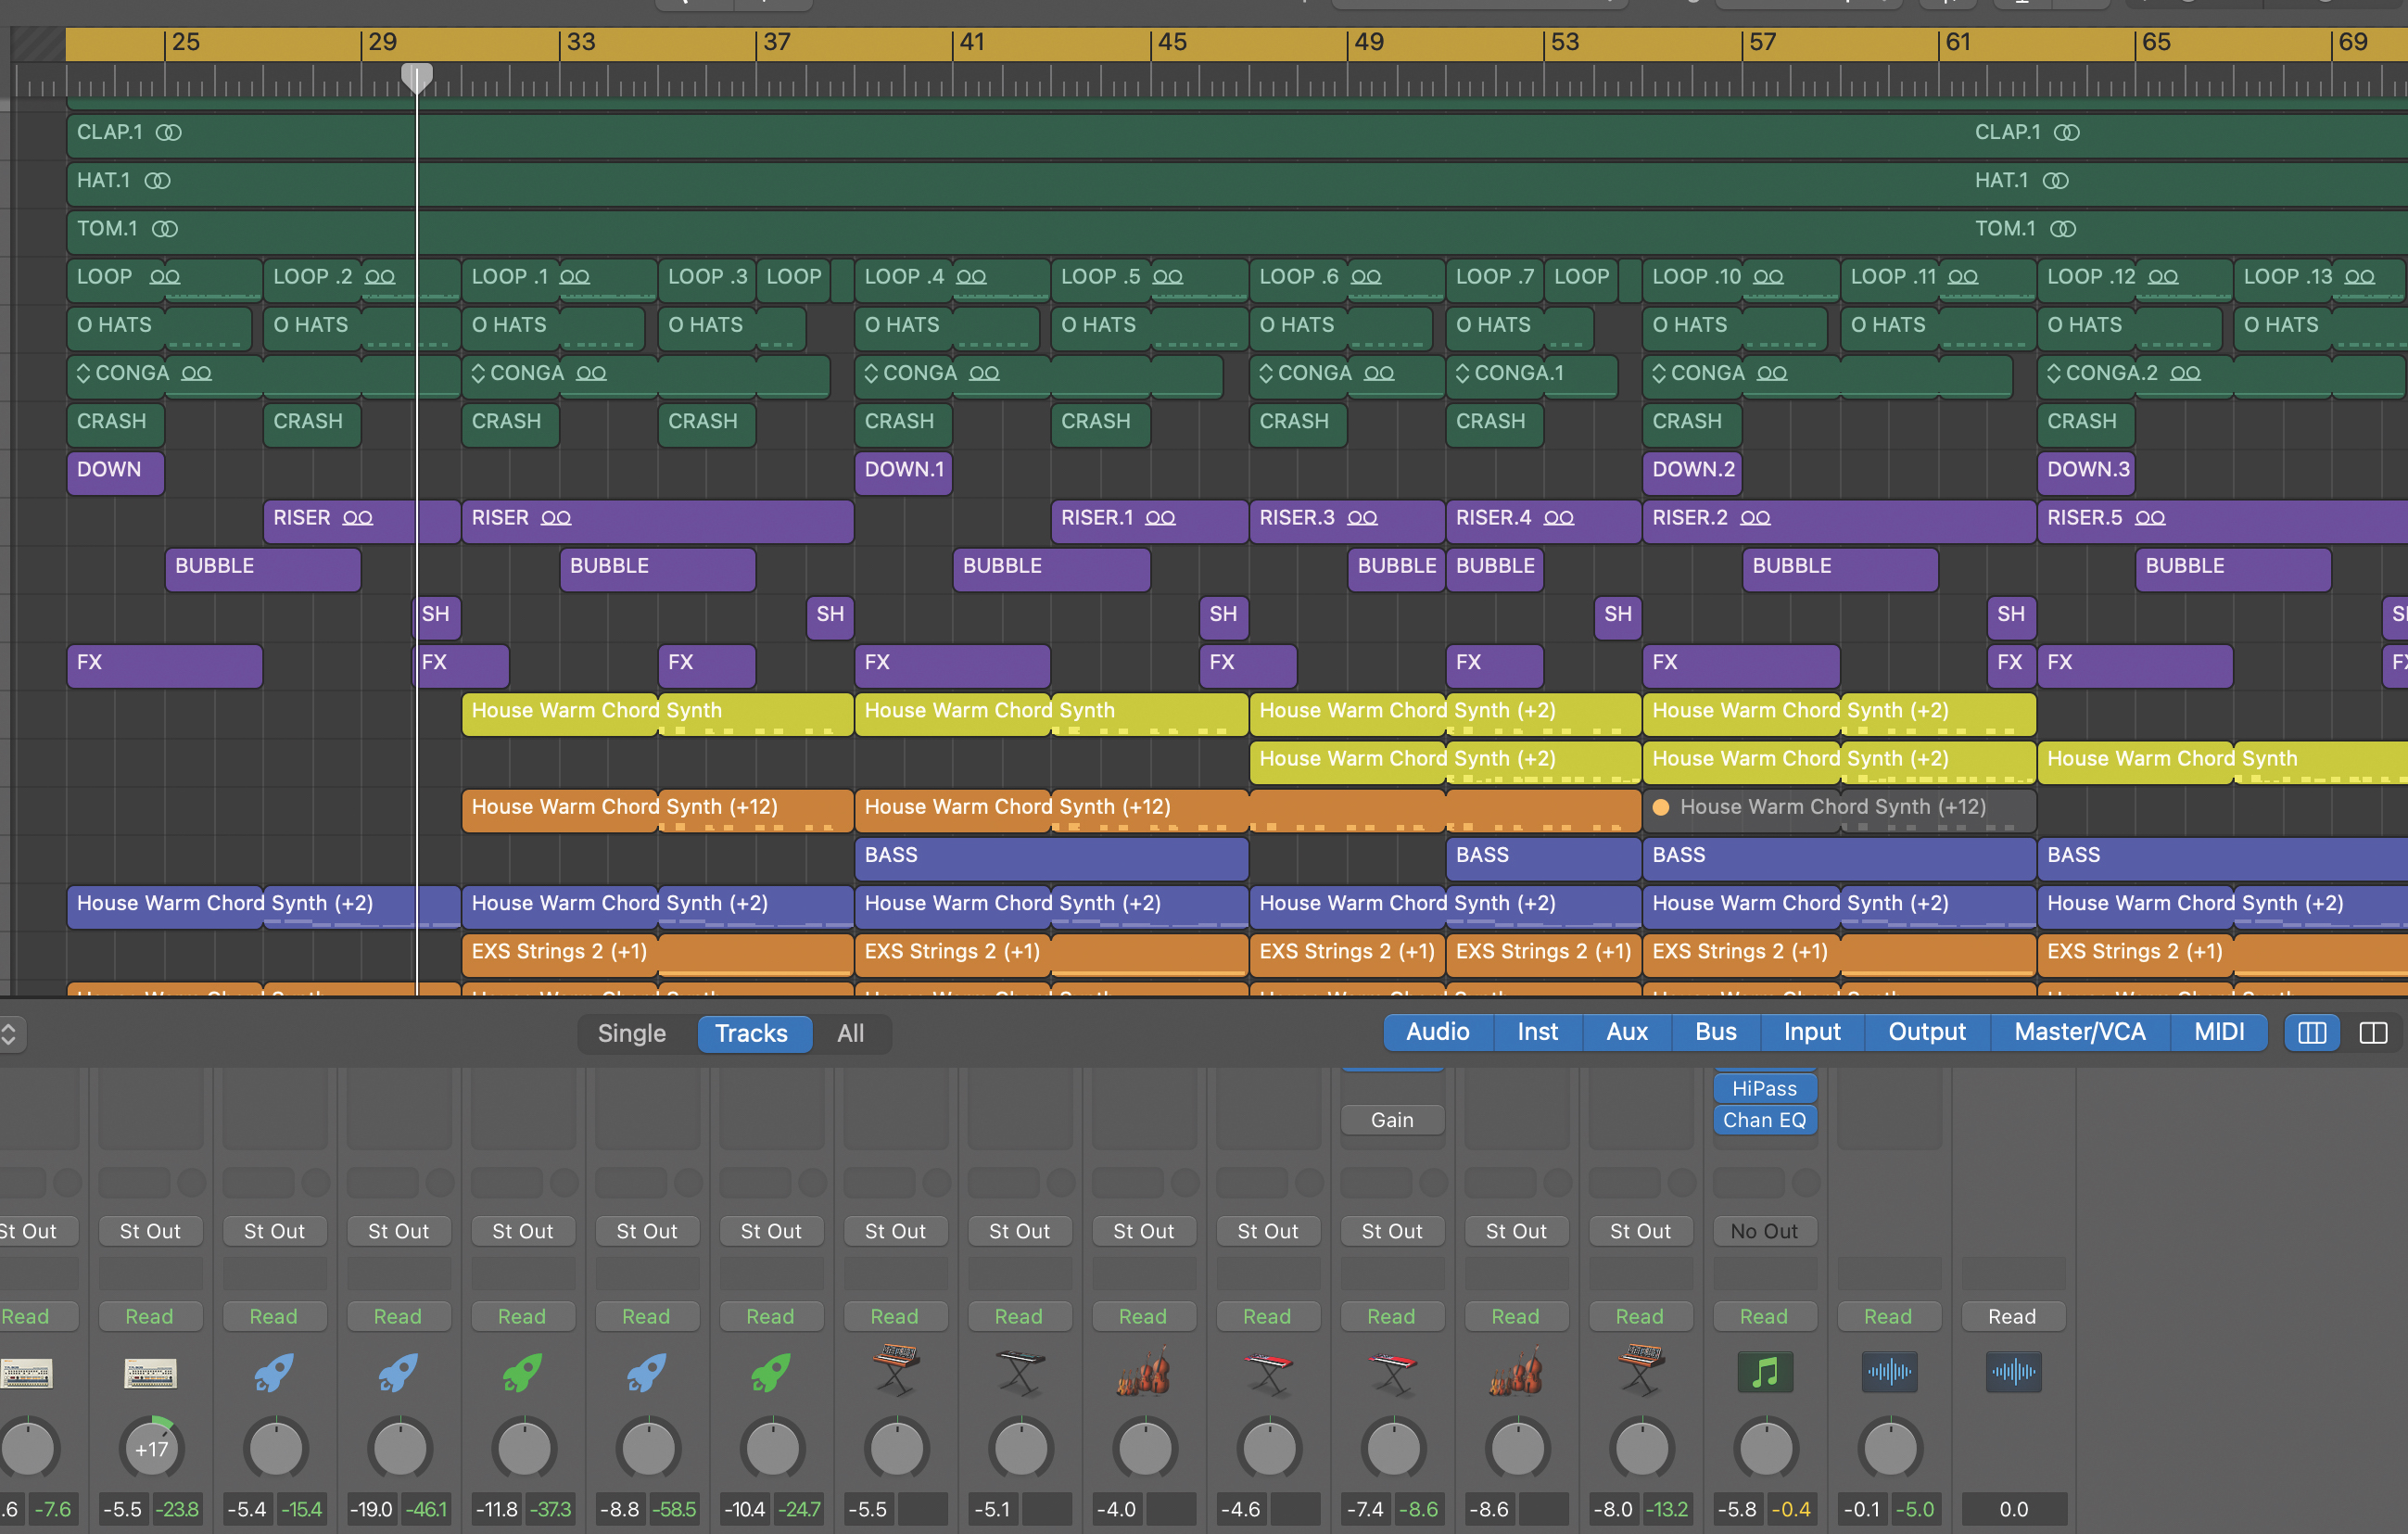
In this tutorial, we’ll take a universal approach to submixing using regular busses, and this should work on all DAWs. Nevertheless, the first thing to appreciate is that we are not using busses to split the signal, as we do with an auxiliary. Rather, signals are routed solely to busses to premix them prior to the master bus.
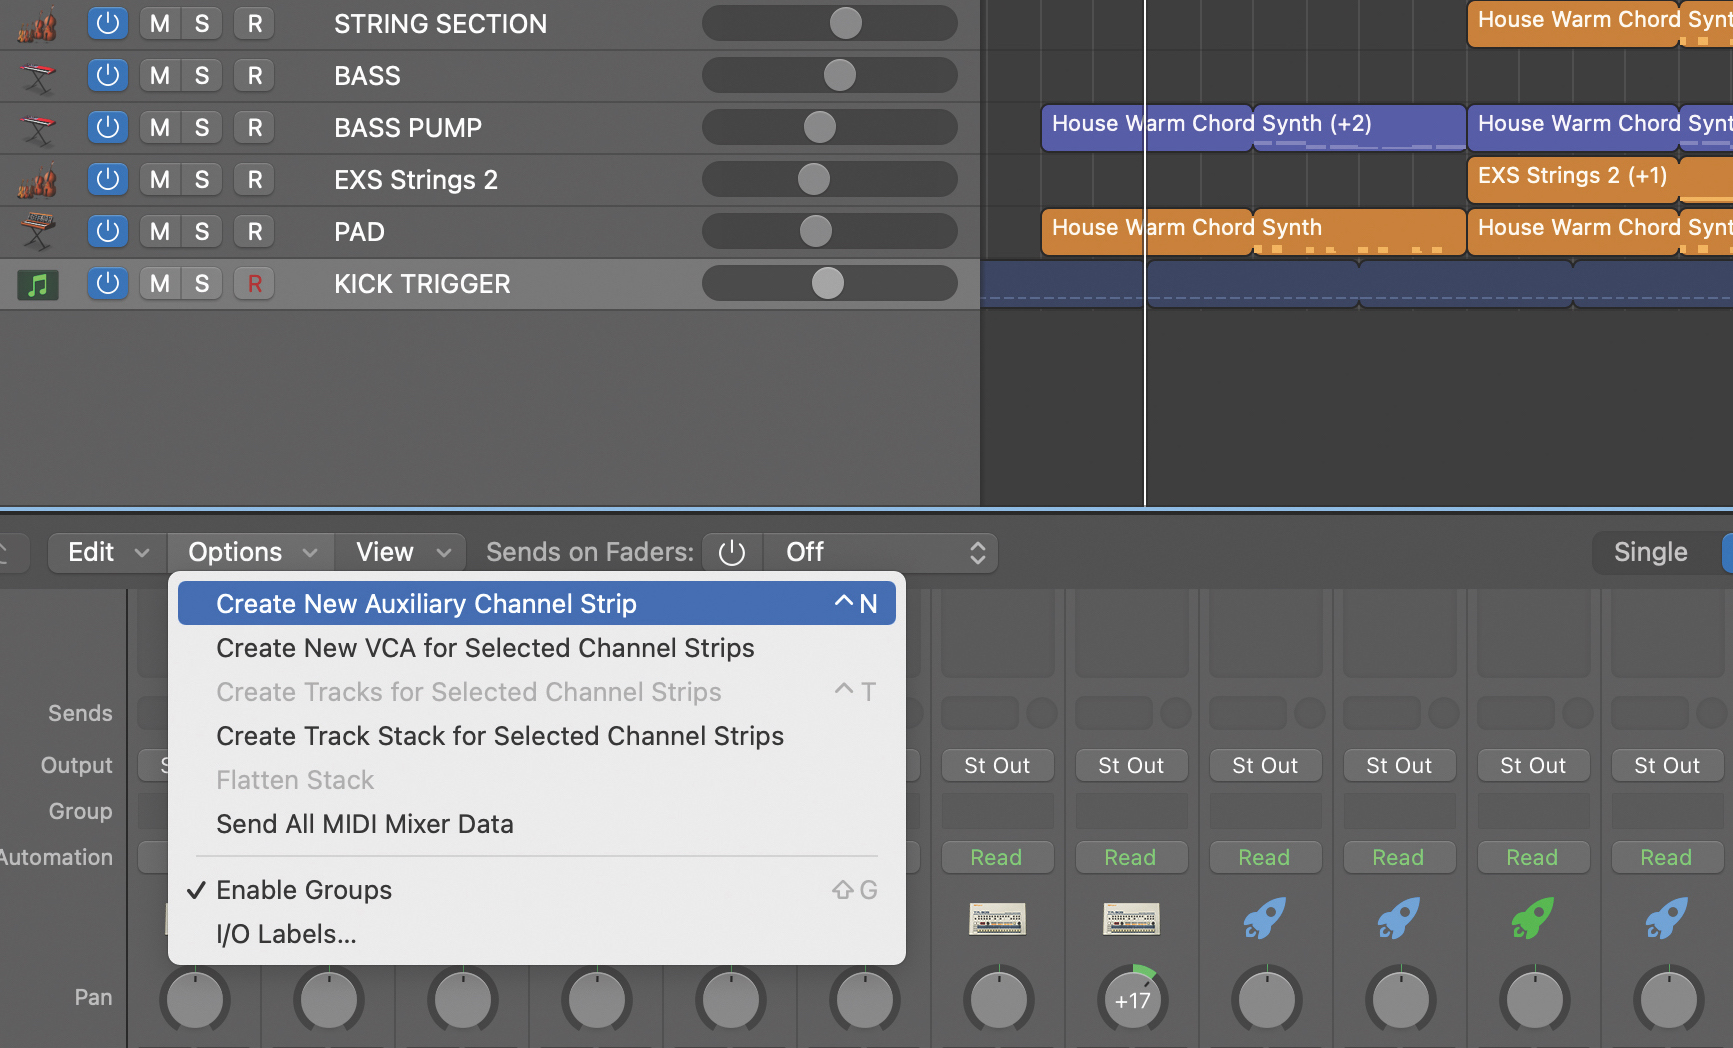
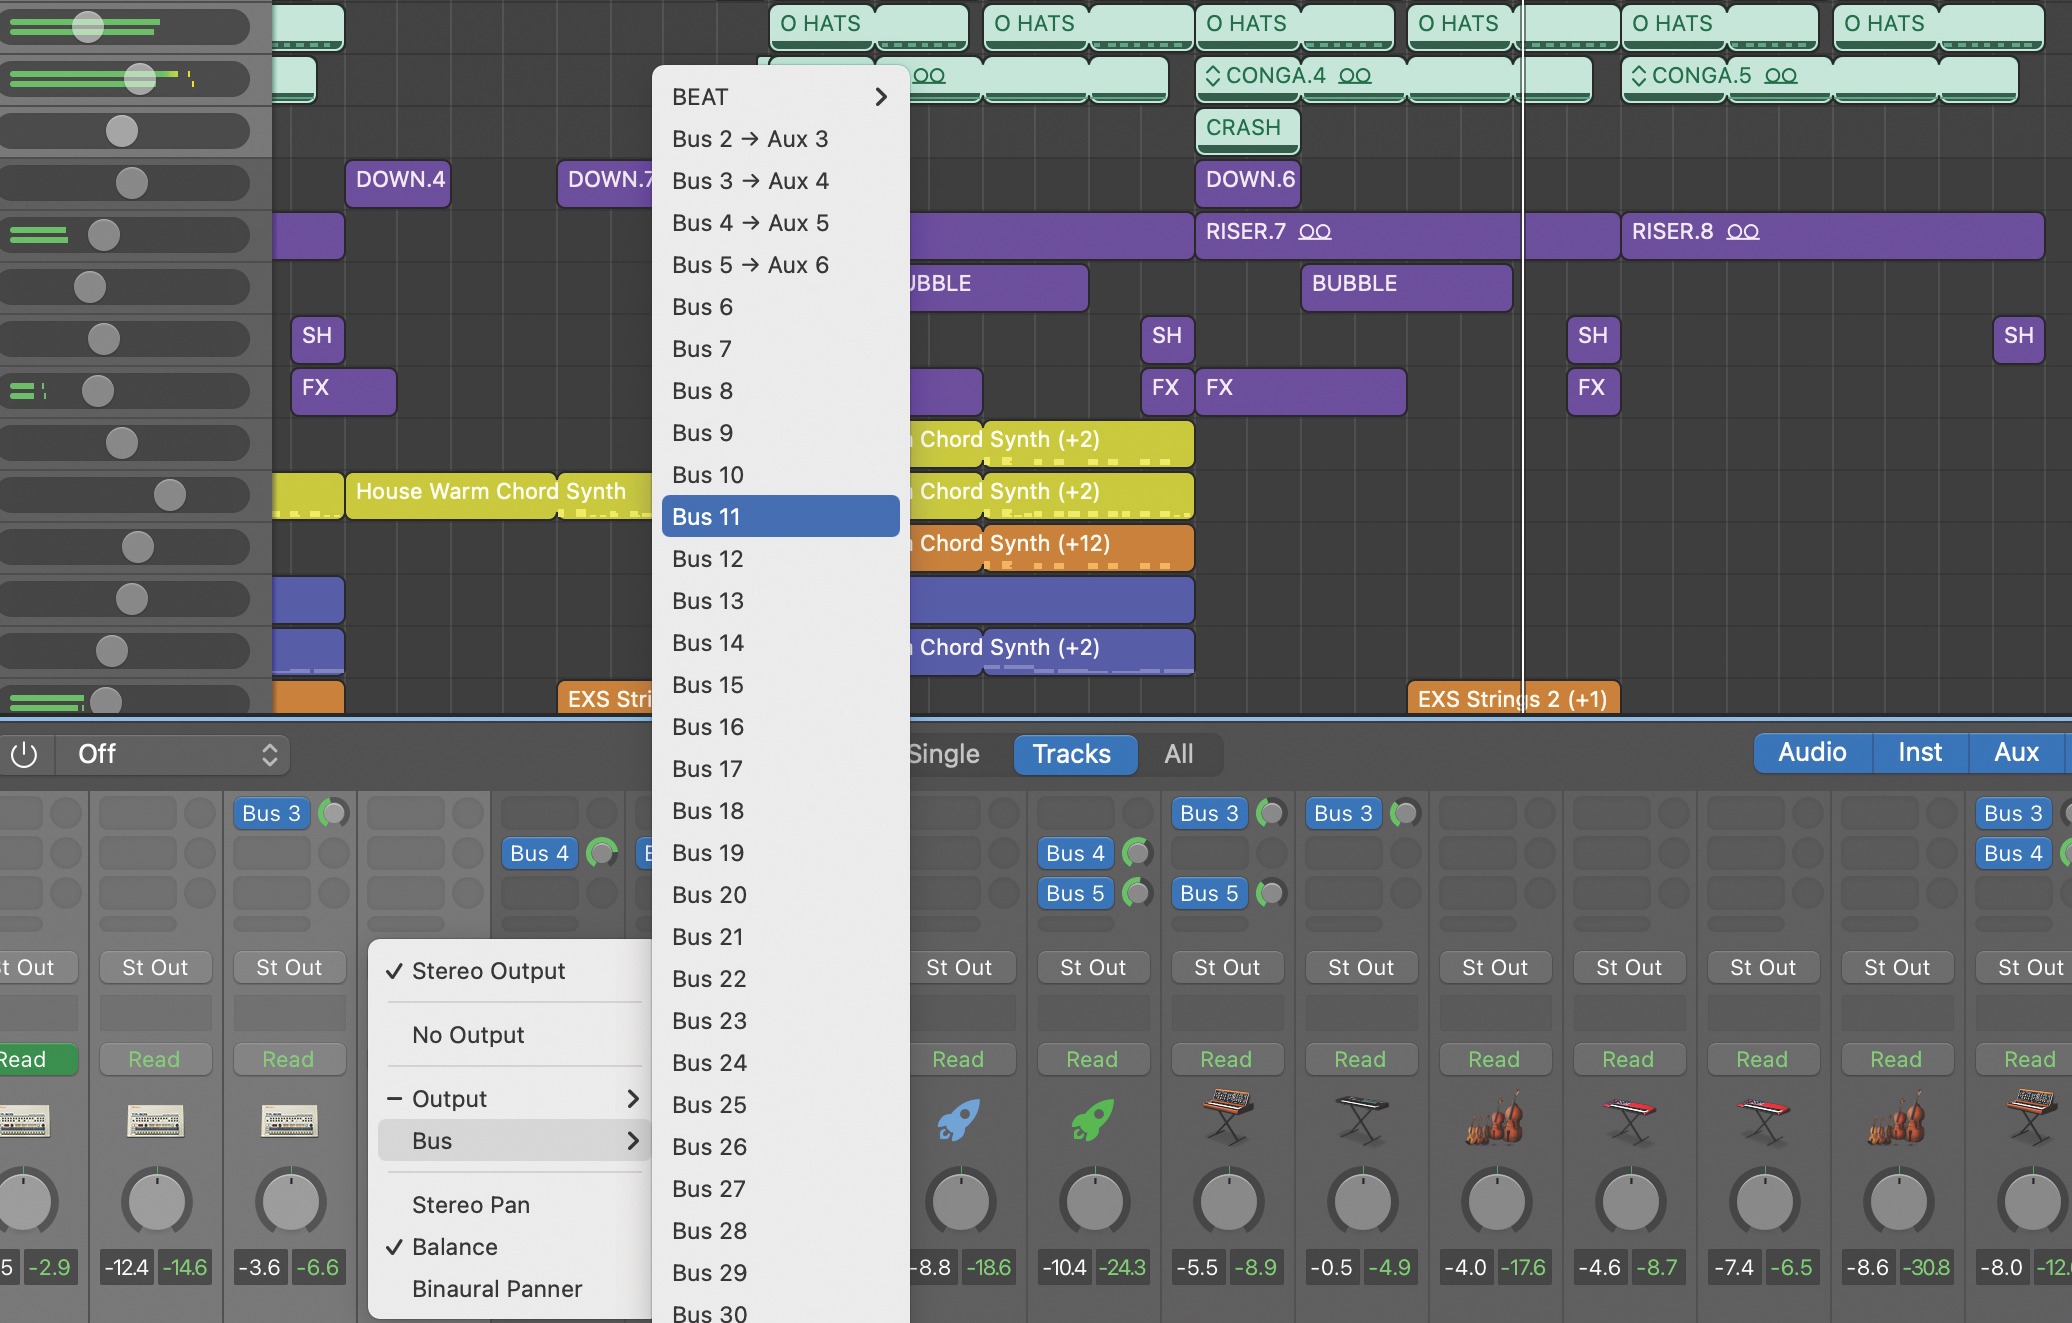
The simplest way to do this is to set up a fresh bus or busses, with faders at unity. Then on your individual tracks, use the track output option to switch the routing from the main output to the required bus. The audio will now pass from your track to the submix bus, then from the submix bus to the main output.
Want all the hottest music and gear news, reviews, deals, features and more, direct to your inbox? Sign up here.
There is no requirement to set up submixes for everything. In fact, doing this can sometimes be more confusing. If you’re new to submixing, select elements that clearly go together but happen to be on multiple tracks. Drums or vocals for example. You can create submixes whenever you like, but doing so at early stages can help get things organised.
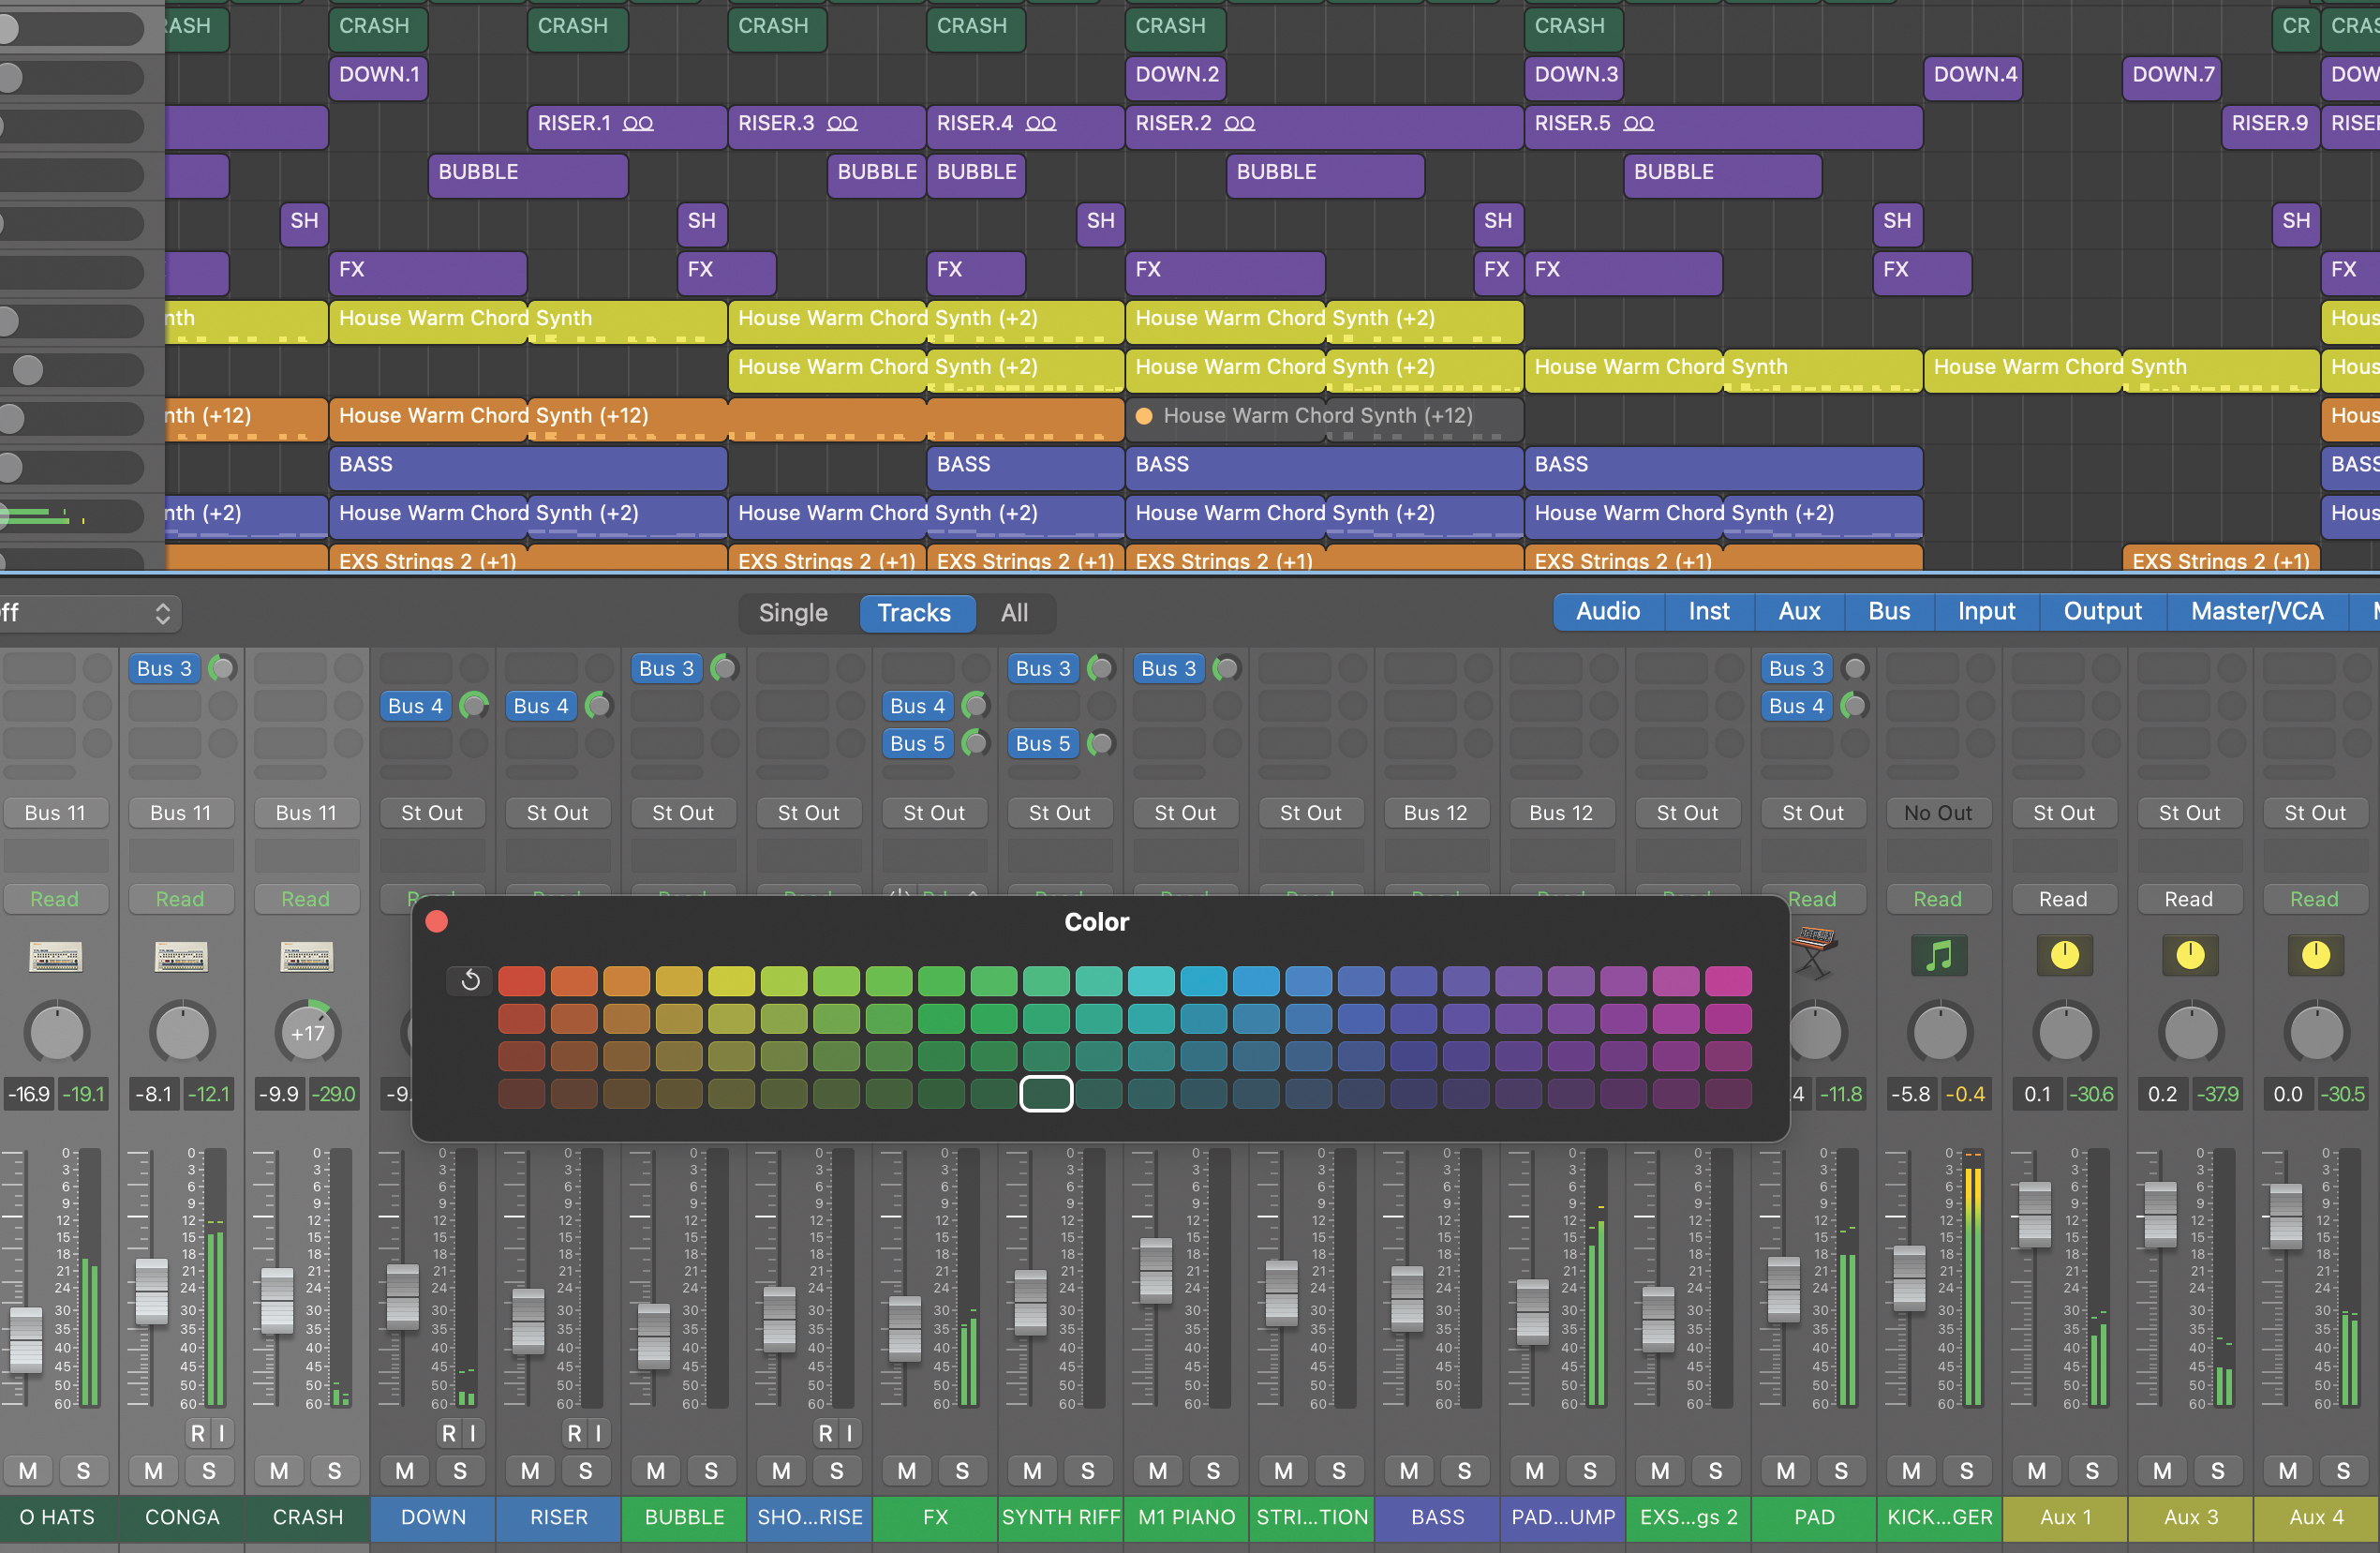
To get started, we’ve set up our first couple of busses – Drums and Basses – routing all key elements of our beat (eight tracks) and our two bass tracks accordingly. In addition to naming and colour coding the faders, so it’s all easy to spot, we’ve loaded up EQ and task-specific compressors.

Submixes give a great way to gel multitrack instruments such as drums, and compression is a perfect tool. Here we’re using the SSL Bus Compressor 2 to add glue, and also the EQP-1A for some overall sheen. Meanwhile, on our bass, we’re adding to the track-specific bass compression with an opto design: IK T-RackS White 2A.
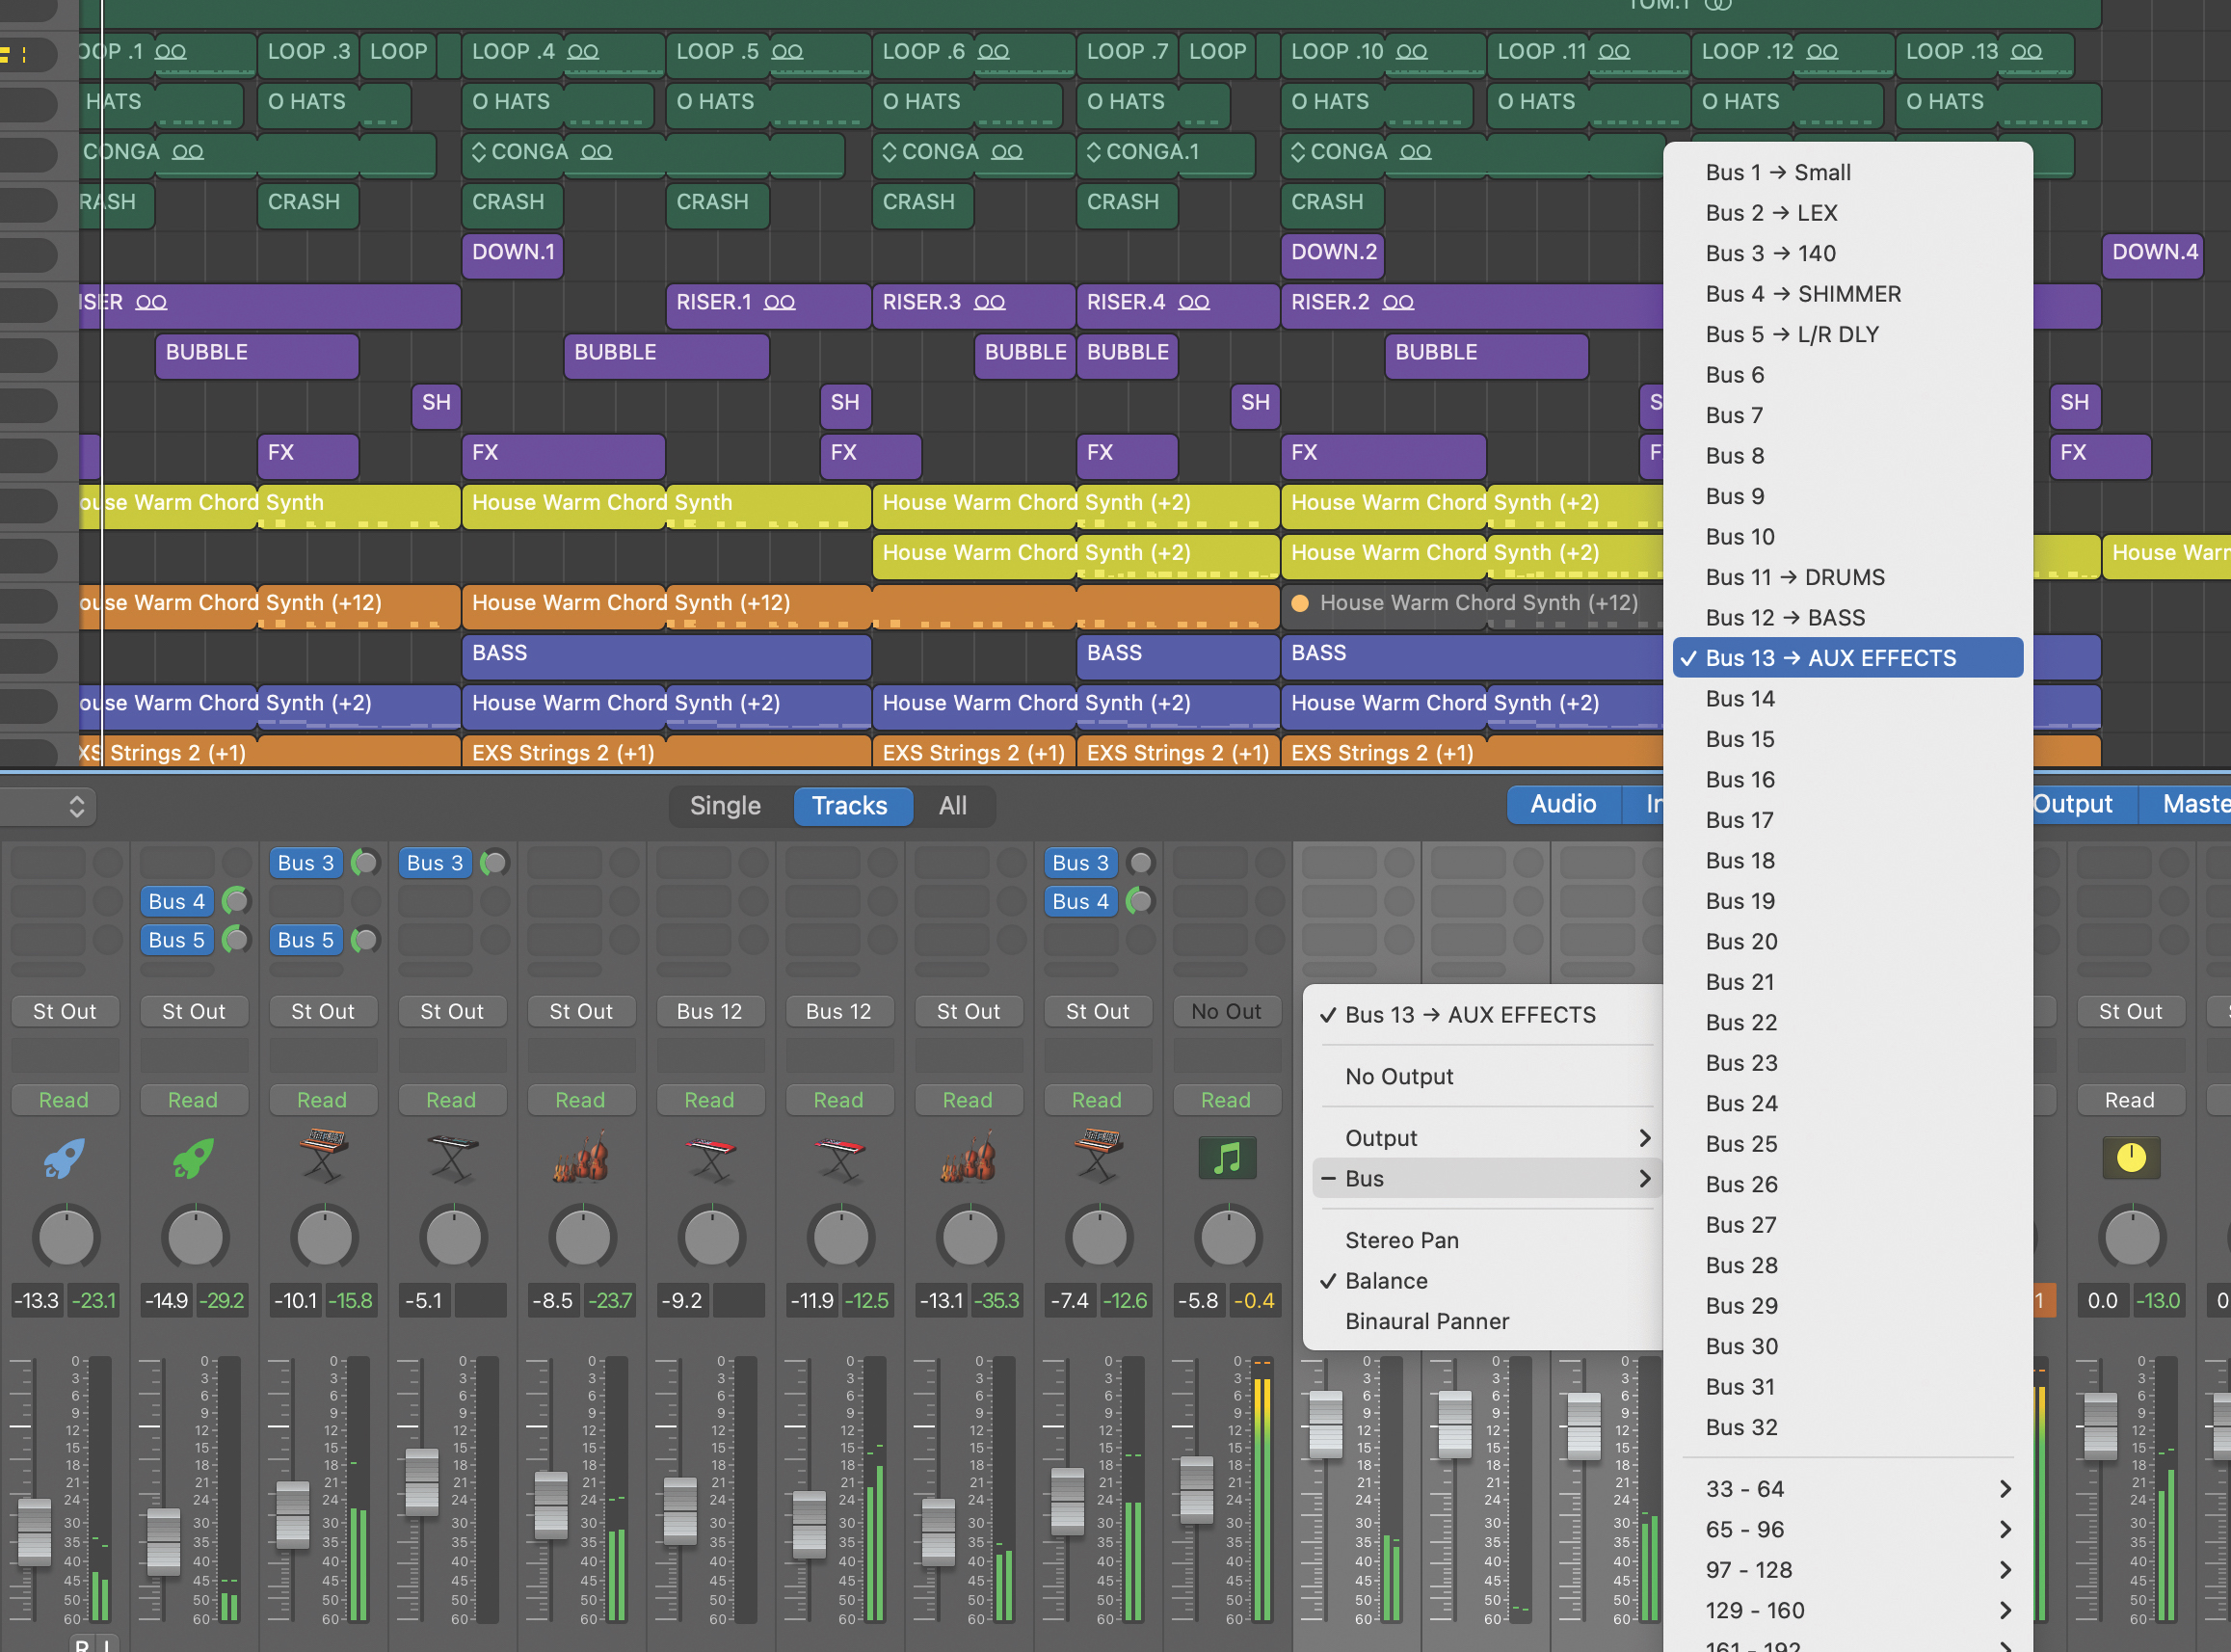
When discussing submixing, we often focus on combining tracks, but submixing auxiliary effects returns is also helpful. Here, we’ve simply grouped all our auxiliary returns into one submix channel (Aux Effects). If you’re using specific effects for certain tracks (vocals, say), then more focused effects submixes can also be useful.
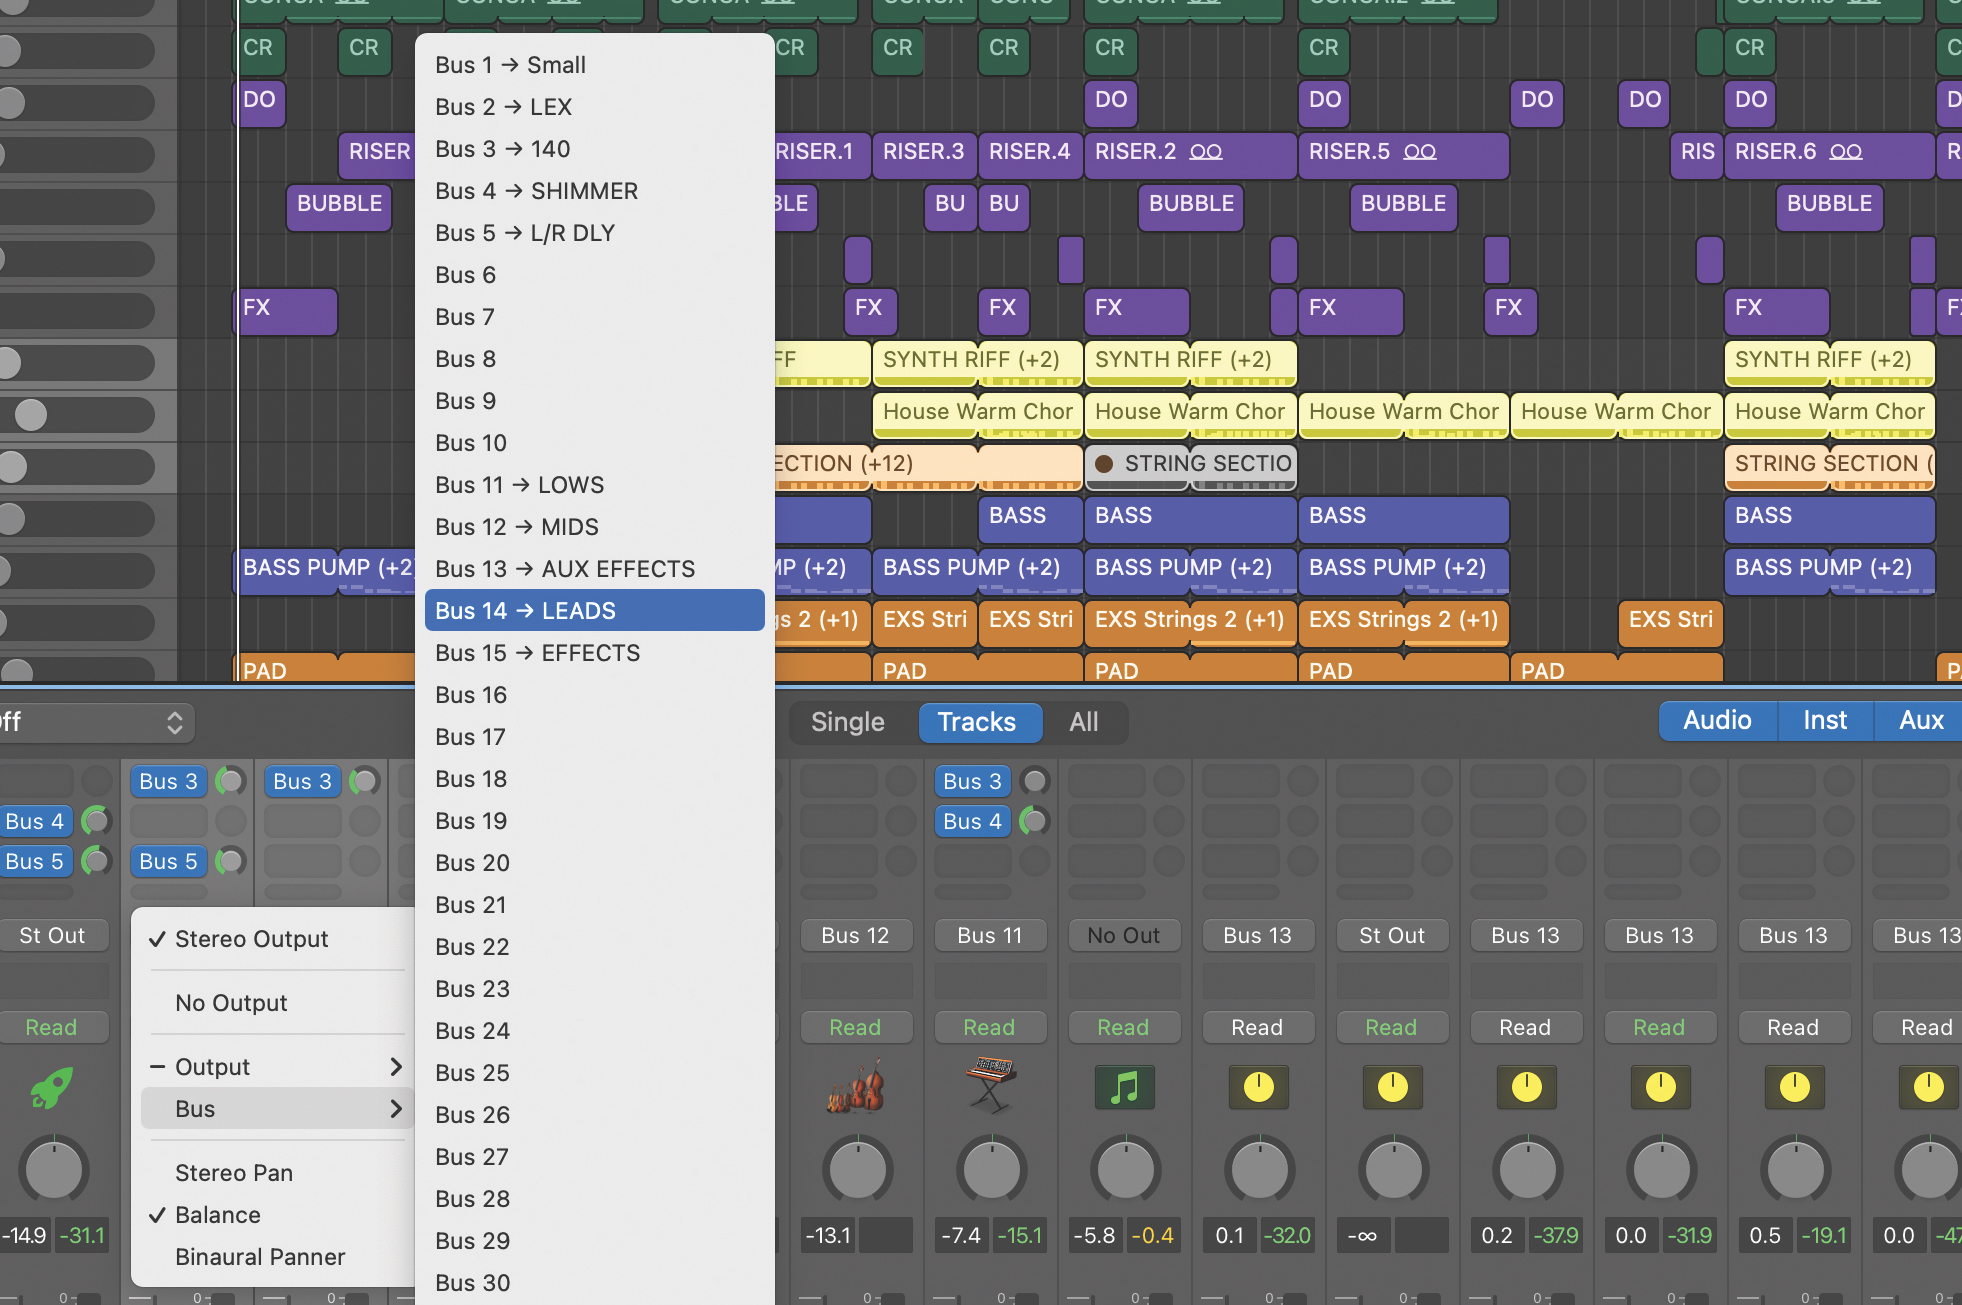
So far we’ve looked at grouping tracks by instrument type, but this certainly isn’t the only option. Common techniques include submixing tracks according to their main frequency content or function. As an example, we’ve swapped things around in our track, creating low- and mid-range submixes, supplemented with lead instruments and effects.
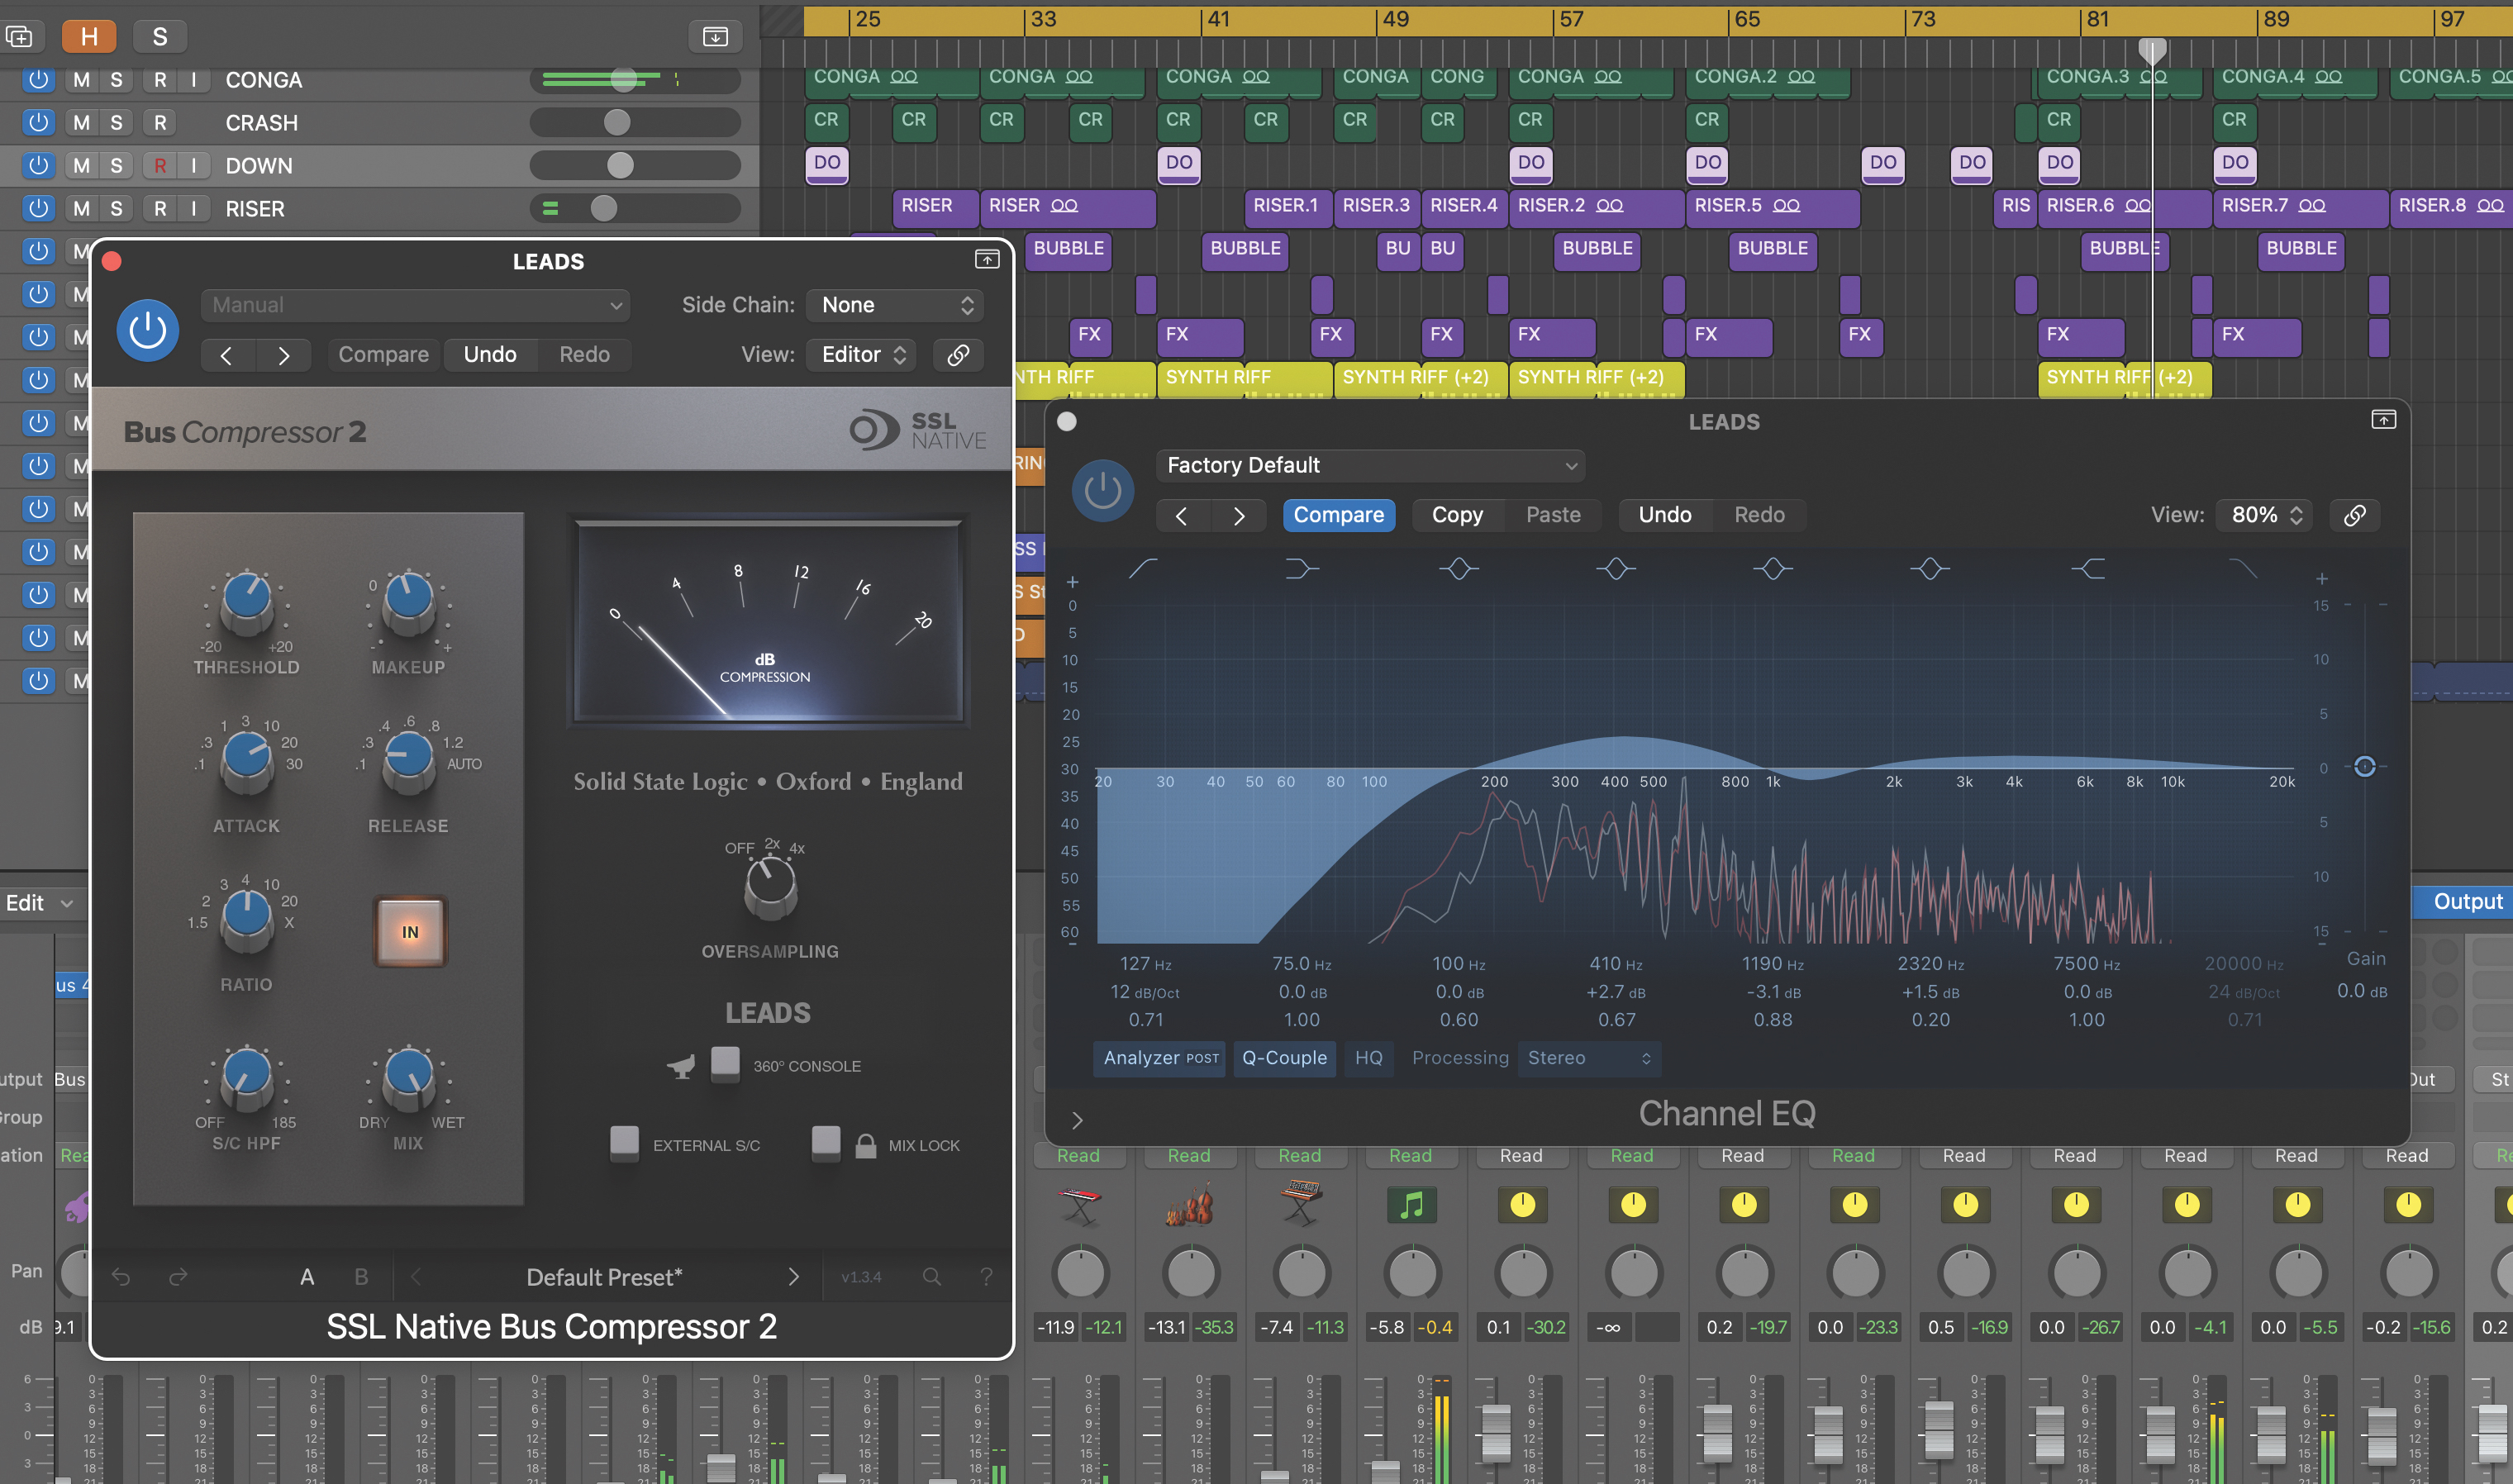
As you can see, we now have the kick and bass tracks going to the same submix. Most other drum elements plus the pads are routed together. Meanwhile, the lead aspects (keys and synths) are grouped. We’ve now used more specific compression and EQ on each of these groups.
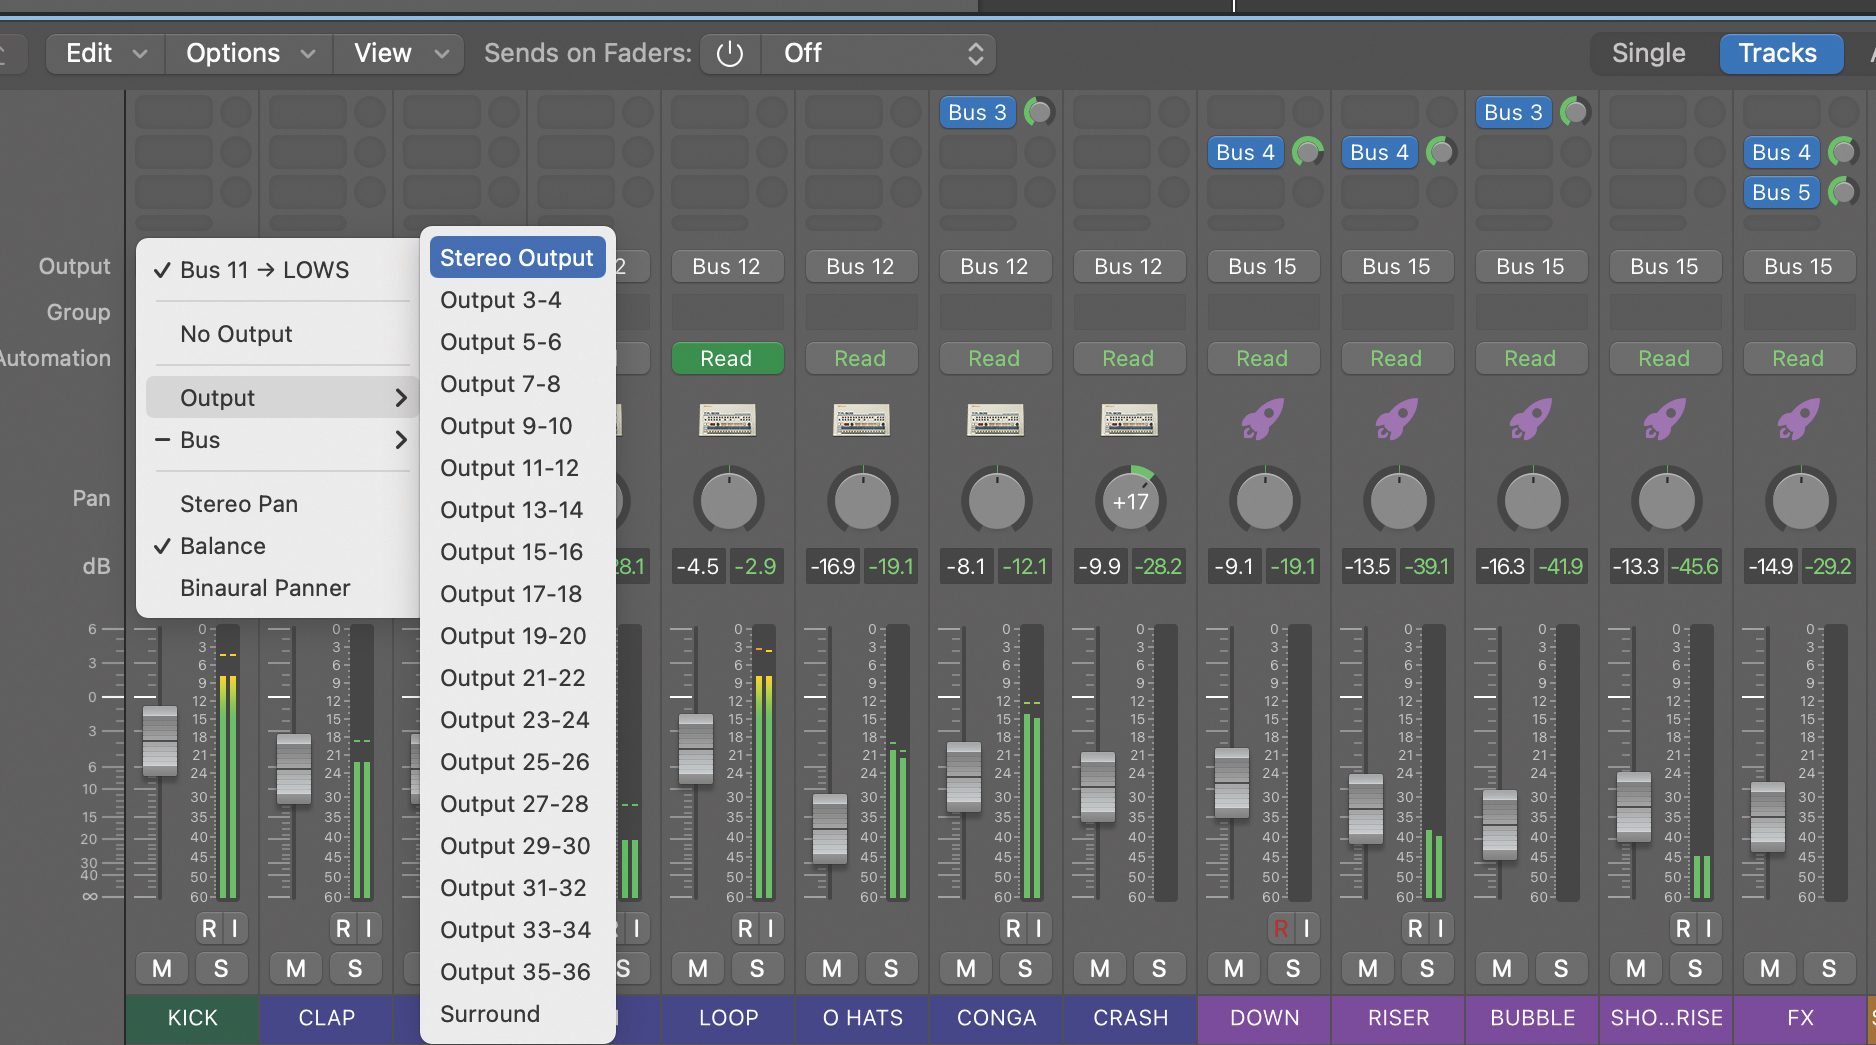
Don’t be afraid to remove an item from the submix or parallel process individual elements. For example, if you like the drum submix, but don’t want the kick to influence it, remove the kick and simply process it independently. Alternatively, you could parallel the kick by using an additional auxiliary send and bus.
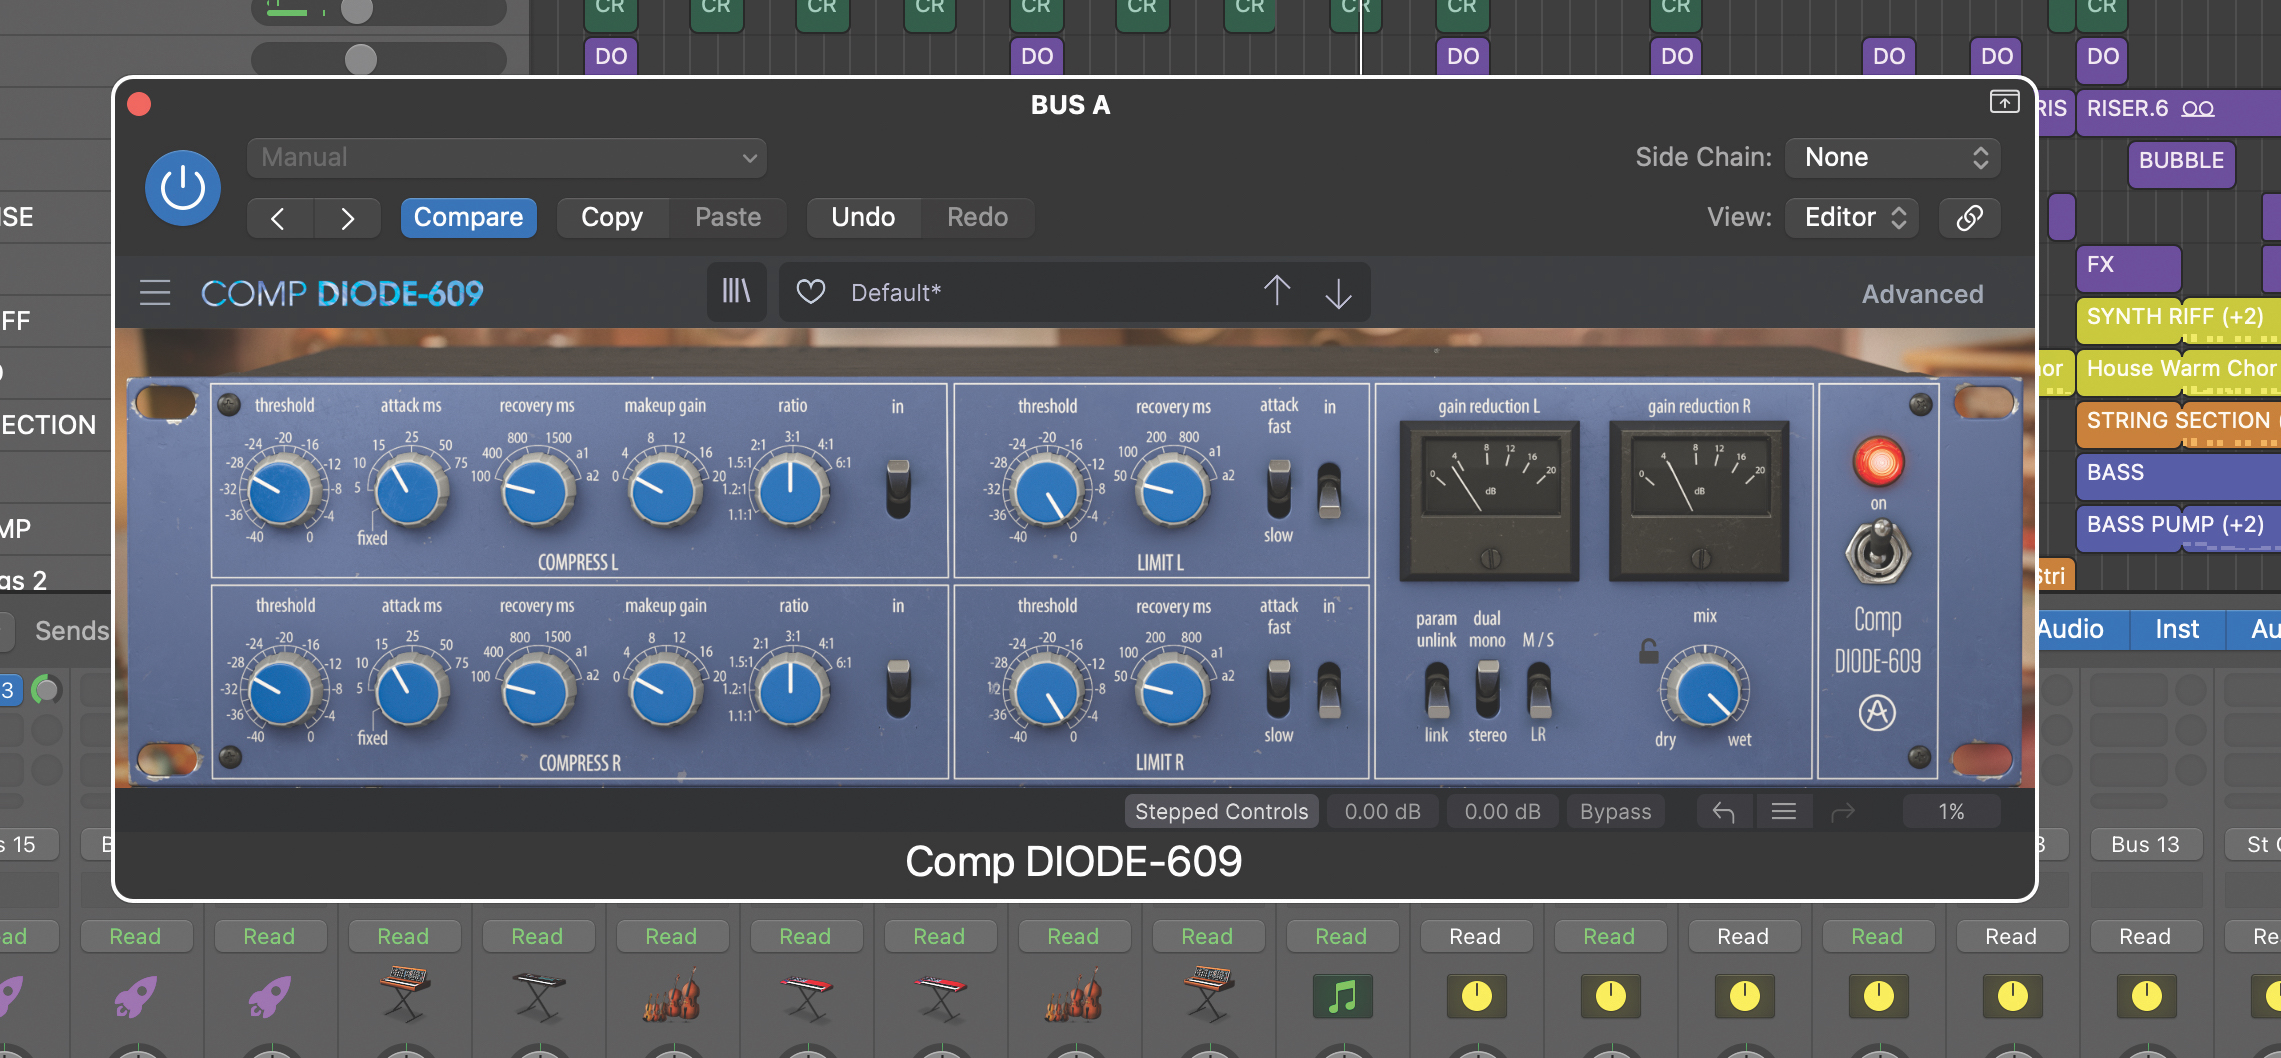
It would be remiss of us to discuss submixing without mentioning Michael Brauer’s method, and although we’re not necessarily suggesting you copy it, it’s definitely worth investigating, and at the very least demonstrates that finding your own system and then most importantly finessing it, is perfectly valid.
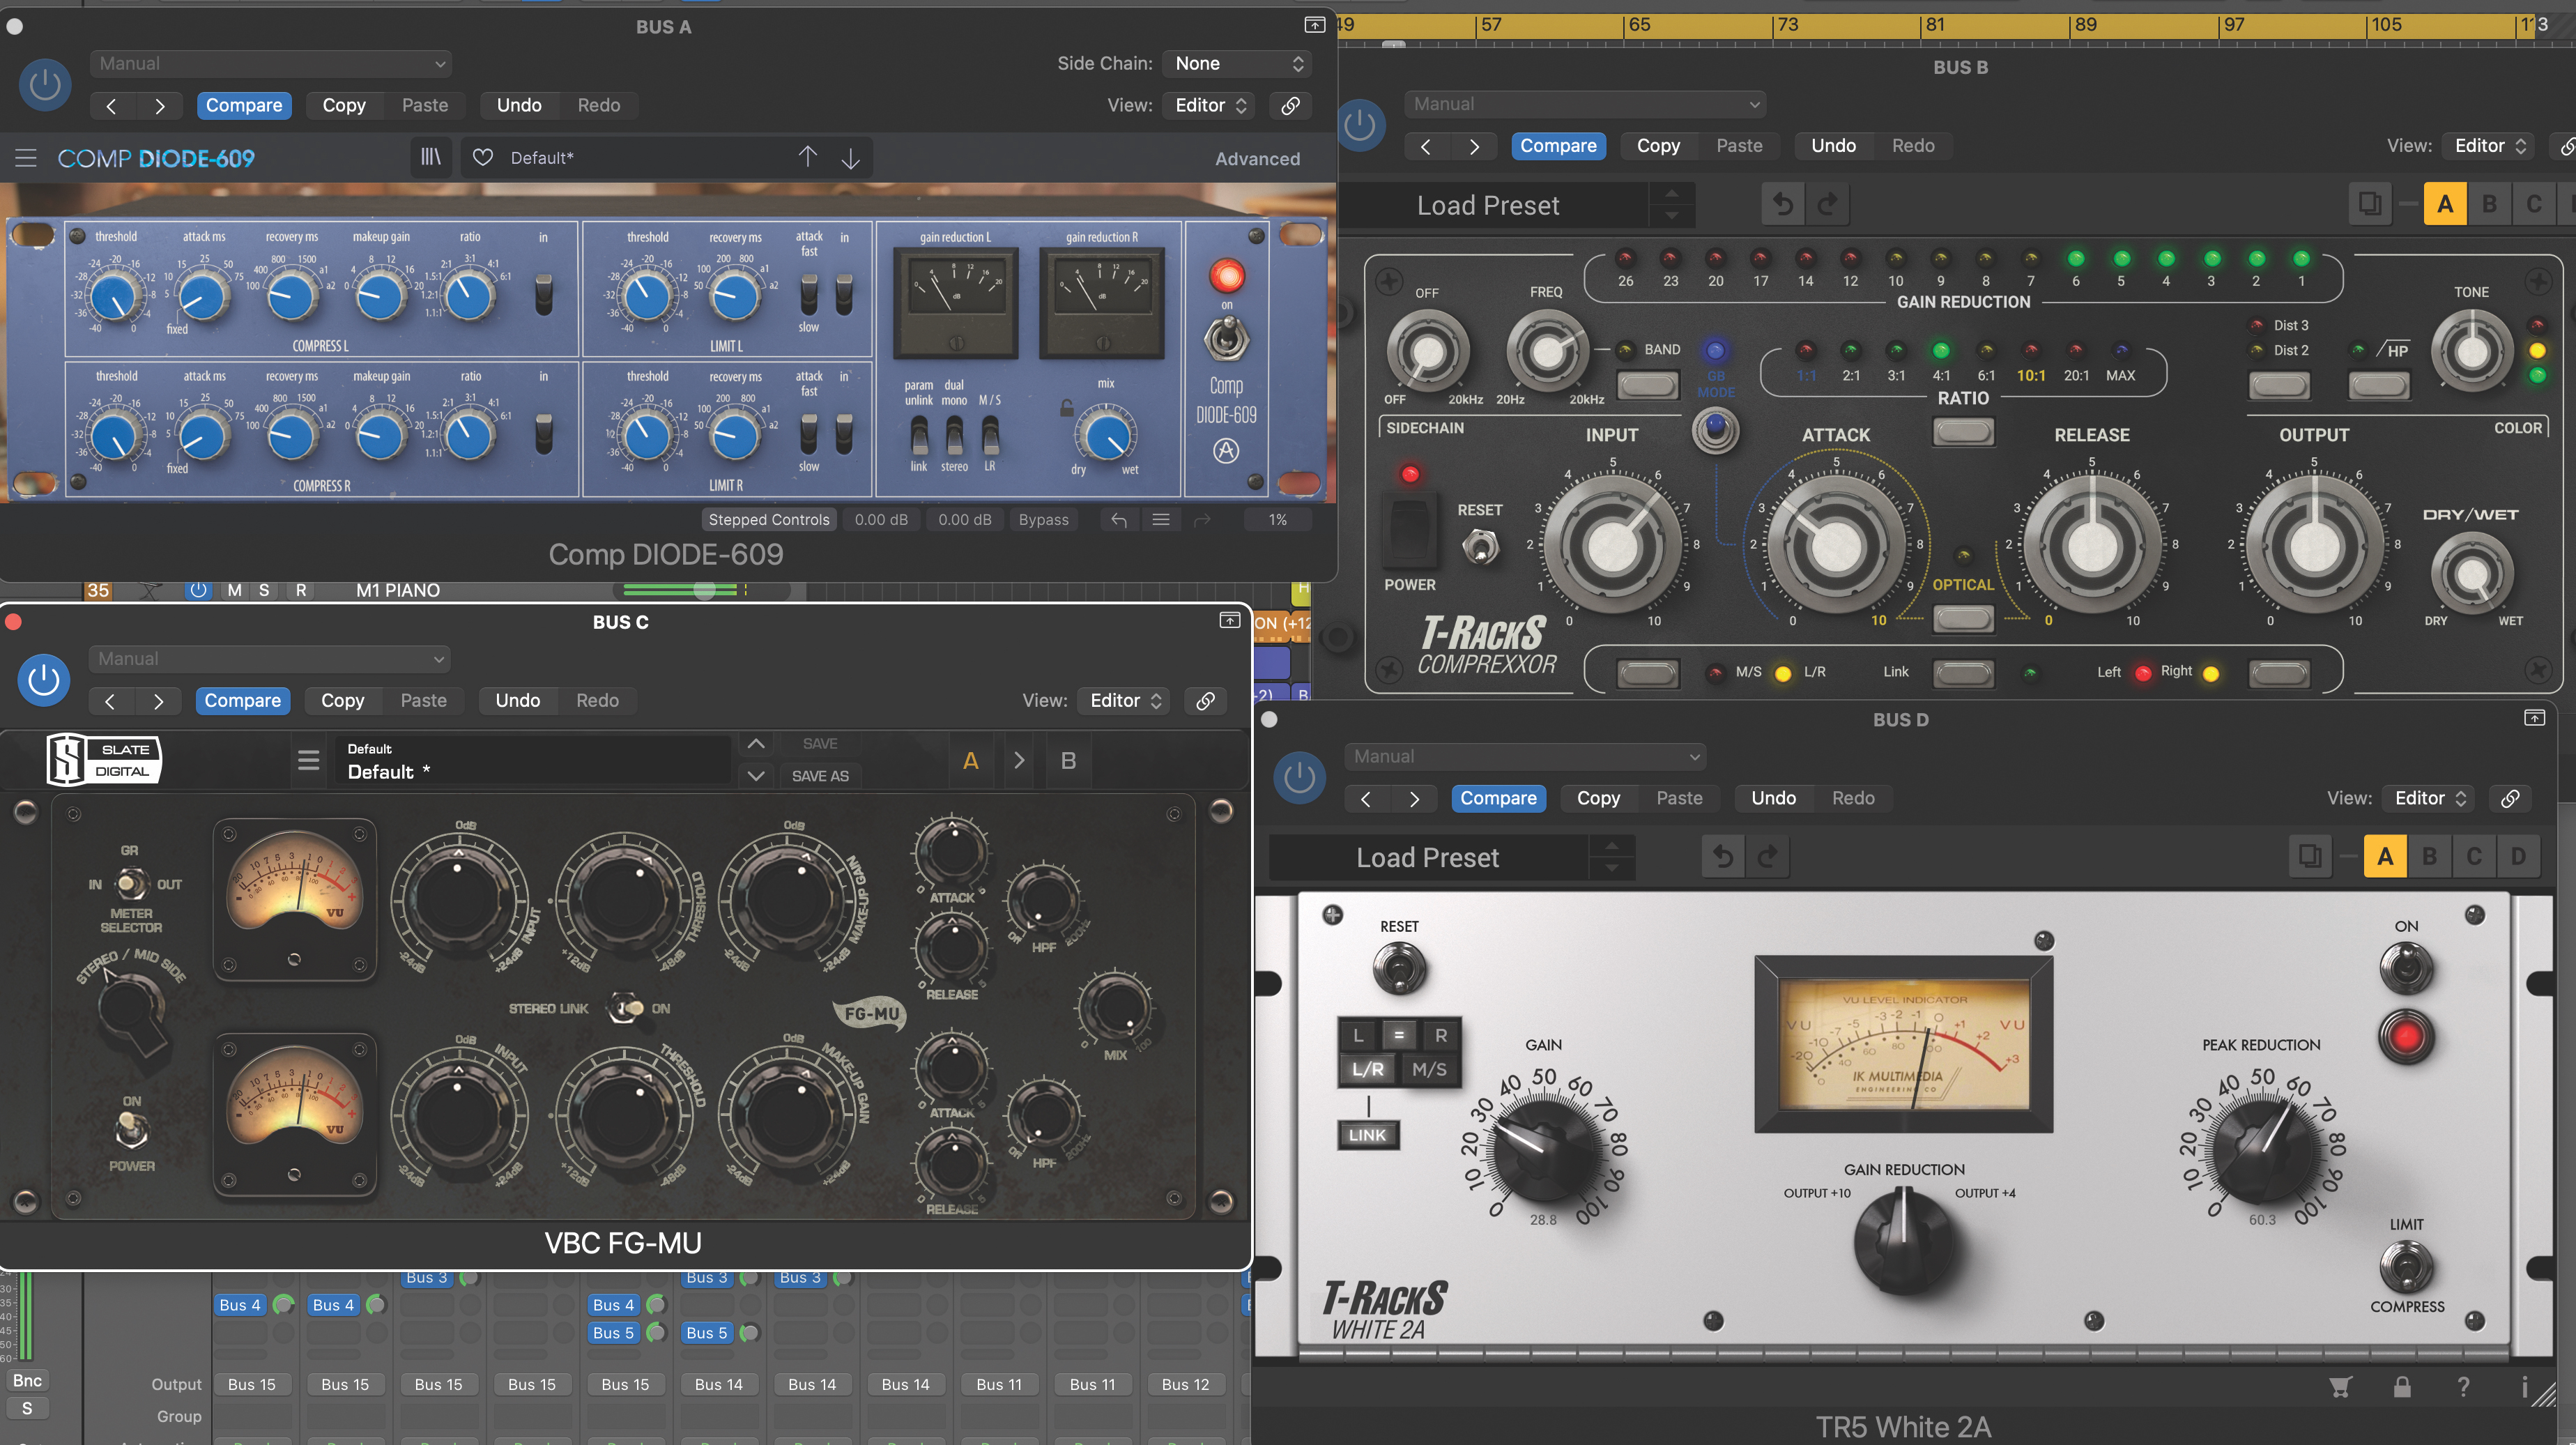
Brauer’s technique uses four stereo busses (A, B, C and D) for the instrumentation, and then blends the main vocals directly into the stereo bus via a number of parallel compressors. Each bus uses a different compressor (diode bridge, VCA, valve and optical), with tracks routed according to compressor behaviours.

Audio levels to the busses are post-fader, so you are mixing ‘into’ the sub mix compressors, attempting to find a sweet spot. Even with modest gain reduction, each compressor adds its own harmonics. Overall the method provides a nuanced approach to mix glue and helps with balance between instruments and vocals.
Pro tip
Submixing audio tracks is a technique that started on physical mixing consoles, so although it’s perfectly acceptable to replicate a similar methodology in your DAW, it should come as no surprise that your DAW may include features that streamline the process.
Unfortunately, there seems to be no universal terminology for this, so check out your DAW for specifics. For example, in Ableton Live you can simply select multiple tracks and group them (Edit/GroupTracks).
This creates a separate Group track which you can treat as a regular track, adjusting the level, pan, adding plugins and using automation. There’s a similar kind of option in Cubase which also uses the Group track (Group Channel To Selected Channels). Meanwhile, Logic Pro includes both track grouping and stacking systems.
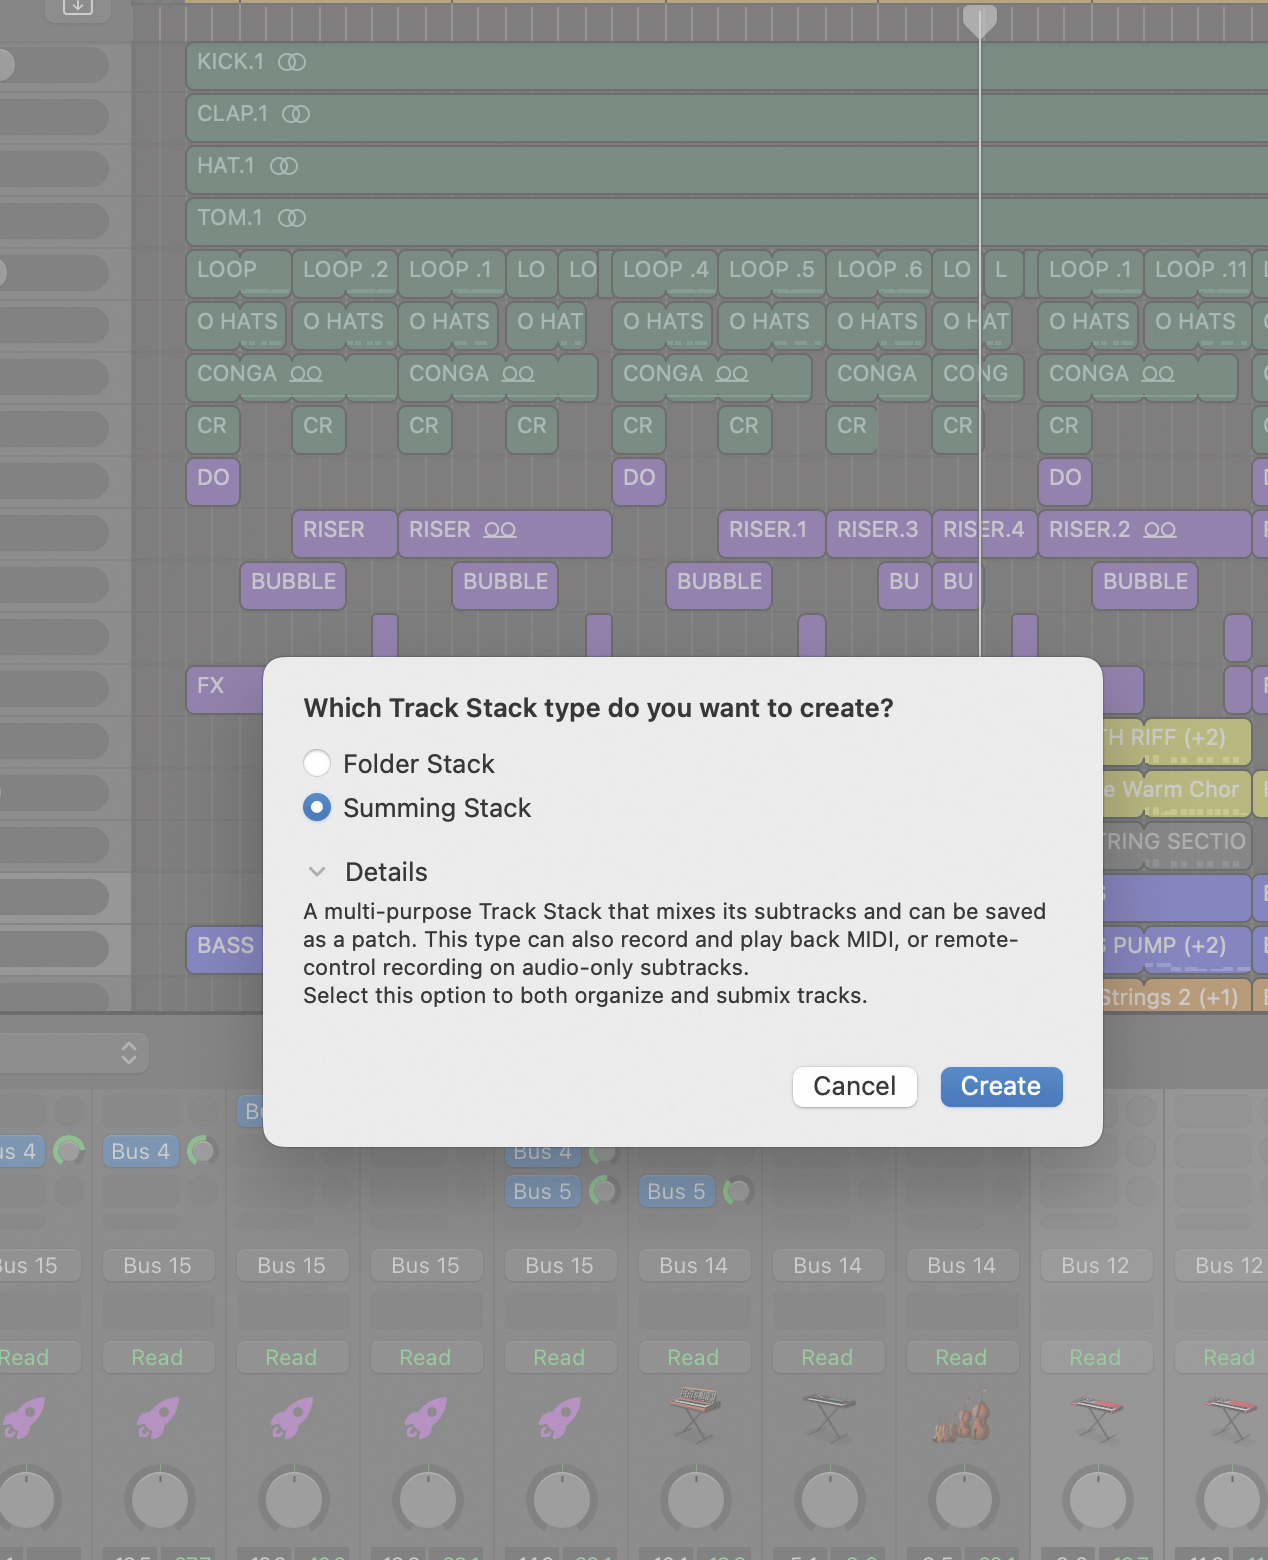
The latter has a feature (Option/CreateTrackStack/Summing) that automatically assigns selected tracks via a bus to a dedicated folding submix fader with level, pan, inserts and sends. Finally, in Studio One you’ll find that selected tracks can be collectively assigned to a new bus (Track/Add Bus For Selected Channels).
Recommended listening
1. The Chainsmokers - Think Of Us ft. GRACEY
To create a defined and impactful sound, submixing can be a very useful technique.
2. The Last Dinner Party - Nothing Matters
Submixing can really help you take control of layered tracks like this.
Jon is a London based platinum award winning mixer, producer, composer and club remixer with a diverse CV that spans dance, pop, rock and music for media. He’s also a long term contributor to MusicRadar's music technology tutorials and reviews. Whether working alone or collaborating he usually handles final mixdowns, so you’ll also find MusicRadar peppered with his handy mixing tips.


