In the Quick Tips series, we serve up quick, easy and inspiring ways to generate new musical ideas in just four simple steps.
Often when writing drums and fills we end up repeating the same patterns, or unconsciously imitating what we are used to hearing. A way of finding inspiration is to let our software create patterns for us, and we can then decide what we like and what we don’t.
For the sake of simplicity, in the following example we will write snare fills over a simple dance groove. But don’t limit your imagination to simple things, this technique can be applied to different drum elements, or even melodic lines.
We’re using the Live 11 chance function on the MIDI clip, combined with velocity range and a Sample & Hold LFO to change the pitch of the sample. This way we will create potentially infinite variations of snare fills.
To take it further and give it a more human feel, we will add tightness and timing randomness using grooves.
Randomness is liberating, but we still need to apply aesthetic judgment to the final result. Resampling the results using both audio and MIDI will give us the ability to pick and choose what we like.

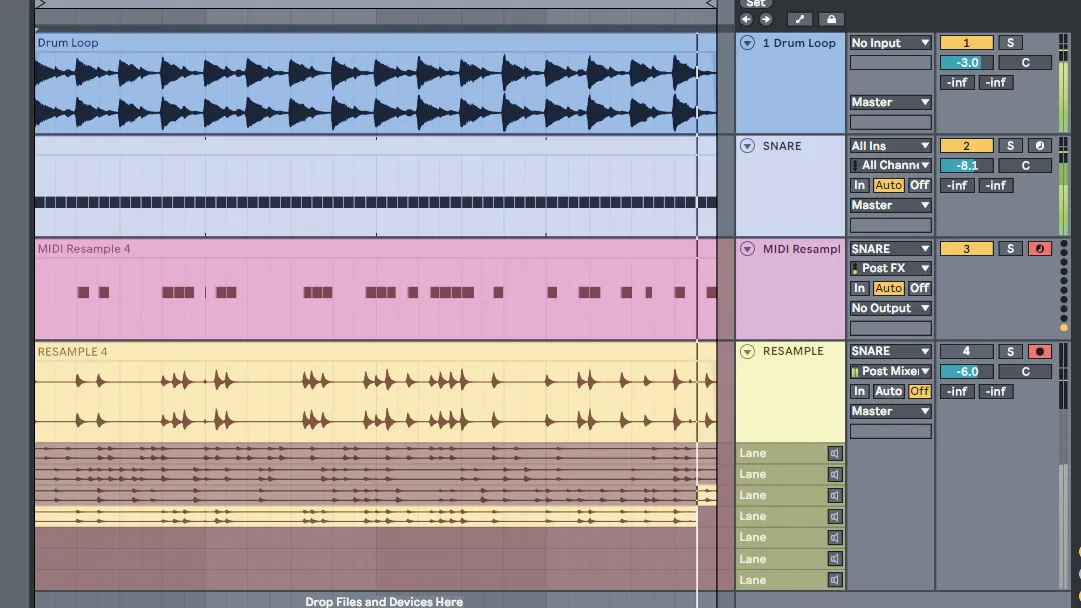
Step 1: In a main drum loop project, in a new MIDI track, load a snare sample into an empty Drum Rack slot and create a one-bar MIDI clip. Write a note for every 16th (experiment later with different subdivisions). Give a 35% chance to every note and a velocity range of -50, so not every note plays the same.
Step 2: In the Controls tab of the Simpler where your snare is loaded, activate the LFO, choose a Sample & Hold waveform, select 16th notes and dial in some modulation percentage of the pitch. This way the snare sound will be a different pitch every time. Use your taste to find the right percentage.

Step 3: To avoid a perfect quantisation feel, we extract the groove from the drums and apply it to the MIDI of the fill. This way any swing the original drums had will be applied to the fill too. We then apply a bit of randomness to the groove so that every hit will not be perfectly quantised each time.

Step 4: Create a new Audio and a new MIDI track. Choose the input on both as the snare track. Enable recording on both of them and make the clip do a few passes. Now you’re free to choose what sounds better, both using the take lanes and moving the fills where best suited. You still have the MIDI too if you want a different sample.
