How to animate drums using filters
Use filters to get your drums moving
Want all the hottest music and gear news, reviews, deals, features and more, direct to your inbox? Sign up here.
You are now subscribed
Your newsletter sign-up was successful
Filters and drums have always gone hand in hand in electronic music production, whether it’s in the processing of discrete elements of the kit at the sound design stage, or big hands-in-the-air sweeps applied to the drums bus at key points in a track. The reasons for their affinity are clear: the drum kit (electronic or acoustic) is as rich in frequencies as musical signals get, while the rhythmic output of the instrument makes it a particularly viable target for LFO- and envelope-generated modulation.
Here, we’ll show you three different ways in which filters can be mobilised over individual kit pieces – kick, hi-hats and snare – to shape their frequency content over time, making them sound more dynamic and interesting. First, we’ll look at automation within the host DAW, before moving on to the two aforementioned modulation types. Many filter plugins also feature step sequencers and other ‘advanced’ modulation sources, but we’ll perhaps come back to those in a future instalment.
We're using two of the finest software filters around for this tutorial – Cytomic’s The Drop and Soundtoys’ FilterFreak – but there’s nothing here that can’t be done using any half-decent plugin, as long as it features high-pass, band-pass and low-pass modes; and, of course, LFO and envelope modulation.
Article continues below 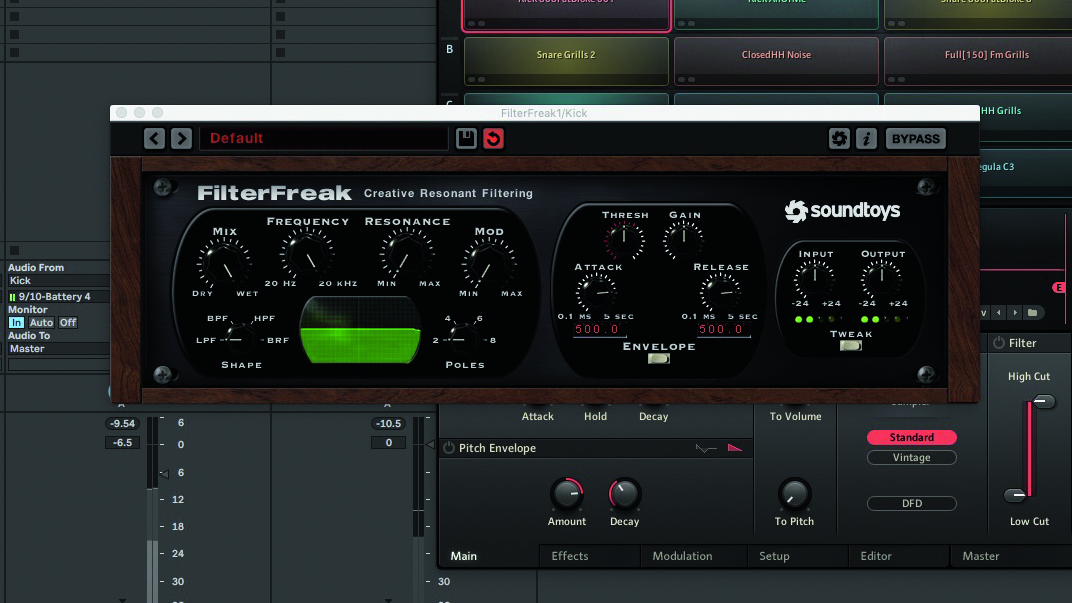
Step 1: Let’s start by adding interest to a kick drum line through the use of an automated low-pass filter. Our kick drum here is a big, subby 808, with plenty of sustain to play with, but any kick – long or short – can be shaped in this way. Start by inserting your filter plugin of choice on the kick drum channel.
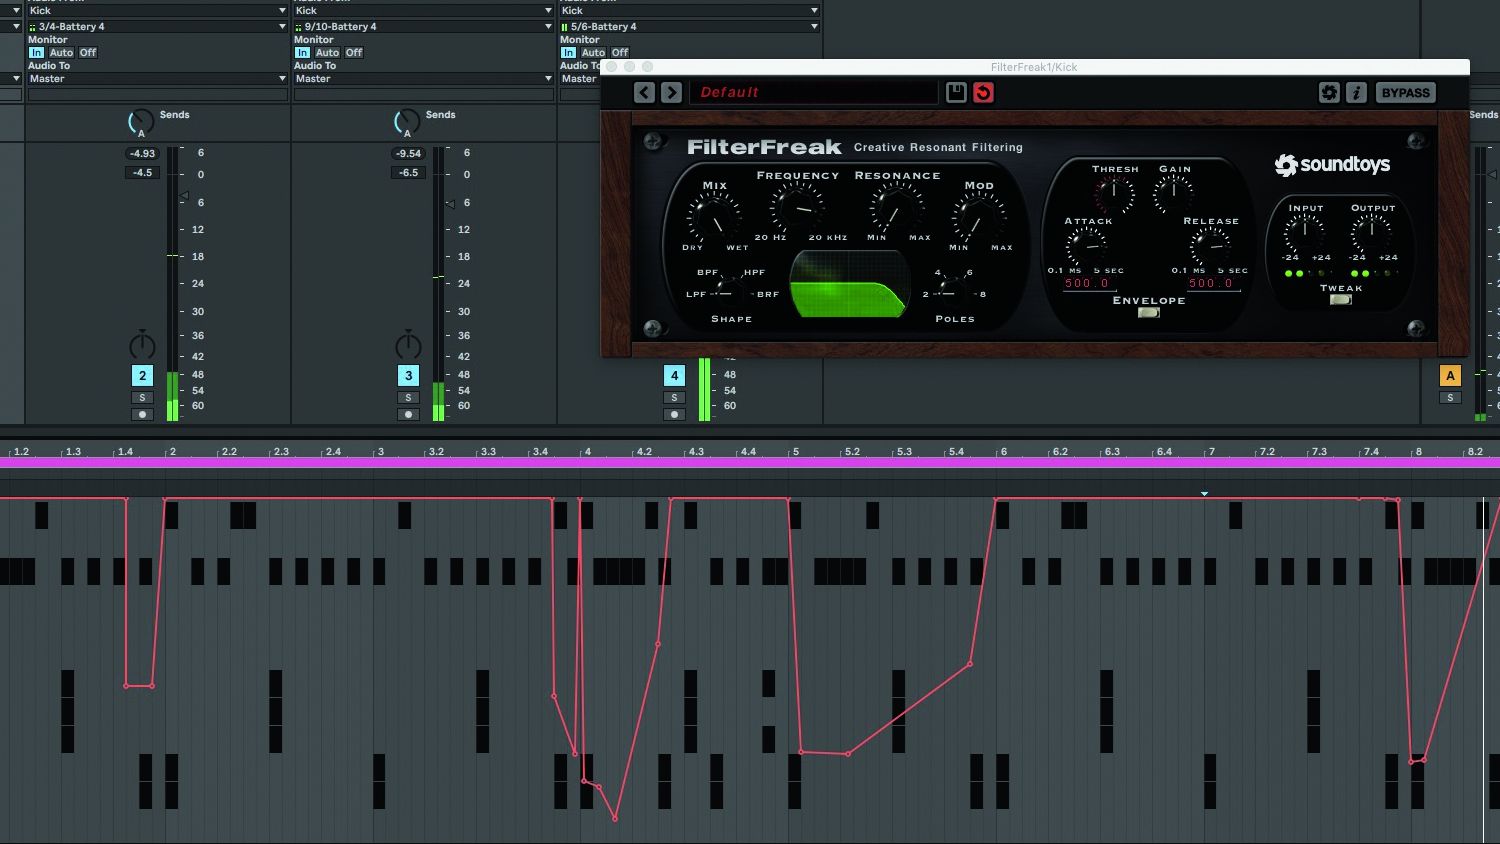
Step 2: Open the automation lane for your kick drum clip or track and work through the part, automating the Cutoff and Resonance to sculpt its higher frequencies on select hits, with the goal of introducing tonal variation and a sense of progression to the whole thing.
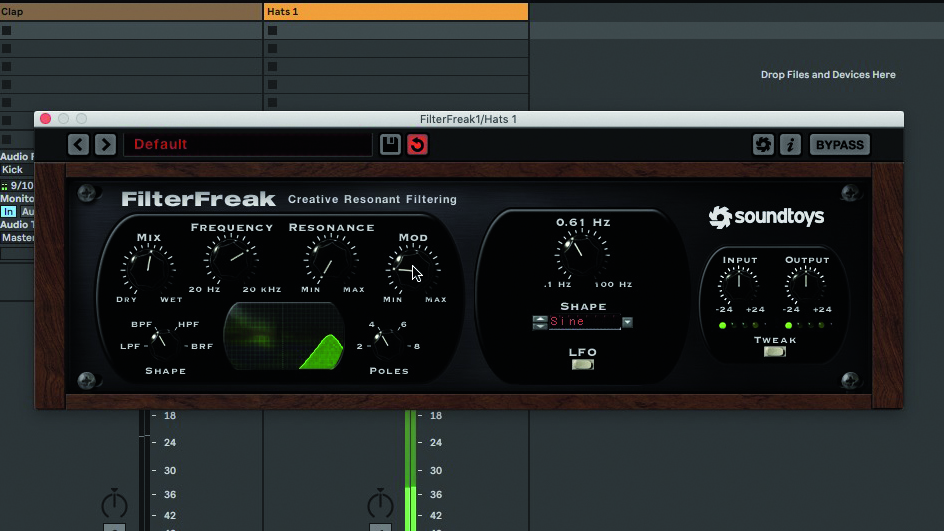
Step 3: The other way is to use modulation within the plugin – ie, LFOs and envelope followers. Applying a slowly LFO-modulated band-pass filter to hi-hats, with a fairly low Mod Depth and mixed about 50/50 wet/dry, makes them sound more animated. We’ve kept the LFO unsynced so the pattern varies over time.
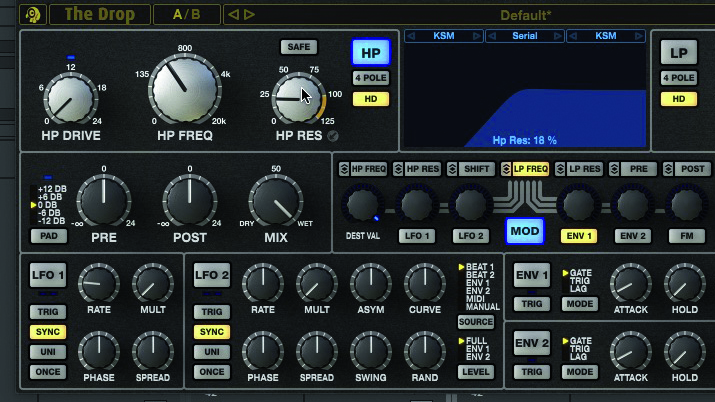
Step 4: Now let’s create a whipping snare filter sweep effect using an envelope-following high-pass. With your filter inserted into your snare channel and set to High-Pass mode, put the cutoff somewhere where it starts to bite into the snare’s lower midrange, and crank up Resonance until you get a sharp peak.
Want all the hottest music and gear news, reviews, deals, features and more, direct to your inbox? Sign up here.
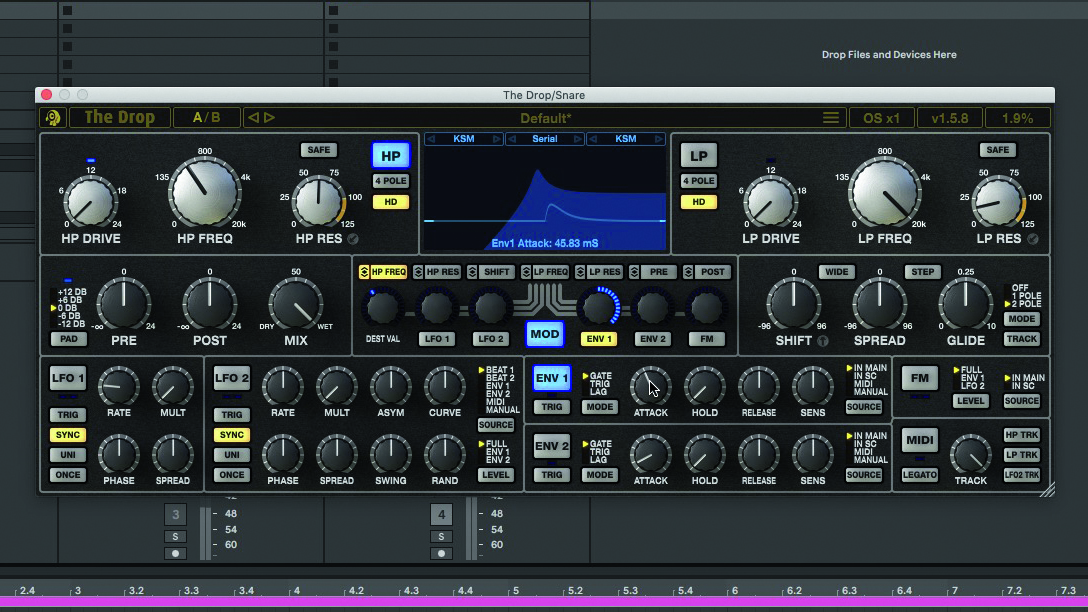
Step 5: Dial in positive envelope modulation, so that the filter sweeps upwards when the snare hits. Set a long enough Attack to let the initial transient and as much of the body as you want to include through, but not so long that the snare is gone before the filter has actually swept far enough to have any effect.
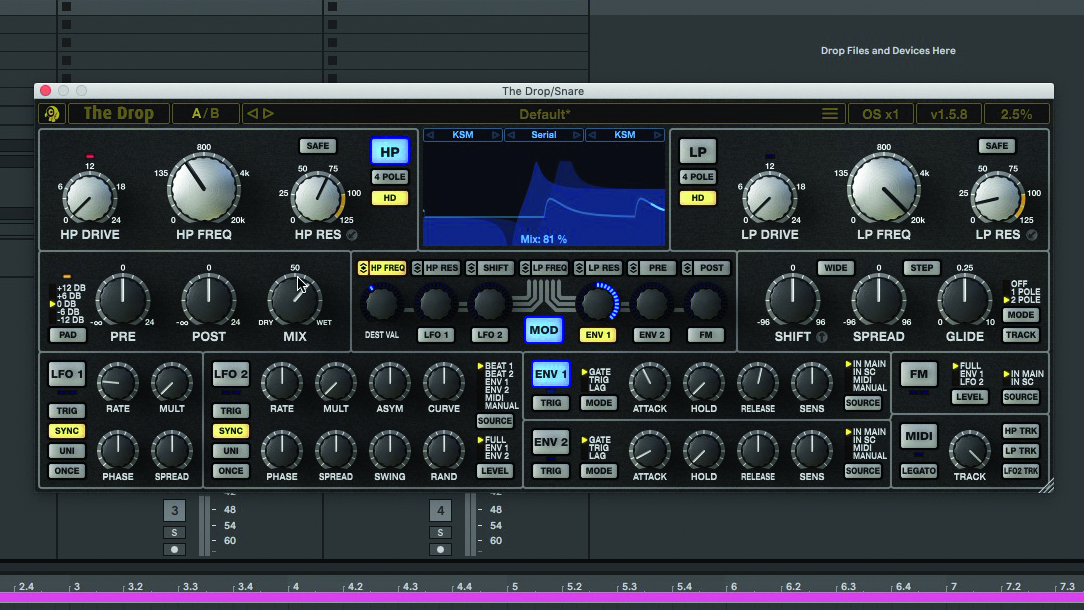
Step 6: Release decides the speed where filter cutoff drops back to its unmodulated setting: the downward sweep. Overlay the filtered snare with a clap or another snare, and/or adjust the filter’s Dry/Wet mix, to return weight lost in the process. Tweak Attack, Release and Resonance to tailor the effect.
Computer Music magazine is the world’s best selling publication dedicated solely to making great music with your Mac or PC computer. Each issue it brings its lucky readers the best in cutting-edge tutorials, need-to-know, expert software reviews and even all the tools you actually need to make great music today, courtesy of our legendary CM Plugin Suite.
