How to design a glassy and ethereal pad sound
If you need a pad that shimmers but doesn’t get in the way of your mix, try this patch out for size

Let’s face it, we all need pads! Once you’ve addressed your drums and bass in your mix, the chances are you’ll find yourself turning to pads to help bolster your track’s harmonic core, while adding interest to the sonic spectrum. The problem is, pads often get a bad rap, and for good reason…
Many of the impressive-sounding pads which we have heard over the years have acquired something of a date stamp, and nothing exemplifies this more than the glass pad. Thanks to its sharpness of sound and resonant colour, it doesn’t do itself any favours, as it immediately conjures imagery of dated soft-rock tunes, performed by musicians with mullets!
You’ll be pleased to know this is not where we are taking a trip today, but we are going to take the concept and create something altogether more subtle and with a degree of timbral undulation.
While these more ethereal glass pads have arguably never gone away, it’s useful to know how to control the harmonic content. This can be achieved at both the synthesiser filter level, or with heavy equalisation, leaving a pad which should blend into many forms of production styles.
We’ll draw some musical inspiration from the likes of applauded electronic musician and producer Chicane, while not getting too glassy and overbearing in the process.
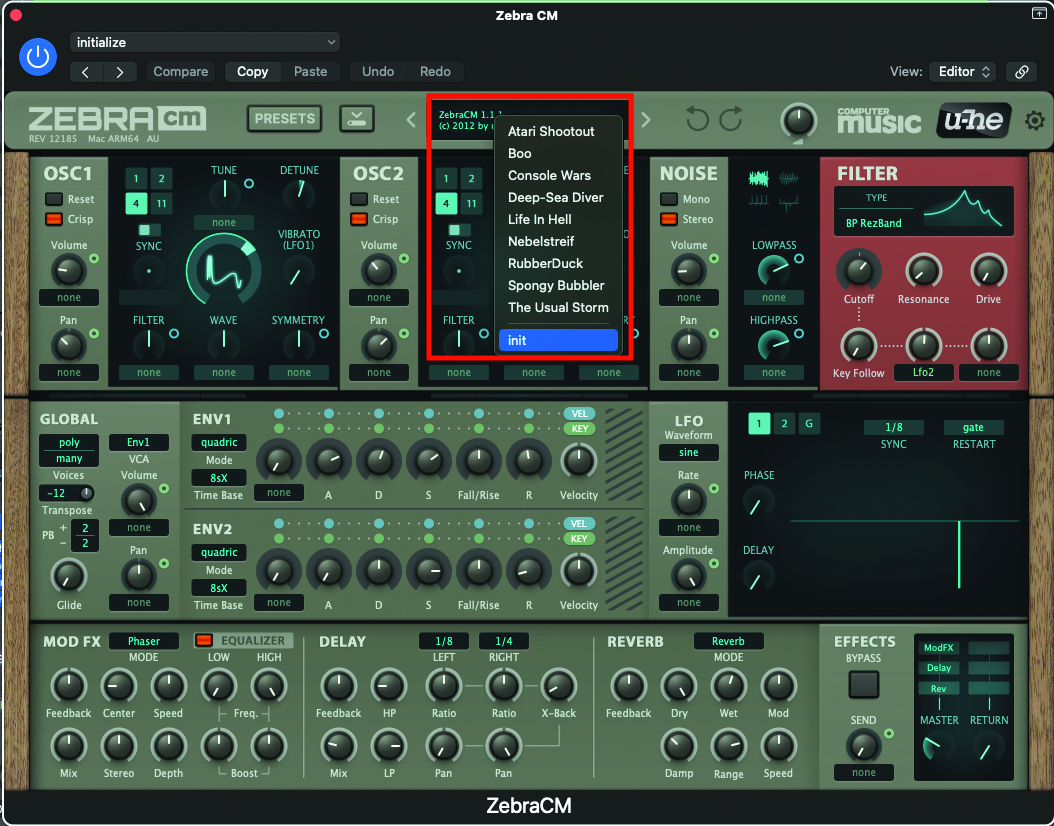
Let’s begin by initialising a patch on the ZebraCM. This synth plugin comes free with every issue of Computer Music magazine: if you don't have it, you'll be able to follow along with a similarly capable soft synth.
Open up your DAW and load up the plugin. Once the plugin window is open, move to the central display at the top of the window, click to reveal the drop-down menu, and select ‘init’ from the bottom. This will initialise the patch.
Want all the hottest music and gear news, reviews, deals, features and more, direct to your inbox? Sign up here.
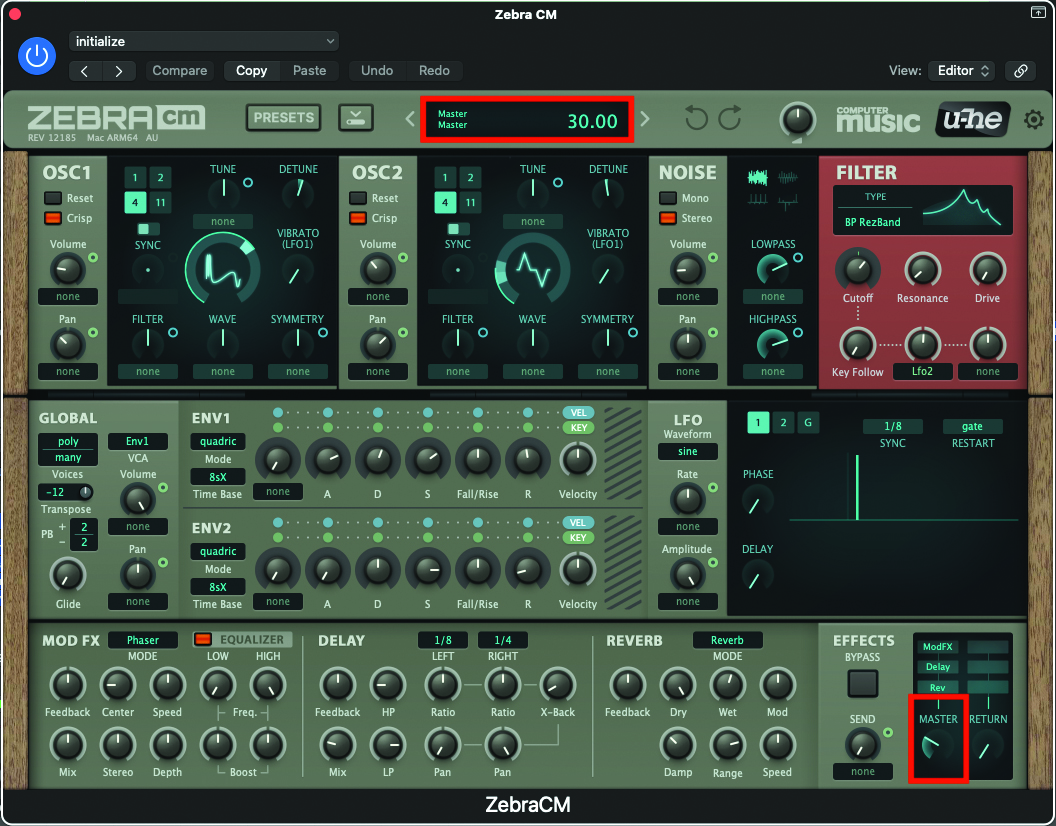
This patch is going to be a relatively loud one, so now would be a great time to reduce your master volume to a level of 30. Just as a reminder, every time you tweak a pot or setting on the plugin, you will see an accurate value/numeric in the upper display.
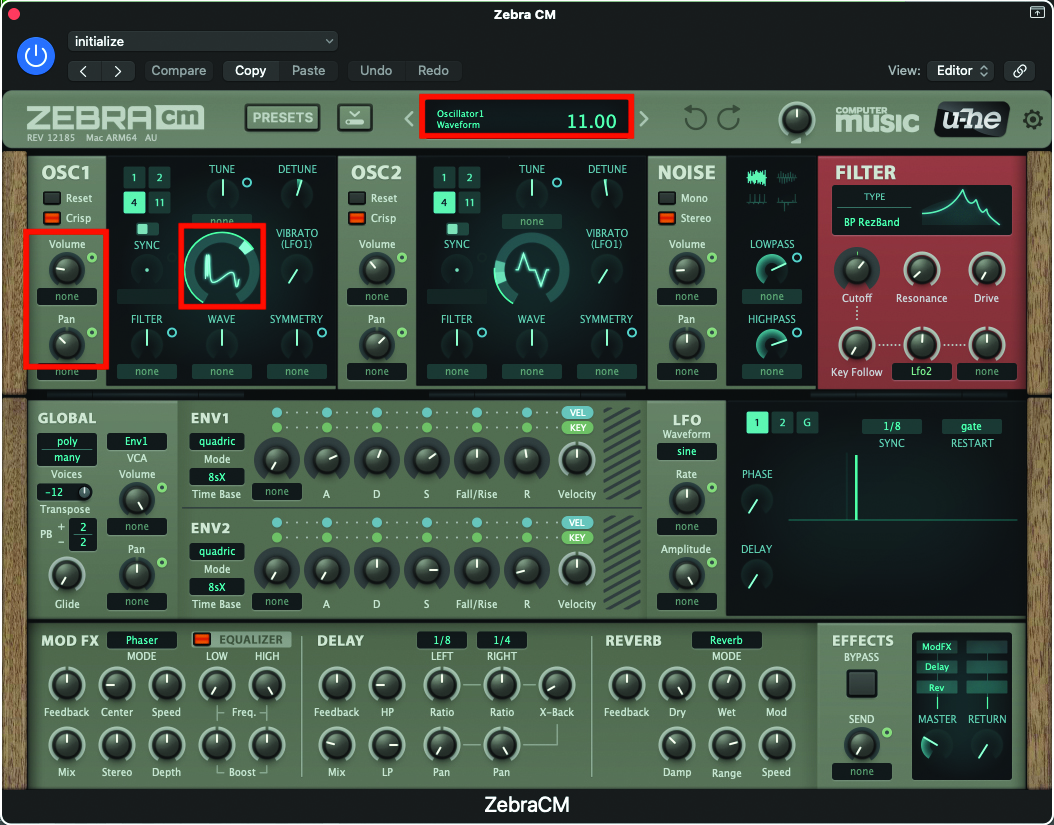
We will start to craft our sound by turning our attention to OSC1. We want to adjust the waveform to a value of 11.00, which we will also need to reduce in volume, to a value of 45. To create a wider stereo image, adjust the pan pot to a value of -30.
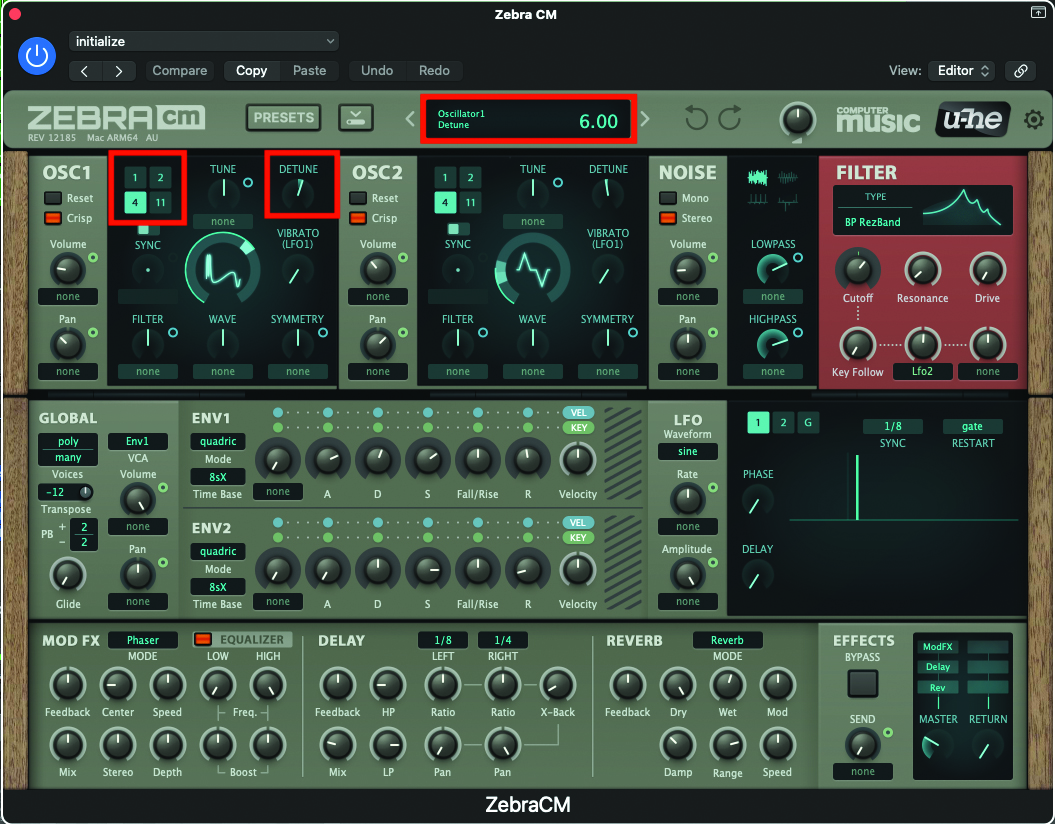
To further enhance OSC1, we can activate four aliased voices, by clicking on the number 4 in the upper left hand area. This will thicken the texture of OSC 1 considerably, but only once we have adjusted the Detune pot, which we can set to a value of 6.
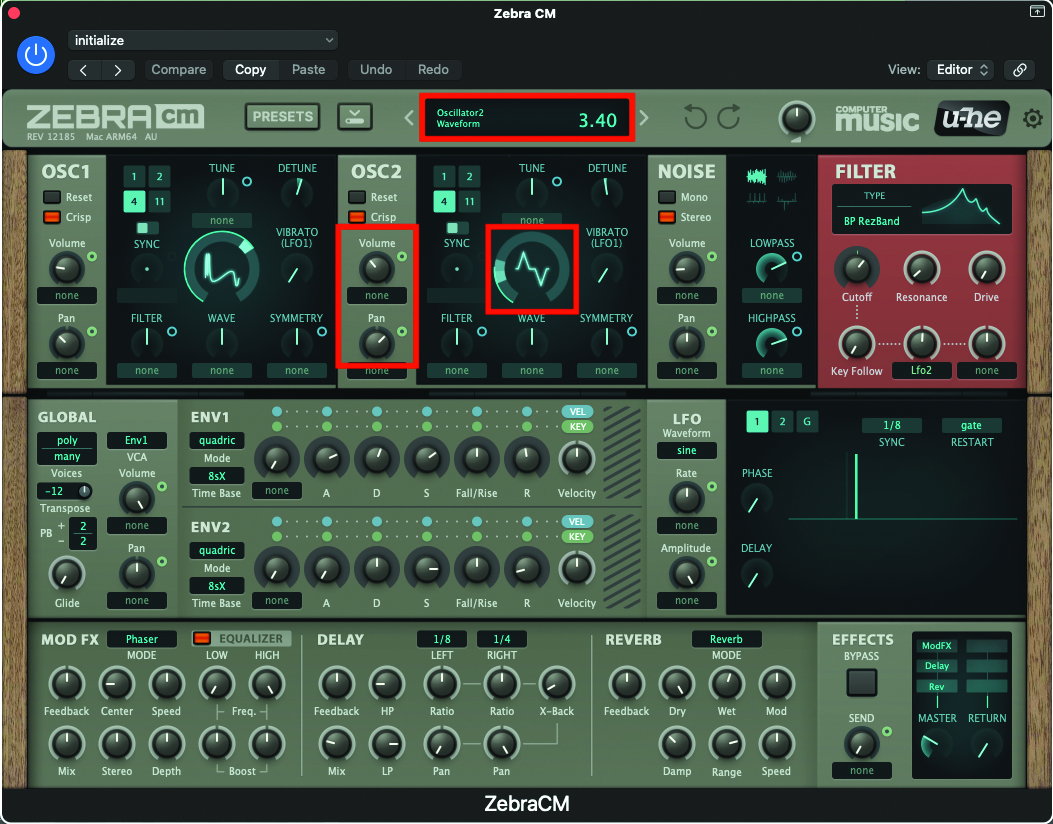
Now we can turn our attention to OSC2, which will adopt some similar characteristics. Firstly, adjust the waveform to a value of 3.40. This is another relatively complex waveform, which we need to reduce in volume, to a value of 74. We can also adjust the pan pot, to a value of 30, which will nicely counterbalance OSC1.
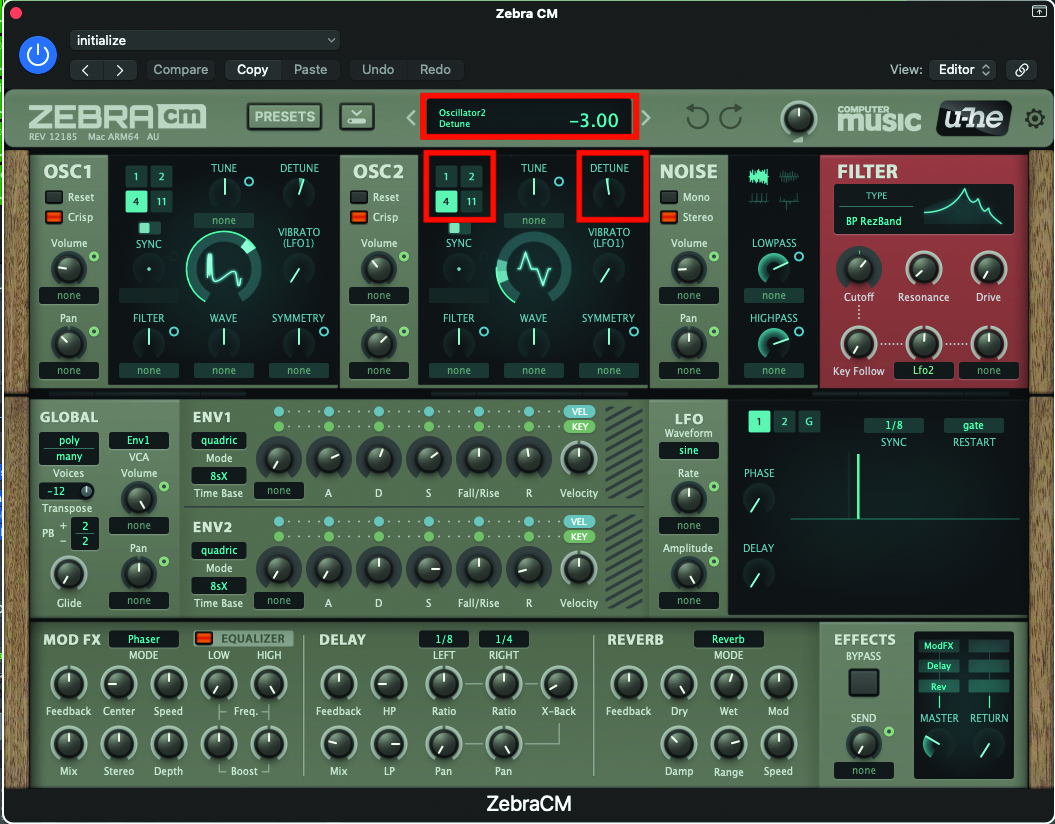
We’ll refine the settings of OSC2, but applying aliasing here too. Select a value of 4, before adjusting the detune pot to a value of -3. While OSC2 is largely mirroring OSC1, its selected waveform is more dominant, thanks to its harmonic makeup and increased volume.
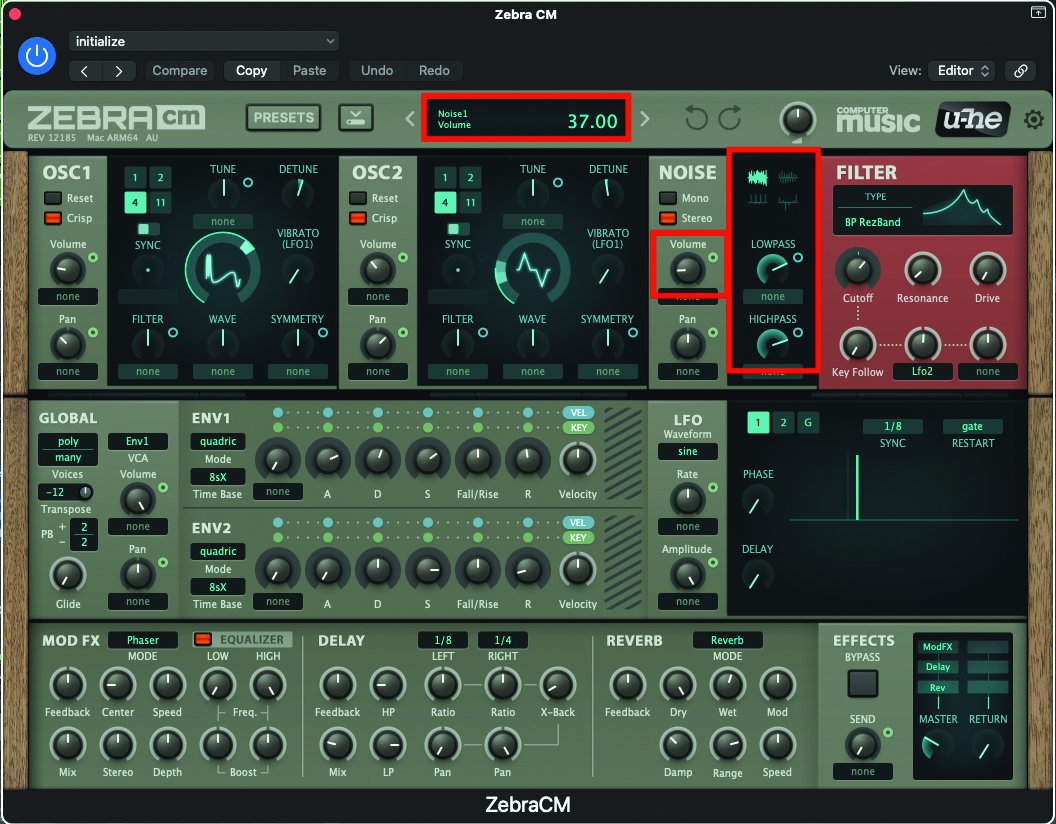
Alongside the oscillators, this patch is going to utilise white noise to add some wispiness to the overall colour. Increase the white noise level to 37. Ensure that you have white noise selected (it’s the upper-left icon) and adjust the Lowpass pot to a value of 72, and Highpass pot to 74. The filtering will prevent the noise form being too overbearing.
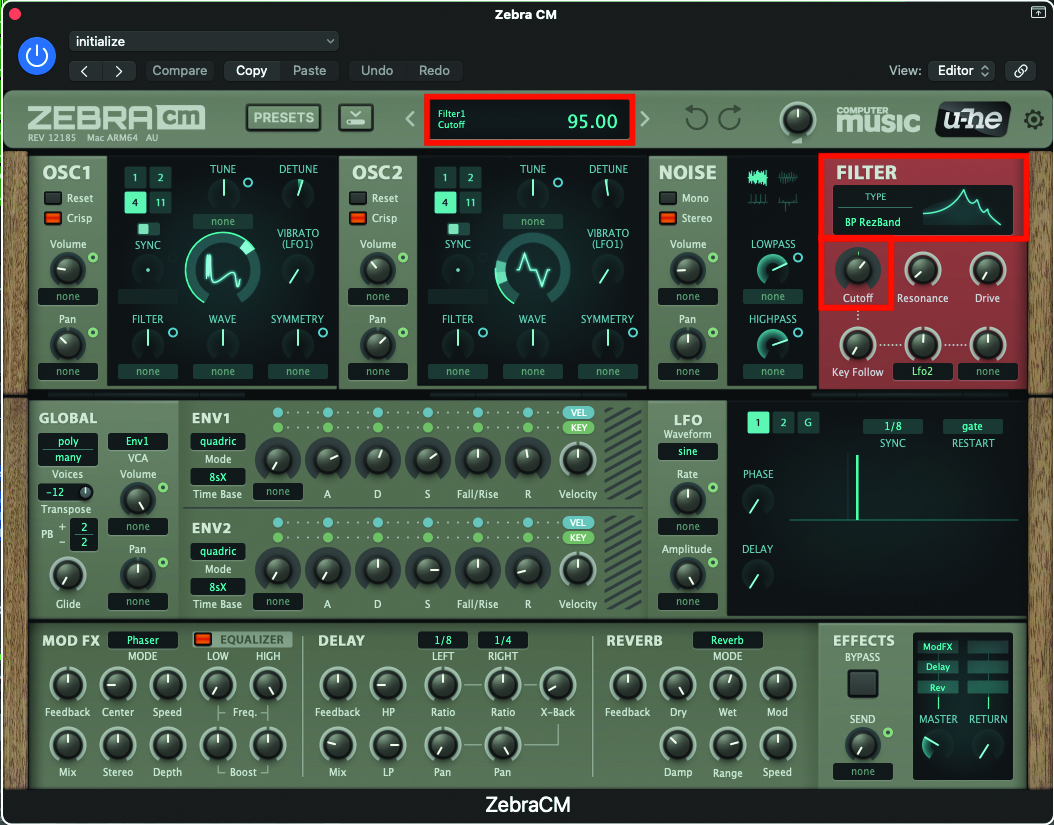
Now we can move to the filter section. We’re going to use a bandpass filter in this patch, which we can select from the filter drop-down menu. Select the BP RezBand filter, which also adopts a resonant spike, alongside its bandpass traits. Adjust the Cutoff pot to a value of 95.
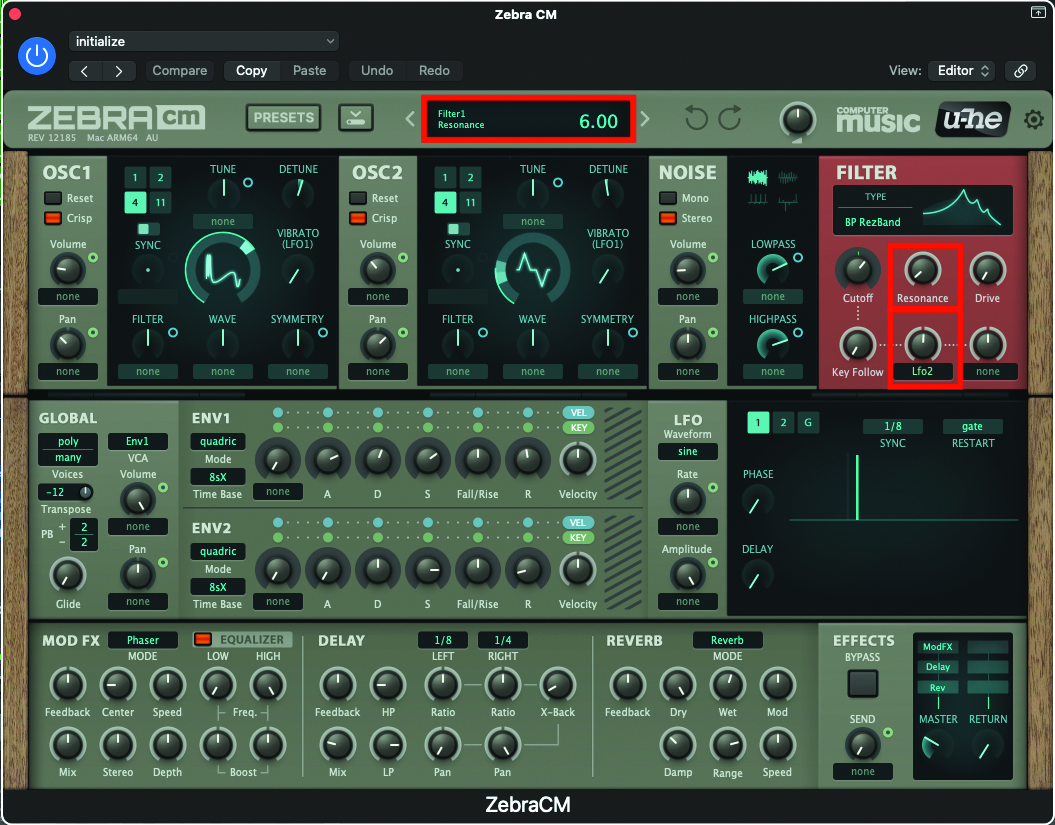
Keeping within the filter section, adjust the Resonance pot to a value of 6. We are also going to apply some LFO modulation to the filter’s Cutoff, which we do by reassigning the user-assigned pot to LFO2, using the drop-down immediately below the pot. Once assigned, set the pot to a value of 3.
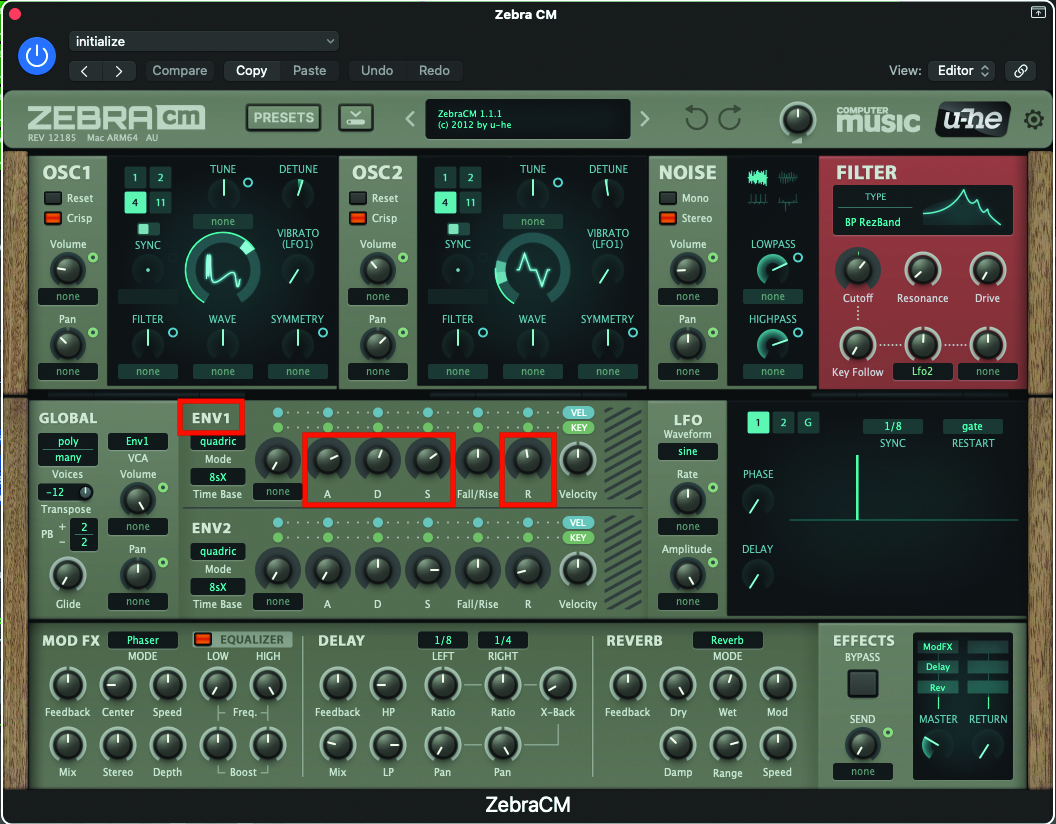
We only require the use of ENV1 for this patch, as we only need to control the amplitude, or volume of our sound. Set the Attack pot to a value of 72, Decay to a value of 57, the Sustain to 68, and finally the Release to 47. Being an ethereal pad, the attack and release phases are relatively slow and generous in time.
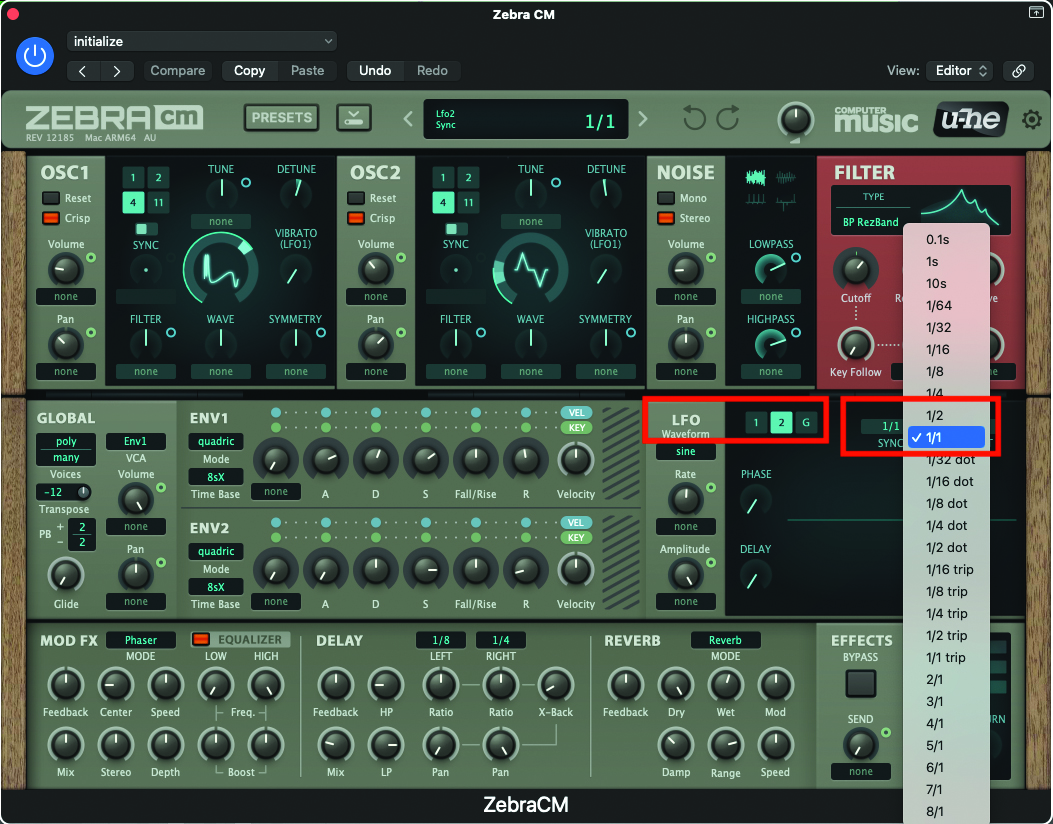
Moving to the LFO section, ensure that you have LFO2 selected, which should be highlighted in turquoise. You can adjust the rate of modulation to suit your track, by using the Sync drop-down menu. We like the idea of allowing a modulation cycle over one bar of music (in 4/4 time) which you can achieve by selecting 1/1.
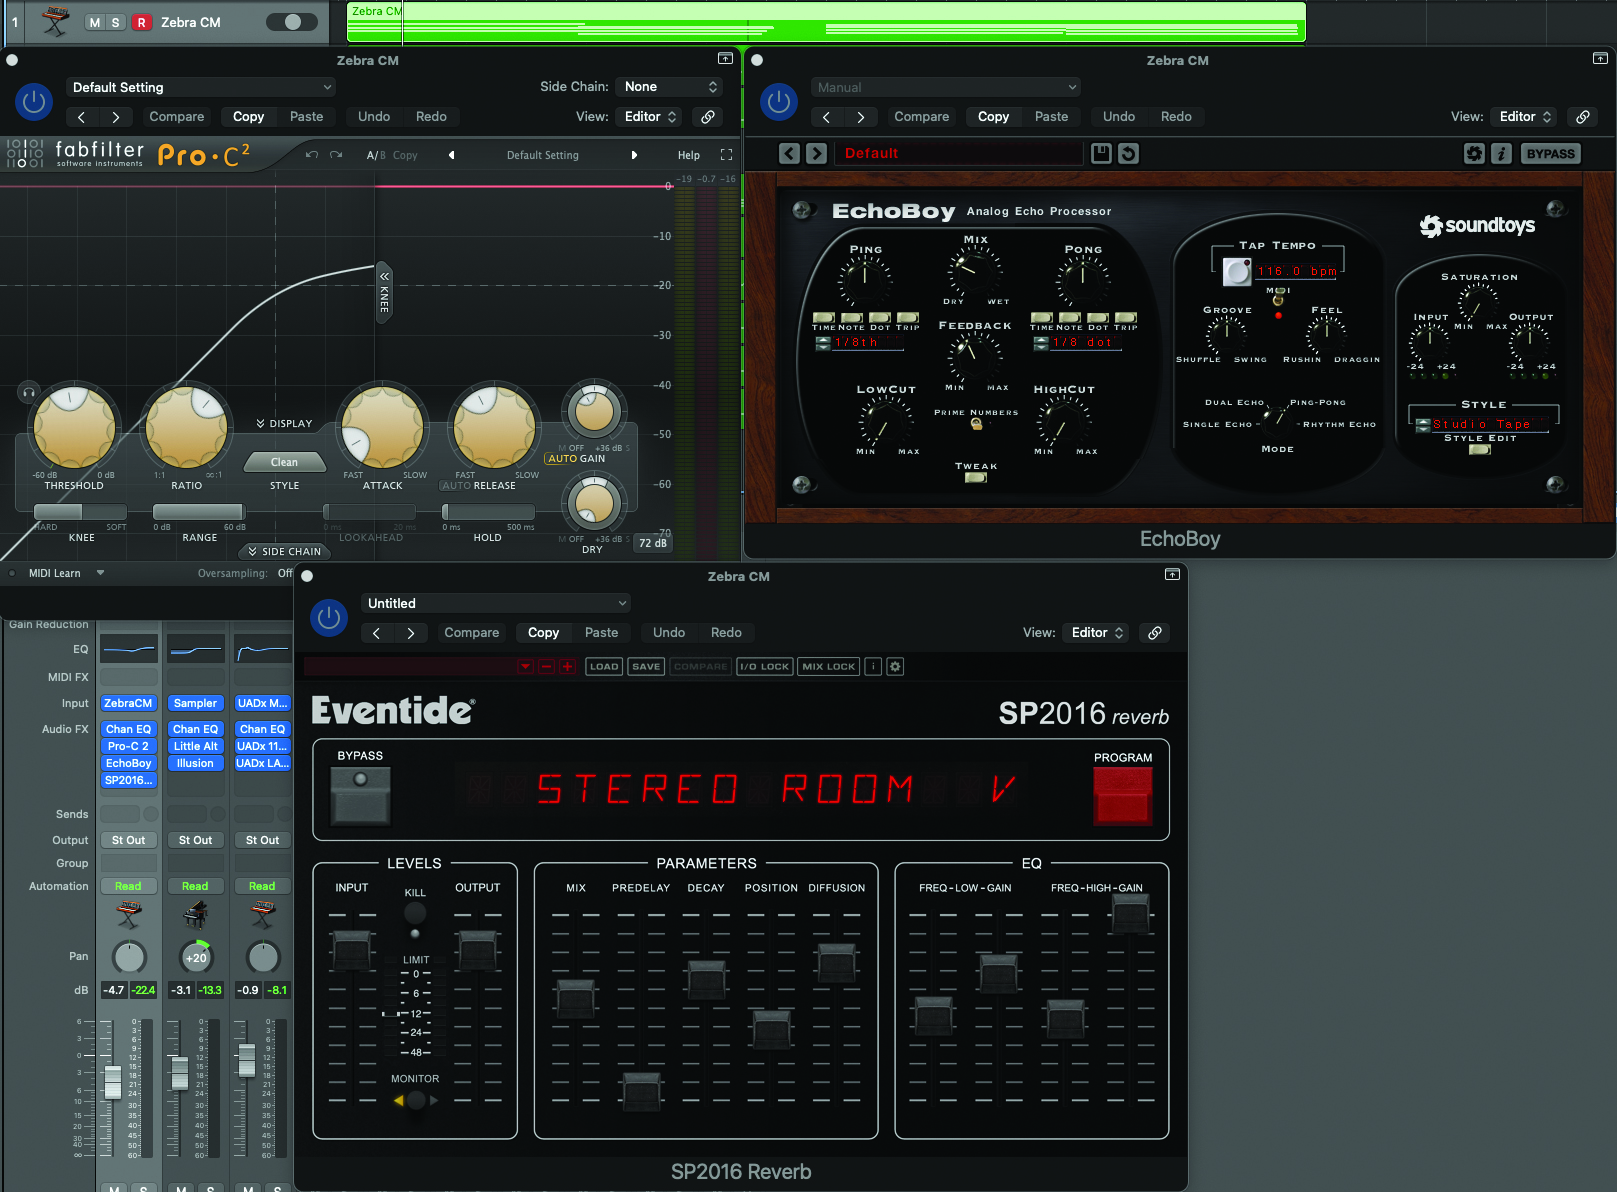
Finally, adding some back-end effects will really help this patch. Try using a chain which begins with compression. Then add a delay, followed by a relatively generous and bright reverb. We’re using examples here from Fabfilter, Soundtoys and Eventide, but DAW‑based effects will do a perfectly good job, too!
Pro tip
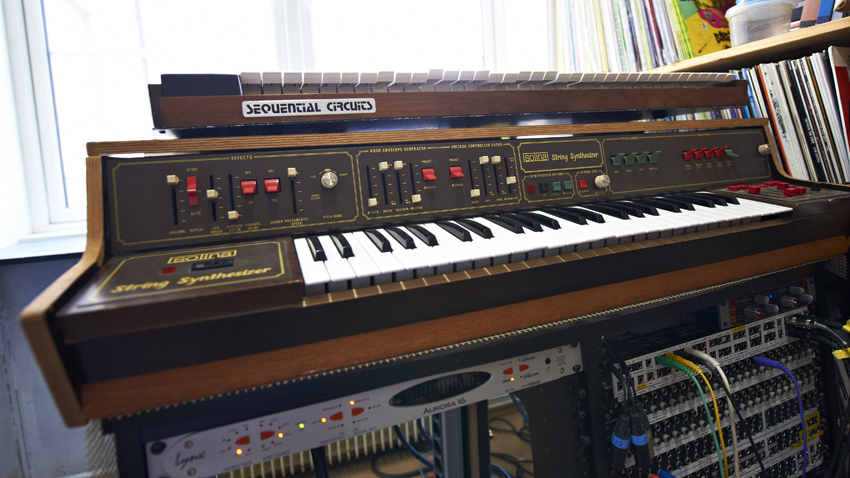
Some of the earliest synthetic pad examples were created using machines such as the Mellotron, or String Machines such as the legendary Solina. As the music tech at this time was very firmly in its infancy, pads were larger than life, occupying the full frequency range of a mix.
As the technology has developed, our ability to combine, blend and mix tracks together has largely become something that we take for granted, working with many tens of tracks within the confines of our computers. This is where a pad can be of huge benefit while mixing. It occupies a much narrower frequency band to its historical brethren, so can nestle in the upper-mid and high frequency spectrum, without causing mix problems.
This is also helpful should you choose to adopt a similar musical stance to a producer such as Chicane. He has a tendency to use extended chords; these are chords which add notes above the basic triad, sounding fuller, richer and with a hint of jazz. With more notes comes the risk of clouding the mix, so our helpfully defined pad will assist by keeping textures light.
Recommended listening
1. Chicane - Hijóping
This recent release from Chicane adopts his classic style, with hints of ambience.
2. Massane - No Return
This beautiful track uses an even more sparse pad to support the reflective piano chords which play toward the front of the mix.