Essentials Lesson: Get Playing Now Part Two (TG224)
New to guitar? Follow TG's video lessons for newbies!
Essentials Lesson: Get Playing Now Part Two (TG224)
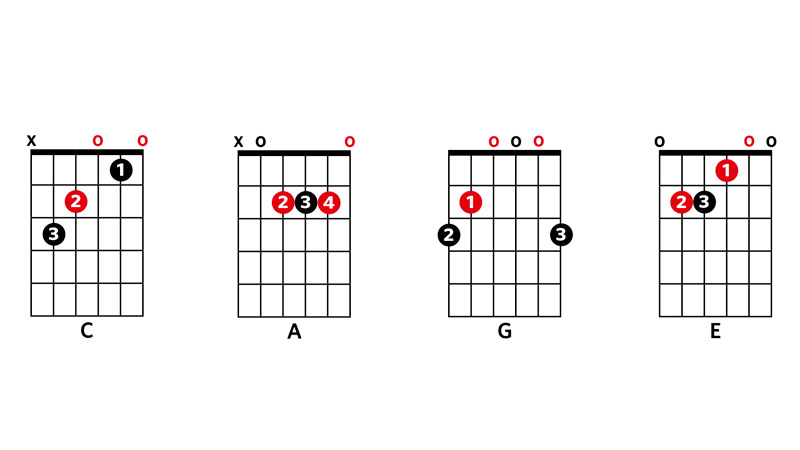
TG224 chords 1
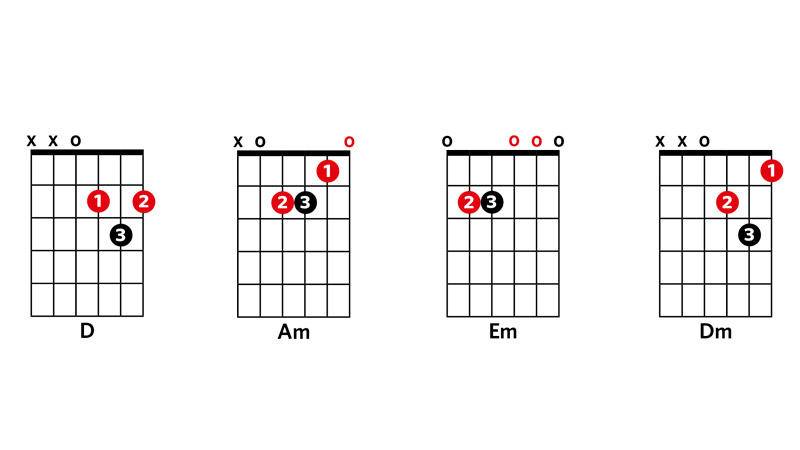
TG224 chords 2
TG224 tab ex1
TG224 tab ex2
In part two of our absolute beginner series, TG shows you how to hold the guitar and play those all important first chords.
Originally from Total Guitar issue 224 (February 2012)
Introduction
If you followed our last lesson you should be familiar with the main parts of your guitar; you should be able to tune up, and you should be able to play notes by pressing down on the strings. These are vital skills for every beginner guitarist - you can't play guitar without them!
Your next step is to start playing chords. A chord is three or more notes played together. We've provided eight beginner chords shown as fret boxes (diagrams that represent the guitar neck and strings, with dots to show you where to put your fingers). Don't worry if your fingertips hurt a little bit to at first. This will stop after a few weeks of playing. Chords are easier to play if your posture is good. Sit incorrectly and your fingers won't reach the fretboard properly. Guitarists talk about having enough 'strength' to play a difficult chord, but if you hold the guitar right you will need less strength anyway.
To finish off, we've composed a short piece of music. Practise the chord changes before you play with the backing, and remember that good posture and hand position make the track easier to play.
Posture and hand position
How you sit and how you hold your guitar will affect the position of your hands on the fretboard and, therefore, how you play. Sit on a stool or a chair that enables you to keep your back straight. Assuming you're right handed, place the guitar on your right leg and bring your right arm over the body so that your pick hand rests near the strings. Classical players prefer to place the guitar on the opposite leg (the left leg for a right handed player) and support the left foot on a foot stool. Your posture should allow you to fret notes right on your fingertips, without touching any other strings.
Essential chords
The chords we've chosen are essential shapes that all beginner guitarists should make time to learn. Take a look at the chord diagrams in our picture gallery - these tell you where to place your fingers. The 'o's are 'open' strings, and a circled number is a fretting hand finger. A black 'o' or circled number is the root note (eg, A is the root note of A minor). C and G are difficult for some beginners. Come back to them at a later date if you struggle.
Want all the hottest music and gear news, reviews, deals, features and more, direct to your inbox? Sign up here.
Stop the buzz!
Keep your fingers as close to the frets as possible. If you're too far away you'll end up with fret buzz. Keep your thumb roughly in the middle of the back of the neck. You can move a bit but avoid taking a 'baseball bat' grip. If your hands are in perfect position you should see string marks on your fingertips.
Chord change exercises
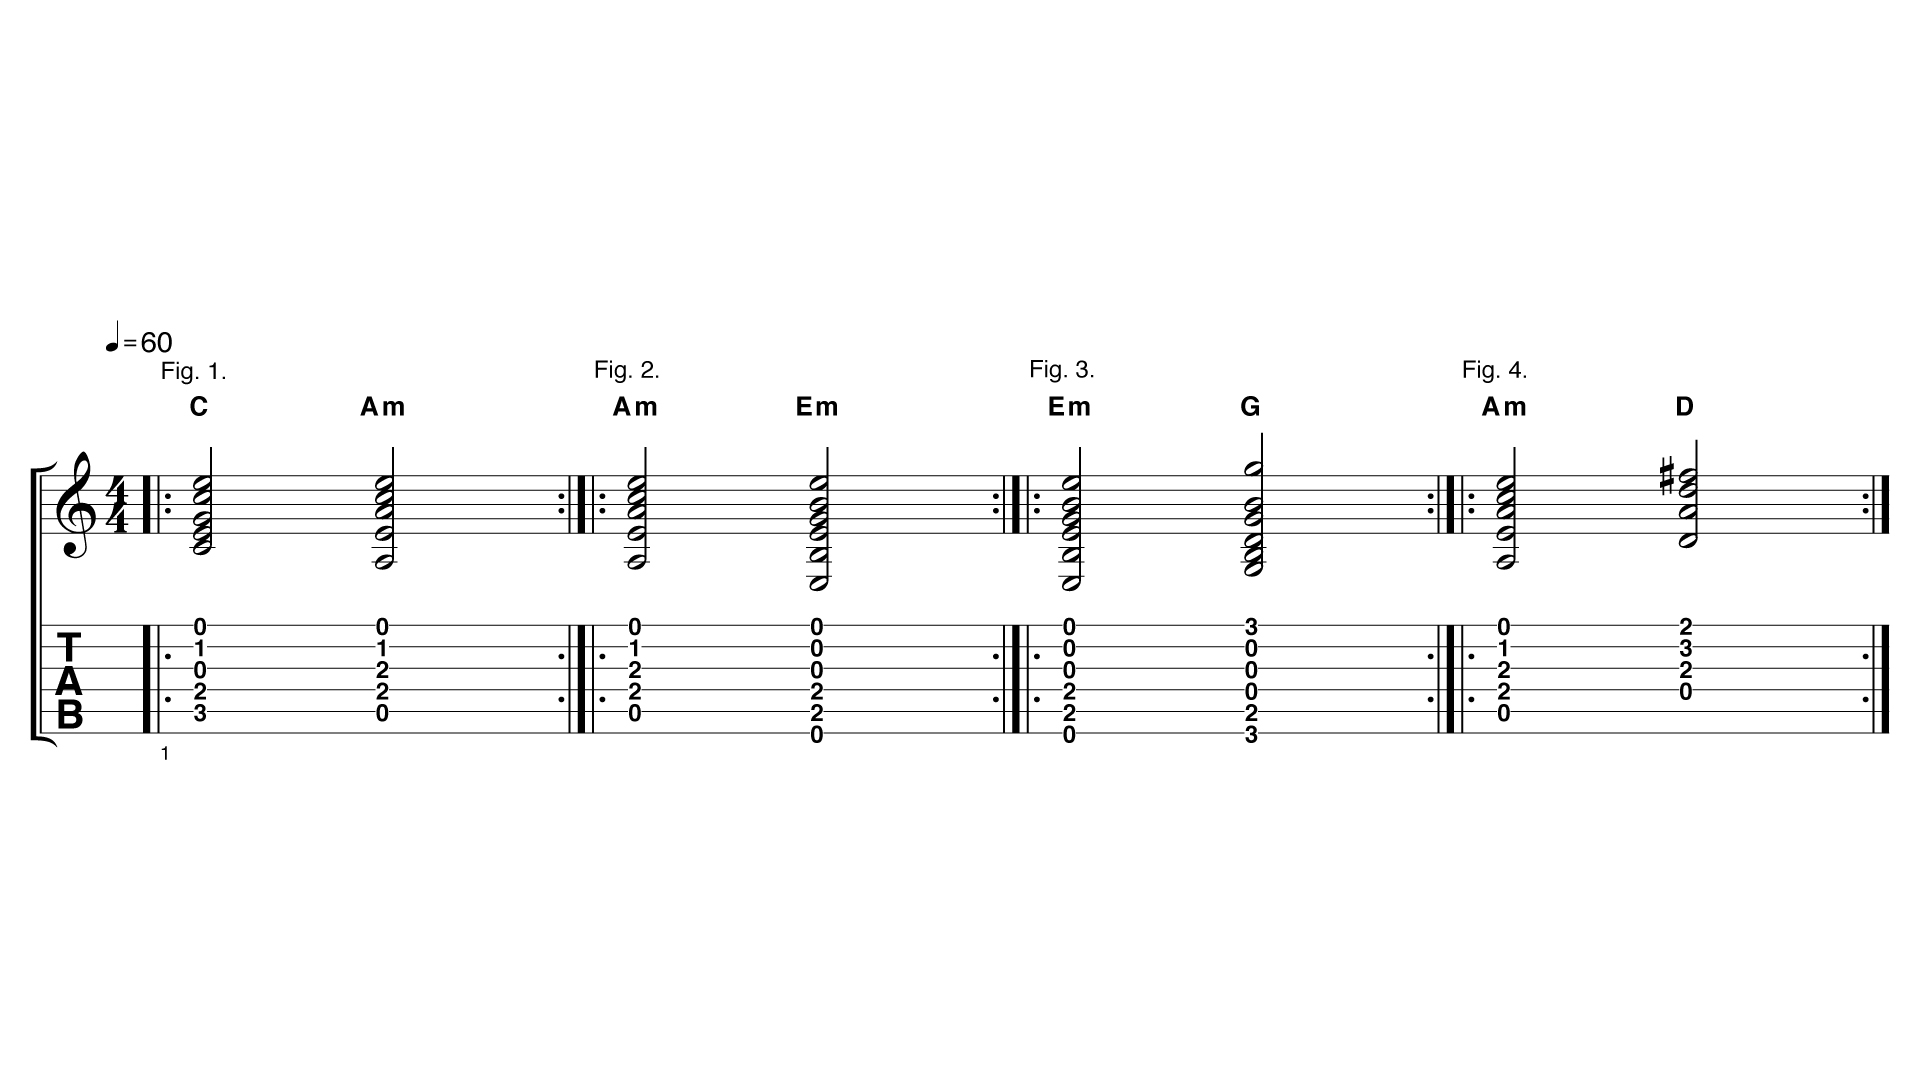
Spend a few minutes a day practising the changes shown in the tab. C and A minor share two notes, so keep your first and second fingers in place and move only your third finger. Although A minor and D share a note, you have to move all your fingers in one go.
Chord sequence
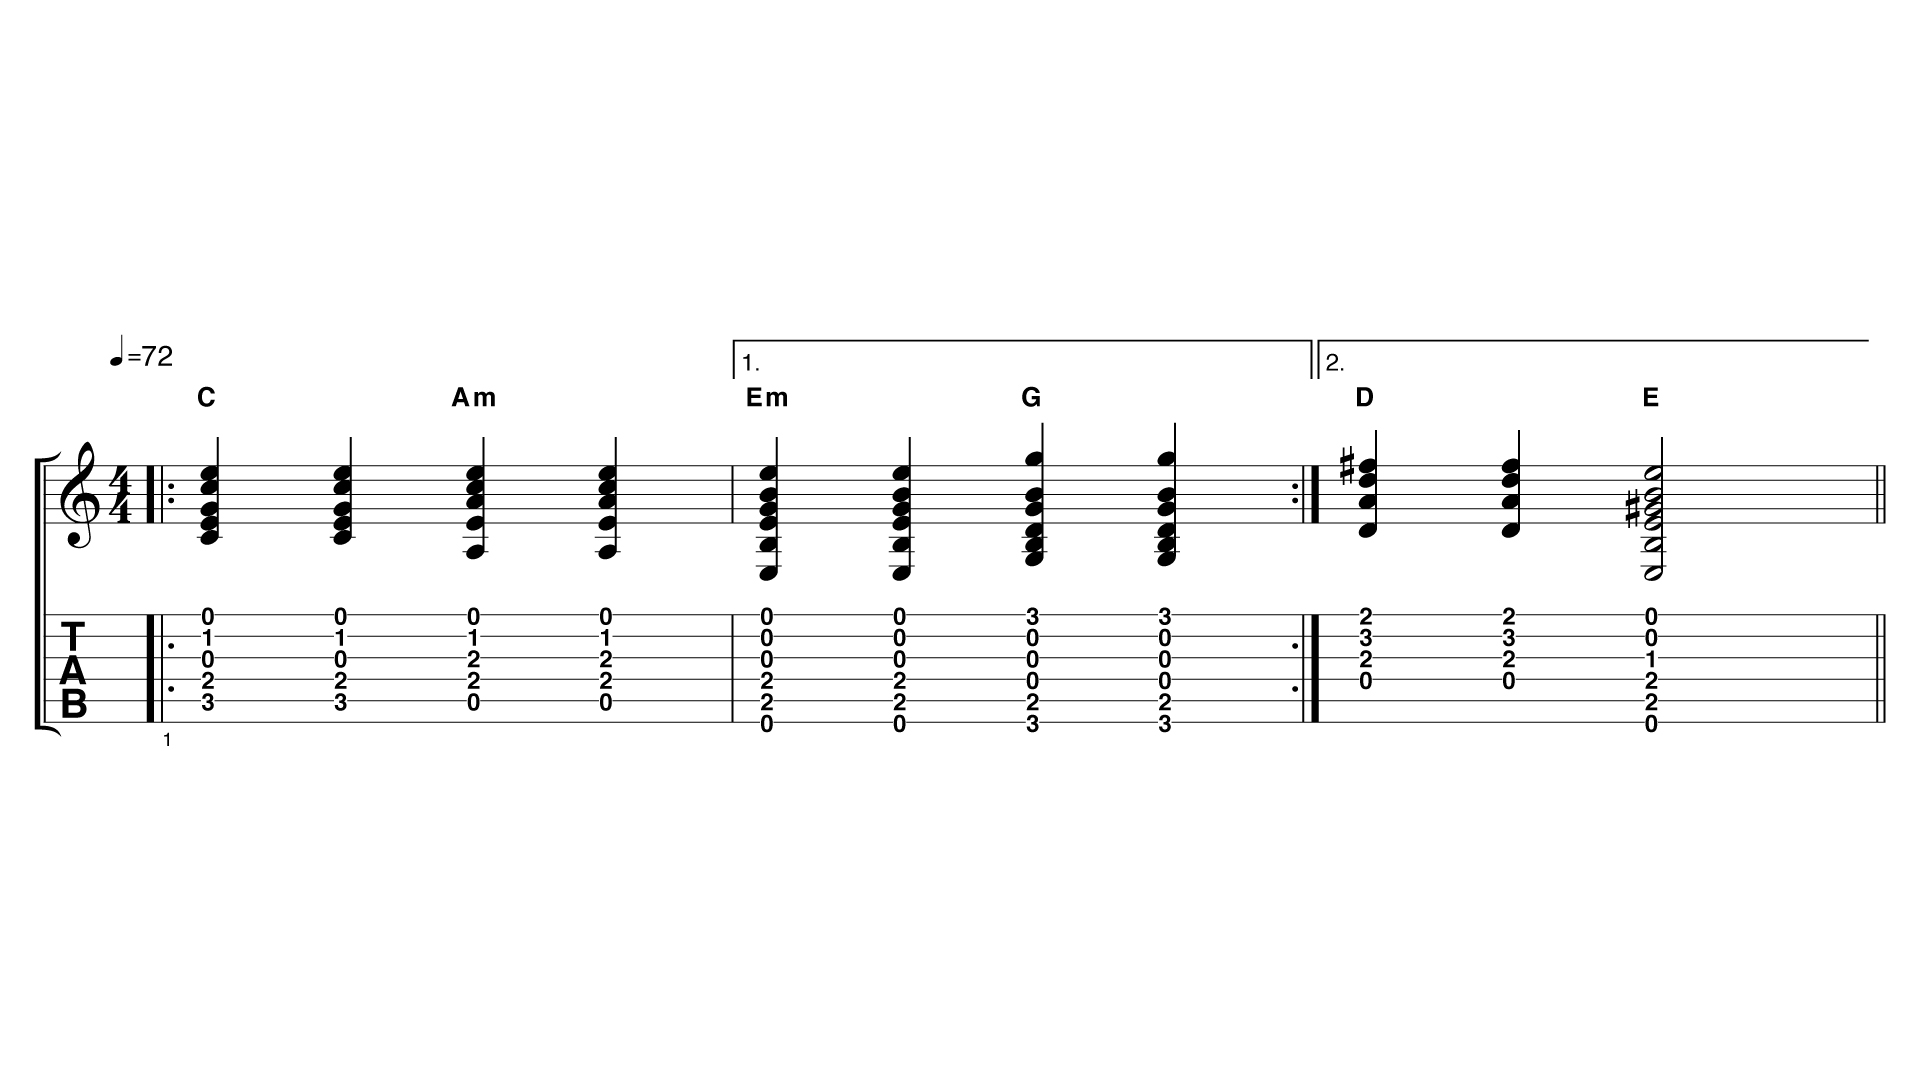
When you've had a go at the chord change exercise try playing this chord sequence. You have only a moment to move your fingers as you change chord so keep your movements as small and quick as you can. Strum each chord twice. The tempo is quite slow; be careful not to rush and play too quickly.
Tutor: Chris Bird
Videographer: Martin Holmes
Click here to go to part 1 of Get Playing Now
Click here to go to part 3 of Get Playing Now
Buy a copy of Total Guitar here: http://bit.ly/13D1Au4
Total Guitar is Europe's best-selling guitar magazine.
Every month we feature interviews with the biggest names and hottest new acts in guitar land, plus Guest Lessons from the stars.
Finally, our Rocked & Rated section is the place to go for reviews, round-ups and help setting up your guitars and gear.
Subscribe: http://bit.ly/totalguitar

