MusicRadar Verdict
Waveform is now friendlier, contains more creative tools and brings workflow improvements you’ll have missed from other DAWs.
Pros
- +
The DAW now restarts when it crashes because of errant plugins.
- +
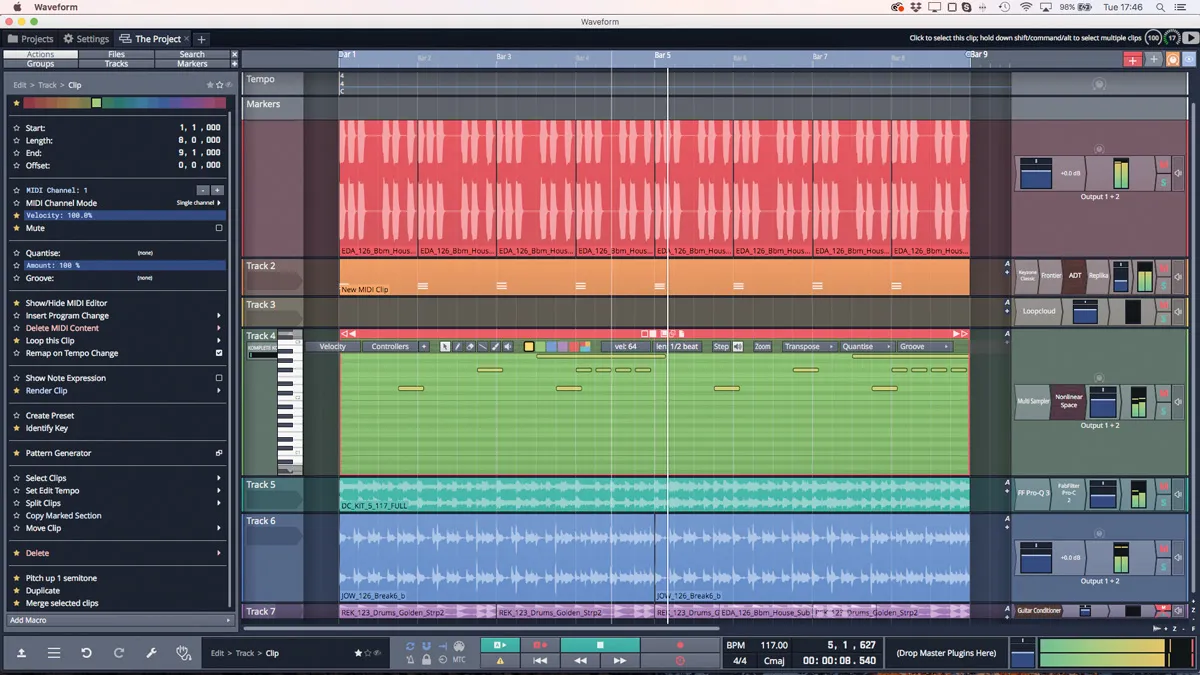
Waveform’s interface is now much simpler to deal with.
Cons
- -
Actions Panel is a step in the right direction but could be more reactive to the user, long-term.
MusicRadar's got your back Our team of expert musicians and producers spends hours testing products to help you choose the best music-making gear for you. Find out more about how we test.
Now firmly back under the management of its original creators, Waveform continues to shed its ties to ‘the Mackie era’ and has fully returned to its innovative roots.
With the business model of yearly buy-once updates being strangely old-hat these days, Tracktion has to make each update worth buying, and version 10 is stuffed with new features of all stripes: creativity, utility and workflow.
Last year’s review of Waveform 9 noted both the moments of genius and frustration that Waveform brings, thanks to the software’s distinctive take. Some of those gripes are now gone: for example, the text-heavy interface has been cleared up using some nice graphic touches. The thing is, when Tracktion opens a door, it closes a window - and the new Actions Panel, alas, bears that same old familiar text-heavy style.
Replacing the Properties panel, this left-hand area contains a contextual list of commonly-used parameters. When you click on anything in Waveform 10, the Actions Panel displays a list of related ‘actions’. Select a track, and you’ll bring up actions like Mute, Solo, Freeze and so on, and you also get actions related to a track: ‘Select all Clips in Track’, for example. You can also add your own actions to the panel and import Macros.
Waveform 10 comes with Auto-Tune Access, the entry-level version of Antares’ culture-defining software. This offers MIDI input, the Retune Speed parameter the kids love so much these days, and a Humanize function. It’s possible to pull off ridiculous Cher/T-Pain-style effects with it, yes, but it’s also usable for subtle pitch correction. Installing Auto-Tune Access is a faff, though, requiring you to download CodeMeter RunTime from Wibu Systems. We found it, in all honesty, quite annoying - that’s not Tracktion’s fault though. But you’re not slaved to Auto-Tune’s questionable correction quality: Waveform 10 also has Melodyne Essential (with ARA capability) and Élastique Pro timestretching technology, giving it three ways to mess with pitch.
Certain functions and items can now be accessed in their own windows, such as Loop Properties, Macro Parameters and MIDI Controller Mappings, and said windows are accessible directly from the Actions Panel. This being a whole panel, you can star certain actions and hide ones that are rarely used.
In theory, the Actions Panel makes it easier to carry out multiple tasks without menu-diving, learning new key commands or doing endless searching. However, for me it’s not well-stocked with appropriate commands - we’ve had to spend a lot of time adding macros to it to gain easy actions for functions like rendering MIDI to audio and merging clips; the stuff we intuitively right-click for in other DAWs. To make life easier, we’d prefer for my own Actions Panel to update automatically based on actions we commonly take, tailoring Waveform as time goes by.
Waveform gets back to its one-window roots with the View Manager. This popout is a panel from which you can control the visibility of... all the other panels. With the number of panels now employed in the DAW being pretty large, having one place to command them all works efficiently in practice, although some may feel it takes too many clicks.
Waveform 10 introduces 62 new processors in the form of the ‘Artisan Collection’. These plugins come from the crowdsourced developer Airwindows, and are inspiring, leftfield processors that can really get your sonic exploration started. Effects like Energy and Hard Vacuum get things nice and pumped, for example, while Guitar Conditioner is a great mix-readier for more than just guitars.
The Artisan Collection plugins are simple but hugely effective. With their somewhat undescriptive names and functionality these may take some getting used to but once you do they’re a boon for creative uses.
The once-simple Multi-Sampler is increasingly comprehensive. Version 10’s update introduces a 64-sample maximum, layer mute and solo, and the option for layer selection to reflect the last note played by MIDI input. Elsewhere, you can use new recording tools to get sounds into Multi-Sampler on the Record page. There’s a retrospective record function, which monitors the track’s input in the background, and brings up the last 30 seconds of audio from the buffer when activated - you don’t even need to have had a Multi-Sampler running. You can also set Multi-Sampler’s record input to System Output, taking its cue from your whole computer, so you can sample from other apps running at the same time. Since Waveform 10.1, this function has had a few bugs ironed out.
Grouping has become more fully featured in Waveform 10, which now lets you link or unlink common properties between grouped items as you see fit: Volume, Pan, Mute, Solo, Record (arm), Send, Colour, Height and Visibility can be connected across members of a group as needed.
Tracks and clips can now be edited in dedicated windows, making things easier for those with screen space to spare or non-standard users, such as audio editors, podcasters, obsessive beat slicers et al. There’s a new MIDI Preview tool that can audition multiple notes at the position you place it, and Range Selection, which lets you select and group items based on time, not based on where clips start and end.
Warping audio at transients to quantise it to a groove is an essential feature in modern DAWs, and Waveform’s take on that is Groove Doctor, a four-step process that lets you fine-tune your work by seeing what’s being done throughout. Groove Doctor is more like a macro-driven assistant, helping you make multiple edits within a clip by automatically detecting slices, then cutting, moving, crossfading and rejoining them. To show how it works, after you finish with the Groove Doctor, if you Undo your changes, you’ll go through each stage individually. All the messy work is done through friendly settings, making Groove Doctor a sure cure for your audio timing ills. It involves more steps than solutions offered by other DAWs, although this also means it’s a lot more customisable too.
Every version of Waveform has its brilliant new ideas. Here, these are Mute/Solo dragging - where clicking either on one channel and holding the mouse button down will ‘paste’ the settings to other channels as you roll over them - and automatic reloading after Waveform crashes.
This is a huge update, and there’s plenty more that we haven’t got into. Version 10 will inspire current owners, placate lapsed users, and attract new ones in equal measure.
