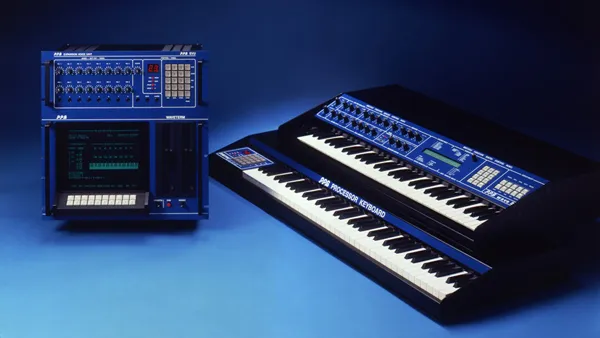
40 years ago, legendary synth designer Wolfgang Palm introduced the world to wavetable synthesis with his PPG Wave 2 synth.
Unlike the static waveforms of an analogue oscillator, a wavetable oscillator loads a template – the wavetable itself – with descriptions of different waveforms. The oscillator reads and reproduces these, adjusting playback rate to control the pitch.
Technically a wavetable is no more than a series of digitally sampled waveforms laid end‑to-end in a standard PCM WAV file. By using waveforms of an exact length, the oscillator can predict where each waveform starts/ends, and can select different waveforms from within the table. Throw in a bit of waveform-blending and the oscillator can morph smoothly through all of the waveforms in a wavetable.
Initially, systems capable of creating wavetables were hugely expensive. But today your DAW has all you need, plus the ability to host synths to use as sound sources. That said, for editing and processing your waveform recordings, a standalone wave editor has its advantages, and so ideally your wavetable-building setup needs both DAW and wave editor.
Many wavetable synths can import custom wavetables, and you need one of these to play your creations. Some such synths also contain bespoke wavetable editing tools that take some legwork out of the otherwise manual process.
Read on as we get to grips with the fundamentals of this highly creative process…
Wavetable formats
The most important wavetable concept is the ‘frame’ or ‘window’. This is a span of audio that’s a specific number of samples in length, and which contains the template for a waveform; usually a single cycle. That waveform should be sized to fill the frame perfectly so that, when repeated, a constant static timbre is produced.
Different synths have different wavetable specifications, and these centre around the number of samples in a frame, the bit depth of those samples, and the maximum number of frames that a wavetable can contain. There is no standard for this, so you should always check a synth’s requirements before spending time creating wavetables for it.
The good news is that most modern wavetable synths have gravitated towards the same format: 2,048 samples per frame, any bit depth, and a maximum of 256 frames in a wavetable. These synths can also handle mono or stereo wavetable files, but there’s rarely much point in creating stereo wavetables, so use mono wherever possible.


Sample rate and wavetable frequency
From an oscillator’s perspective the sample rate of a wavetable WAV file is unimportant: 2,048 samples is 2,048 samples, irrespective of sample rate.
However, because this is a fixed length, the frame size interacts with the sample rate you’re working at to determine the frequency of the waveforms contained within a wavetable. If you produce a waveform that matches this frequency, then the number of samples in a single cycle of that waveform will equal the target frame size.
To calculate a wavetable’s frequency, divide the sample rate you’re working at (in Hz) by the frame size. Unfortunately, as you can see from Table 1, the resulting wavetable frequencies don’t match with any standard note frequencies. There are a couple of strategies for dealing with this: time-stretching and re-tuning
Fitting to frames
If using a synth or tuneable instrument to generate waveforms, you can adjust the tuning so that the nearest note’s frequency matches the wavetable frequency (see Table 2). The margins are tight – a small deviation in waveform frequency can create a mismatch between wavelength and frame size – so the synth or instrument you use has to have sufficiently fine-grained tuning control to work.
The alternative strategy is to use tape-style time-stretching (that is, time-stretching that does not perform pitch correction) to resize your recorded waveforms. In order to keep time-stretching to a minimum you should work with the note that most closely matches the wavetable frequency. If the source of your waveforms can’t produce a low enough note, move to a higher octave and double the number of waveform cycles included in a frame for each octave you increase by.
Time-stretching can distort the waveform, and often doesn’t work well (or at all) when applied to very short snippets of audio such as single-cycle waveforms and short wavetables. The best approach, therefore, is to record longer segments of your source waveforms and time stretch these prior to editing out single-cycle waveforms. To calculate the time-stretch percentage, divide the frame size by the waveform’s single cycle length (in samples) and multiply the result by 100.
Frame count
Wavetable specifications always define a maximum number of frames, but this does not mean a wavetable has to contain this many frames. However, you may wish to record a single evolving sound that will fill a large number of frames, and if so, you’ll need to know how long that sound should be.
If you are using the tuning strategy to match waveform and frame sizes then simply multiply the frame size by the number of frames you wish to fill. If using time stretching, then look up the single-cycle wavelength in samples for the note you are creating (see Table 1), multiply this by the desired frame count and round up to the nearest whole number.
Creating wavetable waveforms using plugin synths

Choose a working sample rate and create a new DAW project. Add an instance of any soft synth; we're using u-he's Bazille CM. This comes free with the Computer Music Plugin Suite, bundled with every issue of Computer Music Magazine. Load the Init patch and disable the synth’s effects, such as delay or reverb.

Consult Table 1 on the previous page to choose your optimal note. Create a series of 10 one-beat-long instances of this note with a beat-long gap preceding each note.

Set up a starting point sound and decide how it will progress to an ending point. Set up automation lane(s) for each parameter that will change.
Set up a starting point sound and decide how it will progress to an ending point. Set up automation lane(s) for each parameter that will change.

Create automation that advances the parameters in equal-sized steps from start point to end point. The automation nodes should not align with note start or ends.

Consult Table 2 to find the tuning offset. Apply this to Bazille’s master Pitch section (hold Shift for fractional changes). Ensure Transpose is set to zero.

Bounce/export to a new mono audio file with the same sample rate and bit depth as your project. We are now ready to extract waveforms from the recording.
Designing wavetables
A good way to approach wavetable design is to think in terms of key points within the wavetable – the starting point, the ending point and often a number of intermediate points. You can then create specific waveforms for these moments.
This method has the added benefit of allowing you to record long enough passages of each sound to ensure you can find a stable and correctly-sized waveform instance to copy into your finished wavetable form.
An alternative when using synths as your source is to create a starting point and then automate synth parameters to transform the sound to an ending point. Once bounced to an audio recording you can snip out the start and end point waveforms and as many intermediate points as you need.
When working this way, it’s often best to progress the automation in steps, with one step for each frame you want to create. This allows the synth to settle down and produce a steady timbre after a parameter change. The alternative – using smooth curves – is OK if you’re aiming to create a high frame count using a synth’s bespoke import tools, but keep in mind that the waveform will be changing constantly, even within the span of a single cycle, which is not ideal.
Pitch and phase consistency
It’s imperative to maintain a steady pitch within any sound you’re using as the basis of a waveform. This means there should be no vibrato, chorus, or anything else that causes pitch variations within the sounds you’re working with.
Moreover, because the waveforms in a wavetable interact when the oscillator blends between them, phase consistency is important, particularly between waveforms in consecutive frames. Where a phase shift is an intrinsic or unavoidable part of a wavetable, it should happen progressively over multiple frames.
Related to this is DC offset, which can make phase matching harder and limit the waveform’s overall magnitude (ie loudness). It’s therefore a good idea to apply a DC offset removal process across your source waveform recordings before normalising or editing them.
Predictable vs unpredictable sources
Waveforms can be sourced from anything that makes a sound, although we generally want musical sounds which means turning to synths and instruments. Of these, digital synths and plugins are the easiest to work with because they offer accurate, stable tuning, and produce regular, predictable waveforms that are easy to identify during editing.
Using a predictable source means that, once you’ve identified the length of a single cycle, you know exactly how long all of your subsequent edits will need to be. In contrast, analogue synths (and plugins that accurately model analogue synths) produce unpredictable waveforms that can vary in shape and wavelength from one cycle to the next. It’s all part of what makes analogue synths sound so great, but it makes things awkward for a wavetable designer. Similarly, acoustic instruments often contain constantly shifting timbres and subtle pitch changes.
Keep in mind that you’re not designing a cool-sounding synth patch, but creating the raw ingredients to use in any number of cool-sounding synth patches
Dealing with these unpredictable sources demands more care and selectiveness when extracting single waveform cycles from a source recording, and being more considered in how you apply time stretching. This finickitiness isn’t too much of a nuisance when it comes to wavetables containing only a handful of frames, but becomes a chore when targeting a high frame count.
Whatever you use as a source for waveforms, always keep in mind that you’re not designing a cool-sounding synth patch, but creating the raw ingredients to use in any number of cool-sounding synth patches. Tuning and detuning, envelopes, LFOs, effects and all the rest of it can be applied in the synth hosting the wavetable, so should not feature in your source sounds. What really matters is the raw timbre – that is, the harmonic content – of the waveforms that you create.
Editing and assembling wavetable waveforms

Open your waveform recording in a wave editor or new DAW project. Switch the timeline to Samples mode and enable “Snap to Zero Crossing”.

Zoom on the first waveform and select a single waveform cycle. If not at the expected length, return to the source project, adjust Bazille’s master transpose and/or tuning, and re-export.

Select the entire recording. Run a DC Offset Removal process, then normalise to between -1.5dB and -3dB. If you did not adjust tuning in the previous tutorial, apply a time stretch now (see Table 2).

Zoom in on the first waveform. Select a single cycle, ensuring it’s the expected length. Copy and paste to a new audio file (wave editor) or track (DAW).

Copy and paste all remaining waveforms to the new file or track. Ensure each waveform’s length is correct; extend a sample-or-two away from zero crossing if necessary.

Save or export your new wavetable. In your DAW, load a wavetable synth, import your new wavetable (the method will be dependent on the synth - we've chosen to use BLEASS Megalit), and start making some cool sounds!
Bespoke editors and approaches
The wavetable creation methods that we’ve discussed so far involve a fair amount of manual work, but there are a small number of synths that include specialised editing tools. These can take a lot of the complexity out of wavetable creation, but are bespoke to the synth in question and so each has its own particular functionality and workflow.
For example, Steinberg HALion and Xfer Serum analyse the pitch(es) within imported audio and perform the aforementioned awkward time-stretching. Vital, on the other hand, won’t automatically detect pitch, but does let you specify the frame size of the imported waveforms, includes tools for creating and reshaping waveforms, and can export creations as standard 2,048 samples-per-frame wavetables.

Getting experimental
Alongside synths with bespoke tools are others that can perform ‘dumb’ importing of wavetables. If your wavetable has been properly prepared to the synth’s specifications then you will get the expected results.
If not, or if you throw in a random WAV file, then the synth will still create wavetable frames from the imported audio, but you may find that the results will be unpredictable and chaotic. This doesn’t mean they aren’t useable, however…
For example, if you import any-old WAV file into, say, Arturia Pigments, the synth will extract as many 2048-sample frames from that audio as it can (up to its 256 frame limit), and present these as a wavetable. Although this wavetable will probably sound janky, Pigments will still morph through it, thereby creating a changing pattern of harmonics.
Using this as an FM or PM source for a second oscillator, and driving the wavetable’s position with an LFO or envelope can create spectacularly rich and interesting timbres to synthesise with.
Other sources
We’ve focussed on using synths as sources for waveforms, but, really, you can use anything that you can imagine. Why not, for example, try creating some wavetables of your own voice, wavetables that morph between acoustic and electric guitar tones, or wavetables that blend completely unrelated timbres and instruments. If you can imagine it then you can create it with a wavetable.
Granted, it can take you a bit of practice to get the hang of creating wavetables that deliver the results that you would expect, but it’s definitely worth the effort. Wavetables provide access to the very heart of a synthesiser to shape as you see fit, with each wavetable you create becoming a springboard to accessing scores of interesting and completely original synth sounds.
Creating wavetables with Vital

Create a new waveform recording. Use Table 1, from above, to help calculate the note length for 200-250 frames, and use smooth automation curves to vary the sound.

Do not use any tuning or time correction. Bounce the synth part to audio. Top-and-tail the recording and export to a new audio file.

Head over to Vital's website. Click Get Vital, choose an option (the free Basic version is sufficient), and then download and install the synth.

Load an instance of Vital. Click the pencil icon next to Oscillator 1’s waveform display. Select Import Wavetable from the editor’s ‘burger-button’ menu.

Select the first timeline marker. Set Window to your single-cycle note length. Drag from the start of the small preview until the waveform is clear of any initial lead-in.

Select the ending timeline marker. Drag from the end of the preview until the waveform is clear of any final lead-out. Close the editor and start synthesising!
Using random audio as a wavetable

Create a new instance of Vital. Open the wavetable editor. Use the Import Wavetable option to load any-old snippet of audio – the more atonal the better.

Play around with the Window setting to change the pitch and timbre. Set Start and End markers, as in the previous tutorial, then close the editor.

Turn Osc1’s level to zero. Enable Osc2 and load the Vital Sine wavetable. In Osc2’s Phase dropdown select FM<-OSC1 and adjust the strength dial to suit.

Experiment with altering the pitch of Osc1. You could also experiment by adjusting Osc1’s wavetable Window settings, and adding modifiers to the wavetable.

Map some modulation – LFO or envelope – to the wavetable position of both oscillators, and to the FM strength. Experiment with some unison detuning of Osc2.

Enable Osc3 and import the wavetable you created in the second tutorial. Continue to experiment and synthesise, familiarising yourself with Vital’s impressive toolset along the way.
Popular wavetable synths
Put the theory into action with these popular plugins...
1. Waldorf PPG Wave 3.V

Price: £130/€155 | Buy PPG Wave 3.V
Journey back to where it all began with Waldorf’s emulation of the PPG Wave 2. Alongside original PPG wavetables are more than 100 others developed by Palm himself, and the ability to import user wavetables. All are treated to an emulation that emulates the aliasing and other characterful artefacts of the original hardware.
2. Arturia Pigments 4

Price: $108/£85/€99 | Buy Arturia Pigments 4
Pigments’ multi-engine architecture makes it a must-have synth, but it’s even more useful to wavetable designers. As well as being able to import custom wavetables and inject them into its powerful synthesis path, its Analog, Sampler and Harmonic engines provide a deep well of timbres to use in new wavetables.
3. BLEASS Megalit

Price: £86/$110/€101 | Buy BLEASS Megalit
Although not an advertised feature of Megalit, the synth is fully capable of importing custom wavetables for use in its pair of flexible wavetable oscillators. Just drop your creations into the UserFolder/Documents/BLEASS/BLEASS Megalit/Wavetables folder and you can load and synthesise from them through the instrument’s intuitive interface.
4. Korg modwave

Price: $765/£549 | Buy Korg modwave
Inspired by Korg’s classic ’80s wavetable synth, the DW-8000, the modwave sends its wavetables through a powerful synthesis engine with true one-knob-per-parameter operation. Custom wavetables in a variety of formats can be transferred to the hardware from your computer, making this a hands-on wavetable monster.
5. Waldorf Blofeld Desktop

Price: £507/$579 | Buy Waldorf Blofeld Desktop
Having acquired PPG’s intellectual property when the company closed, German manufacturer Waldorf has spent decades perfecting and advancing Palm’s original wavetable technology. This is on full display in the Blofeld Desktop, a sleek, stylish unit that packs a large collection of classic and new wavetables, alongside the ability to load user samples.
6. Native Instruments Kontakt

Price: £269/$299 | Buy Native Instruments Kontakt 7
NI’s ever-popular Massive demonstrates the huge potential of wavetables, but sadly cannot import user wavetables. Not so Massive’s stablemate, the sampling powerhouse that is Kontakt. In truth, Kontakt’s wavetable features are quite basic, but this is more than compensated for by the sampler’s formidable downstream sound design capabilities.
7. Xfer Serum

Price: $189/£129 | Buy Xfer Serum
One of the most widely used wavetable synths is Serum, and this is in no small part thanks to its powerful import tools that can create a useful and useable wavetable out of almost anything you throw at it. The intelligent importer can recognise the pitch and phase of imported audio, and fix most common wavetable issues effortlessly.
8. Steinberg HALion
Price: $349/£298 | Buy Steinberg HALion
One of the many strings to HALion’s bow is its flexible wavetable engine, multiple instances of which can be stacked-up in a single program (alongside many other flavours of synth engine). The engine includes a powerful wavetable editor that recognises pitch, adjusts phase, and generally makes light work of custom wavetable creation.
9. Synthesis Technology WaveEdit

Price: Free | Download
Whilst not the slickest piece of GUI design you’ll ever come across, if you have a synth that supports 256 sample-per-frame, 64 frame max wavetables then WaveEdit is the tool for you. The app allows you to draw or import waveforms and apply processors with parameter automation, before exporting the whole lot to a finished wavetable.
10. Vital

Price: Free | Download
Available for free, but with excellent premium options and presets available too, Vital is a super powerful and thoroughly modern wavetable synthesiser. The synth’s built-in wavetable import and editing tools provide a deep set of options that can take a lot of the workload out of custom wavetable creation.