How to create stereo spin delays in Logic Pro
Are you confused by how to approach delays in a mix? We focus on a tried and tested technique
Want all the hottest music and gear news, reviews, deals, features and more, direct to your inbox? Sign up here.
You are now subscribed
Your newsletter sign-up was successful
Delay is a vital aspect of most mixes and can be used in numerous ways. In this article, we’re focusing on spins. Making full use of the stereo image can be an important aspect of a successful mix, and often we need to find a way to add width to mono sounds.
Adding spin delays is a key technique ideal for lead and featured elements and involves picking out specific snippets to add delay to. This could be certain words in a vocal or notes in a lead part, and works particularly well used at the end of phrases.
It’s a great device to help smooth transitions, fill gaps and can be used as a featured effect or in more subtle ways. There are a few different ways to achieve spins, including using snippets of duplicated audio and creating them manually, but the most efficient and flexible is to use an automated auxiliary send.
Article continues belowWe can then supplement this with additional automation or even add further processing of the send and return if required. Finally, listen to most mixes and you’ll hear spins working in time with the track, and many delay plugins load up already set to tempo sync.
So, in terms of timing, all you have to do is choose the division you want for your spin. That said, spins can work in free time as well, and we’ll look at both options in the walkthrough.
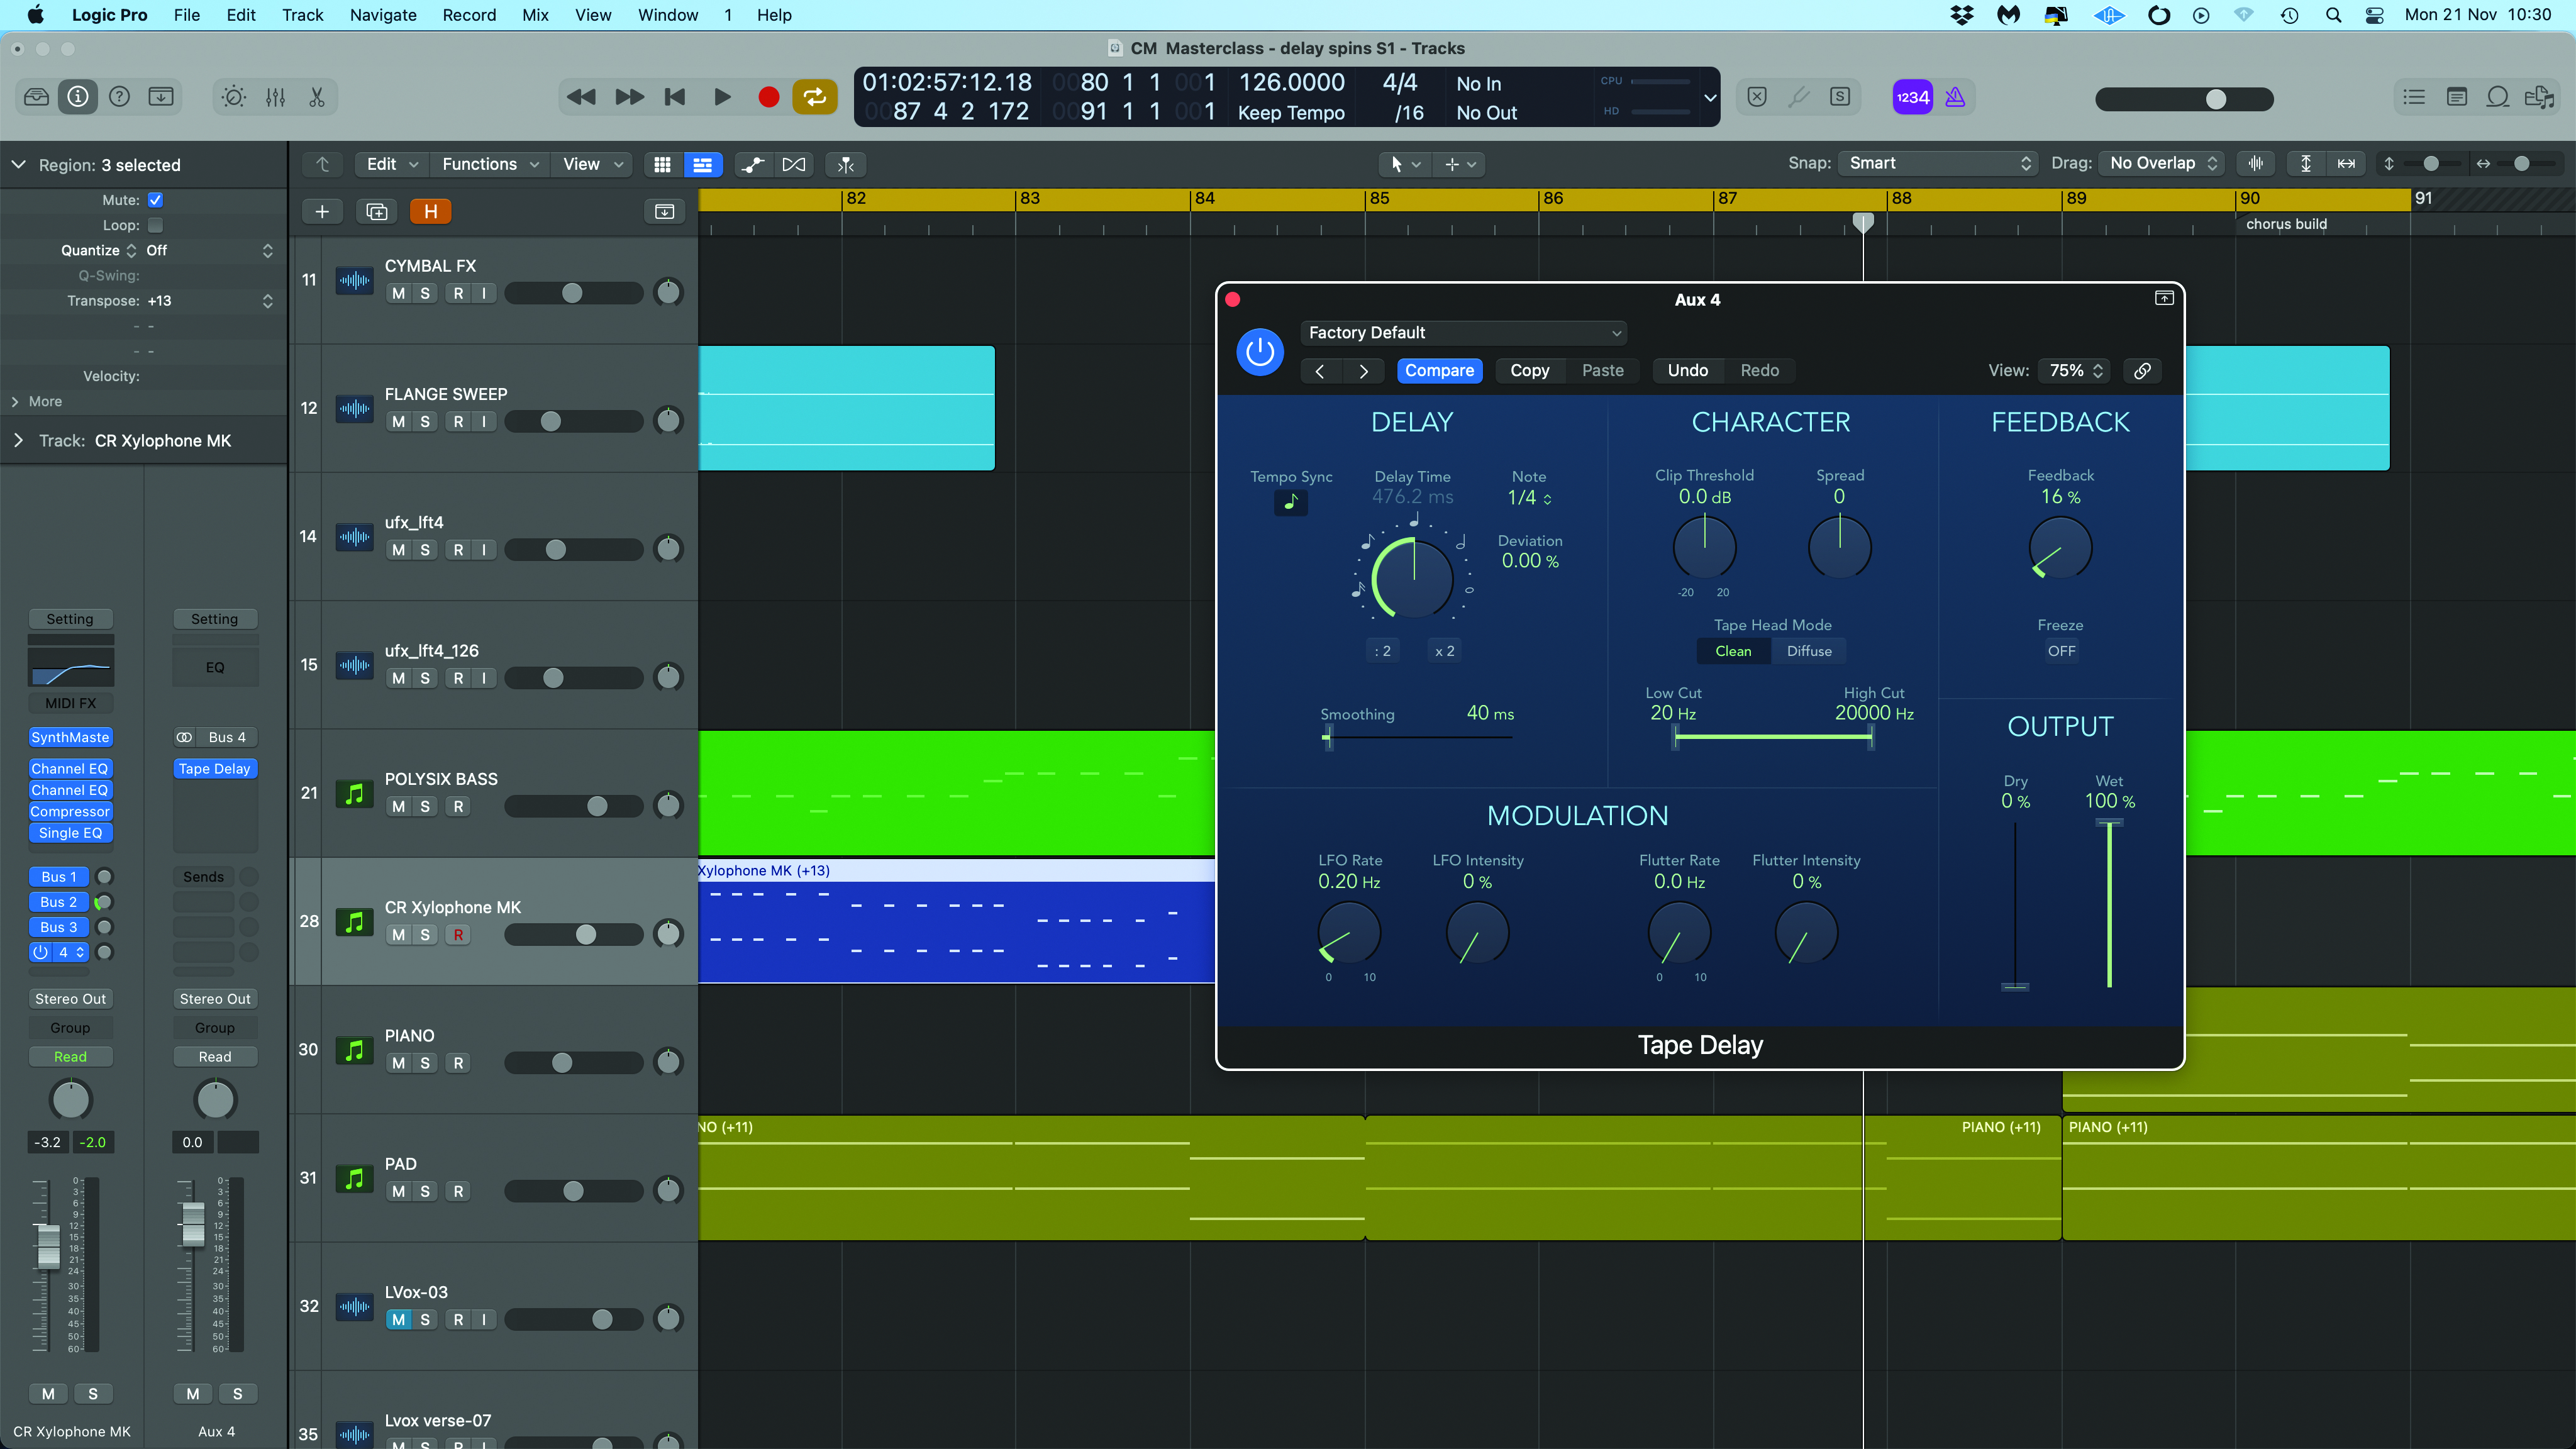
There are various ways one can set up delay spins, including creating a separate track just for the parts you want to send, or even create them manually using an audio track. Here, we’re going to stick to a tried and tested method using delay plugins on an auxiliary. To get started, load up a delay on an auxiliary.
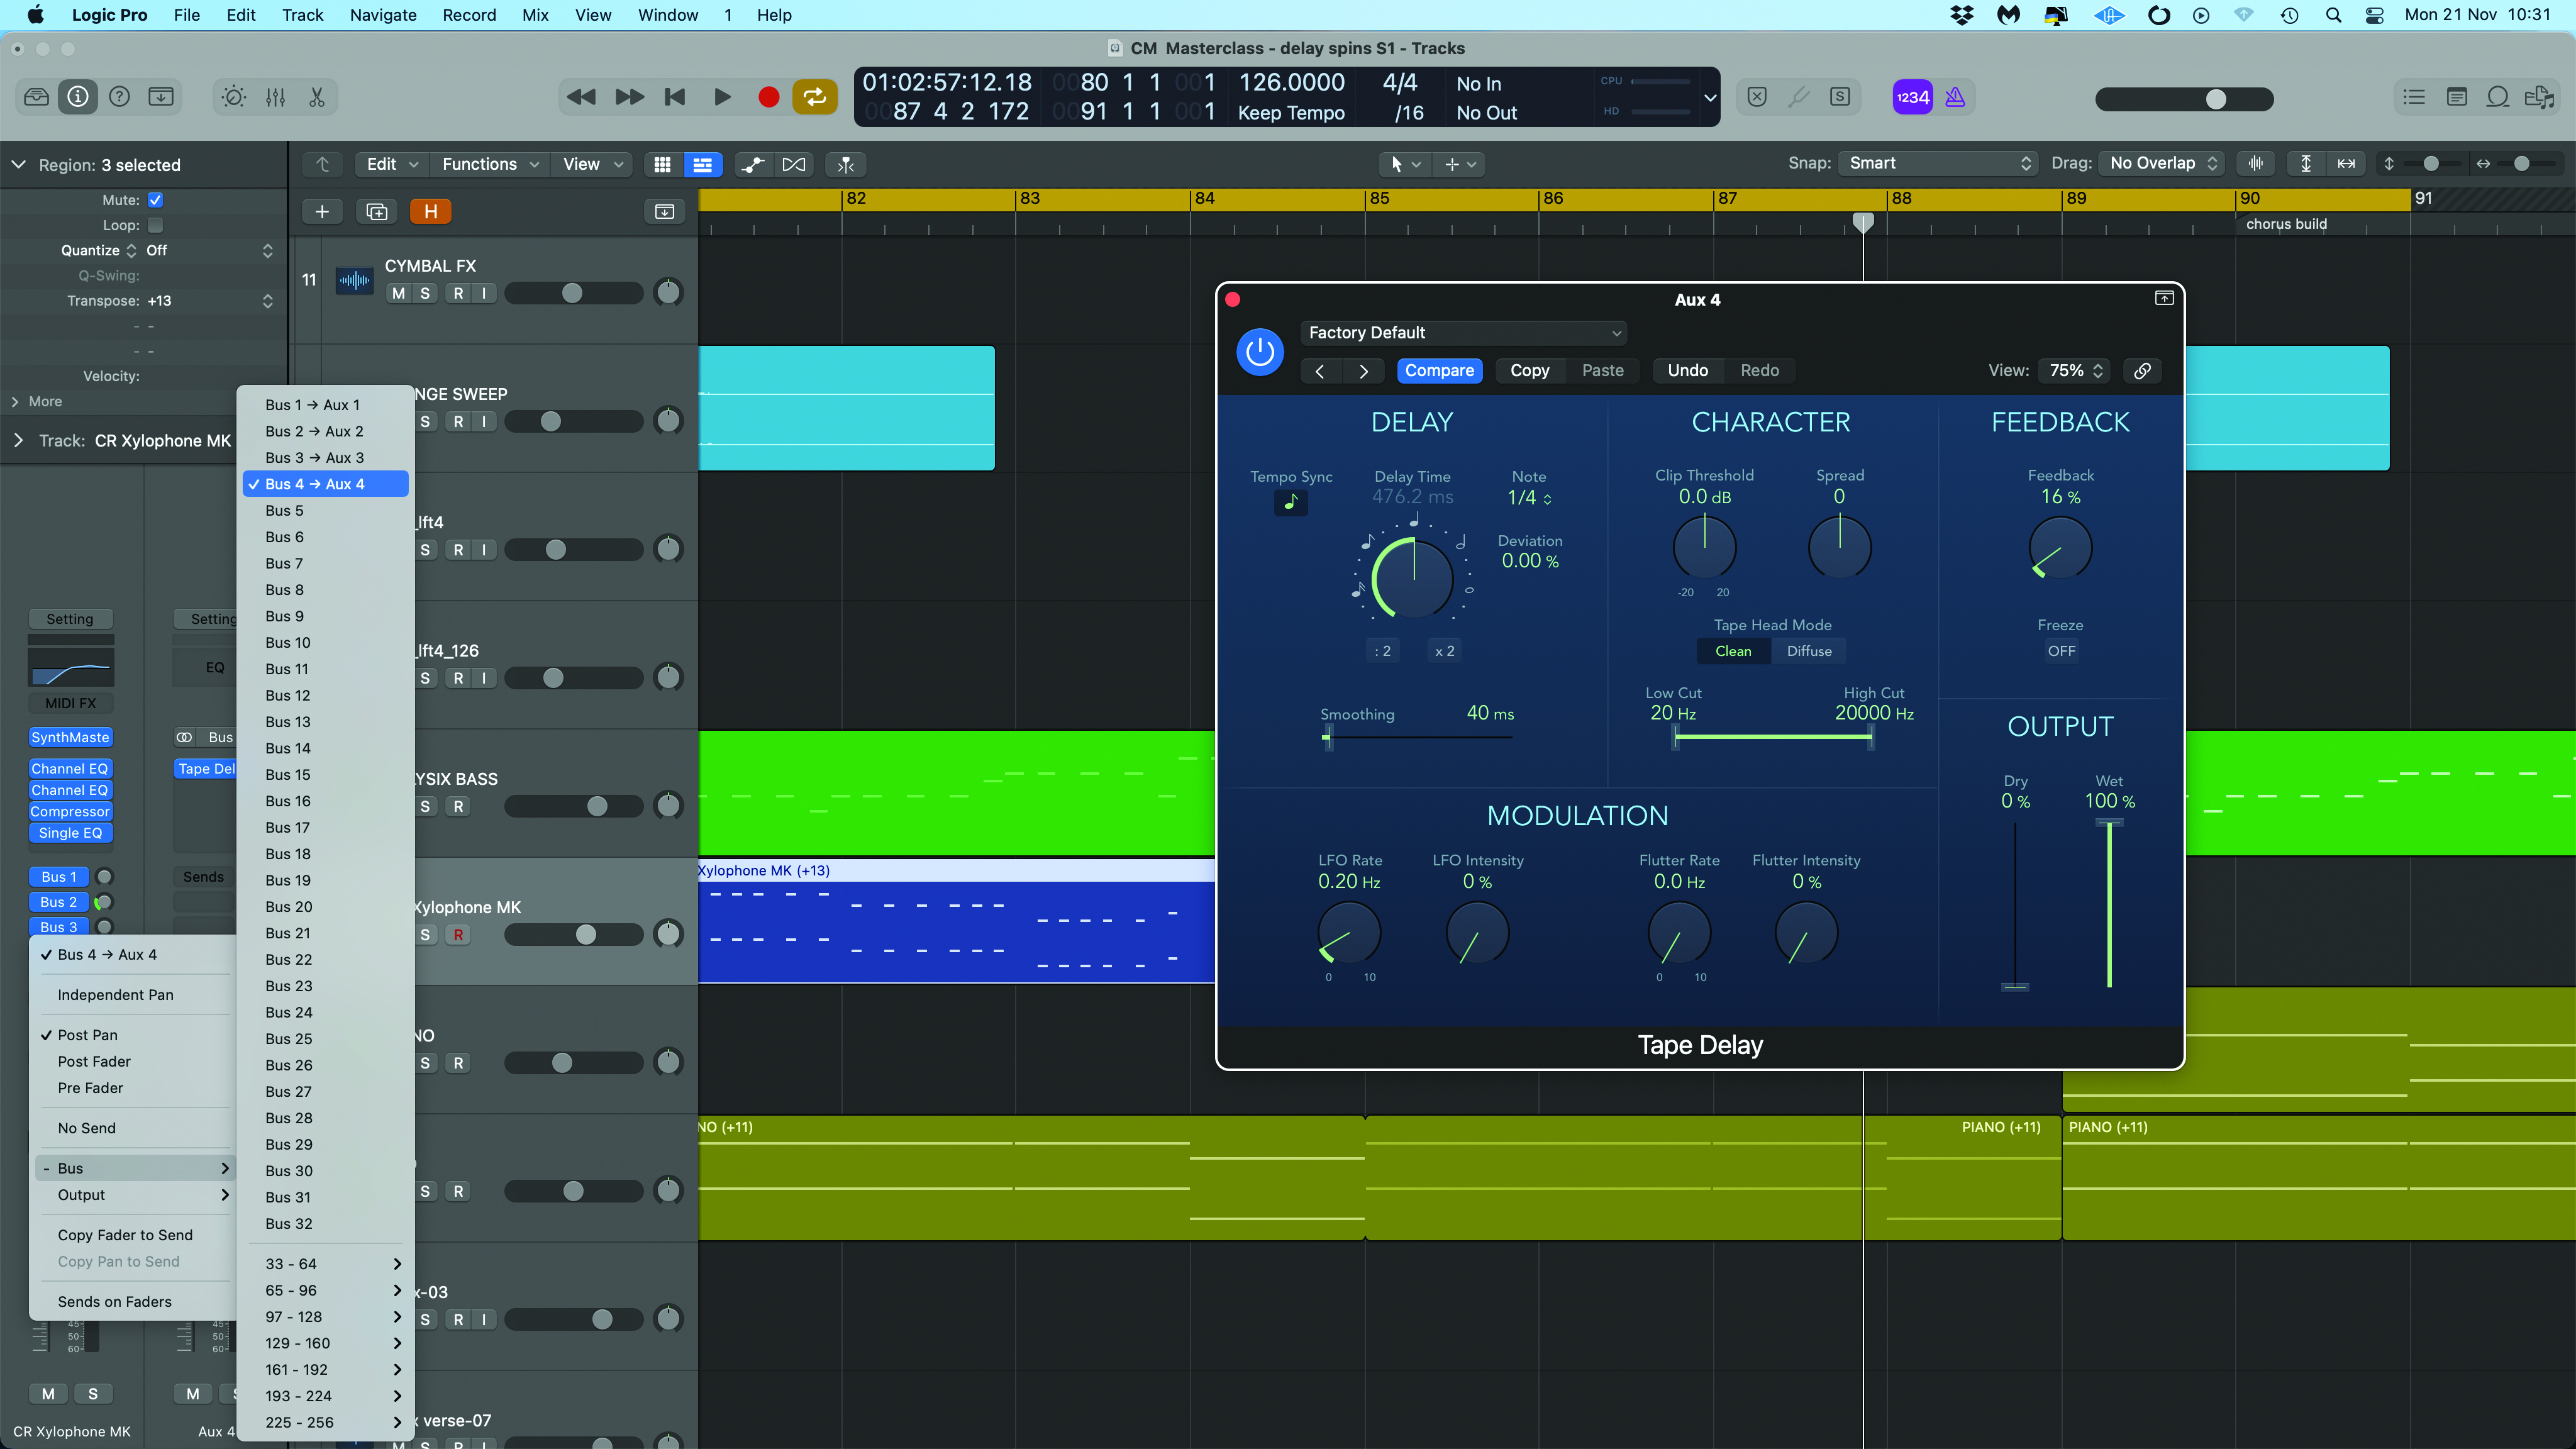
On the plugin, select a tempo-synced delay (we’re starting with quarter notes). Next, to test out the delay head over to the track or tracks you want to process, assign a send to the delay’s auxiliary bus, and manually send a quick snippet of audio.
Want all the hottest music and gear news, reviews, deals, features and more, direct to your inbox? Sign up here.
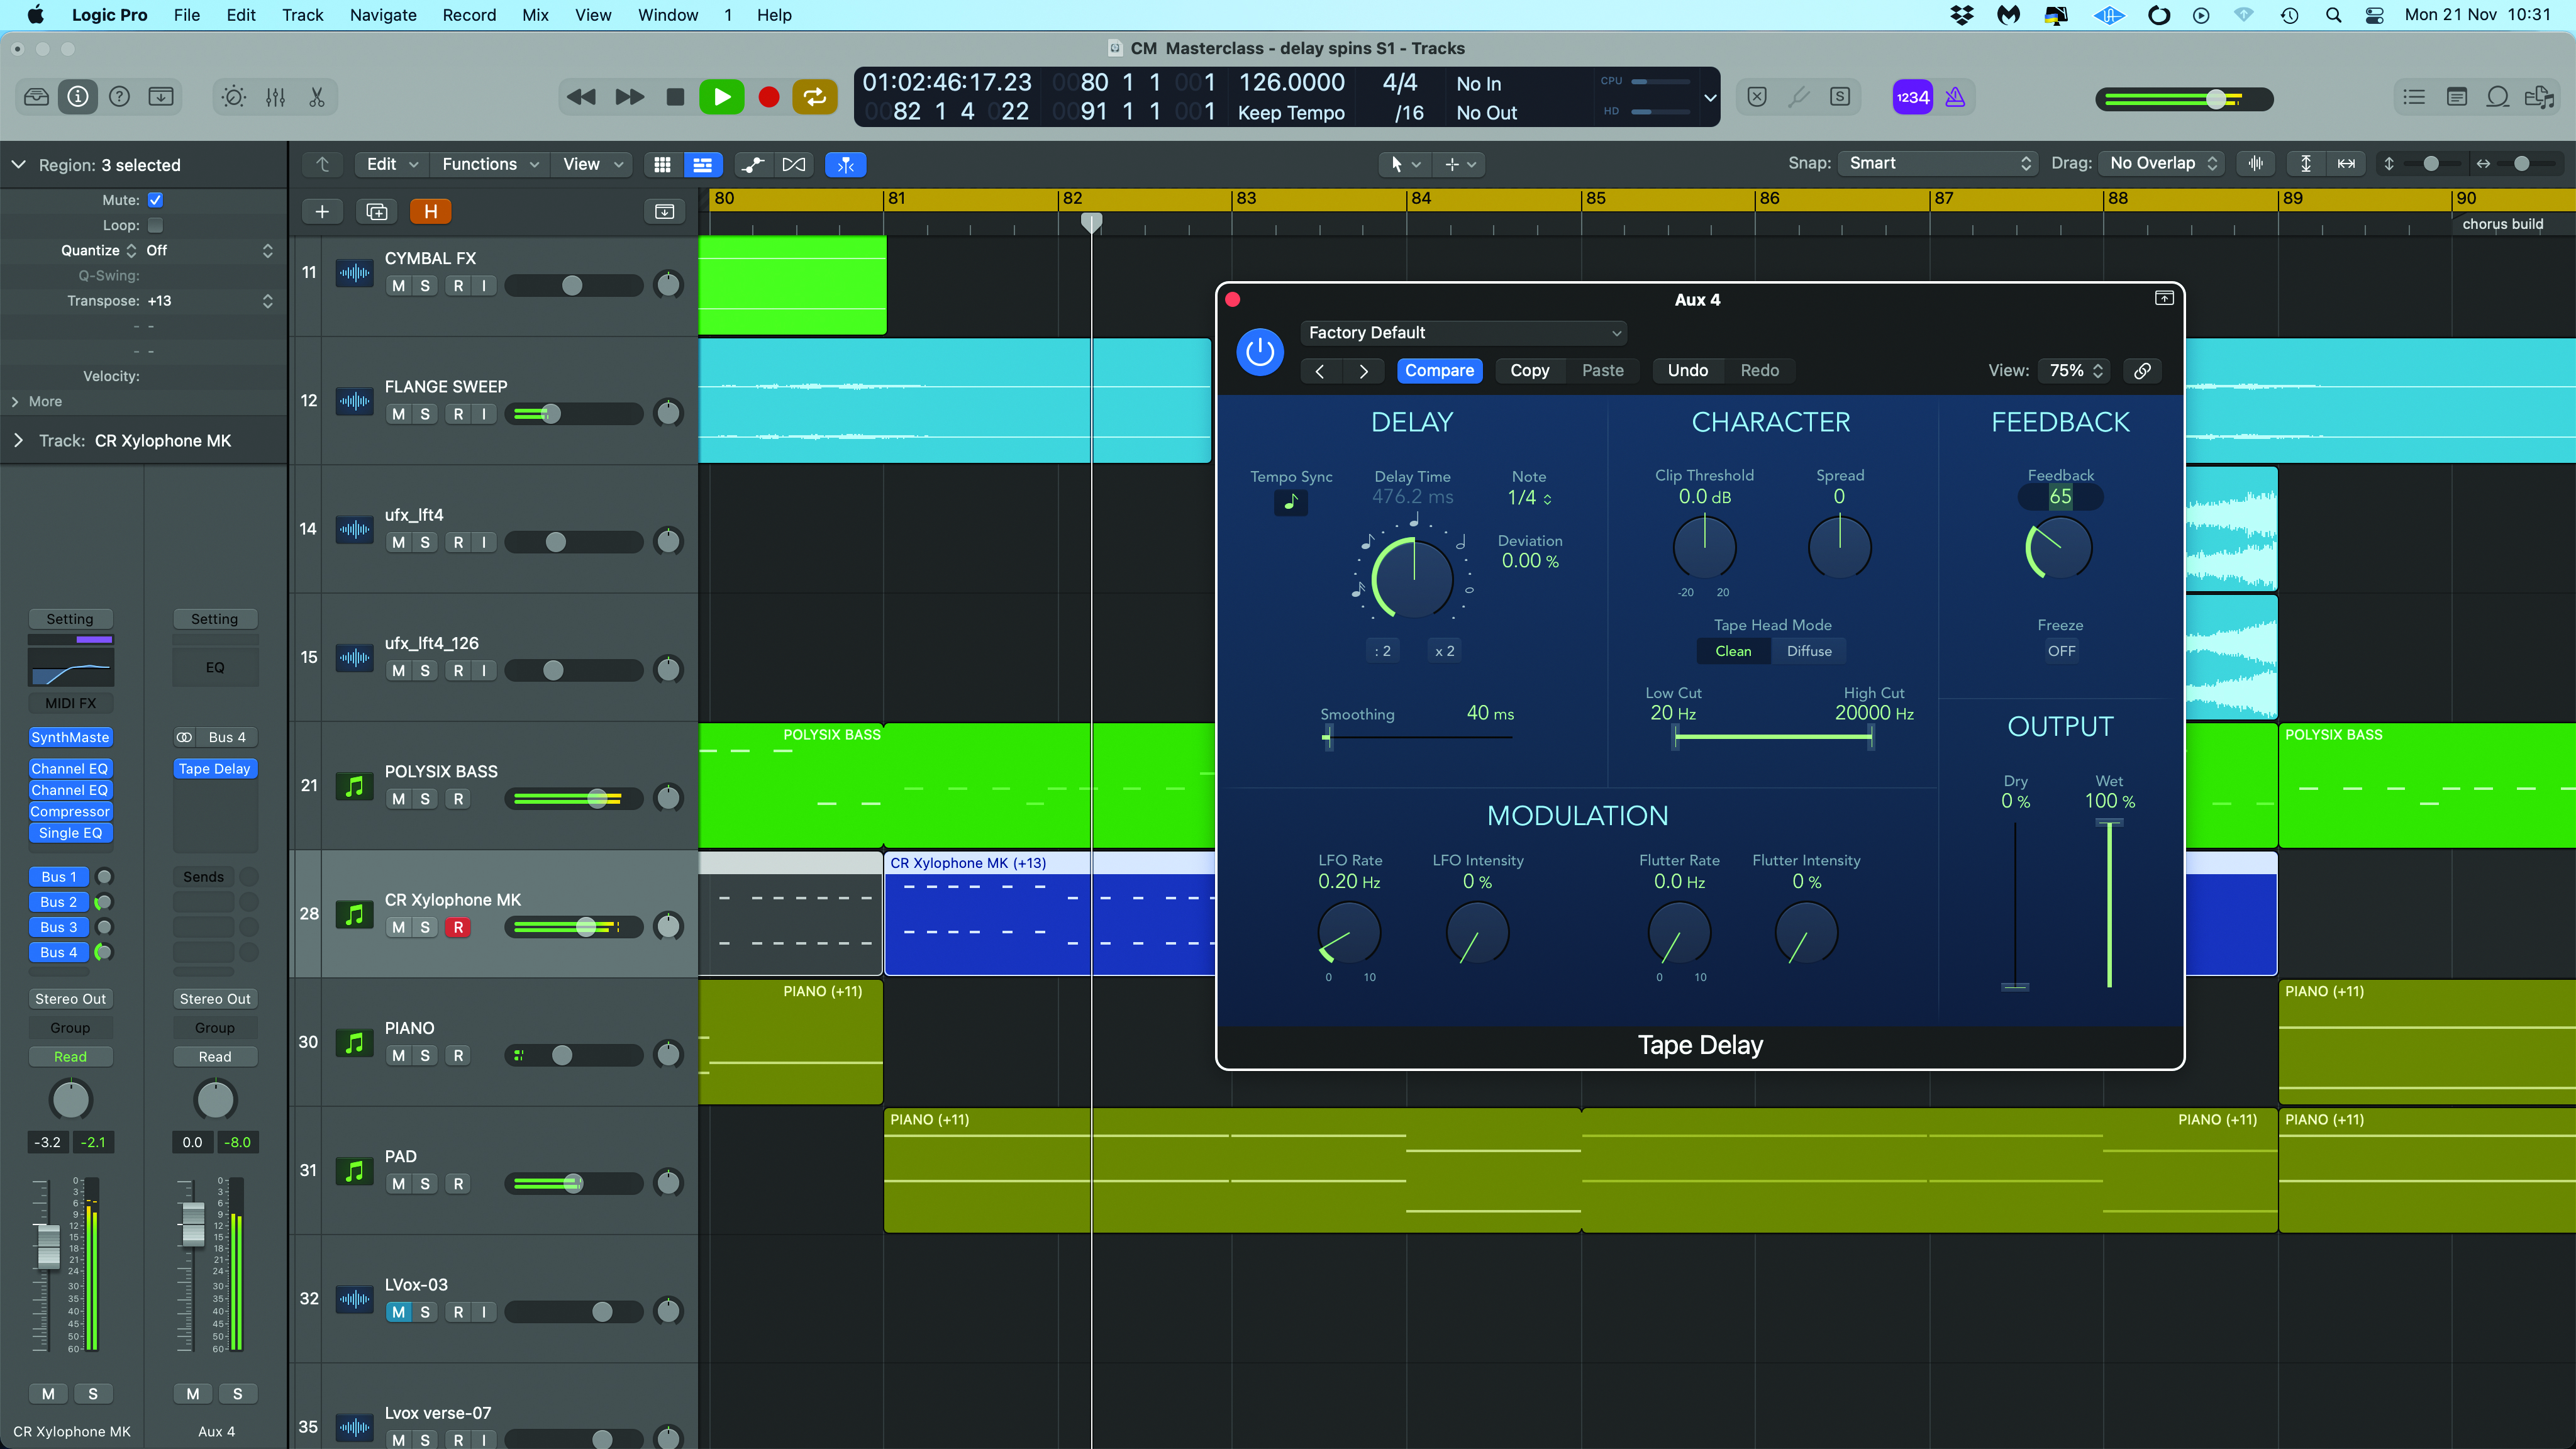
This should give you a good idea of what sort of send level you’re going to need, and also how much feedback. Set a low feedback setting if you just want a subtle echo. For more featured spins, as we’re going for here, you’ll need a higher setting (ours is on about 65%).
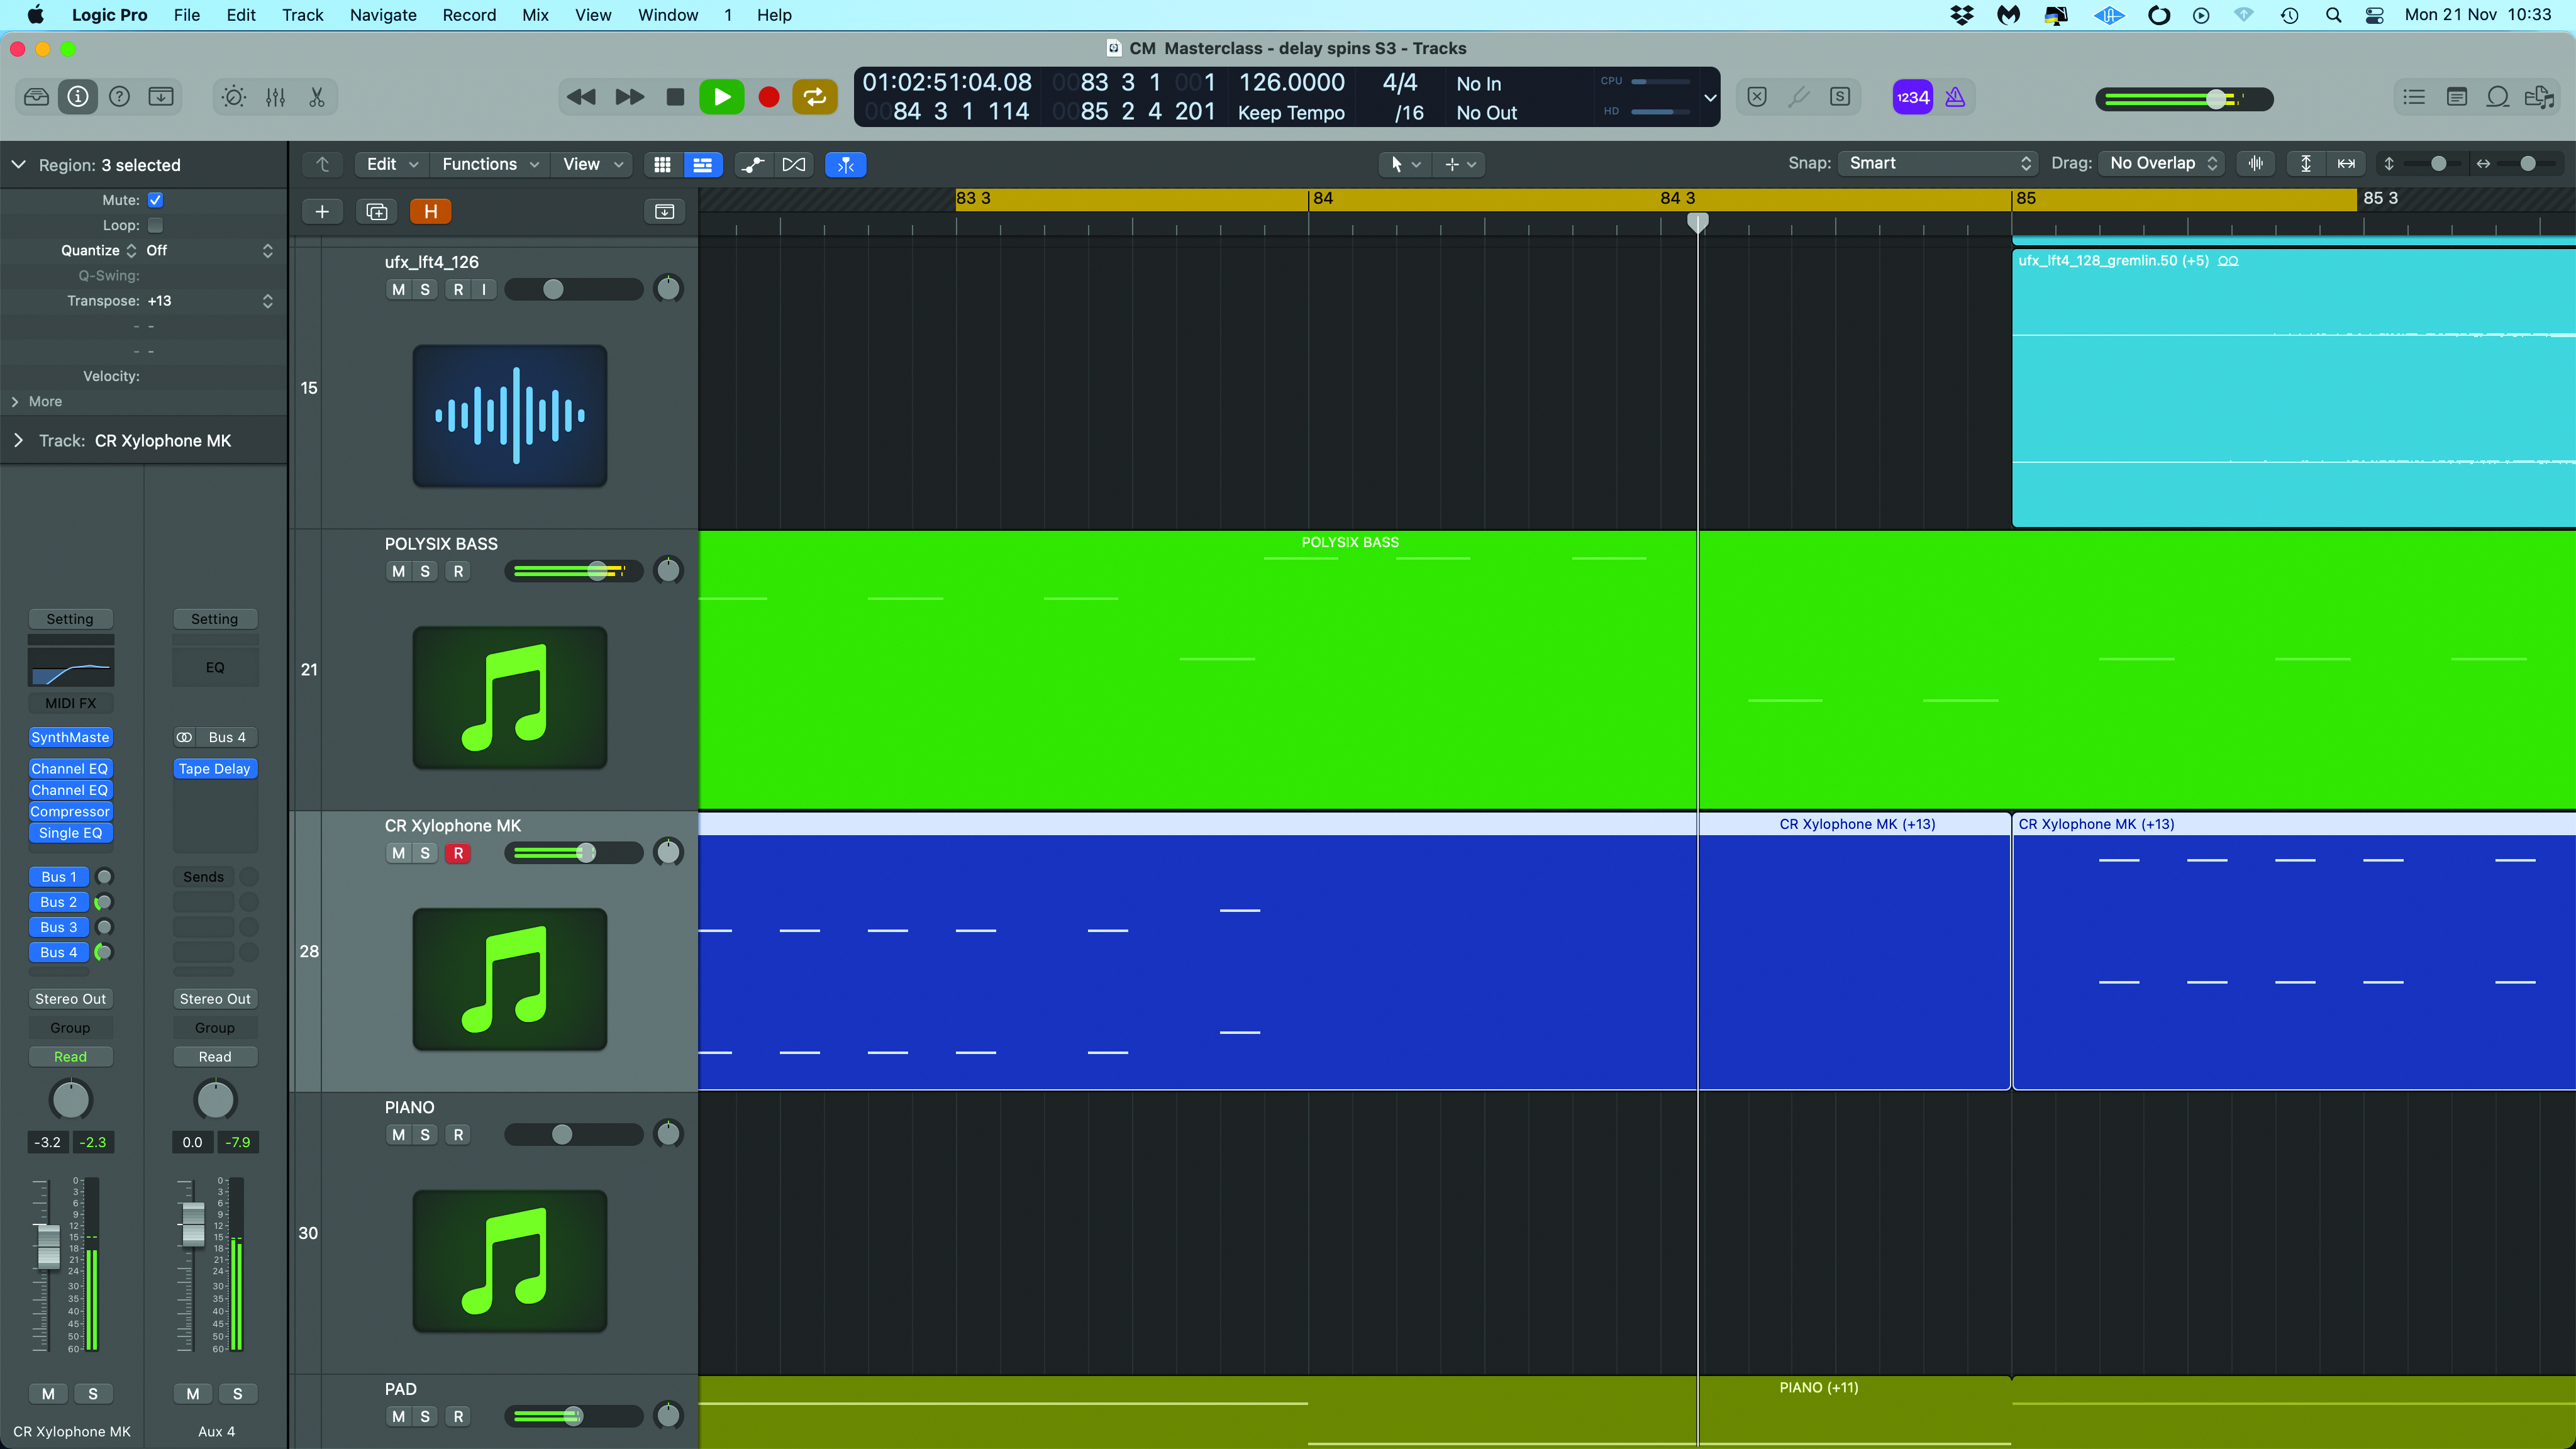
With the delay set up, the next task is to pinpoint the sections to process. As mentioned, we typically add spins at the end of phrases to emphasise words or notes. For our example xylophone part, we’ve zoned in on a specific point and this is a single note at the end of the phrase.

Try the spins out manually by sending some level in real time. This gives a quick idea if the idea will work. If you’re confident with your DAW automation you could also write these moves in at the same time. Alternatively, you could draw them in manually once you’re happy with the sections.
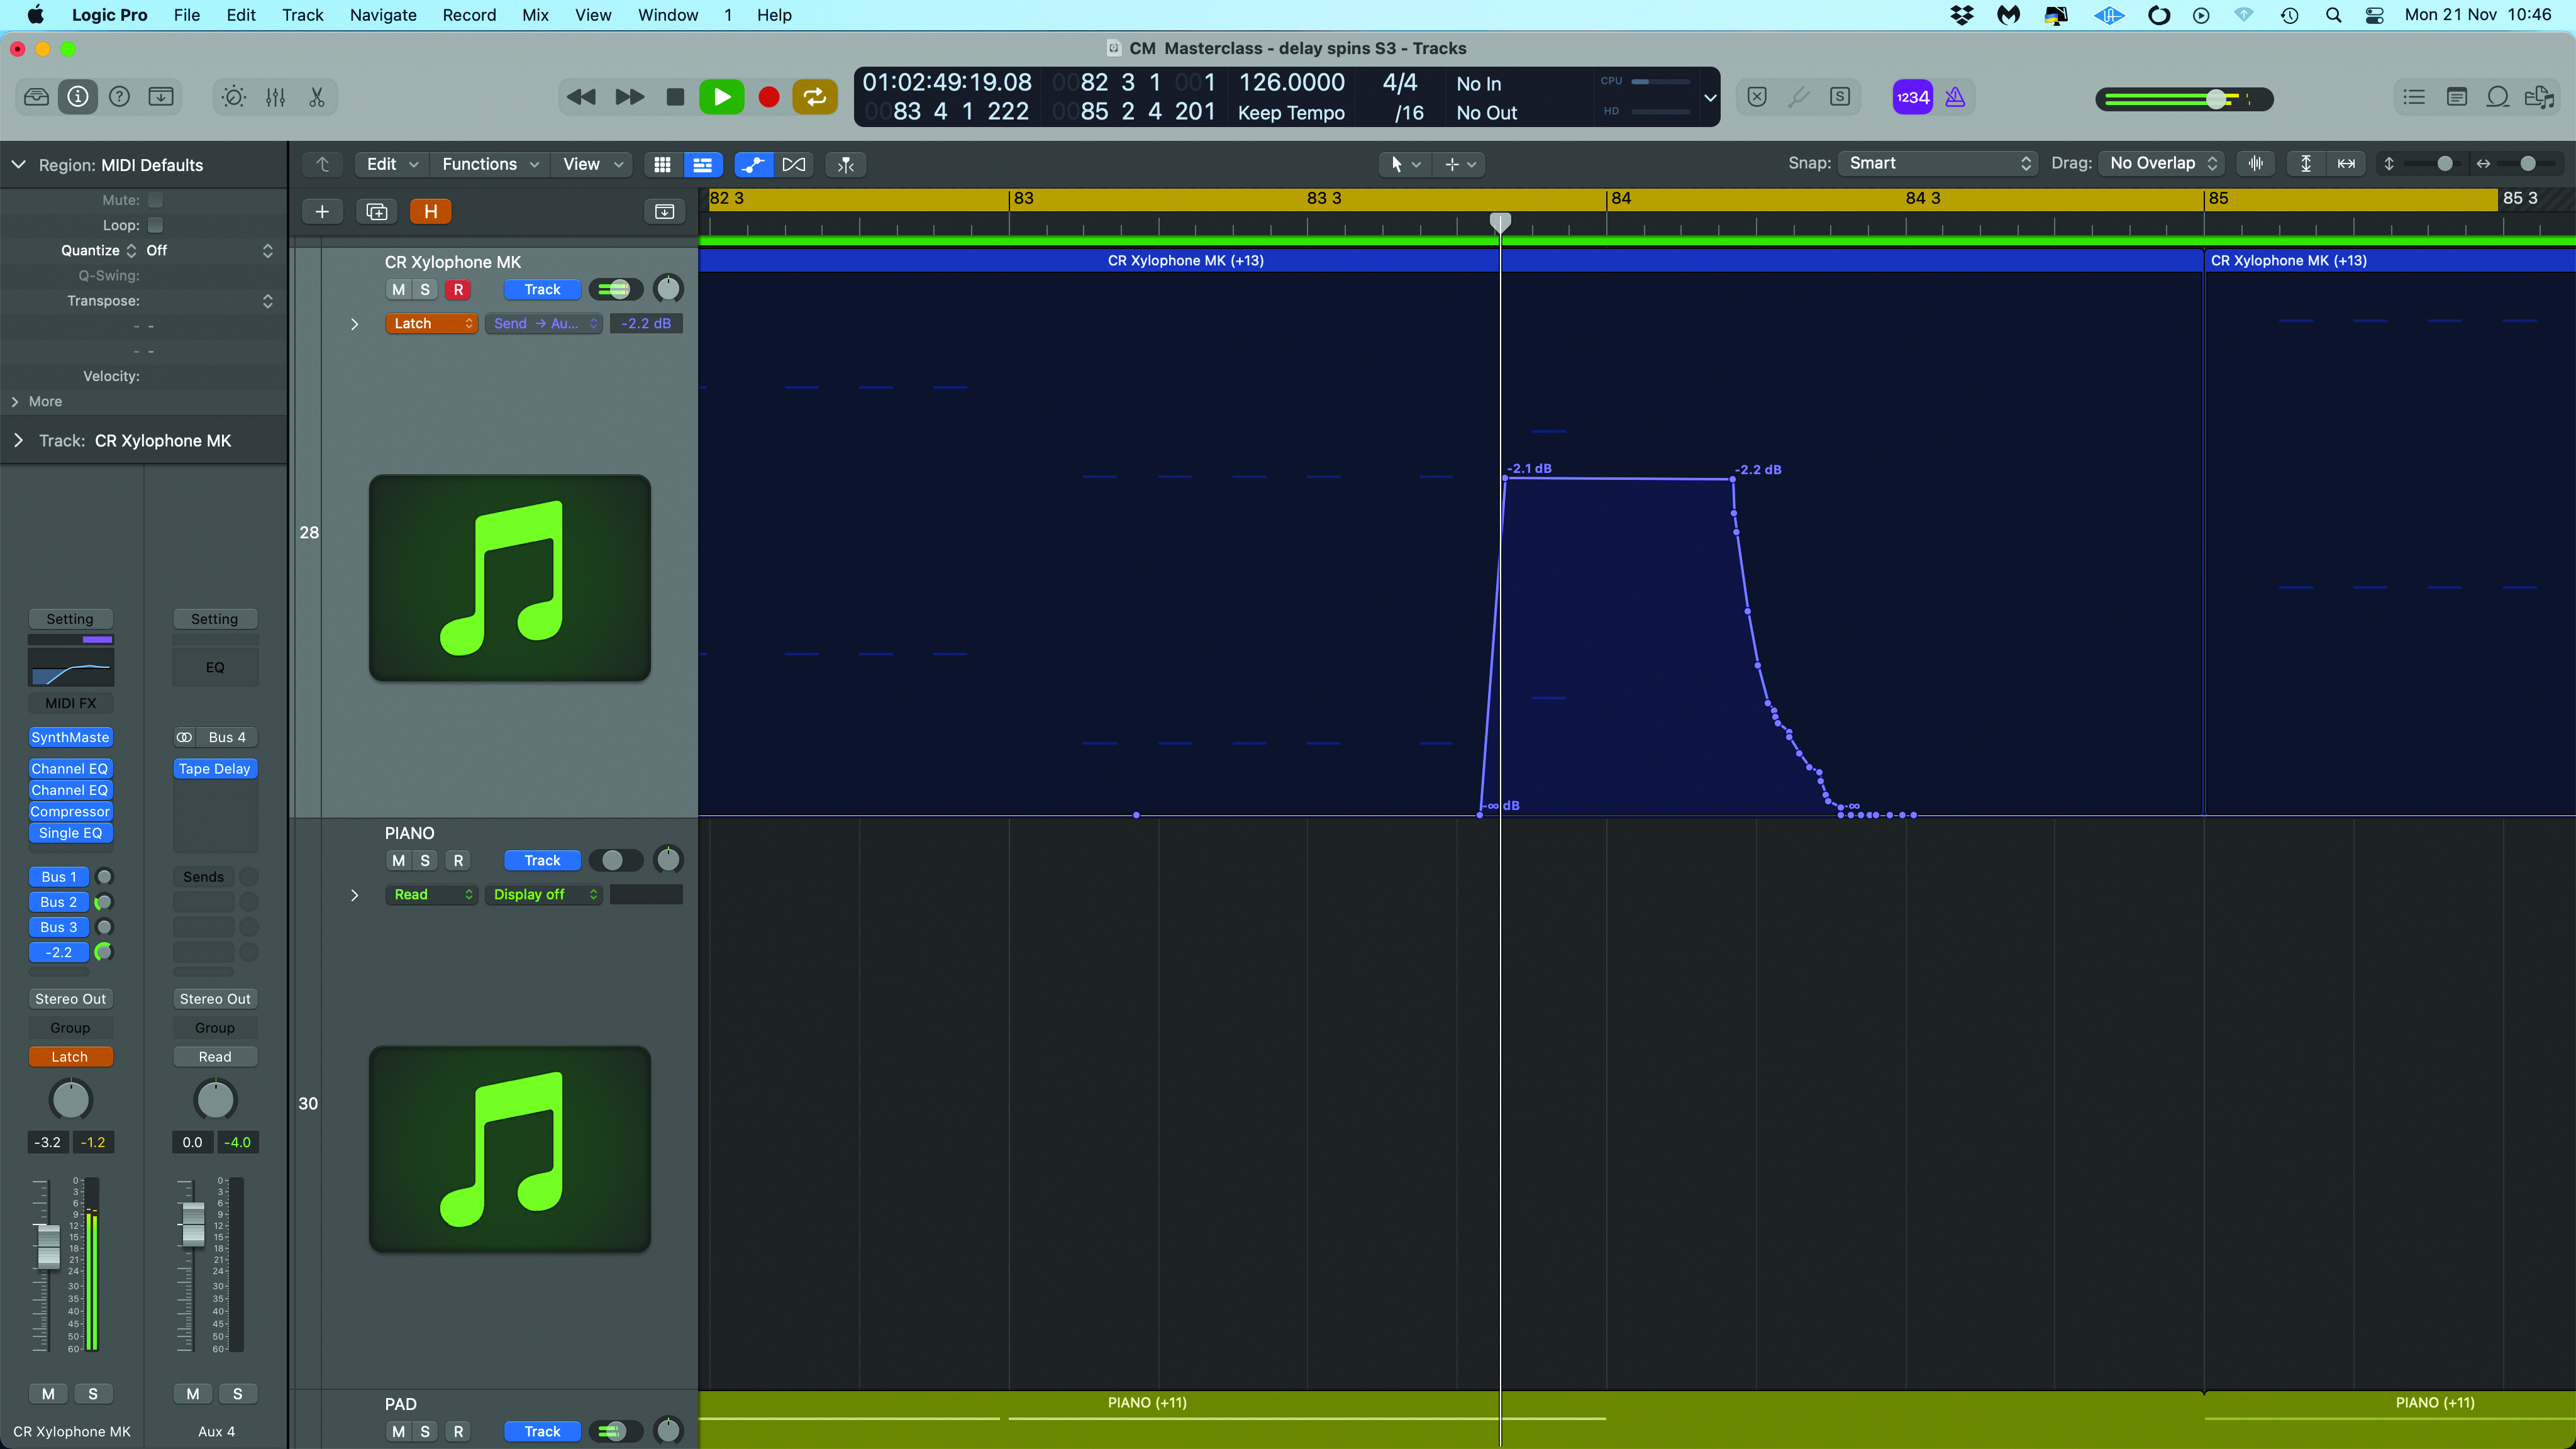
Finally, finesse the send automation. Often this only involves working on the send level. However, with vocal parts it can be more tricky, particularly if you’re using a small snippet of a word rather than the whole word. Either way, try shaping the send level automation to achieve the desired outcome.
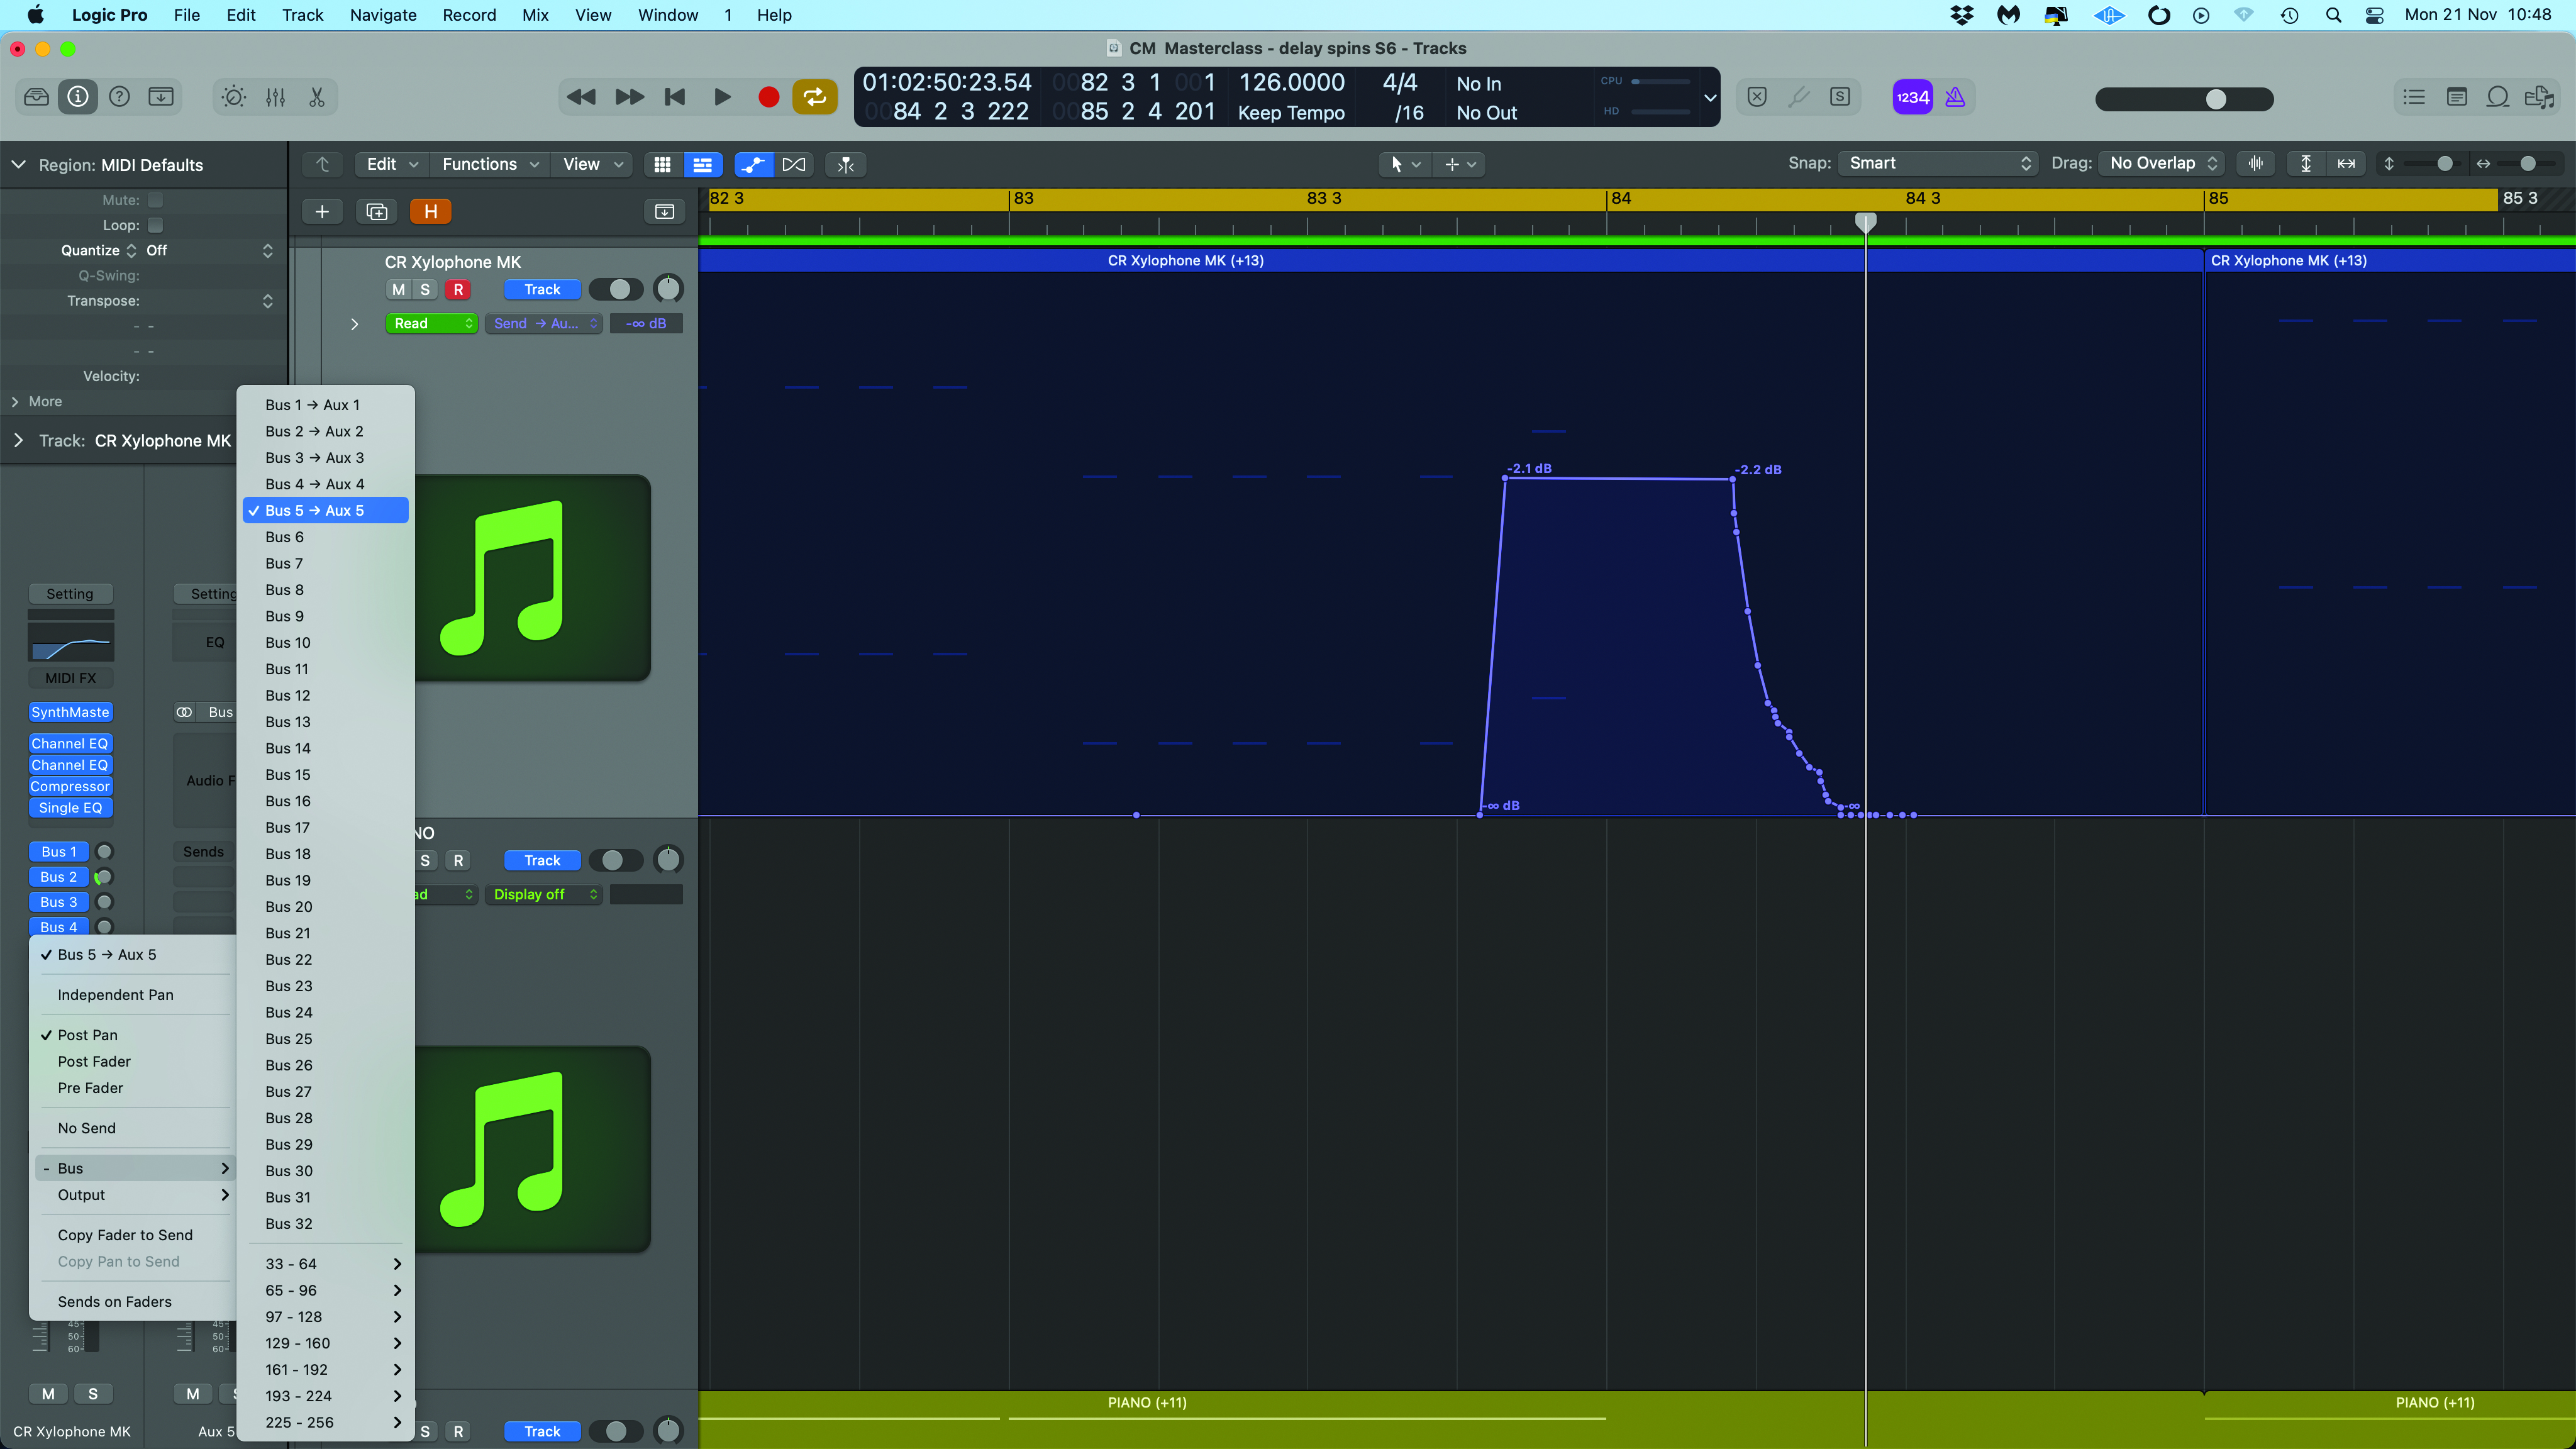
As you work through potential spins, it’s sometimes clear that different snippets need different delay timings, and it can work really well having targeted delay timings for specific points in the track. The easiest way to achieve this is to set up additional delays on fresh auxiliaries.
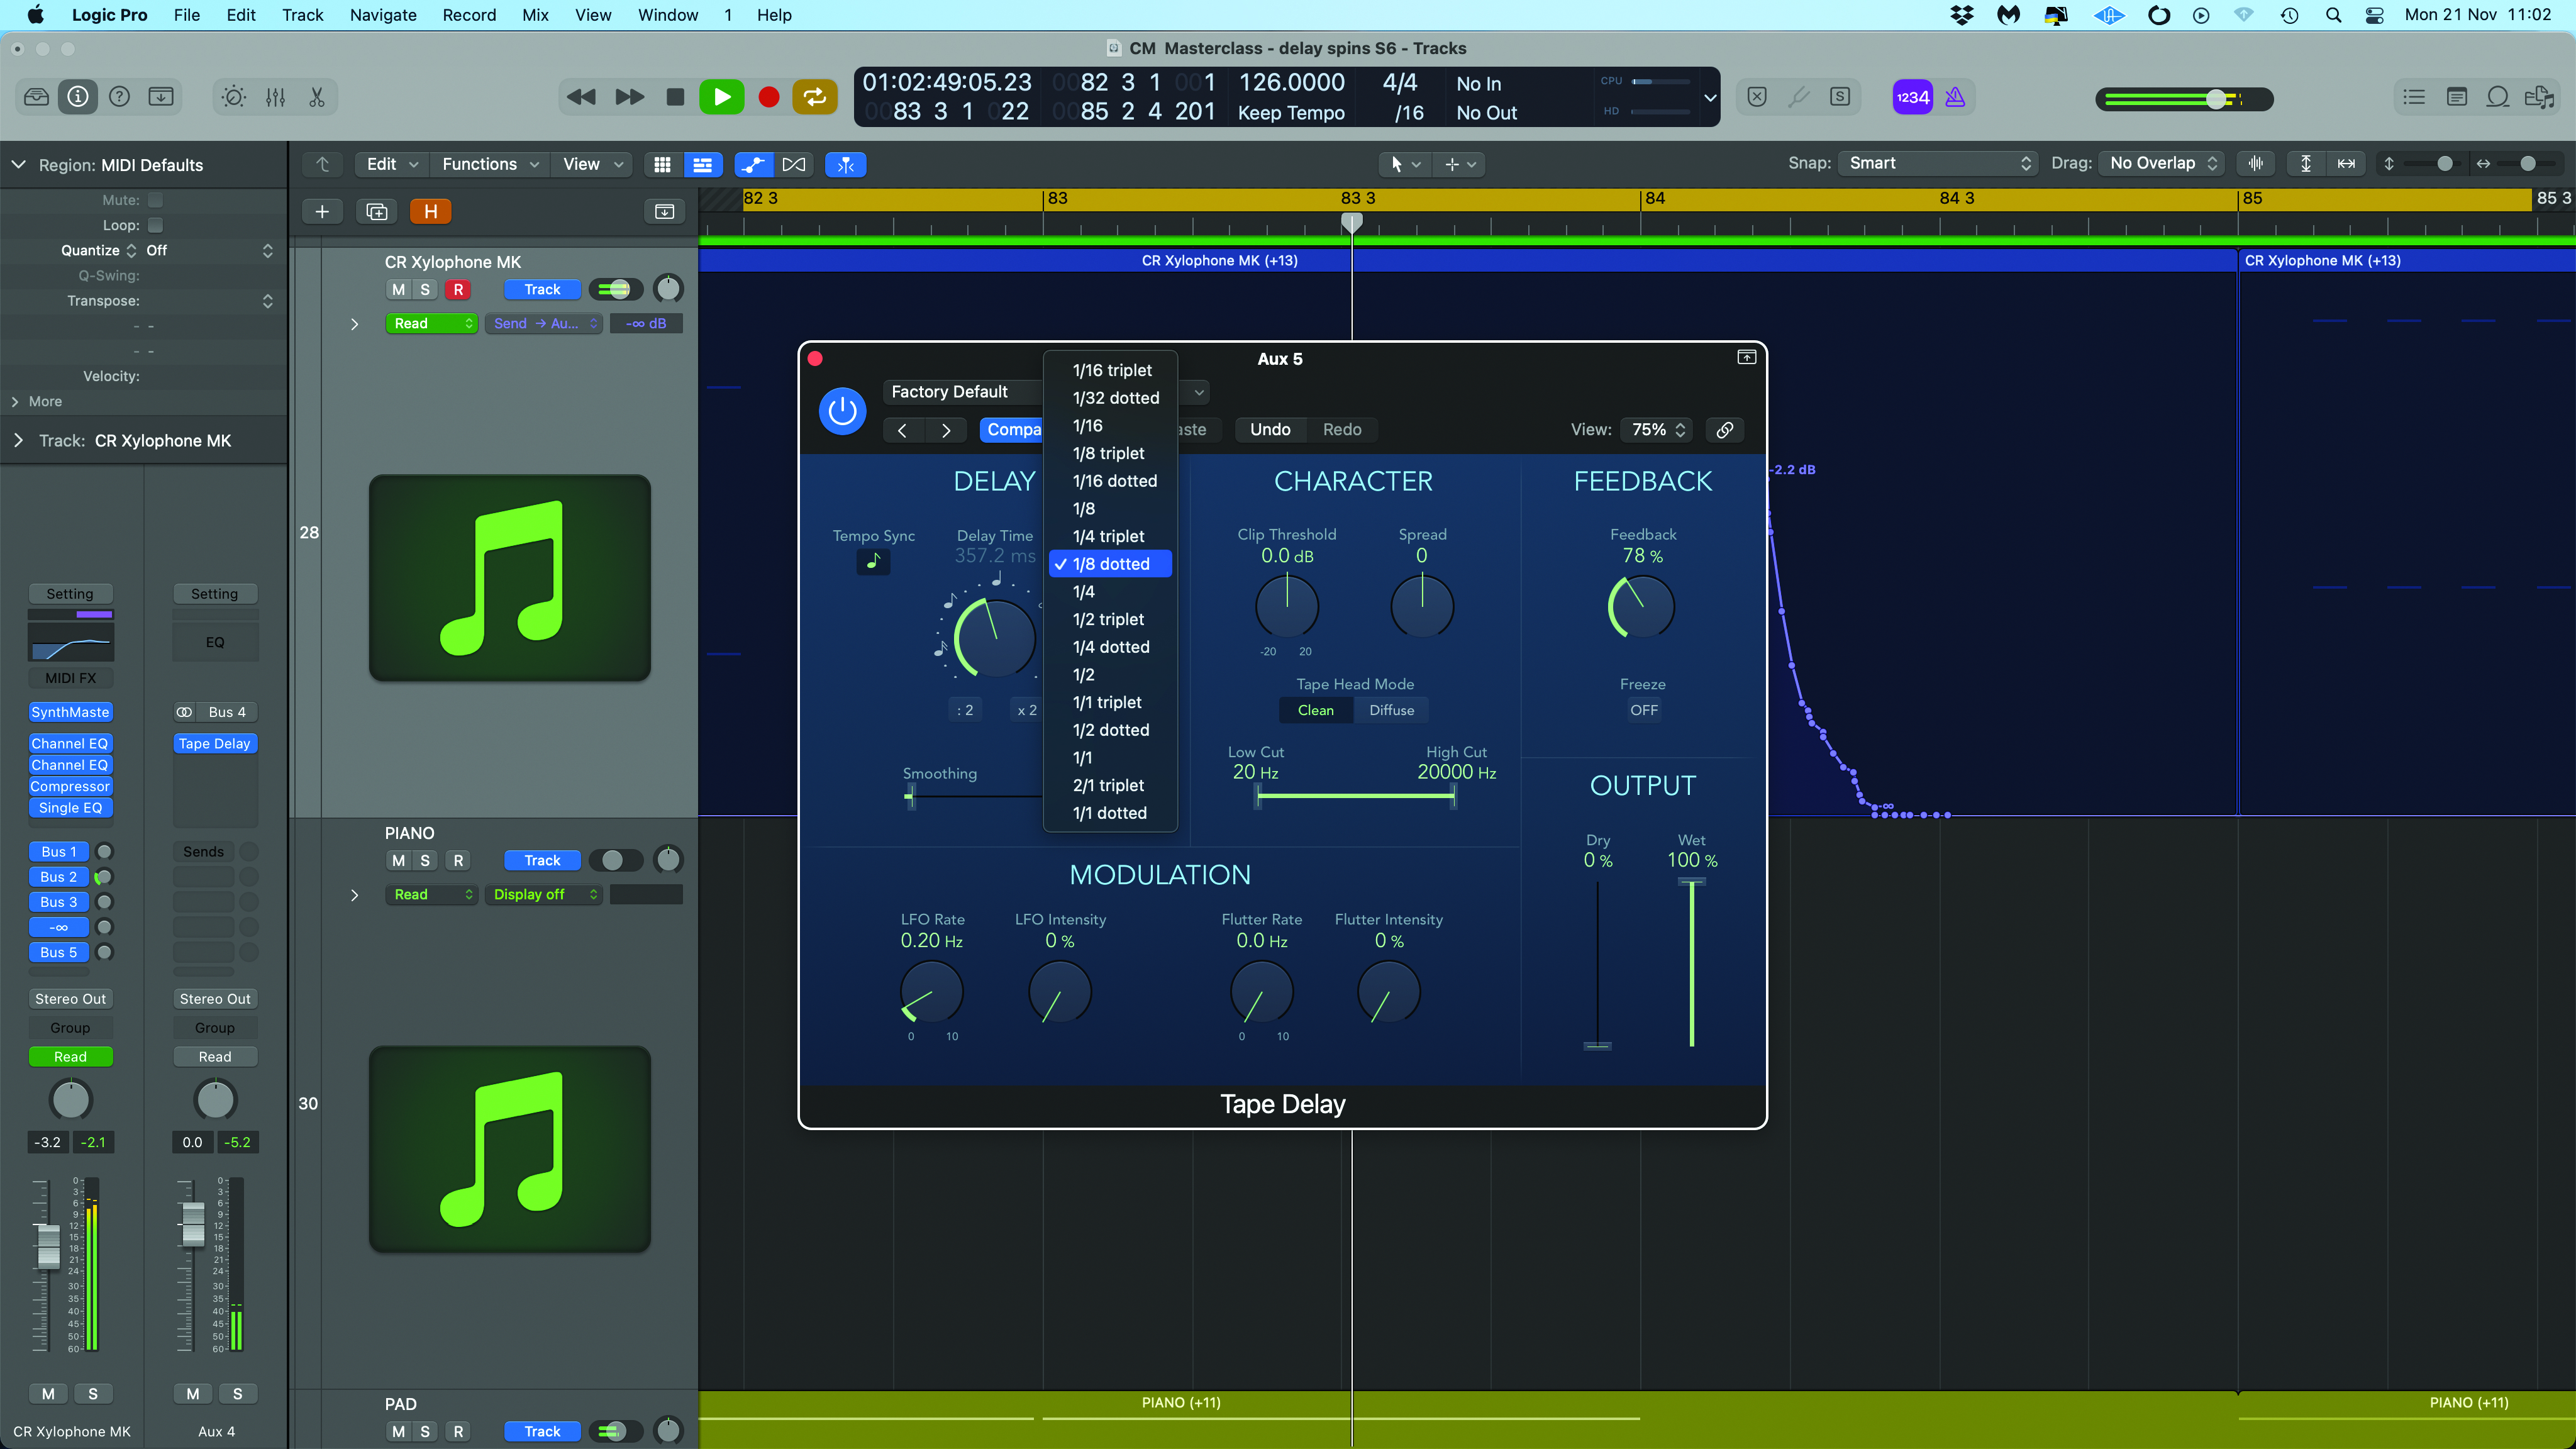
In addition to quarter notes, synced delays that work well include half note or even three 16ths (a dotted eighth note), and this latter option is great when the track has a swing feel or you want to enhance that feel. Work your way through the track trying out different timings on different sections and different parts.
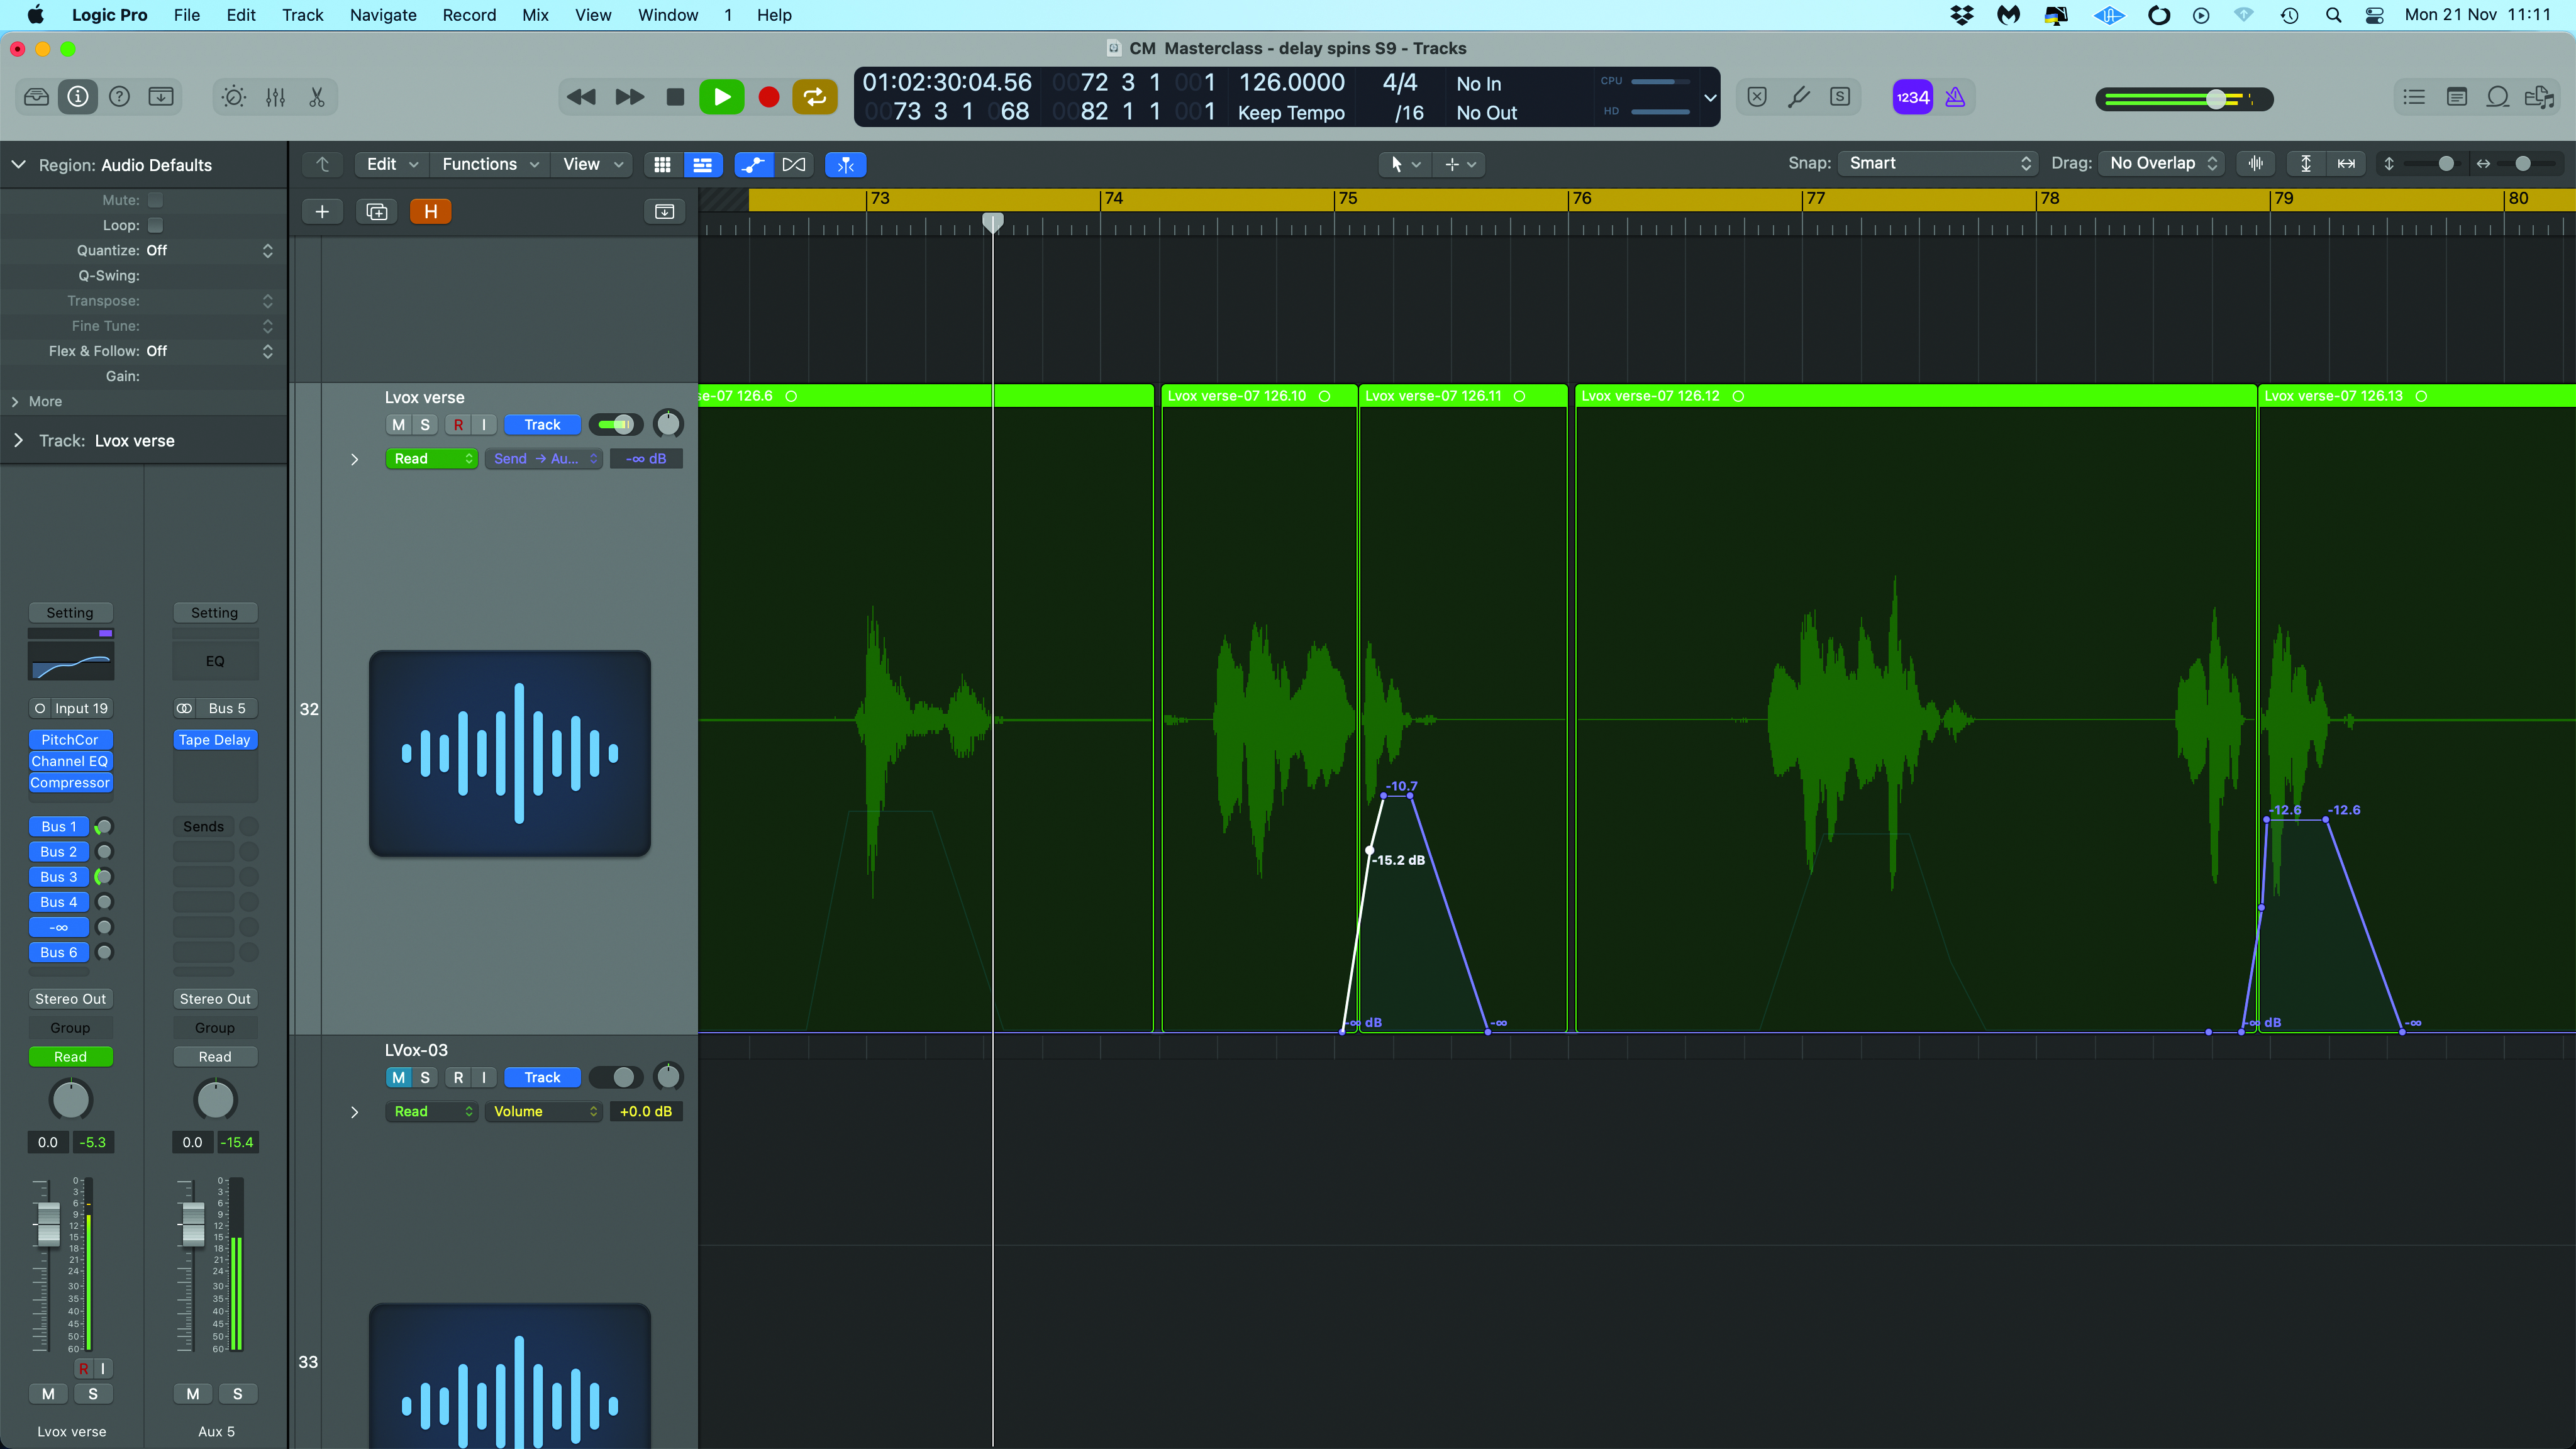
Once again, when you’re happy, commit the send levels to automation in whichever way works best for you, and finesse the automation as before. Here for our vocal we’ve used a mixture of quarter note and half note spins, adding them alternately at the ends of phrases.
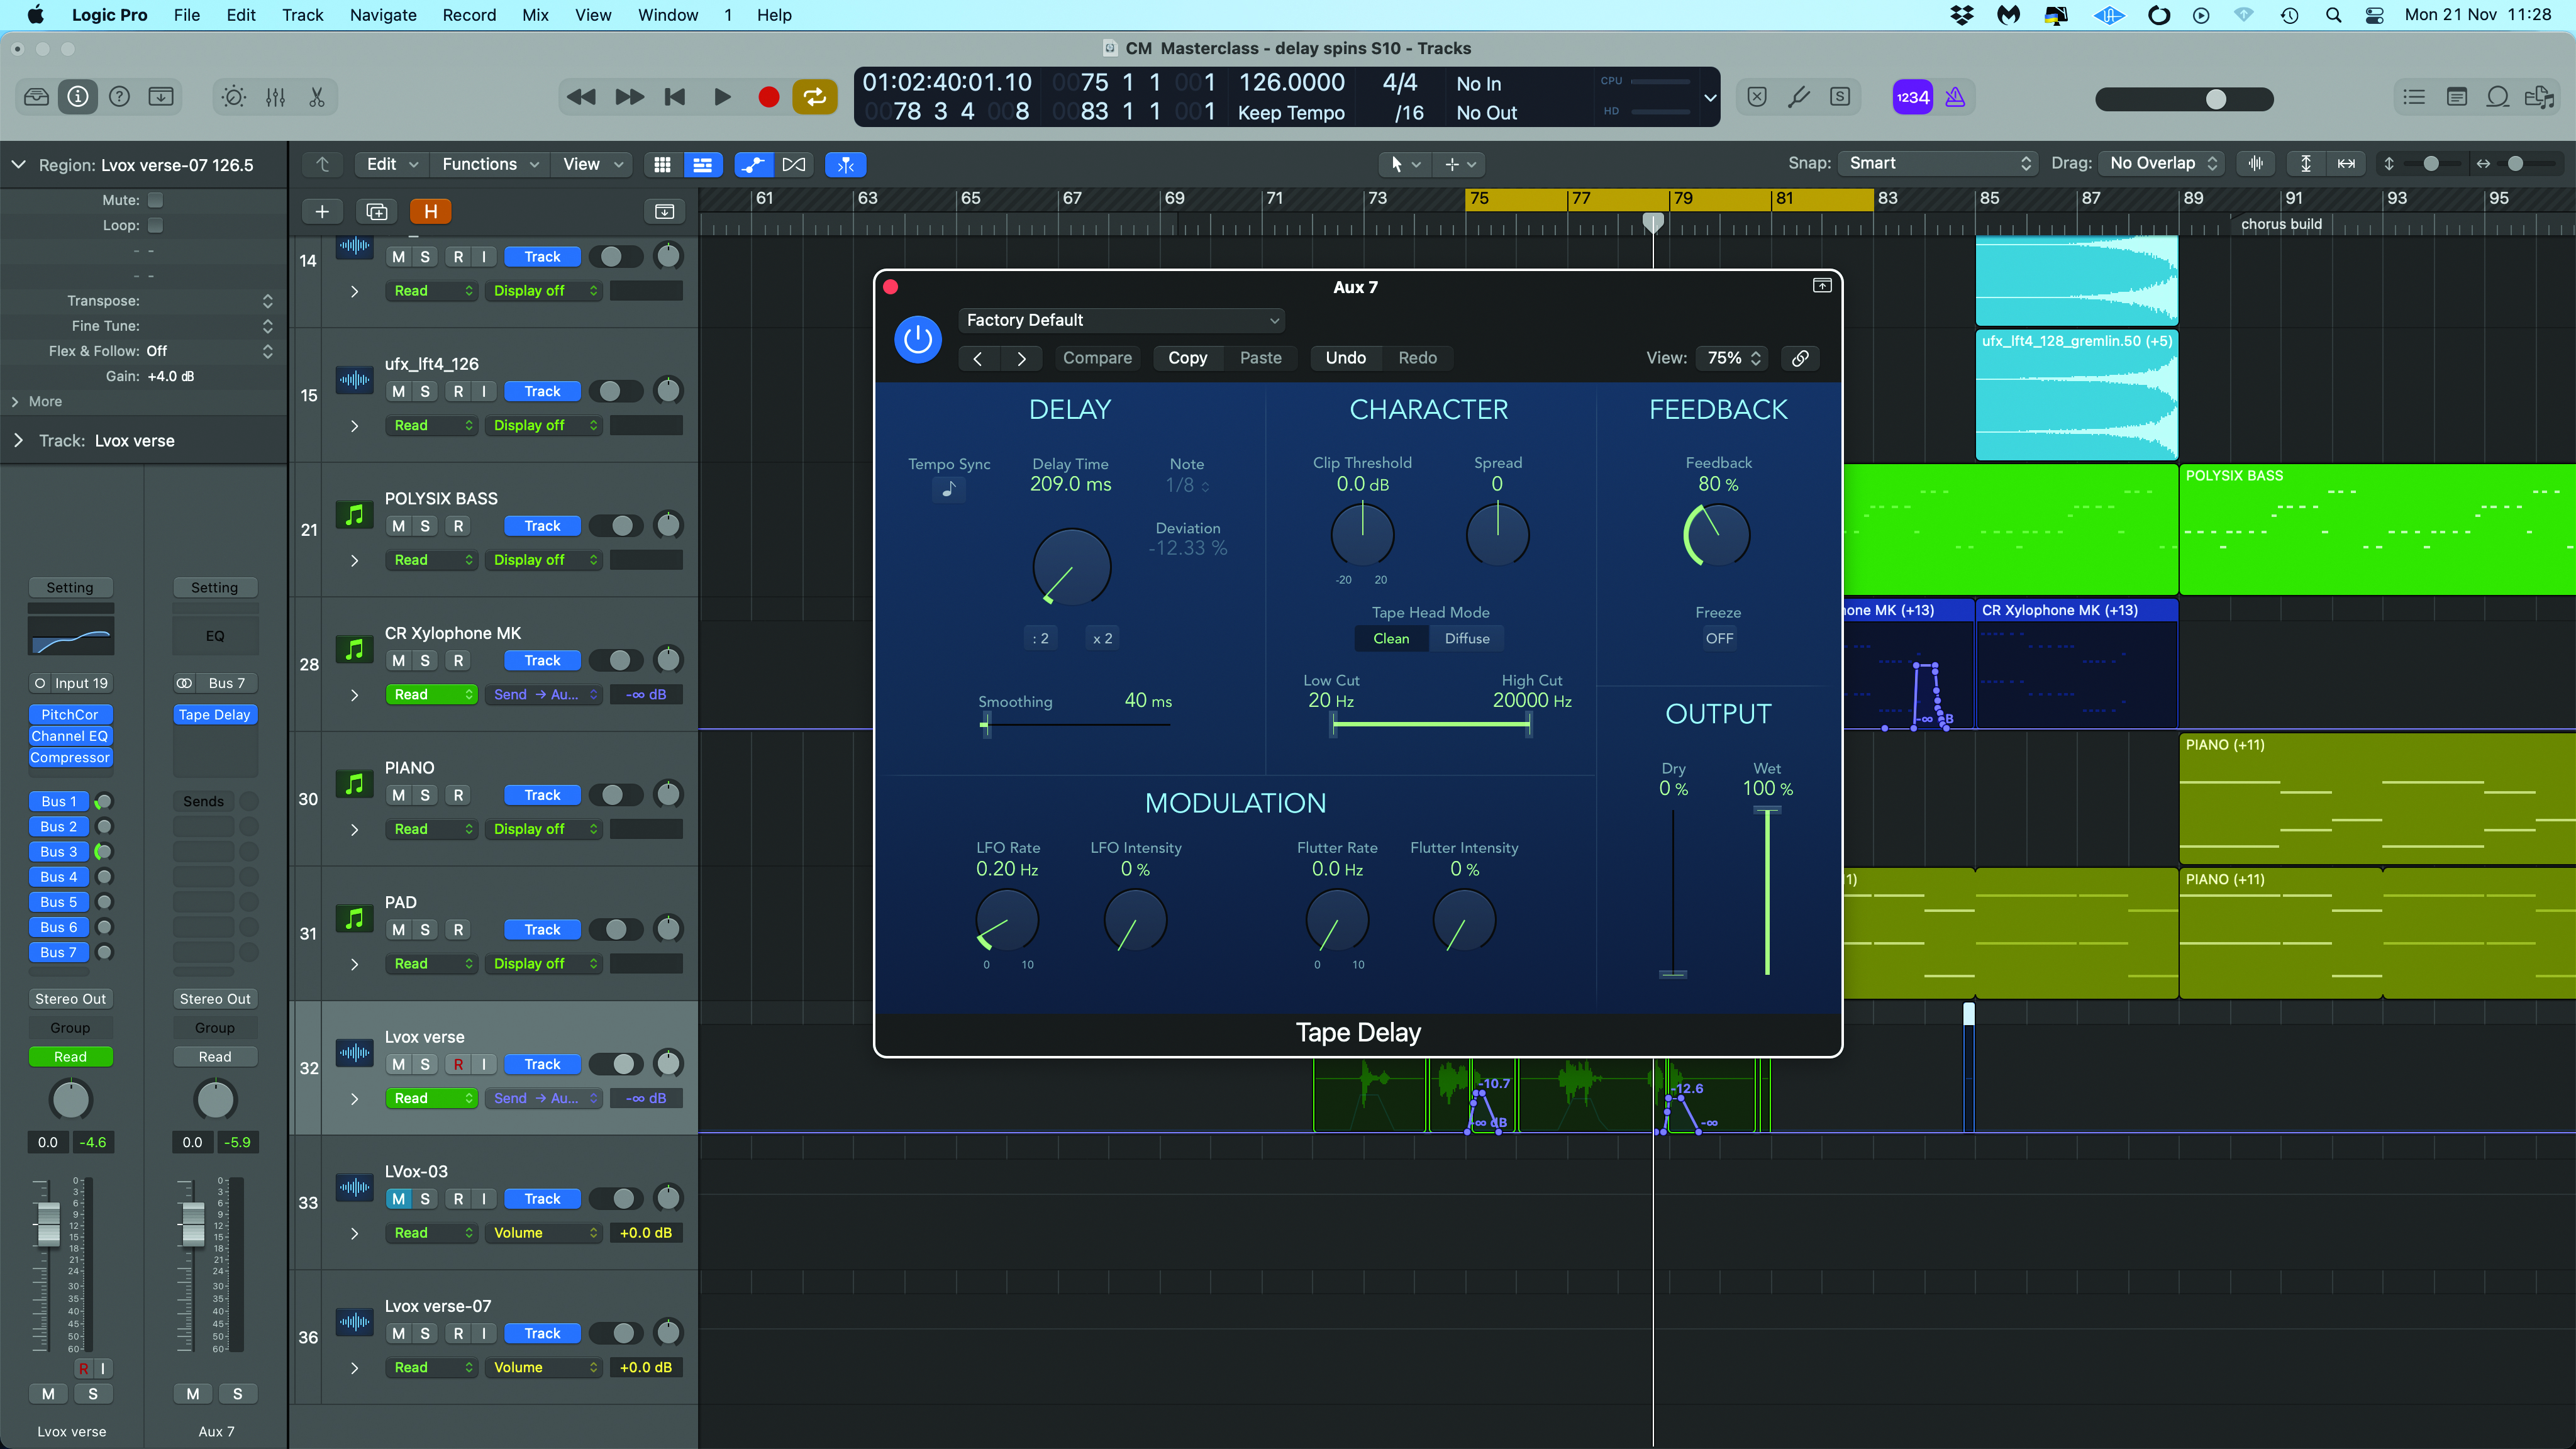
So far we’ve focused on tempo-synced delays, and most of the delay spins we use are tempo-synced. However, it is possible to use free time delays as well. Unsurprisingly, these don’t work particularly well for longer delays. However, for shorter delays they provide a great way to create interest or fill gaps.
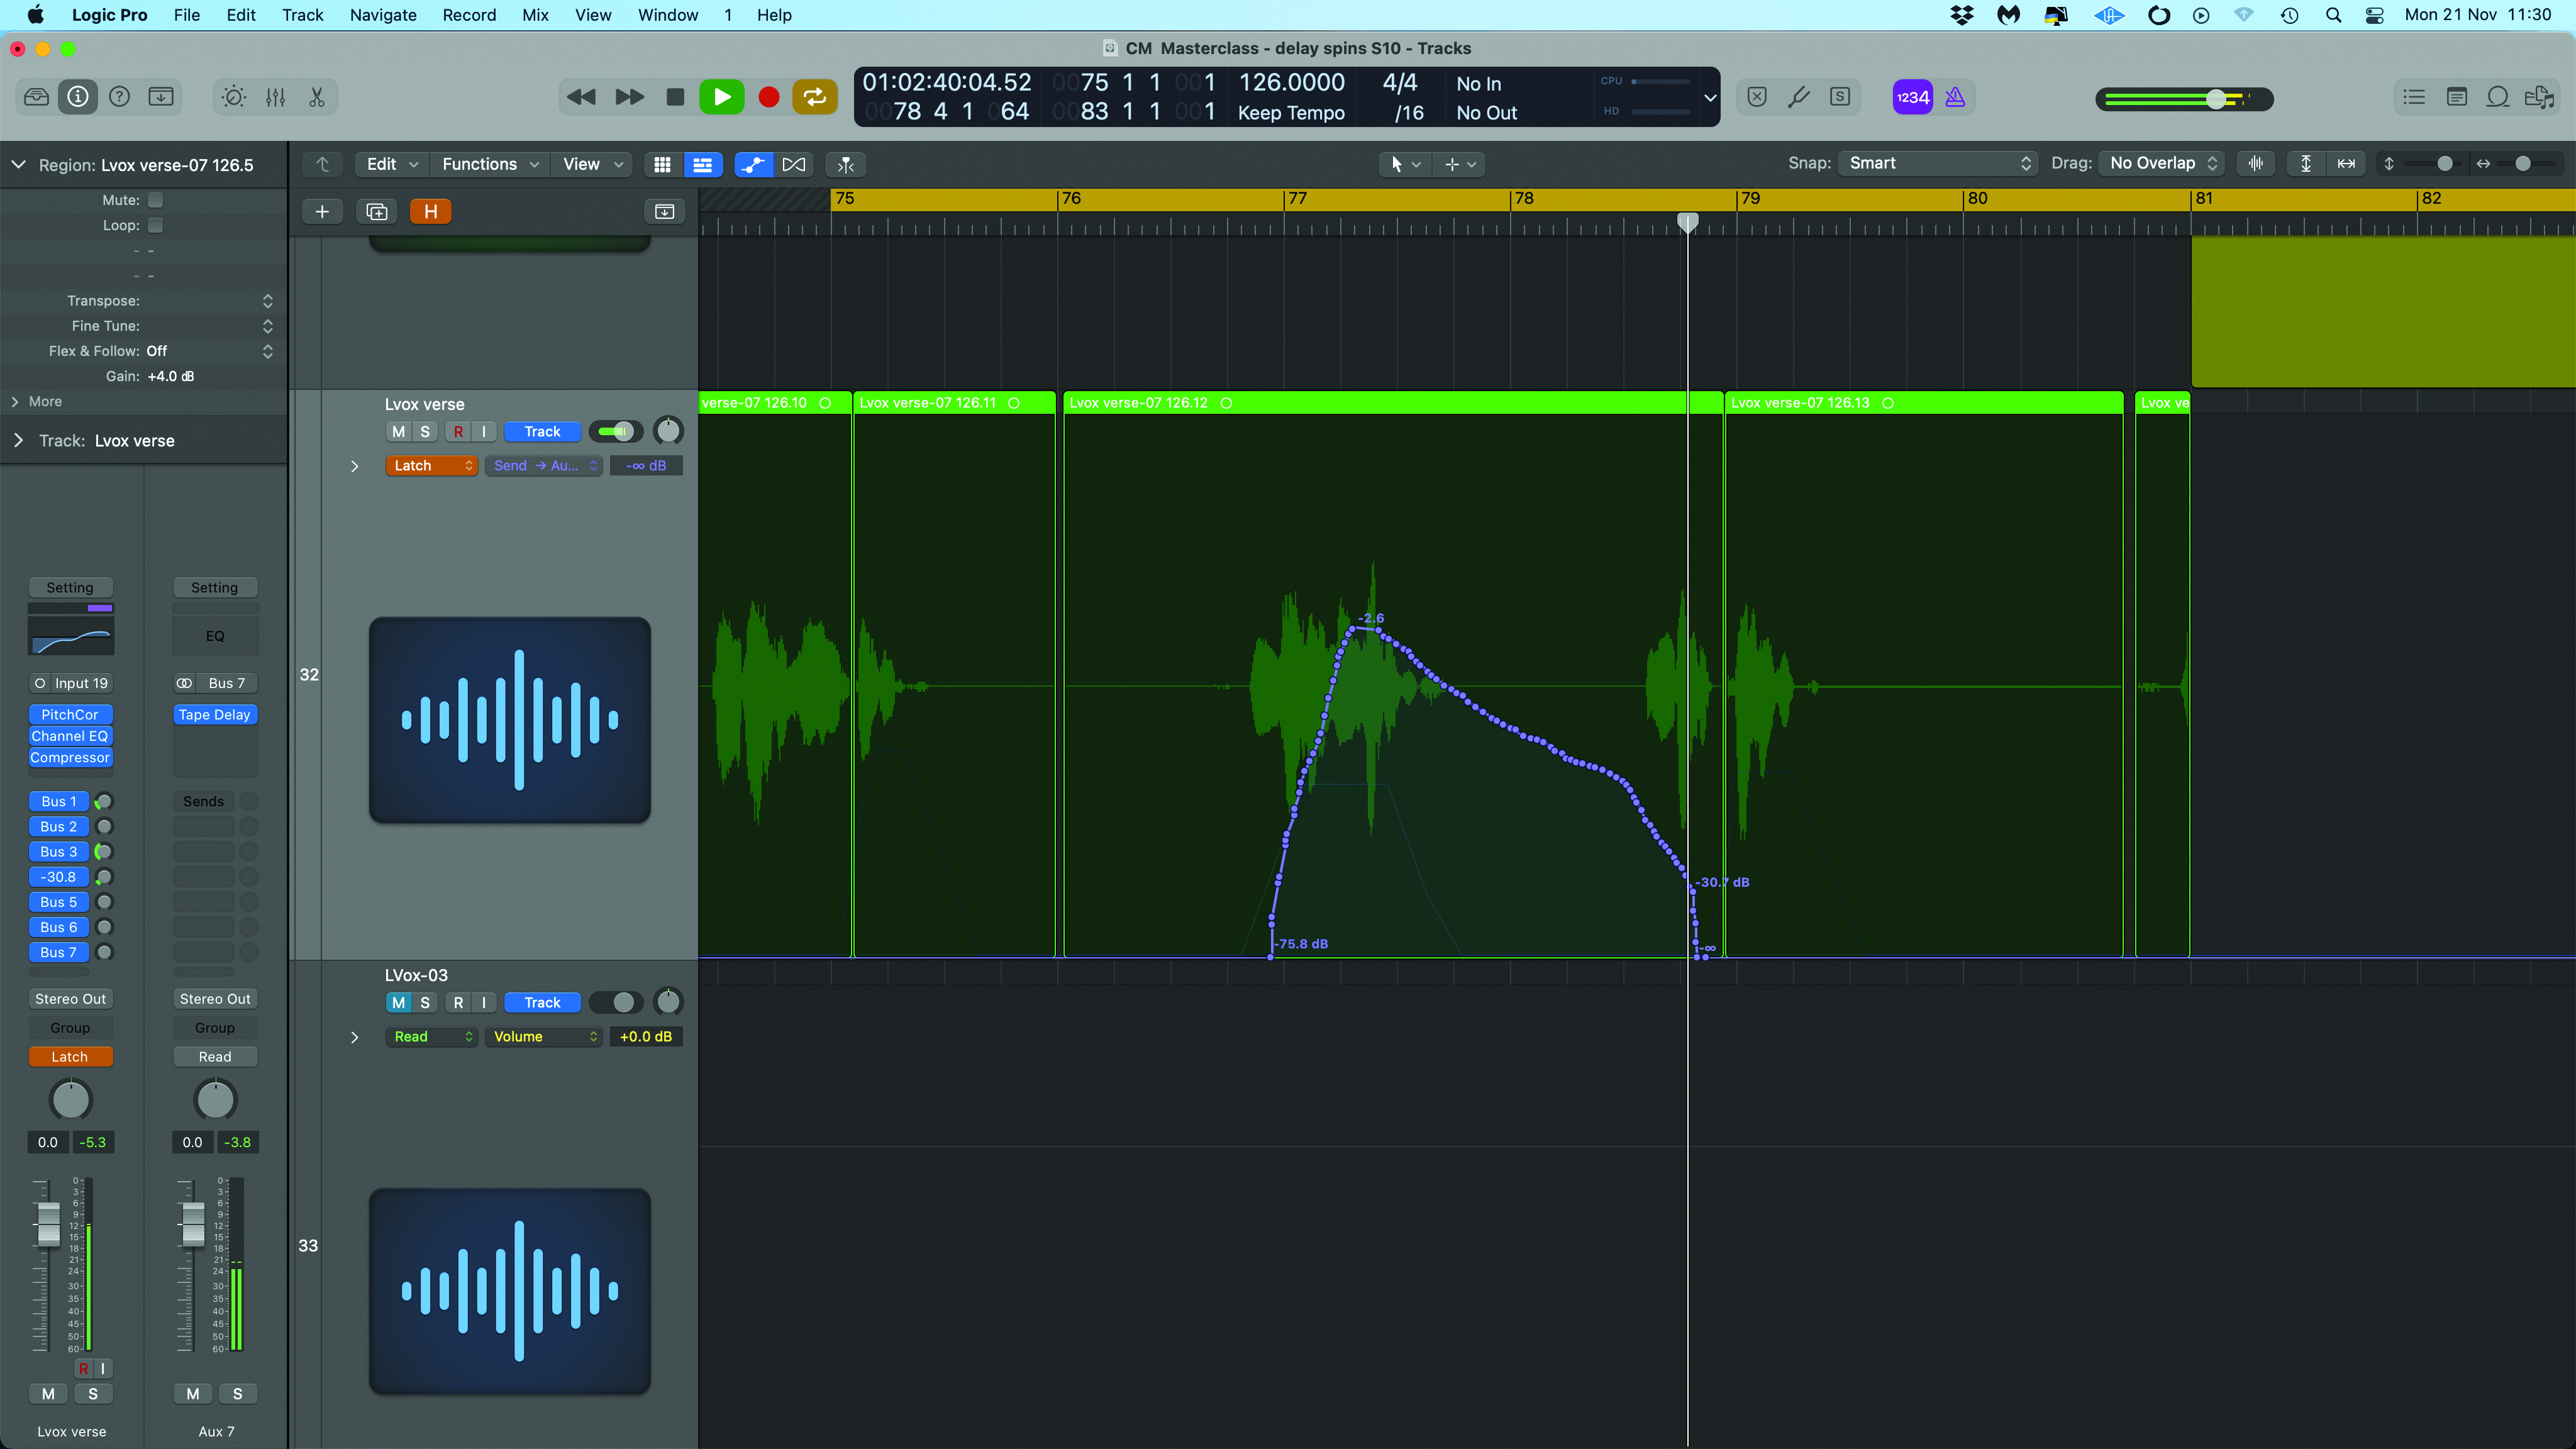
The timing of the delay will roughly depend on the tempo of the track. Here the example track is at 126bpm and we’ve set the delay at about 210ms to start with. The plan is to create a slightly chaotic delay spin with a decent feedback level that builds quickly and then dies away quickly.
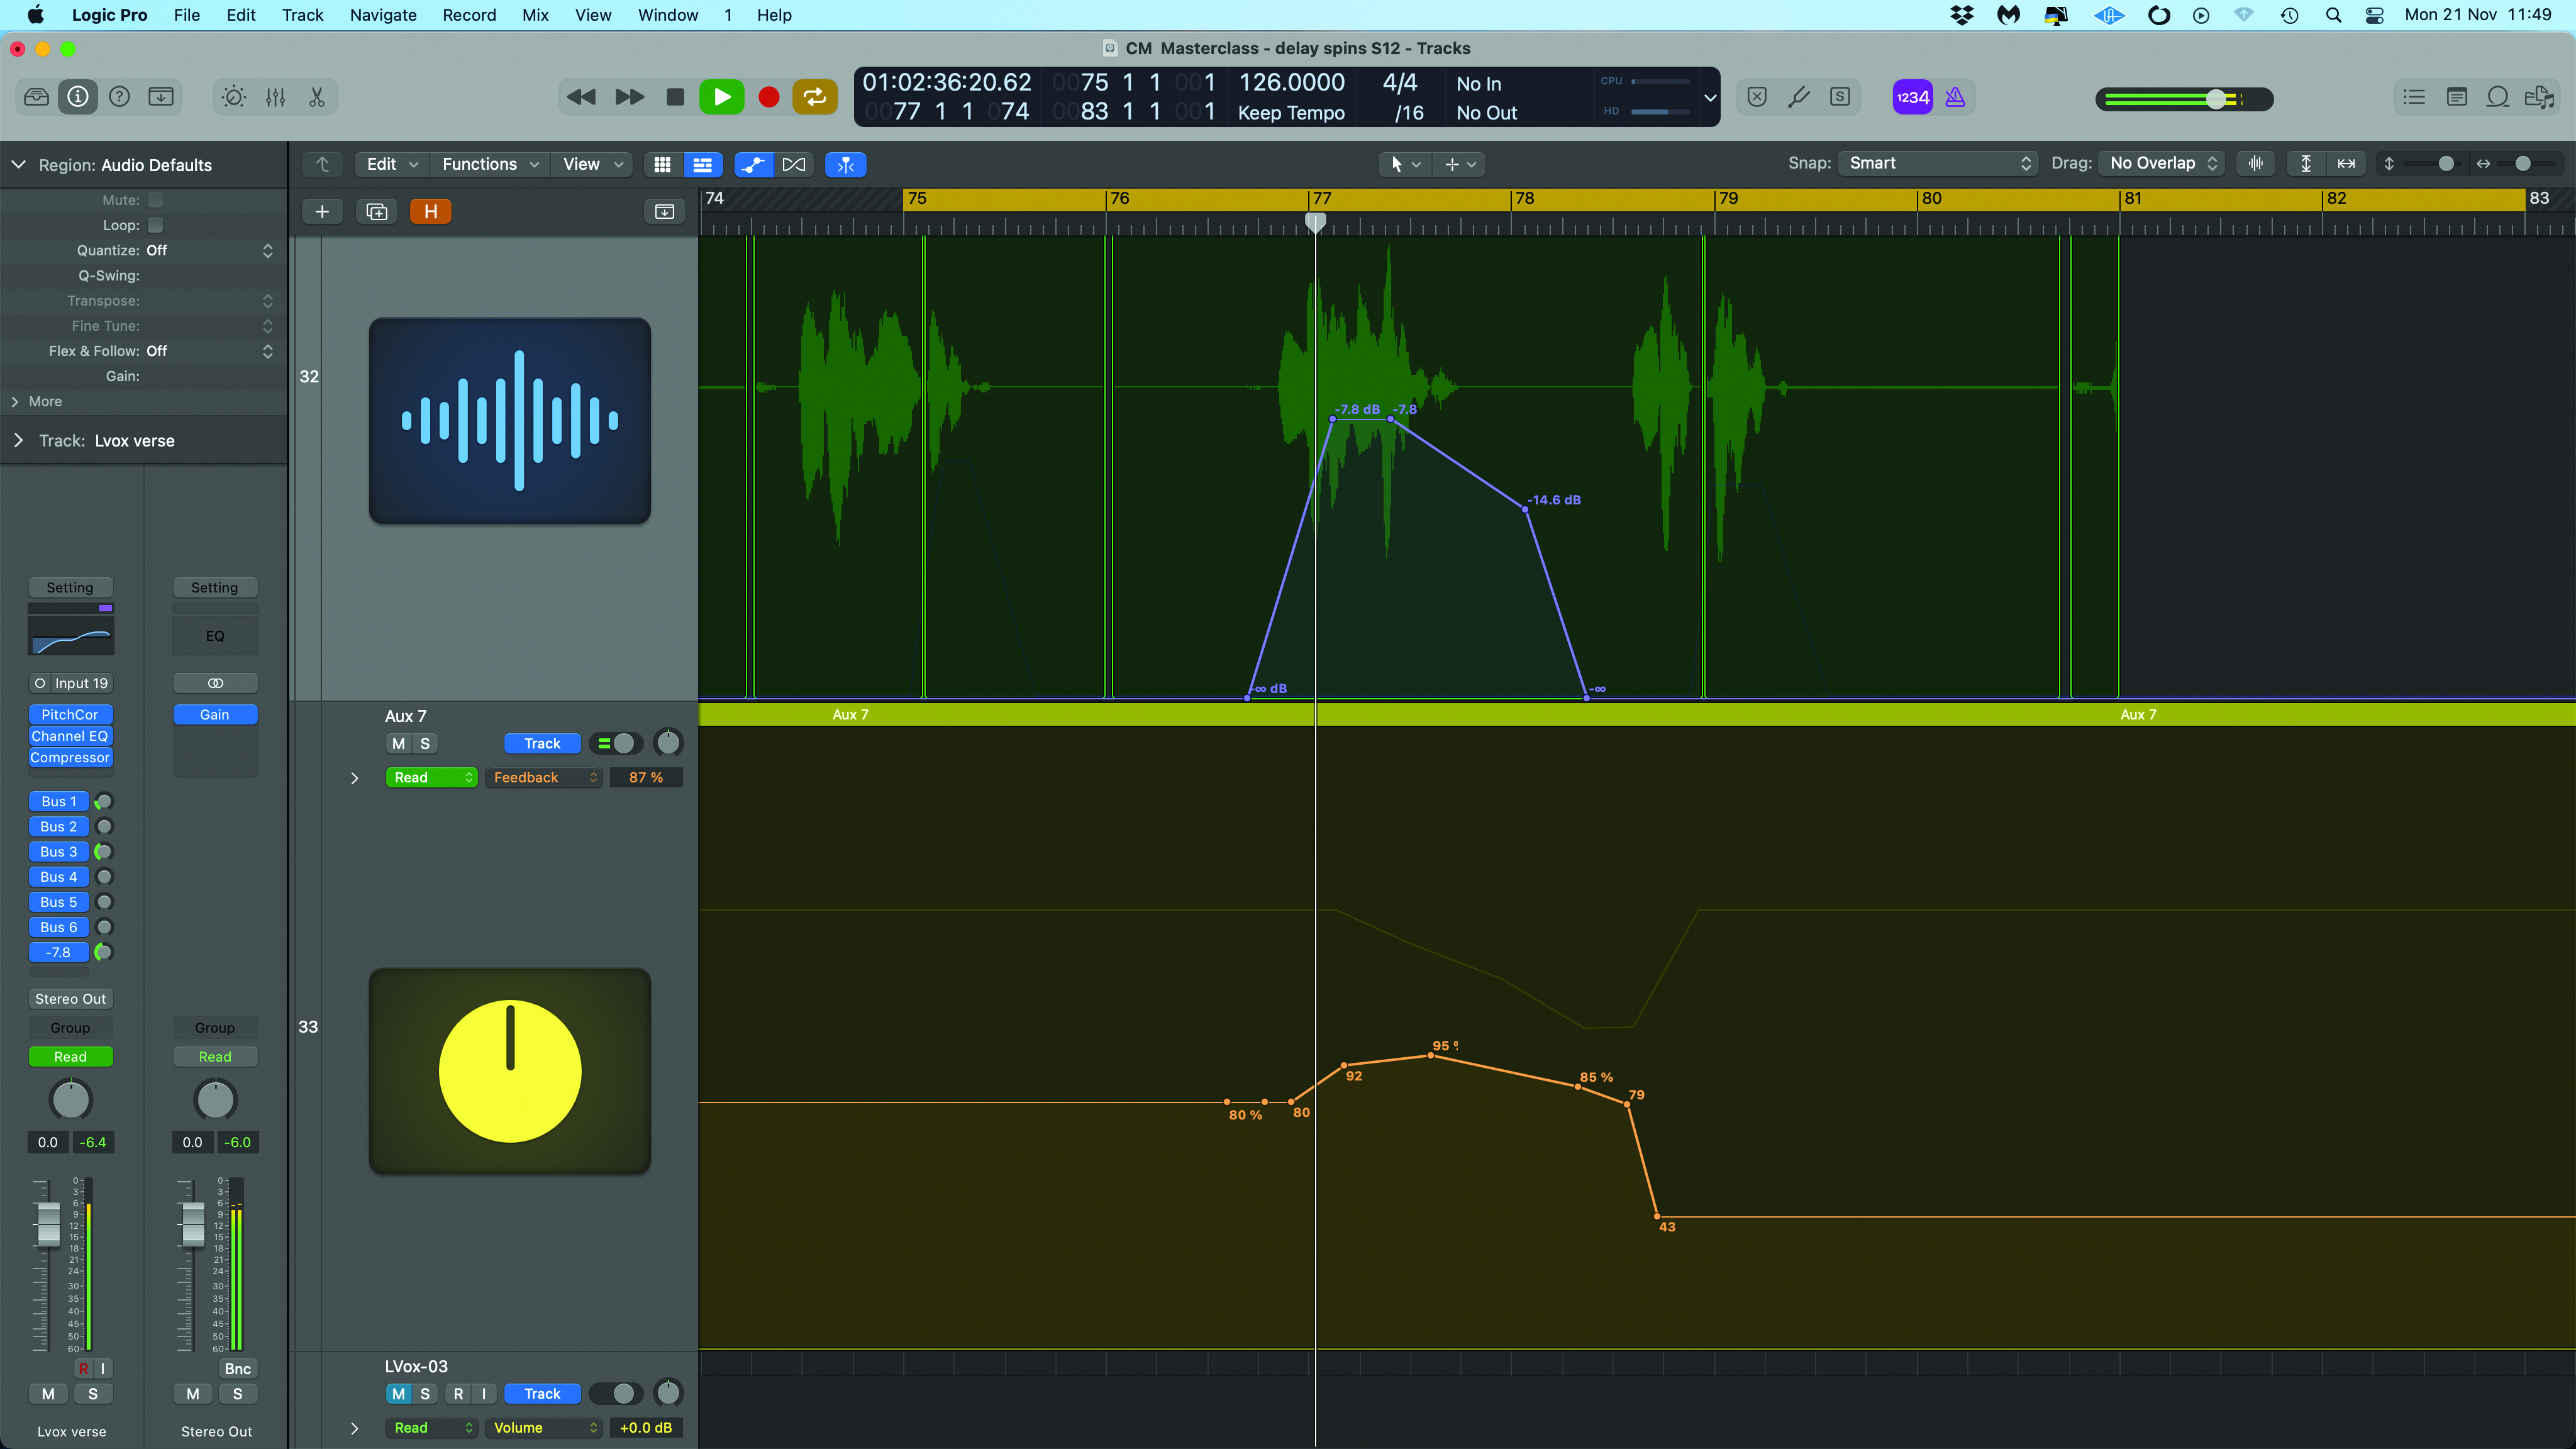
Finessing this kind of effect requires a bit more automation, and on this occasion we’re controlling the feedback amount and return level. This creates a fast build up of the delay, which is then ducked down quickly, and we’ve reduced the feedback as well to quicken the decay stage.
Pro tip
So far we’ve only looked at using simple echo-style delays. There are, of course, numerous ways we can modify the delay. Starting with EQing the feedback loop or even EQing the whole delay return, we can also add distortion or even stick the delay through its own reverb.
However, shelving the creativity for a moment, let’s look at the delay itself. One option is to add static or automated panning to the delay return, or simply use a ping pong-style delay. These options create stereo interest but can also make even more of a feature out of the delay spin.
A second option is to use a synced pre-delay before the delay. This isn’t quite as bonkers as it might seem, and can be achieved quite easily by inserting a delay on the auxiliary return bus before the main delay and setting its mix to maximum.
For this technique to make any difference, the pre-delay must be a different length to the main delay and one option that works well is to use a quarter note pre-delay with an eighth-note spin.
Recommended listening
1. Joel Corry x RAYE x David Guetta - Bed
This chart smash is a masterclass in modern delay spin techniques.
2. Pink Floyd - Us And Them
Just to show that the technique’s been around forever – it’s even got some panning for added interest.
Jon is a London based platinum award winning mixer, producer, composer and club remixer with a diverse CV that spans dance, pop, rock and music for media. He’s also a long term contributor to MusicRadar's music technology tutorials and reviews. Whether working alone or collaborating he usually handles final mixdowns, so you’ll also find MusicRadar peppered with his handy mixing tips.
