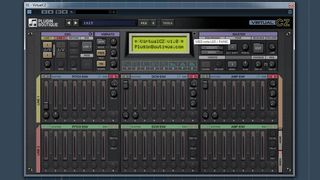
The Reese bass is one of the most iconic sounds in electronic music. It's got thick, powerful sub bass and rich mid harmonics that vibrate and move the soul when heard on a great sound system. After being pioneered by Kevin Saunderson in the classic house track Just Want Another Chance, it was sampled and taken further by drum 'n' bass pioneers.
Here, we'll focus on a virtual reimagining of the original synth that created this monstrous sound, the Casio CZ series. Plugin Boutique's VirtualCZ captures the spirit and sound of that classic hardware, adds extra waveforms, a new chorus and tempo syncing, and even acts as a software editor for those lucky owners of the 30-year-old real deal.
Casio's CZ synths used a synthesis technique known as Phase Distortion, which is similar to FM, although less complex and easier to control. In lieu of a regular analogue filter, the DCW envelope produces a similar effect by increasing or decreasing the amount of phase distortion, creating harmonic overtones. Also, the default envelopes aren't of the typical ADSR variety (although those can be set up, too). Instead, seven-stage multi-segment envelopes give us more sound-shaping potential.
Step 1: Load an instance of Plugin Boutique's VirtualCZ. First up, change the Backlit LCD screen colour to green, as it's easier to read. Click the LCD screen and select your colour of choice from the menu.
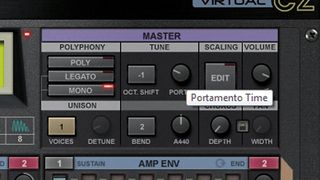
Step 2: As we're looking to make a bass sound, let's change the polyphony of the synth to mono in order to prevent overlapping notes. In the Master section, press the Mono button. In the Tune settings, turn the Portamento knob up to around 27 (that's 252ms) to let the notes glide subtly into each other.
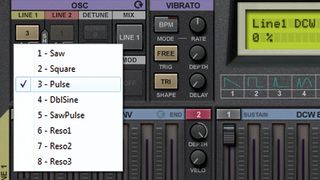
Step 3: In the Oscillator section at the top left, change Line 1's Shape A to Pulse, and its Shape B to Dbl Sine. The resultant sound is a mixture of the two oscillators. You can of course try different combinations or set both as the same shape, but this combination works well for this patch, as it sounds rich and thick.
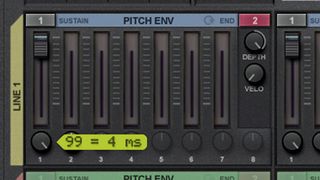
Step 4: Let's add a sudden pitch decrease at the start of the sound to make the beginning of each note more punchy, by tweaking Line 1's Pitch Envelope generator. For generator 1, move the slider up to 85 - you'll hear the sound increase in pitch over time. Move the Rate knob below it all the way to 99 (4ms).
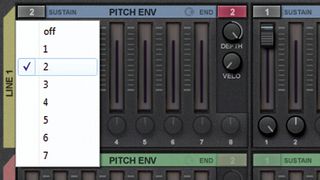
Step 5: The sound now plays at a constant high pitch, but we want it to drop quickly back to the original pitch to add that punch. Click the Pitch Envelope's Sustain number button and set the value to 2. Now, when a key is held down, the note will sustain at whatever value is set in step 2 of the envelope.
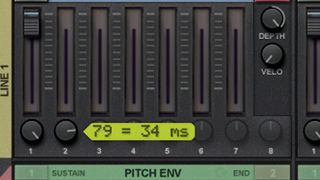
Step 6: To complete the effect, adjust the Pitch Envelope's second Rate knob to around 79 (34ms). Now the sound will drop back to its original pitch very quickly creating the desired subtle effect we're after.
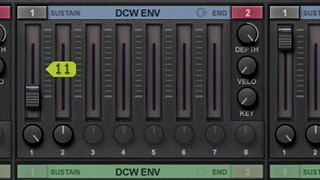
Step 7: Our bass sound needs to have most of the high frequency content removed to give it that classic rumbling Reese effect. To do this, in the DCW (Digitally Controlled Waveform) Envelope, move the DEG 1 slider down to about 11. This will remove most of the high-end information in the sound, giving us that warm low-end.
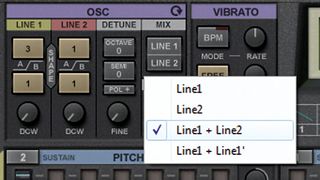
Step 8: Let's activate Oscillator 2. Click the Line 1 button in the Mix section of the Oscillator and set it to Line1 + Line2, You'll now hear both oscillators playing at the same time. Change Line 2's Shape A to Square, and you'll hear a change in the sound. You can experiment with different wave types to preference.
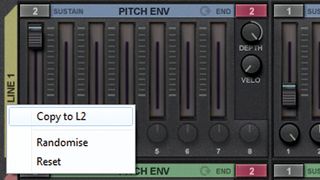
Step 9: We can copy the MSEG settings from Line 1 over to Line 2 to save us creating the same envelope settings for oscillator 2. Click the Vertical Line 1 text tab and select Copy to L2. Now both oscillators will have the same punch and reduced upper harmonic content.
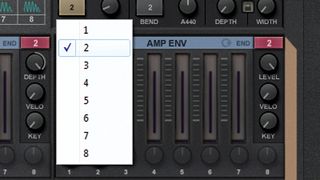
Step 10: Let's introduce some detuning to give our sound that nasty, pulsating, out-of-control edge. Adjust the Fine knob (in the Detune section) to 38 (63 cents). Now, in the Unison section, set Voices to 2, and turn Detune up to 2.8 - this causes multiple voices to play at the same time, slightly detuning against each other for a fatter sound.
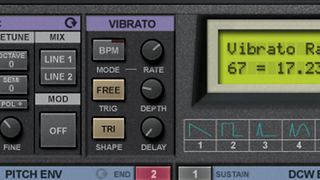
Step 11: Next, some subtle vibrato. Set the Vibrato Depth knob to 21 and Rate to 67 (17.23Hz). You can also widen the sound ever so slightly for some excitement. Turn the Pan Width knob up to 18%. Don't overdo it here - this is a bass sound, and we don't really want any panning in the low end of the spectrum, as it'll take away a lot of weight.
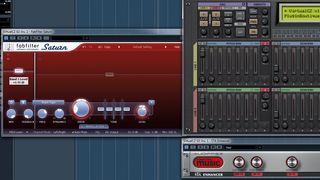
Step 12: For the final stage, load up STA Enhancer CM by Audiffex on the output channel of the synth and whack the Low Process dial up to 100%. Some multiband distortion from FabFilter Saturn will seal the deal: create a breakpoint at 60Hz, boost the lower band level to around +15dB, and reduce the upper band by 8dB to balance out the sound a bit more.
