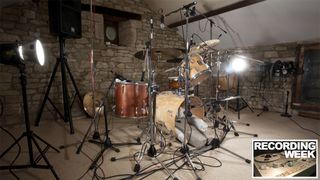
RECORDING WEEK: Like any instrument, drum kits aren't always set-up for the perfect recording. An experienced drummer will have evolved their kit: found a favourite snare or two, collected a few good cymbals and will have set it up so that it feels right to play live.
A drum kit will sound different in any room, and any song will call for a distinct drum sound, so for every session you will need to fine-tune the kit and the room for that specific demand.
Every aspect of the kit has to be addressed and what follows takes you through all the issues that should be worked at prior to hitting the record button, leaving no stone unturned.
There's no substitute for experience but this guide should help to ground you in the basics of the drum session, speed up the learning process and give a feel for how to get the kit toned and tuned so that its sound wins through in the final mix.
Choice of Kit
As with any instrument, the quality of manufacture has a huge impact on the sound it makes. Any drummer worth their salt will have evolved a good fettled kit around them but their playing ability might occasionally outstrip their ability to pay for a good one. Generally you won't have a choice over what kit you're recording, you'll get what you're given. But it may be the case that a studio has it's own kit which is better than the drummer's own, especially for recording purposes which differs from the demands of live work.
The better recording kits include Gretsch, Ludwig, DW and Yamaha, and some makers are famous for individual drums, for example, Noble and Cooley snares, Ludwig kick drums, Zildjian cymbals. The Ludwig Black Beauty snare is a timeless classic recording snare. A good drummer will have a selection of snare drums and cymbals and the choice will be determined ultimately by the track you're recording.
It's the producer's job to make that choice based on how they want the end result to sound. Ask yourself questions like does the song need a deep fat snare or a high snappy one?
Drum heads
Drum heads should always be new or thereabouts for a recording session. Skins soon lose life after repeated beating so make sure the drummer has spare heads with them. Undoubtedly the drummer will have their favourite heads but as a general rule coated heads record better - their tone is warmer and they still have a good 'skin' attack. And although always a personal choice, two-ply tend to sound better than single-ply. Clear heads tend to be overly bright and without body on the top side but work well for the bottom resonant heads where thinner is better.

Sticks
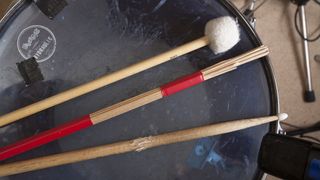
Choice of sticks is determined by the song and weight of playing required. A drummer should carry a selection of weights and varieties of wooden sticks and they should have a feel for which stick is required but it pays to experiment with different ones and deciding after a playback. A softer track may even require brushes or mallets. An in-between solution are 'hot-rods', a bunch of thin sticks lashed together which make a more diffuse but clear hit.
You could even arrive at a combination solution with a stick in one hand and a brush or hot-rod in the other.

Starting your recording
Get the drummer to hit each drum individually for a while. First of all consider whether you're hearing the drum at its best. Does it sound the same as it does in the room? Could the mic position be bettered?
Dial up a rough record level bearing in mind they'll hit it a lot harder during a take. Use EQ to improve the tone once you're convinced the mic's in the right place. This can be done on the way to 'tape' if you're blessed with good EQs but otherwise generally better on the playback side. The same goes for compression - you can't undo bad compression so unless you've got racks of Urei 1176s, LA2As and Fairchilds, leave it to the playback side.
"For getting the best performance you can't beat playing along with other people."
Once you're happy with the individual drum sounds, get the drummer to play the whole kit. Check levels and balance the kit for monitoring purposes. Make sure there aren't any odd noises and the whole thing feels consonant. Record a bit of their playing and let them hear it so you can discuss the sound and its merits for the track you're about to record. Be prepared to make changes to any of the above factors. Now is the time to experiment and evolve the sound. It's unlikely to come good just like that.
Click track
Click or no click is always a big point of debate. The decision should take into account the needs of the song, the drummer's ability and the feelings of the producer and the band. The results are always very different so the decision shouldn't be taken lightly.
Using a click track always makes editing so much easier but that shouldn't have a bearing in the debate. If you decide on a click, establish with the drummer the best sound for them to latch onto, the interval (1/4 note, 18th note etc) and level of accents for downbeats. You don't want to be hearing the click in the control room so route it out of a discreet output.
You also don't want to hear strains of click spill on the drum overheads as the cymbals decay at the end so always try to map the click with automation, turning it down in quiet sections and off on the last beat. That means making sure the drummer always starts at the same point on the click. For example, tell them to hear one bar of click, stick hit the next and come in on bar three.
Guide tracks
The drummer's going to need something to drum along to if you're not doing a full band live session. For getting the best performance you can't beat playing along with other people, ideally with a visual connection.
With other players in the drum room you have to think about spill. If you can screen them off, great. If they're playing electric instruments you can DI them. A guide instrument on the room and overhead mics is a no-no. Fine up to a point if you're doing live takes but not for something that isn't going to be in the final mix.
You can always resort to just an aural connection and have other players in another room and everyone on headphones If you're using a click track you can always record the guide parts initially in the room with the drummer and then re-record the drummer overdubbing to those guides. Not ideal for performance but it works well.
Headphones
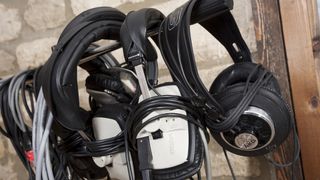
Headphones necessary evil unless you go all out for a live style recording with PA and wedges and embrace the spill. While this certainly bigs up the excitement and has its place in some recording situations it might not always result in a hi-fidelity sound and your mix options will be limited.
Most drum sessions will be done using headphones and to avoid spill they should be the closed-cup variety. The long time classic studio headphone is the Beyer DT100, they're hardy, they're not too bright for high volume listening and they take high spls. There are better sounding cheaper headphones to be had, particularly from Audio-Technica.

Foldback balance
Set up a foldback mix for the drummer by listening on similar headphones in the control room. Undoubtedly they'll want it a lot louder than you can bear and the click level will be deafening, but go with what they want and always keep checking that they're happy.
Establishing tempo
The best way to do this is to get the band to play free until you have the right feel and capture the tempo from that performance. You can usually do this on the tempo counter of your DAW but if not there are plenty of phone apps that do it.
If the natural playing speeds up and slows down through sections you'll have to carefully program the click to do likewise. This is the sort of thing that would be best worked out in rehearsal because it can take time. Above all rehearse and settle into your performance before you begin recording. Good luck!
Recording Week is brought to you in association with Universal Audio. Check out the Recording Week hub page for more tips and tutorials.


