We continue our A to Z journey through the world of GarageBand by dealing with the letters H to M. This is the second of four parts - part 1, part 3 and part 4 are also available.
H is for Help
GarageBand is such a brilliantly straightforward program that it's really unlikely you'll ever need extra help once you've found your way around and mastered the basics. However, if anything is unclear, there's loads of help on Apple's own website and via the trusty Help menu.
I is for Instruments
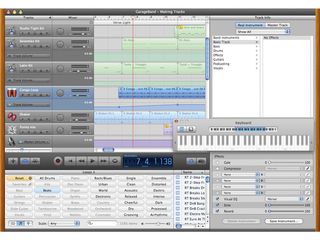
GarageBand's Instrument tracks enable you to play notes and phrases onto the Arrange page directly. Once you've clicked the 'plus' button or selected a new Instrument track via the Track menu, a list of instrument types appears in the Track Info pane on the right. Within these categories, you can then choose any sound you like. If you want synth sounds, there are leads, basses and pads aplenty, while smooth, retro operators can choose from electric pianos, Clavs and organs, too. You'll also find everything from orchestral instruments to sound effects, so putting together tracks in specific or hybrid styles shouldn't be a problem.
You can input notes either from a dedicated MIDI controller keyboard or via GarageBand's own QWERTY keyboard input device, which you can open from the Window menu.
J is for Jumping
Jumping from section to section within your piece is really easy, particularly if you use GarageBand's Arrange Track facility. Once you've constructed a verse and a chorus, simply open the Arrange Track, create blocks around these musical passages and name them. To copy a whole section, simply hold down the Alt key while clicking on the relevant Arrange tag and all the musical data underneath will copy to your chosen destination.
Want to move your arrangement around? No problem - just drag again without the Alt key. Put a loop around a particular section to jam new ideas over the top, or jump to a particular location by clicking on the ruler at the top.
K is for Kick Drum
If you know you want drums, you've got lots of options. For starters, you can drag in any drum you like the sound of from the Loop Browser. Alternatively, you can assign one of GarageBand's many drum kit instruments to an Instrument track, putting an individual drum sound on each key of your MIDI keyboard. You can play patterns until you come up with something you like and then just record it. If your timing isn't so great, quantize can help. (By the way, you'll find the kick drum on note C1 of every kit.)
L is for Loop Browser
This is perhaps GarageBand's most famous feature. Via that slightly curious 'eye' button in the Transport Bar you can enter a fantastic world of sounds and loops that can all be auditioned at the touch of a button. You can search for sounds by category or, if you know the name of the sound you're after, simply type its name into the dedicated Find window.
Each file is tagged with key and tempo information, as well as via any number of adjective-based groupings, which means you can organise the content in a number of ways. Finding sounds is a cinch - simply go looking in an appropriate menu of sounds (Percussion, for instance), or search by Moods if you're looking for something Relaxed, Cheerful or Intense, for example
M is for Master Track
The Master Track is where all the individual tracks that make up your Arrangement are simultaneously sent. Think of it this way: you can hear your arrangement via your headphones or speakers, but what you're really listening to is the Master Track. As we've already seen, each part of your piece can have its own level, pan position, effects position and automation lines, but the Master Track's job is to apply Global effects (if you want them), while also enabling you to 'capture' your final track in a number of ways. You can burn your track as an MP3, an AAC file or as a CD-quality AIFF mix.
If you want to, you can also apply a fade-out to your piece via the Track menu. This automatically opens the Master Track at the bottom of your arrangement, complete with a volume automation curve that you can adjust to fit your song.

