Max for Live is simply an open format for creating and sharing devices for use in Live, and the key to getting to know it is experimentation.
When it comes to studio staples like compression, Max for Live's efforts probably won't match your best plugins for pure quality and sonic character, but that's not what Max excels at.
Its strength is in the more interesting and quirky processes, or novel combinations of different processes. If you produce classical soundtrack music or strictly dry-sounding acoustic music, you can probably live without Max, but for the rest of us, it is a treasure trove that deserves to be plundered and personalised.
Get into the habit of opening the editor for every Max device you commonly use and just try things out, however crazy they are. For example, try throwing some distortion into the middle of the signal path of one of your devices - a compressor, say. Or, insert some kind of buffer/glitching effect into a gate device, but using the original signal as the trigger.
The possibilities are as exciting as they are crazy and limitless, and while not everything you try will sound great, you will be amazed at how often exerting your imagination pays dividends. And don't forget that Max devices are cannibalistic: they're only too happy to consume other Max devices to produce larger uber-devices.
Live 9 Suite comes with Max for Live included, along with a set of 25 specially built Max for Live devices - essentially, 25 all-new devices for Live.
Check out the latest issue of Computer Music (CM 192) for a tutorial feature on the new devices included with Max For Live.

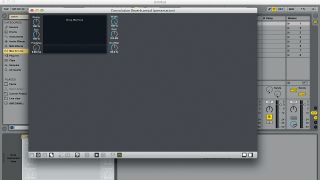
Step 1: Here we're going to see how easy it is to edit a Max for Live device. Start with a fresh project and add an instance of the Max for Live Convolution Reverb device. Open the Max device editor using the small icon to the left of the Hot Swap Preset icons in the top right corner.

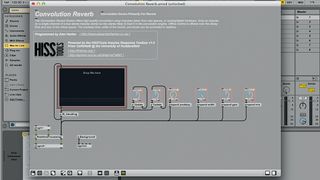
Step 2: Click on the Freeze/Unfreeze icon at the bottom left of the resulting window to allow editing. Initially, you will simply see a version of the device window in a larger window, but there's an unsuspecting Whiteboard icon in the middle of the row, which toggles Presentation mode and Patching mode. Click this to enter Patching mode.

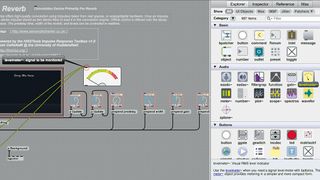
Step 3: Now click on the Open Sidebar icon on the far right to see the many (and varied!) individual components from which Max For Live patches are created. Drag a Levelmeter device into the screen next to the main reverb display. Now click on the Realtime Processing outputs in the bottom left and connect them to the Levelmeter's inputs.

Step 4: We need to ensure the meter is displayed, so we right-click on the meter and select Add To Presentation, then go back to Presentation mode. From here, we drag the right edge of the reverb display until the meter is contained within it. We save this preset, and in our main Live window, we see that the device now displays the meter. Congratulations - you just built your own custom Live device!

