If you think compression and limiting are primarily for corrective level control, vocal ducking and conventional hum-drum studio processes, it's about time you broadened your dynamics horizons.
In this feature, we'll reveal six out-there dynamics processing techniques you can employ right now to take your tracks in new and inventive directions.
For more creative compression tutorials and tips, pick up the October edition of Computer Music (CM234).
1. Breathing and pumping edits
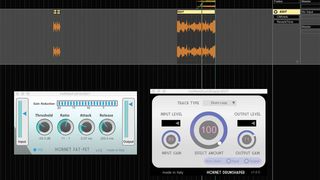
By compressing disparate parts of your mix together as one composite signal, it's possible to create interesting 'breathing' interactions that can form the basis of a creative fill or edit. In this particular example, we've rendered our entire track down to a single audio file before placing this section in isolation at the end of 8 and 16 bars (being sure to delete the original parts at those points).
Next, on this 'edit' channel, a touch of reverb and low-pass-filtering creates a little depth and contrast. Finally, we've creatively squashed the processed track section with a generous helping of HoRNet's Fat-FET and DrumShaper compressors, pulling out the reverb tails and suppressing dynamics under the heavy bass weight. Finally, a simple reverse sweep reinforces the tension-building edit just before the track slams back in.
2. Crushing breakdown interactions
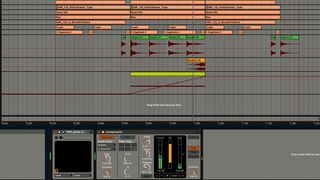
If your track is rolling along smoothly, but it's time to cool things down and transition into a breakdown, try using exaggerated sidechain compression and ducking interactions across unexpected parts of your mix. A great way to push FX hits and impacts into the foreground is by grouping all of your main 'drop' elements (eg, drums, bass, vocals and synths) to a single bus or group channel, then using your breakdown FX to trigger sidechain compression over this bus/group, moving the main parts out of the way at key points.
Alternatively, take the opposite approach and use your drums or bass to sidechain a breakdown - this way, you can fill a quiet section of the track with intensifying noise and crashing percussion, then slowly introduce the core elements back into the mix to diminish the levels of other sounds at crucial points.
3. Magnifying vocal breaths and artefacts
Compression reduces the loudest parts of a signal, which in turn amplifies the quieter sections - so by pushing dynamic reduction to extremes, you can creatively crank up the level of artefacts and noise to create quirky sonic material. We've cut up and rearranged various vocal breaths, rough chops, clicks and quiet noise sections to create a dynamic, stuttering, unintelligible montage of vocal 'glitches'; then, by forcing this signal into a heavy stage of limiting, the quieter artefacts and noise elements within the signal are pulled right up to the same level of the louder sections, creating a squashed rhythmic vocal loop that's ripe for slicing and remixing.
4. Abusing frequency-controlled compression
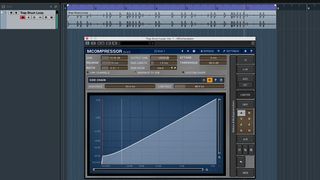
A compressor's response can change greatly with frequency content, so many allow you to filter or EQ the incoming 'sidechain' signal (the inaudible 'trigger' signal that controls the compression) in order to customise the response. When compressing a drum bus, filtering out bass from the will stop a heavy kick reducing the gain too much, preventing unwanted 'pumping'.
To use this creatively, you can get extreme results by heavily boosting or cutting frequencies: crank the sidechain signal's bass to trigger 'pump', for example, or automate the sidechain frequency for weird effects.
5. Parameter automation
When dialling in compression settings, we usually expect to 'set it and leave it' - but one way to get dynamic interactions and movement is by varying settings over time. In the video, we've heavily compressed a techno drum loop using HoRNet's DrumShaper - by automating parameters at regimented points within the groove, we're forcing the loop's snare further into the compression stage.
6. Designer claps
Let's transform some wimpy percussion sounds into monster drums with OTT limiting and reverb…
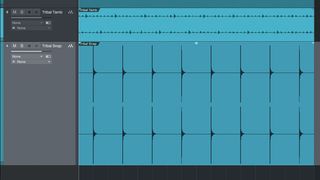
Step 1: Download and load the audio files "Tribal..." into a 125bpm project. The snap sound on beats 2 and 4 of each bar features an extremely prominent transient, making it especially 'pokey' and painful to the ear - so let's give it some character and life with creative dynamics crushing.
Mix with spiky snap

Step 2: Insert D16 Frontier over Tribal Snap.wav, then dial in -11dB Output Volume and -33dB Threshold. These exaggerated settings are crushing the loud transient, heavily bringing the snap's tail up in the mix to create a sizzling 'ppsht' sound.
Mix with flattened snap
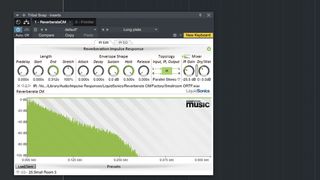
Step 3: Applying reverb pre-limiting causes the limiter to 'magnify' the reverb, creating a widening effect. To do this here, we'll load Reverberate CM before pulling its Dry/Wet back to 0:-3dB. Experiment by placing different effects before the limiter to design inspiring drums for your sample library.
