Since its launch back in 2002, Native Instruments' Kontakt has established itself as one of the most popular samplers on the market. With a huge array of in-built processing, slicing, timestretching and modulation options, it makes light work of pretty much any sampling-related task, and also offers some unique features, such as Authentic Expression Technology.
Most modern DAWs offer much of the functionality of a third-party sampler as standard, either via timeline-based editing tools or as part of a bundled sampler (Logic Pro's EXS24 being a good example); however, Kontakt is not only compatible with all major DAW software, but has the advantage of working as a standalone program if needed - great for live performance situations.
With these 12 tips, we aim to improve the productivity of your Kontakt sound design and programming sessions. For much more on NI's incredible sampler, grab Computer Music 220, which is on sale now in print and digital formats.
1. Under Starter's Orders
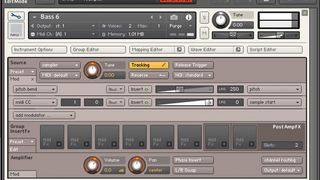
Make a sampled bass or lead line more interesting by controlling the Sample Start position in real time with a MIDI controller. Open Kontakt's Source Module and set the playback mode to Sampler, then click the Mod button. Pull down the Add Modulator menu and choose MIDI CC from the External Sources menu, with the target set to Sample Start and the amount set to 100% - the default setting maps the Sample Start time to your keyboard's mod wheel.
2. Snappier Snares
A great trick for adding extra attack to drum hits without boosting their peak volume is to place the Transient Master effect on your instrument's Group FX out with a Limiter afterwards, and boost the Attack to around 60%. Keep the Limiter's Input Gain at 9dB and its Output at -9dB, and the added transient spike will be clipped by the limiter, increasing the perception of attack without boosting the peak over the set parameters.

3. Rewrite The Script
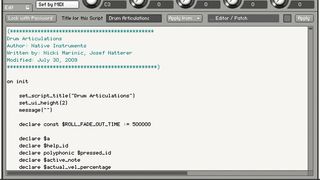
Reached the limits of what Kontakt's main functions offer, or just fancy learning a bit of programming? Why not look at the Script Editor? The scripting functions included with the software can be used to customise the playability and functionality of any instrument, and even allow you to make your own custom backgrounds and controls.
4. So Solid Crew
As well as super-clean digital EQ and compression algorithms, NI have included some superb emulations of classic SSL hardware processors in Kontakt's extensive roster of built-in effects - try the Solid G EQ for characterful EQ boosts, and the Solid Bus Comp to add that SSL-style snap to your transients.
5. A Step Too Far
Hidden inside the Other section of the Modulation menu is a 32-step modulator that works in a similar fashion to a step sequencer. Sync it to host tempo or adjust the playback speed manually.
6. Adaptive Resonance
The Adaptive Resonance Filter can be used to create filter sweep effects without adding too much harshness - as the amplitude of the signal increases, the resonance is reduced to match. It's ideal for filtering samples with sharp transients, such as drums, resulting in less unpleasant resonances than you'd get with a regular filter, for example.
7. Organic Modulation
Adding elements of randomness to a Kontakt instrument can really bring it to life. A crude example would be using the Random Unipolar and Bipolar modulation sources (found in the External Sources section of the Add Modulator menu), which change their state every time a note is pressed.
8. Throwing A Wobbler
Making a wobbly, dubstep-style bass is usually done by modulating the filter cutoff on a square wave. A simple but different way to achieve the same effect is to modulate the Volume control found in the Amplifier module. This affects the amplitude of the sample, rather than the frequency content, giving a cleaner sound.
9. Retrigger Finger
A good way to create unique drum patterns is to slice a drum break in Kontakt and play it back via MIDI. Load up Retrigger in the Script Editor and experiment with the Rate control. Try it in Free mode at under 0.1ms to create wild glitching effects.

10. Delay Away
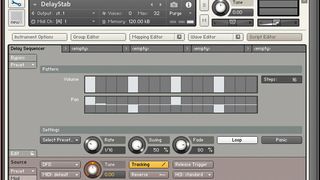
Kontakt's built-in delay is very useful, but the Delay Sequencer (found in the Script Editor) allows the creation of a customised MIDI delay line - sequencing the pan steps hard left and right for a ping-pong delay, to give one simple example.
11. Reese Machine
Turn a boring, plain old sawtooth sample into a menacing, nasty Reese bass using Kontakt's Group Editor. Load the sample into a new instrument, then open the Group Editor and duplicate the sample's group (right-click it and choose Duplicate Group). Next, turn off Edit All Groups, before tuning the first group up by 50 cents and the second one down by the same amount.
12. Six Pack
Kontakt is fair bristling with MIDI-controllable dials and sliders, so live performers in particular will want to check out the 6 MIDI Controllers.nkp preset in the Script Editor. This creates six 'macro' knobs, each of which can be assigned to one or more Kontakt parameters and linked to the knobs and faders on your MIDI keyboard - just the thing for building complex performance instruments.


